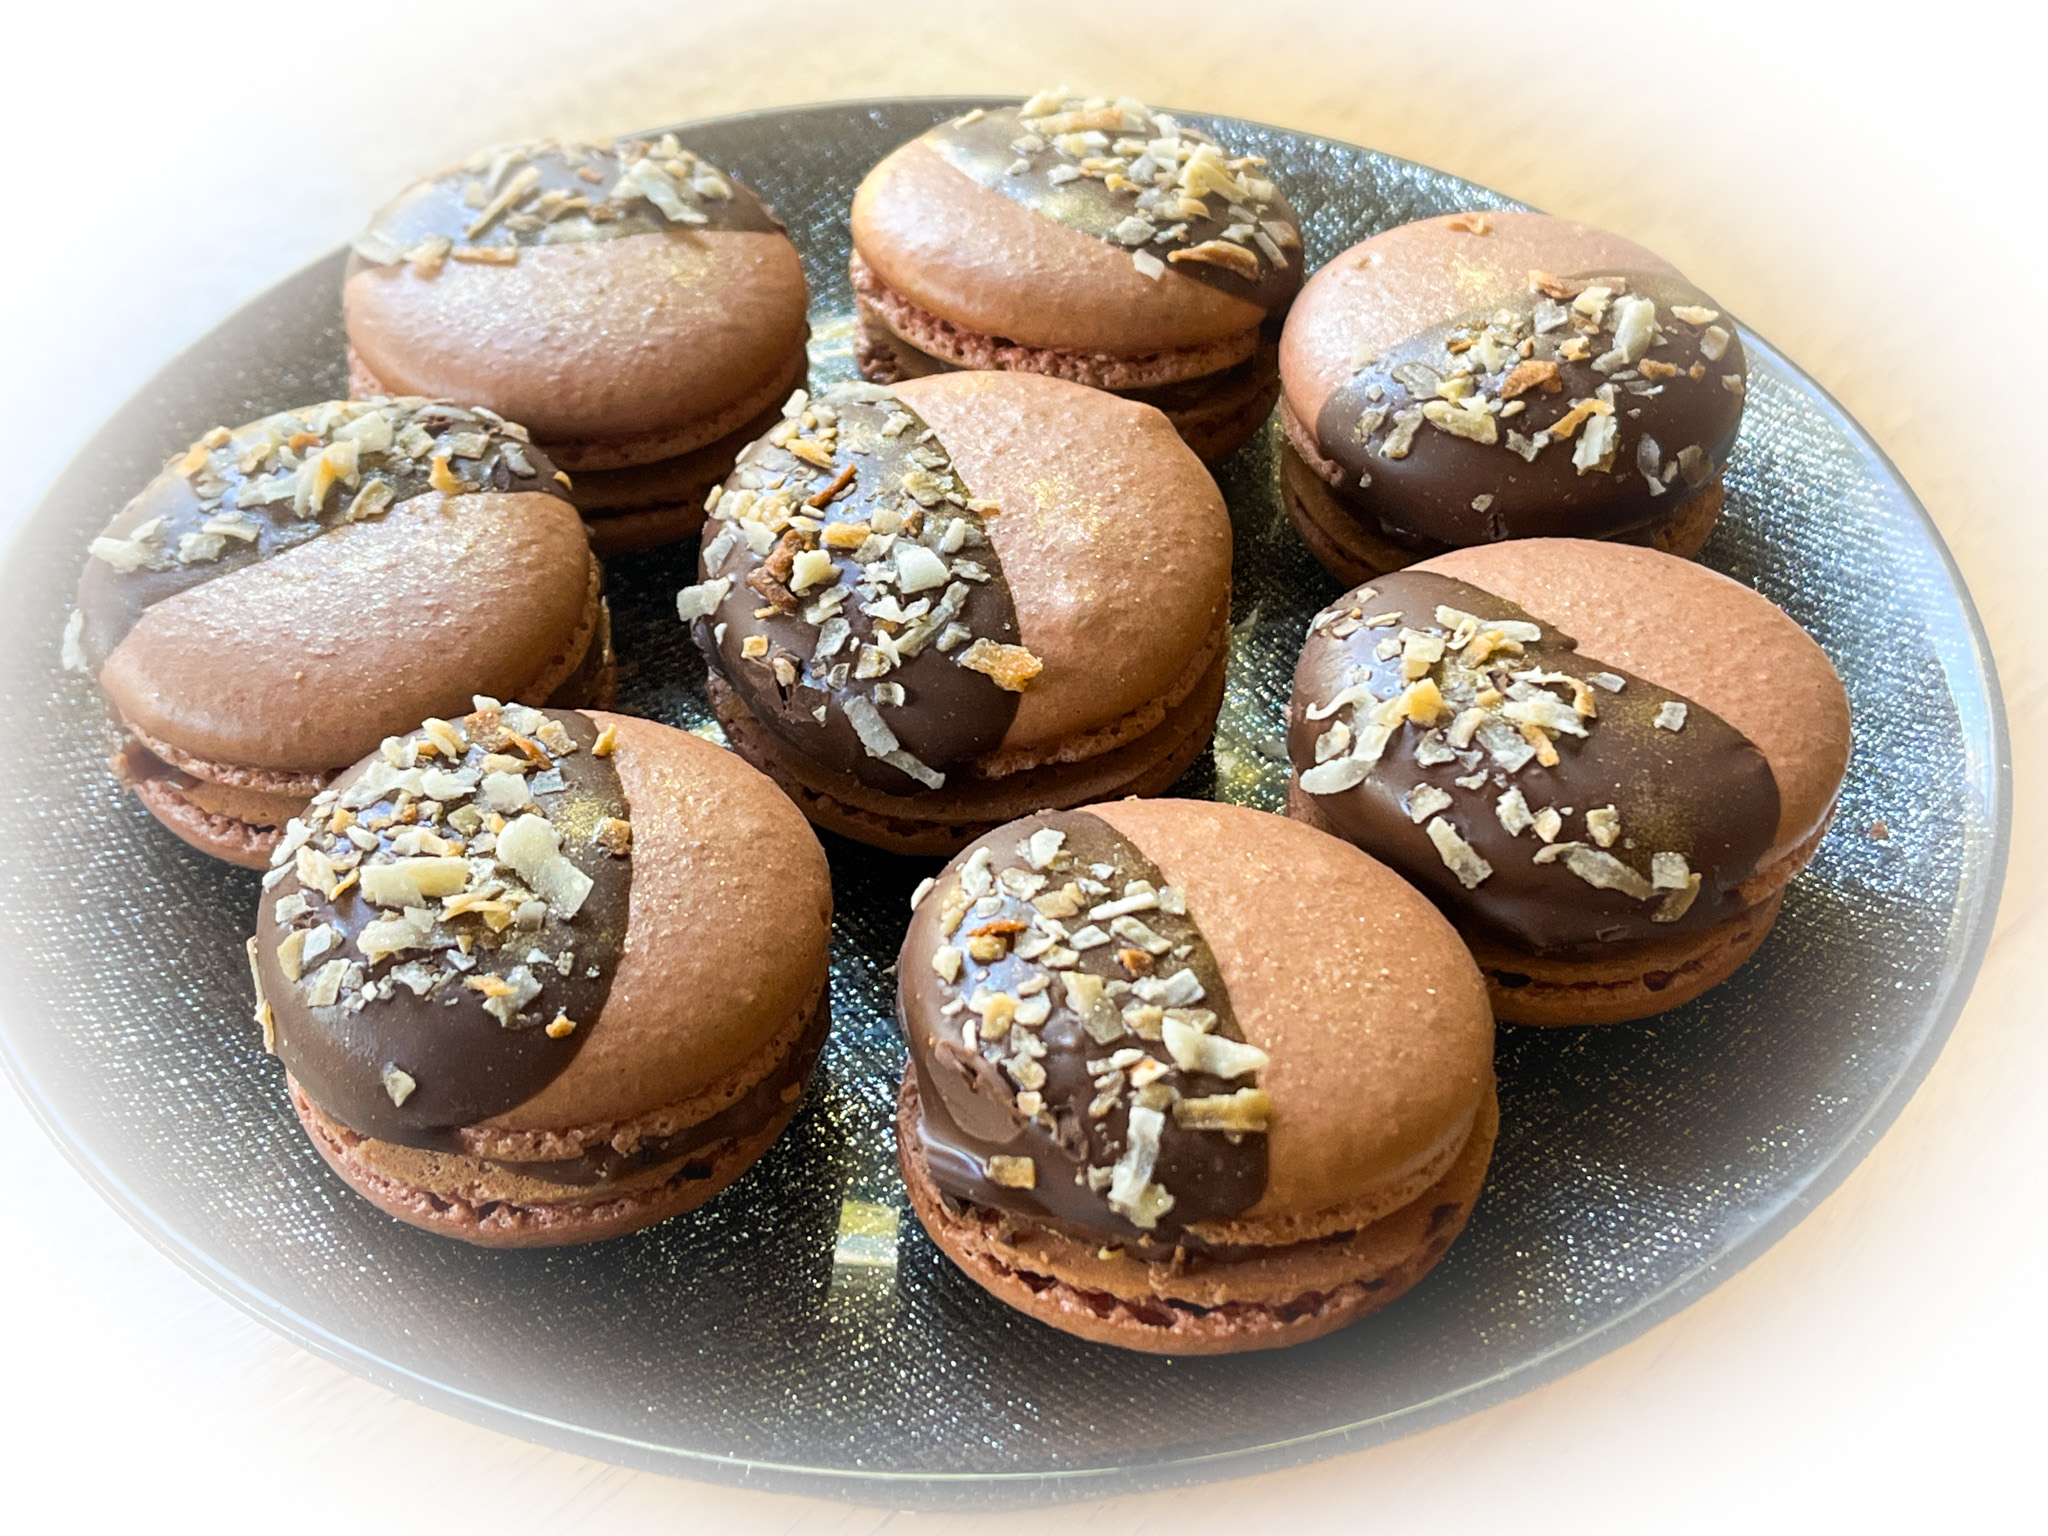
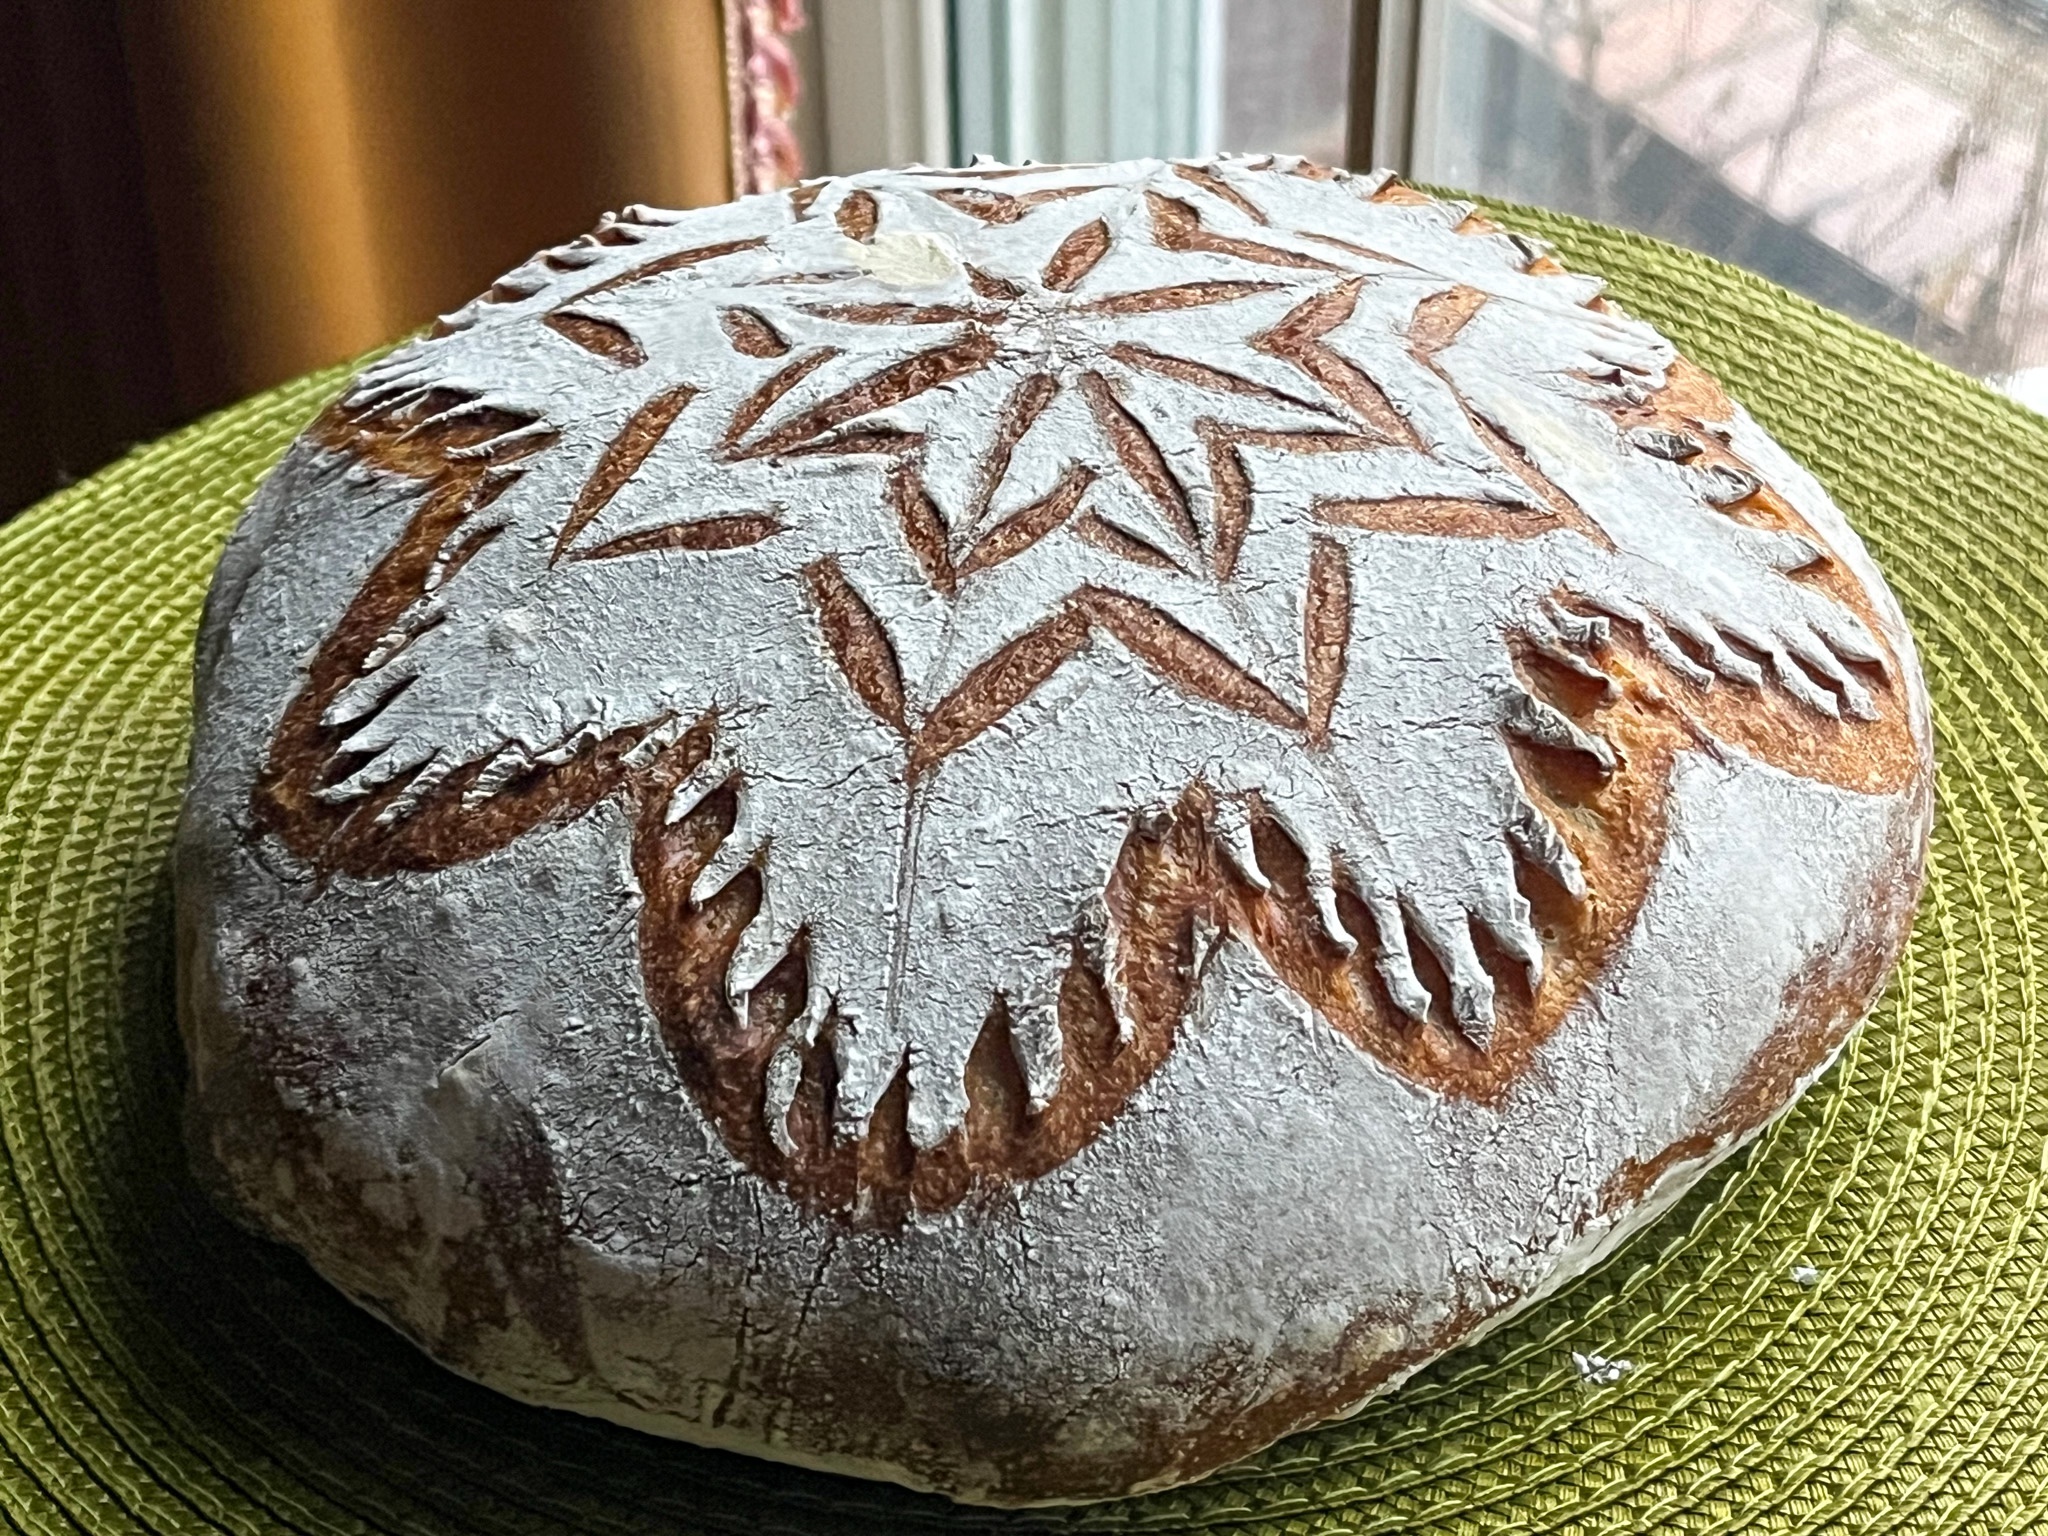
FALL LEAVES PANCH PURAN SOURDOUGH


PANCH PURAN SOURDOUGH
(from the Bewitching Kitchen)

500g bread flour
350g water
75g starter at 100%
9g salt
1 tsp pinch puran spice mix

Make the levain mixture about 6 hours before you plan to mix the dough. It should be very bubbly and active.

When you are ready to make the final dough, place the water in the bowl of a KitchenAid type mixer and dissolve the starter in it, mixing with a spatula briefly, then add the flour, salt and spice mixture. Turn the mixer on with the hook attachment and knead the dough for 4 minutes at low-speed all the time. You will notice the dough will gain quite a bit of structure even with just 4 minutes in the mixer. Remove from the machine, and transfer to a container lightly coated with oil, cover lightly with plastic wrap and allow it to ferment for 4 hours, folding every 45 minutes or so. Because the dough is already a bit developed from the initial time in the mixer, you should get very good structure after 3 and a half hours, or even sooner than that.


After four hours bulk fermentation, shape the dough as a ball, and place, seam side up, in a lightly floured banetton. Leave at room temperature one hour, and then place in the fridge overnight, from 8 to 12 hours.


Next morning, heat the oven to 450F.Place a parchment paper on top of the dough, a flat baking sheet, and invert the dough, flipping it out of the banneton. Flour the surface of the dough, score with a razor blade, and bake at 450F for 45 minutes, preferably covered for the first 30 minutes to retain steam. Cool completely over a rack before slicing.

ENJOY!

to print the recipe, click here

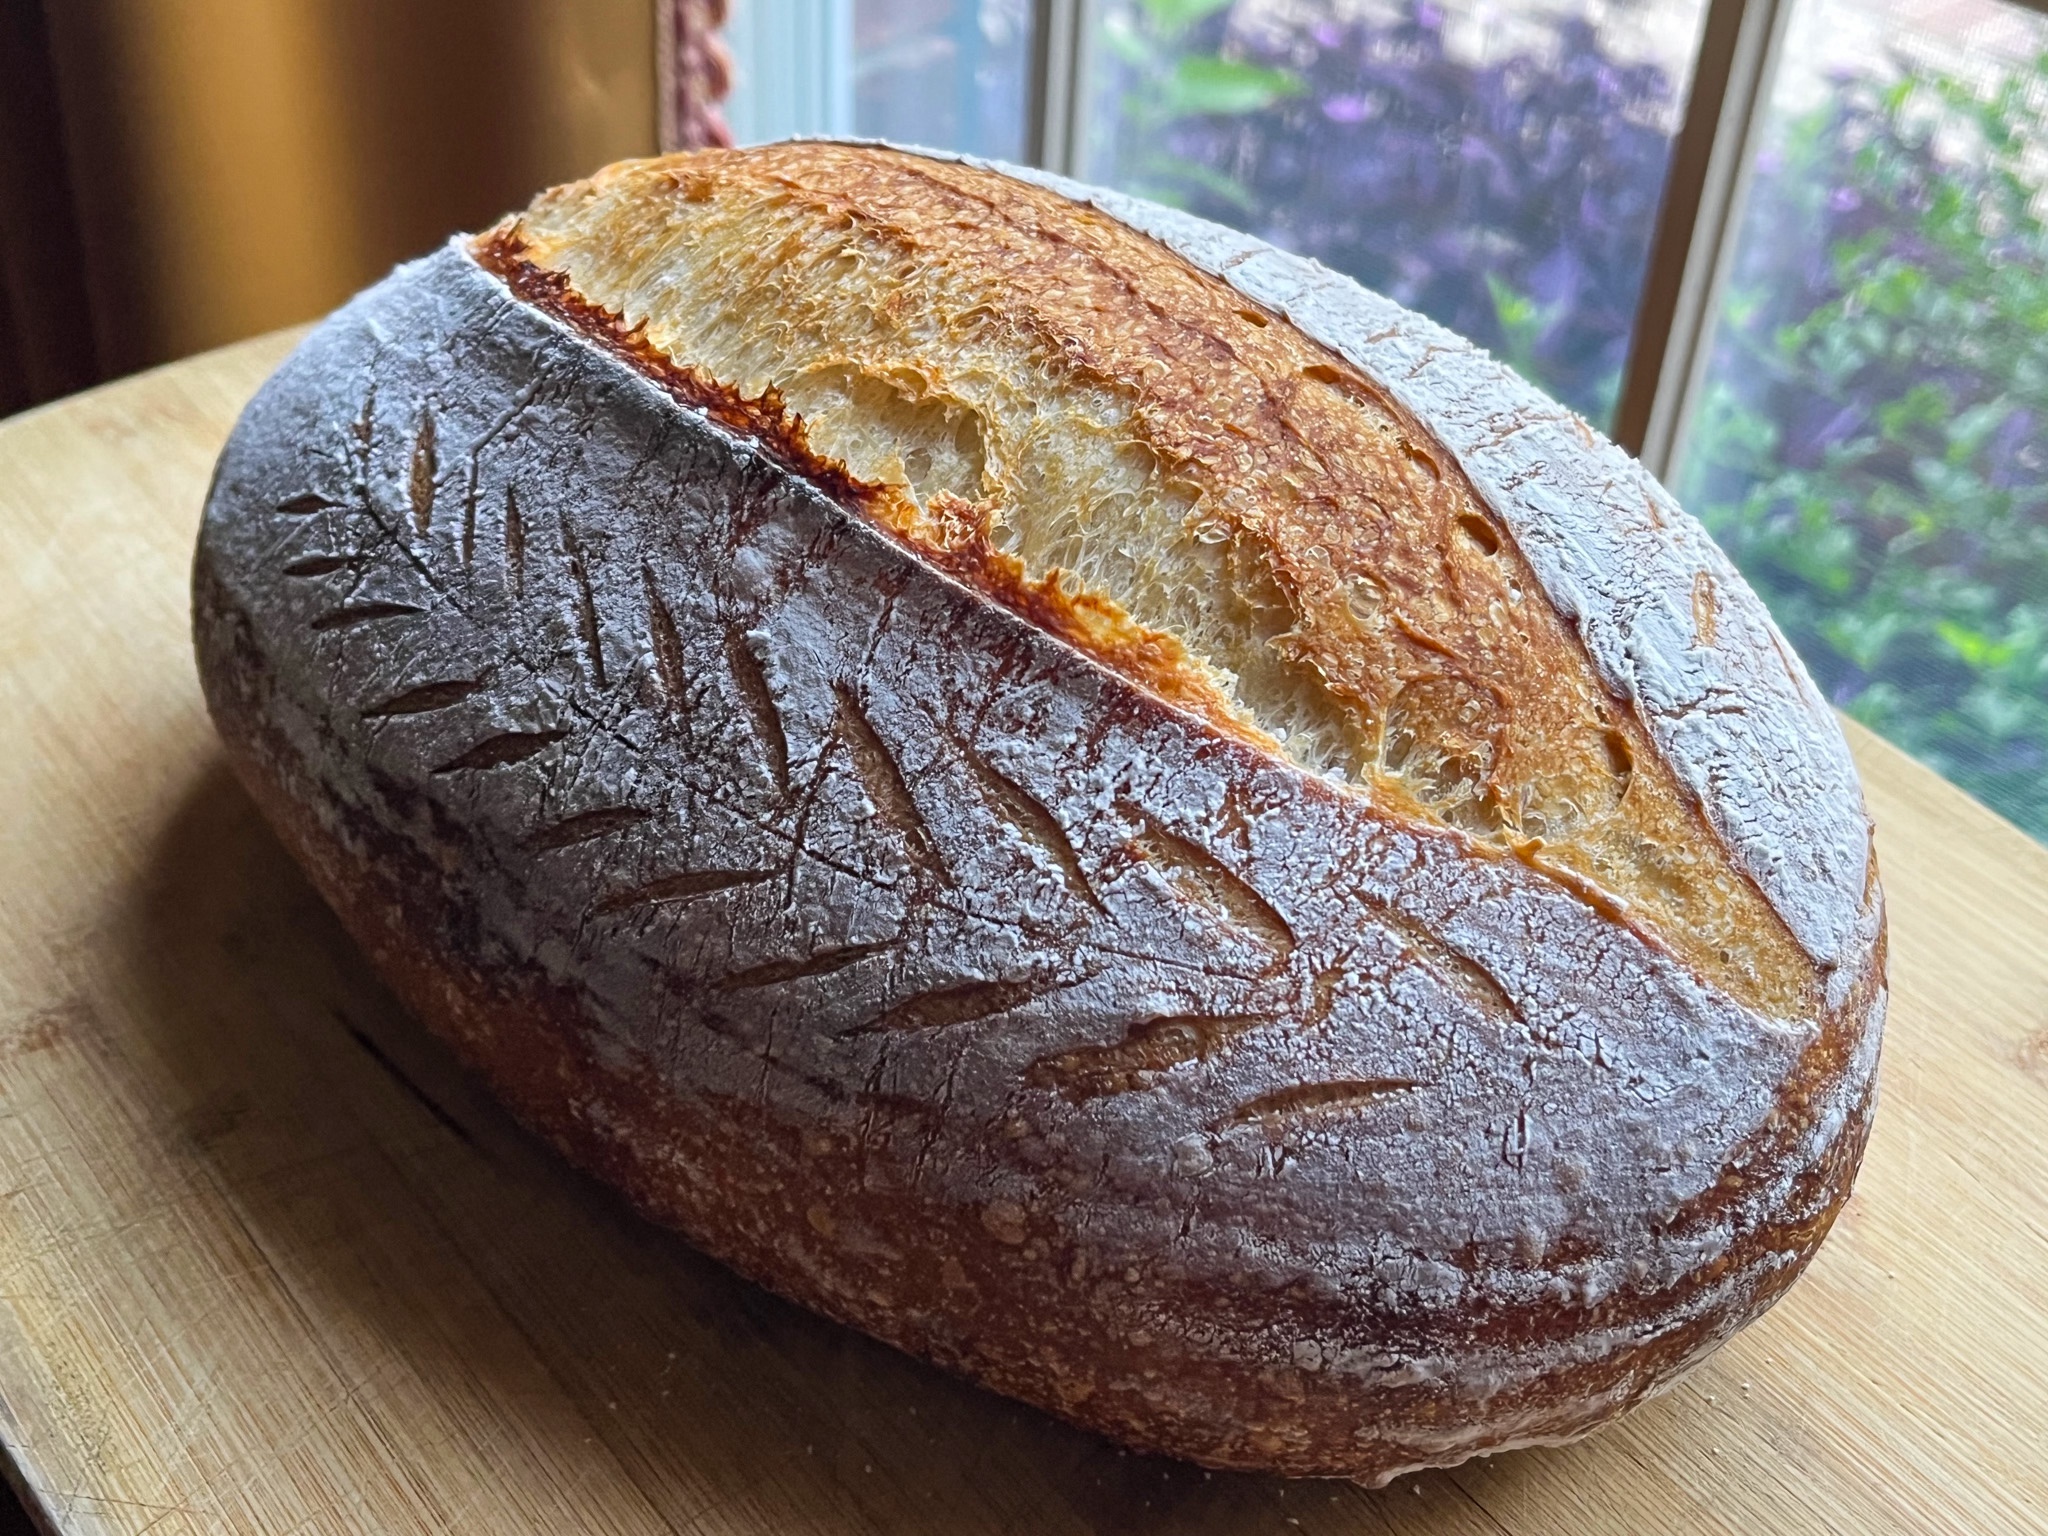
Comments: I love the yin-yang feel of this design which is quite popular for batard-shaped loaves, you can see examples everywhere in social media. Coupling razor blade with small scissors is all you need to get this simple look going.

Before I leave, let me share a few more designs of the recent past…
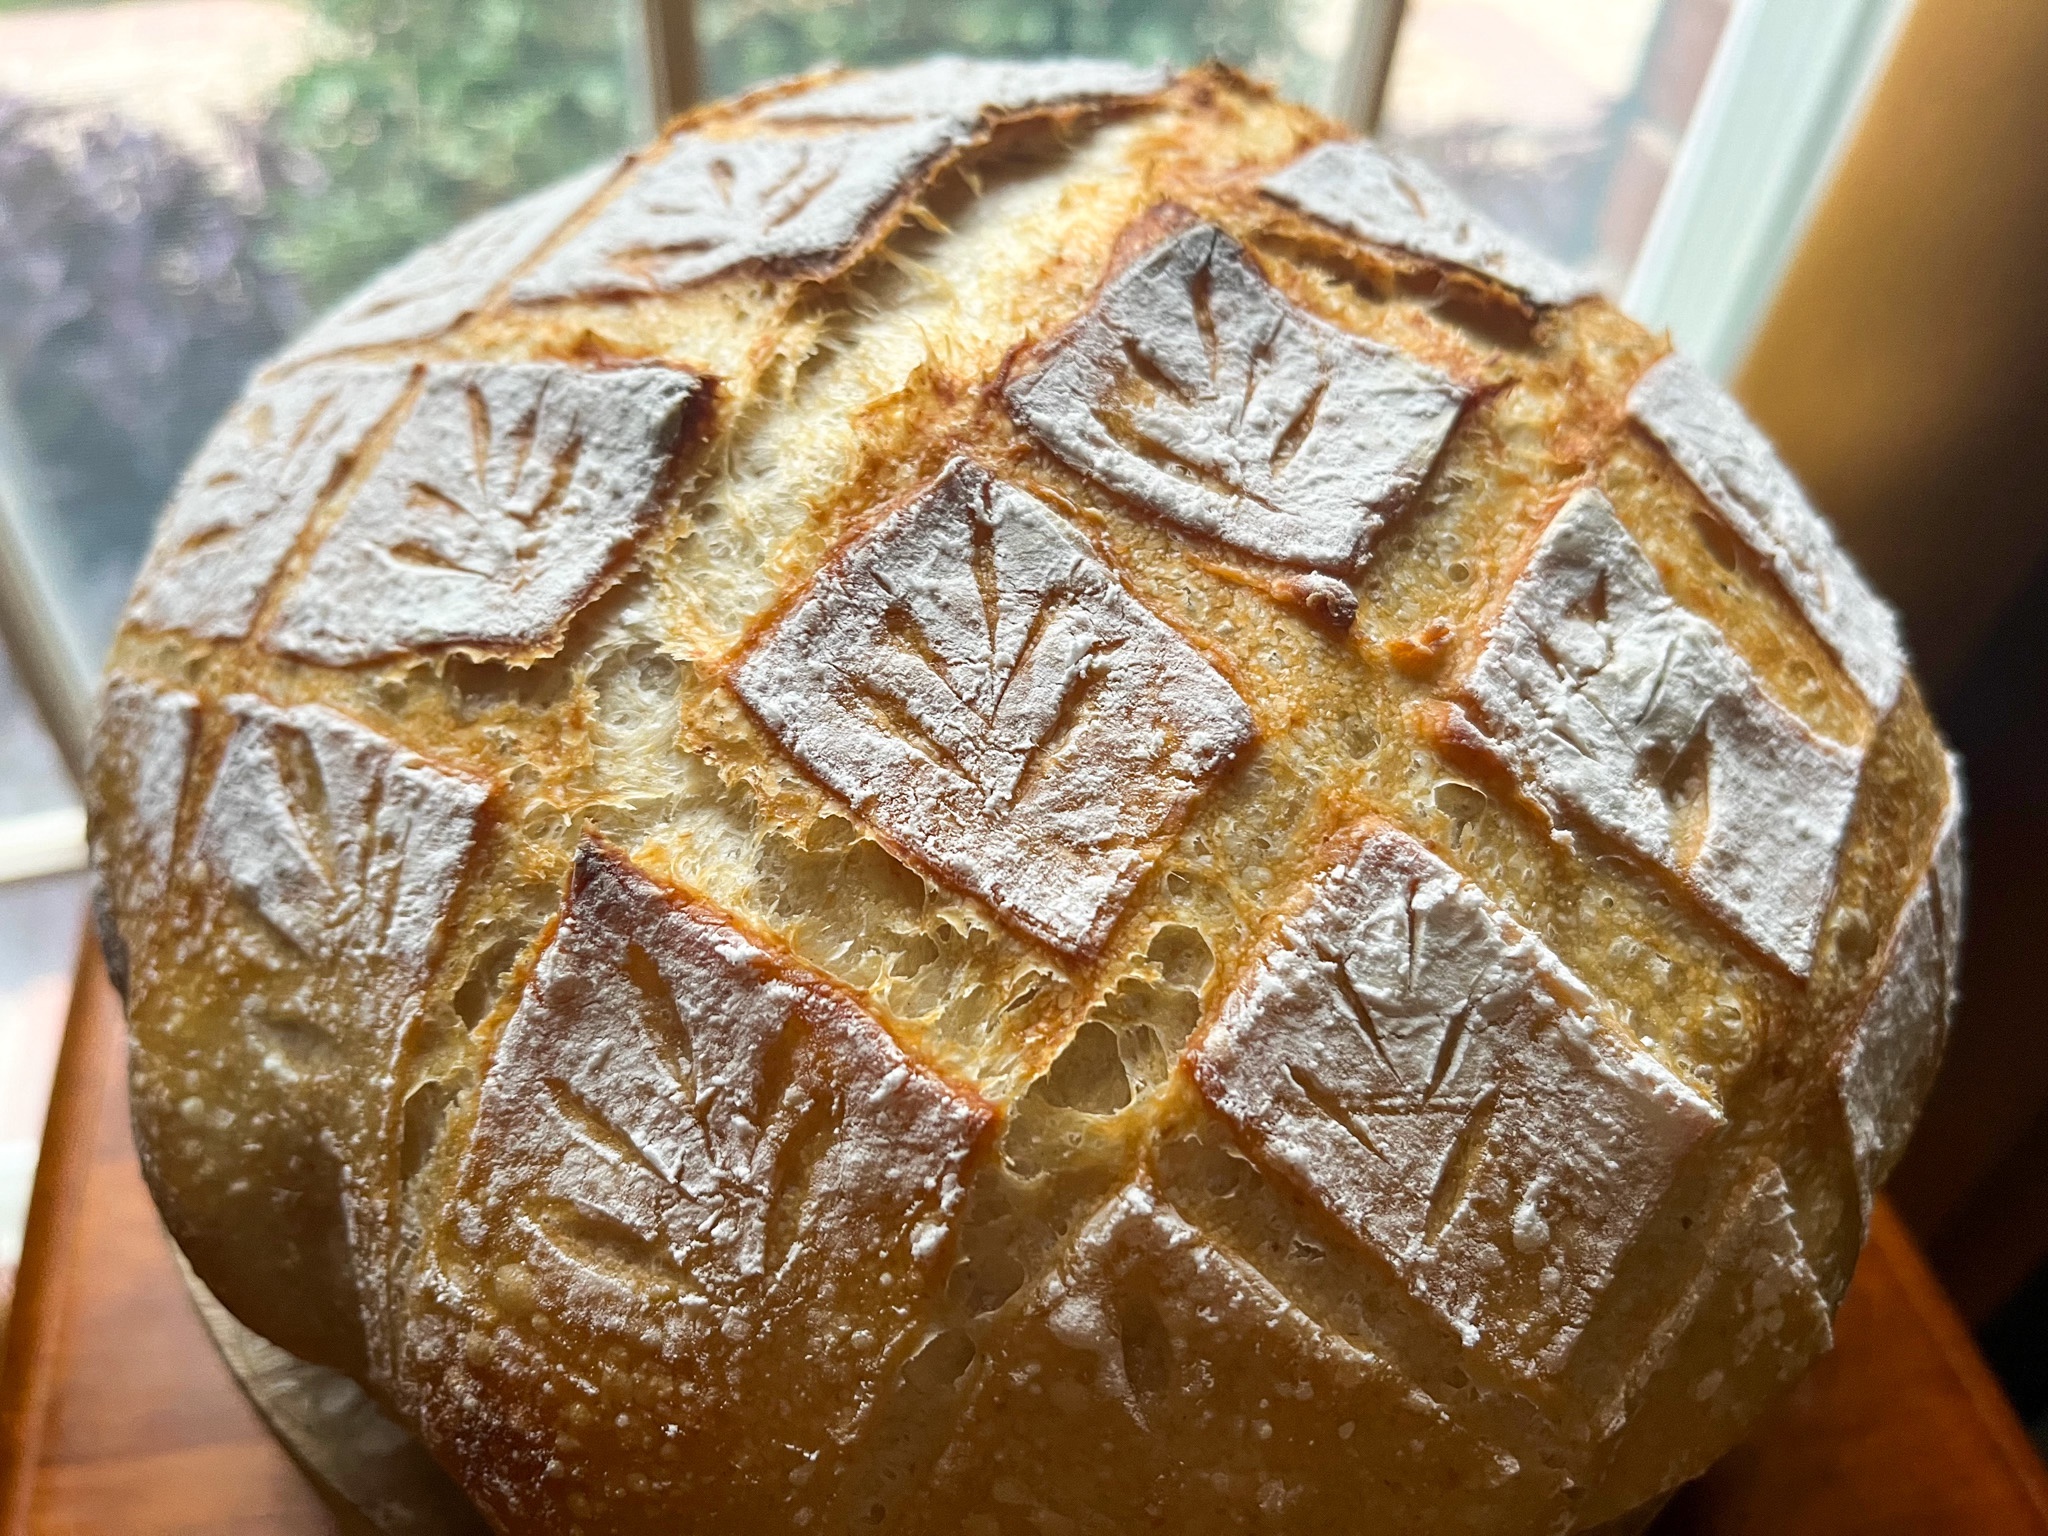

For the above look, a very simple grid is the initial scoring, then just a few extra touches in the center of each square.
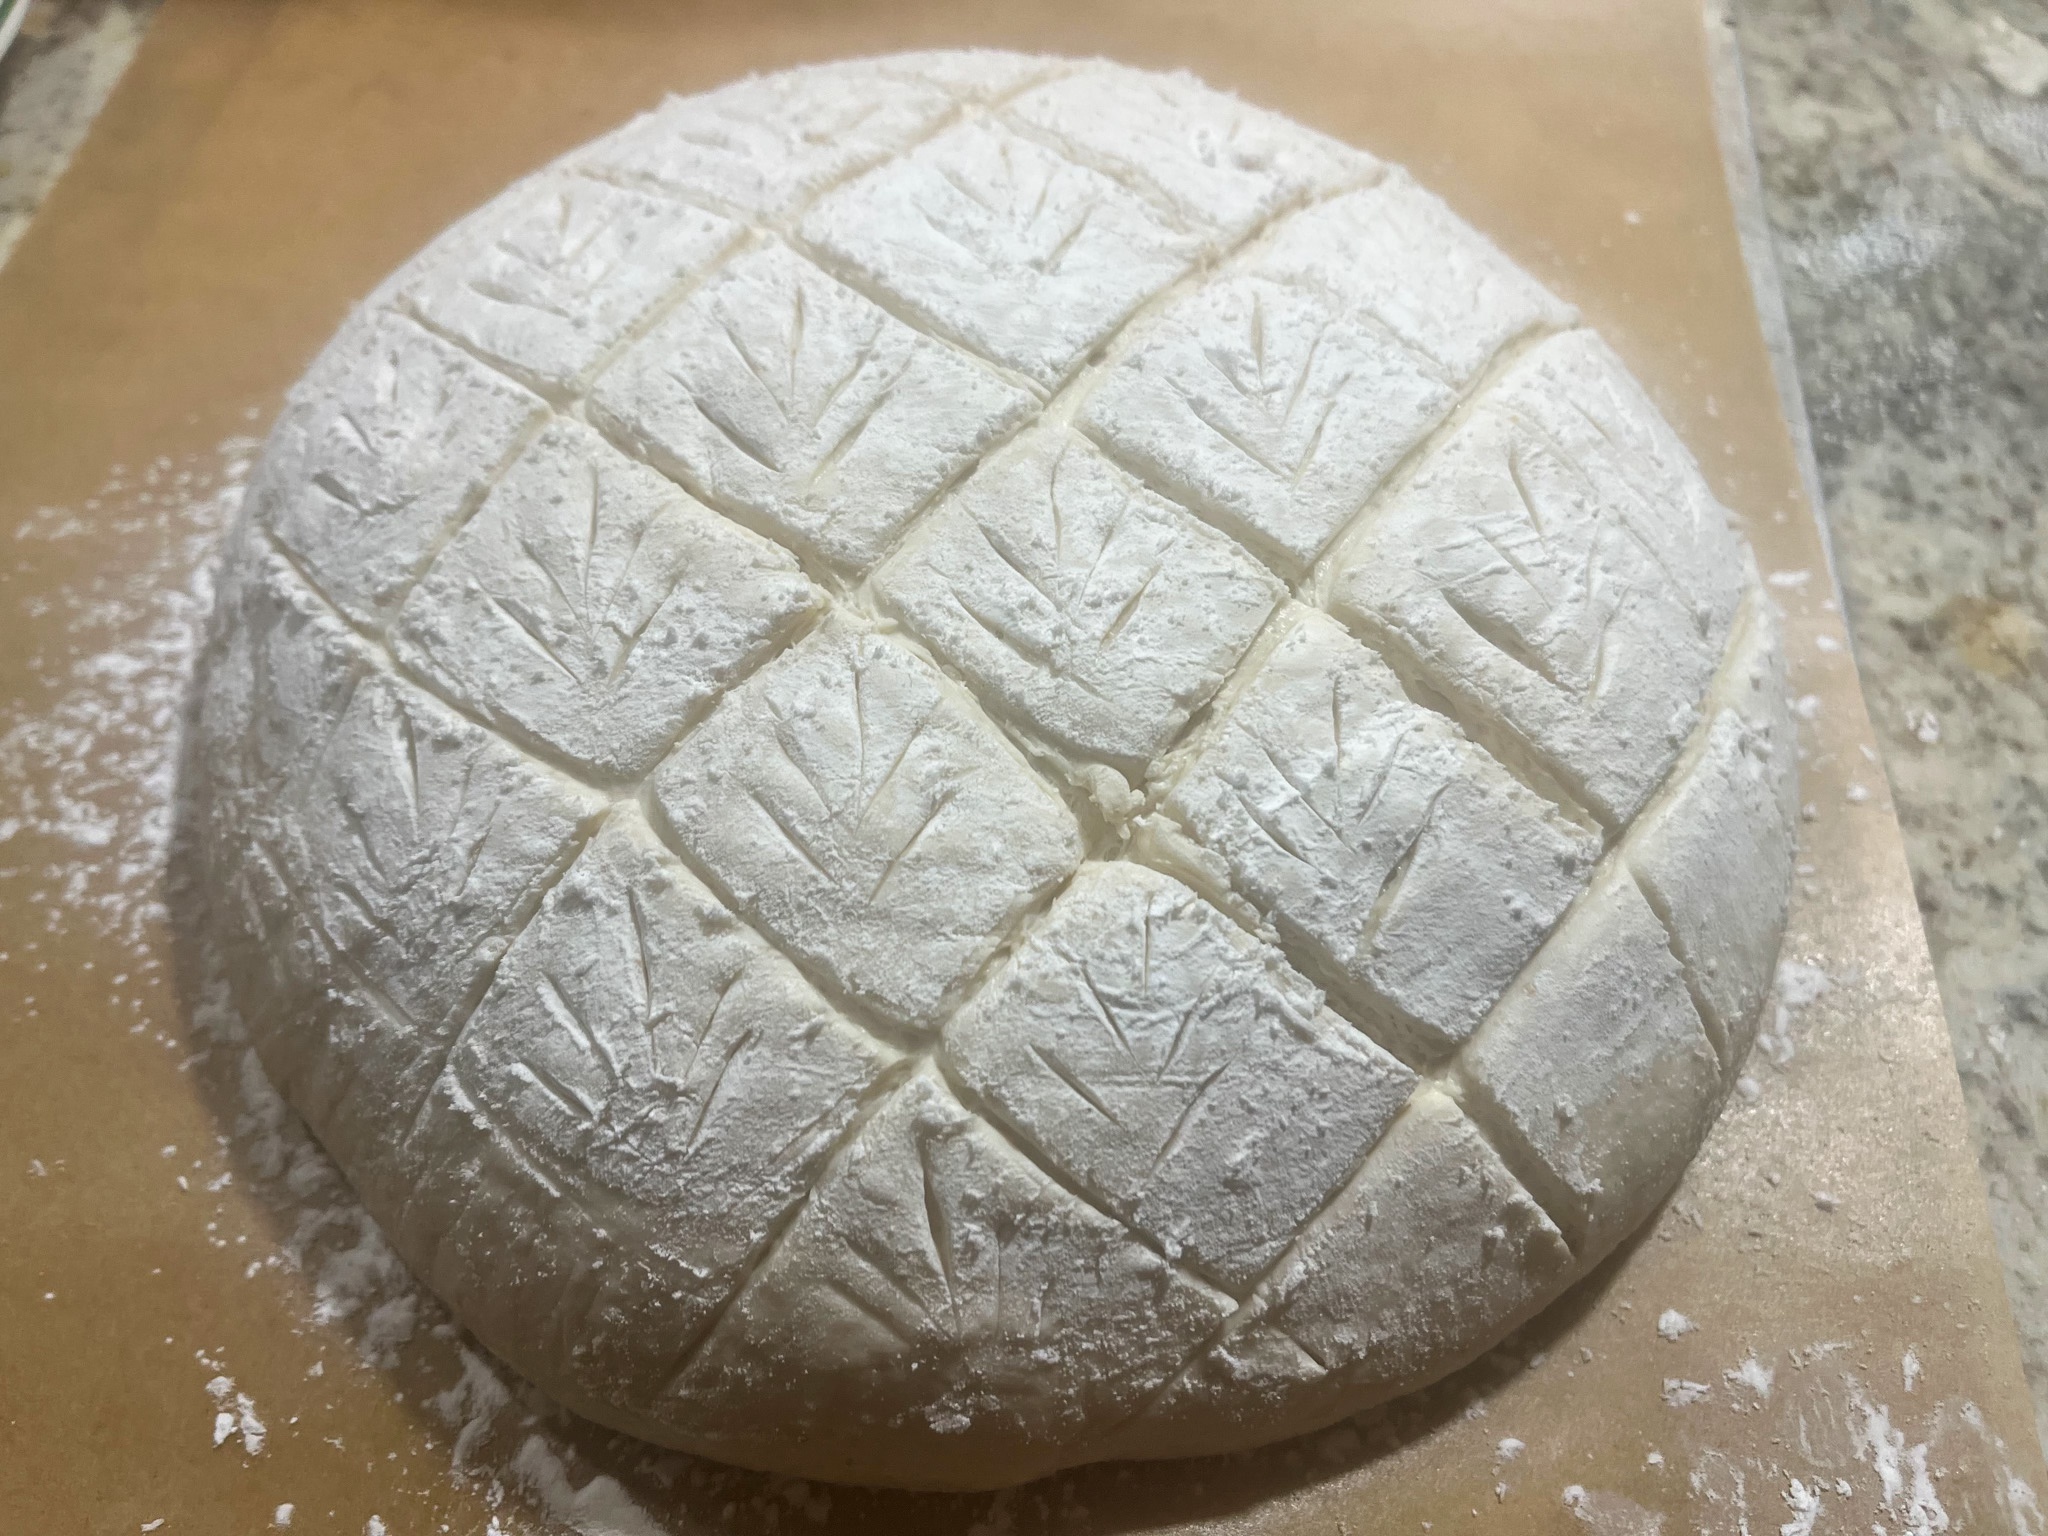
.

Another batard shape that is super simple and effective, relying on a central deep cut and a few decorating light touches with the blade…
A little stencil adventure…

And a festive scoring coupled with a slightly heavier coating with tapioca flour…
That’s all for now, folks, stay tuned for more soon!

ONE YEAR AGO: Farro with Chickpeas and Spinach

TWO YEARS AGO: Bison a la Mode de Bourgogne

THREE YEARS AGO: Masala Mashed Potatoes

FOUR YEARS AGO: Lessons from Tanya: Sugar Cookie Silhouettes

FIVE YEARS AGO: Cherry-Chipotle Chicken Thighs

SIX YEARS AGO: White Chocolate Mini-Mousse with Sugared Cranberries

SEVEN YEARS AGO: You Say Ebelskiver, I say Falafel

EIGHT YEARS AGO: Happy Thanksgiving!

NINE YEARS AGO: Two Takes on Raspberries

TEN YEARS AGO: Spice Cake with Blackberry Puree & The Global Pastry Review

ELEVEN YEARS AGO: Own Your Kitchen with Cappuccino Panna Cotta

TWELVE YEARS AGO: Chicken Parmigiana, the Thriller

THIRTEEN YEARS AGO: Wild Mushroom Risotto

FOURTEEN YEARS AGO: Tartine Bread:  Basic Country Loaf 

FIFTEEN YEARS AGO:  Pugliese Bread

A DUET OF VEGGIES

I love Delicata squash, but it is not easy to find at the grocery stores in our town. My first recipe incorporates the squash as a salad ingredient, still warm from the oven, although it will be equally tasty served cold. The second calls for Brussels sprouts, much more widely available. A super simple way to cook it, I hope you’ll give it a try.


ROASTED DELICATA SQUASH SALAD
(from the Bewitching Kitchen)

for the salad:
2 small Delicata squash, halved lengthwise and seeded, cut into ½-inch pieces
olive oil, for drizzling
a handful of pepitas
3 cups baby spinach leaves
1 Granny Smith Apple, peeled, cored and diced
a handful of dried cranberries
salt and freshly ground black pepper

for the dressing:
3 tablespoons extra-virgin olive oil
2 tablespoons apple cider vinegar
1/2 teaspoon Dijon mustard
1/2 teaspoon maple syrup
salt and freshly ground black pepper to taste

Toast the pepitas on a small pan with a smidgen of olive oil and a touch of salt. When fragrant, remove to a bowl and let them cool.

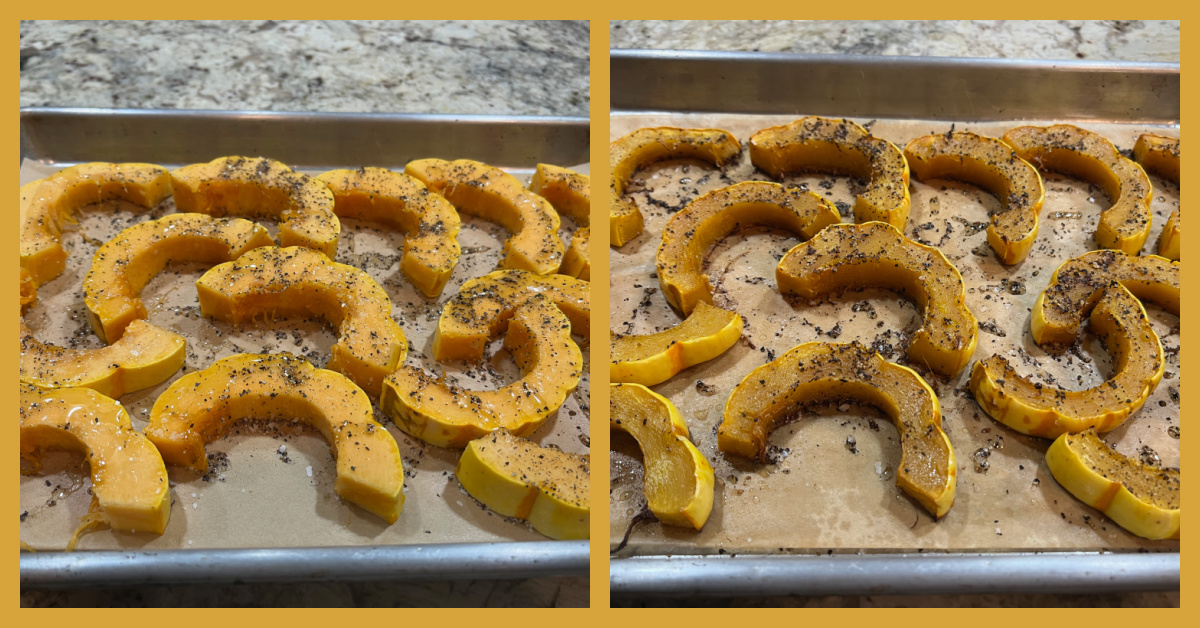
Heat the oven to 425°F and line a baking sheet with parchment paper. Place the squash on the baking sheet, drizzle with olive oil and sprinkle with salt and pepper. Toss to coat and roast until the squash is golden brown on all sides, about 25 minutes.

Make the dressing: In a small bowl, whisk together the olive oil, apple cider vinegar, mustard, maple syrup, and a pinch of salt and pepper. Set aside.

Assemble the salad: Combine the spinach, toasted pepitas, cranberries and apples. Add half the dressing, toss to coat well. Add the warm roasted squash, drizzle the leftover dressing, gently toss everything together, so that the spinach gets slightly wilted by the warm squash. Adjust seasoning if needed with salt and pepper. Serve right away.

ENJOY!

to print the recipe, click here

Comments: You can definitely roast the squash and just serve as a side dish for a nice dinner. I do not peel Delicate, the skin is tender enough that I don’t mind eating it. This was a hearty salad, that we enjoyed with roast chicken thighs.

And now, for a real super simple recipe that will go into our regular rotation.


CHEESY ROASTED BRUSSELS SPROUTS

Cook whole sprouts in gently boiling salted water for 8 minutes.

Drain and place on paper towels to dry.

Cut each sprout in half.

Transfer to a bowl and coat them with olive oil, seasoning lightly with salt and pepper.

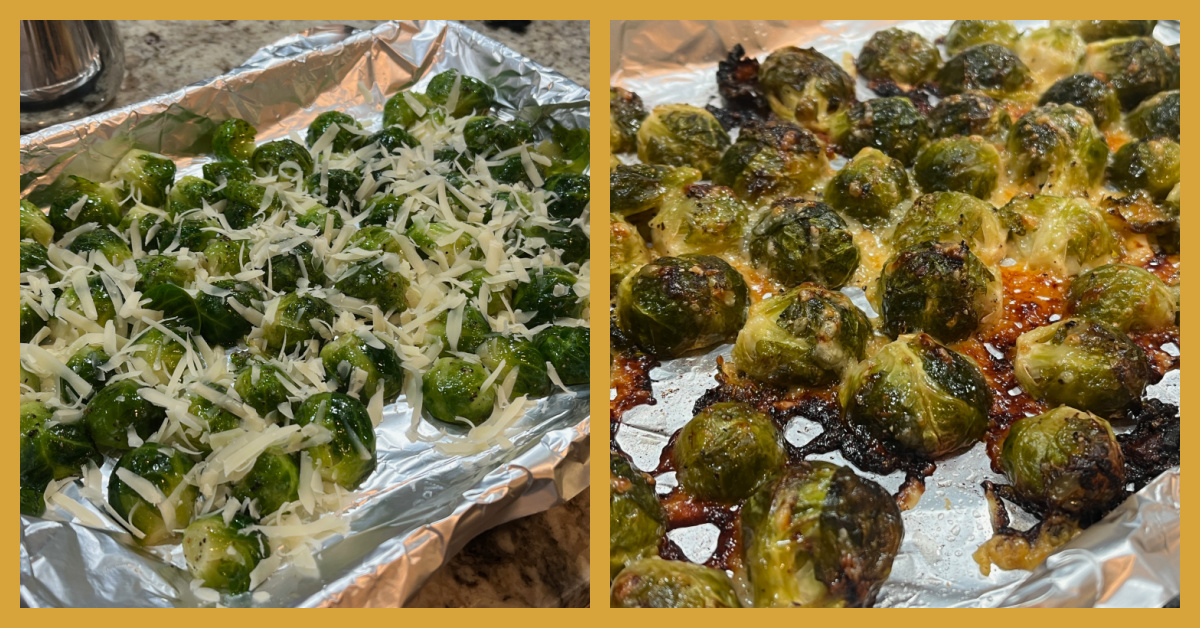
Line a baking sheet with aluminum foil, place the sprouts as a single layer, cut side down.

Roast at 425F for 15 minutes.

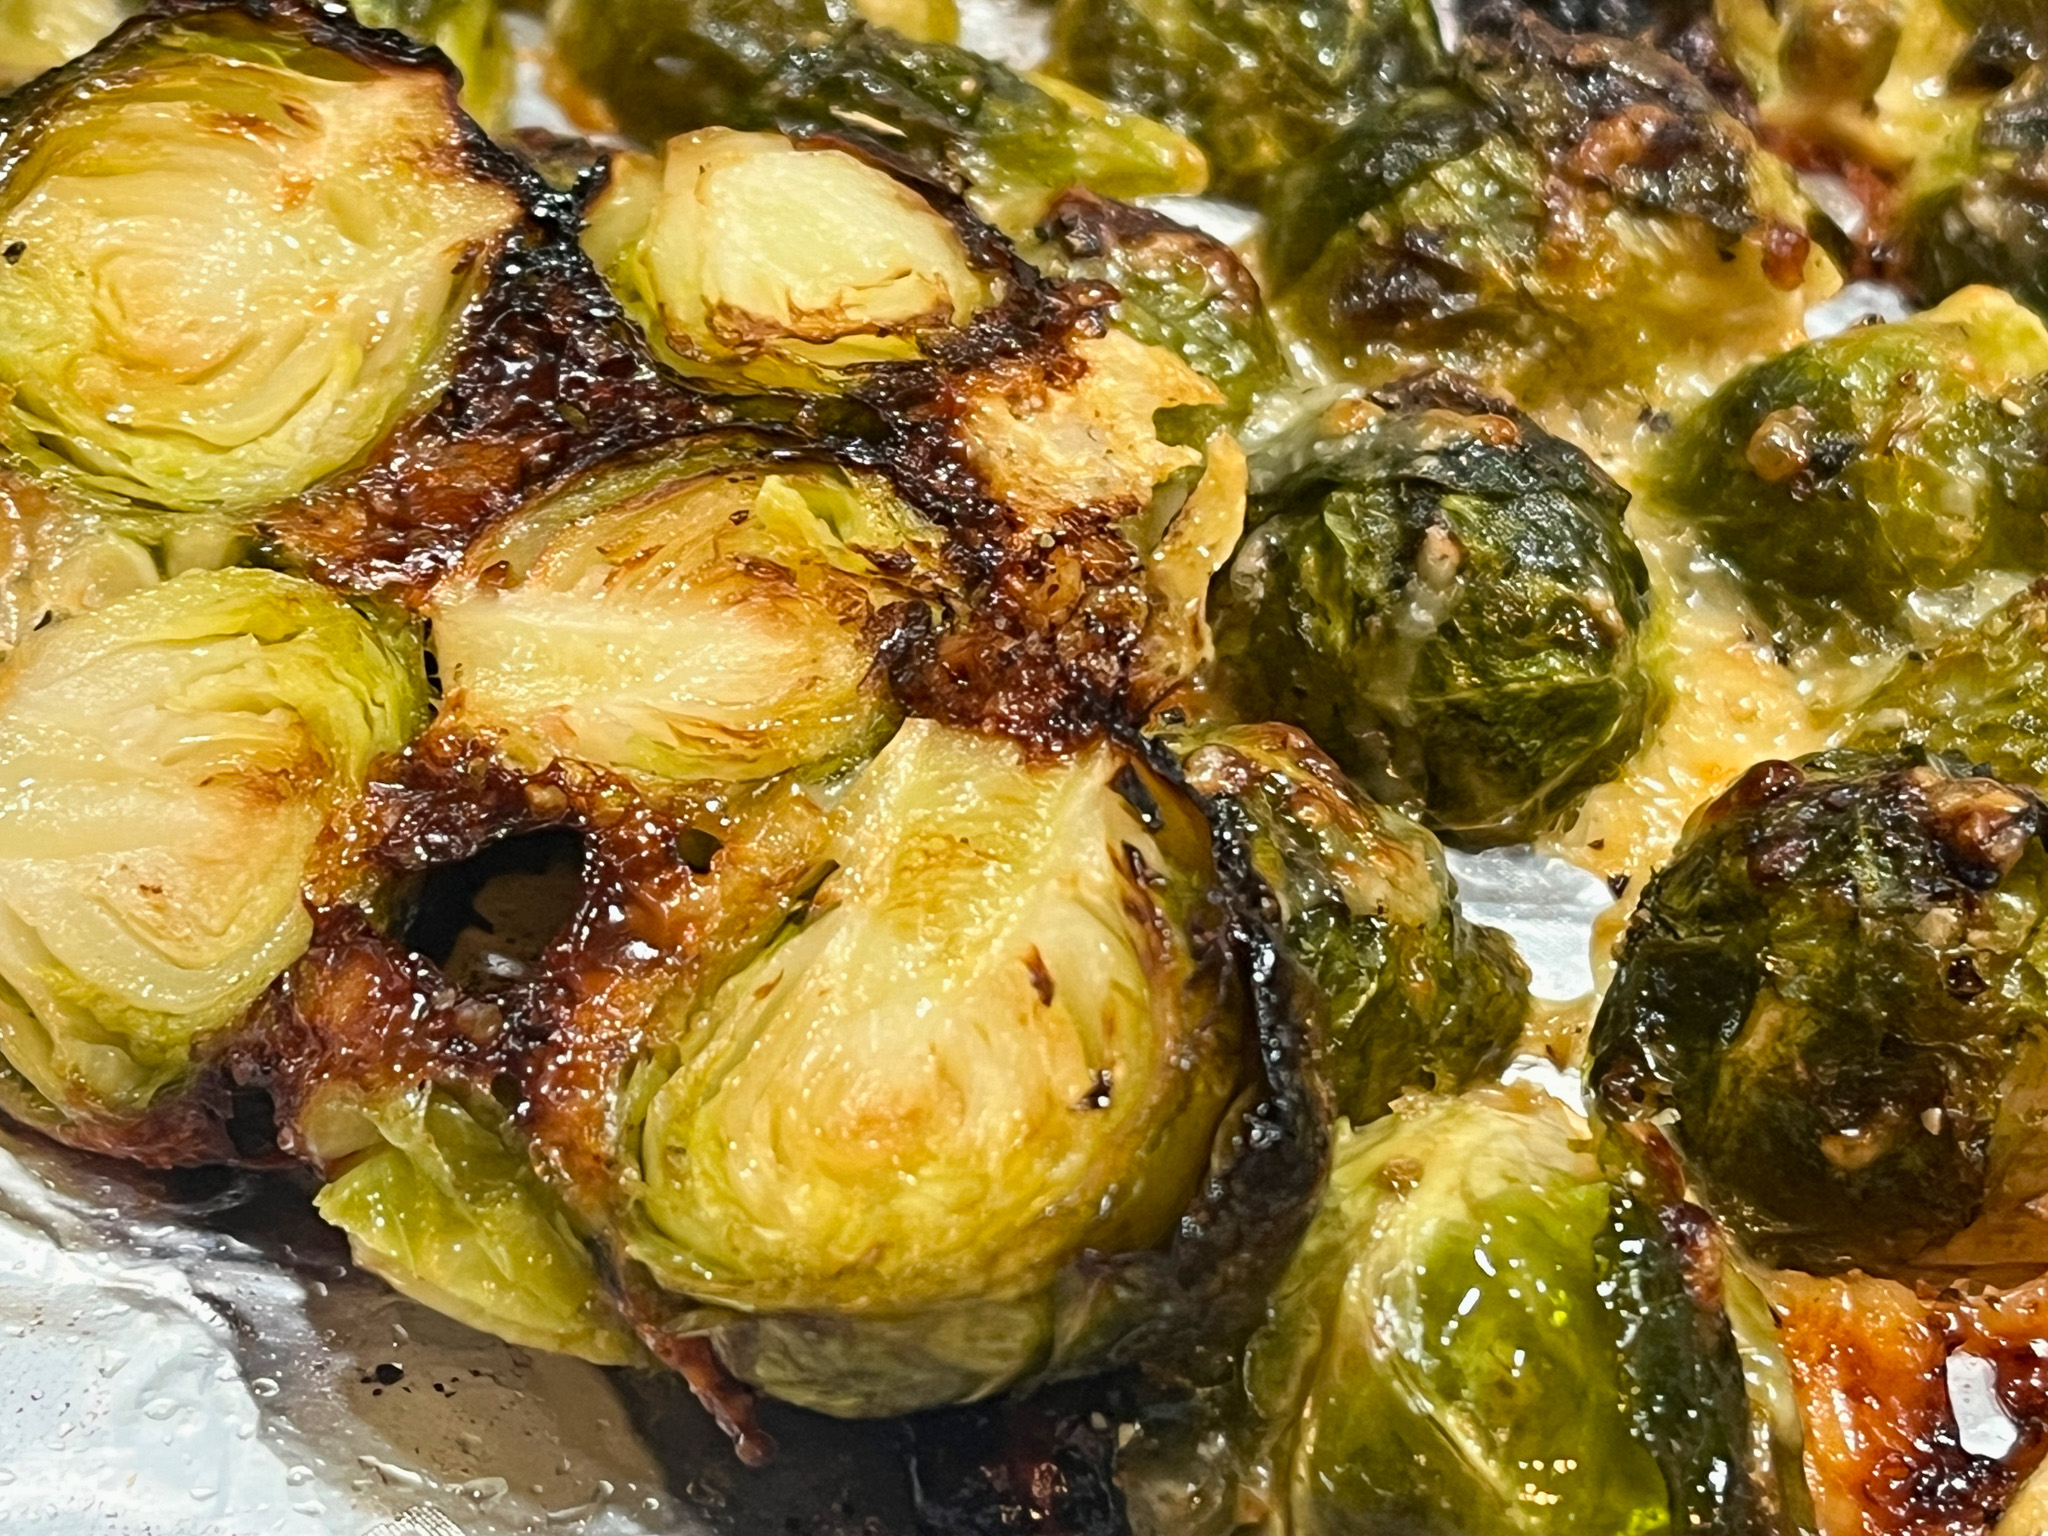
Add grated Parmigiano cheese all over and roast for another 15 minutes, or until the cheese is golden brown.

Keep an eye on it, you don’t want the cheese to burn.

.

to print, click here


Comments: This was a real nice way to get tender sprouts with no bitterness and the right amount of char. It may seem a bit fussy to cut them in half after cooking, but I think it was worth the small effort. If they are cut in half before simmering they do not retain the shape well and get a bit too mushy in the end. Of course, this is a matter of personal preference. See what works best for you…

ONE YEAR AGO: That Turkey Bread

TWO YEARS AGO: Compressed Eggplant and Gruyere Slices

THREE YEARS AGO: Charcoal-Painted Spelt Sourdough

FOUR YEARS AGO: Lime-Ganache Bonbons

FIVE YEARS AGO: The Dobos Torte

SIX YEARS AGO: Coffee-Caramel Entremet Cake

SEVEN YEARS AGO: Fennel Soup with Almond-Mint Topping

EIGHT YEARS AGO: Eataly

NINE YEARS AGO: Spaghetti Squash Perfection

TEN YEARS AGO: Skinny Eggplant Parmigiana

ELEVEN YEARS AGO: Supernova Meets Wok

TWELVE YEARS AGO500 Posts and The Best Thing I ever made

THIRTEEN YEARS AGO: Back in Los Angeles

FOURTEEN YEARS AGO: White House Macaroni and Cheese

FIFTEEN YEARS AGO: Korean-Style Pork with Asian Slaw

MUERTOS RANCHEROS

The moment I stumbled on this amazing blog – Ghoulatheart.com – I knew I had to make something from it right away. The recipe for Muertos Rancheros called my name really loud, as I had the right pan for it and the timing could not be more perfect: the week before Halloween! I made a tomato-free version, so if you want a more authentic version, check her blog post.

MUERTOS RANCHEROS
(inspired by Ghoulatheart.com)

Mock tomato sauce:
1 jar of roasted red bell pepper (12 ounce)
8 ounces mushrooms
1 tablespoon balsamic vinegar
salt to taste

2 tablespoons olive oil
1 shallot, finely minced
1 celery stalk, diced
1 pound ground turkey
1 tsp salt
1/2 tsp chili powder
1/2 tsp cumin
1 can black beans
cilantro leaves to taste
chicken stock to adjust consistency

jumbo eggs, whites and yolks separated
olive oil spray

garnish (optional)
flour tortillas cut in ghost shapes
olive oil spray

Heat oven to 350F.

Cut flour tortilla in ghosts shapes of varied sizes. Spray olive oil on both sides and bake until golden. Reserve for garnish.

Make the bell pepper sauce by running all ingredients in a food processor until super smooth. Reserve.

Heat the olive oil on a large skillet, add the celery and shallots, season lightly with salt. Sautee until fragrant. Add the ground turkey, salt, chili, cumin, and cook until the turkey is almost cooked through. Add 1 cup of the red bell pepper sauce, cook gently in low heat for 10 minutes, with the lid on. Add the black beans, cilantro, and a little chicken stock to loosen the sauce and make it a good environment to place the eggs over. Cover the pan and keep it at a simmer.

Make the eggs. Spray the skull pan with olive oil, add the egg white of the JUMBO egg, season lightly with salt. Cook in the oven for 4 minutes. Remove the pan, add the egg yolks, one per cavity. Put back in the oven and cook for 3 to 4 minutes more. Remove the pan from the oven, go over the edges of the eggs with a plastic knife or spatula to make sure it is loose enough to slip off the pan. Place a parchment paper and a baking sheet on top of the pan (careful, it is HOT), invert it. Eggs should slip off easily. Carefully place them with a silicone spatula over the sauce, with the heat turned off. You might need to add more chicken stock depending on how dry the sauce looks. Serve immediately decorated with tortilla ghosts.

ENJOY!

to print the recipe, click here

Comments: If you ever need to adapt a recipe that calls for tomato sauce due to food sensitivities, I recommend you try this red bell pepper version. I saw it online in a discussion forum and was intrigued. We really like it a lot. It is of course a huge departure from the ranchero sauce, but I hope the Ranchero Police won’t come after me. Cooking the eggs in the pan can be tricky, I had a big mess on my first try, I did not use spray, I rubbed olive oil in the cavities and that was clearly not effective. Some readers of her blog recommended adding the yolk to the sauce and just cooking the whites in the pan, but I found it harder to invert the egg whites only as the volume is very shallow. I think what works best is add the eggs to the sauce with the heat OFF, and let the yolks just cook in the residual heat. You might want to practice with one egg in your oven and see how it goes. Nudge the egg gently with a plastic spatula before inverting on the parchment paper.

Such a fun meal for scary times! The tortilla ghosts I saw on FoodTV The Kitchen show, and thought it was a good way to add something else to this meal. Poor little ghost was a little scared, knowing his end – another end – was near!

ONE YEAR AGO: Scary Skull Bakes

TWO YEARS AGO: Spicy Citrus Peanut Salad

THREE YEARS AGO: Shrimp Stir-Fry, Kung Pao-Inspired

FOUR YEARS AGO: Cauliflower Steaks with Olive and Caper Salsa

FIVE YEARS AGO: Twice-Cooked Eggplant

SIX YEARS AGO:  Turkey Burger, Japanese-Style

SEVEN YEARS AGO: Pumpkin Macarons

EIGHT YEARS AGO: Slow-Cooked Whole Chicken

NINE YEARS AGO: Chocolate Zucchini Cake with Chocolate Frosting

TEN YEARS AGO: Pecan-Crusted Chicken with Honey-Mustard Dressing

ELEVEN YEARS AGO: Bewitching Kitchen on Fire!

TWELVE YEARS AGO: Cashew Chicken Lettuce Wraps

THIRTEEN YEARS AGO: Chiarello’s Chicken Cacciatore

FOURTEEN YEARS AGO: Donna Hay’s Thai-Inspired Dinner

FIFTEEN YEARS AGO: Panettone

GERMAN CHOCOLATE MACARONS

These were made with a colleague from our department in mind, it was a big Birthday for our IT wizard who is also a lover of German Chocolate Cake. I decided to make a filling that started as a brigadeiro would, but with coconut for good measure. Some toasted pecans in the center. And a coating with chocolate. Gold luster powder to add the mandatory bling, as if you don’t sparkle on a Birthday there is something wrong with you!


GERMAN CHOCOLATE MACARONS
(from the Bewitching Kitchen)

For the shells:
200g powdered sugar
115 g almond flour, preferably super fine
115 g egg whites at room temperature (approx. 4 eggs)
1/8 tsp of cream of tartar (optional)
100 g granulated sugar
¼ tsp vanilla paste or extract
brown and a tiny bit of red gel food color

Line 3 heavy baking sheets with parchment/baking paper or Silpat mats. Layer the powdered sugar and almond flour in a food processor. Pulse until the mixture looks like fine meal, about 12 pulses. Pass through a sieve and transfer to a small bowl or to a sheet of parchment/baking paper. Set aside.

Place the egg whites and cream of tartar in the bowl of a stand mixer fitted with the whisk attachment. Make sure that the bowl and the whisk are impeccably clean. Starting on medium speed, whip the whites with the cream of tartar until they look like light foam. The whites should not appear liquid. The foam will be light and should not have any structure.

Slowly rain in the granulated sugar in five additions, trying to aim the stream between the whisk and the side of the bowl. Turn the speed up to high. Continue to whip the meringue until it is soft and shiny. It should look like marshmallow creme (marshmallow fluff). Add the vanilla. Whip the egg whites until the mixture begins to dull and the lines of the whisk are visible on the surface of the meringue. Check the peak. It should be firm. Transfer the whites to a medium bowl, add the gel color.

Fold in the almond flour mixture in two increments. Paint the mixture halfway up the side of the bowl, using the flat side of a spatula. Scrape the mixture down to the center of the bowl. Repeat two or three times, then check to see if the mixture slides slowly down the side of the bowl. Put the mixture in a piping bag fitted with your choice of piping tip (round, ¼ or ½ inch in diameter or 6 – 12 mm). Pipe circles. Slam each sheet hard four to six times on the counter/worktop. Let the unbaked macarons dry until they look dull but not overly dry. Drying time depends on humidity. In a dry climate, the macarons can dry in 15 to 20 minutes; in a humid climate, it can take 35 to 40 minutes.

While the macarons are drying, heat the oven to 300 F. Bake one sheet at a time on the middle rack. Check in 11 minutes. If the tops slide or move (independently of the ‘feet’ when you gently twist the top), then bake for 2 to 3 more minutes. Check one or two. If they move when gently touched, put them back in the oven for 1 to 2 more minutes until they don’t move when touched. Let the macaroons cool for 10 minutes before removing from the pan. The macarons should release without sticking.

Assemble the macarons: find two macarons similar in size and add a good amount of filling to the bottom of one of them. Place the other on top and squeeze gently to take the filling all the way to the edge. Store in the fridge for 24 hours for perfect texture.

For the filling:
1 can condensed milk
1 tablespoon butter
1/4 cup shredded unsweetened coconut
1 tbsp cocoa powder
toasted pecans, chopped fine
melted dark chocolate or candy melts
toasted sweetened coconut
golden luster spray (optional)

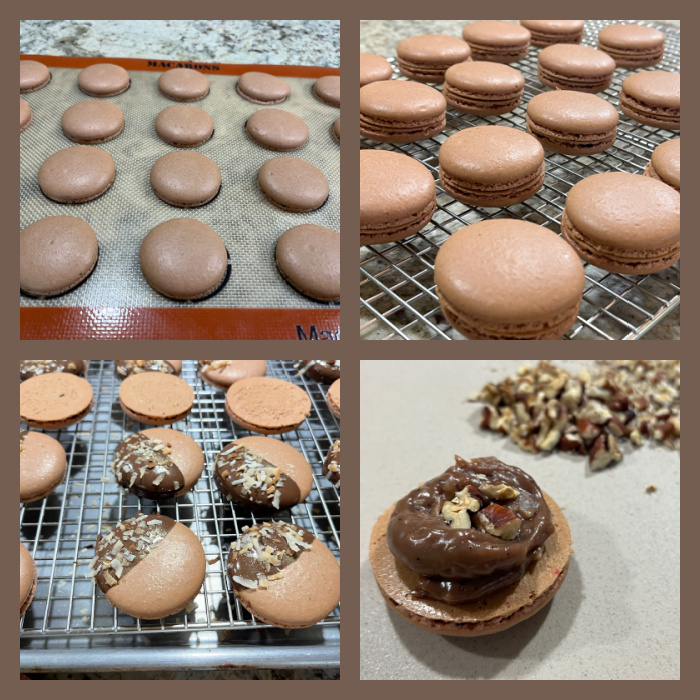
Before filling the shells, melt chocolate or candy melts and dip ONE shell that will be the top half way into it. Immediately sprinkle toasted coconut on top.

Make a “brigadeiro” mixture by adding condensed milk, butter, cocoa powder and coconut to a sauce pan. Heat in medium heat constantly stirring until the mixture releases from the bottom of the pan. Transfer to a bowl and let it cool, but do not refrigerate. You can pipe it on the shells if it is still slightly warm, but not too hot.

Add a circle of coconut brigadeiro to a bottom shell, sprinkle a little bit of pecans in the center. Cover with the decorated and fully set top shell. Spray gold luster if you like. Place shells in the fridge overnight.

ENJOY!

to print the recipe, click here

Comments: I normally prefer not to add cocoa to the shells, just to the filling, because macarons are finicky enough and sometimes “stuff happens” when you add cocoa. I had never used brigadeiro to fill them, and from the feedback I got, it worked quite well. I did not have a macaron but tried the brigadeiro mixture and that is one good tasting brigadeiro, I might repeat it and roll it like the traditional stuff.

ONE YEAR AGO: Dressing up the Oreo Cookie

TWO YEARS AGO: OMG Roasted Sweet Potatoes

THREE YEARS AGO: Air-Fried Eggplant Raita

FOUR YEARS AGO: Turkey-Pumpkin Roulade with Cider Sauce

FIVE YEARS AGO: Strawberry-Vanilla Mini-Cakes

SIX YEARS AGO: Bourbon-Glazed Pork Tenderloin with Pea Pesto

SEVEN YEARS AGO: Chocolate Chip Cookies from Naturally Sweet

EIGHT YEARS AGO: Little Bites of Paradise

NINE YEARS AGO: Maple-Glazed Pumpkin Bread

TEN YEARS AGO: In My Kitchen, October 2014

ELEVEN YEARS AGO: Grilled Steelhead Trout

TWELVE YEARS AGO: Brown Butter Tomato Salad

THIRTEEN YEARS AGO:  Spelt and Cornmeal Rolls

FOURTEEN YEARS AGO: Roasted Potato and Olive Focaccia

FIFTEEN YEARS AGO: Multigrain Bread Extraordinaire

HELEN FLETCHER’S PINEAPPLE KOLACHE

I am going to say something quite daring, so here it goes: this might very well be the best thing I’ve baked in a whole year! If you follow my blog, you probably know I am quite fond of Helen’s recipes, because not only they always work, but her explanations are crystal clear, and make you comfortable to try something even if it seems complex or out of your skill level. I had never made kolache, but following the method described in this post, I had no issues. They turned out fantastic! Check her post for all sorts of variations for the filling, or go with the one I chose: pineapple. Tart, bright, fresh, perfect contrast with the slightly sweet bread dough. A winner. I promise you.

PINEAPPLE KOLACHE
(from Helen Fletcher’s Pastries Like a Pro)

for the pineapple filling:
1 cup well drained crushed pineapple
⅓ cup sugar
1 teaspoon potato starch or cornstarch
1 teaspoon lemon juice
1 tablespoon melted butter

Whisk together the sugar and potato starch or cornstarch. Combine all ingredients in a small pan and bring to a boil over medium heat. Boil for 1 minute. Cool completely. Refrigerate until needed.

for the dough:
½ cup butter (1 stick, 114 grams)
½ cup sugar (100 grams)
1 teaspoon salt
1 cup sour cream (225 grams)
2 teaspoons instant yeast
½ cup lukewarm water
2 eggs
4 cups all purpose flour (560 grams)

Cut the butter into pieces and place in a small saucepan along with the sugar and salt. Heat until the butter is melted. Remove from the heat and let it sit until it is lukewarm. Add the sour cream. Whisk it into the butter mixture. Add eggs and yeast, whisk them in. Lastly, add the water. Transfer to the bowl of a mixer. Add the flour and, beat until it comes together.  Knead in the machine for 3 minutes, turning after about 1 ½ minutes as the dough will adhere to the top of the dough hook and not get beaten.  The dough will be very soft and more of a batter.

Place it in a greased bowl or container, cover with plastic wrap and allow it to rise until doubled, about 2 ½ hours. After it has risen, punch it down, re-cover it and refrigerate overnight so the butter can firm up. 

for shaping and baking:
Refrigerated dough
1 egg, well beaten
pineapple filling

Line three baking sheets with parchment.  Set aside. Punch the dough down if risen and divide the dough in half (585 grams each).  Shape each piece into a rectangle.  Wrap each piece in plastic wrap and refrigerate for 10 to 15 minutes. Remove one piece of dough from the refrigerator and roll it out so it is ½ inch thick.  The dough will be very firm. With a 3″ cookie cutter (or whatever size you want) cut out rounds and place them on the parchment about 1 inch apart.  Repeat with the second piece of dough.  Reroll and cut additional rounds. Cover them with tea towels and allow to rise until almost doubled.

Preheat the oven to 375°F. With your fingers, make a deep well in the rounds about ½ inches in from the edge of the dough but do not go through the dough.  Start by making a hole in the center. Expand the well by pressing the dough down. Brush the top edges of the Kolache with the beaten egg. Fill the wells with 1 to 1 ½ tablespoons of filling.  Bake on a double pan for about 20 minutes for the 3″ size until the top of the dough is well browned.  Reduce the time for smaller pastries.

Makes about 20 – 3″ rolls with re-rolling the dough.

ENJOY!

to print the recipe, click here

Comments: I highly recommend you visit Helen’s site to get her step-by-step photos and instructions, especially if you’ve never made enriched bread dough. The dough is very nice to work with, a bit sticky, but I urged the temptation to add more flour and all ended well in the end. I was intrigued by the pineapple filling because I rarely use pineapple in baking, but it was much better than I expected. I made the filling the day before, right after mixing the dough and placing it in the fridge for overnight proofing. Next day the whole thing was a breeze, just rolled the dough, cut circles, filled and baked. I donated them all, but sampled one for “quality control”. It was hard to stop, but I exercised herculean self-control.

Helen, cannot thank you enough for so many great recipes I’ve made from your site!

ONE YEAR AGO: Blood Orange and Cranberry Mini-Cakes

TWO YEARS AGO: Simnel Cupcakes

THREE YEARS AGO: Oat and Sesame Seed Sourdough

FOUR YEARS AGO: Moroccan Turkey Pie with Olive Oil Crust

FIVE YEARS AGO: Another Twisted Sister of the Shepherd’s Pie 

SIX YEARS AGO: Cashew Chicken, My Way

SEVEN YEARS AGO: Two Deliciously Simple Salads

EIGHT YEARS AGO: In My Kitchen, April 2016

NINE YEARS AGO: Spring has Sprung with Suzanne Goin

TEN YEARS AGO: Chai Brownies

ELEVEN YEARS AGO: Pomegranate-Molasses Glazed Carrots

TWELVE YEARS AGO: Braised Brisket with Bourbon-Peach Glaze

THIRTEEN YEARS AGO: The Real Vodka Sauce

FOURTEEN YEARS AGO: Spring Rolls on a Spring Day