SMOKED SHRIMP TACOS WITH ROASTED JALAPENO SALSA

To make this simple recipe, you’ll need a smoker. If you don’t have one, use the same rub on the shrimp and grill it. I am not too wild about liquid smoke, and would rather omit that component than include it in the rub, but if you have a brand you are fond of and know how much to use, go for it. The Roasted Jalapeno Salsa was published last week on Mimi’s blog, and I made it on the same day I read it. I just knew we would love it. Beware, it is spicy!

SMOKED SHRIMP TACOS WITH ROASTED JALAPENO SALSA
(from The Bewitching Kitchen and Mimi’s blog)

for the dry rub:
1/4 cup granulated sugar
1/8 cup firmly packed brown sugar
2 tsp hot chili powder
2 tsp salt
1 teaspoon ground coriander
1 teaspoons ground black pepper
1/2 teaspoon ground ginger

1 pound jumbo shrimp, peeled, deveined, and tails removed

Heat the smoker to 200F with mesquite, oak, or pecan wood.

In a small bowl, mix together all the ingredients for the dry rub. Pour the rub over the shrimp and make sure everything is well coated. Add the shrimp to the smoker and smoke for 15 to 20 minutes. Serve with the salsa, and your favorite toppings.

ROASTED JALAPENO SALSA
(slightly modified from Chef Mimi)

6 large jalapeños
4 Roma tomatoes
2 tablespoons olive oil
1/2 teaspoon salt
1 generous bunch cilantro, chopped
Juice of 1/2 lemon
1 teaspoons honey
2 tablespoons olive oil
1/2 teaspoon salt
Pepper, to taste

Heat the oven to 400 degrees F.

Start by preparing the jalapeños. Remove the stems, then slice them vertically around the core of seeds. Discard the seeds and stems. Roughly chop the jalapeño slices and place them in a medium-sized bowl. Chop the tomatoes into quarters and remove the seeds, then place them in with the jalapeños. Toss the mixture with the oil and salt, then place it in a baking/roasting dish. Roast until vegetables are caramelized, about 30 minutes.Place the roasted jalapeno-tomato mixture with the cilantro and other ingredients in a food processor and pulse, until the desired texture.

ENJOY!

to print the recipes, click here

Comments: I made the salsa around lunch time, kept it in the fridge and brought to room temperature as I prepared the shrimp. Everything was ready then in less than 30 minutes, perfect weeknight meal. The shrimp turned out juicy and tender, with a nice flavor from the dry rub. And the roasted jalapeno salsa went perfectly with it. But if you are not into spicy food, this is definitely not for you. My Dad, the pepper-addict, would be proud of me! The shrimp is actually quite mildly flavored, so consider just serving it with a store-bough mild salsa if you prefer.

ONE YEAR AGO: Corn Fritters

TWO YEARS AGO: Minnie Macarons

THREE YEARS AGO: Air-Fried Mexican Meatloaf

FOUR YEARS AGO: Mimi’s Sticky Chicken, a Call from my Past

FIVE YEARS AGO: Perfect Soy-Grilled Steak

SIX YEARS AGO: The Devil’s Bread

SEVEN YEARS AGO: Heart of Palm Salad Skewers

EIGHT YEARS AGO: Potluck Frittata and Lavoisier

NINE YEARS AGO: Home-made Corn Tortillas

TEN YEARS AGO: Whole-Wheat Spaghetti with Peanut Sauce

ELEVEN YEARS AGO: Brigadeiros: A Brazilian Party!

TWELVE YEARS AGO: Lemony Asparagus

CLAY POT SMOKED DUCK WITH POTATOES

This gem of a recipe was made by my beloved husband. I know what you’re thinking: if only all women could be so lucky, right? Since he was in charge of the meal I did not take pictures of the whole process, but it turned out so good, I have to share. Duck is a tricky bird to cook. Legs and breast cook at different rates, so roasting can pose problems. The combination of smoker and clay pot did a magical job, but if you don’t have a smoker, the clay pot alone will work beautifully (check out this post from 10 years ago – !!! – by my friend Celia).

CLAY POT SMOKED DUCK WITH POTATOES
(from the Bewitching Kitchen)

1 whole duck
salt and pepper to taste
1 tsp Herbes de Provence
fingerling potatoes
hickory wood pellets (for smoker, optional)

Soak your clay pot in water, reserve.

Season the duck inside and outside with salt, pepper and Herbes de Provence. Place in a smoker at 250F for 30 minutes. This will give it a very light smoky flavor.

Place the duck in the cold clay pot, add the potatoes all around it, season them lightly with salt, pepper, and Herbes de Provence. No need to add any oil. Close the clay pot and place in a cold oven. Turn it to 425F. Roast for 2 hours. After one hour, open the clay pot and carefully remove some of the accumulated fat with a baster. Close the pot again and continue roasting.

At the end of 2 hours, open the lid and reduce the temperature to 375F. Roast for 30 minutes longer, or until the skin gets as crispy as you like it.

ENJOY!

to print the recipe, click here

Comments: This was one outstanding meal. Phil made a little duck stock with the neck and gizzards of the bird and used that to make a simple gravy, but I tell you, it was excellent straight from the oven, nothing else needed. The potatoes put up a beautiful fight with the duck for the spotlight, because they got infused with duck fat and absolutely perfect. The most amazing thing is that the duck itself did not turn out fatty or overly greasy. As I said, if you don’t have a smoker, just go straight for the clay pot.

In the very near future, I will adapt this method to make a Chinese-style roast duck. I actually tried a very convoluted recipe a couple of months ago and it was an epic disaster. It involved spatchcocking, sous-vide for 20 hours, fridge-drying overnight, roasting, and a side of grievance. It did not bring me joy. But now, enlightened by the man I married, I am ready to re-visit the issue. Stay tuned.

Halloween 2019, when Karl Lagerfeld met Spider Woman, fell into her web, and they lived happily ever after…
 

ONE YEAR AGO: Bloody Cupcakes for a Spooky Halloween

TWO YEARS AGO: Lamb Meatballs, Slow-Cooker Version

THREE YEARS AGO: Elaine’s Sourdough Boule

FOUR YEARS AGO: Zucchini, Lemon and Walnut Cake

FIVE YEARS AGO: Paleo Energy Bars

SIX YEARS AGO: Pecan-Crusted Chicken with Honey Mustard Dressing

SEVEN YEARS AGO: Mozzarella Stuffed Turkey Burgers

EIGHT YEARS AGO:  Cashew Chicken Lettuce Wraps

NINE YEARS AGO: Clay-pot Pork Roast

TEN YEARS AGO: Panmarino

ELEVEN YEARS AGO: A Classic Roast Chicken

SMOKED PORK TENDERLOIN WITH ROASTED PARSNIPS

You know those dinners you think might turn out pretty tasty and they go on to blow your mind in the deliciousness department? This was it. I had never smoked a pork tenderloin, but it sounded like a simple, new way to enjoy one of our favorite cuts of meat. Parsnips are the classical example of under-rated root veggie, but paired with maple syrup and harissa? Yes, please. Great dinner, and thanks to social isolation quite doable any day of the week.

SMOKED PORK TENDERLOIN
(from the Bewitching Kitchen)

1 pork tenderloin, silverskin removed
olive oil to rub, about 2 Tablespoons
coarsely crushed peppercorns, about 1 Tablespoon
1 Tablespoon turbinado sugar
salt to taste
applewood for smoking

Mix the peppercorns and sugar in a small bowl. Dry the meat well. Rub with olive oil, then coat with a small amount of the spice mixture. Season with salt to taste.

Place in smoker set at 225 F with a small amount of applewood chips. Smoke for 3 hours.

Let it sit for 10 minutes, tented with foil. Slice the meat and serve.

ENJOY!

to print the recipe, click here

ROASTED PARSNIPS WITH MAPLE AND HARISSA
(from the Bewitching Kitchen)

Parsnips, peeled and cut in steak-fries style
4 Tablespoons olive oil
1 Tablespoon maple syrup
1/2 tsp Rosey Harissa (or substitute smoked paprika + harissa or other seasoning of your choice)
Salt to taste
(asparagus are optional)

Heat oven to 425F. Make a spice mixture with the olive oil, maple and Rosey Harissa or another seasoning of your choice.

Coat the pieces of parsnips with the mixture. Add to a roasting pan covered with aluminum foil, season with salt. Add a splash of water to the pan, cover with aluminum foil and roast for 20 minutes. Remove foil, add asparagus (if using), mix well and roast for 20 minutes more, until veggies are nicely browned.

ENJOY!

to print the recipe, click here

Comments: The Rosey Harissa spice has been on my list of things to try for a long time. I don’t even remember where I read about it for the first time, it’s been a while. I finally caved and ordered a bottle (it is a bit pricey), but I’m glad I did. It conveys a similar flavor of my recent passion (Ottolenghi’s Rose Harissa paste), but because it is dry, you can use it in different ways and it can sit in your pantry for a longer time. Smells wonderful.

The meat was tender, juicy, and with a nice hint of smoke. It went perfectly well with the roasted veggies.  I had some leftover asparagus sitting in the fridge, so I roasted with the parsnips, but you can omit that or even add other root veggies, just keep in mind their roasting times. Sweet potatoes, butternut squash, turnips, they would all work great.

I know not everyone has a smoker, so you can do a similar preparation cooking the pork tenderloin in the oven, after searing it on the stove top. Use smoked paprika to season it, and you will be on your way for a delicious meal.

ONE YEAR AGO: Fresh Take on Farro with Roasted Veggies

TWO YEARS AGO: Secret Recipe Club Reunion 2018

THREE YEARS AGO: Parsnip and Tomato Soup

FOUR YEARS AGO: A Retro Dessert

FIVE YEARS AGO: Cauliflower Tortillas: Going low-carb and loving it!

SIX YEARS AGO: Clementines in Cinnamon Syrup

SEVEN YEARS AGO: In My Kitchen, April 2013 

EIGHT YEARS AGO: Thrilling Moments

NINE YEARS AGO: Maple-Oatmeal Sourdough Bread

TEN YEARS AGO: Pork Trinity: coffee, mushrooms, and curry

INCREDIBLY SIMPLE TIMES FOUR: OCTOBER 2018

Time to feature recipes that are so simple they hardly qualify as such.

INCREDIBLY SIMPLE #1

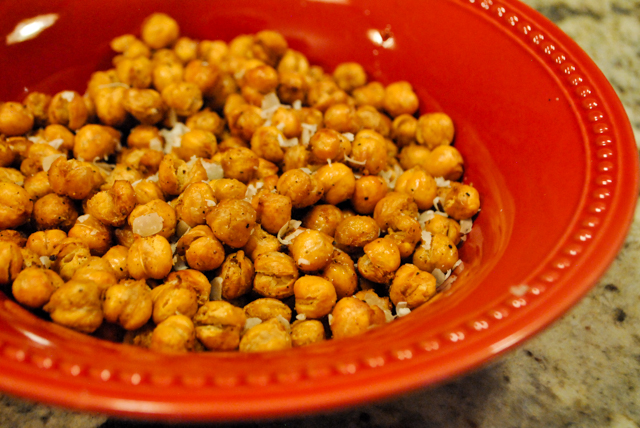
AIR-FRIED CHICKPEAS
(also work in a regular oven)

AIR-FRIED CHICKPEAS

1 can chickpeas
a little olive oil
spices of your choice (I used Southwest mix from Penzey’s)
salt
grated Parmigiano cheese

Drain the chickpeas and dry them on paper towels. You need to prevent them from steaming, as much as possible. Place them in a bowl, coat lightly with olive oil, and add the spices of your choice, just a little sprinkle will do. Season with salt.

Spray the basket of your air-fryer with olive oil. Set it to 360 F. Add the chickpeas and roast them for 12 to 15 minutes, shaking the basket every five minutes or so.  Transfer them to a serving bowl, and sprinkle Parmigiano while they are hot. Enjoy right away, or store them for many hours at room temperature, uncovered. They are still excellent next day.

If using a regular oven, set it to 400F, and roast the chickpeas for 25 to 30 minutes.

to print the recipe, click here

I’ve made them both ways, oven and air-fryer. The air-fryer gives a little more crunch, so it is my favorite method. The fact that it is so fast does not hurt it either!  Beware, they are addictive. Perfect to nibble as appetizer but also quite good sprinkled over salads, spinach in particular goes well with crunchy chickpeas. Curry is a great spice to add to them before air-frying/roasting. Make sure to save them in an open bowl, they keep their crunchy nature better that way. Not that they will last that long.

INCREDIBLY SIMPLE #2

LEMONY SAUTEED ZUCCHINI

LEMONY ZUCCHINI

Prepare enough zucchini pieces to almost cover a 12-inch non-stick frying pan, like shown below:


Add 1 tablespoon olive oil to the pan and allow it to heat until almost smoking. Add the pieces of zucchini, season with salt and pepper, and do not touch them. Let them develop a dark golden color on the side touching the pan, like shown below:

Only when they get to this point, move them to get some color on another side. Again, move them as little as possible, and wait for a deep color to develop. When the zucchini is tender (but not mushy), squeeze lemon juice all over, and shake the pan to move the slices around and gently coat them with the lemony glaze that forms.  Serve immediately, adjust seasoning if necessary.

INCREDIBLY SIMPLE #3

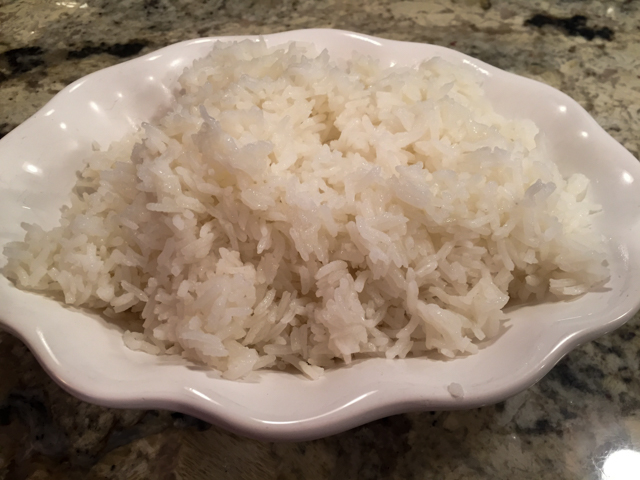
SMOKED RICE

Smoked rice, you ask? I first read about it in a blog I follow, Love and Olive Oil. Lindsay bought some smoked Basmati rice and raved about it. I was intrigued, and decided to take the smoke into my own hands. If you don’t have a smoker, you can follow the method described hereIf you have an electric smoker, it’s quite straightforward…

Add hickory wooden chips (or any wood you like) to the smoker

and set it to 175 F.

Place 2 cups of rice on a quarter-sheet baking pan.

Smoke it for one hour.

Allow it to cool completely, and cook the rice as you normally would.


I cooked one cup and saved another smoked cup for later. I was afraid that the rice would be all clumped up, because I did not want to rinse it after smoking. To my surprise, it was super fluffy, all grains well separated. The hour of heating at 175 F did not hurt anything, quite the contrary.  The rice had just the right amount of smokiness, and was excellent as a side dish for some sausages cooked sous-vide. We are smoking rice quite often these days…

INCREDIBLY SIMPLE #4

SOUS-VIDE ITALIAN SAUSAGES

SOUS-VIDE ITALIAN SAUSAGES

5 Italian sausages
1/2 cup Lager beer
salt and pepper

Heat the sous-vide to 170 F.

Place the sausages inside a food-safe plastic bag. Add the beer, season with a little salt and pepper.  Use the water displacement method to close the bag.

Submerge the bag and cook the sausages for 1  to 3 hours.

Remove the sausages from the bag, discard the cooking liquid. Dry the sausages very well, and crisp them up on a non-stick pan with a light coating of oil, or on a hot grill.

The sausages cooked sous-vide can also be kept in the fridge for a couple of days. When you want to serve them, place them in hot water for 5 minutes, then proceed to saute them as described.

to print the recipe, click here

Sous-vide sausages, smoked rice, and a little butternut squash on the side…

When we cook sausages on the grill, we go through a pretty elaborate method of switching them from the grill to a pan with simmering beer on top of the stove. They go back and forth, back and forth, from simmering to the grill, to make sure they end up moist and flavorful. The sous-vide delivers the same quality in terms of texture, without any hassle at all. I doubt I will cook this type of sausage any other way. Even warmed up in the microwave two days later, they were excellent.  If you have a sous-vide gadget, give it a try.

I realize that this series of Incredibly Easy recipes used an air-fryer, electric smoker, and a sous-vide, but except for the Italian sausages, all others can be prepared without any special cooking equipment.

ONE YEAR AGO: Parsnip, Coconut and Lemongrass Soup

TWO YEARS AGO: In My Kitchen, October 2016

THREE YEARS AGO: Paleo Moussaka

FOUR YEARS AGO: In My Kitchen, October 2014

FIVE YEARS AGO: In My Kitchen, October 2013

SIX YEARS AGO: Bourbon and Molasses Glazed Pork Tenderloin

SEVEN YEARS AGO: Crimson and Cream Turkey Chili

EIGHT YEARS AGO: Taking a break from the nano-kitchen

NINE YEARS AGO: Chocolate Chip Cookies

SMOKED SALMON FAIT MAISON

I love this French expression that makes “home-made” sound a lot more special…  In Paris, they often print it in restaurant menus to indicate that some item – say,  their country paté – is “fait maison.”  In other words, unique. Special. Cannot get anywhere else. And that’s pretty much how I feel about smoked salmon made in our very own electric smoker. If you like the stuff available at the grocery store, you will flip for this. It is so much better, it doesn’t even seem like the same food item. I go as far as saying that buying an electric smoker is worth it just for smoking salmon. And steelhead trout.

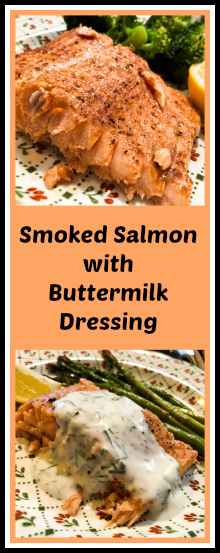
SMOKED SALMON WITH BUTTERMILK DRESSING
(from the Bewitching Kitchen, inspired by many sources)

1 salmon fillet (about 4 pounds)
½ cup seafood dry rub
1 lemon, sliced
½ cup buttermilk dressing

for dry rub (makes more than you need):
1 tablespoon coriander seeds
1 tablespoon yellow mustard seeds
2 teaspoons black peppercorns
1/2 teaspoon whole cloves
1 tablespoon  paprika
1 teaspoon dried oregano
1 teaspoon red pepper flakes
2 teaspoons brown sugar
2 teaspoons kosher salt

for buttermilk dressing:
½ cup buttermilk
1/4 cup full-fat yogurt
Juice of half lemon
1 teaspoon kosher salt
1 tablespoon finely chopped fresh dill

Make the dry rub:  In a small sauté pan over medium heat, toast the coriander seeds, black peppercorns and cloves for 1 to 2 minutes.  Let the mixture cool slightly, then process it thoroughly in a spice grinder and transfer it to a small bowl. Add the paprika, oregano, red pepper flakes, sugar, and salt. Mix thoroughly.  Keep leftovers in a dark, dry place.

Soak 2 cups of wood chips in water for 15 to 30 minutes.  Heat the smoker to 200F.

Pat the salmon dry and let it come to room temperature.  Coat the salmon thoroughly in the dry rub and place it skin-side down on the grates. Scatter the lemon slices over the flesh. Smoke for about 1 hour, or until the flesh flakes easily with a fork.  While the salmon smokes, prepare the buttermilk dressing.

Whisk together the yogurt, buttermilk, lemon juice, salt, and dill. Taste and adjust seasoning if needed. 

Serve the salmon with the buttermilk on the side, or drizzled all over. It’s your call…

ENJOY!

to print the recipe, click here

Comments: Since we acquired the smoker back in December last year, we’ve made this recipe (with or without the buttermilk dressing) countless times.  We simply do not get tired of it. Often we will smoke two pieces, one we remove after 1 hour, and enjoy for dinner. The second piece we allow to smoke for one additional hour or even a little longer. That will be perfect to have over crackers with a bit of sour cream or cream cheese and capers. Or to make salmon rillettes. Or a smoked salmon quiche. Certain dogs love it too…

What makes the smoked salmon ‘fait maison’ so amazing is the texture. Simply cannot beat the texture. It melts in the mouth, and the smoky flavor is just perfect. Subtle. Delicious.

If you do not have a smoker, the closest approximation to this would be a method used by Jacques Pepin, in which you place the salmon on the dish it will be served and stick it in a very low-oven, 200F. You can check it out here. I would then make the same dry rub, but use smoked paprika instead.


Save a pin for later!

ONE YEAR AGO: Kouign-Amann, Fighting Fire with Fire

TWO YEARS AGO: In My Kitchen, Yin and Yang

THREE YEARS AGO: Chocolate Toffee Banana Bread

FOUR YEARS AGO: In My Kitchen, June 2014

FIVE YEARS AGO:  Strawberry Frozen Yogurt

SIX YEARS AGO: Baked Coconut and “The Brazilian Kitchen”

SEVEN YEARS AGO: Honey-Glazed Chicken Legs

EIGHT YEARS AGO: French-Style Rolls


SaveSave

SaveSave

SaveSave

SaveSave

SaveSave

SaveSave

SaveSave

SaveSave

SaveSave

SaveSave

SaveSave