Not sure what is happening but I am getting more and more into eating lentils. I used to think they tasted a bit too “earthy” but now I find lentils, particularly the green, small ones, very delicious. This started as a salad, to be enjoyed cold, obviously. But I had leftovers for two days and on the second I warmed the lentils briefly in the microwave and served with a fried egg, for a very satisfying lunch. The carrots do not suffer from the heating, and if you keep it to a real brief passage in the microwave, the cucumber pieces will be fine. Just don’t try to make it piping hot.
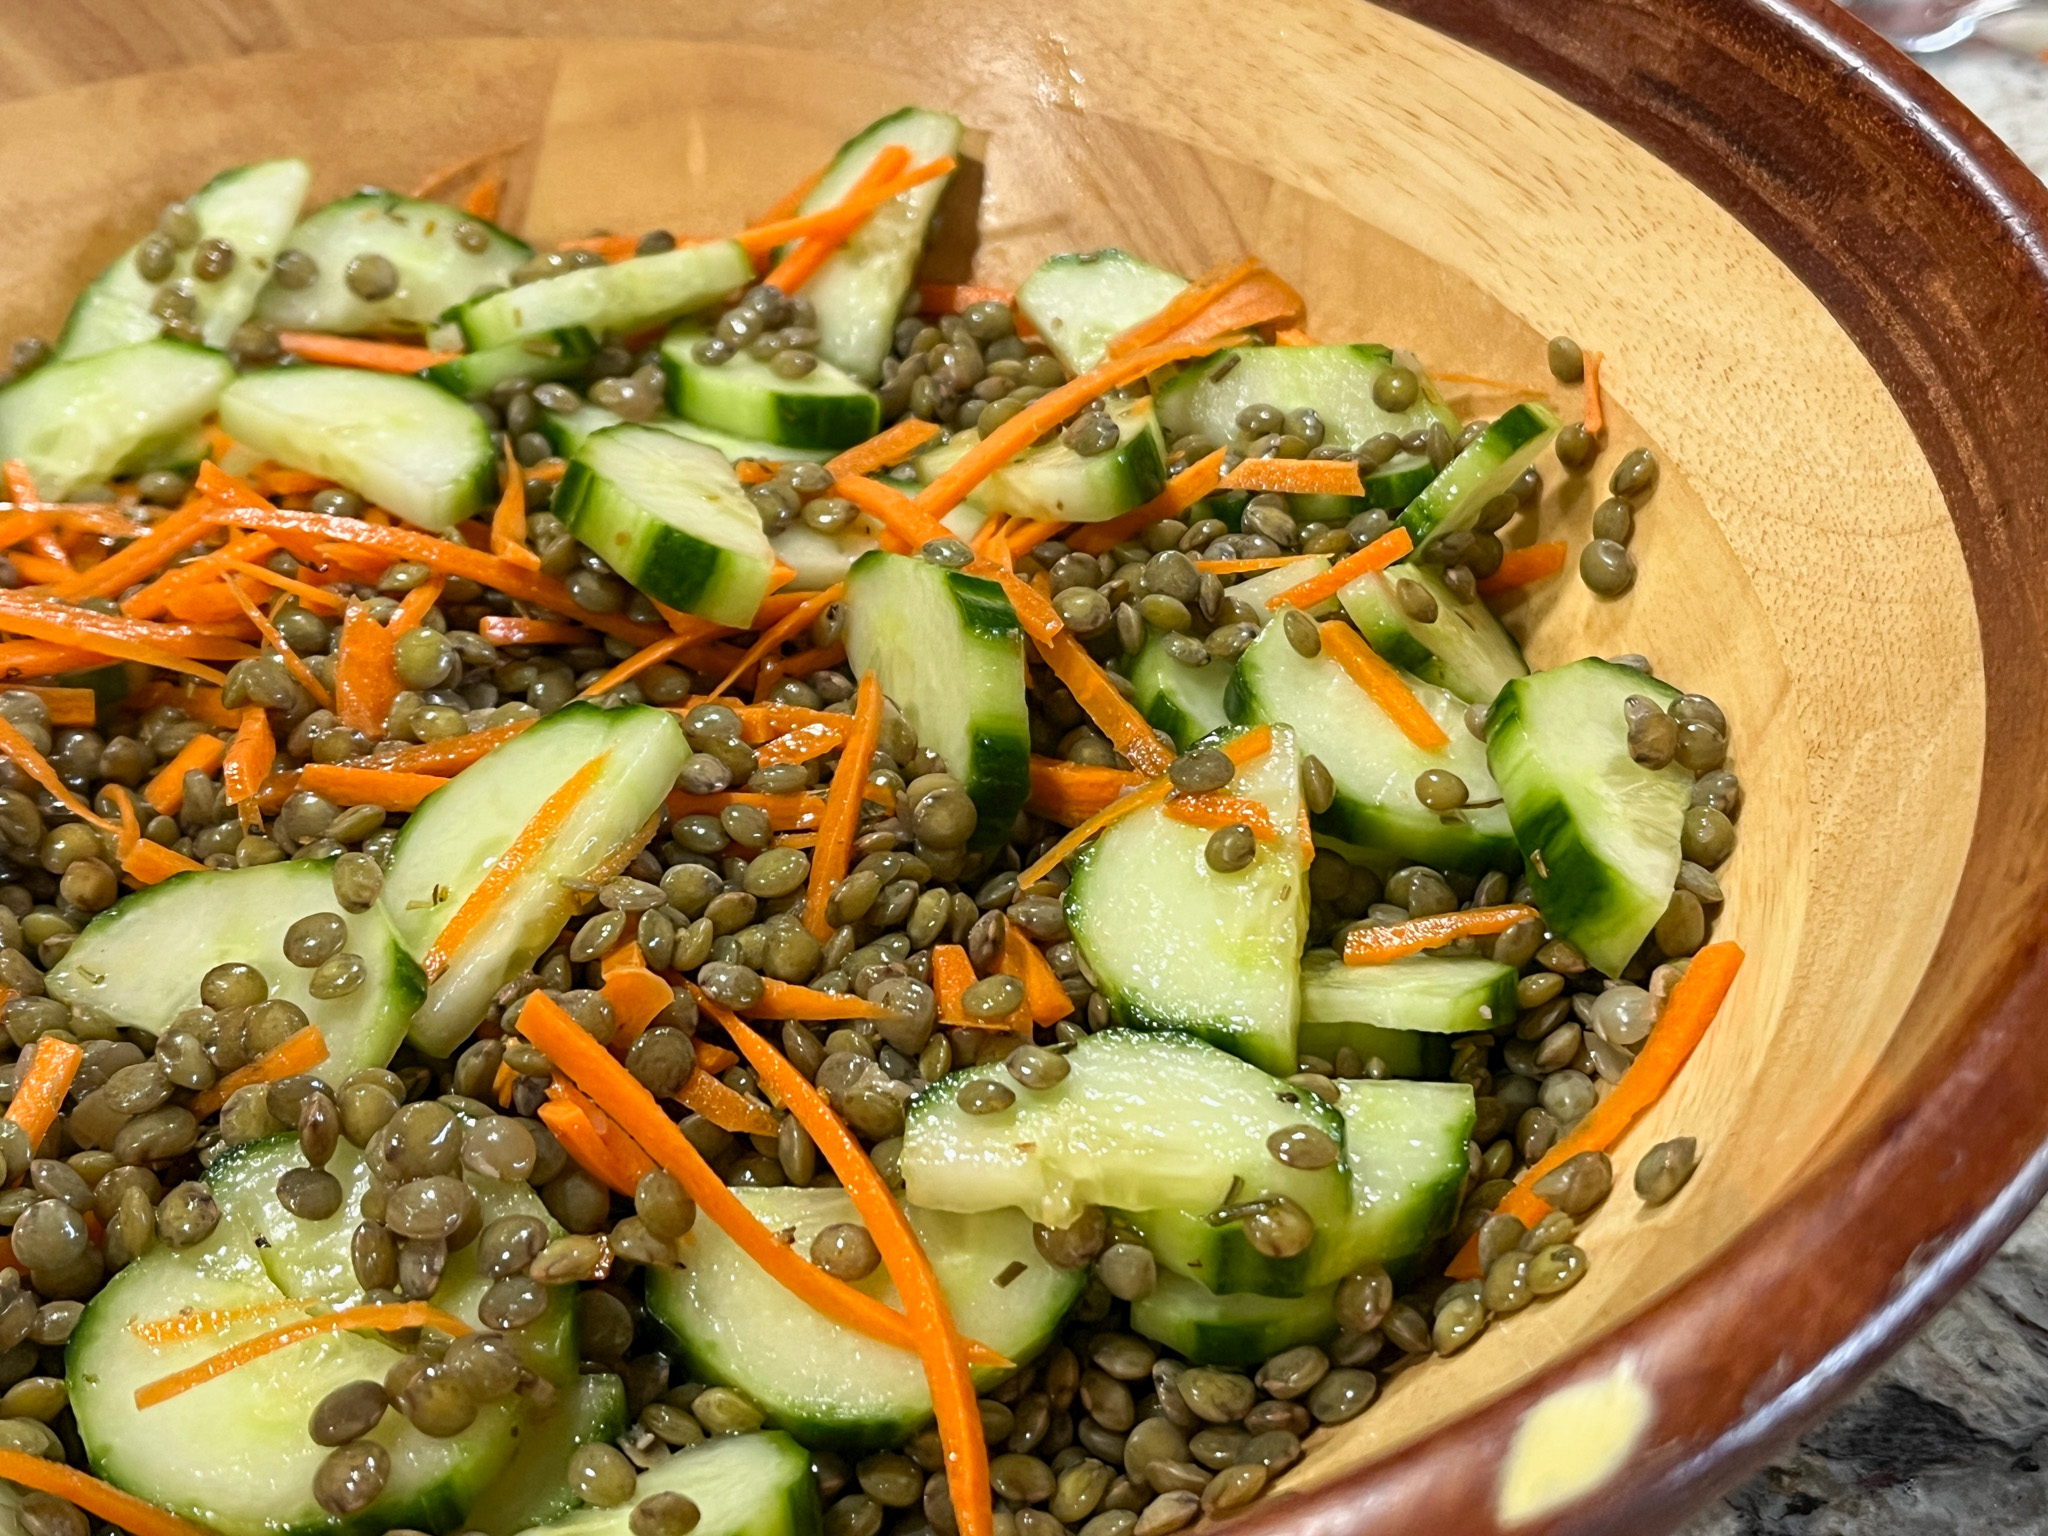
LENTIL SALAD WITH CARROTS AND CUCUMBERS
(from The Bewitching Kitchen)
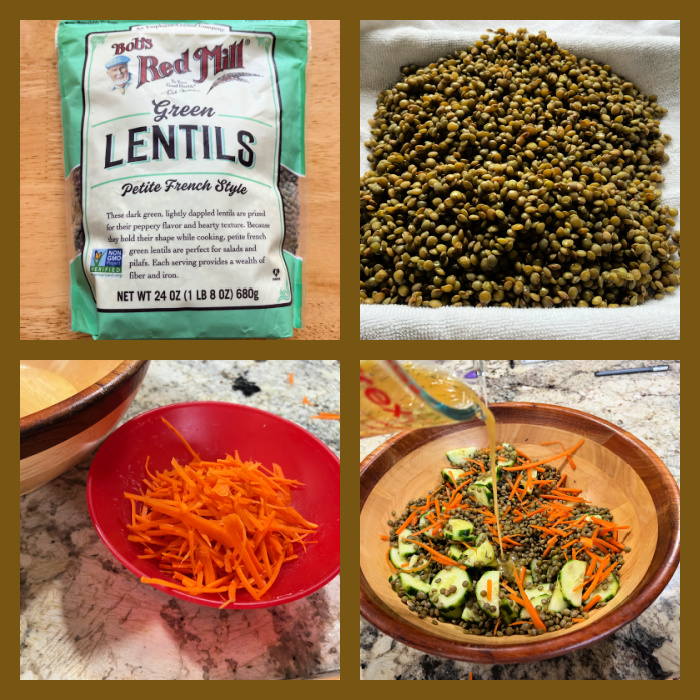
1 cup dried green lentils
2 fresh bay leaves
¼ cup red wine vinegar
3 tablespoons extra-virgin olive oil, plus more to taste
1 tablespoon Dijon mustard
1 tsp salt
2 teaspoons agave nectar
1 large lemon, zested and juiced
ground black pepper to taste
3 medium carrots, julienned
1 small cucumber, sliced thin
Sort through lentils, removing any small pebbles or stones, then rinse them well. Add lentils and bay leaves to a large pot and add enough water to cover by 2 inches. Bring to a boil on high then reduce heat to maintain a simmer. Cover and simmer until lentils are tender, 15 to 20 minutes. Discard the bay leaves. Drain the lentils and rinse with cold water. Line a sheet pan with a towel and pour lentils out evenly onto the pan to dry and cool.
While the lentils cook, prepare the vinaigrette: in a large bowl, combine vinegar, olive oil, mustard, agave nectar, half the lemon juice, salt and pepper. Whisk well. Stir in the carrots and cucumber to coat, then add the cooled lentils and toss again. Taste and adjust the seasonings for salt and pepper. Finish with a drizzle of olive oil, more lemon juice to taste and the lemon zest.
ENJOY!
to print the recipe, click here
Comments: This salad really benefits from a lot of acidity, so do not skimp on the vinegar and lemon juice. Make sure not to over-cook the lentils so that they retain a nice texture. Although it was lovely as a salad, I have to say I enjoyed it even more when gently warmed and served with a fried egg on top. Delicious simple lunch!

1 YEAR AGO: Thai-Style Ground Chicken with Green Beans
2 YEARS AGO: Hawaiian Bread Rolls
3 YEARS AGO: Incredibly Simple Prosciutto-Wrapped Chicken Breasts
4 YEARS AGO: Cauliflower with Sun-dried Tomatoes and Olives
5 YEARS AGO: Curry Sourdough with Sesame Seeds
6 YEARS AGO: Chocolate-Crusted Passion Fruit Tart
7 YEARS AGO: Lemony Shredded Brussels Sprouts with Almonds
8 YEAR AGO: Savory Oatmeal with Bacon and Cheddar
9 YEARS AGO: Air-Fried Carrots, Two Ways (most popular post on my blog!)
10 YEARS AGO: Five Minutes in L.I.T (a tour of our laboratory!)
11 YEARS AGO: Chicken Thighs with Artichokes and Capers
12 YEARS AGO: Pea Pancakes with Herbed Yogurt
13 YEARS AGO: Mushroom Stroganoff
14 YEARS AGO: Tomato Sourdough
15 YEARS AGO: Gamberetti con rucola e pomodori
16 YEARS AGO: Flirting with Orzo