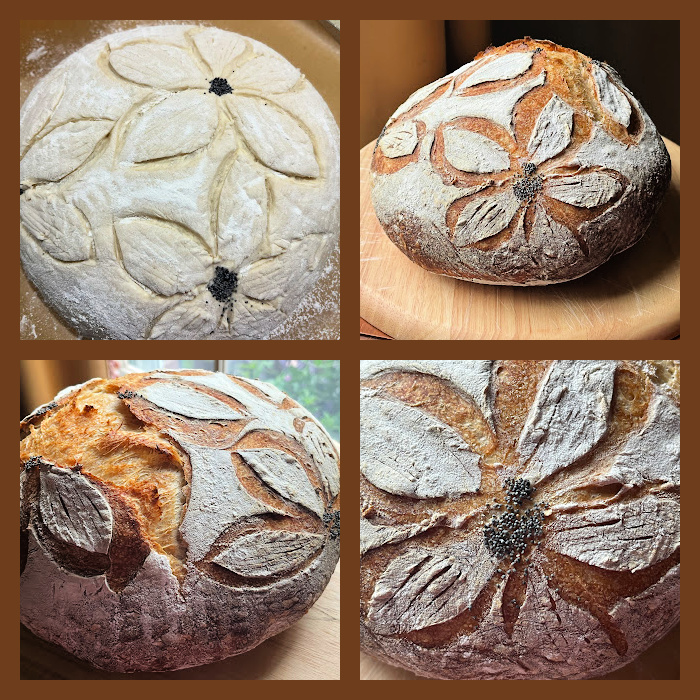
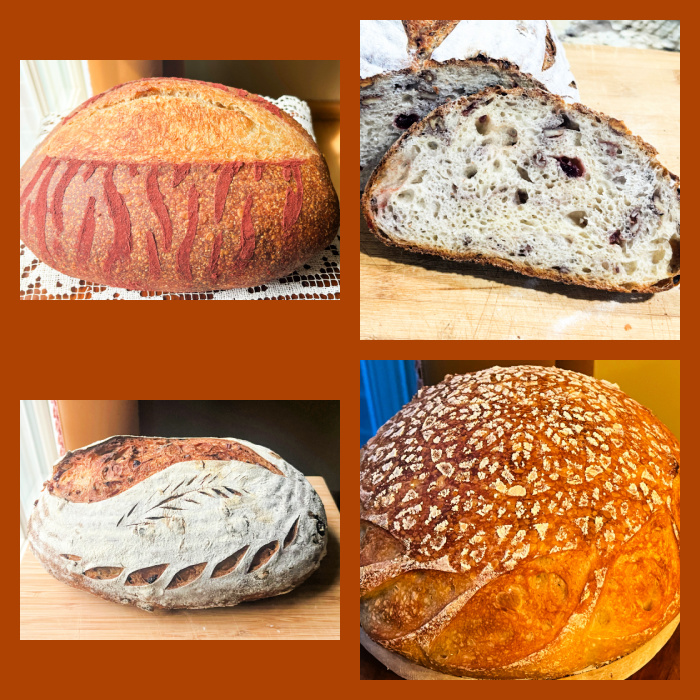
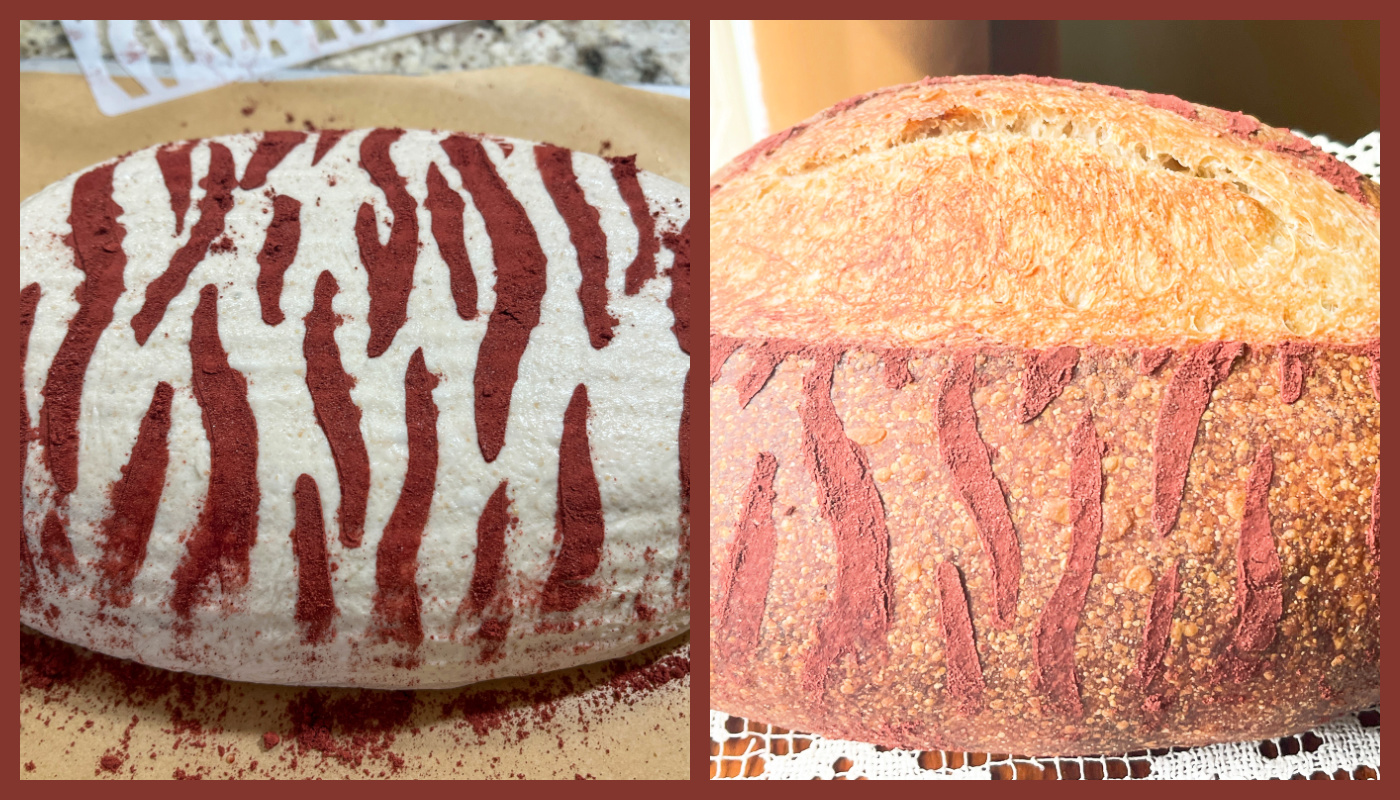
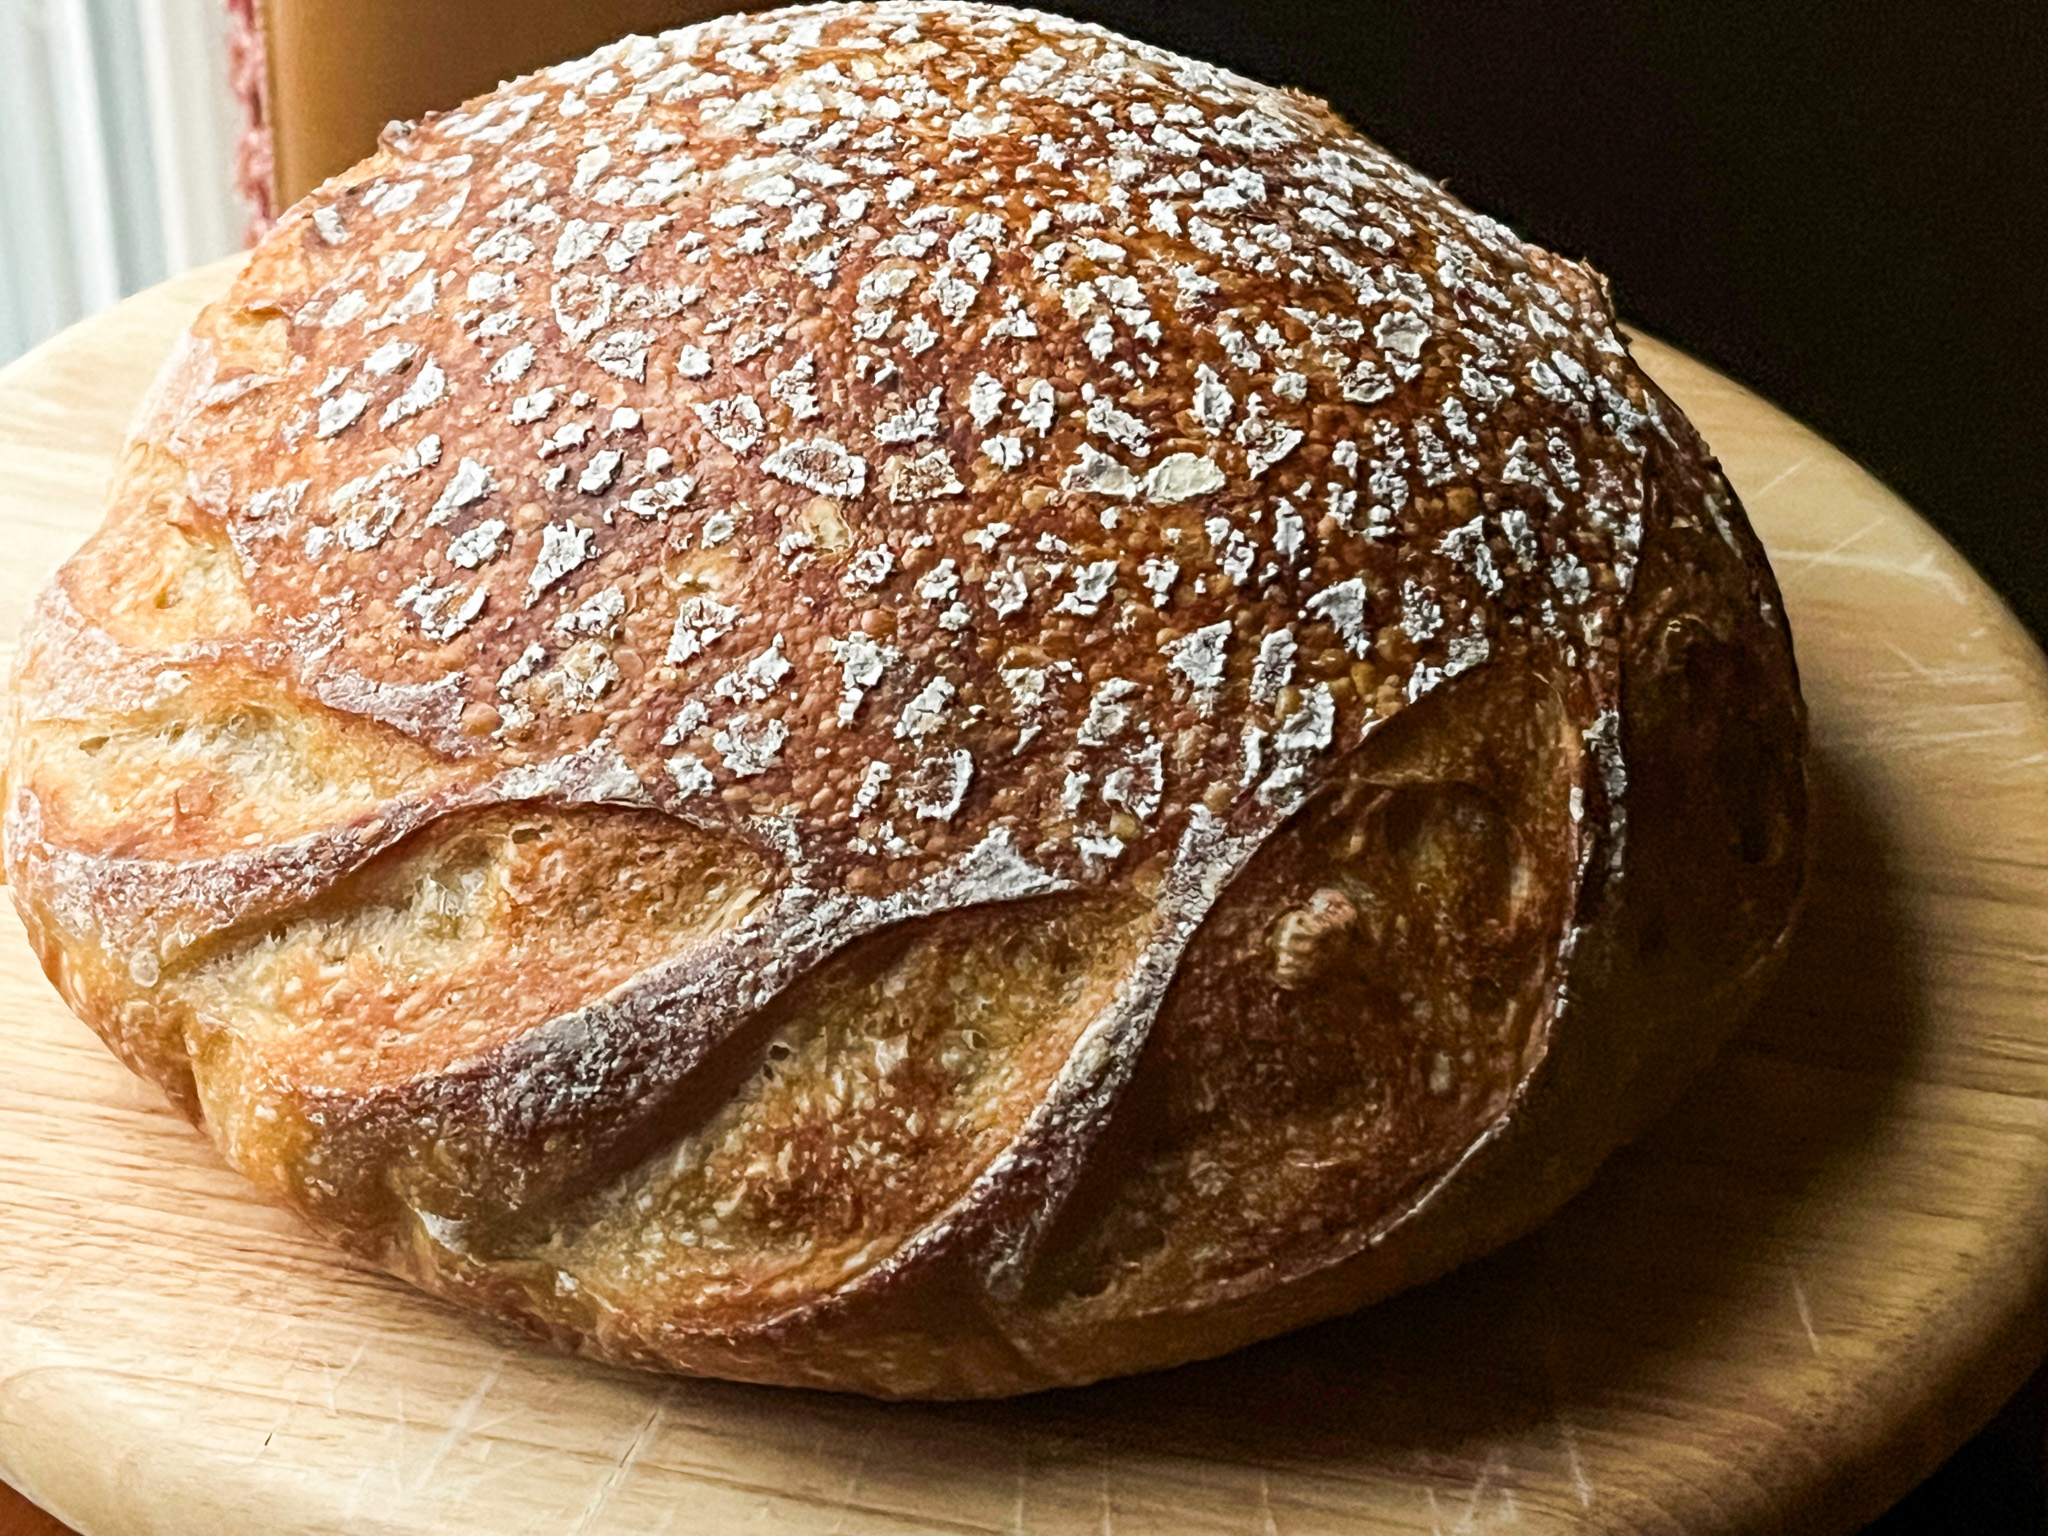
For this super simple sourdough formula, I wanted the outside to give a hint of what’s inside, so I dusted the dough with red yeast powder before scoring it with a combination of razor blade and scissors. I really like the look, and it tasted wonderful!

PAPRIKA SOURDOUGH
(from The Bewitching Kitchen)
375g white bread flour
25g spelt flour
70g sourdough starter at 80% hydration (you can use 100% if you prefer)
285g water
8g salt
1 to 2 tsps paprika
for rubbing on surface:
red yeast powder (I used this product)
Mix all ingredients in the bowl of a KitchenAid type mixer fitted with the dough hook. Knead gently for about 4 minutes (first or second speed maximum).
Transfer dough to a lightly oiled bowl and do a bulk fermentation with 4 to 5 folds made 45 minutes apart. Before you start the fermentation , remove a very small amount of dough to a small glass container (like those that hold spices), and mark where the level of the dough is with a permanent marker. Keep that at room temperature to monitor fermentation.
After the last folding cycle, keep an eye on the fermentation using the small vial. Ideally you want to let the dough ferment until it is double in size. Depending on the day, temperature of your kitchen, it might take 8 hours or more.
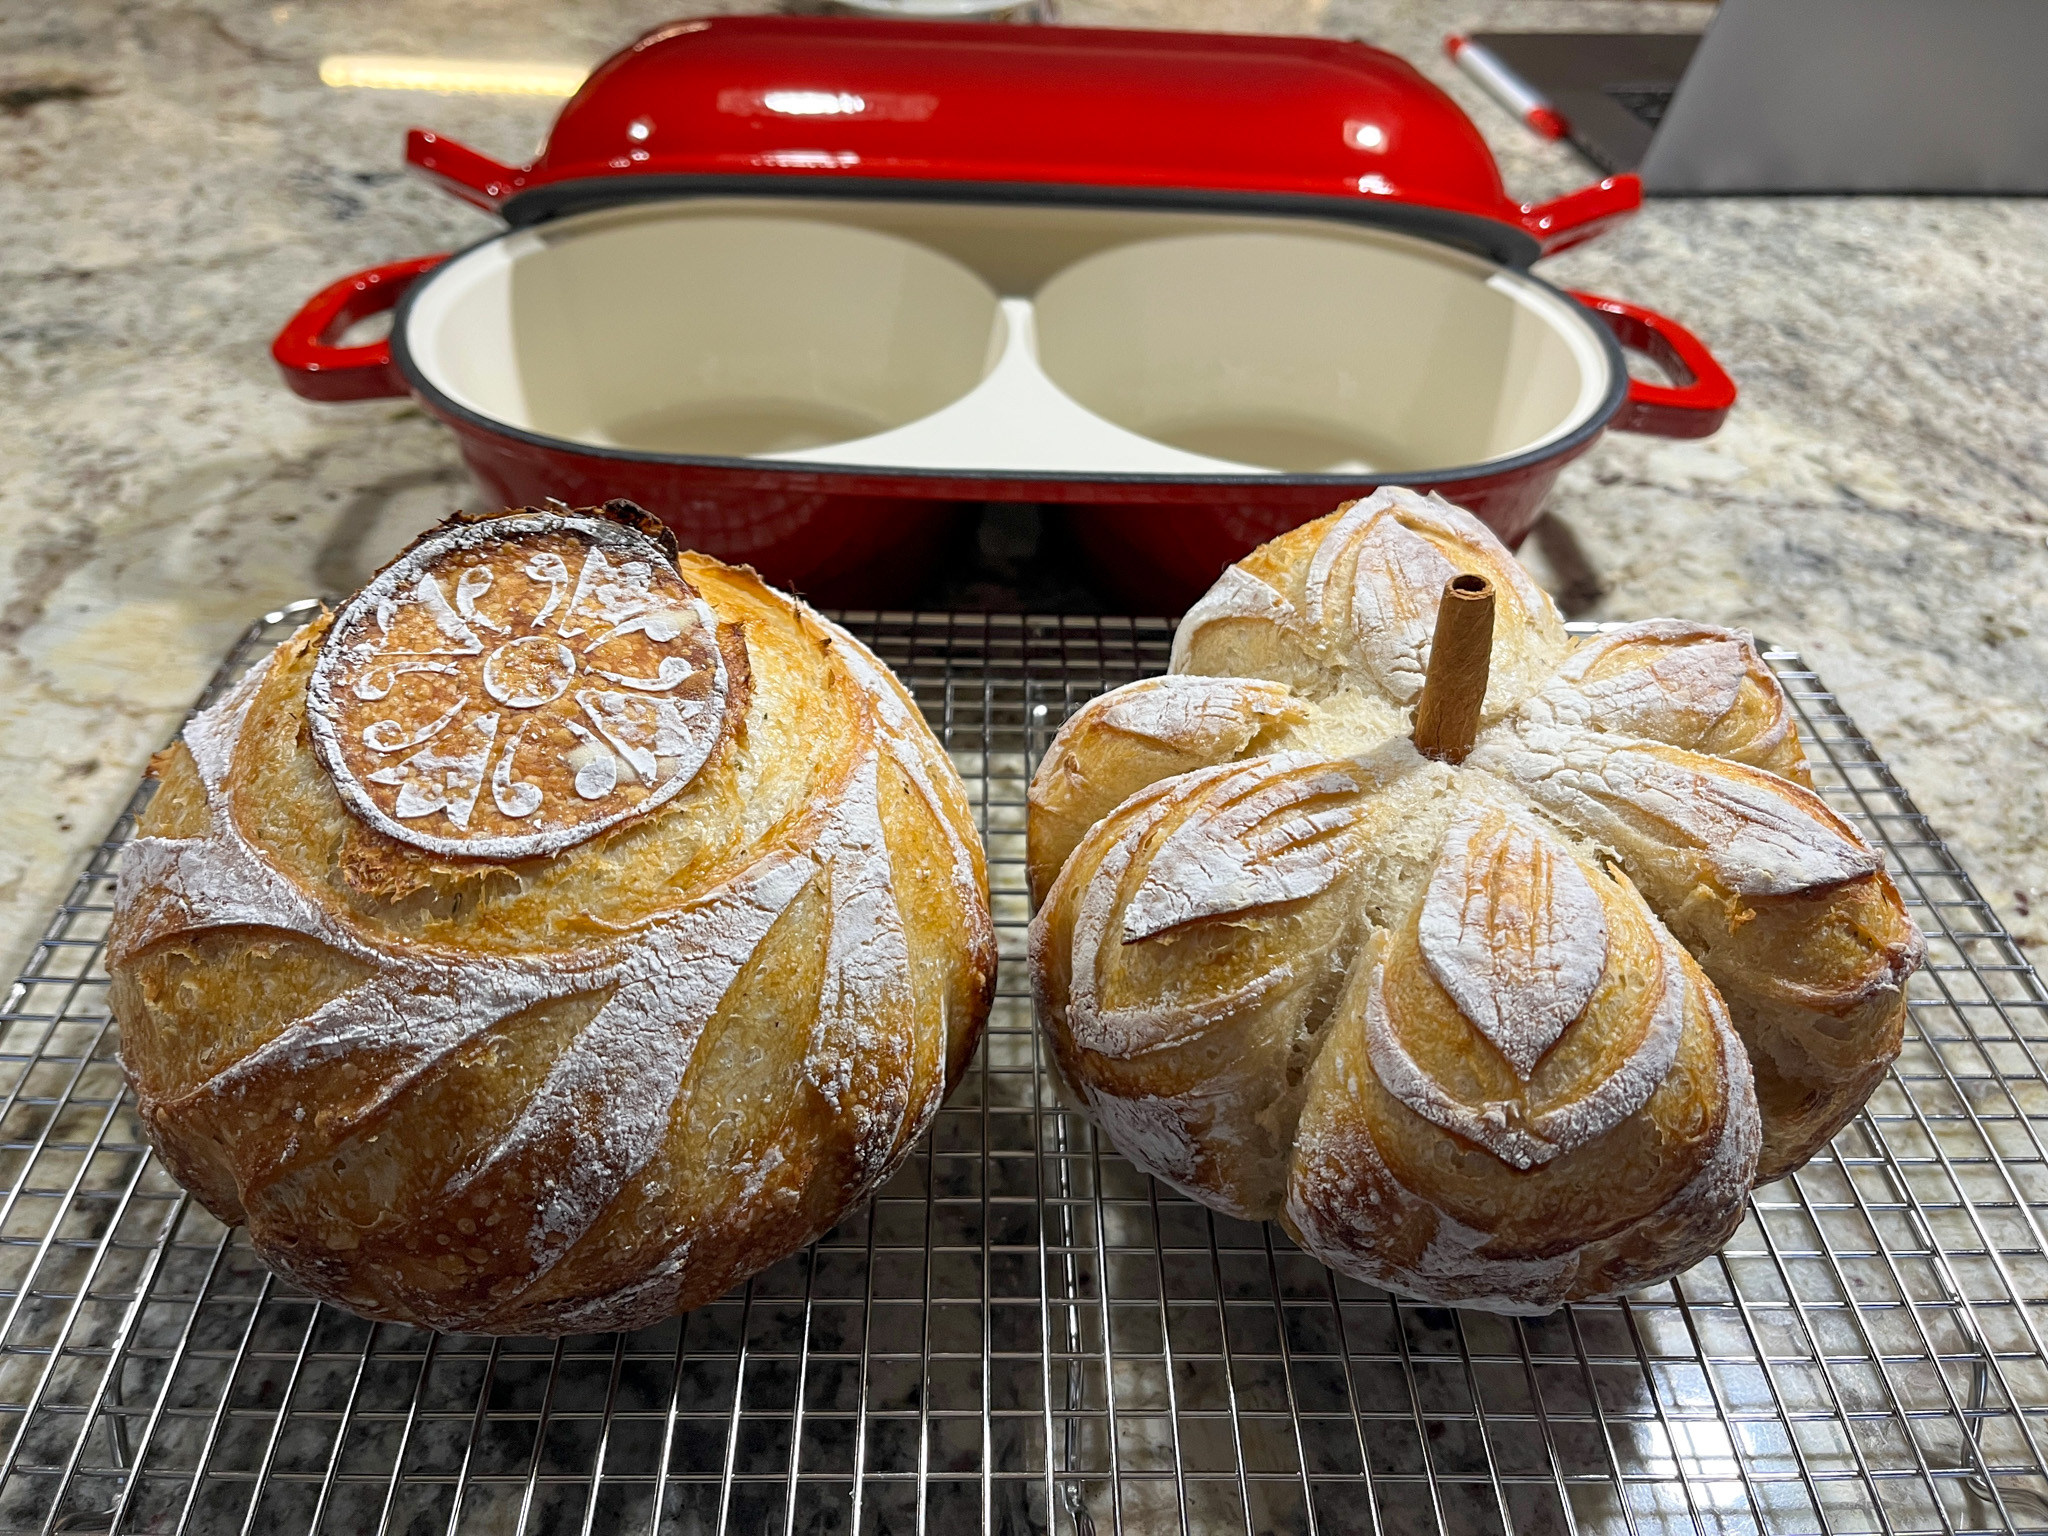
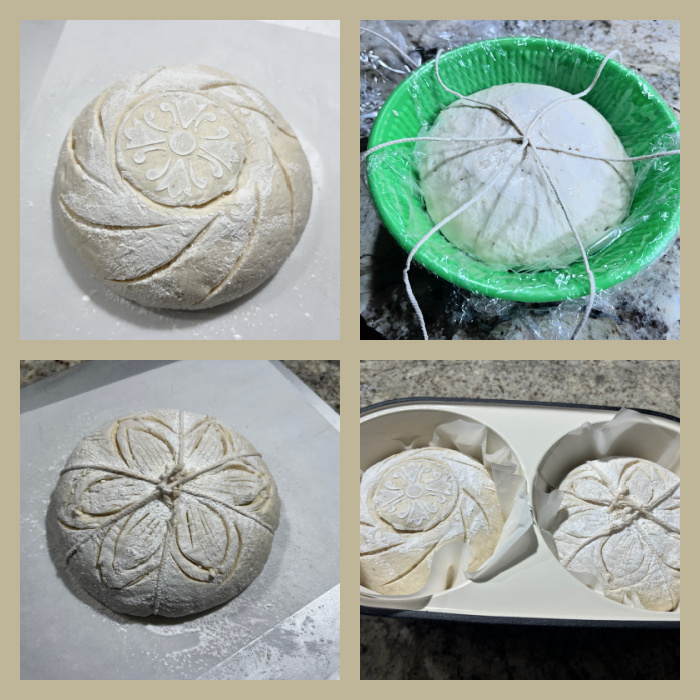
Once bulk fermentation is over, shape the dough as a boule and place in a banneton. Move it to the fridge, covered, and leave it there overnight.
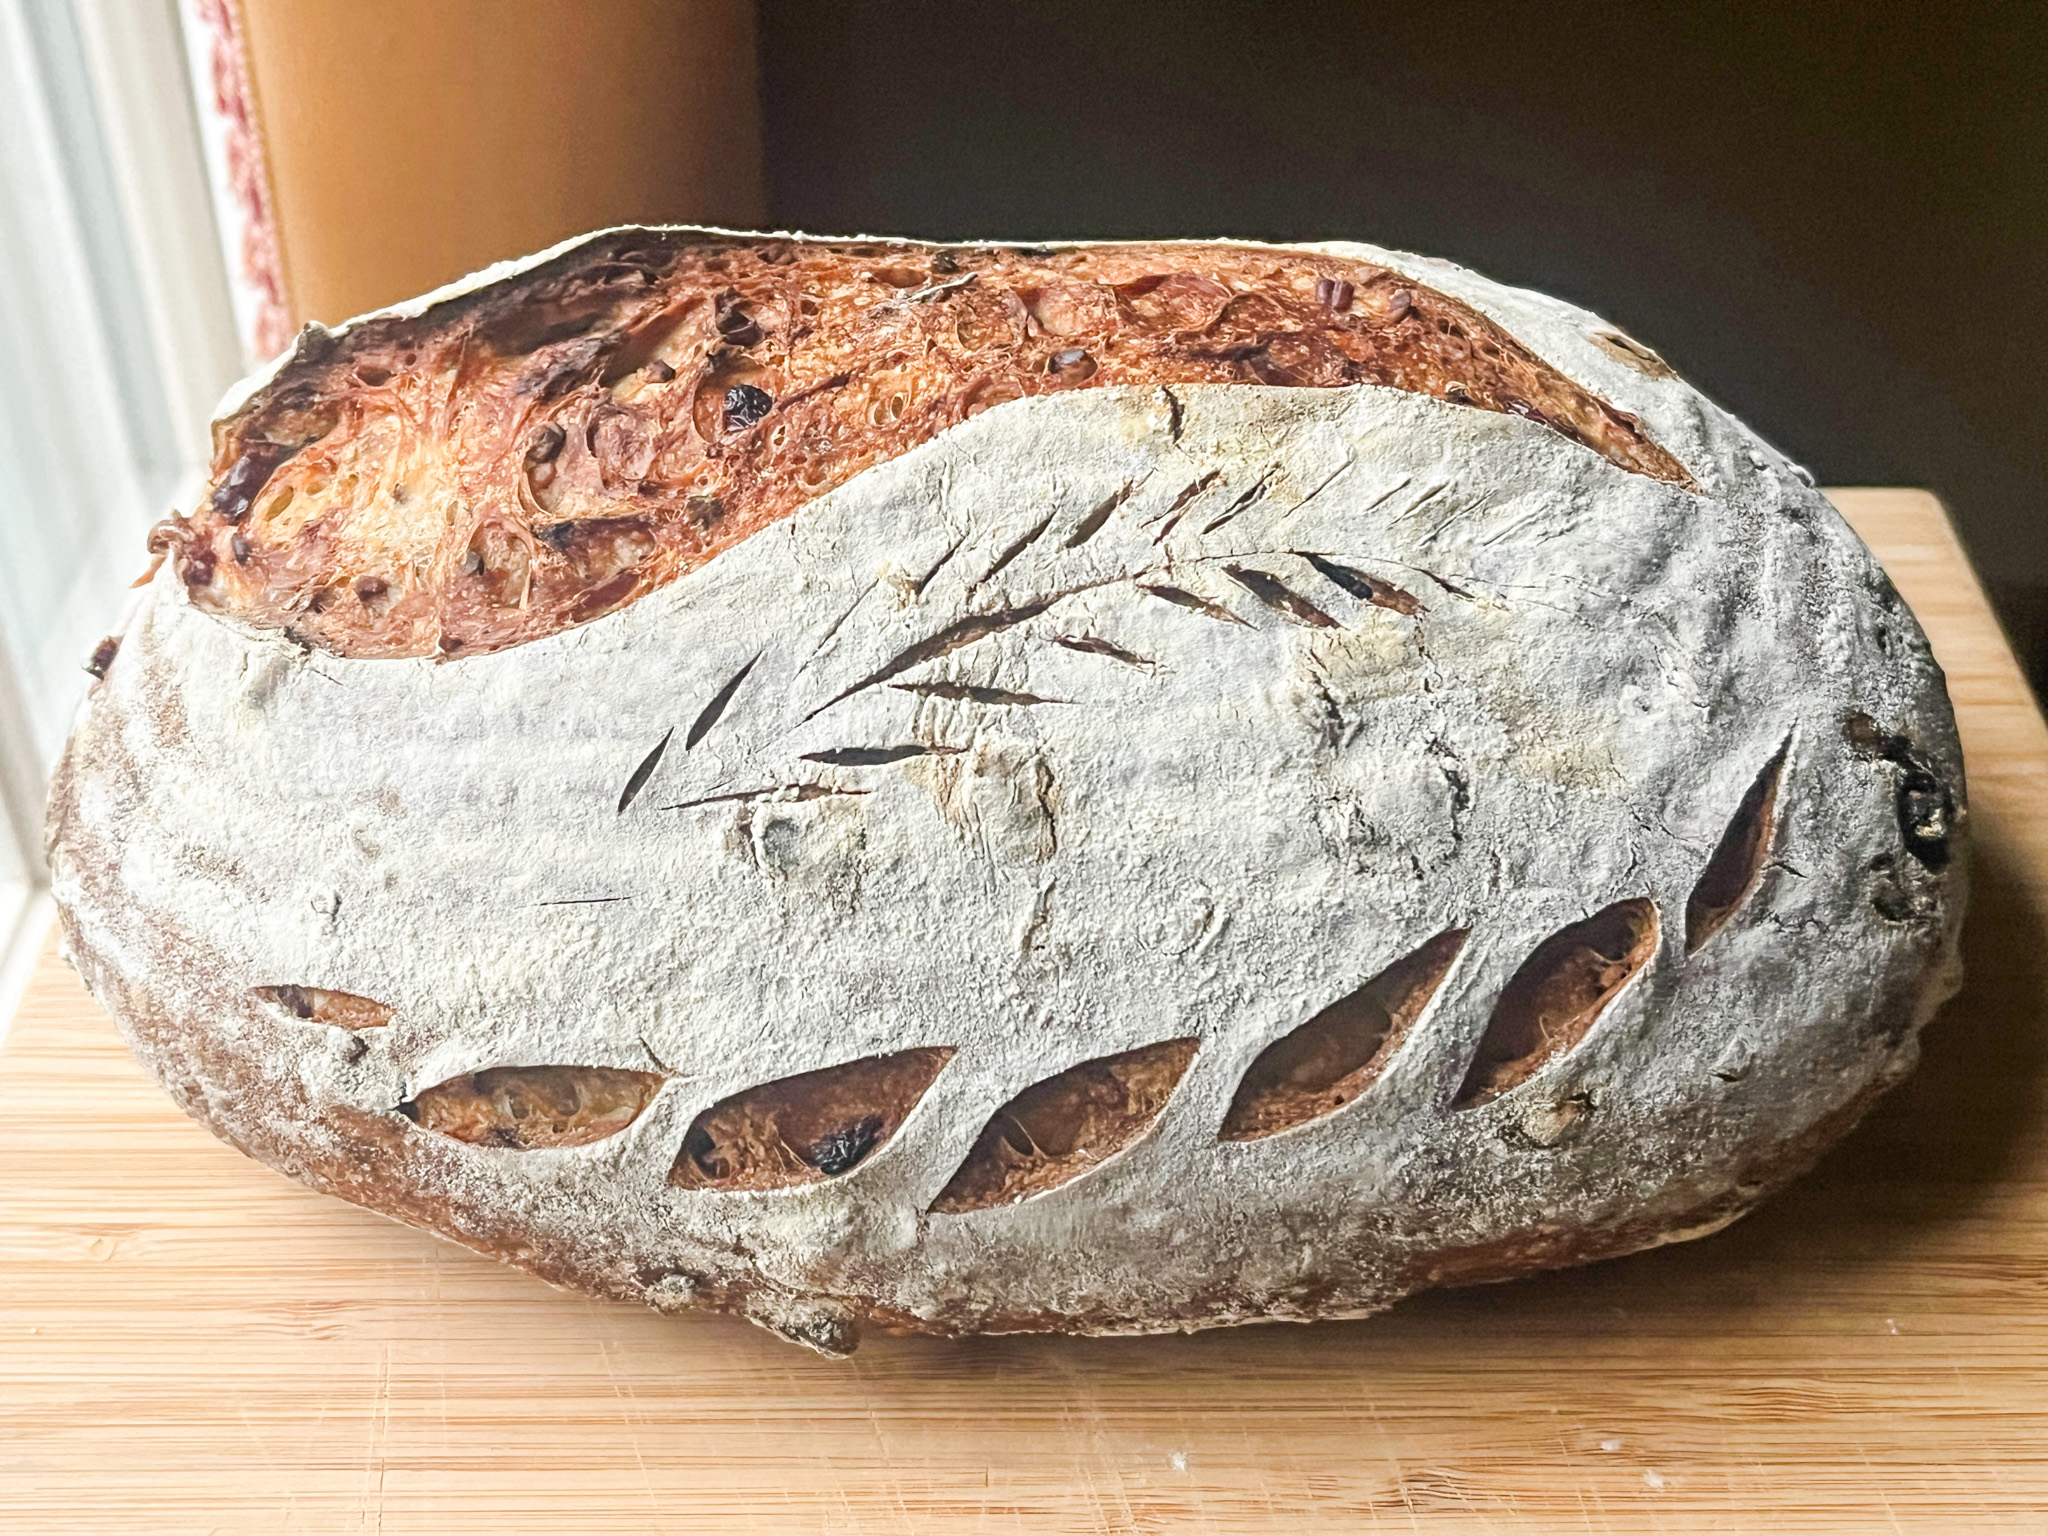
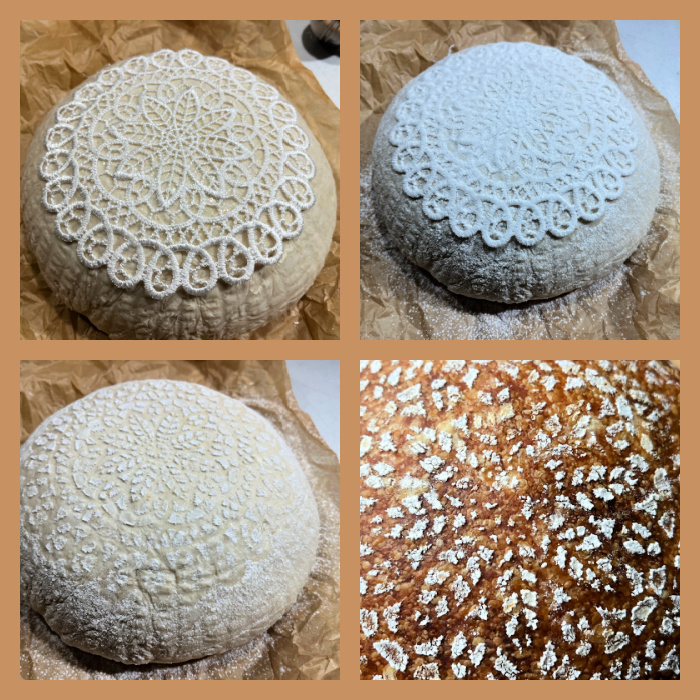
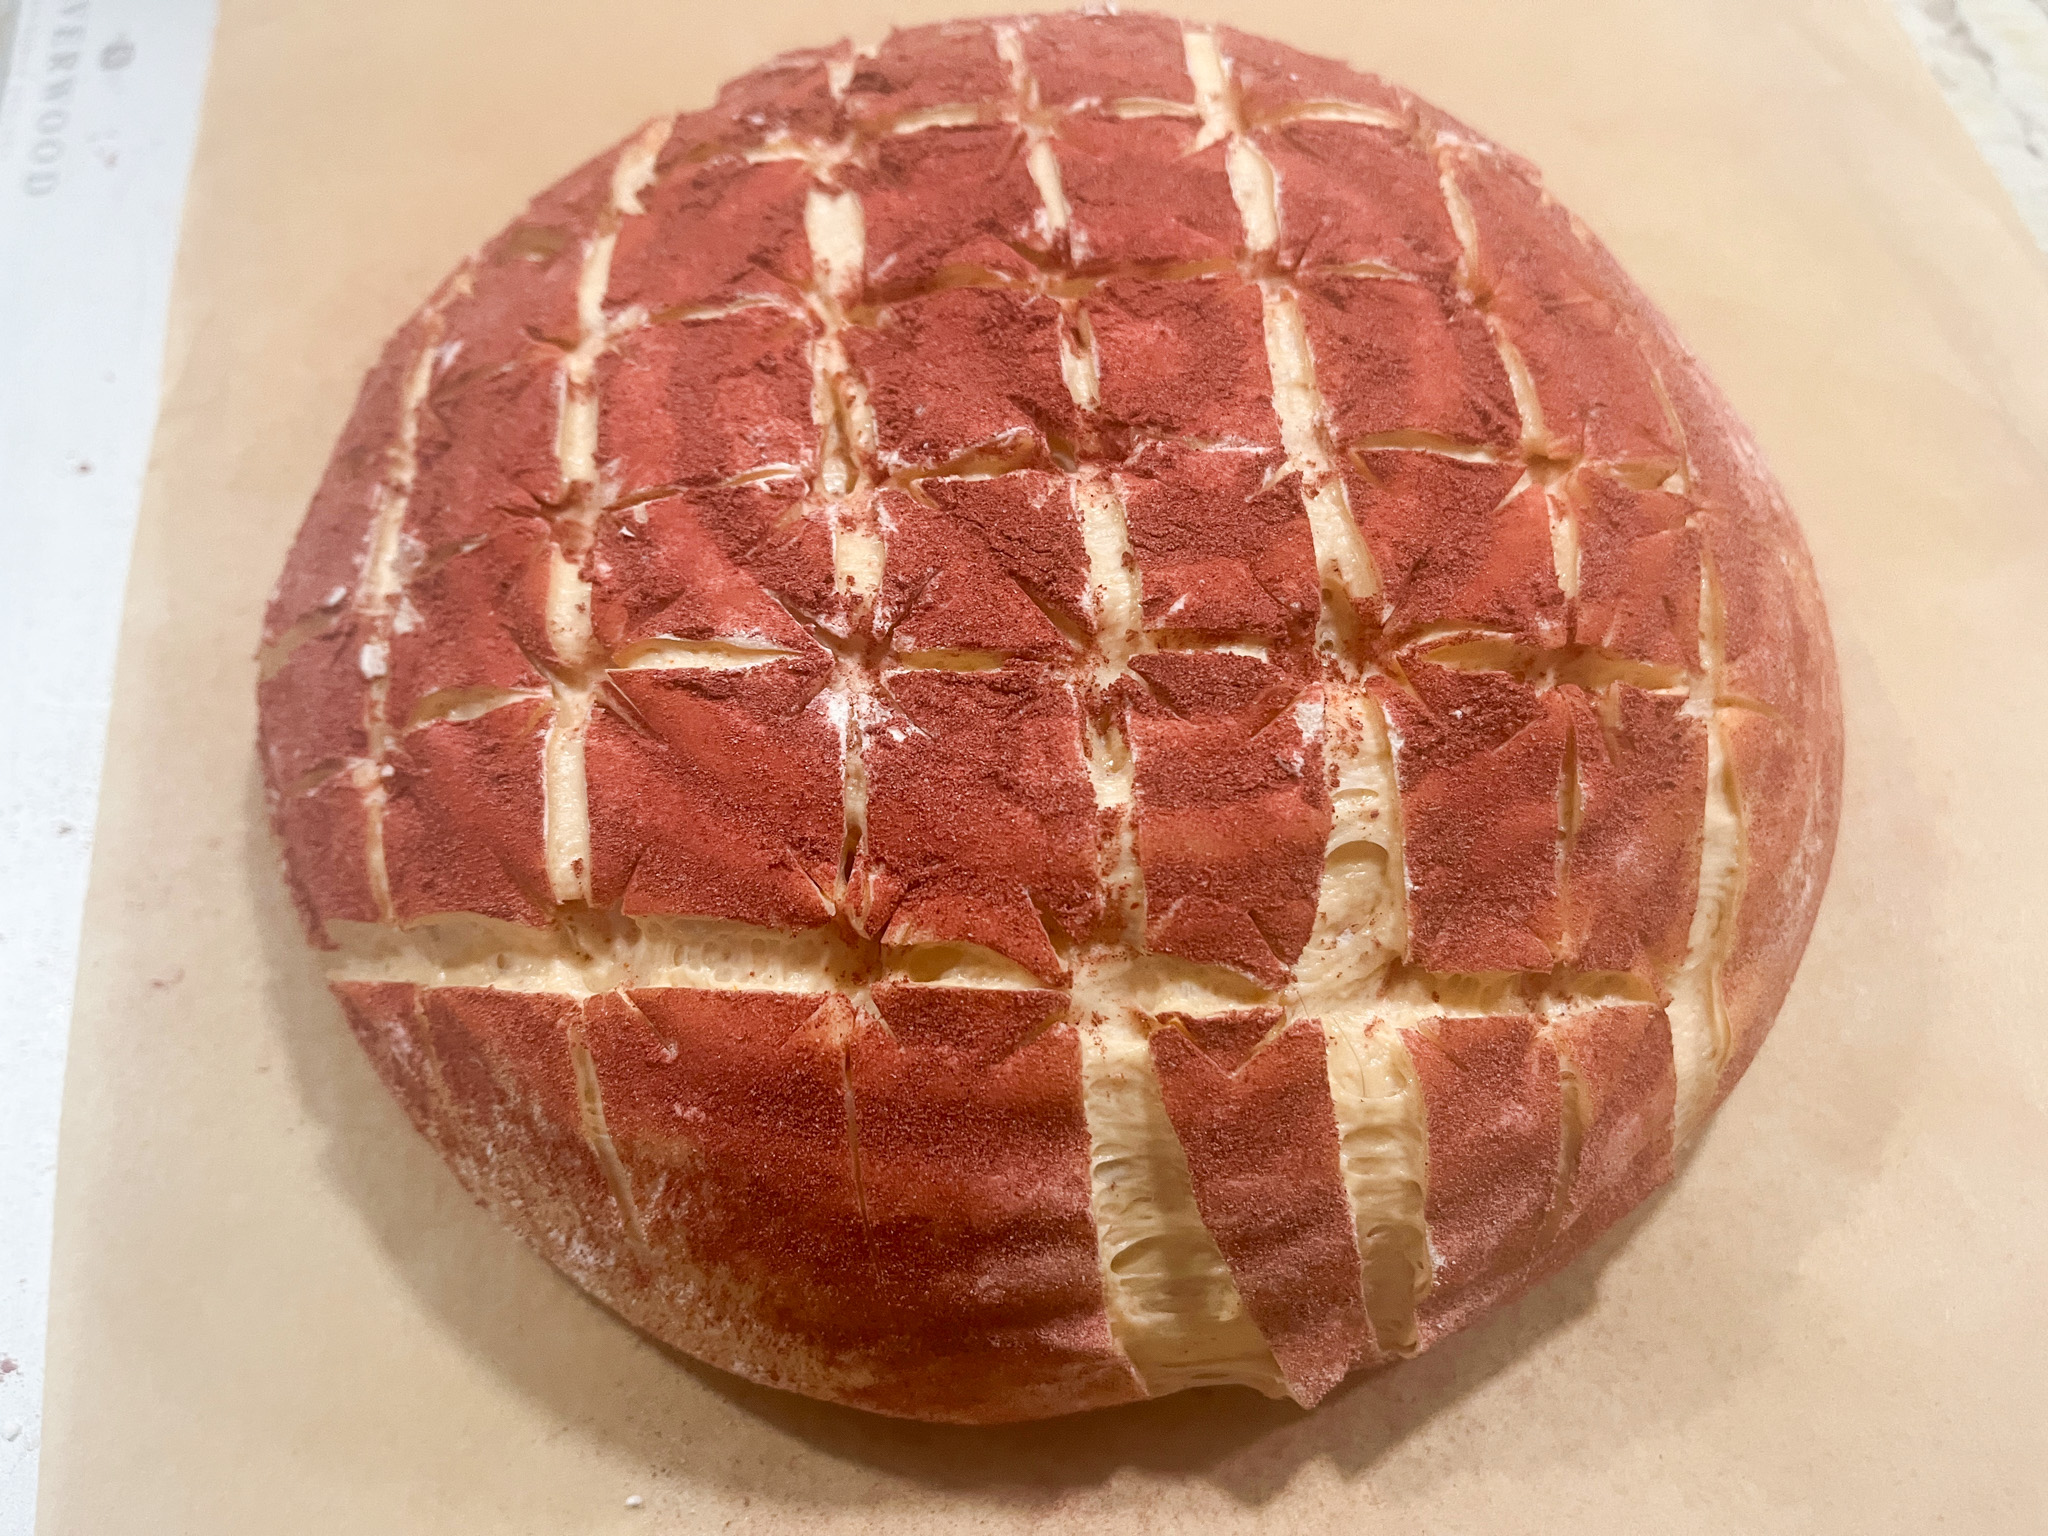
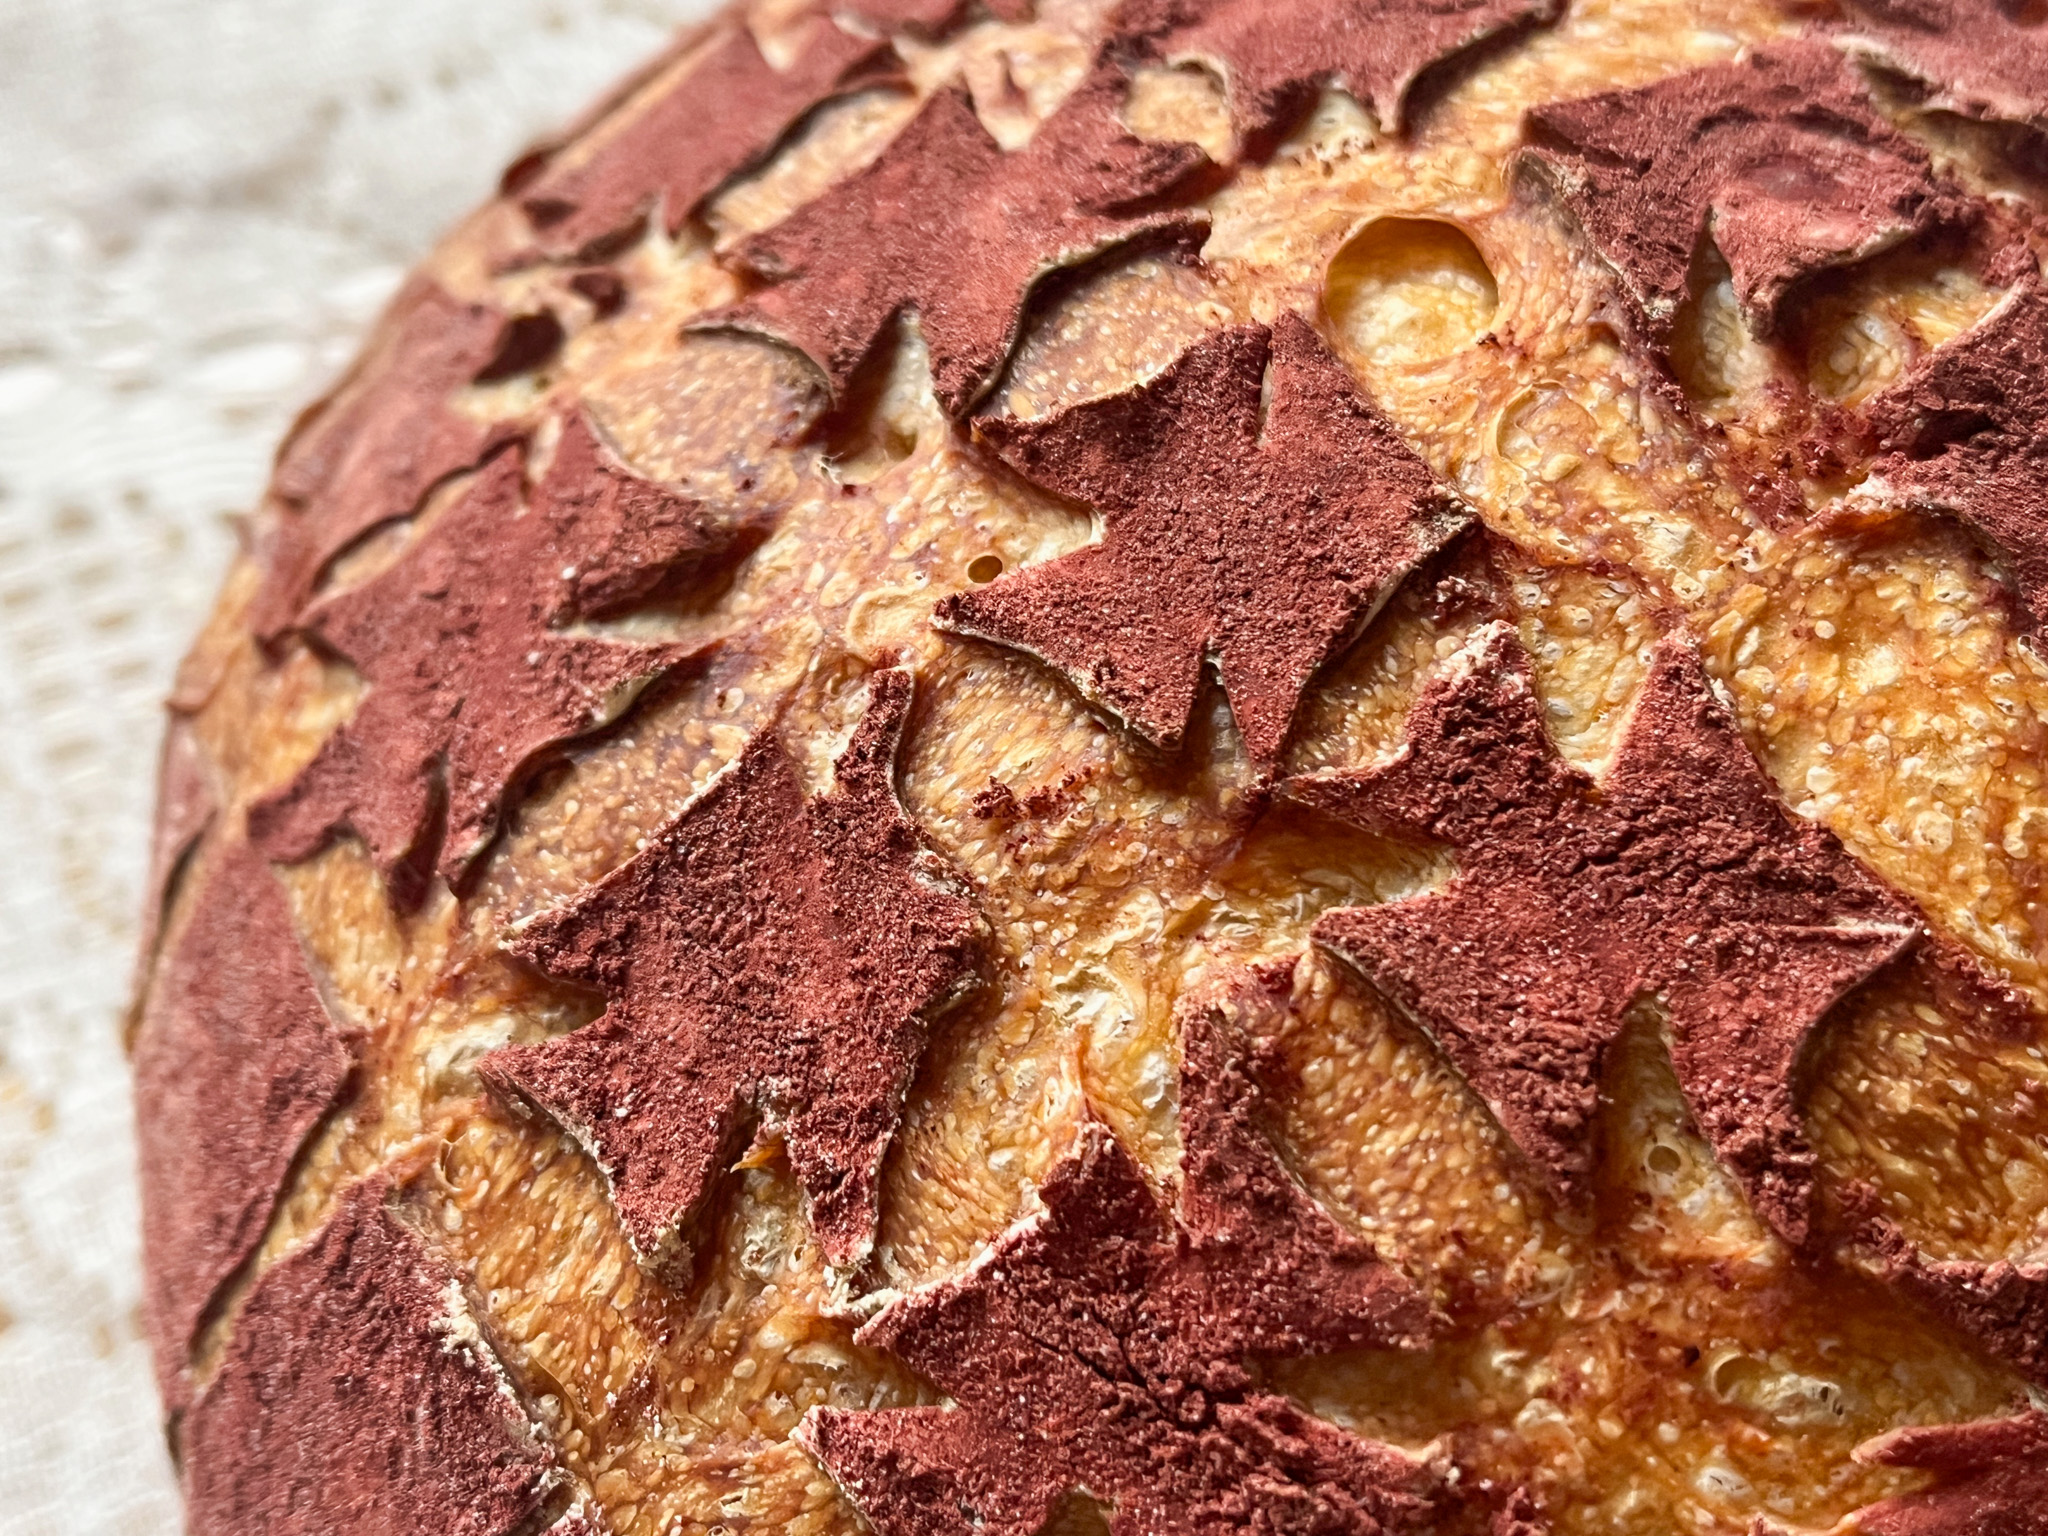
Next day, freeze the dough for 30 minutes in the banetton, to make it easier to score later. Invert the dough on a paper liner, sprinkle red yeast powder all over, rubbing it gently. Score with a sharp razor blade making a grid, and cut the edges with small scissors.
Bake in a Dutch oven with the lid on at 450F for 30 minutes, open and allow the bread to brown for a further 15 minutes.
Cool completely over a rack before slicing.
ENJOY!
to print the recipe, click here
Comments: I love the red yeast powder because it does not fade much during baking, even if you generate steam by keeping the lid closed in the beginning of the bake. Plus, the color is exactly that of paprika, which is what I was hoping for.
My original plan was to add a little oat flake at the center of each square, but after adding the first three, I lost my Zen. Removed those and said to myself “maybe next time”…..
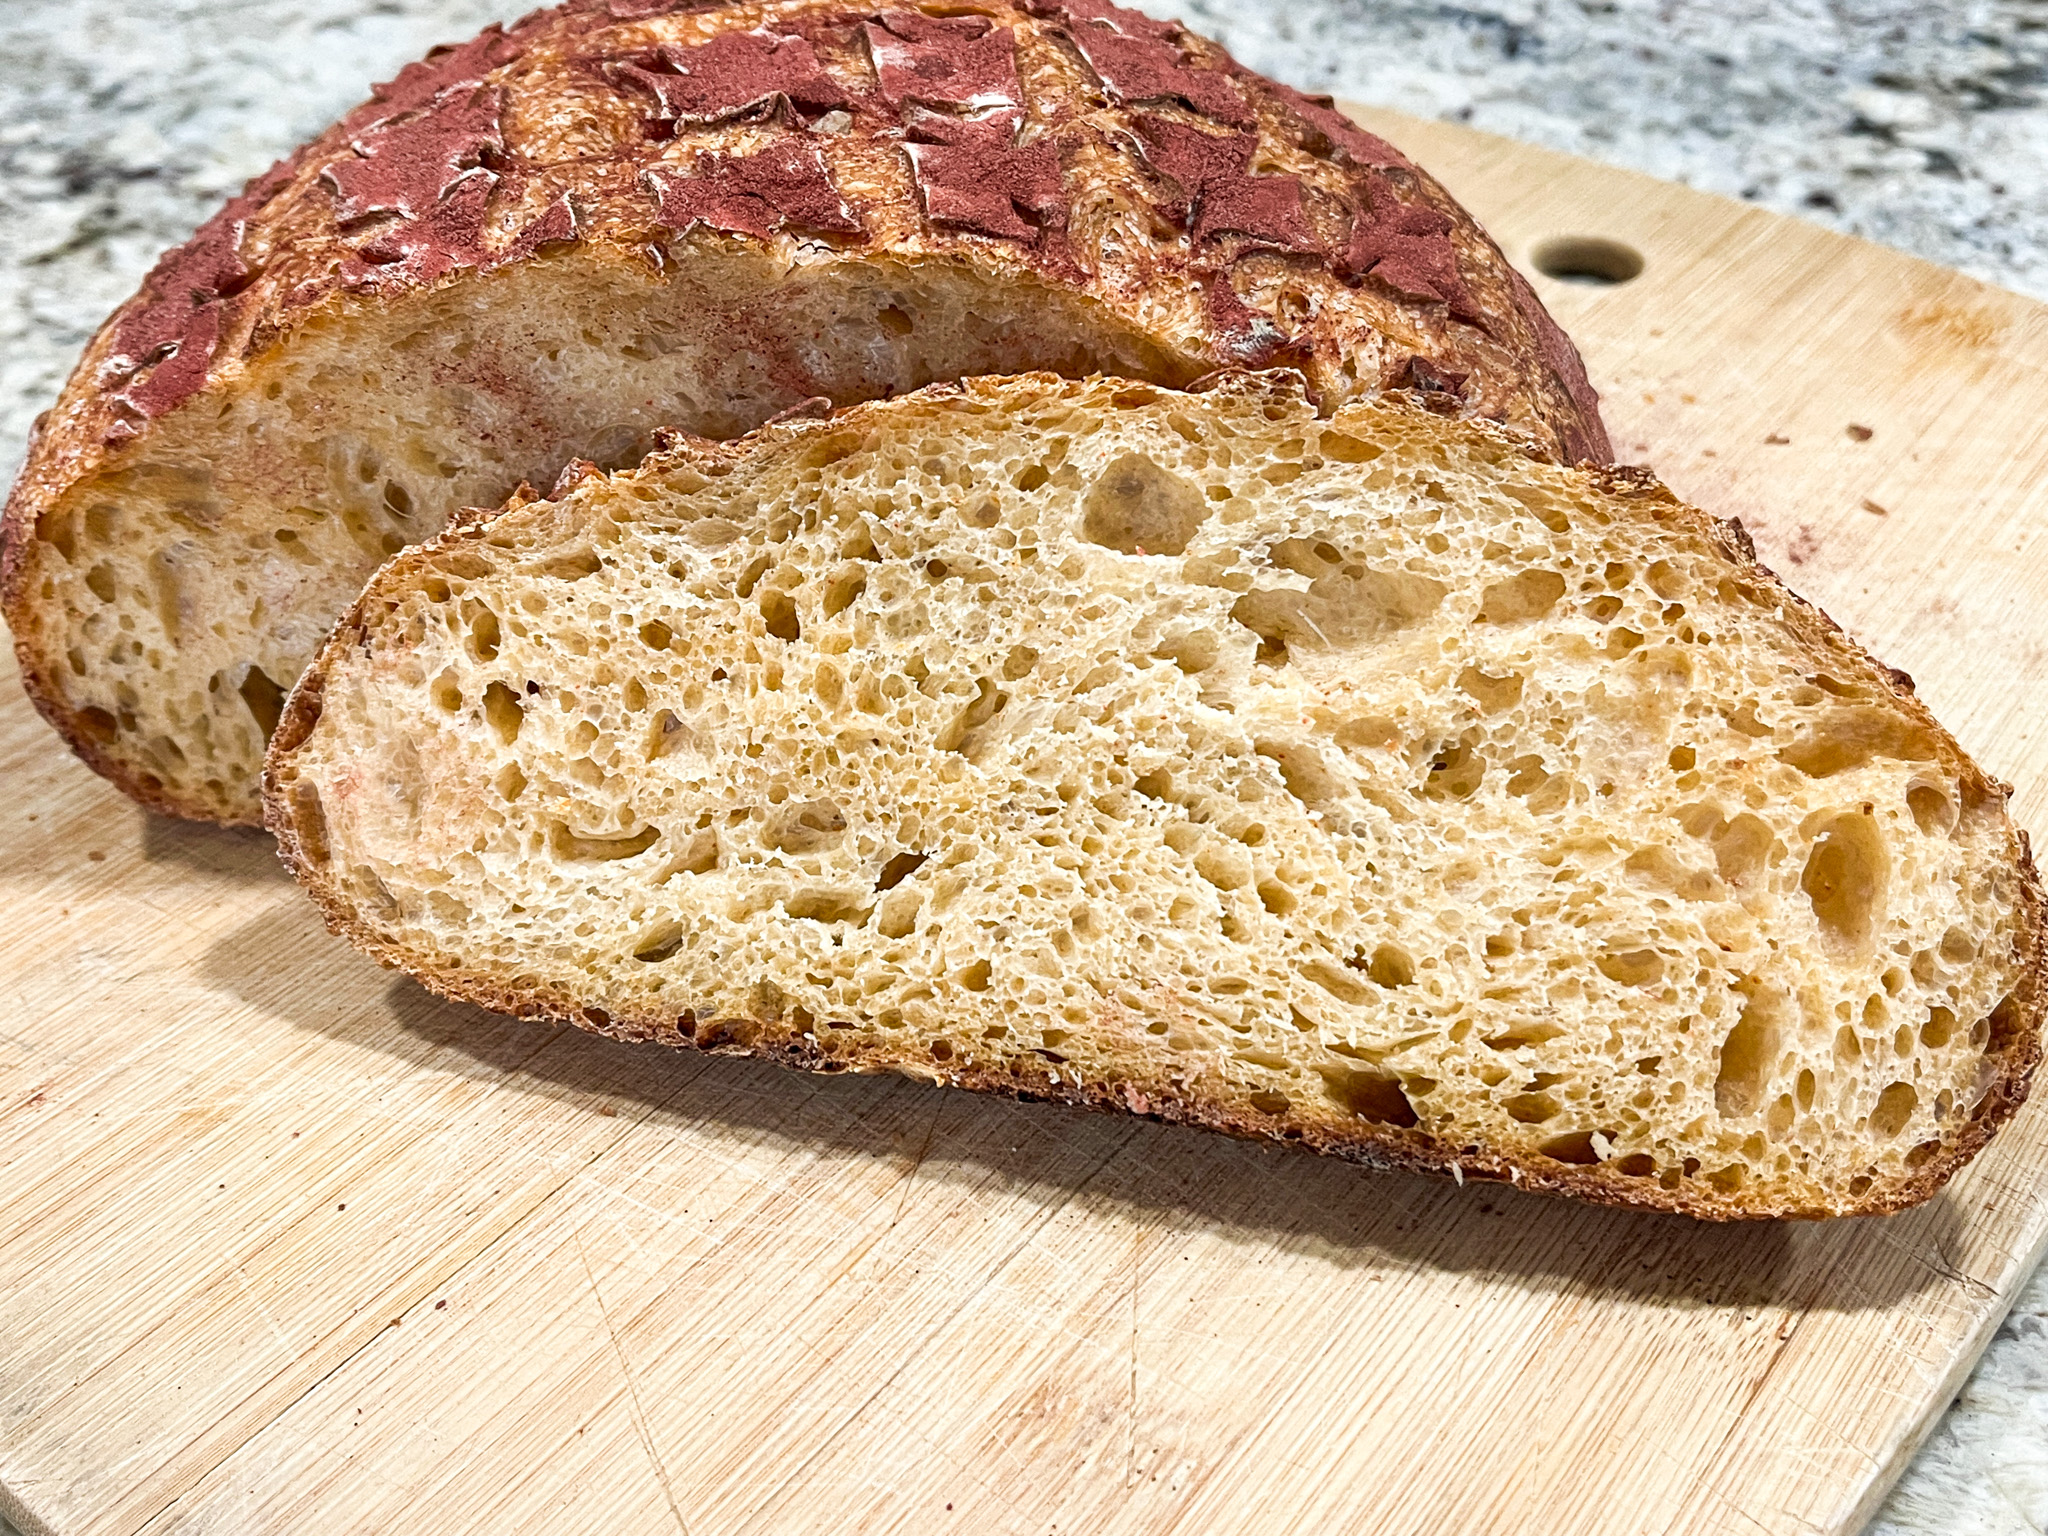
You cannot quite tell it has paprika, but it gets this sightly more complex flavor, plus the soft hint of color in the crumb makes is special. A lovely loaf, highly praised by the husband!
1 YEAR AGO: Spaetzle, a Classic Made Lighter
2 YEARS AGO: Chicken Roll-ups with Asparagus
3 YEARS AGO: Flower-Shaped Dinner Rolls
4 YEARS AGO: Pride Macarons
5 YEARS AGO: Blood Orange Macarons
6 YEARS AGO: One-Two-Three Macarons
7 YEARS AGO: Marshmallow Macarons
8 YEARS AGO: Fujisan Bread
9 YEARS AGO: Air-Fried Tomatoes with Hazelnut Pesto & Halloumi Cheese
10 YEARS AGO: Red Velvet Layered Cake
11 YEARS AGO: Lemon-Lavender Bars
12 YEARS AGO: Quinoa Fried Rice
13 YEARS AGO: Carrot Flan with Greens and Lemon Vinaigrette
14 YEARS AGO: The Secret Recipe Club: Granola Bars
15 YEARS AGO: Awesome Broccolini
16 YEARS AGO: A Twist on Pesto
17 YEARS AGO: Ciabatta: Judging a bread by its holes