JOY COOKIE CLUB: WOODLAND CREATURES

This is my second blog post in the Joy Cookie Club series. For the basic recipes, I used either Neat Edges Sugar Cookies or Gingerbread. For Royal Icing, my favorite recipe is Tanya’s. You can it in her blog here. In this post, all cookies celebrate the woodlands and their beautiful creatures, starting with a majestic bird, one of my favorites. We do have families of owls living in the woods around our home, and often one will fly silently, sit on a branch high on a tree and stare at us for a while. It is magical.

OWLS

For this technique, you’ll need three colors of icing, brown, white and orange. Flood with brown, allow it to crust for 30 minutes. Pipe the white and add black pearls to the eyes. Adding them slightly off center is a good idea, it changes a bit the expression, making them look more natural. Let that crust for 10 minutes and add the orange detail. Feathers were painted with a food pen and gold pearl dust one day later, when the icing is fully set.

CARDINALS

Another beautiful creature we have around, particularly nice to see when it is all snowy outside…

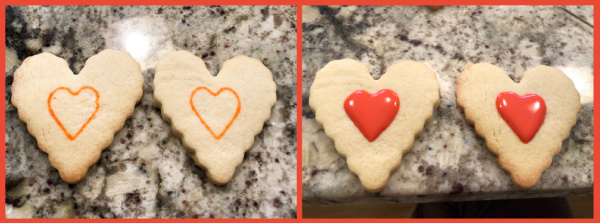
For this design, you’ll need red, orange and black royal icing. I followed the steps of Marlyn, from Montreal Confections. She uploaded to her Instagram page a short video, but as is the case for Instagram, it goes pretty fast. I paused the video and took screenshots to help me figure it all out. But the basic steps are shown in the composite picture below.

I consider this a work in progress. The wings should have been piped with a slightly thicker consistency, so that they would puff up nicely. I ended up trying to gild the lily too much to compensate for the flattish look of the wings, and I don’t like the result very much. I will be re-visiting these cookies soon.

DEERS

I used two different cookie cutters for the deers, but with the same basic decoration approach. Some were dark brown, some were made with a lighter body. Piping was all at the same time, wet-on-wet, except for the nose that was added after 10 minutes, so it would get a little lift. After one day drying, a fine food pen joined the party for the eyes and mouth.

It is easier to make the design if you draw with a pen the basic separation of the two colors. Then, slowly pipe them so they join together nicely. It is really a lot easier than it seems, as long as the consistency of the icing is not too loose.

LLAMAS

Two different styles of llamas, with the same cookie cutter. The main difference is that in one case I made the nose after the rest of the body was crusted, so it got that puffy structure. I liked them both, but the first one is obviously easier. The nose, the ears, the details around the saddle and the collar were all added 30 minutes after crusting. The blush on the cheeks is luster powder (Ruby Red from Oh Sweet Art), applied with a very light touch using a soft brush.

Royal icing roses for additional flair on that lady… Her name is Mercedes, by the way.

ELEPHANTS

I debated whether to make a separate Joy Cookie Club post just for elephants because I love them so much, and they go well with many different designs for decoration. But I did not want them to feel neglected, so here they are.

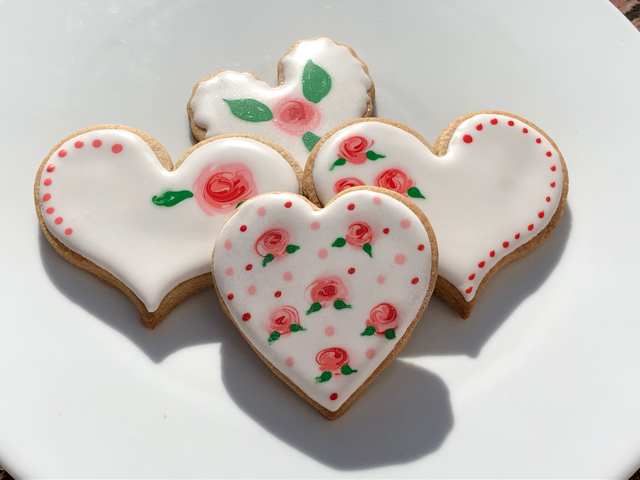
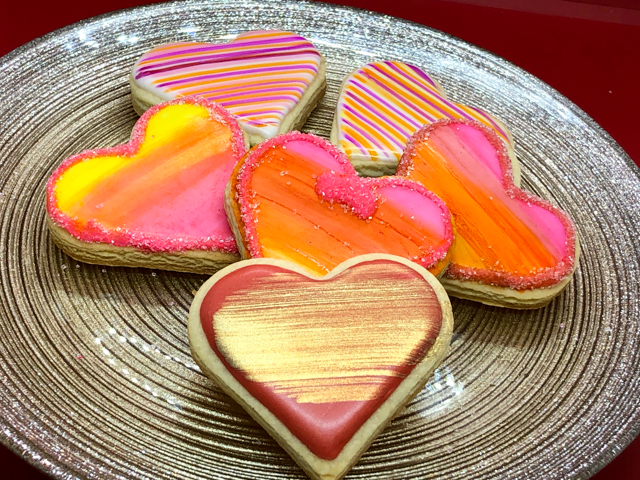
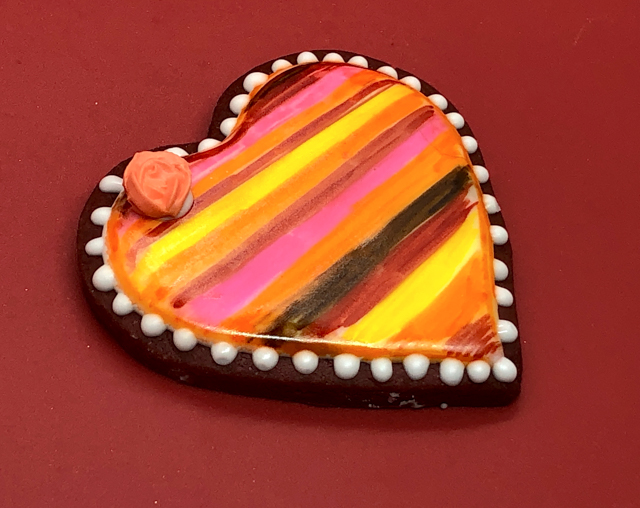
First technique is like a tie-dye. A lot of fun to do, although I messed up on my first attempt (sorry, no pictures!). What you do is gather all the colors you want to use, place them in individual spots, add vodka or everclear to dilute them well. They will form a gunk in the center, just continue swirling with a brush and then remove the gunk, all you need is a very diluted liquid. After that, working quickly, use a brush to add alcohol to the spot you want to color, and immediately touch it with another brush containing the diluted dye. Move it around quickly, do another spot some place else. When you are done with color #1, move to color #2, until you cover the whole surface. Add details with royal icing.

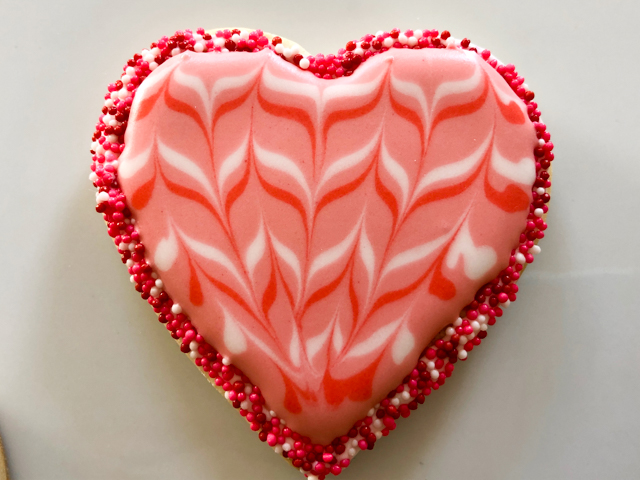
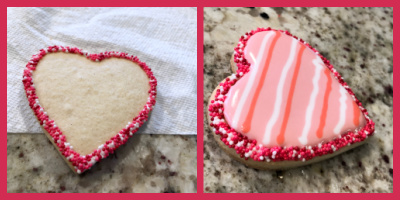
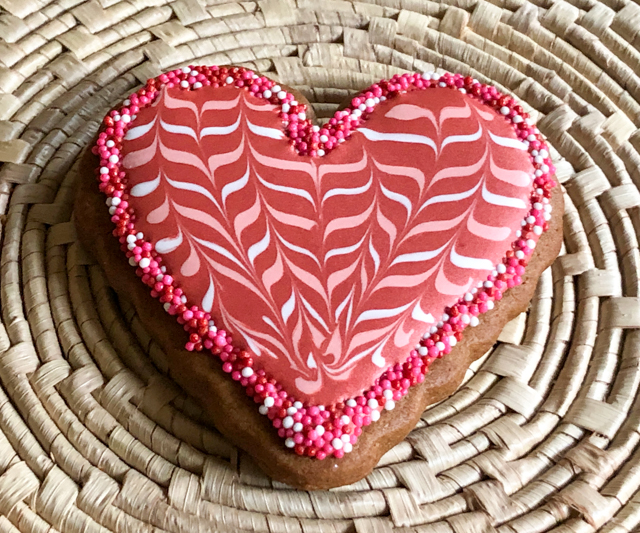
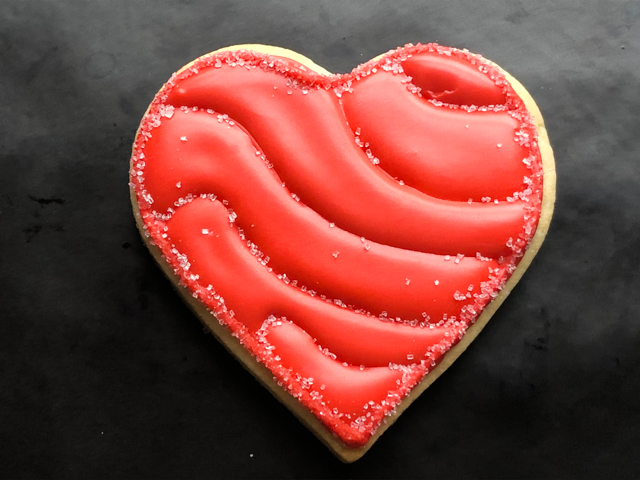
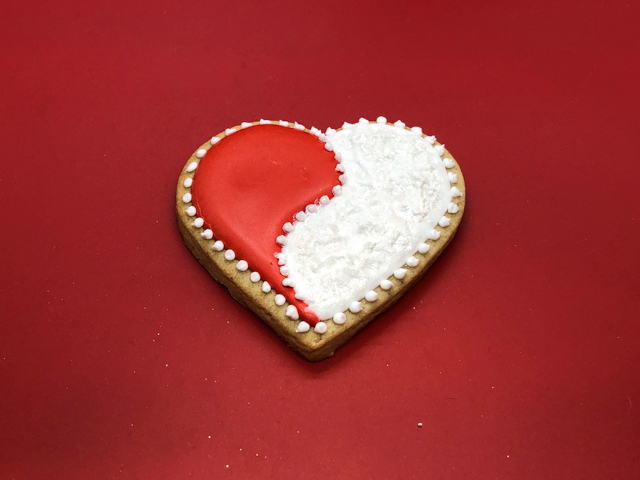
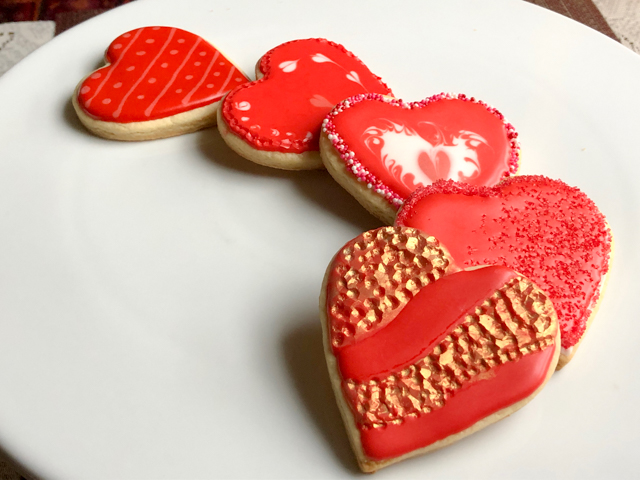
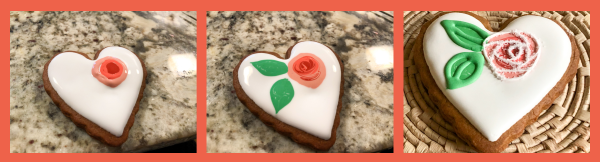
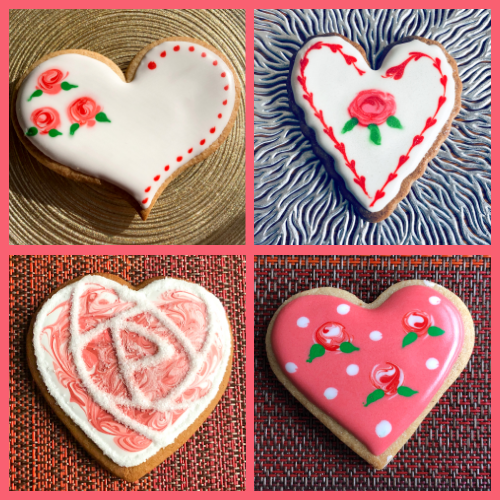
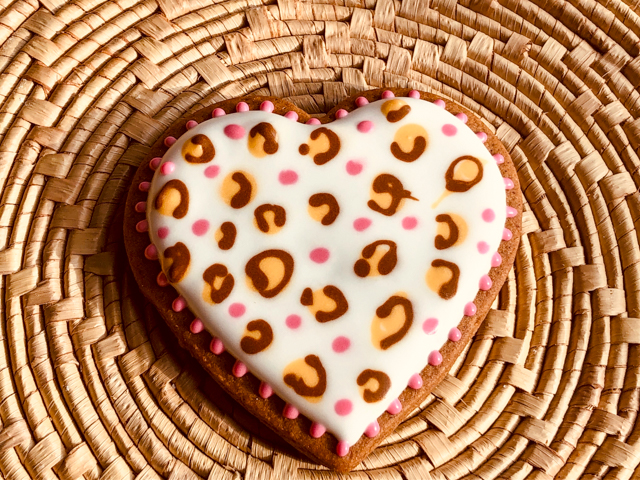
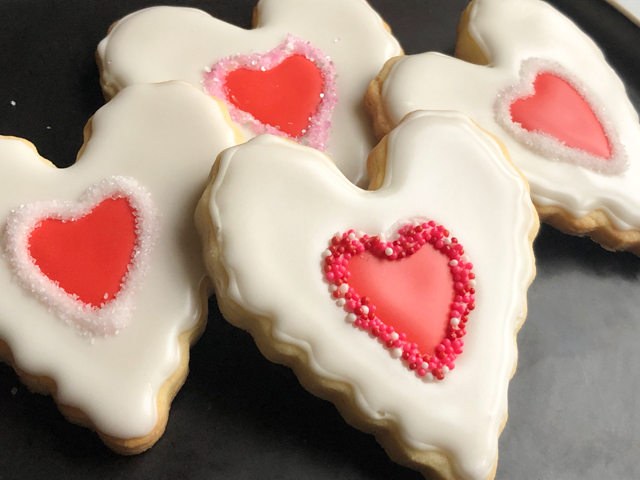
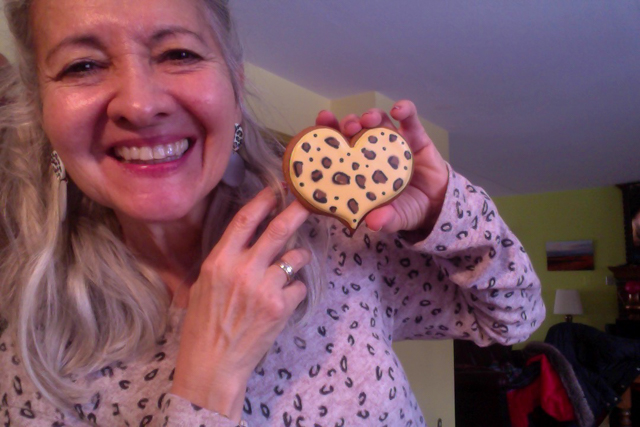
A different cookie cutter, with a modern “feel” is also fun to decorate. Many of these cookies were made the weeks before Valentine’s Day, so I had hearts in my mind…

For this design, the body is flooded, allowed to crust for 30 minutes, then the piped dots are added. Eyes and mouth need to wait 24 hours to be made.

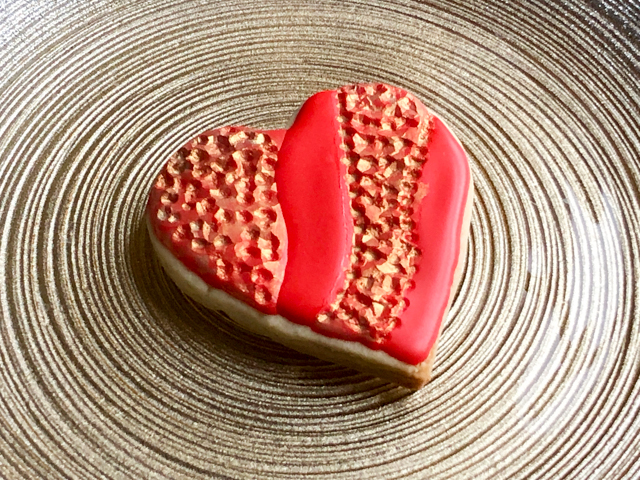
It is also nice to use a marbling technique. Very similar to tie-dye, instead of adding spots of diluted dye, just go with a fine brush and paint lines over the white flooded body. Immediately pass a sponge on the surface, to soften the lines. A make-up small sponge is perfect for that. Once the dye dries, you can add designs on top with royal icing. Later I brushed luster gold, but that is optional.
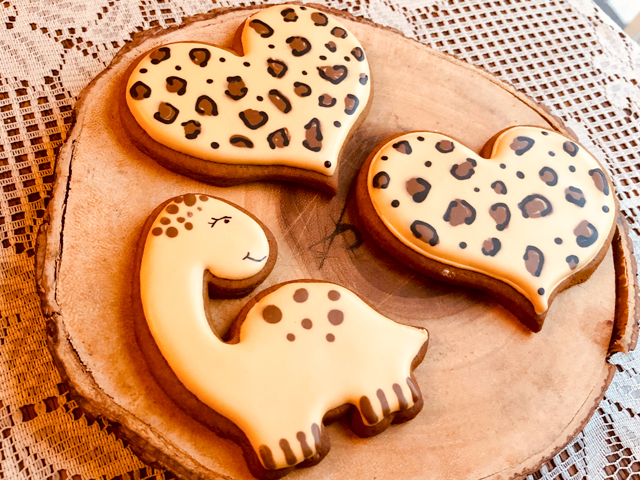
DINOSAURS

Yes, that is pushing the envelope as far as woodland creatures go. But I find them so adorable and like elephants, you can really go crazy with the colors. Extinct animals cannot get mad at you… Poor things.

Another very easy design. Flood the body, use a second color to add details right away. Add the black pearls for the eyes, and after 24 hours draw the eyes and mouth. DONE.

I hope you liked this small collection of decorated cookies. Stay tuned for the next series, that will focus on a Spring and Easter motif.

May you always be excited by your own individual inspiration and vision.
(unknown source)

ONE YEAR AGO: Incredibly Simple… Crunchy Asparagus

TWO YEARS AGO: A Sourdough Quartet

THREE YEARS AGO: When bad things happen to good people

FOUR YEARS AGO: Sweet Potato “Hummus”

FIVE YEARS AGO: Cauliflower Crust Pizza

SIX YEARS AGO: Silky Rutabaga Puree

SEVEN YEARS AGO: Bon Bon Chicken: Light and Spectacular

EIGHT YEARS AGO: Red Wine Sourdough Bread with Cranberries

NINE YEARS AGO: Award-Winning Sourdough Baguettes

TEN YEARS AGO: Country Rye (Tartine)

ELEVEN YEARS AGO: Penne a la Vechia Bettola

May you always be excited by your own individual inspiration and vision.

JOY COOKIE CLUB: VALENTINE’S DAY!

This post inaugurates a new series, the Joy Cookie Club, inspired by a favorite book/movie of mine, Joy Luck Club. If you have not read it, buy two boxes of Kleenex and do so. I bake sugar cookies every week to include in a box that gets donated in the Common Table project of our town. It gives me the opportunity of trying new styles and learn cute tricks with the generous professionals who share their expertise on youtube and instagram. For the basic recipes, I used either Neat Edges Sugar Cookies or Gingerbread. For Royal Icing, my favorite recipe is Tanya’s. You can it in her blog here. Now let me walk you through some of the cookies I made in the past 6 weeks.

STYLE #1: ZIG ZAG WITH BORDER

This is a pretty striking cookie that is so so easy to make! One thing that is hard when we start decorating sugar cookies is the edge. It always ends up a bit messy. By adding a border, you can say goodbye to that problem. Just pipe Royal icing and immediately touch the surface of the cookie on a layer of your favorite non-pareils (or sanding sugar). Let that dry for a few minutes, flood, quickly add lines of contrasting colors and work a needle or toothpick up and down, curving it gently to follow the overall shape of the heart. Detailed instructions here.

STYLE #2 – WAVY HEART

I consider this one a work in progress, as I could not quite match the beauty of the ones made by @thegracefulbaker. The design is actually quite simple. You pipe fine lines dividing the heart in wavy sections, then flood areas that are not touching. Wait for those to crust, maybe 30 minutes or so, and flood the others. If the consistency of your icing is thick enough, the sections will be more “puffed up” and it will look quite striking. I did not get there, but I still like the look.

STYLE #3 – DIVIDED HEART

I love this one so much! Flood one side with red, another side with white. Let them both crust for 30 minutes or more. You can even continue the following day. Add the lines, the dots, and once it’s all crusted, you can use a little diamond dust to make it truly special. For the lines and dots, you’ll need slightly thicker royal icing, either straight from mixing the batch, or very lightly thinned with water. Do not use flooding consistency. But, a similar style can also work with a simpler, wet-on-wet decoration

You can also mess up one side with a brush, and add a totally different texture to the icing. In that case, brushing some white luster powder mixed with vodka is a good move. The picture does not show it very well, but it added a nice shine to the white portion.

STYLE #4 : CRACKLED HEART

A variation of the wavy design, I let the final flooded regions crust for only 15 minutes, and used a little fondant ball tool to press the design. Once it was fully crusted, I brushed gold luster powder mixed with vodka only on the crackled part.

STYLE #5: ROSE BUDS

I was terrified of trying those, as they seemed way beyond my skill level. You can find countless youtube tutorials showing how it’s done, and in fact it is not that hard. You start by flooding in white (or any base color you like). Immediately add two or three concentric dots with the colors for the rose bud. Very slowly swirl them with a needle until you get the design you like. Add little dots of green and pull them with a needle to give them a leaf shape. Let it all dry completely and if you want, add additional bells and whistles. You can draw veins in the leaves, pipe their shape with thick royal icing, and add fine white lines on the rose buds for a completely different, almost modern look.

STYLE #6: CHEETAH HEARTS

I do sound like a broken record, but what can I do? I loved making those also… Super simple, which makes them even better. Flood with white, add large, irregular dots of your color of choice, immediately add edges, also irregular of a second, darker color. Since cheetahs are kept in zoos or far away from your home, no need to fear their revenge, you can go crazy with the color combination… Or even crazier, pairing them with a dinosaur!

STYLE #7: HEART WITHIN A HEART

Are you going to roll your eyes to the ceiling if I tell you I loved making these? Ok, I won’t then. Start with a plain cookie, use a small cookie cutter to draw a small heart in the center. If you are brave, do it free-hand. Flood with red. Let it crust for 15 minutes, surround it with white. Let it fully dry, pipe the edge of the inner heart with white icing, and cover it with non-pareils or sanding sugar. It is a simple, but very elegant look.

STYLE #8: HEARTS WITH DECORATIONS

The only thing that changes is that you need to flood the cookies and let them dry overnight. Then, you can glue to the surface Royal icing transfers in the shapes you like. Either made by yourself or using store-bought sprinkles.

I made the two rosettes with very thick Royal icing dyed pink, and brushed with golden lust powder. But as I mentioned, you can simplify your life and glue little decorations made by Wilton and available pretty much everywhere these days.

STYLE #9: WATERCOLOR SERIES

For these you absolutely need the coating to be fully crusted and dry, 24 hours is best. Flood the cookie with white. Mix food dye colors with a little vodka or everclear, and brush lightly on the surface of the cookie, making the design and colors you like. For a detailed tutorial on youtube, click here. I went with a tequila-sunrise motif. Add a border with royal icing and sprinkles if you so desire. You can also use food-safe pens and draw colorful lines all over the surface, or use a fan brush to add a band of gold, for a simple but effective design.

I hope you enjoyed this small collection of sugar cookies, and consider making them for someone you love.

Flour, sugar and eggs: $ 8.75
Assorted cookie cutters: $12.00
Food gel color: $10.00
Matching cookie to earrings and shirt
AND BEING FREE OF BRACES????
PRICELESS

ONE YEAR AGO: Uttapam, White Lentil and Rice Flatbread

TWO YEARS AGO: Valentine’s Day Sweetheart Cookies

THREE YEARS AGO: Fesenjan, Fast-Food Style

FOUR YEARS AGO: Lavender Macarons with White Chocolate Ganache

FIVE YEARS AGO: Raspberry Chocolate Truffles

SIX YEARS AGO: Red Velvet Cupcakes

SEVEN YEARS AGO: Happy Valentine’s Day!

EIGHT YEARS AGO:  A Few Blogging Issues

NINE YEARS AGO: Dan Dan Noodles

TEN YEARS AGO:  Sophie Grigson’s Parmesan Cake

ELEVEN YEARS AGO: Antibiotics and Food