BULGUR-CARROT SALAD WITH ALMONDS AND FETA

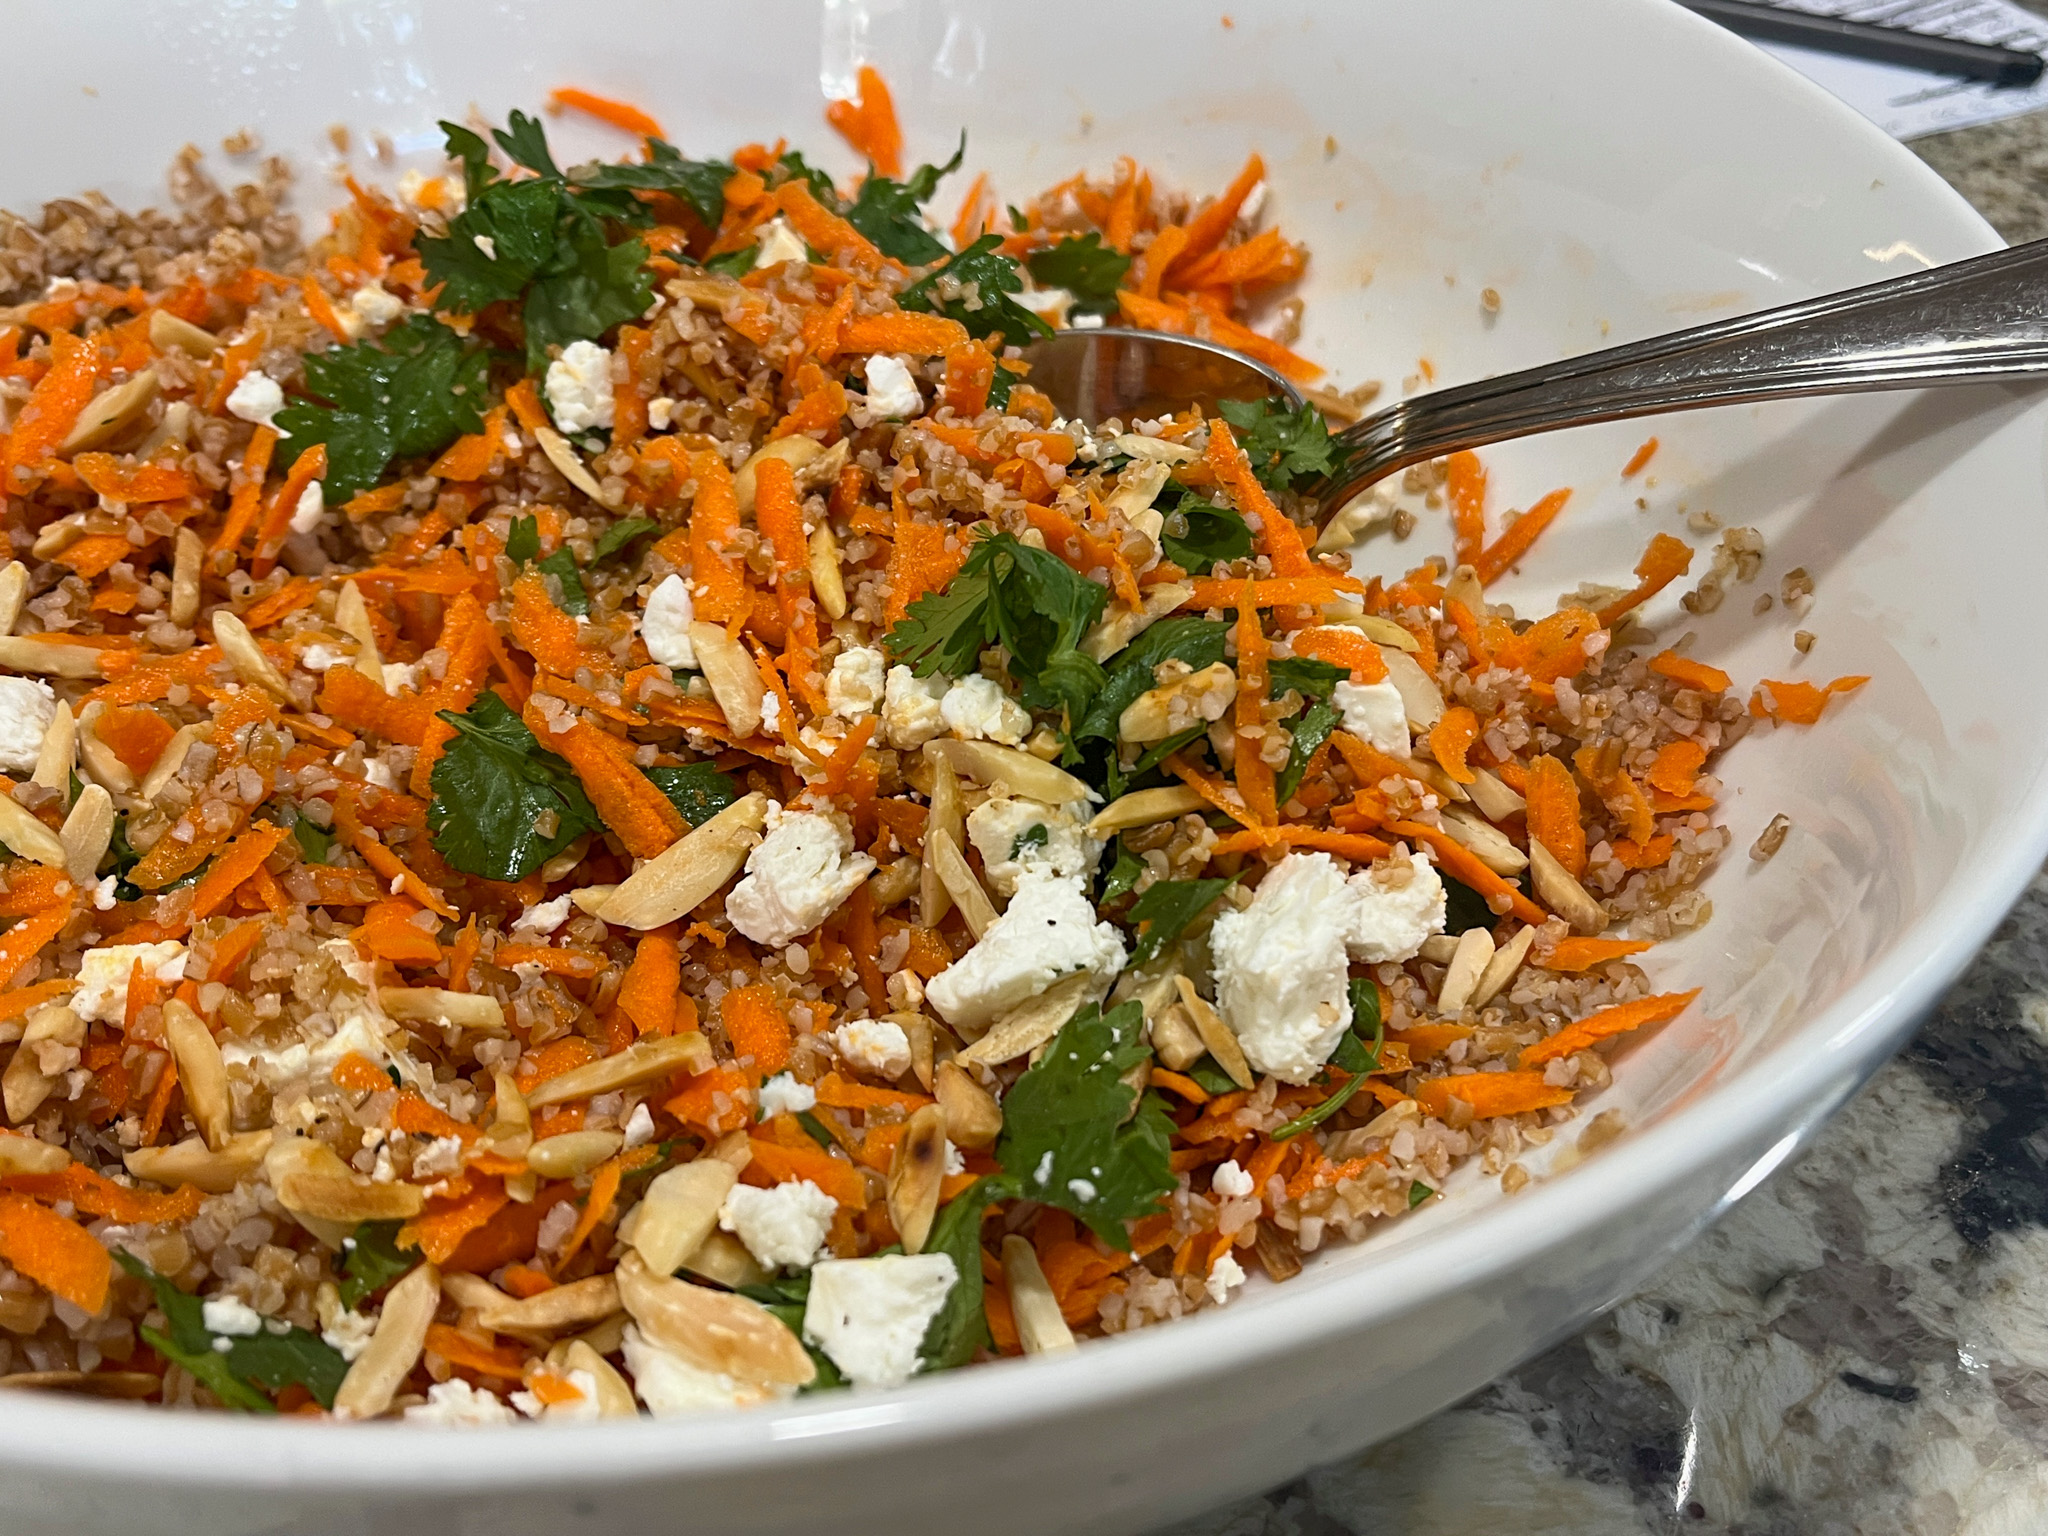
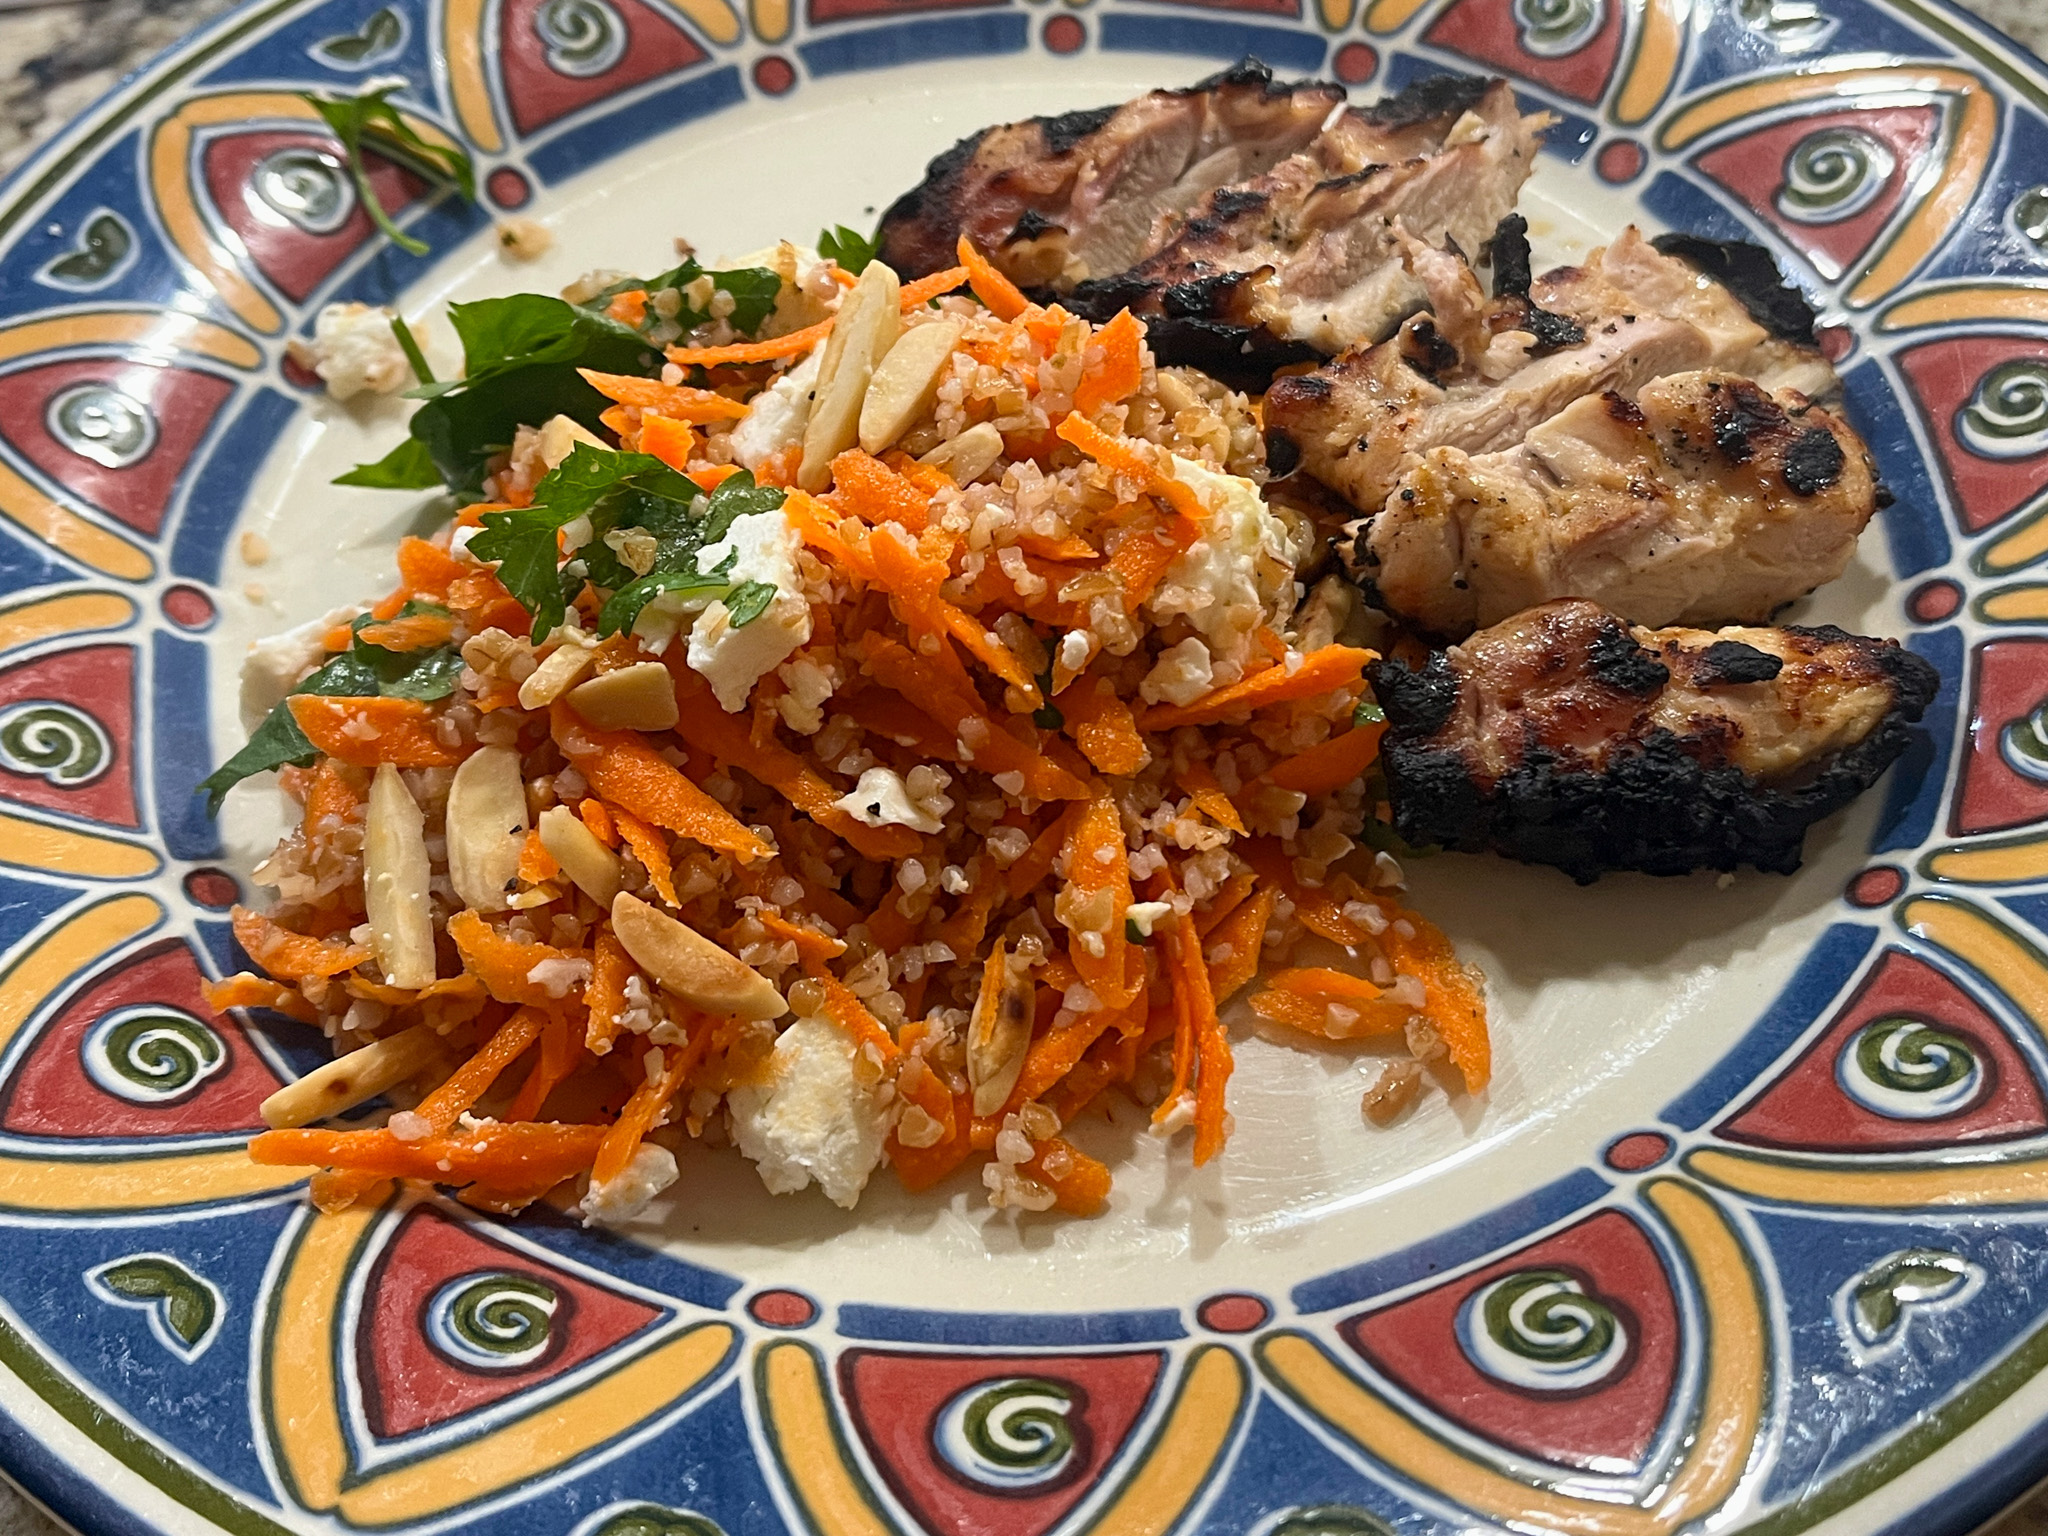
Yes, it is a salad, but next day I warmed it up in the microwave just briefly and wow, what a tasty side dish it became! So consider that option also, you can serve it slightly warm instead of waiting for the bulgur to get cold. Another recipe that the husband asked me to place in our regular rotation, so you know it is a keeper.


BULGUR-CARROT SALAD WITH ALMONDS AND FETA CHEESE
(from The Bewitching Kitchen)

1 cup medium-grind bulgur
1 + 1/4 cups boiling water
salt and black pepper to taste
2 cups shredded carrots
1/4 cup slivered almonds, toasted
1/3 cup crumbled feta cheese
2 tablespoons olive oil
juice of 1 large lemon
1/2 teaspoon ground cumin
chopped cilantro to serve (optional)

Place the bulgur in a medium bowl and cover with boiling water. Top with a plate or plastic wrap and let sit for 20 minutes or until liquid is absorbed. If any liquid is leftover, strain it out. Let the bulgur cool, reserve.

In a serving bowl whisk together the olive oil, lemon juice, cumin, salt and pepper. When the bulgur is ready add it to the bowl and toss together with the dressing. Add in the shredded carrots, cilantro, almonds and feta. Gently toss everything together until combined. Adjust seasoning with salt and pepper as needed, sprinkle with cilantro right before serving.

ENJOY!

to print the recipe, click here
Comments: If you are a vegetarian or need to cook for someone who is, add this recipe to your files, it is truly delicious, very filling but at the same time feels light and refreshing with all the lemon juice and the creaminess of the feta. As I mentioned, warming it up next day was perfect. The cilantro lost its freshness and vibrant color but you can always add a little more once you bring it to the table. Since we are meat lovers, I served it with grilled boneless chicken thighs, but you can go a full vegetarian path if you prefer. One final advice, do not use pre-shredded carrots, they have a nasty texture and will not behave like freshly grated. I intensely dislike grating carrots, but must admit, it is necessary in this case.

1 YEAR AGO: Sourdough Stencil Fun

2 YEARS AGO: Il Pane de Vincenza

3 YEARS AGO: Gruyere Cheese Biscuits

4 YEARS AGO: Incredibly Simple Korean Chicken Thighs

5 YEARS AGO:  Zucchini with Quick-Pickled Vegetables and Peanut Sauce

6 YEARS AGO: Nha Benta (Brazilian candy)

7 YEARS AGO: The Best, The Very Best Hummus

8 YEARS AGO: Chicken Katsu

9 YEARS AGO: Whole-Lemon Marinade: Long Overdue

10 YEARS AGO: Tomato and Cucumber Salad with Almond Vinaigrette

11 YEARS AGO: Eggplant Tomato Stacks

12 YEARS AGO: The Couscous that Wasn’t

13 YEARS AGO: Apple-Cinnamon Bread

14 YEARS AGO: Blueberry Galette

15 YEARS AGO: In My Kitchen, August 2011

16 YEARS AGO: Journey to a New Home

17 YEARS AGO: Friday Night Dinner

TWO INCREDIBLY EASY VEGETARIAN DISHES

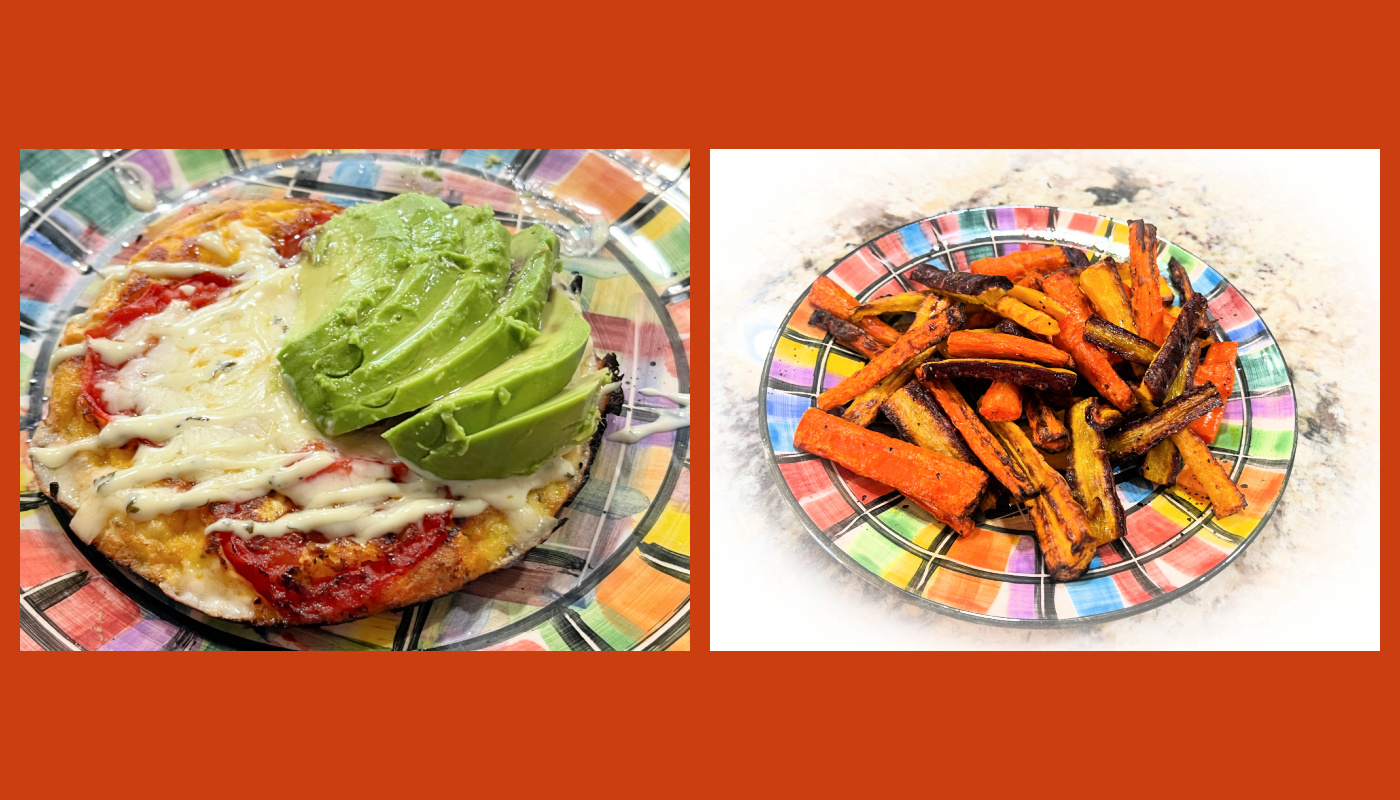
It’s been a while since I posted in the Incredibly Easy folder, but today I share two tasty little recipes that will definitely be part of our rotation. First, a tortilla-egg concoction with tomato and cheese, next a tricolor carrot preparation in the air-fryer.

MINI EGG & TOMATO TORTILLA
(inspired by Hungry Happens)

for one serving

spray of olive oil
1 small flour tortilla
4 slices of tomato
1 egg, beaten with salt, pepper and Herbes de Provence
shredded or sliced mozzarella
avocado for serving (optional)

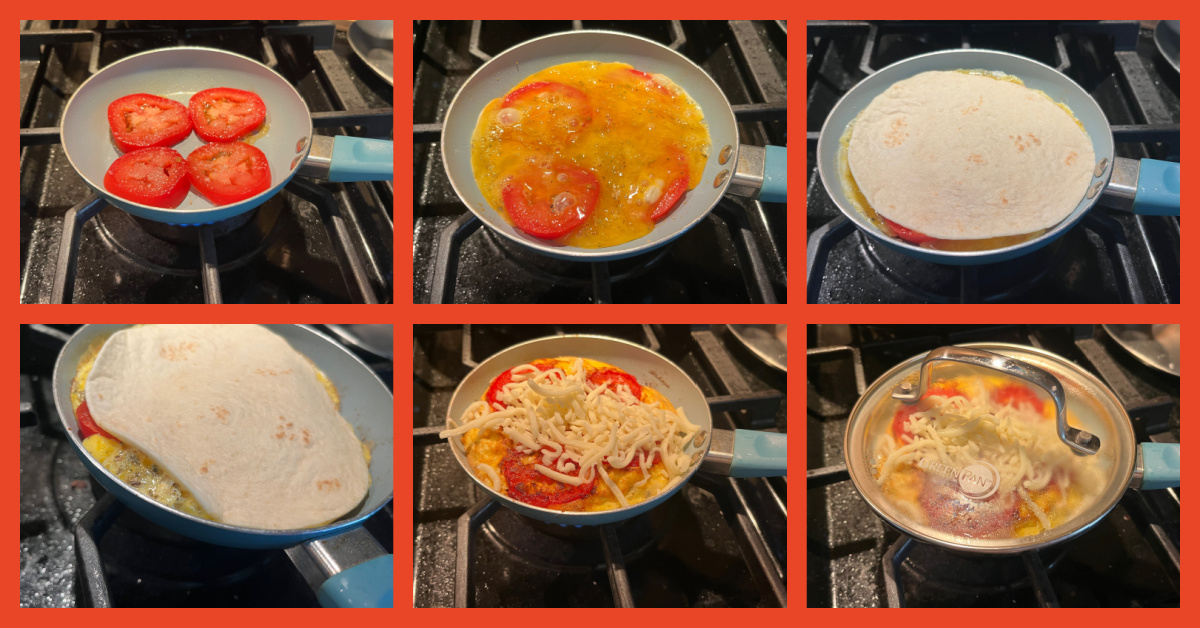
Spray olive oil in a small non-stick skillet, preferably one with the exact same diameter of your tortilla. Place on medium heat and immediately cover the pan with 4 slices of tomato. Season lightly with salt and pepper. Cook for 2 minutes, flip the slices, cook for one minute longer.

Pour the egg over it, and cover it with the tortilla. Cook on medium-low heat until you notice the edges of the egg getting firm and starting to get some color. Carefully flip the tortilla, adding a little more olive oil to the pan before doing so. Add some mozzarella on top, cover the pan and cook until the cheese is melted and the tortilla gets good color at the bottom, probably around 3 more minutes. Serve with avocado slices.

ENJOY!

to print the recipe, click here

Comments: The little pan I used was an impulse buy from a while ago, I found it at our grocery store in town and could not resist it. It is 5.5 inches in diameter and worked perfectly for the small tortilla with a single egg. Visit Hungry Happens site to see a bigger version. I actually made it but prefer the small one, easier to handle and perfect as a lunch for yours truly. Next time I will use a slice of mozzarella instead of shredded because it will melt faster. Consider that if you make it.
.

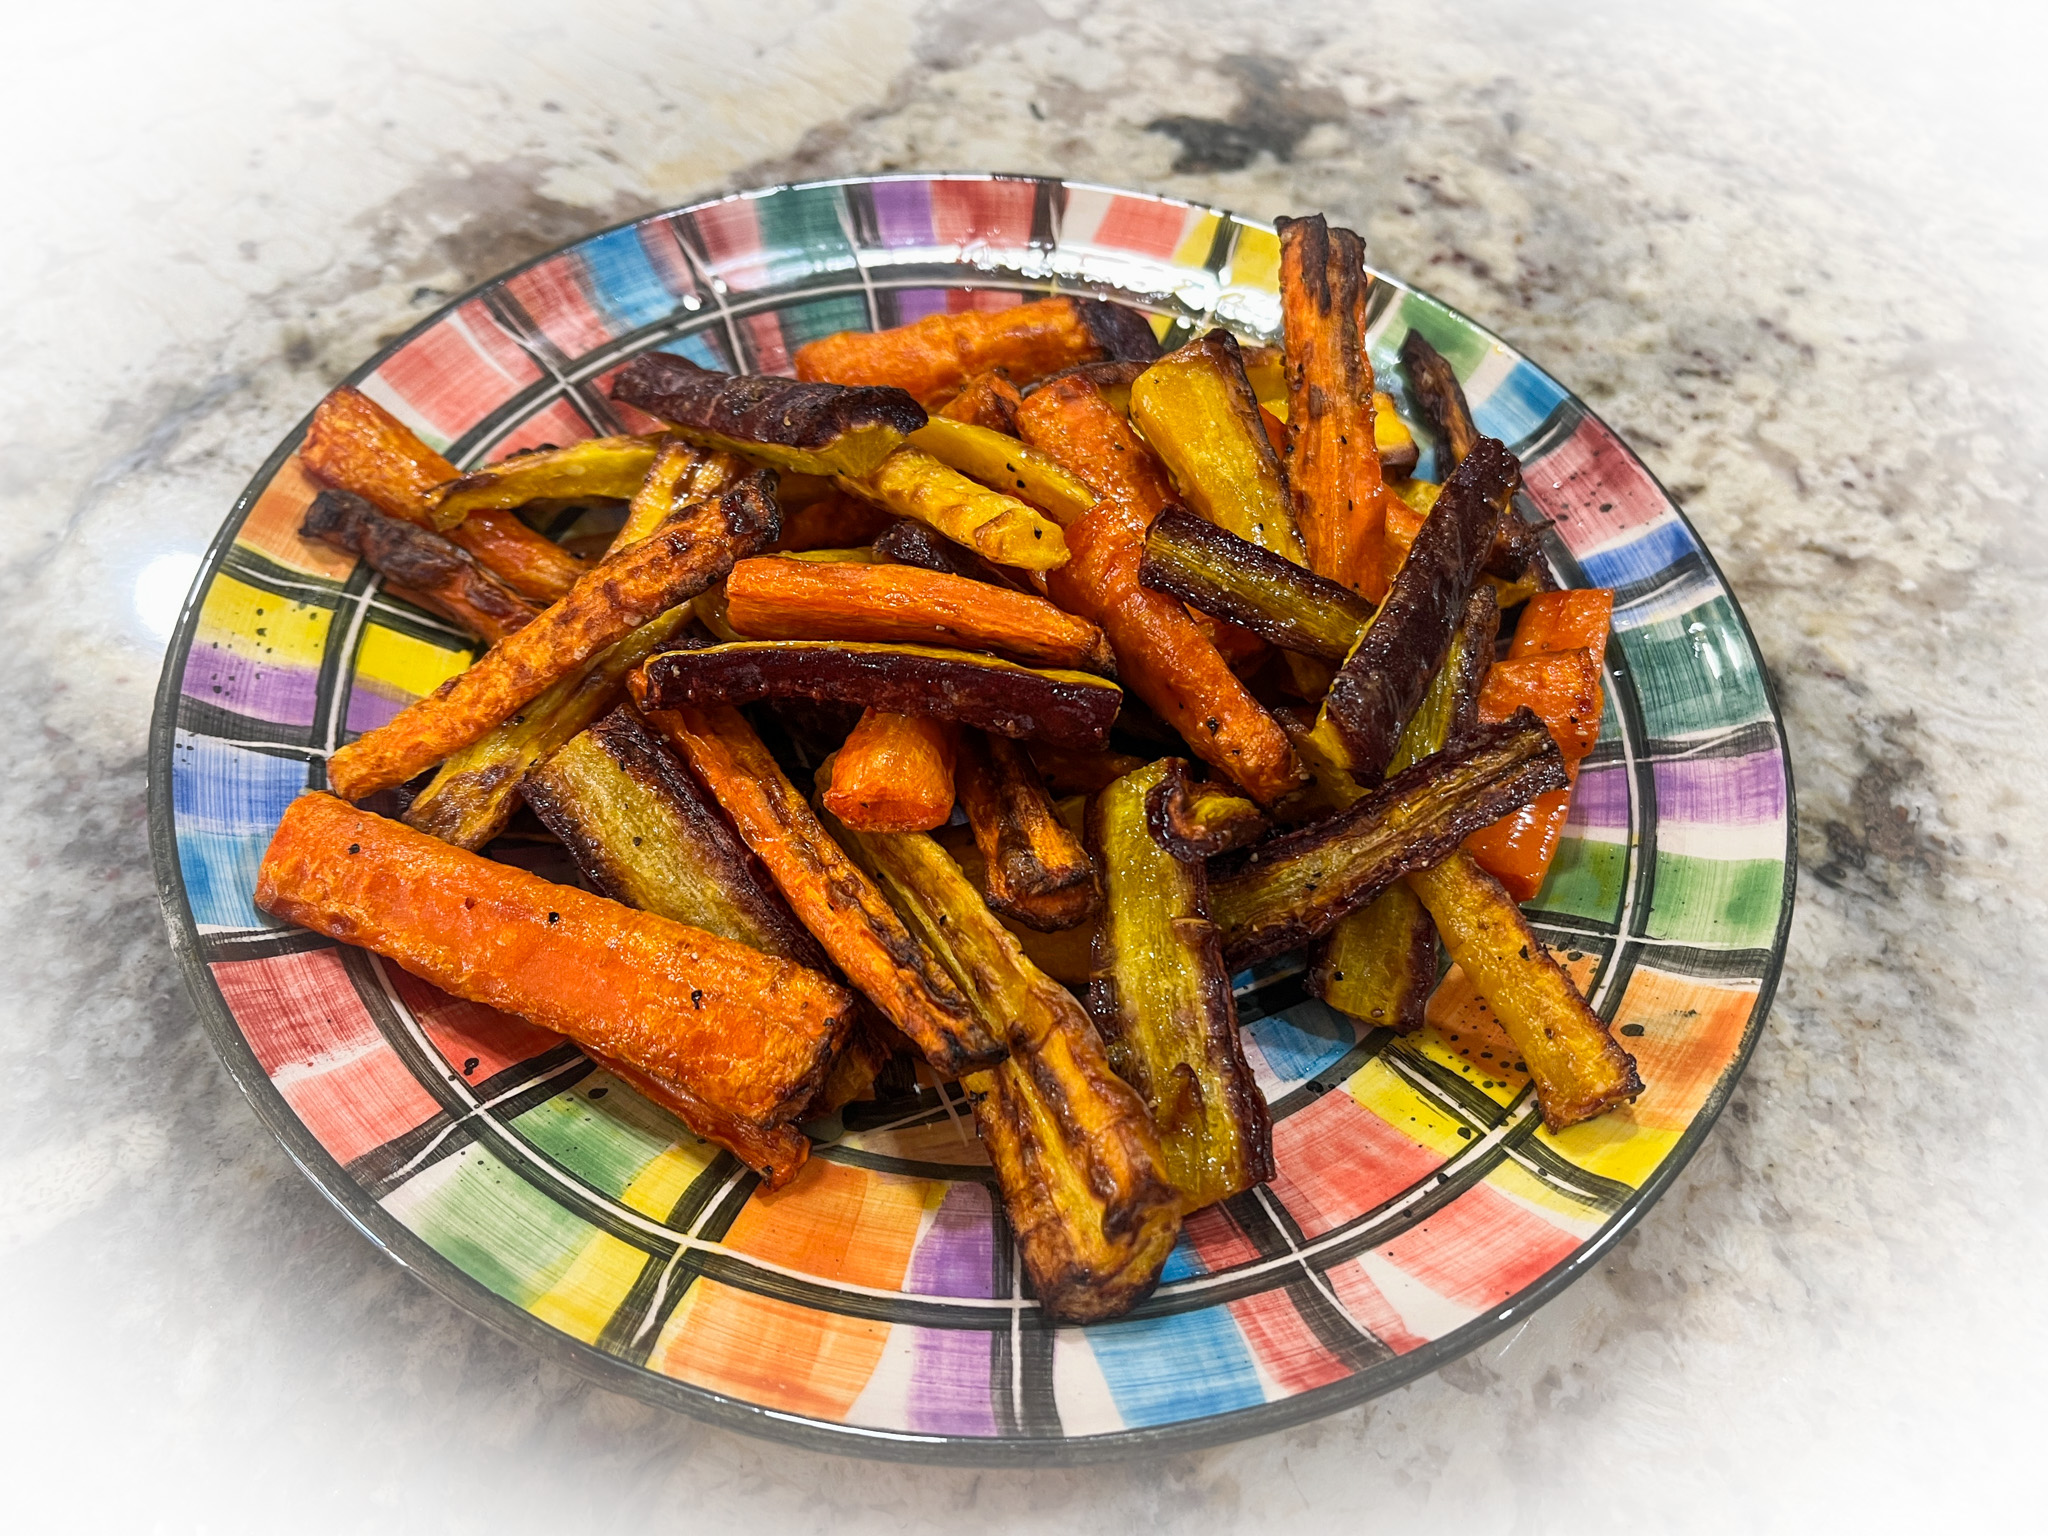
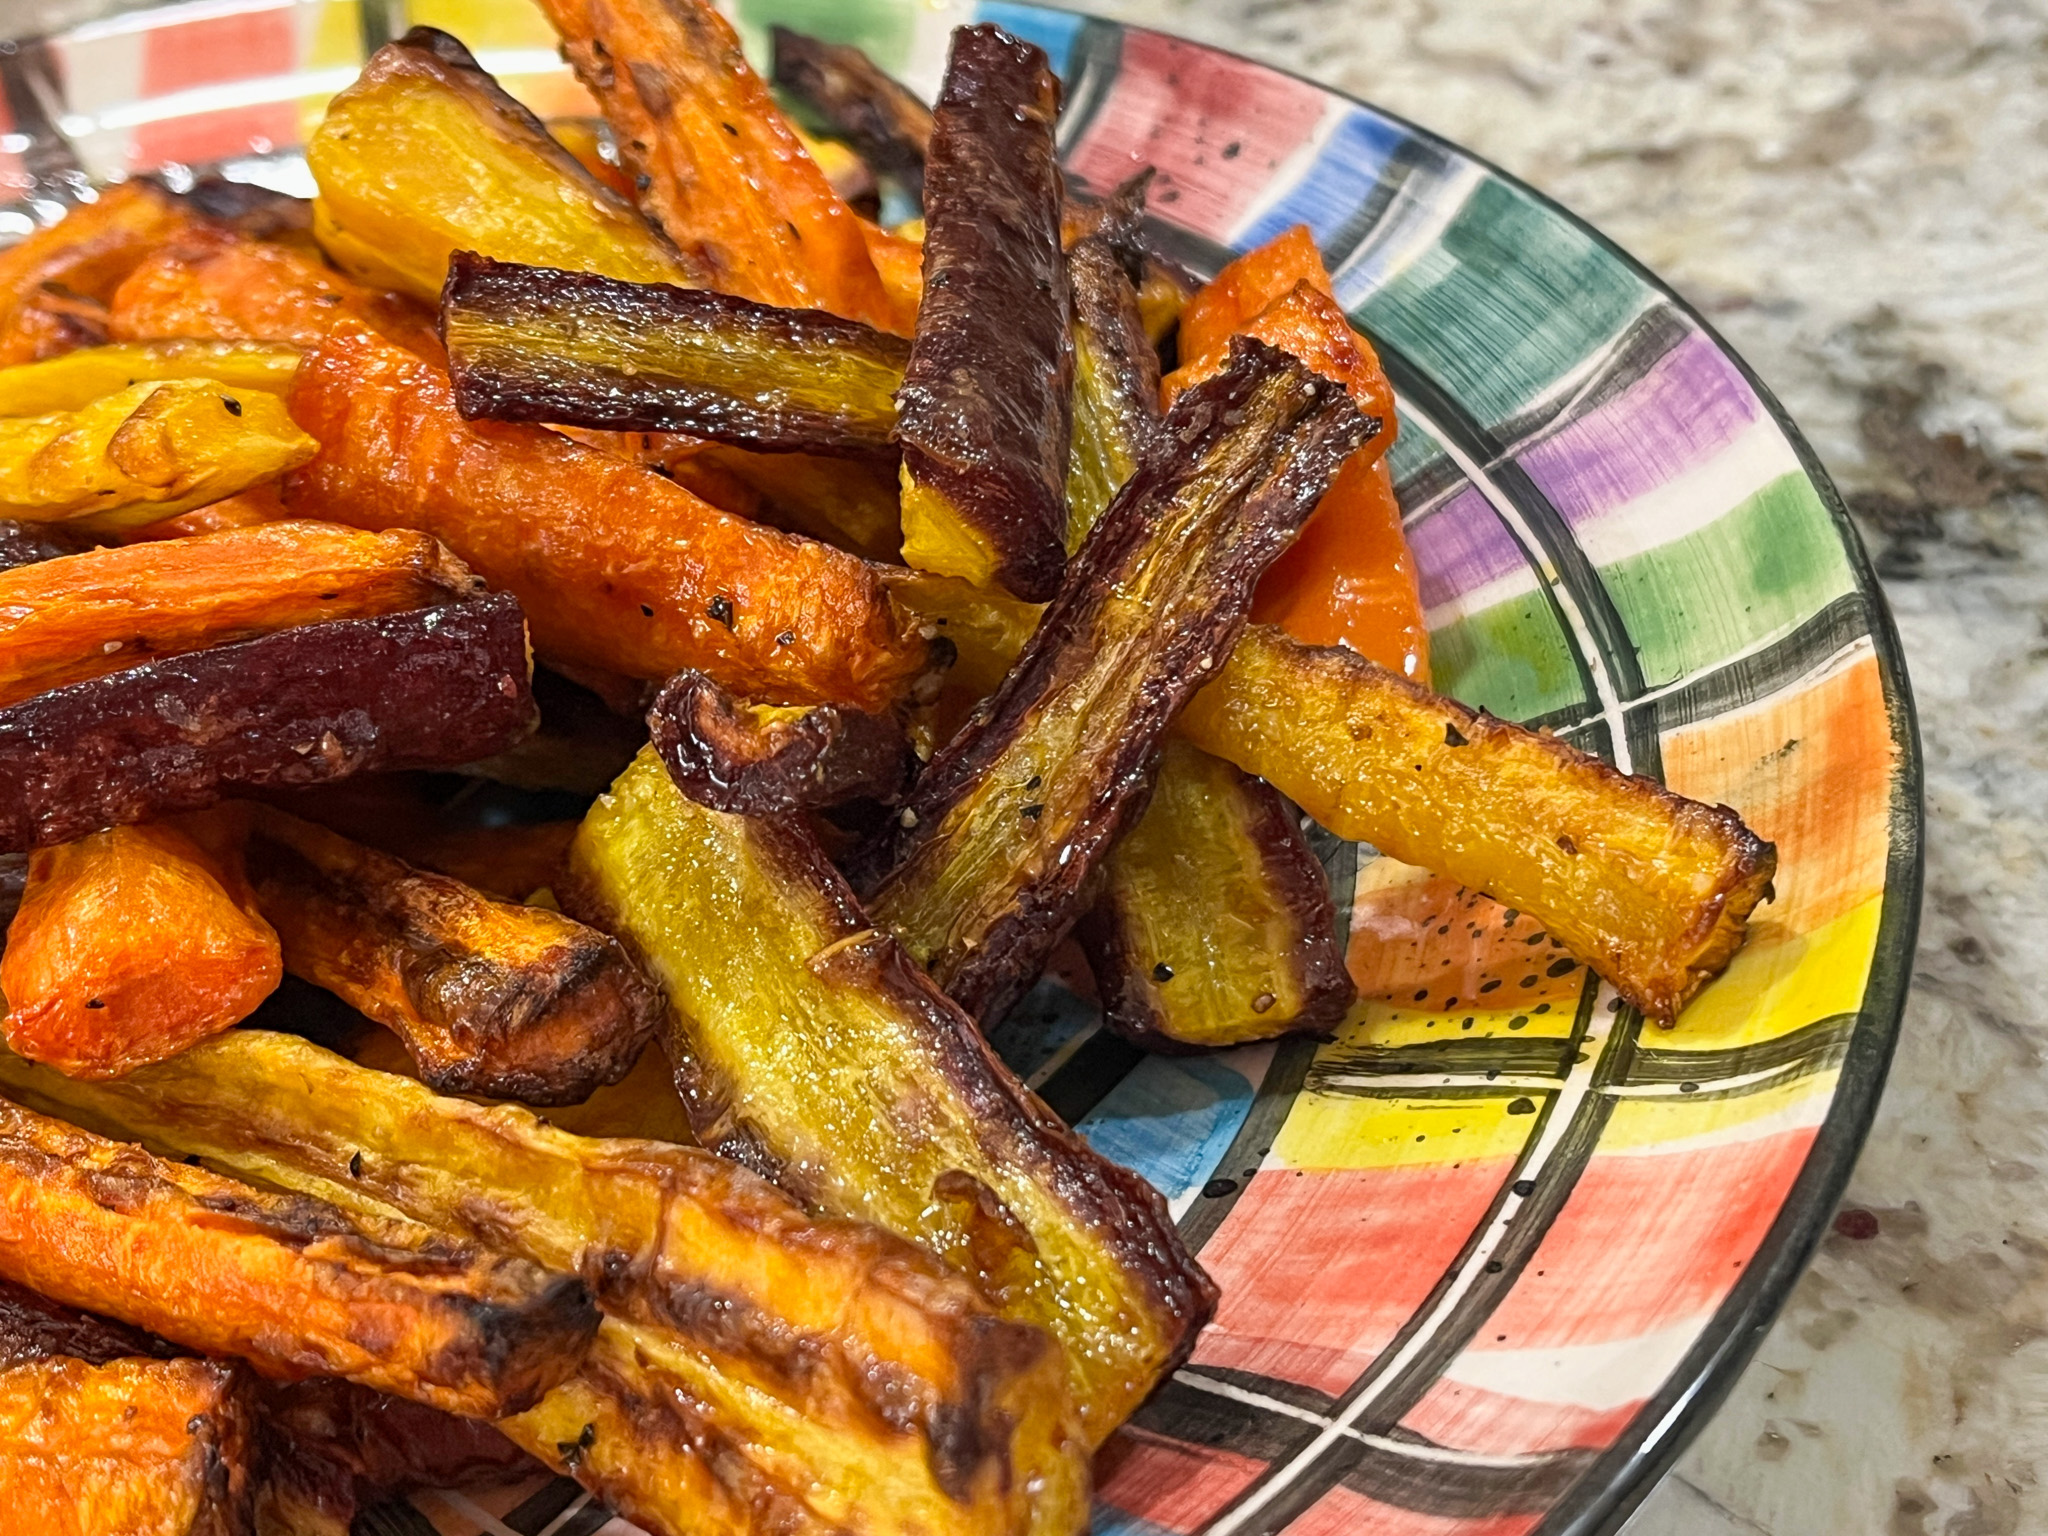
AIR-FRYED TRICOLOR CARROTS WITH ORANGE
(from The Bewitching Kitchen)

2 carrots of each color (orange, purple, yellow)
olive oil
salt and pepper to taste
squirt of fresh orange juice

Cut the carrots in sticks. Place in a bowl, drizzle olive oil to coat them well. Season with salt and pepper. Squeeze orange juice all over, and immediately air-fry at 400F until done, about 20 minutes, shaking the basket every once in a while.

ENJOY1

to print the recipe, click here

Comments: This does not get any easier… I know that people who do not own an air-fryer tend to roll their eyes to the ceiling when they read praise about it, but honestly, it is one gadget I adore ad use all the time. The dry air environment makes it cook things faster and provide a texture I prefer when compared to regular oven, especially for root vegetables. But it is also my method of choice for chicken and eggplant parmigiana. I hope you give this recipe a try, even if you have to use a regular oven. It is delicious, and yes, incredibly easy!

1 YEAR AGO: Two Incredibly Simple Recipes

2 YEARS AGO: Fitness Post, 21day Fix

3 YEARS AGO: Going Beyond Guacamole

4 YEARS AGO: A Trio of Superstars

5 YEARS AGO: Turkey Meatloaf

6 YEARS AGO: Prue Leith’s Smoked Salmon and Beetroot Blinis

7 YEARS AGO: Mandioca Frita 101

8 YEARS AGO: White Chocolate Raspberry Dome Cake

9 YEARS AGO: Blueberry Crumble Coffee Cake

10 YEARS AGO: Pickled Red Onions

11 YEARS AGO: Strawberry Chocolate Chip Cake

12 YEARS AGO: Mini-Chocolate Cheesecake Bites

13 YEARS AGO: Whole-Wheat Spaghetti with Grated Tomato Sauce

14 YEARS AGO: A Taste of Yellow to Honor Barbara

15 YEARS AGO: Gratin of Beefsteak Tomatoes

16 YEARS AGO: Tour de France Final Stage: PARIS

17 YEARS AGO: Snickerdoodles with a Twist

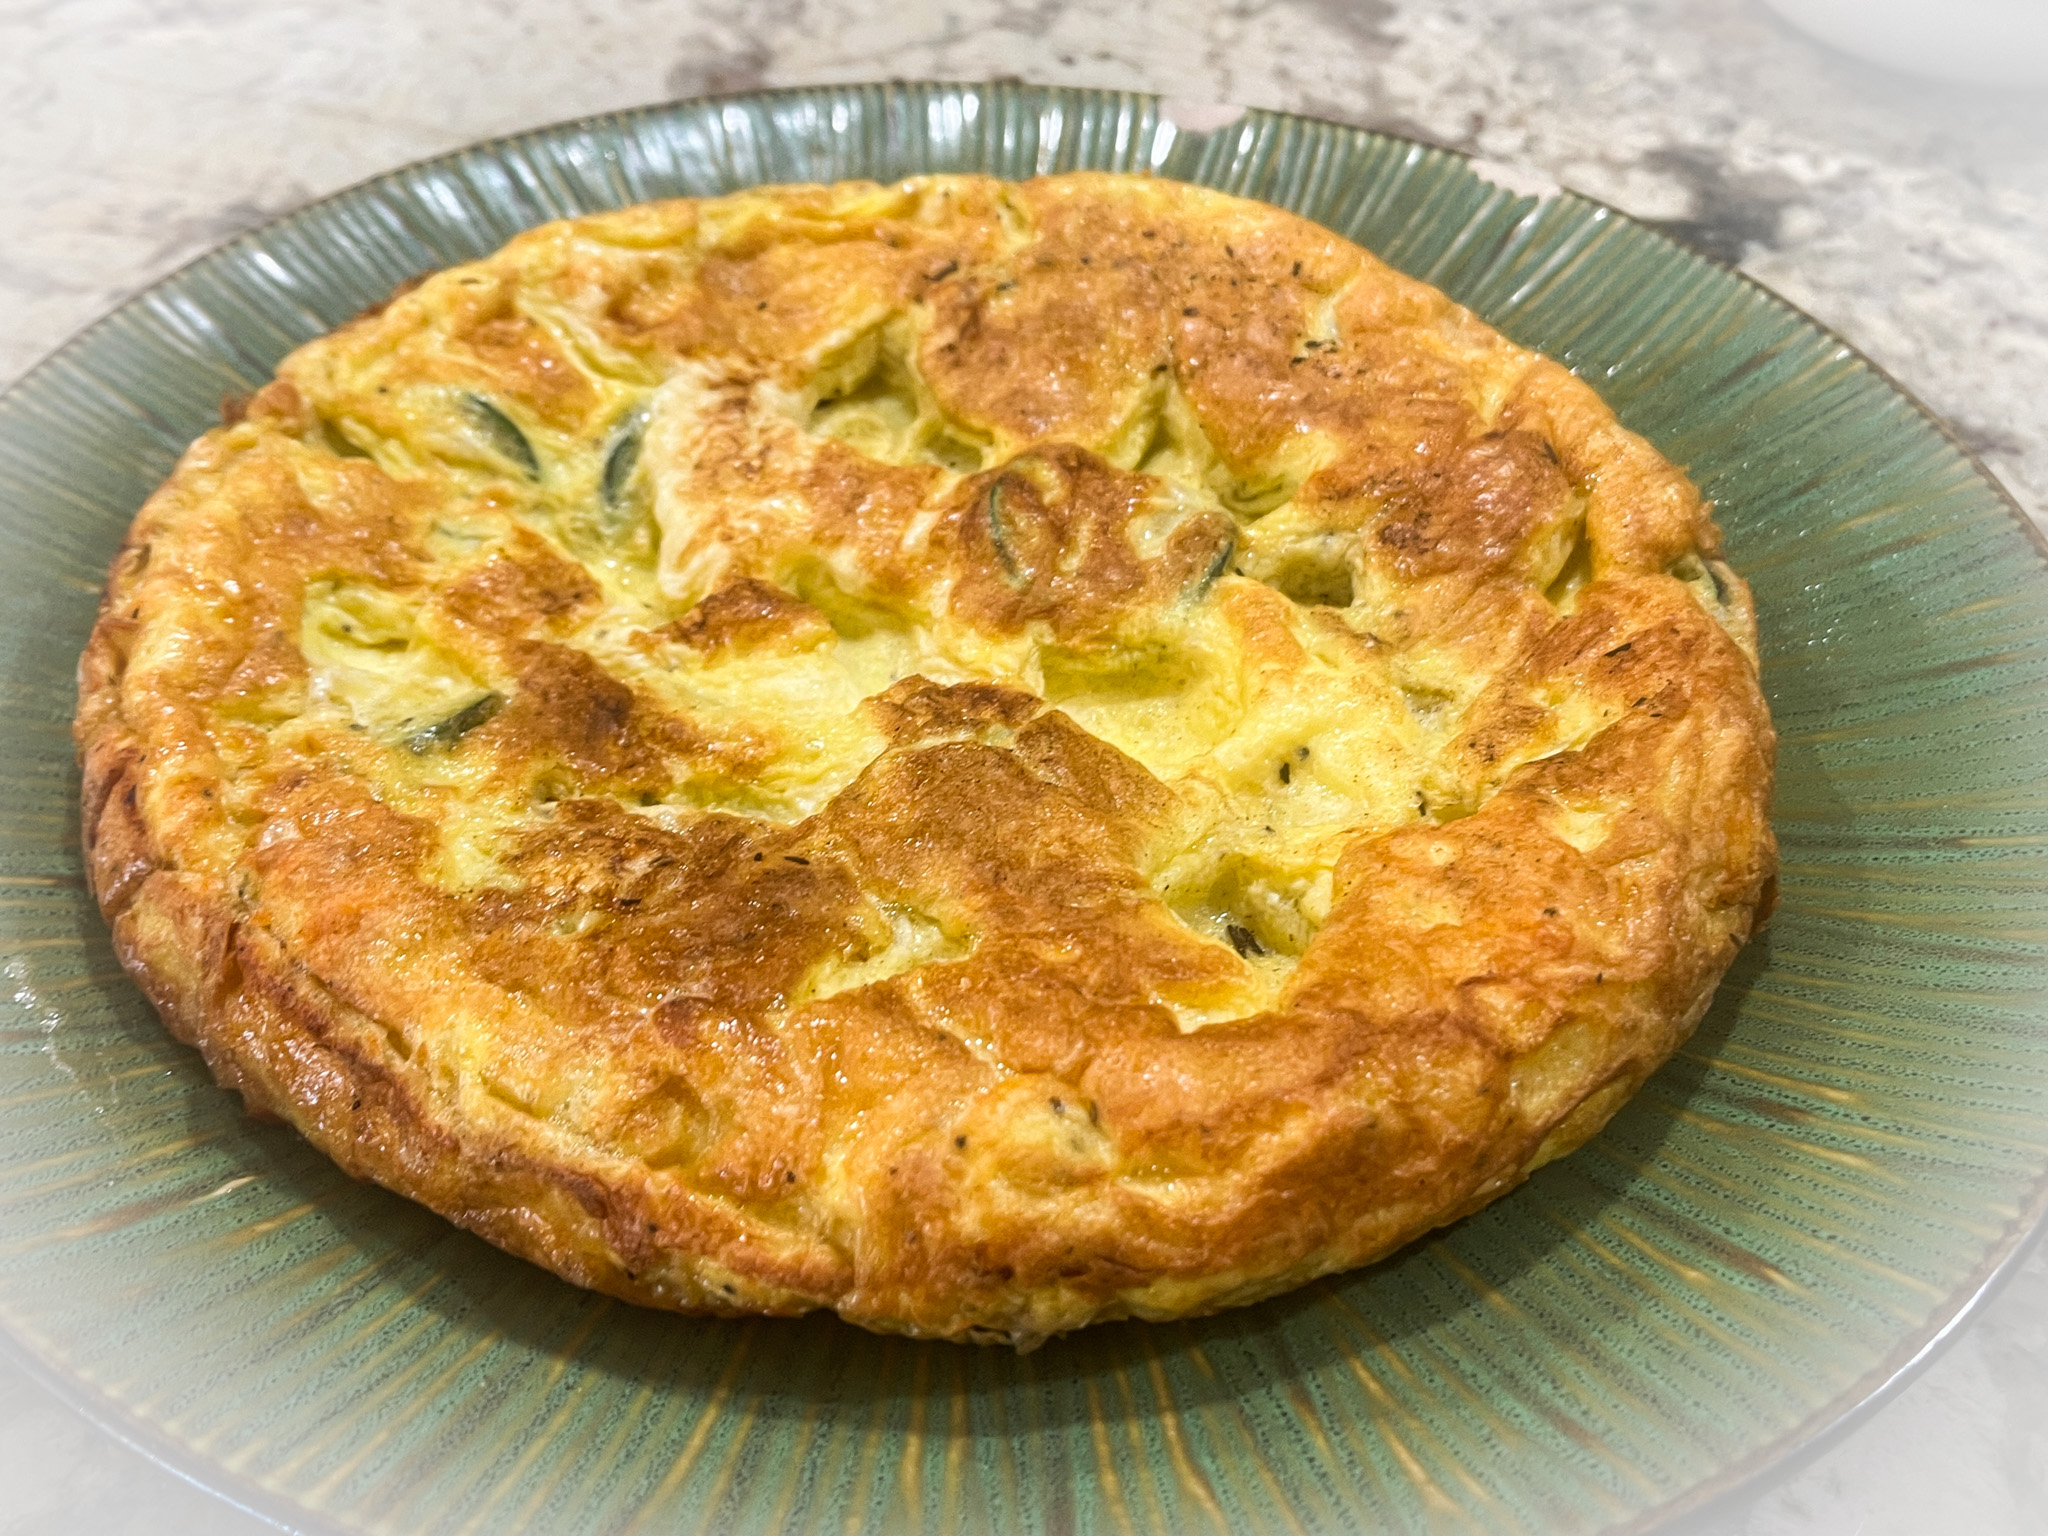
ZUCCHINI FRITTATA WITH CUCUMBER-YOGURT SAUCE

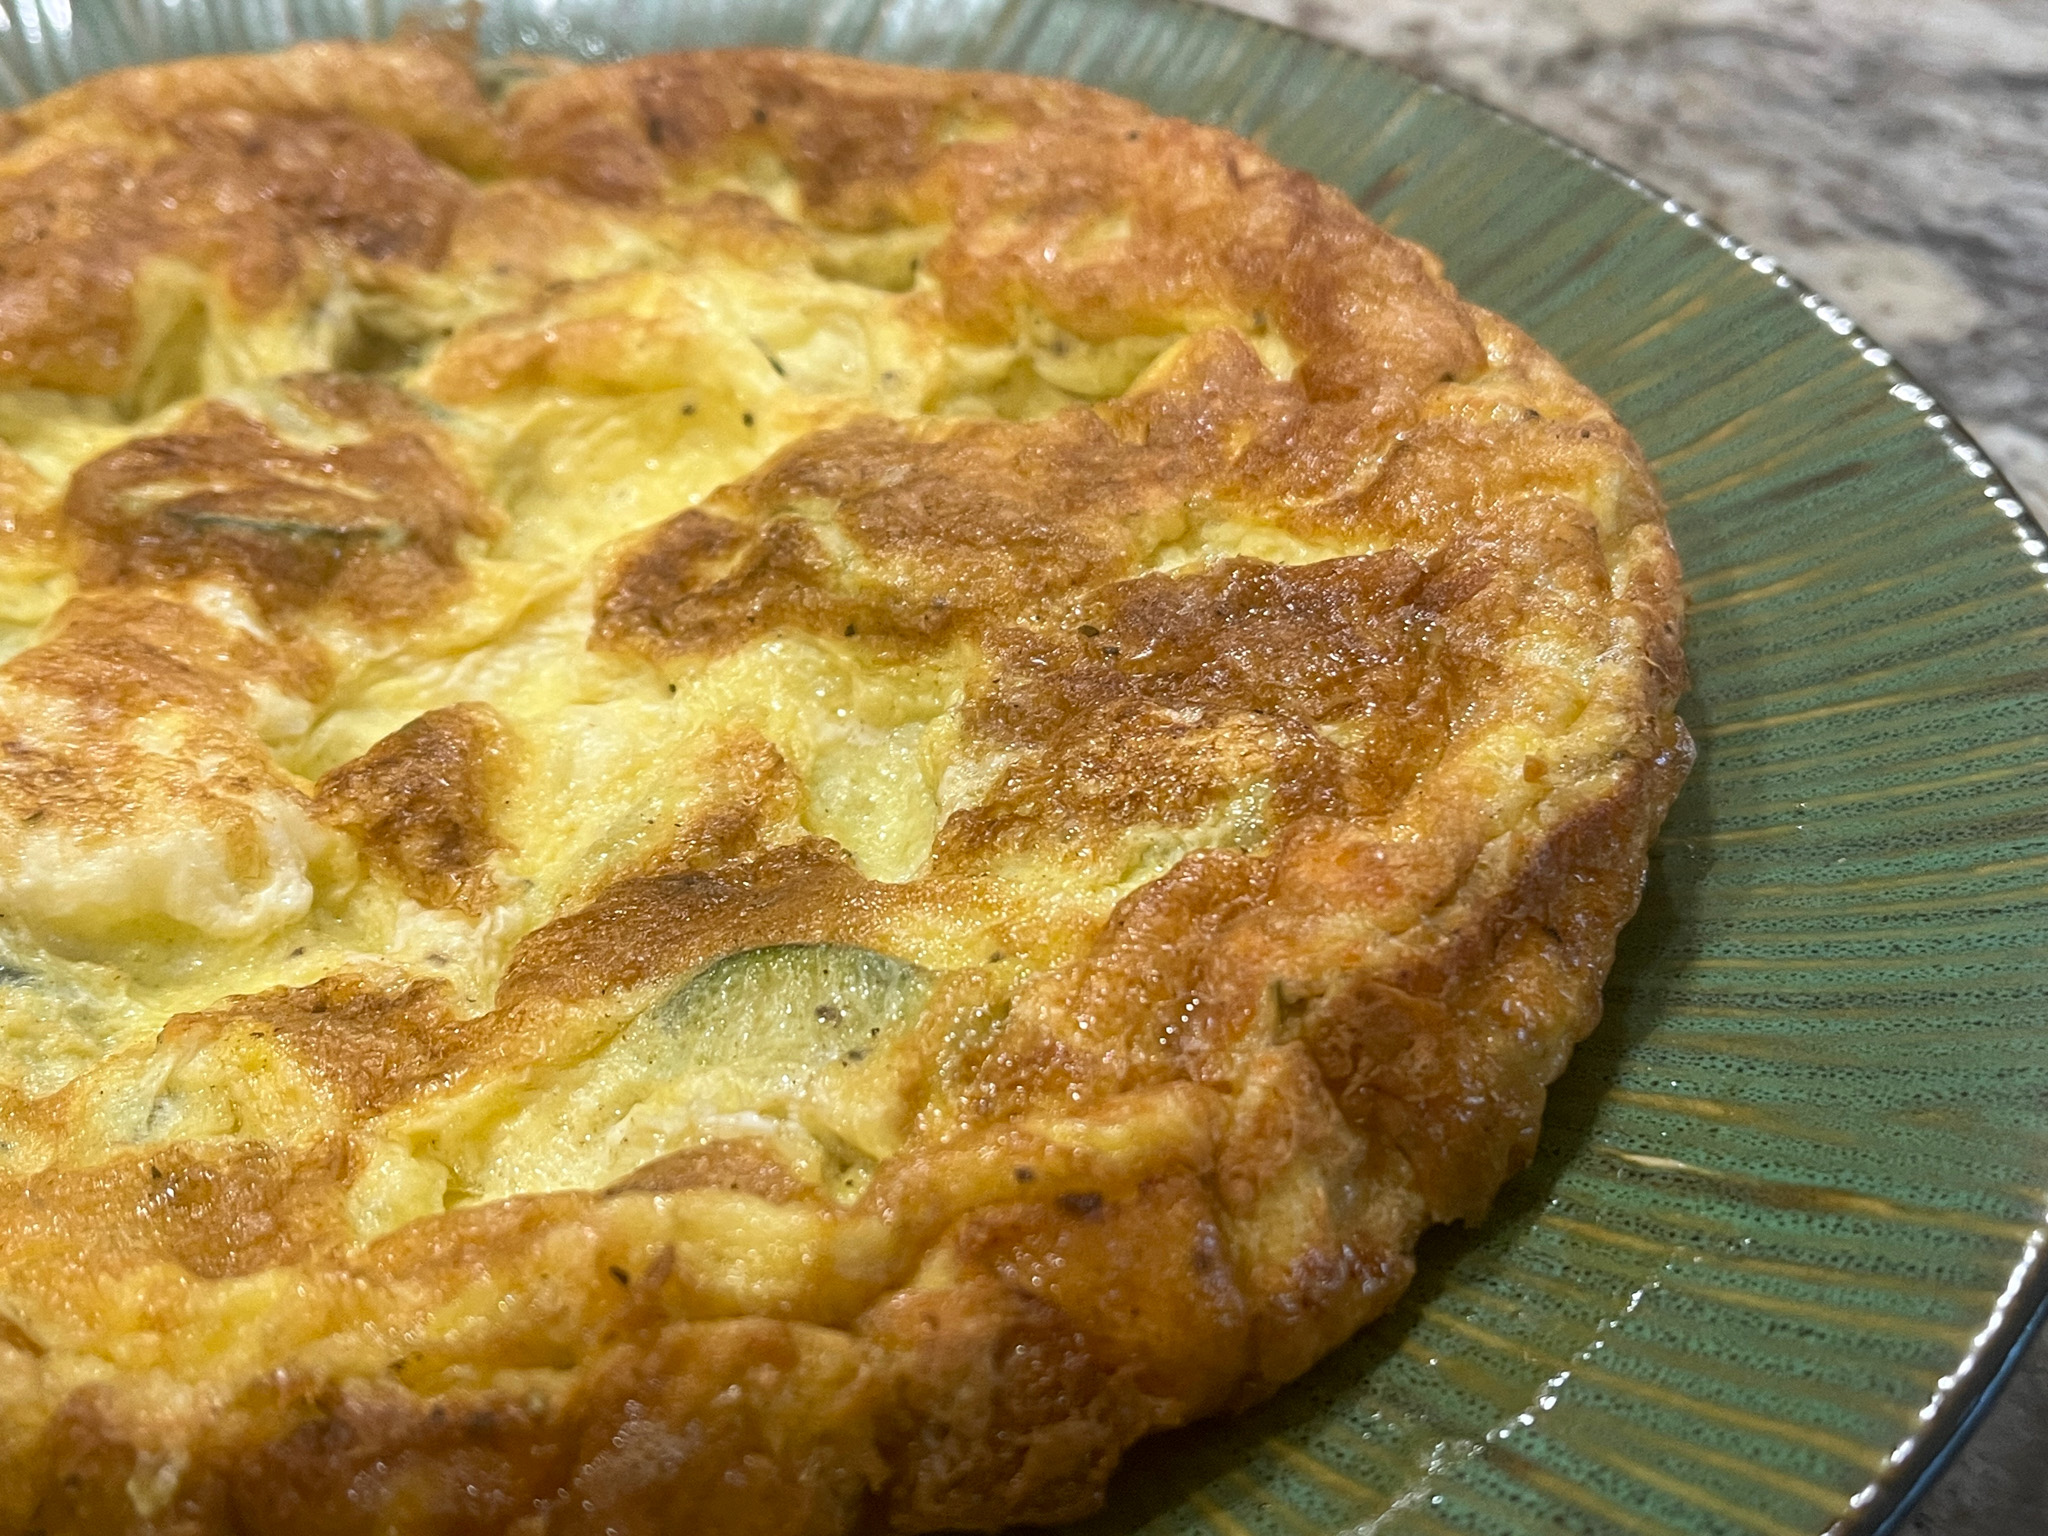
It’s been incredibly hot in this neck of the woods, so our dinners are for the most part light and easy to prepare. This frittata was inspired by a recipe from Elle a la Table. Delicious, even if the cucumber sauce seemed a bit unusual to be paired with it. They worked well together, much to my delight.

ZUCCHINI FRITTATA WITH CUCUMBER-YOGURT SAUCE
(inspired by Elle a la Table)

5 eggs
1 shallot, minced finely
1 zucchini (you might not need the whole zucchini, depending on its size)
20 g butter, divided
1 tablespoon grape seed oil
50 g pecorino cheese, grated
1/2 cucumber
150 g thick Greek yogurt
Herbes de Provence to taste
salt and pepper to taste

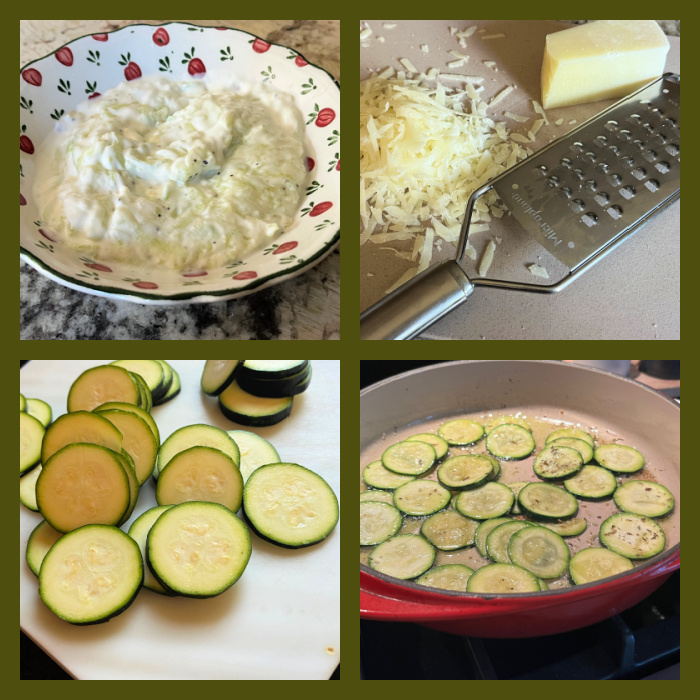
Prepare the sauce: peel and grate the cucumber. Mix them with the yogurt, Herbes de Provence, salt and pepper. Reserve in the fridge until needed.

Wash the zucchini and cut in very thin rounds, do not peel it. In a large frying pan, cook the shallot and zucchini slices with half the butter and the olive oil over medium heat for 10 minutes, stirring regularly.

Meanwhile, beat the eggs. Stir in the grated pecorino. Season with salt and pepper to taste. Increase the heat under the pan, add the remaining butter, and pour in the eggs. Cook until the bottom is fully set, cover the pan to allow steam to help start setting the top. Flip the frittata with the help of a plate, and cook the second side for a few minutes, util just set.

Serve with the cucumber sauce. It is also very good cold.

ENJOY!

to print the recipe, click here

Comments: I don’t buy Pecorino cheese that often, but I probably should. It has such a sharp bite, sometimes it’s exactly what you need. For the frittata I used my Tarte Tatin pan, which is quite appropriate with the handles that allow for efficient “flipping”. The diameter is 9 3/4 inch, 2 inches high. You will have to use the amount of zucchini slices that fully cover your pan, and also play with the number of eggs. Full coverage is needed, but you cannot add a large volume or it will be a mess to try and flip it. For our pan, five eggs was the perfect amount.

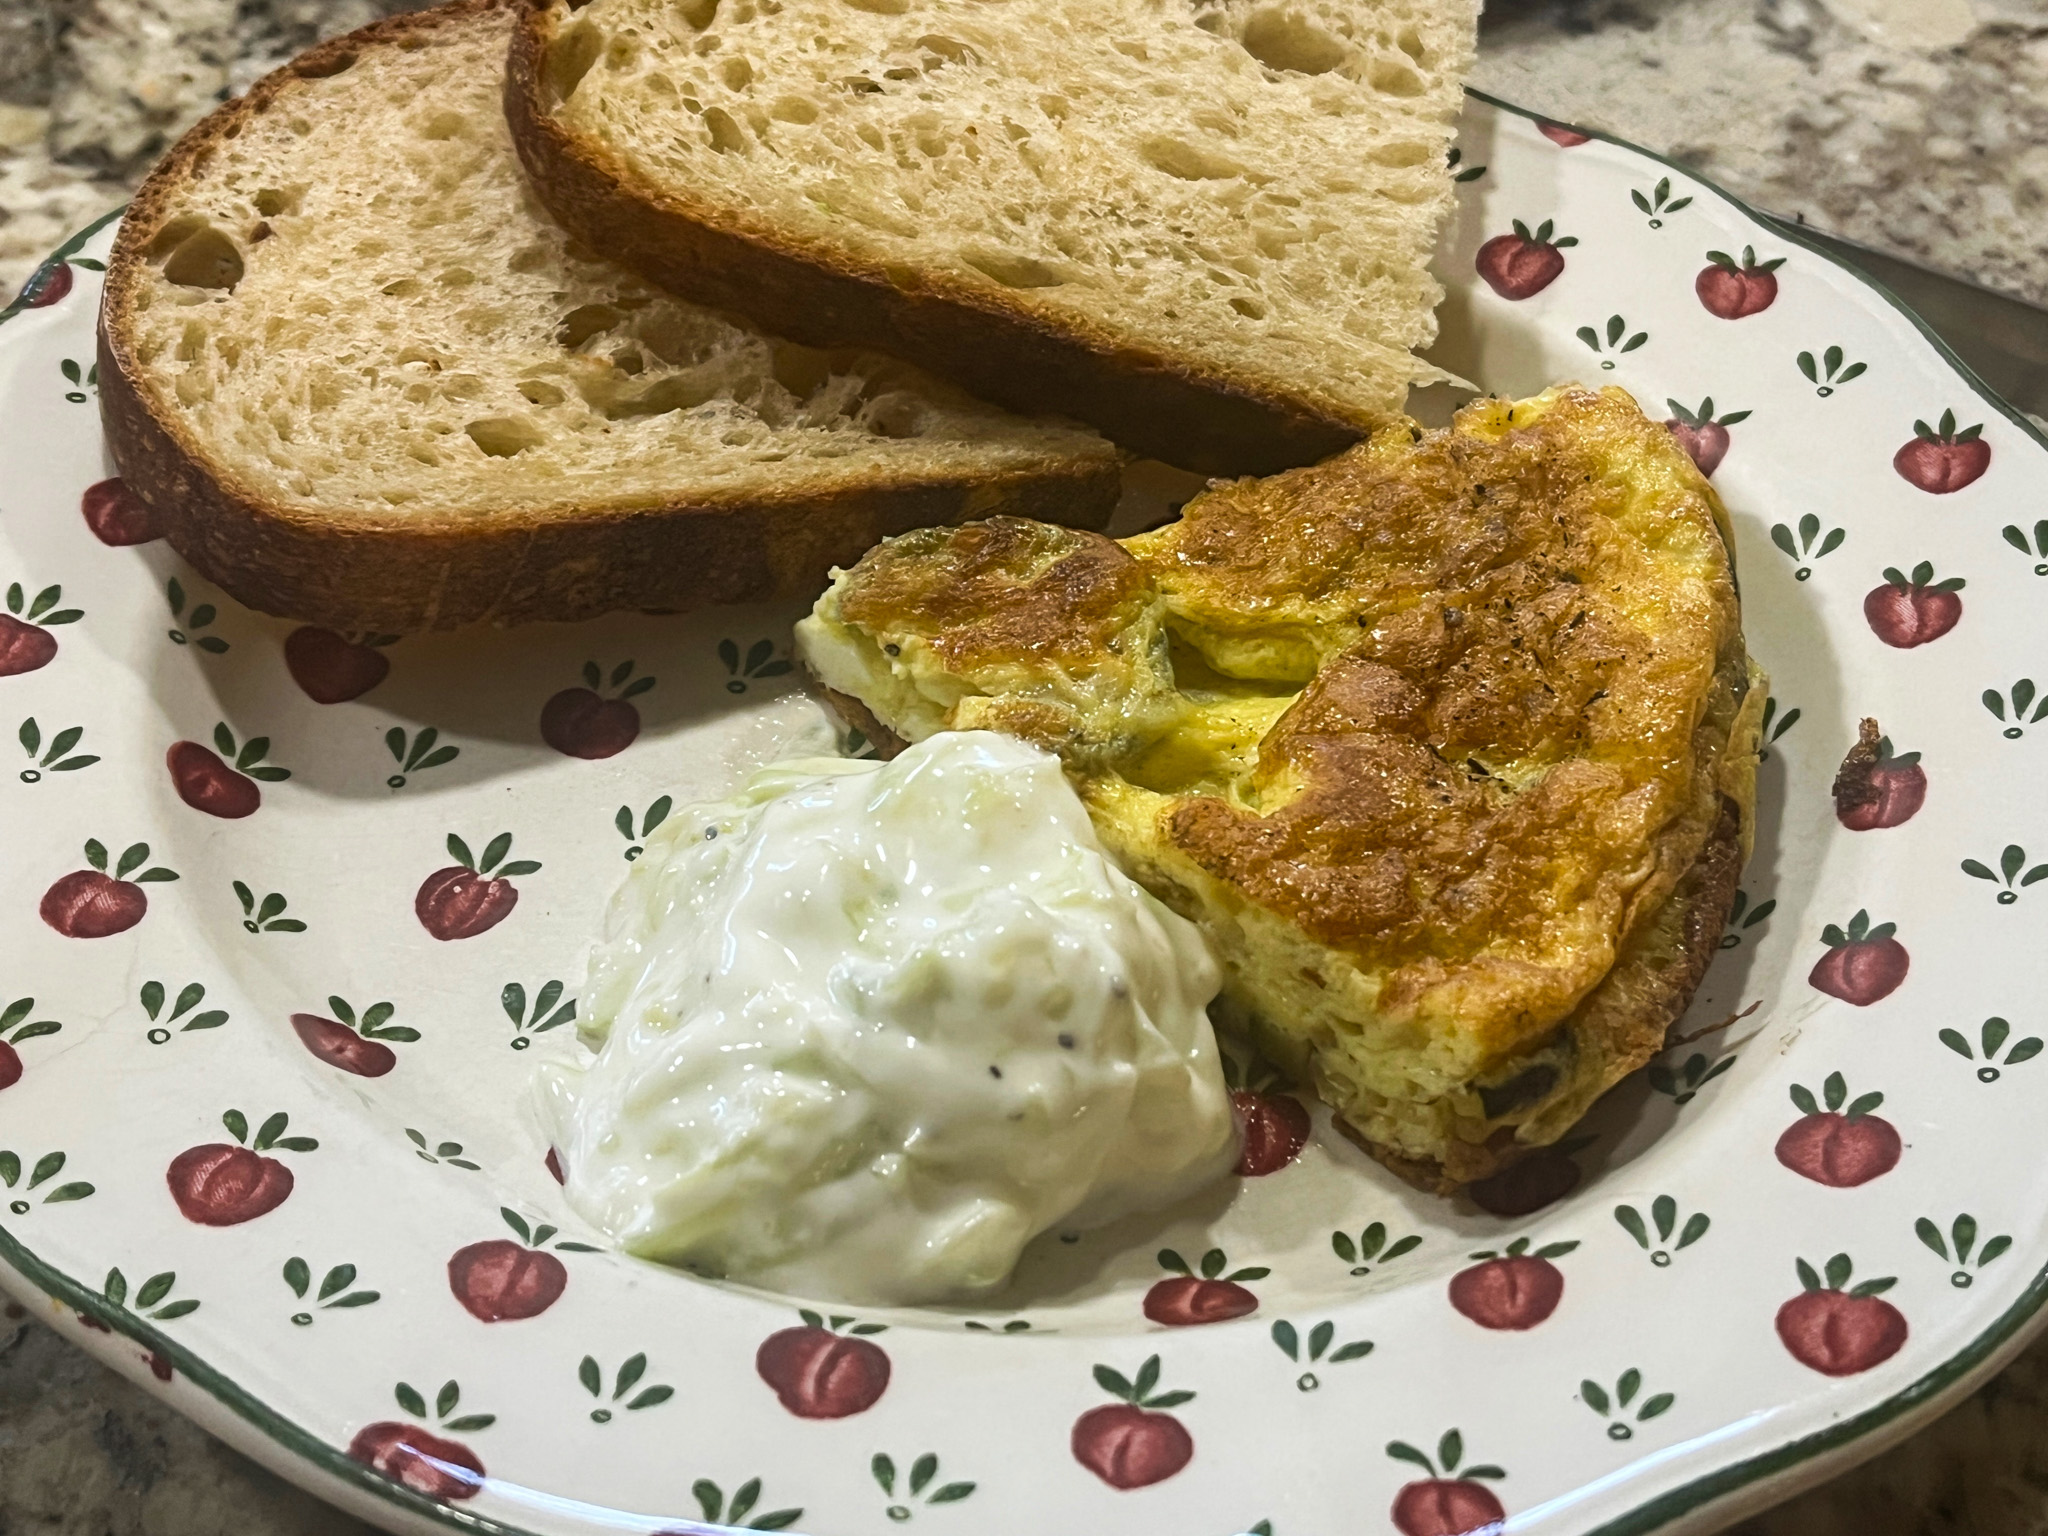
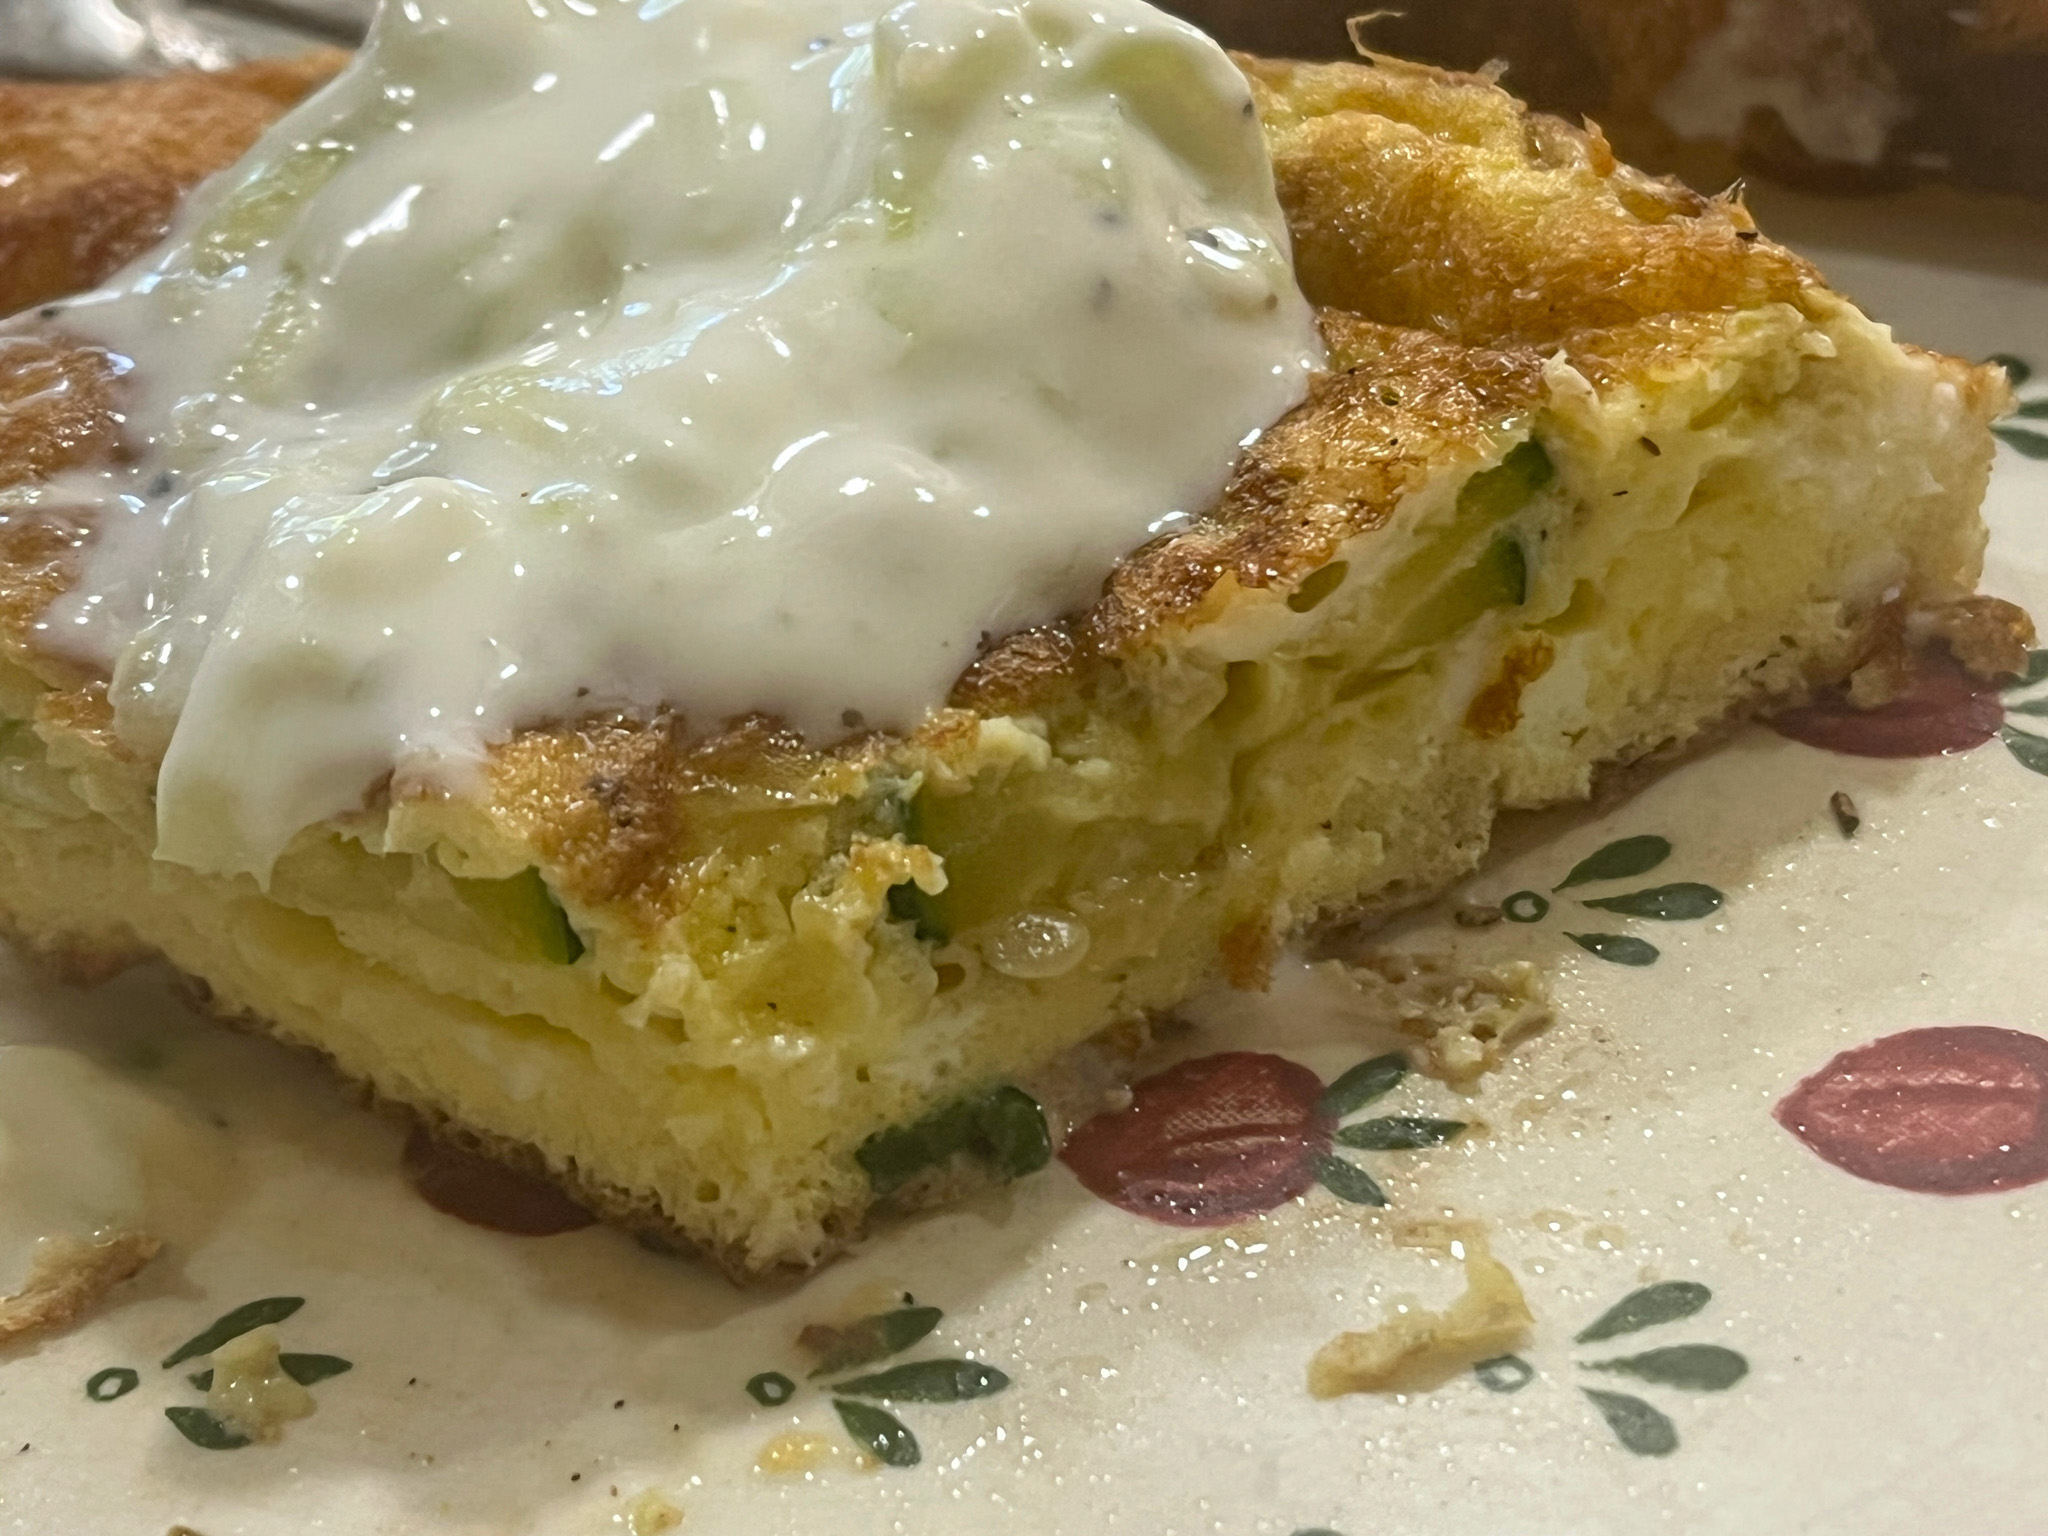
The cucumber sauce is quite refreshing, you can use it as a side dish for all sorts of meals, I am dreaming of grilled salmon next. I was not sure if I was going to like the combination, so I added alongside. But here’s my second helping…

.

Very delicious, simple and light dinner. Slices of sourdough were of course much appreciated also…

1 YEAR AGO: A Trio of Brownies

2 YEARS AGO: A Typical Dinner at The Bewitching Kitchen

3 YEARS AGO: Rolled Buttercream

4 YEARS AGO:  Miso-Ginger Turkey Meatballs with Cabbage “Noodles”

5 YEARS AGO: Smoked Shrimp Tacos with Roasted Jalapeño Salsa

6 YEARS AGO: Corn Fritters

7 YEARS AGO: Minnie Macarons

8 YEARS AGO: Air-Fried Mexican Meatloaf

9 YEARS AGO: Mimi’s Sticky Chicken, a Call from my Past

10 YEARS AGO: Perfect Soy-Grilled Steak

11 YEARS AGO: The Devil’s Bread

12 YEARS AGO: Heart of Palm Salad Skewers

13 YEARS AGO: Potluck Frittata and Lavoisier

14 YEARS AGO: Home-made Corn Tortillas

15 YEARS AGO: Whole-Wheat Spaghetti with Peanut Sauce

16 YEARS AGO: Brigadeiros: A Brazilian Party!

17 YEARS AGO: Lemony Asparagus

CRISPY CARROT CHIPS

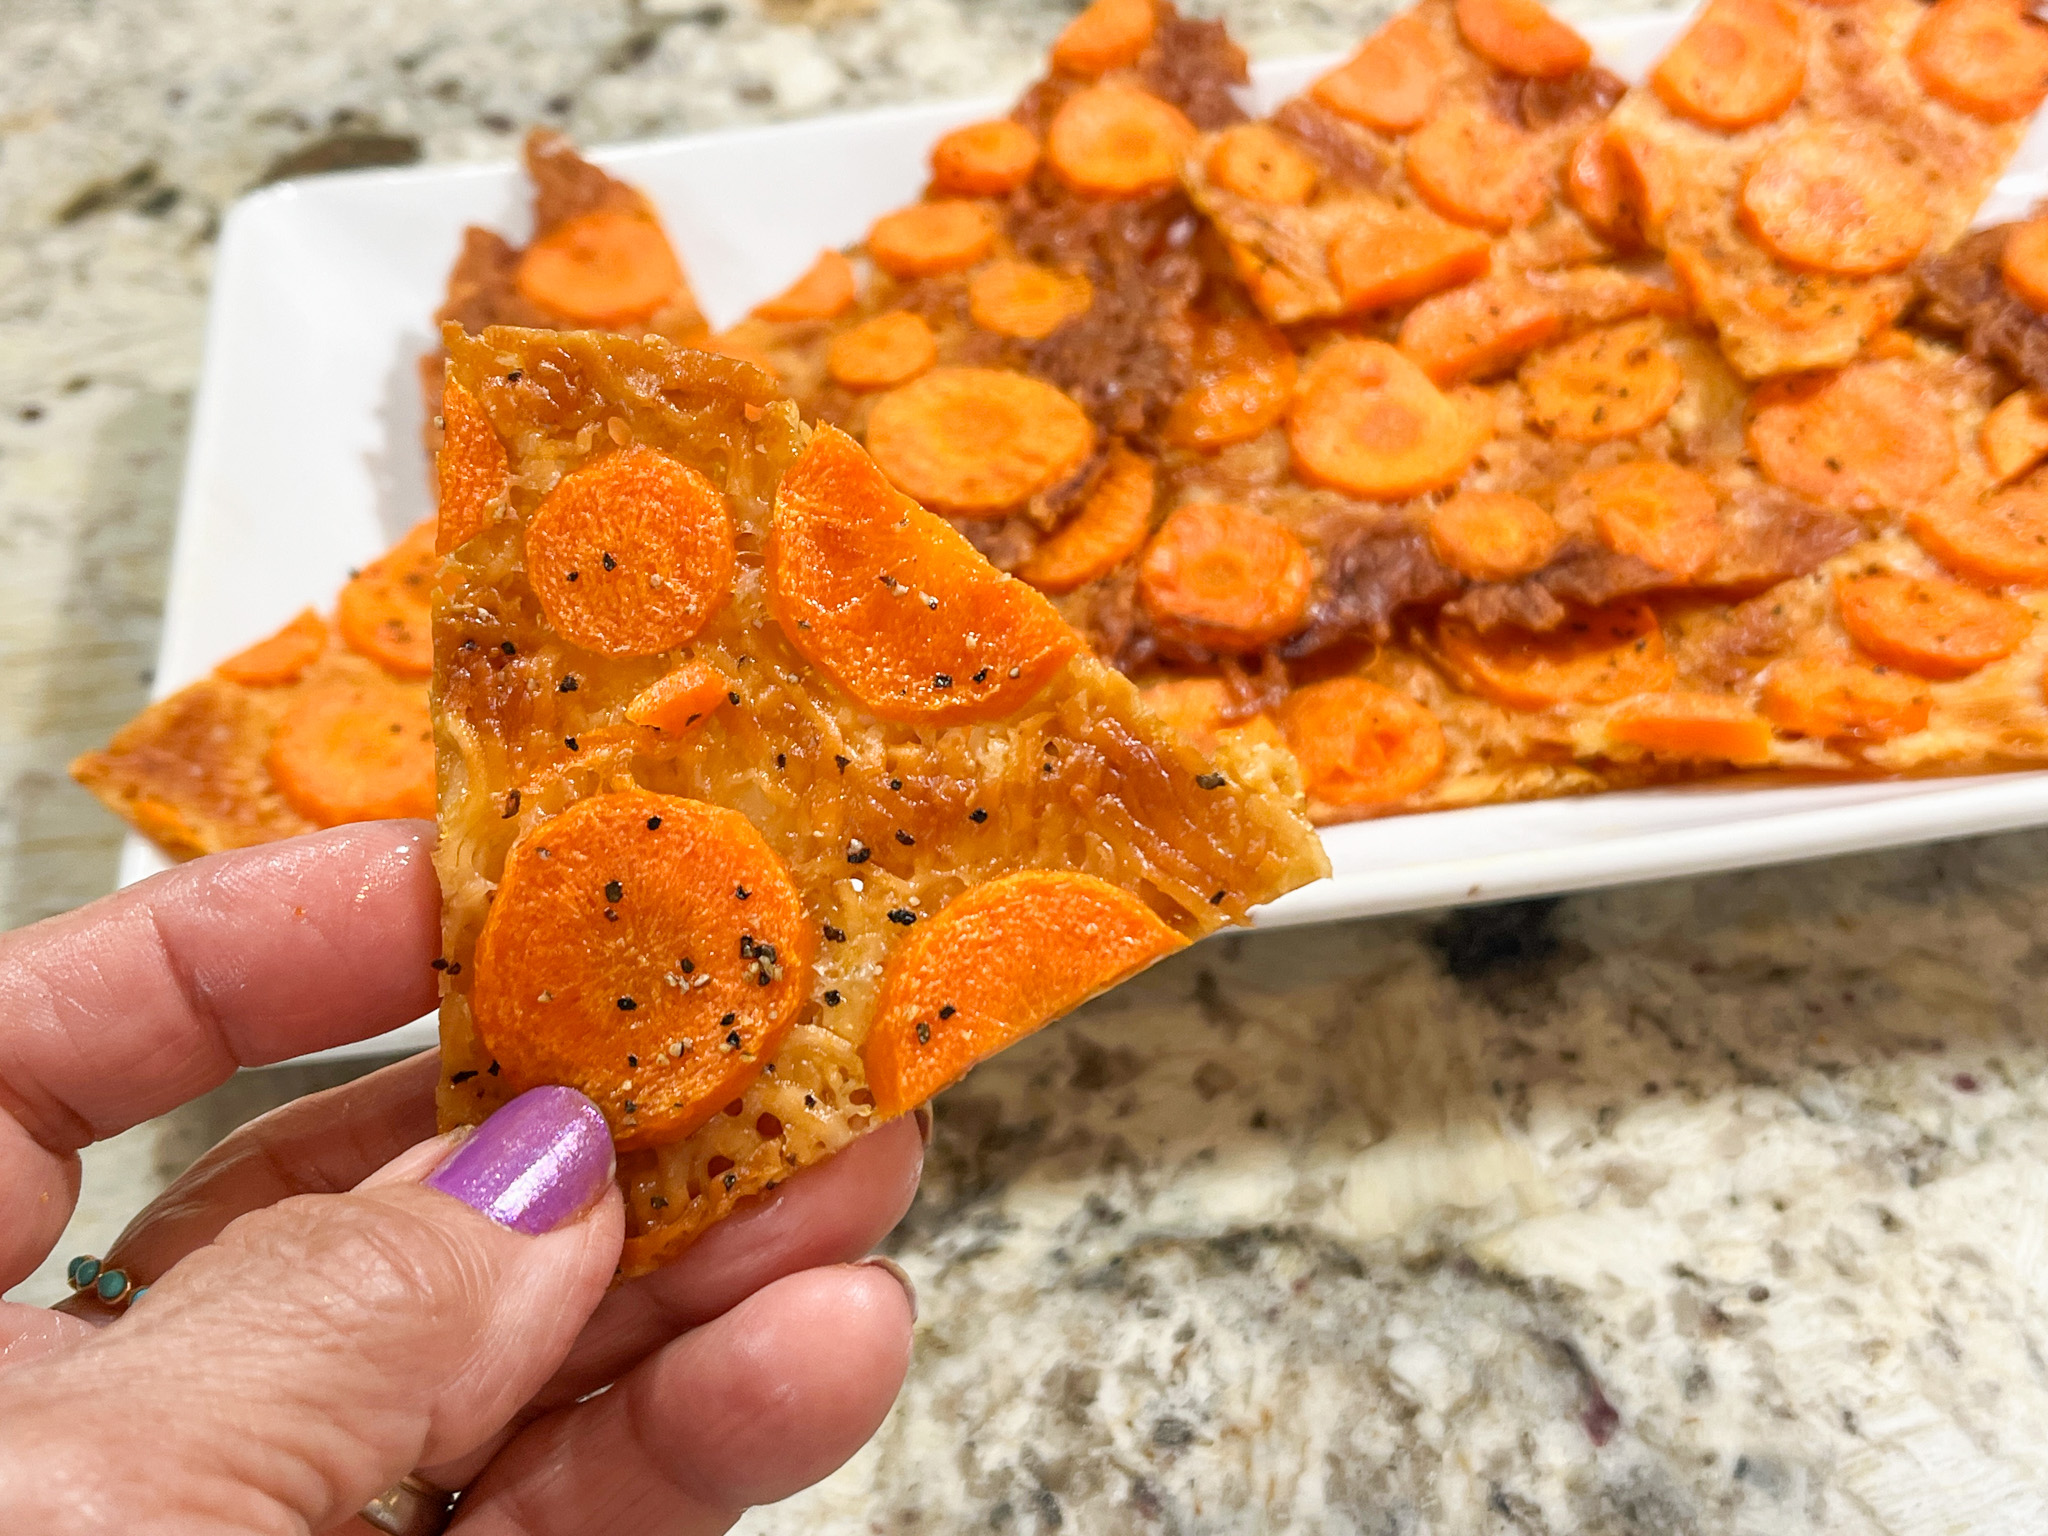
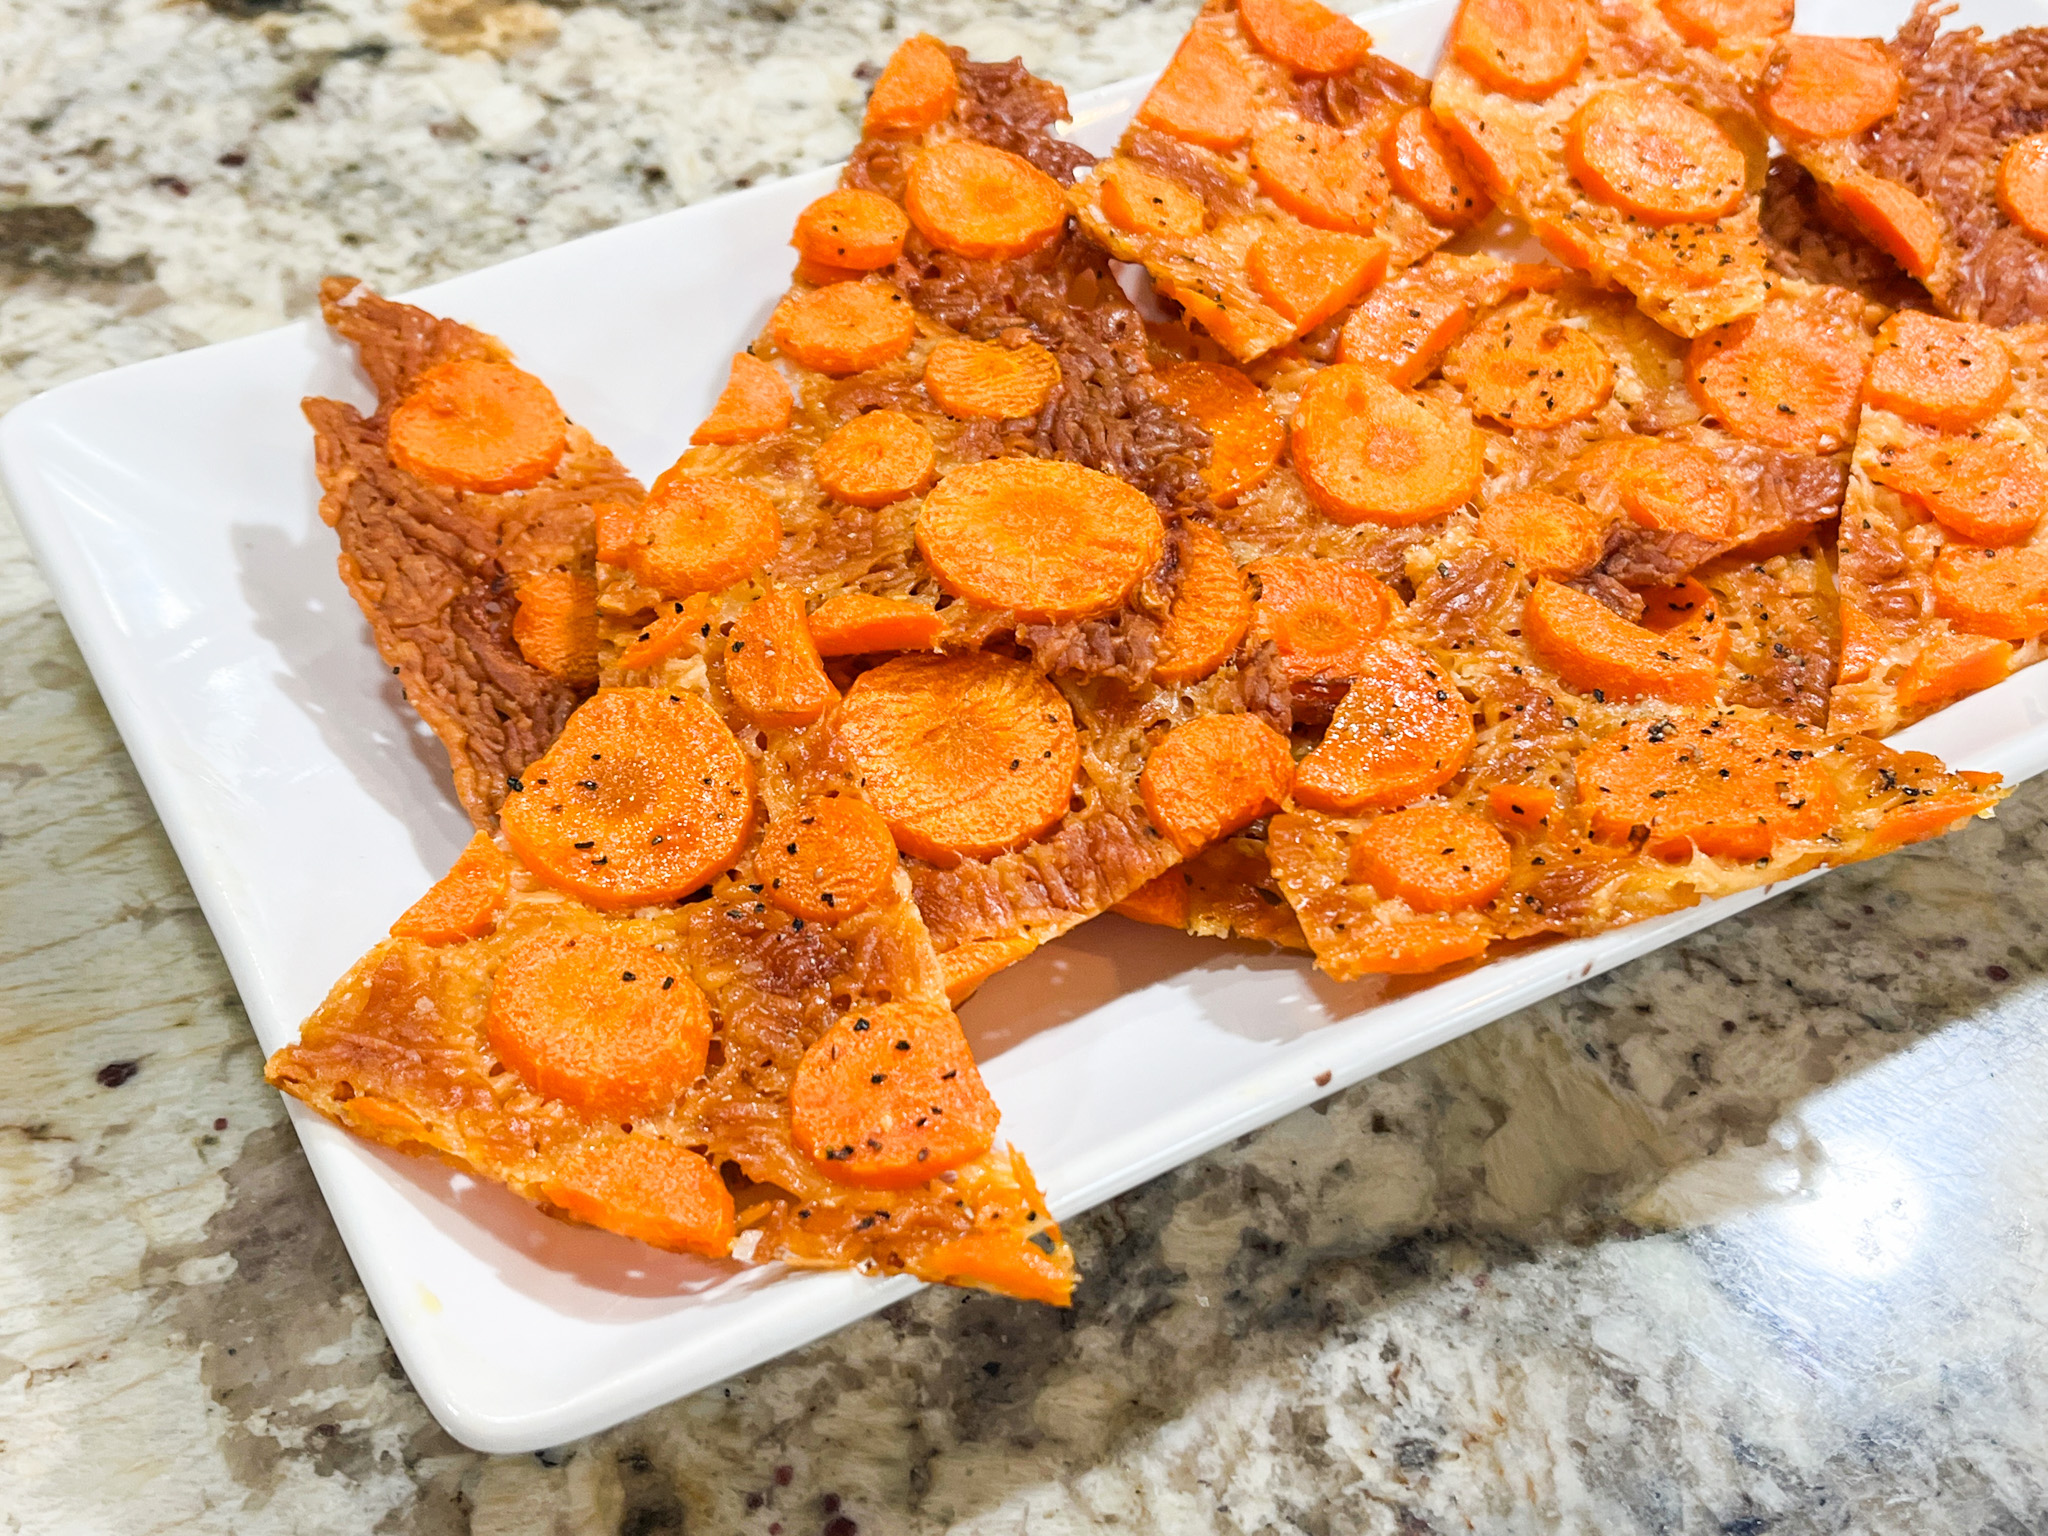
Ready for a totally crazy recipe that seems like a disaster in the making but… it is actually pretty delicious? I cannot take any credit for it, first saw it in the fun blog Hungry Happens. I made a few adjustments and share with you my version.


CRISPY CARROT CHIPS
(adapted from Hungry Happens)

6 oz shredded parmesan cheese
3 large carrots, peeled
olive oil spray or 1 tablespoon olive oil
salt and paprika to taste

Heat your oven to 400℉. Line a half-baking sheet with parchment paper.

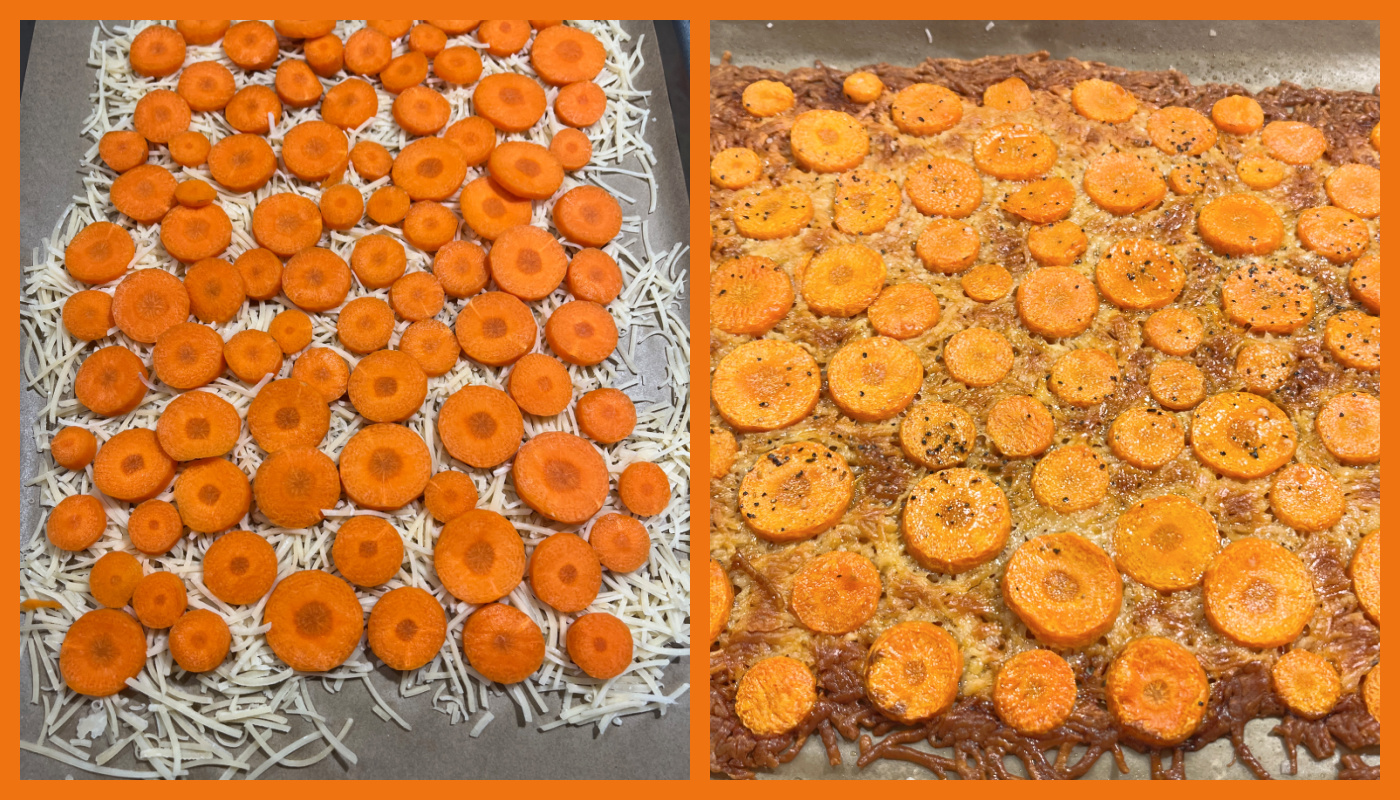
Sprinkle the parmesan cheese on the paper to form an even layer. Slice your carrot into medium thickness coins, around 1/8 inch thick. Place them on top of the parmesan cheese to form a uniform layer. It is best if they touch and you have just a little space between the pieces. LIGHTLY brush the tops with olive oil (or use olive spray, see my comments) and season with salt and paprika to taste. Bake for 20 minutes or until the edges are mostly brown and the middle is golden brown. Allow to cool for a few minutes and tear into chips using scissors.

ENJOY!

to print the recipe, click here


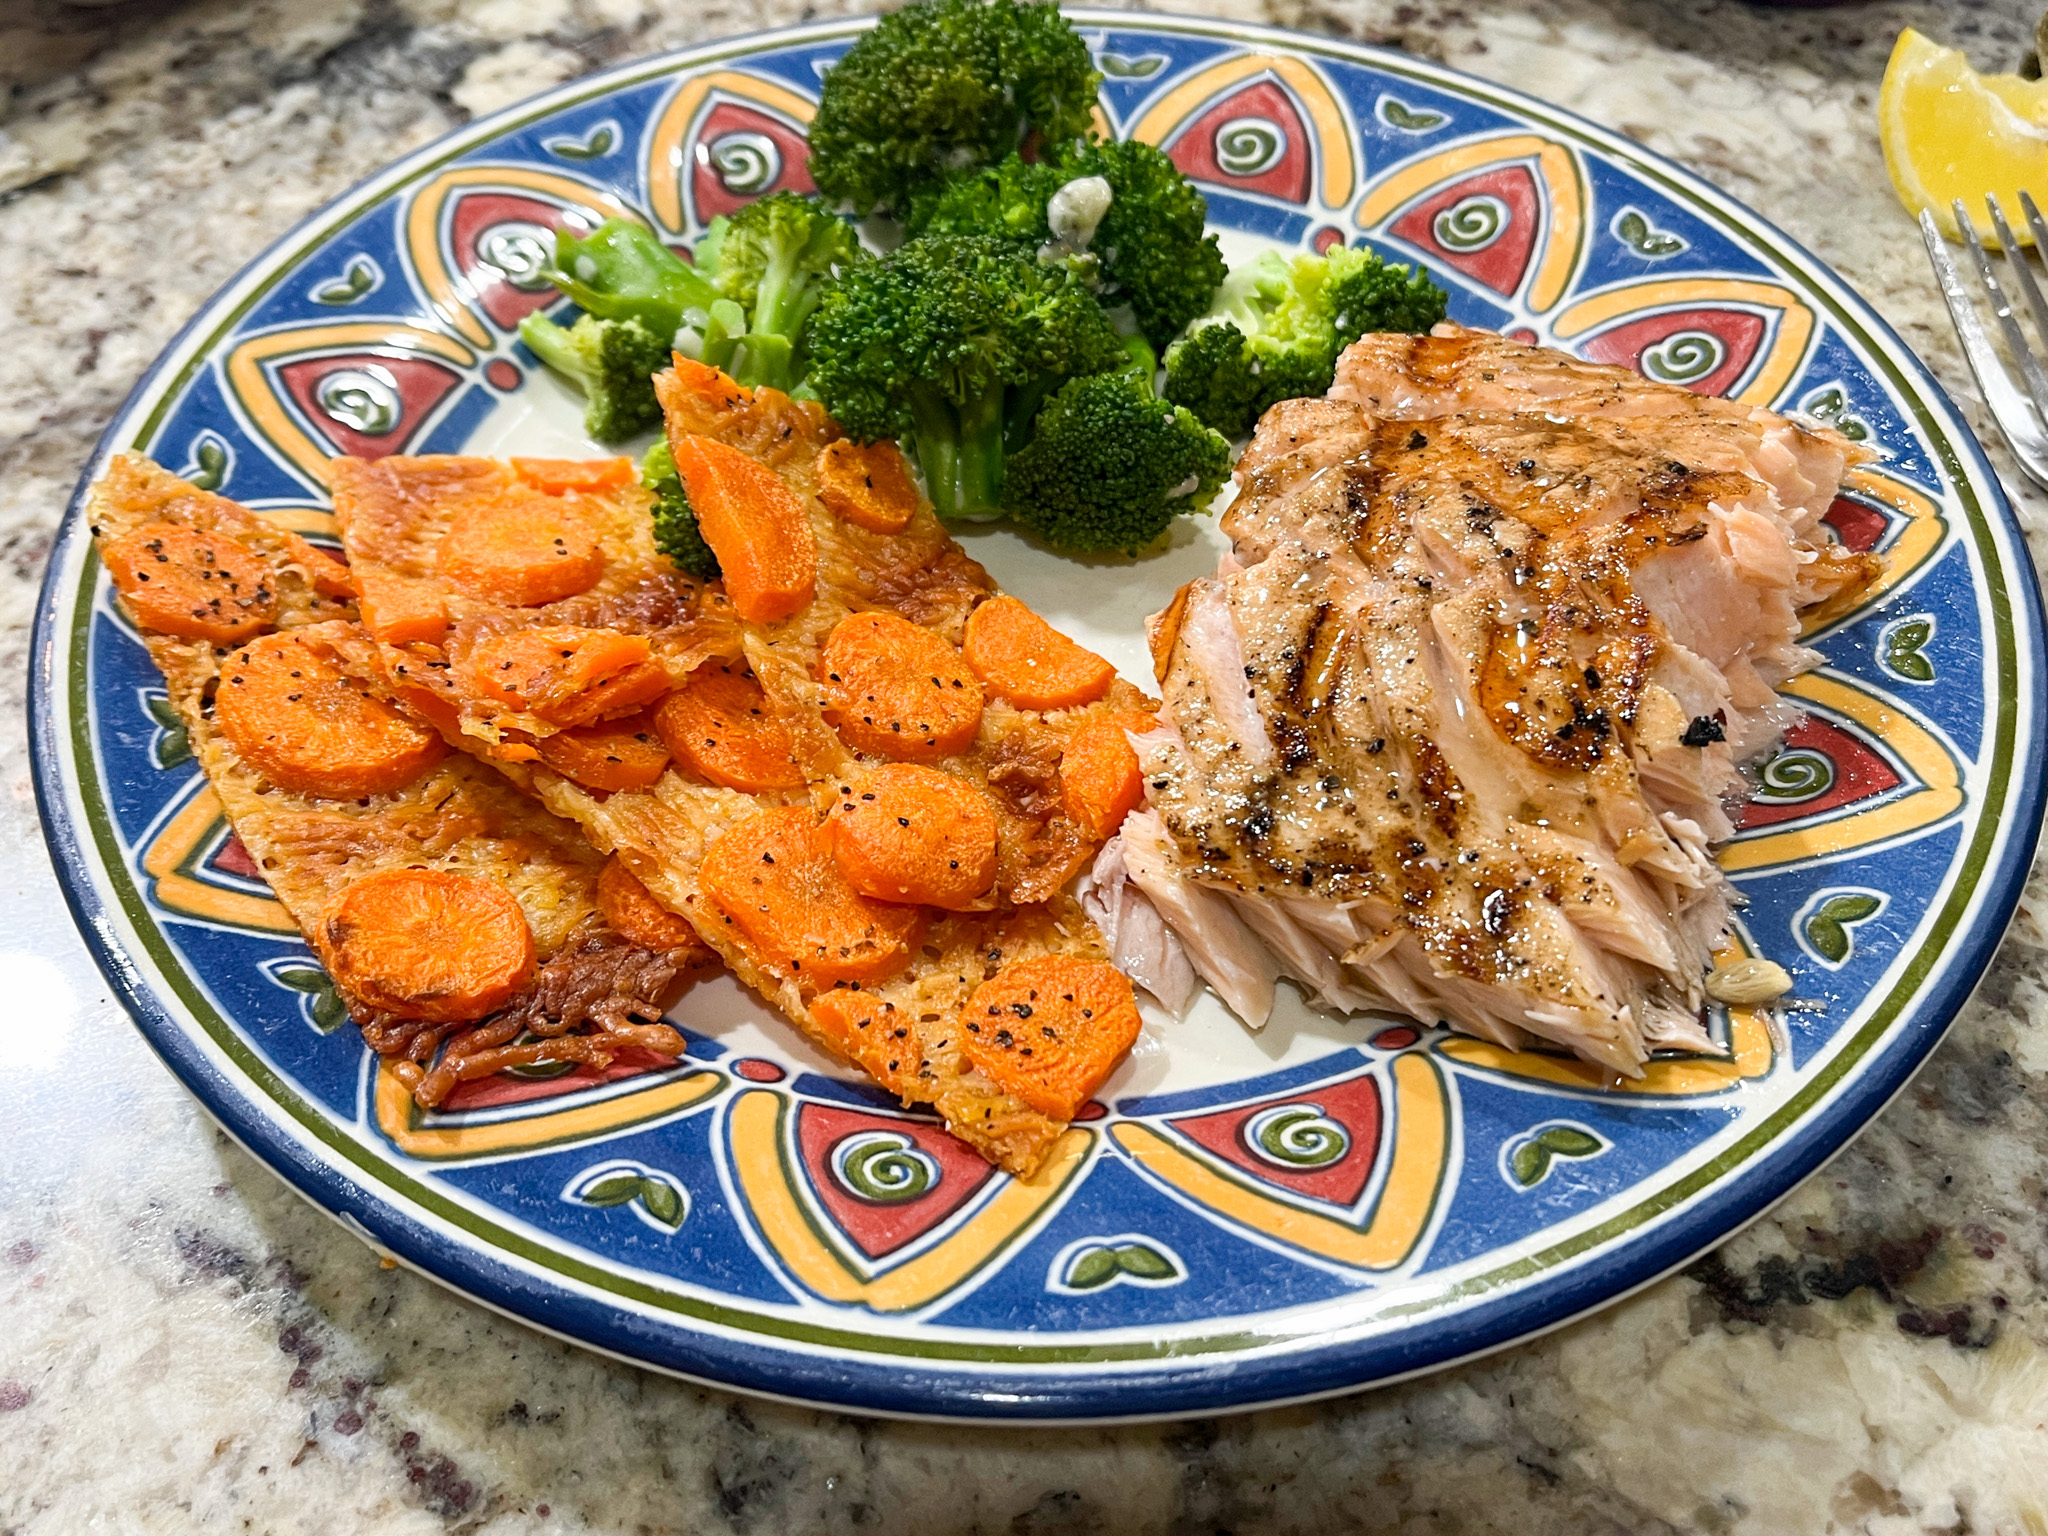
Comments: In our grocery store, we find pre-shredded Parmigiano cheese in 6 oz bags, so that’s what I opted to use in this recipe. But let me advise you to grate your own instead, which is not that hard and as Eha mentioned in her comment, a healthier option! Do as I say, not as I did….. In the original Hungry Happens version, she brushes the top of the carrots with olive oil and I thought it would be too much work, so I used a spray. I now believe that it might be best either to do as she recommended, or lightly spraying the slices of carrots before laying them on the cheese layer. Spraying the olive oil all over made the cheese component a bit greasy. So consider that. I will be making it again, but was so excited about this recipe, I decided to share it right away.

The cheese layer, if left unprotected by carrots, will darken quickly. Use as many carrots as you can to cover it all to the edges. I used scissors to cut the “chips” and like the way that looked. Super unusual recipe indeed, but I am sold! We had it alongside grilled salmon, courtesy of the husband, and steamed broccoli. Now, do you want to know something truly amazing? Leftovers were great enjoyed FROM THE FRIDGE, standing up. I am not even remotely ashamed.

1 YEAR AGO: Peanut Butter Energy Bars

2 YEARS AGO: Cocoa-Lattice Sourdough

3 YEARS AGO: Pistachio Sugar Cookies, the Uzbek Way

4 YEARS AGO: Carrots and Zucchini Stir-Fry with Peanut Sauce

5 YEARS AGO: Cookie Therapy, Anyone?

6 YEARS AGO: The Quasi-Vegan Quiche

7 YEARS AGO: Not Quite Moqueca

8 YEARS AGO: Roasted Butternut Squash with Cashew Nuts

9 YEARS AGO: Mississippi Roast and the Open Mind

10 YEARS AGO: Walnut-Raisin Bran Muffins

11 YEARS AGO: A Star is Born!

12 YEARS AGO: Chestnut Flour Sourdough Bread

13 YEARS AGO: Kinpira Gobo and Japanese Home Cooking

14 YEARS AGO: Walnut Sourdough

15 YEARS AGO: Thai Chicken Curry

16 YEARS AGO: Zen and the art of risotto

HEART-SHAPED FONDANT POTATOES

Valentine’s Day is coming up, so if you are cooking at home, this would be a perfect side dish… A little bit tricky to get the timing of everything right the first time, but we absolutely loved this recipe.

HEART-SHAPED FONDANT POTATOES
(from The Bewitching Kitchen)

Medium-large Yukon Gold Potatoes
1 quart warm water
4 tsp salt
2 tablespoons olive oil
salt and pepper to taste
2 tablespoons butter
1 to 2 cups chicken broth
sprigs of rosemary and thyme

1 heart shaped cookie cutter, preferably metal

Cut the potatoes in slices as thick as your cookie cutter. Use the cookie cutter to get heart shapes, as many as you want and will fit an oven-safe skillet in one single layer. Place the slices of potato in a bowl with the warm water and salt for 2 to 6 hours.

Remove the potatoes from the brine, dry them well. Heat the olive oil in a skillet, when really hot, add the slices of potato and let the first side brown well. Season with a little pepper, you might want to skip the salt due to the brining. Brown the first side for about 4 minutes. Flip the slices over, add the butter, once it melts, remove the pan from the heat and carefully add the chicken stock, to about half the height of the potatoes. Add the rosemary and thyme.

Cover the pan and transfer to a 400F oven for 25 to 30 minutes. Remove the sprigs of herbs, and spoon some of the cooking liquid over the potatoes. Serve immediately.

ENJOY!

to print the recipe, click here


Comments: Fondant potatoes are a classic, but as you might imagine, I had to reduce a little bit the amount of butter. It did not compromise the taste, they were melt-in-your-mouth tender and super flavorful. In the classic version, cubes of potatoes much larger are used, and the cooking time is longer. It is al little tricky to make it work with thinner slices, but worth the trouble. Leftovers, in case you are wondering were spectacular still two days later. We enjoyed them with beef tenderloin and asparagus. Ate like Royalty. Not surprising, since a Prince lives with us…

ONE YEAR AGO: Coconut Cupcakes get Frosty

TWO YEARS AGO: Mexican Bolillos

THREE YEARS AGO: Brazilian Style Banana Cake

FOUR YEARS AGO: Tiger Shrimp in Chili Sauce

FIVE YEARS AGO: Tangzhong Hamburger Buns

SIX YEARS AGO: Potato Soup with Spicy Shrimp

SEVEN YEARS AGO: Rose-Harissa Chicken Thighs

EIGHT YEARS AGO: Caramel-Chocolate Tartlets

NINE YEARS AGO: Chicken Korma-ish

TEN YEARS AGO: Sunday Gravy with Braciola

ELEVEN YEARS AGO: In My Kitchen, February 2015

TWELVE YEARS AGO: Avocado and Orange Salad with Charred Jalapeno Dressing

THIRTEEN YEARS AGO: Green Olive, Walnuts and Pomegranate Salad

FOURTEEN YEARS AGO: Romanian Flatbreads

FIFTEEN YEARS AGO: Ziti with Artichokes and Meyer Lemon Sauce

SIXTEEN YEARS AGO: Blasted Broccoli, Stove-top version