FOR THE LOVE OF RYE

How do you feel about rye flour? I love the taste, but don’t particularly enjoy working with it, as the dough handles in a completely different way from those made with regular wheat flour. Today I share two sourdough recipes that call for rye, the first one quite heavily, the second as a small component of the bread. Both are quite substantial and very flavorful.
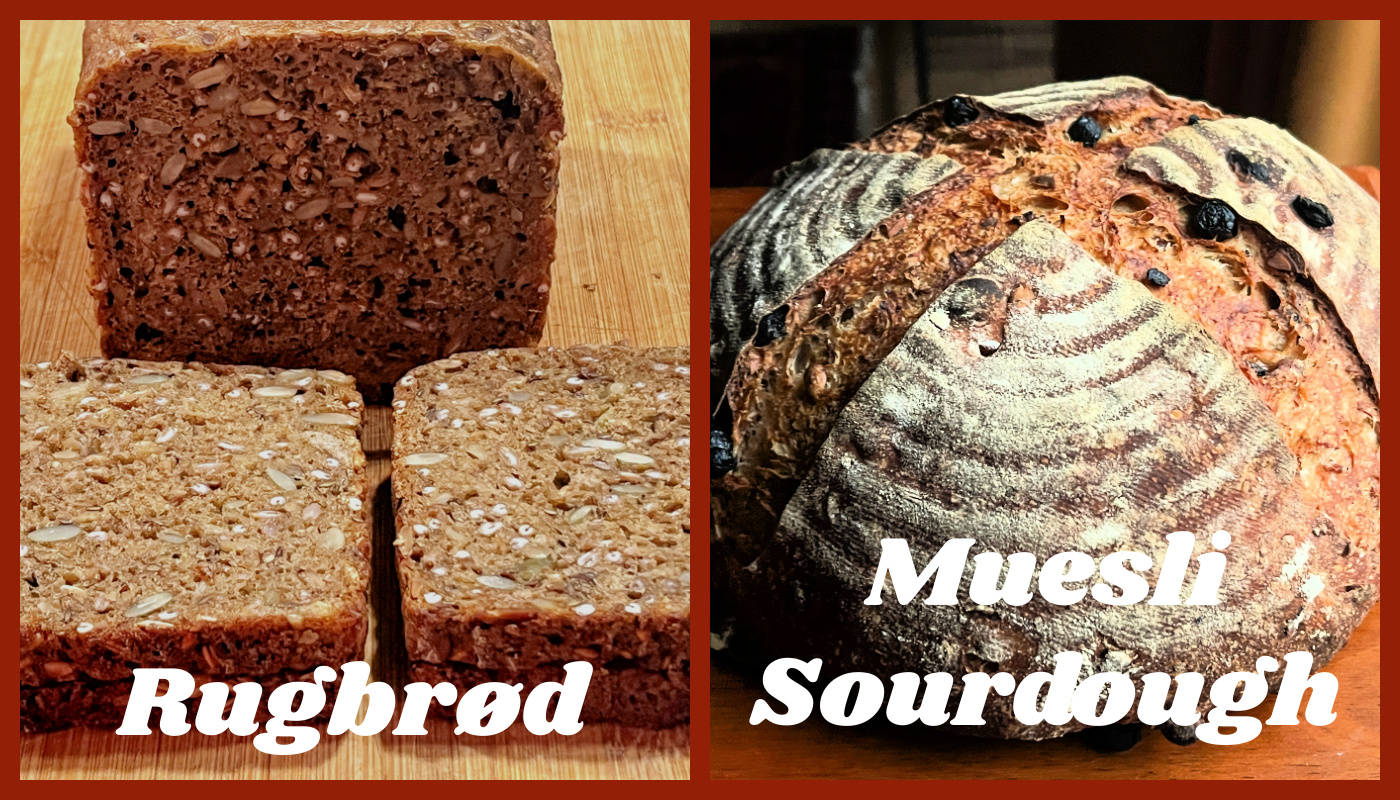
I cannot share the recipe for Rugbrød, but you can find it in Sourdough Everything, a book just published by Rachel Pardoe, aka Sourdough Enzo of Instagram fame. I’ve been following her for a long time, and was thrilled to see she wrote her first cookbook. I bookmarked quite a few recipes, but started with Rugbrød (Danish Rye) because it is one of my all-time favorites. Plus, it can be a bit intimidating to make, as rye flour is a major component.
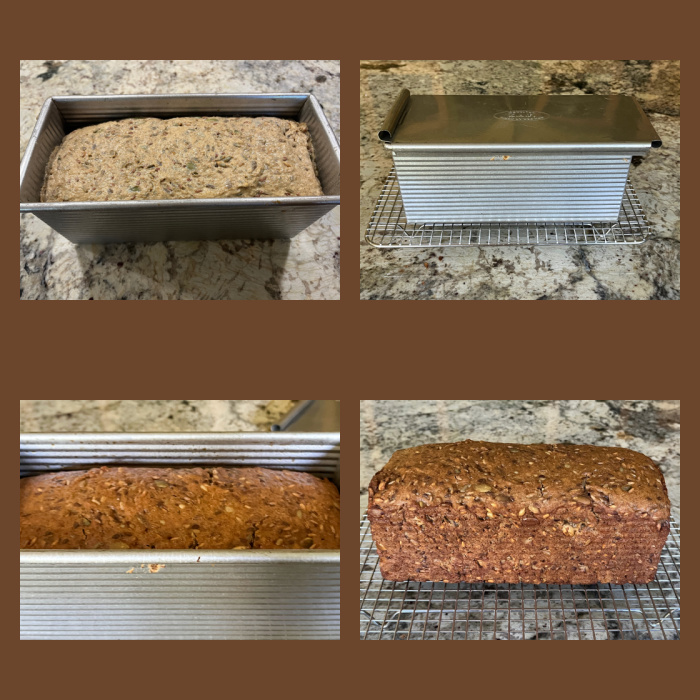
The bread takes a seed soaker made the day before, with rye berries, sunflower, pumpkin and flaxseeds. The starter is made with rye flour, also the day before. It is a slow process, and I advise you to remove a small portion of the dough and place in a small vial to follow fermentation. This is something I’ve been doing regularly for about a year and I feel a lot more confident about when to move the bread from room temperature to fridge for the overnight proof. The bread was absolutely delicious, and kept well at room temperature for several days, although we ended up slicing and freezing, like we always do.
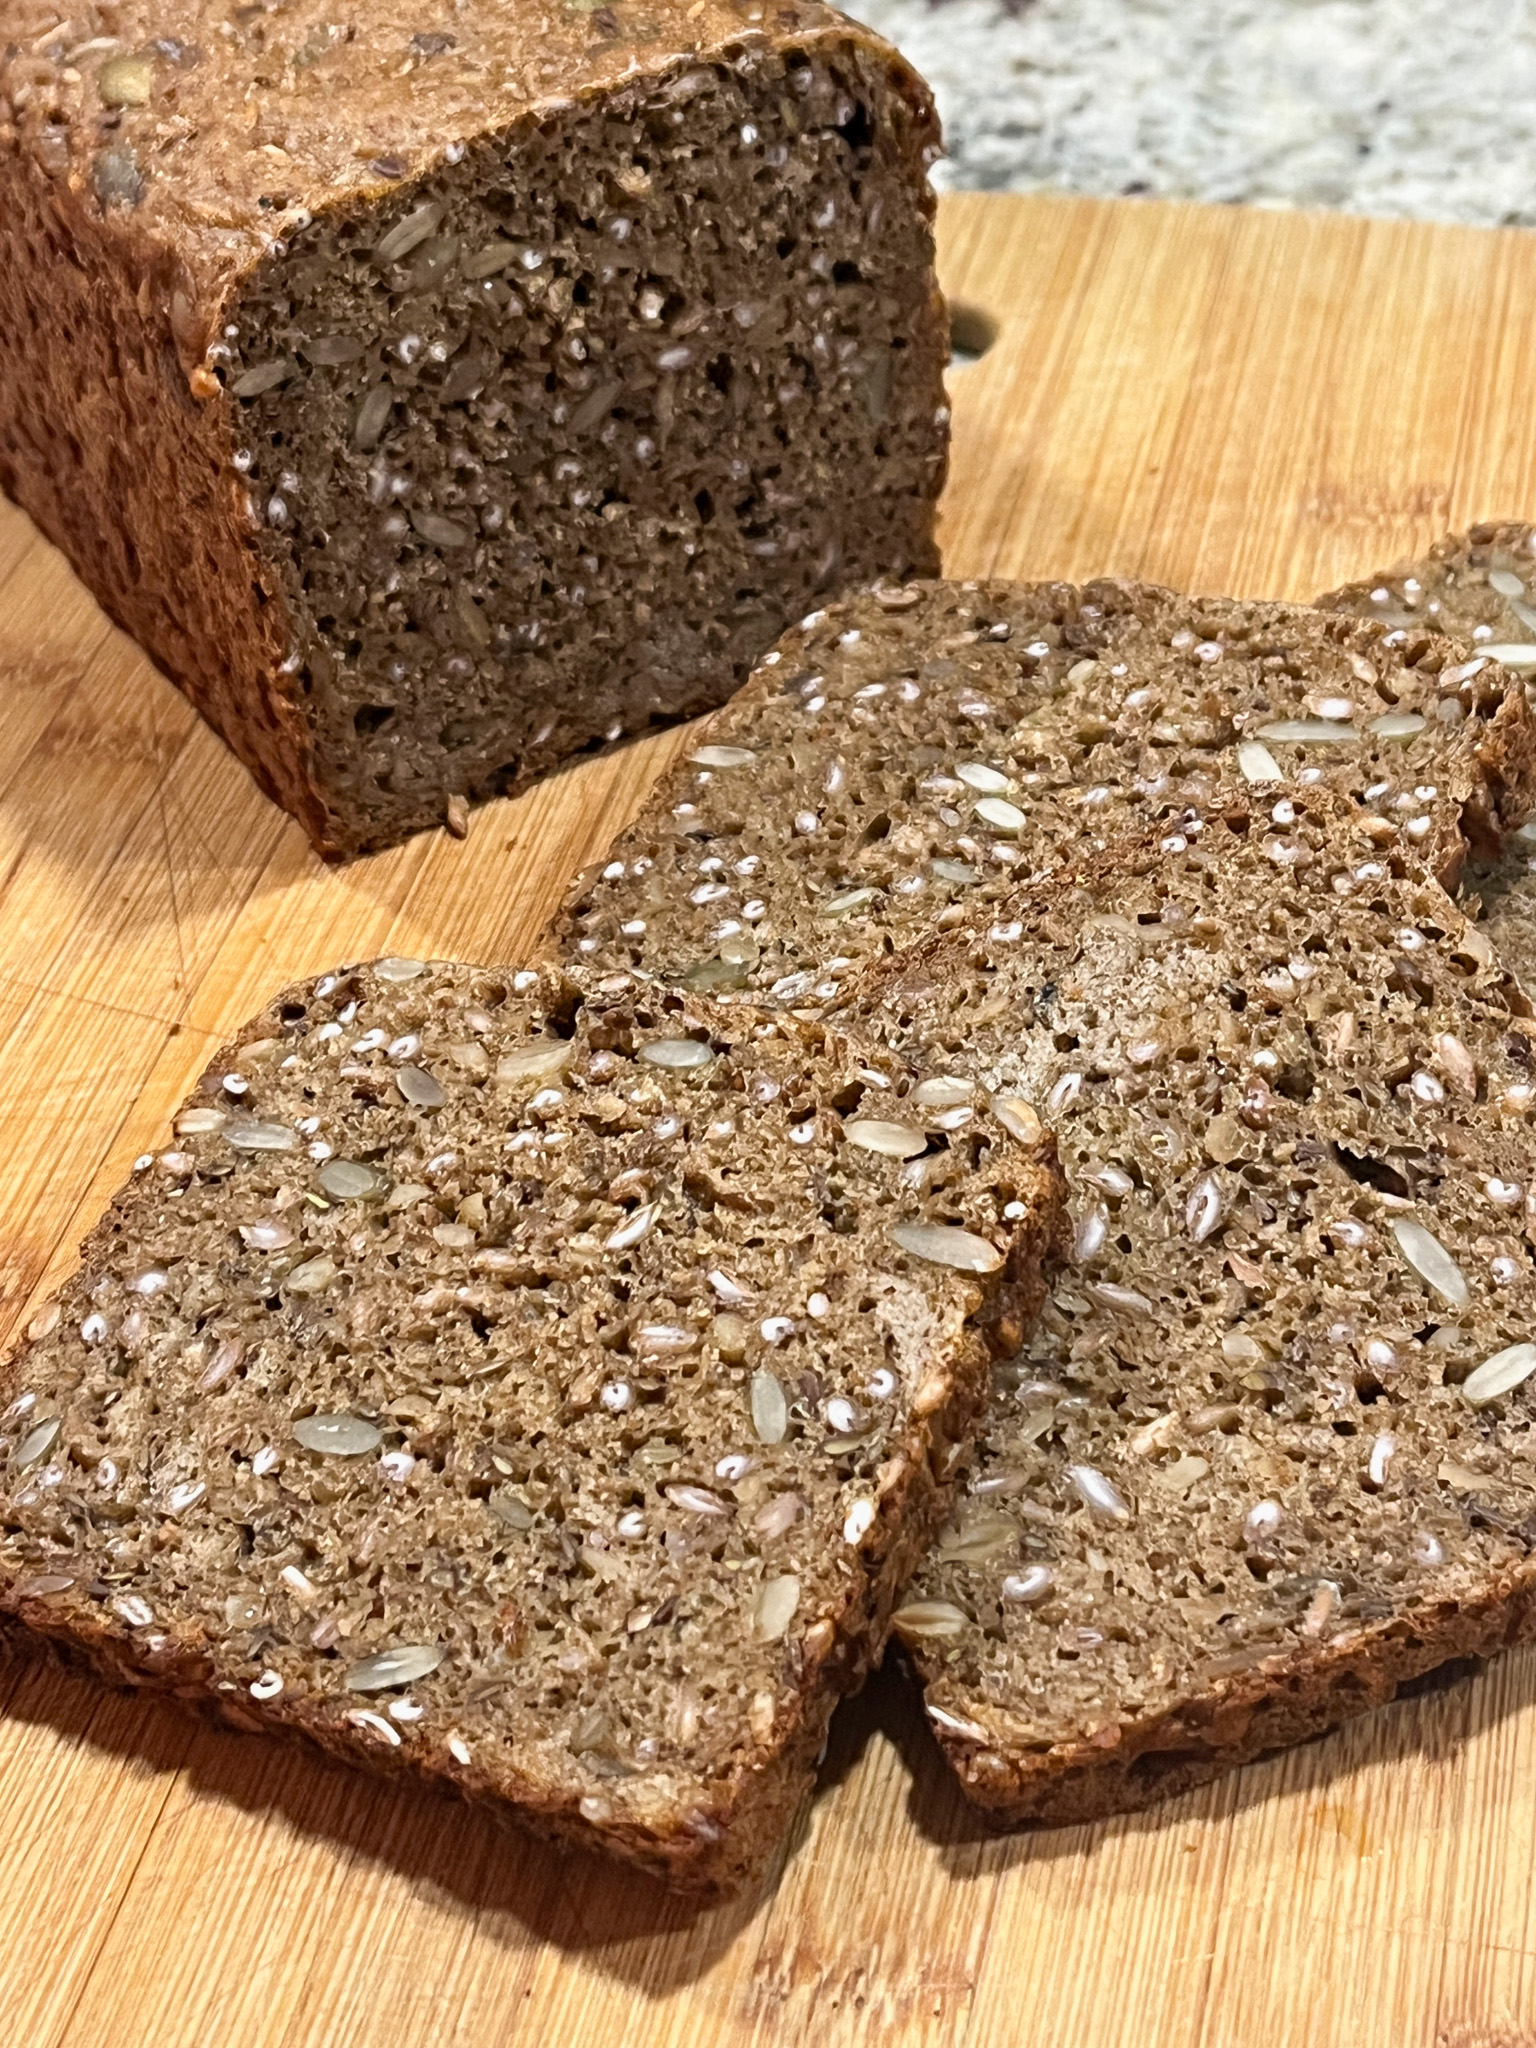

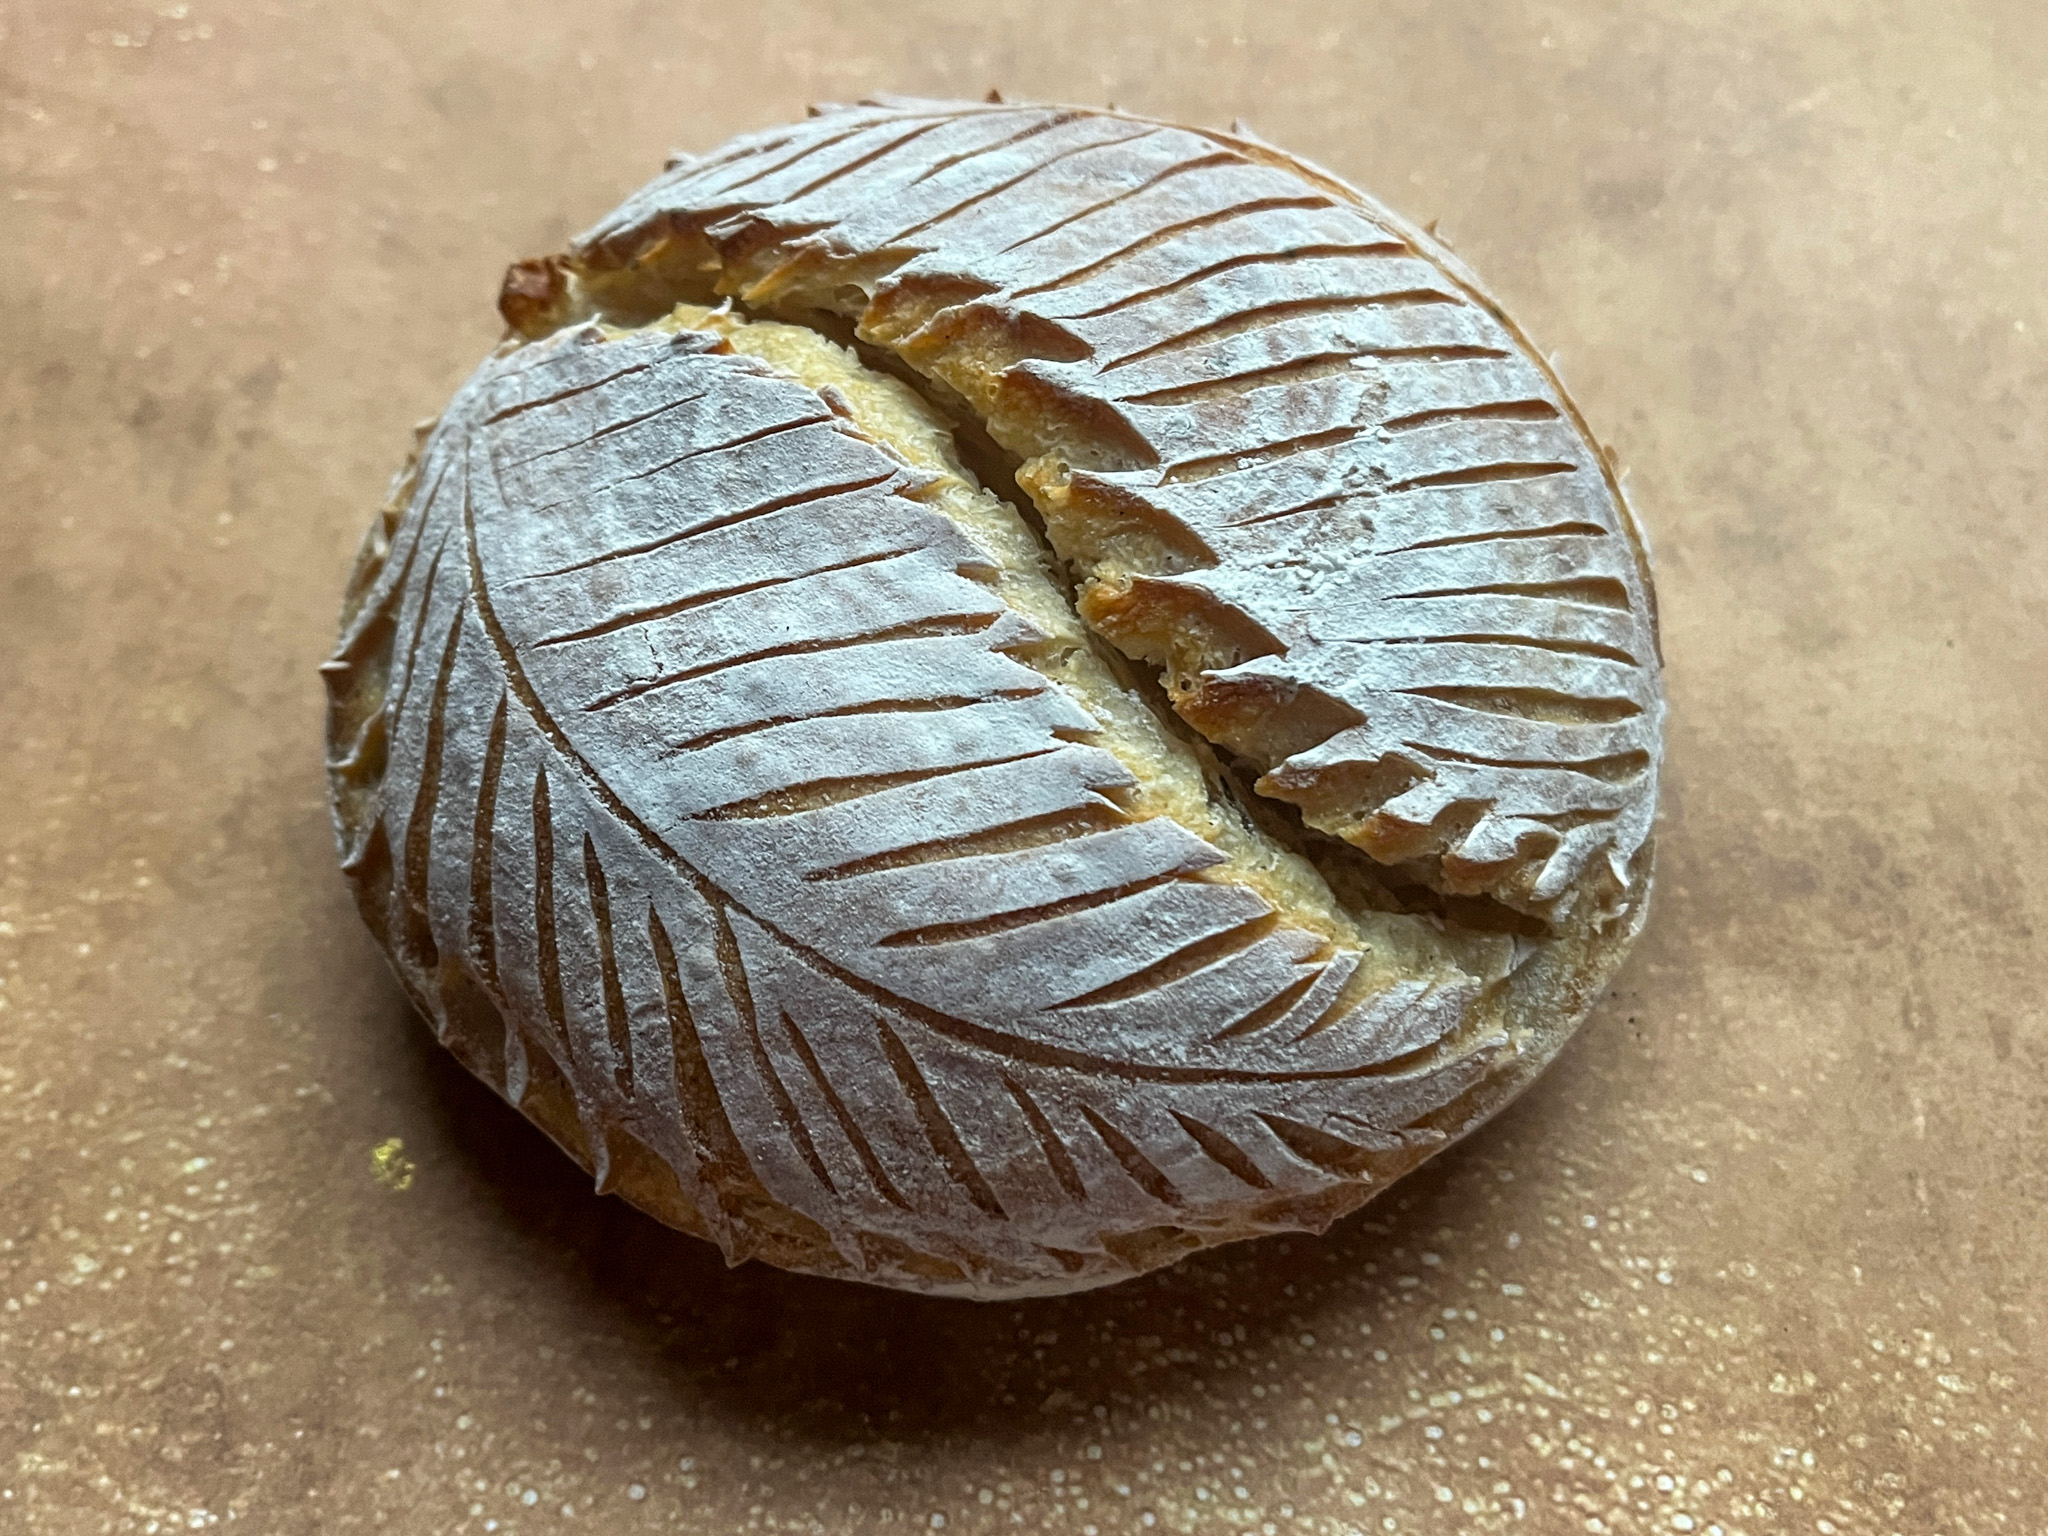
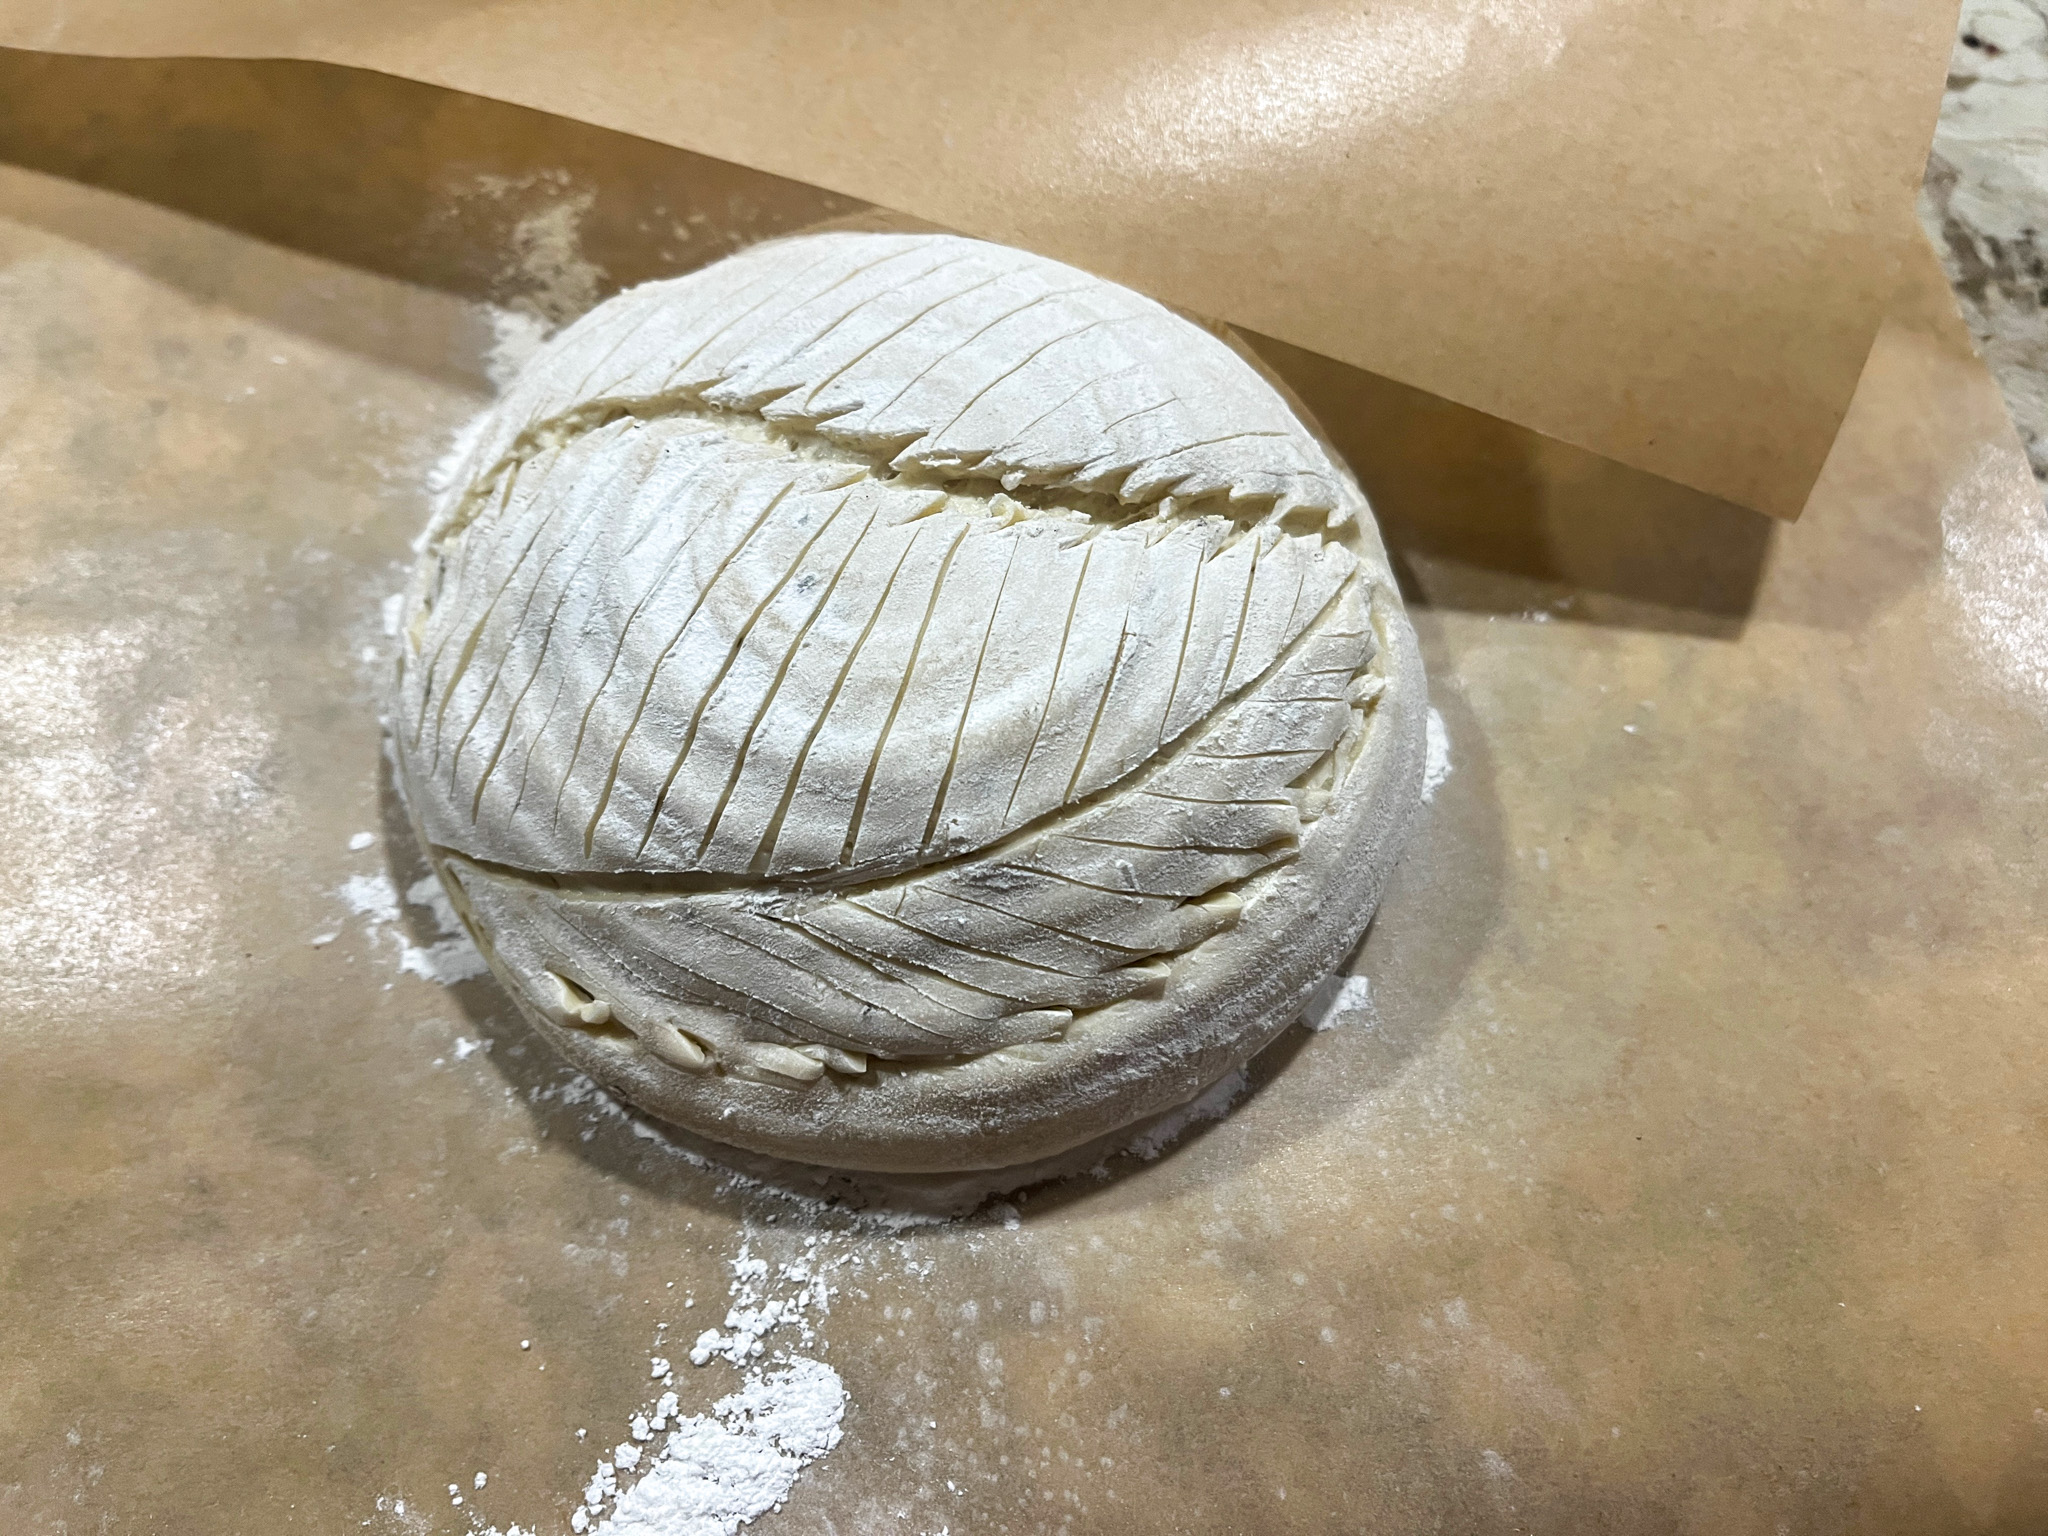
I will definitely bake more from Rachel’ book in the near future. If you are into sourdough scoring and decorations, the last chapter of her book goes over many of the techniques she often shows on her Instagram page, including painting, which is something that I am still a bit tentative when I give it a try. Her henna-painting on a 3D design is breathtaking, but I need to get mentally ready to go for it. Might take me a very long time (sigh).

Moving on, I share a recipe that was inspired by an European bread brought to my attention by my friend Margie. She actually went through the trouble of translating it from German to English for me, and I made it as written but I think the difference between European ingredients and American made it a bit too dense. So I adapted it and ended up with a bread that the husband already said “has to be in our regular rotation”. It turned out truly delicious and rye flour is a small but important component.
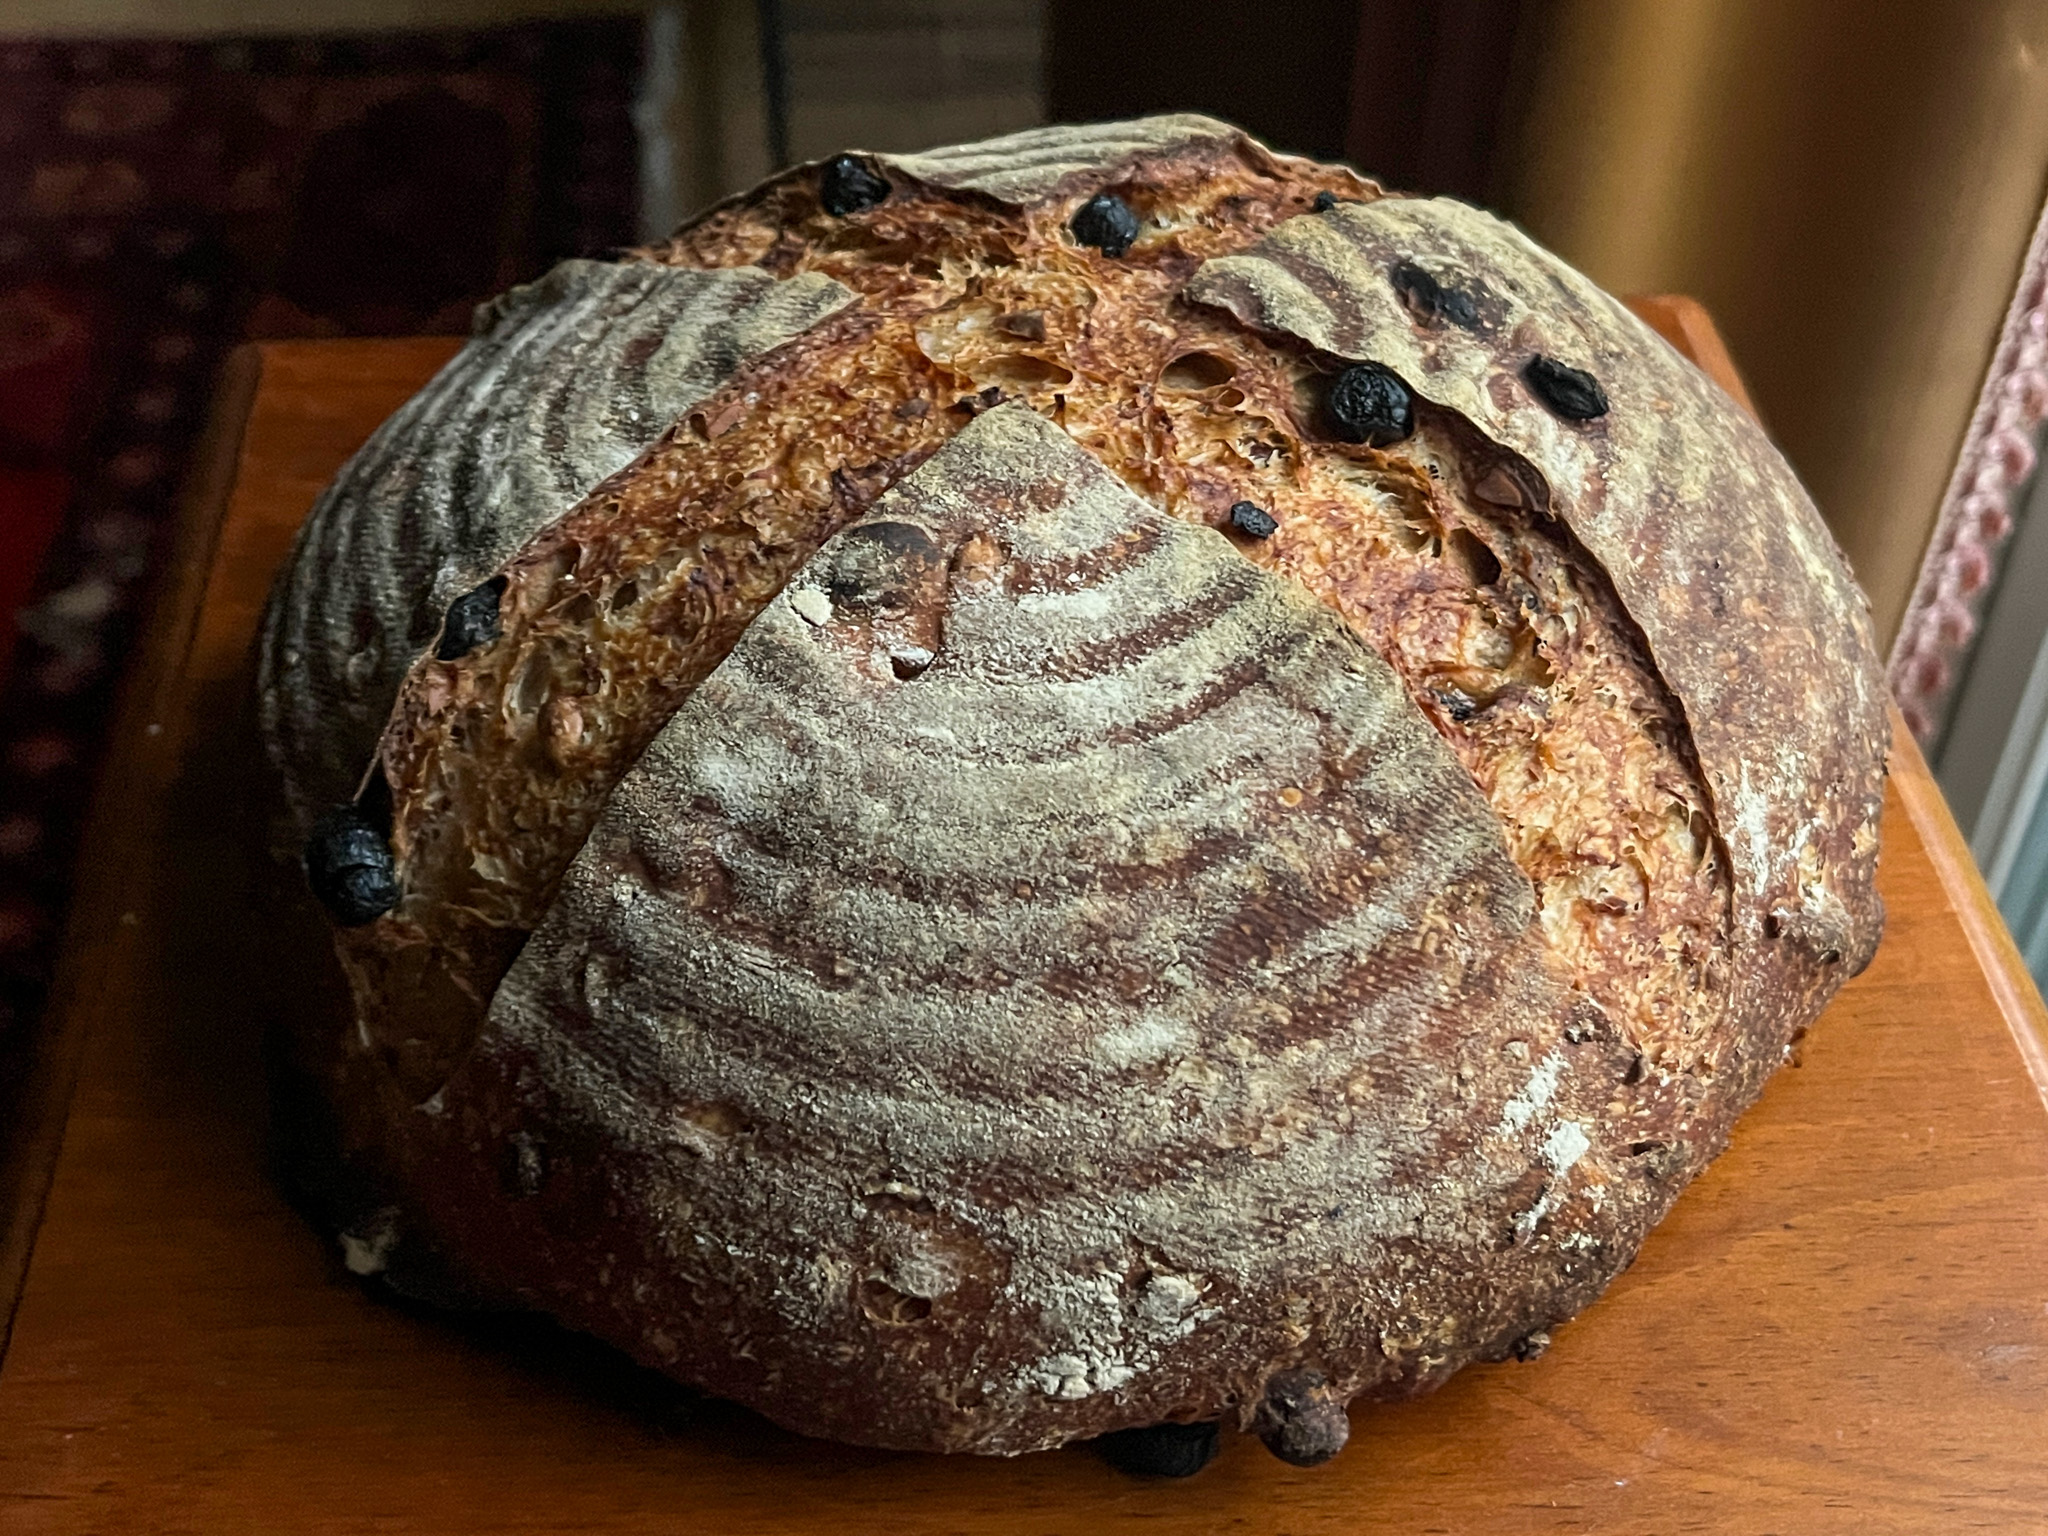
MUESLI, ALMOND AND RAISINS SOURDOUGH
(from The Bewitching Kitchen)

Makes: 1 large loaf
Total flour: 500 g
Rye: 20%
Hydration: approximately 78%

for the main dough:
400 g strong bread flour
100 g whole rye flour
100 g active sourdough starter, 80%% hydration
360 g water (divided in 330g + 30g)
10 g fine sea salt
1 tablespoon honey

Inclusions:
80 g muesli
60 g whole almonds, roughly chopped
60g raisins
80 g boiling water

The day before making the bread: Toast the almonds on a 350F oven for about 7 minutes. Leave it at room temperature. Prepare the muesli soaker: pour 80 g boiling water over the muesli. Stir well, cover and let stand for 1 hour. Move to the fridge overnight.

Make the dough next day: mix the bead flour, rye flour, 330g of the water, and leave it undisturbed for 30 minutes. Add the starter (100g), honey, salt and remaining 30g water. Mix by hand or with the dough hoiok in a KitchenAid type mixer on los-speed for about 3 minutes.

Genty spread the dough as a rectangle. Add the muesli (do not drain), almonds and raisins, and fold the inclusions as best as you can without worrying too much, it will all incorporate as the fermentation proceeds. Bulk fermentation will be about 6 hours, with folding every thirty minutes for the first two hours (four cycles of folding). You can follow the rate of fermentation by removing a small amount of dough into a vial. Aim for about 75% increase in volume, mine took a litle more than 6 hours total.

Pre-shape as a round loaf. Wait 15 minutes, do the final shaping. Place in a banneton, and move to the fridge until next morning. My dough stayed 14 hours in the fridge before baking at 450F for 30 minutes covered, then 20 more minutes uncovered.

Let it cool completely before slicing.

ENJOY!

to print the recipe, click here
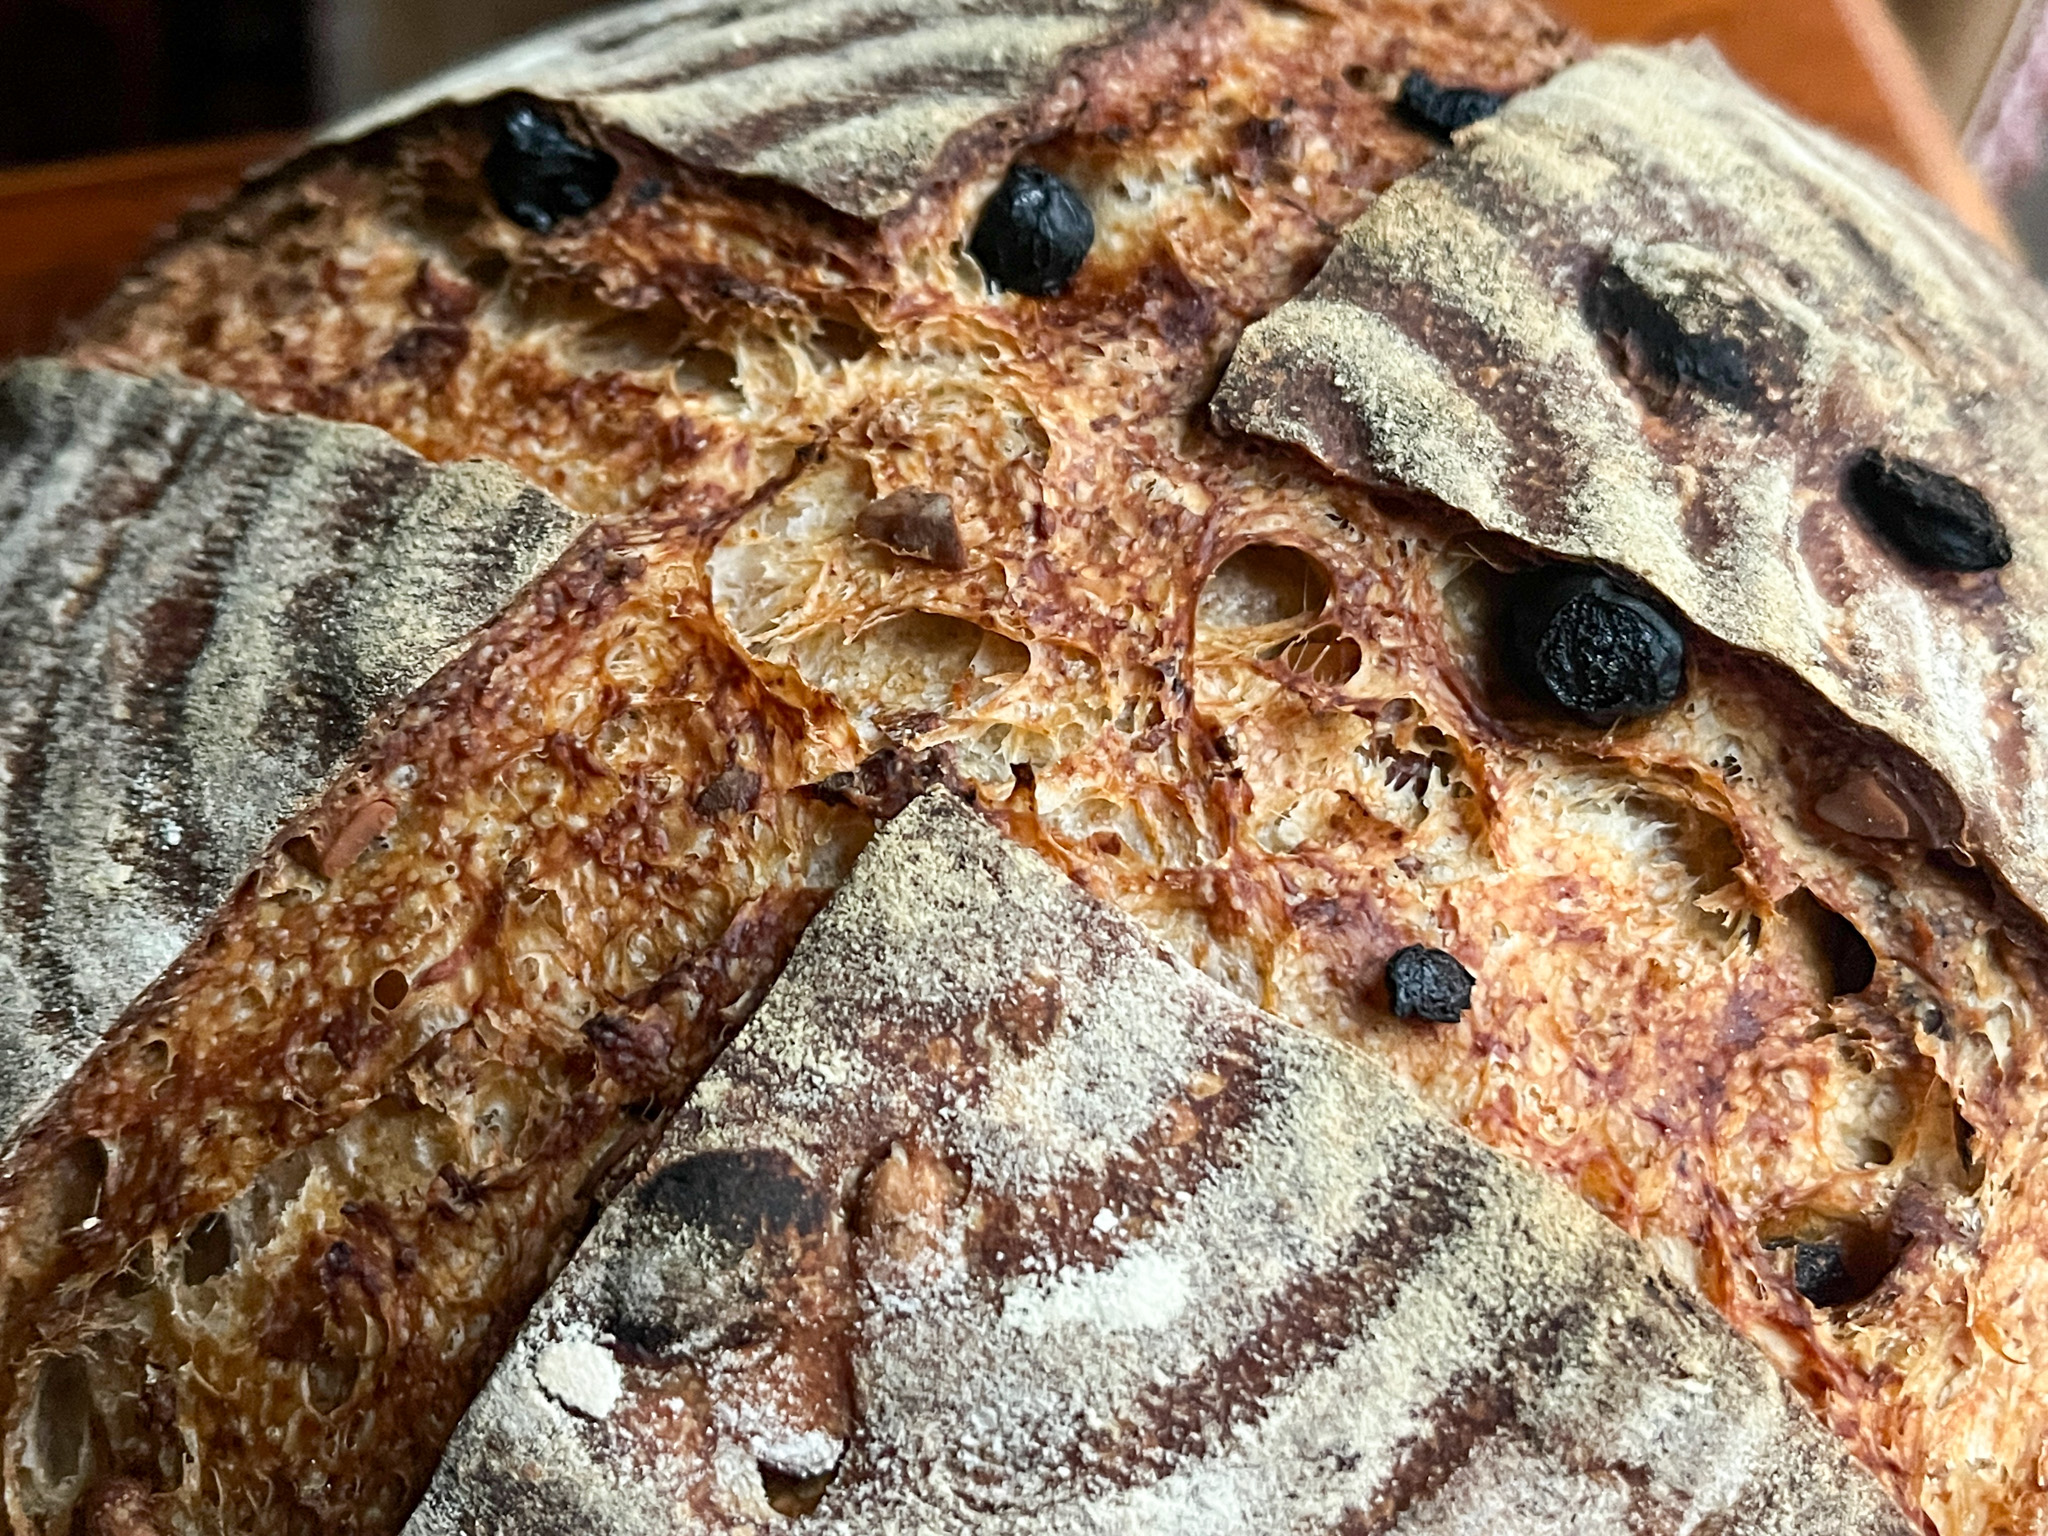
.

Huge thank you to Margie for bringing the Muesli sourdough into my world!
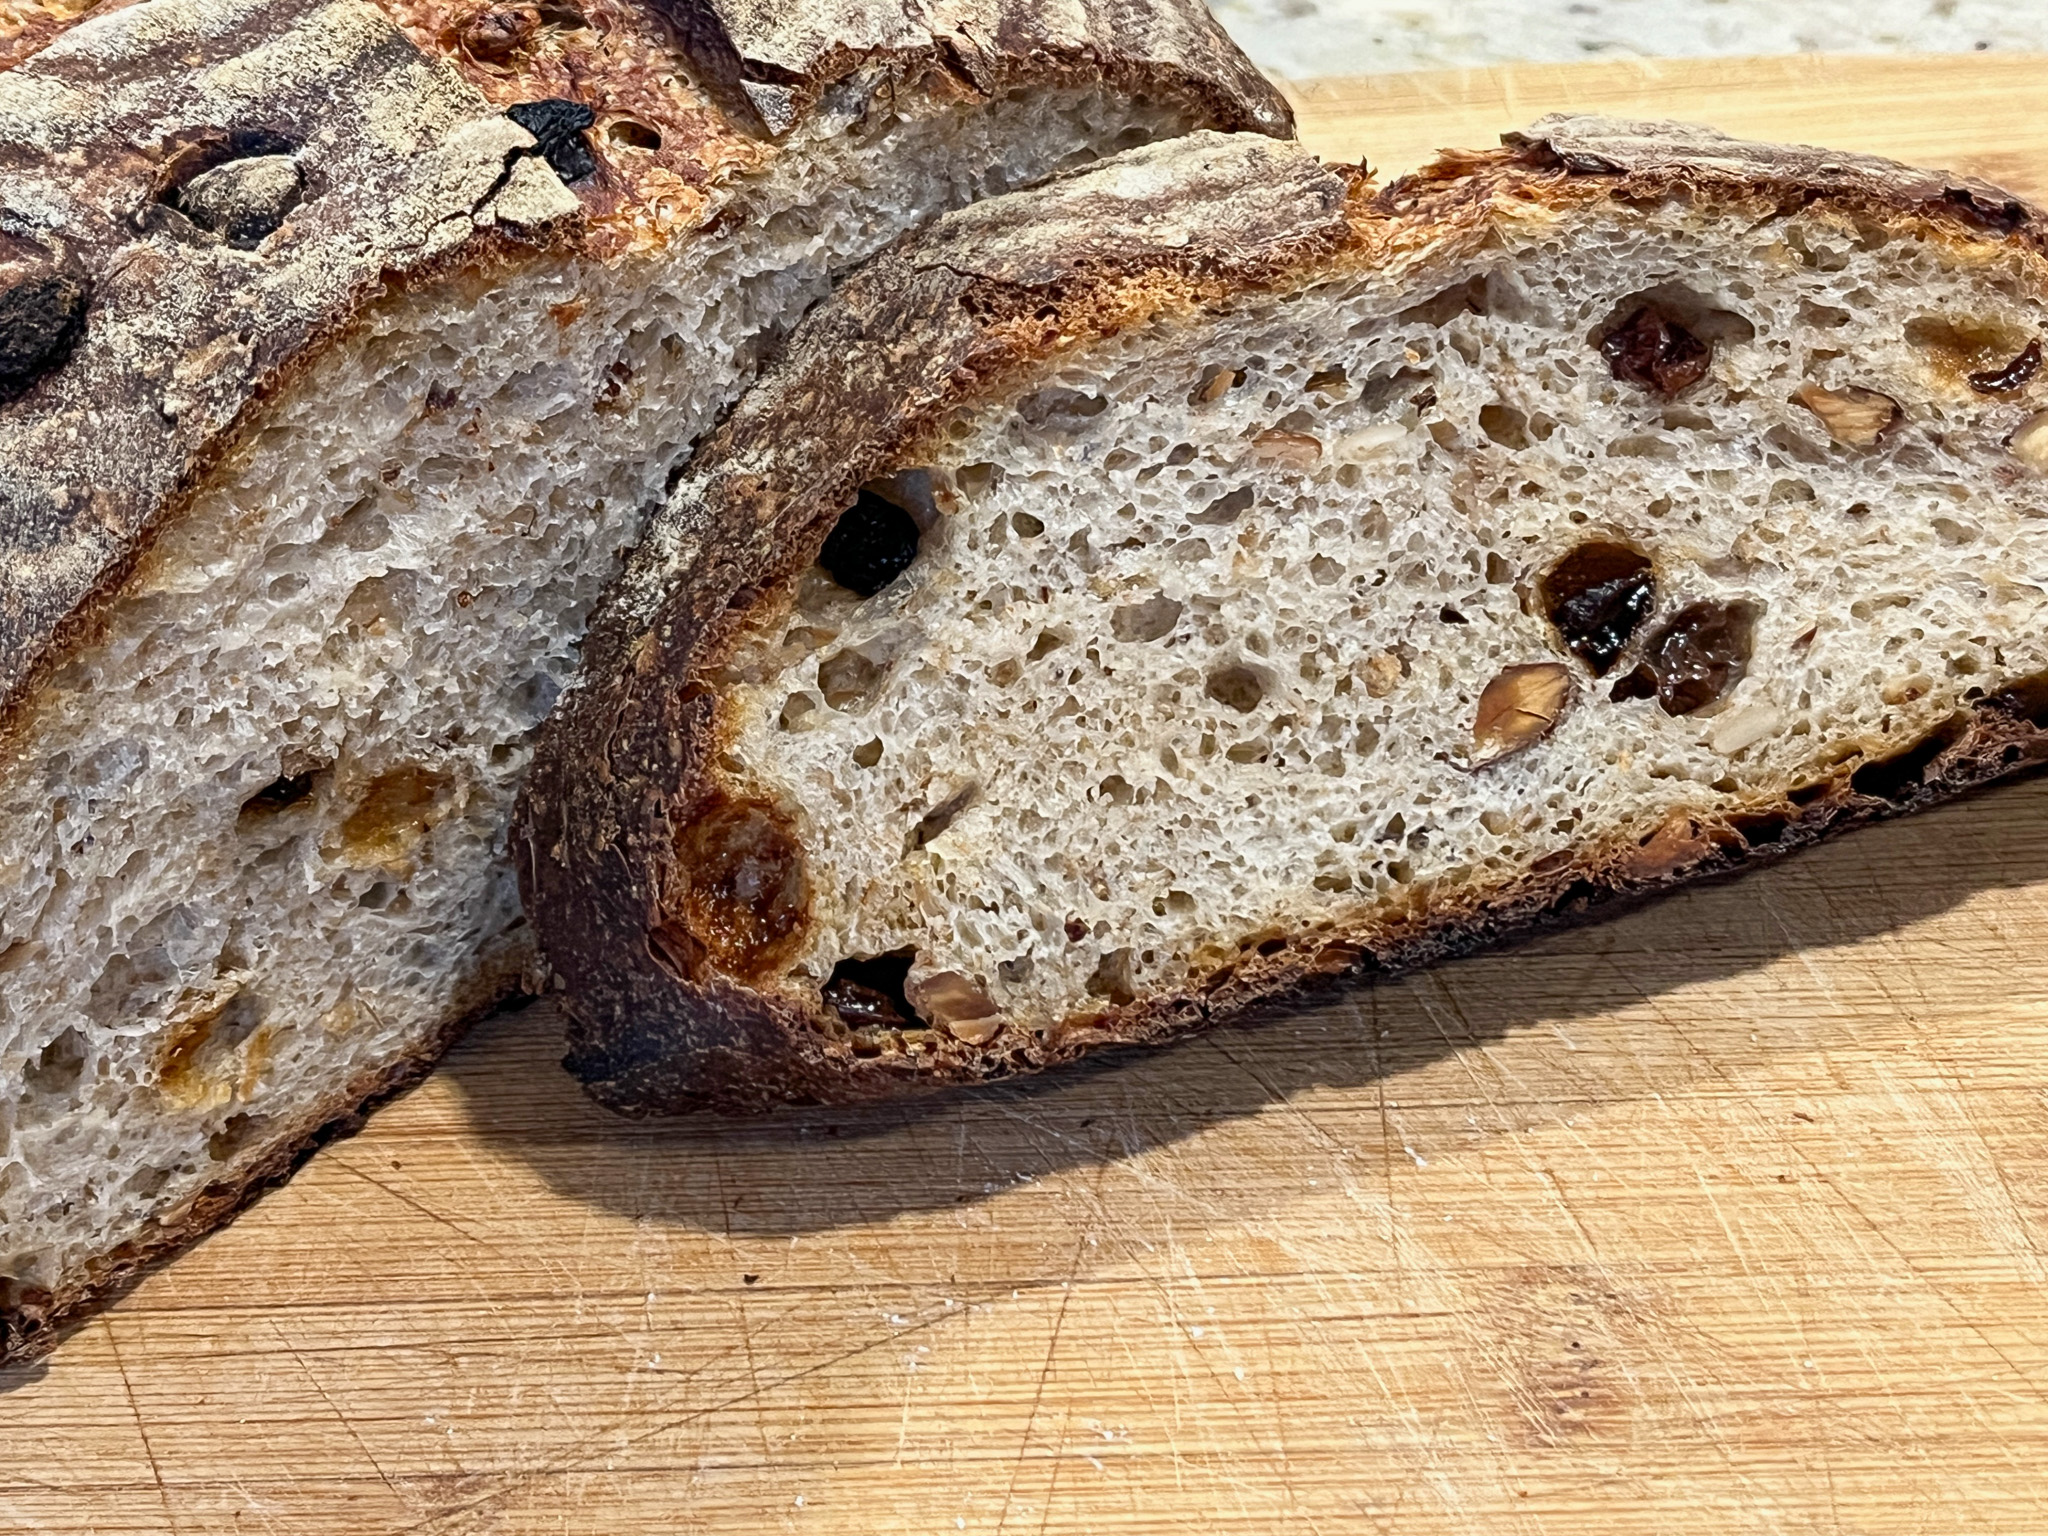
.

1 YEAR AGO: Incredibly Simple Zucchini Rounds

2 YEARS AGO: Mjukkaka, a Swedish Flat Bread

3 YEARS AGO: Polka Dot Love Sourdough

4 YEARS AGO: Plum Sorbet

5 YEARS AGO: Grilled Chicken with Sesame Roasted Carrots

6 YEARS AGO: Let’s Get Spooky!

7 YEARS AGO: Miso and Sesame Roast Chicken with Revelation Quinoa

8 YEARS AGO: Incredibly Simple Times Four

9 YEARS AGO: Parsnip, Coconut and Lemongrass Soup

10 YEARS AGO: In My Kitchen, October 2016

11 YEARS AGO: Paleo Moussaka

12 YEARS AGO: In My Kitchen, October 2014

13 YEARS AGO: In My Kitchen, October 2013

14 YEARS AGO: Bourbon and Molasses Glazed Pork Tenderloin

15 YEARS AGO: Crimson and Cream Turkey Chili

16 YEARS AGO: Taking a break from the nano-kitchen

17 YEARS AGO: Chocolate Chip Cookies
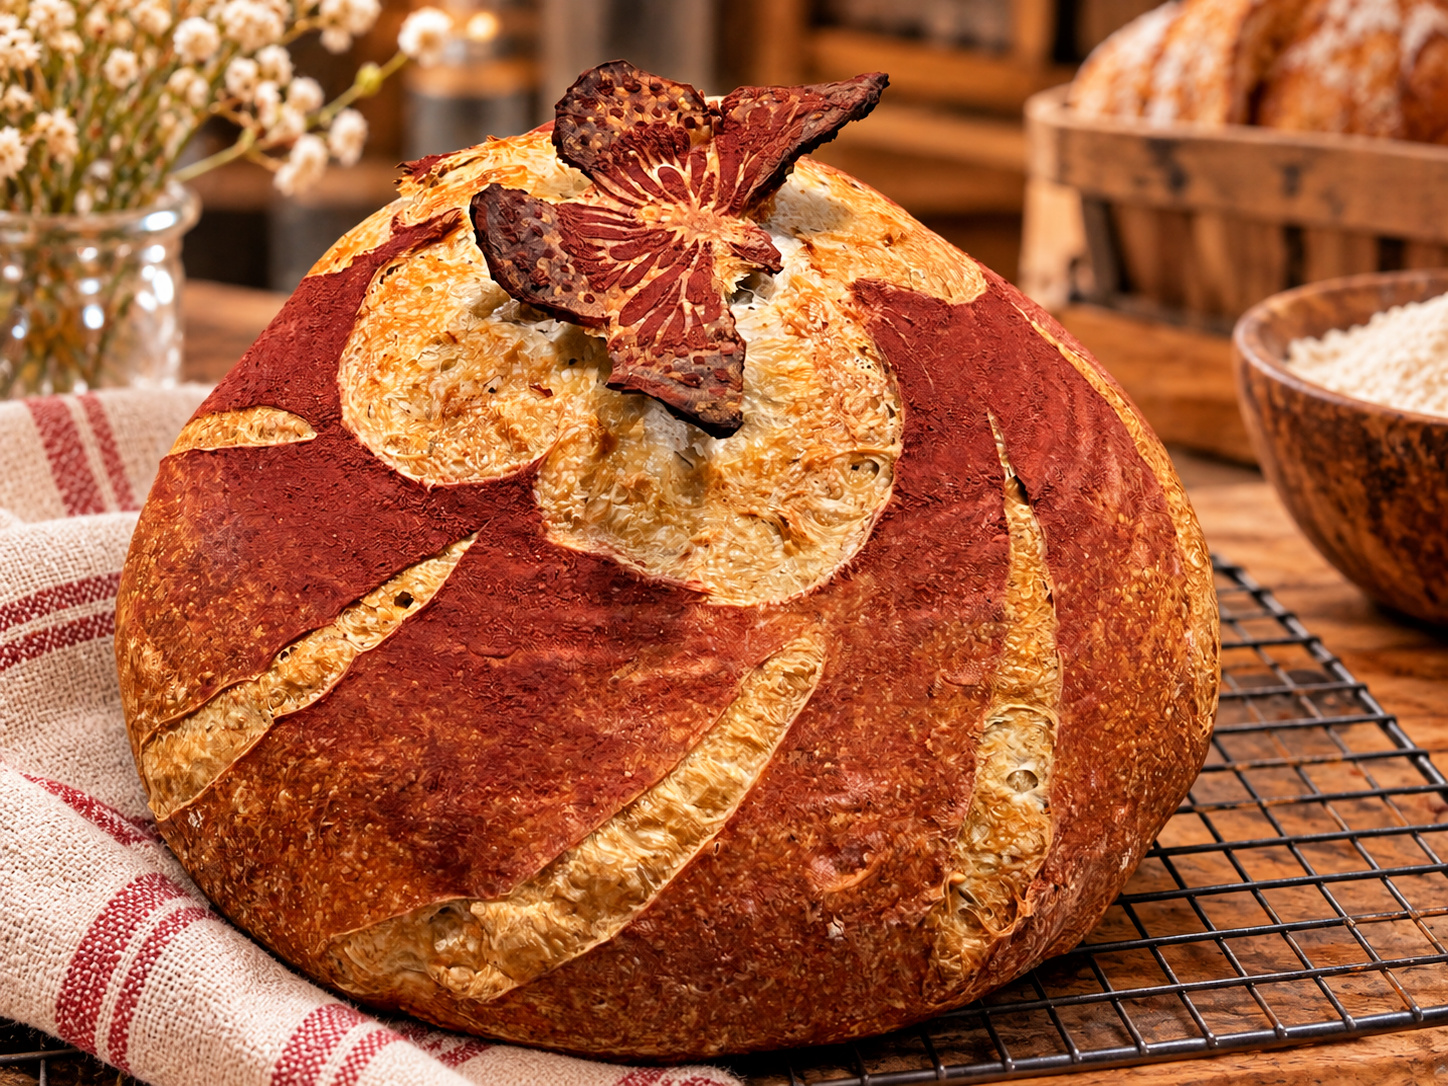
FLOATING BUTTERFLY, THE VIDEO


As I mentioned in my post from yesterday, I am back to share a detailed video of the method to make the floating butterfly, this time in a large boule format. The process is separated in two videos, made in real time. I go over some of the struggles of the past and how they got solved. Apparently I also talk to my bread, which I only realized when I watched it. Oh, well.

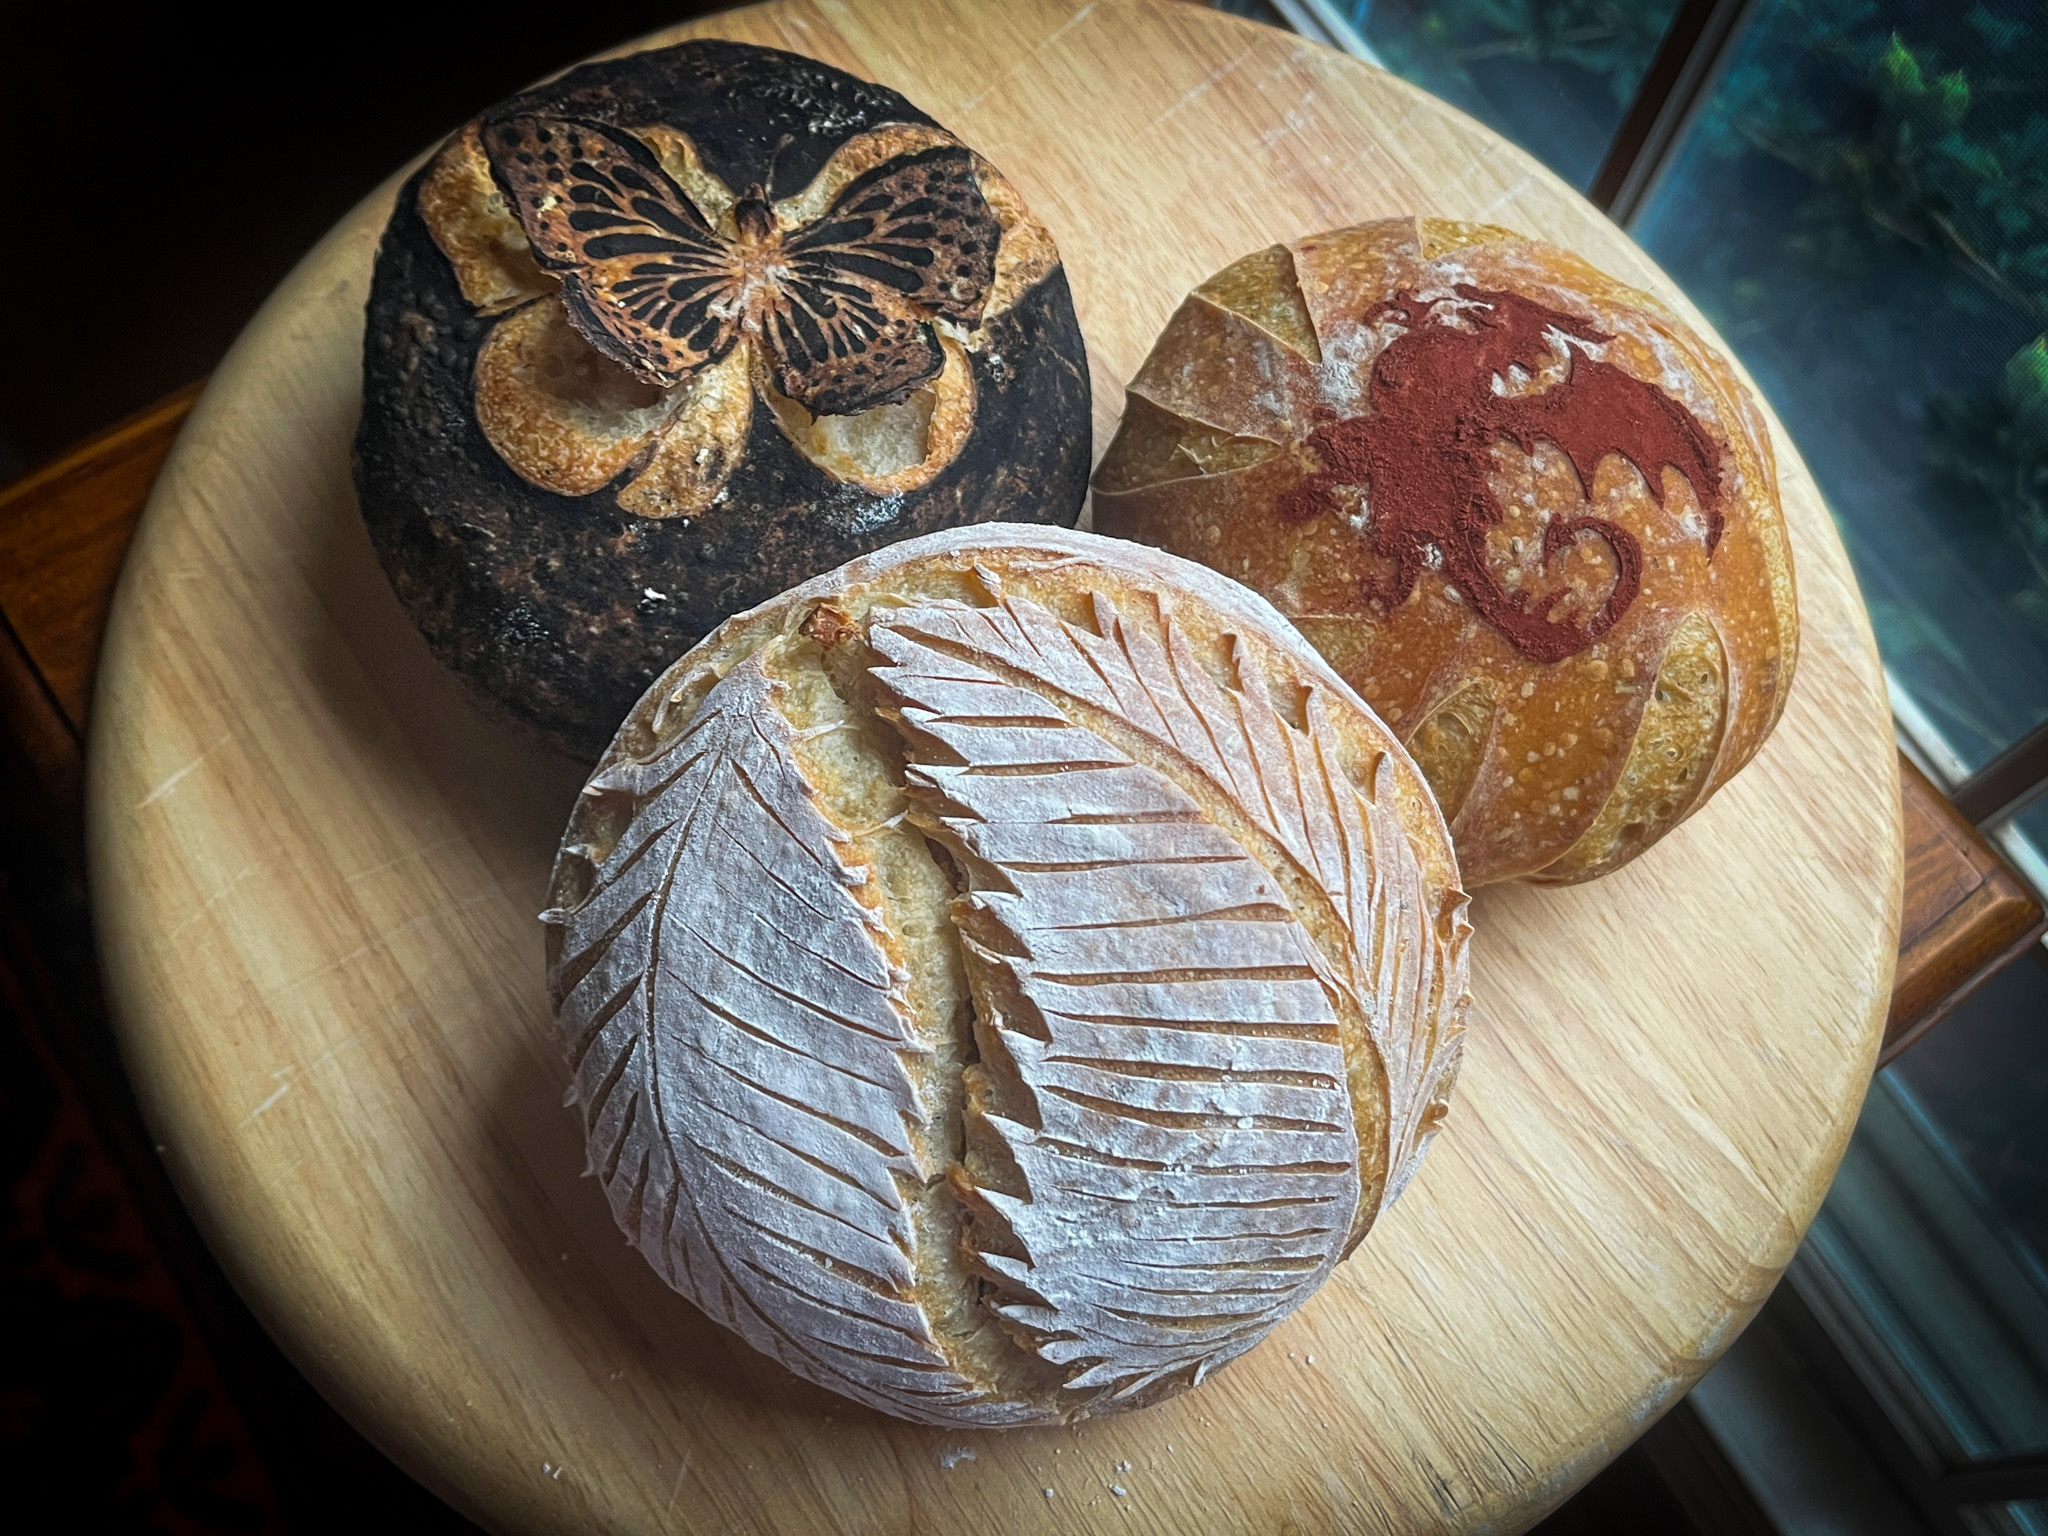
MINI-SOURDOUGH BOULES, THREE WAYS

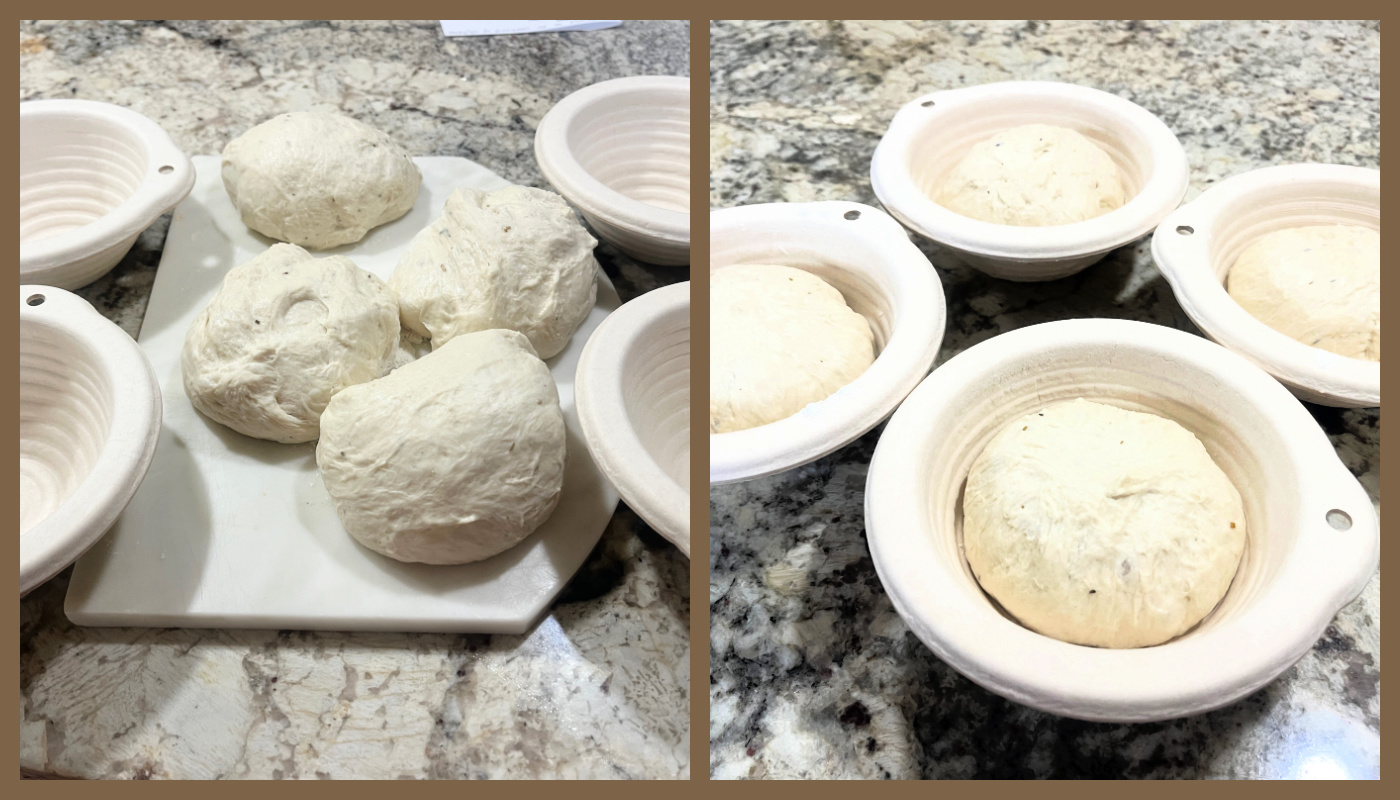
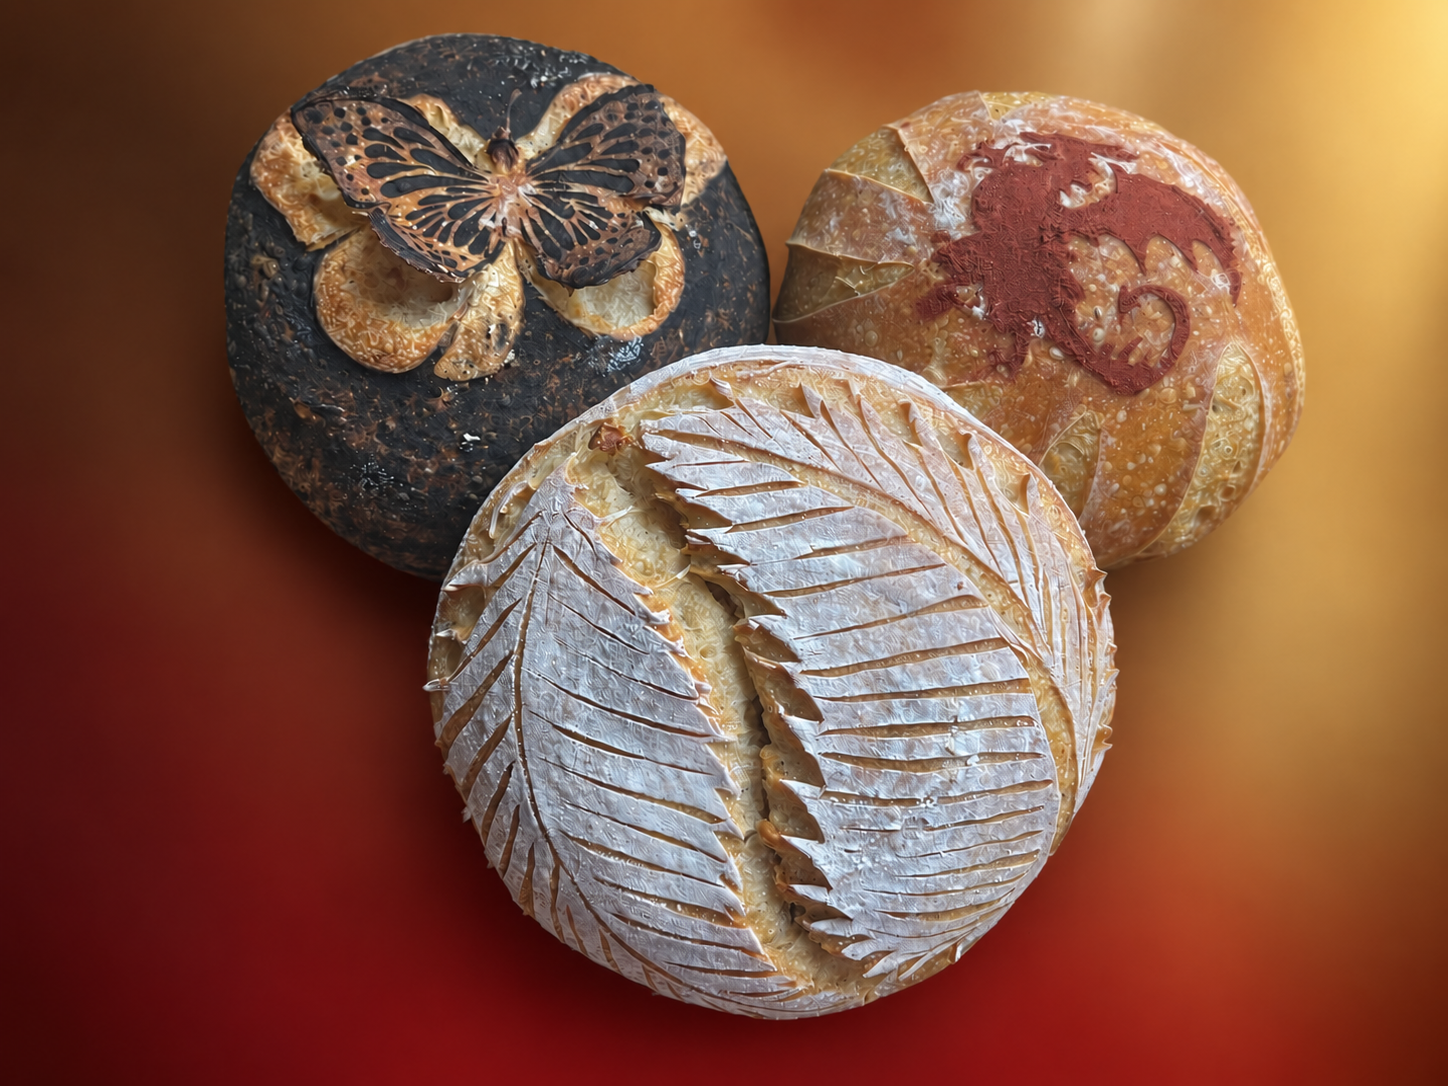
Baking small breads is a great way to practice different decorative designs starting with a single batch of dough. That’s exactly what I am sharing with you today. My default recipe, using 500g of total flour gave exactly 4 little balls with 230g total dough each. The bannetons I used were bought on eBay. As far as I can tell, they are not available anymore, but I found the same kind at Evil Empire (click here), although you do have to buy a set with way too many…

After overnight in the fridge, I froze them still in the banneton for 30 minutes to facilitate scoring and working with the stencils. I start with my favorite, the floating butterfly…

.

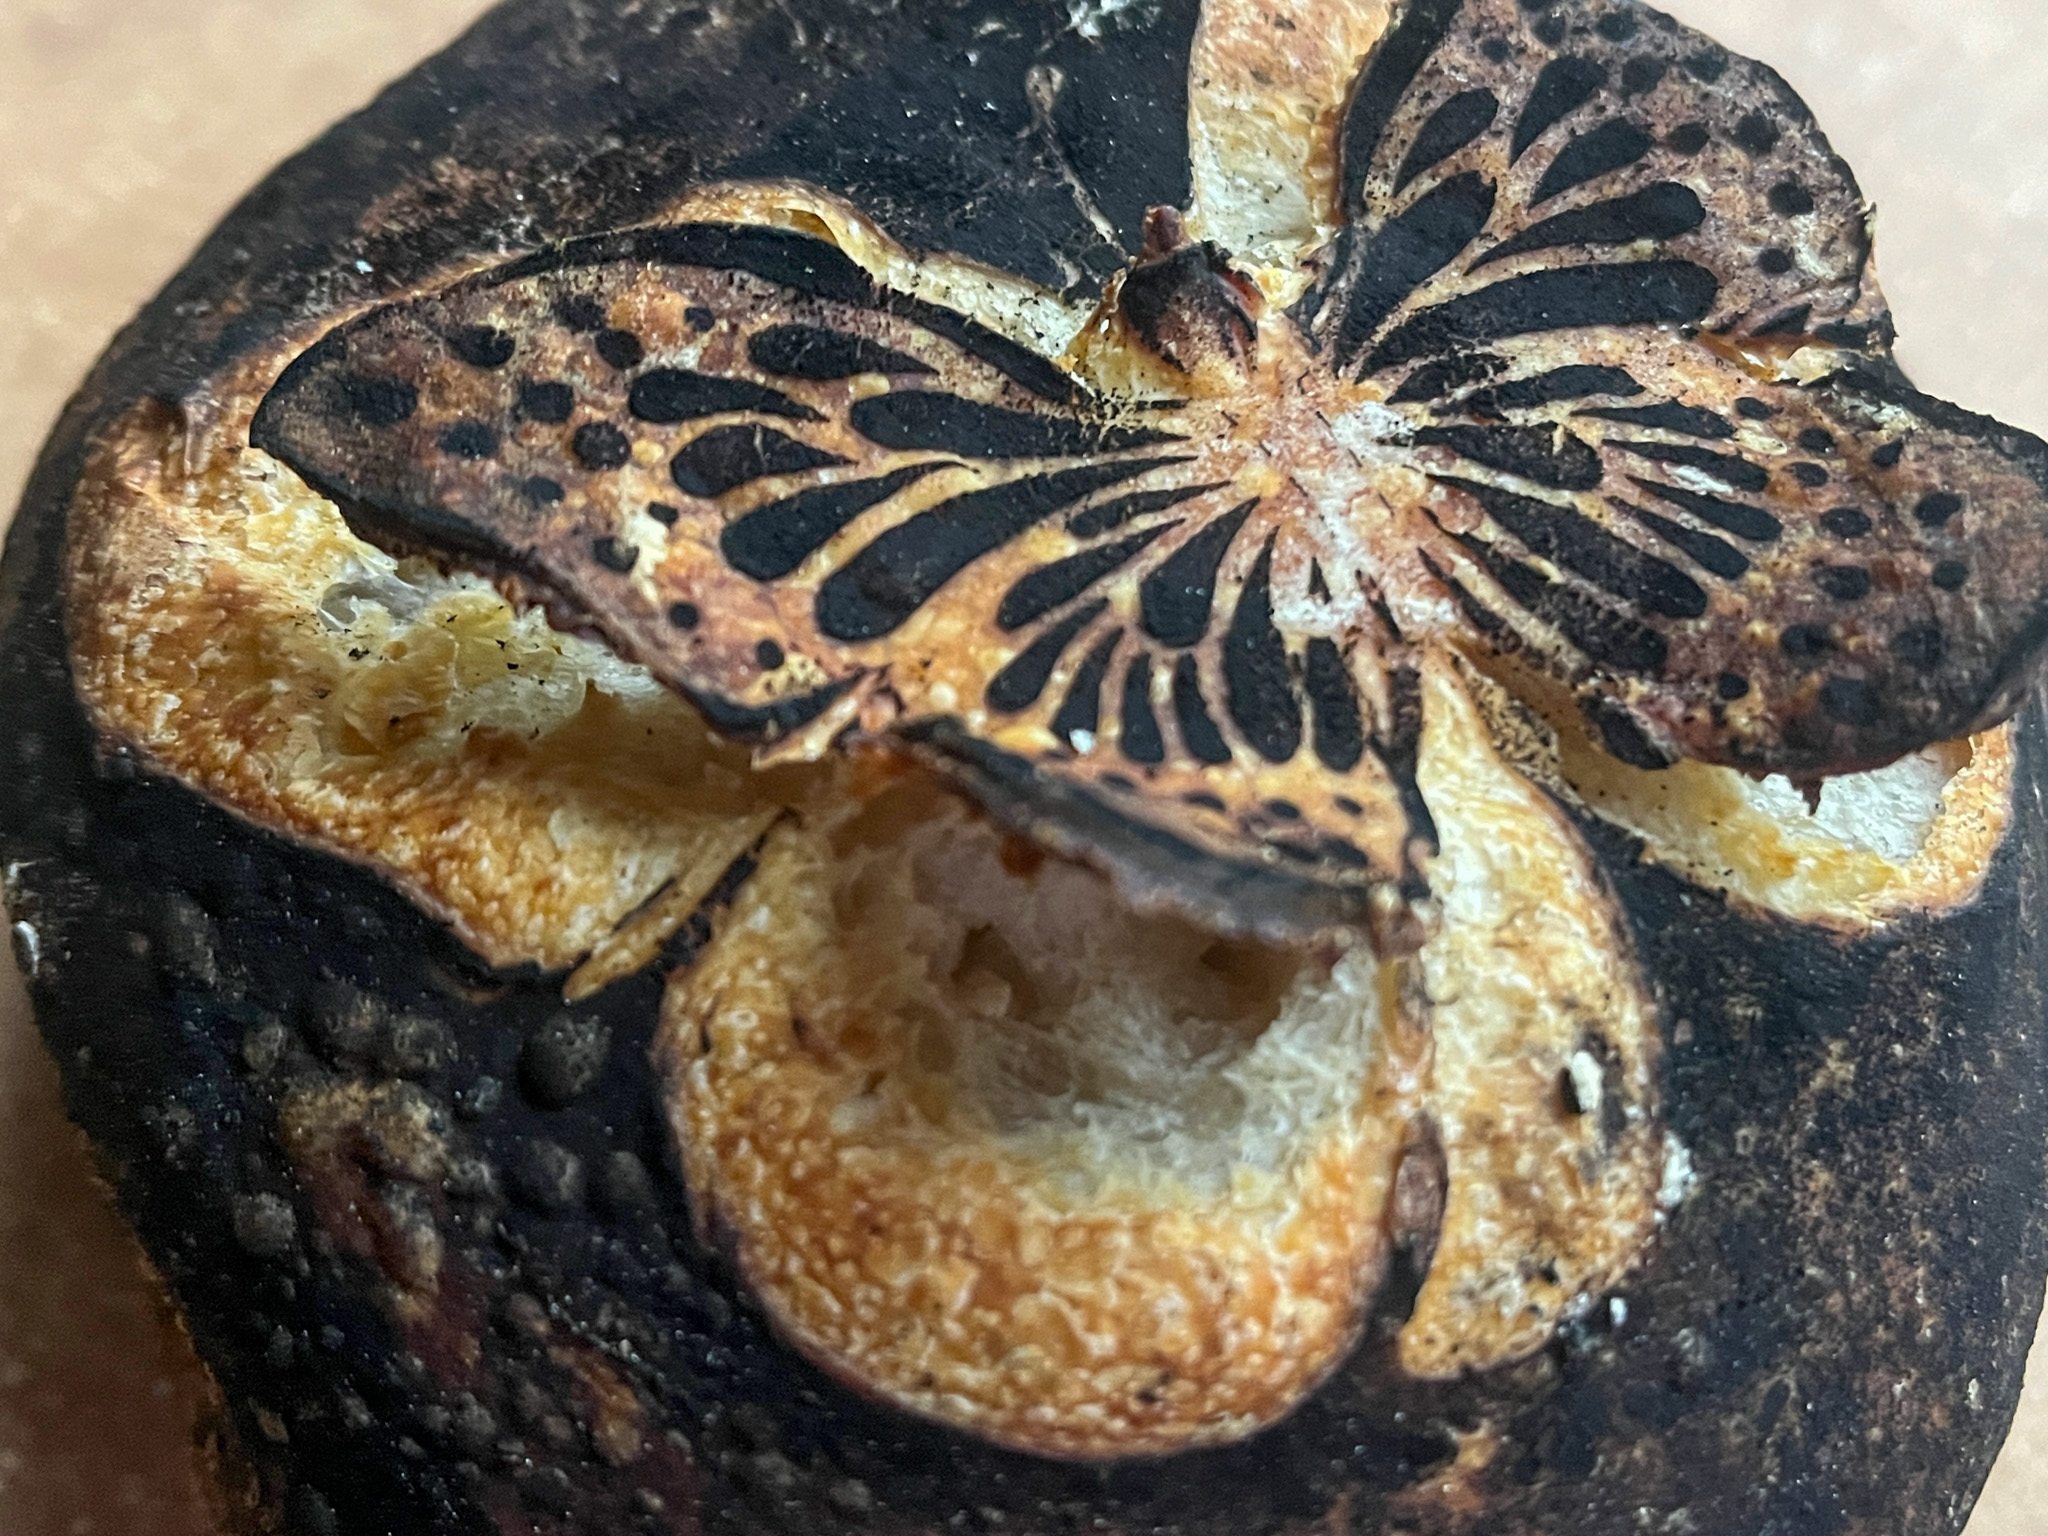
THE FLOATING BUTTERFLY

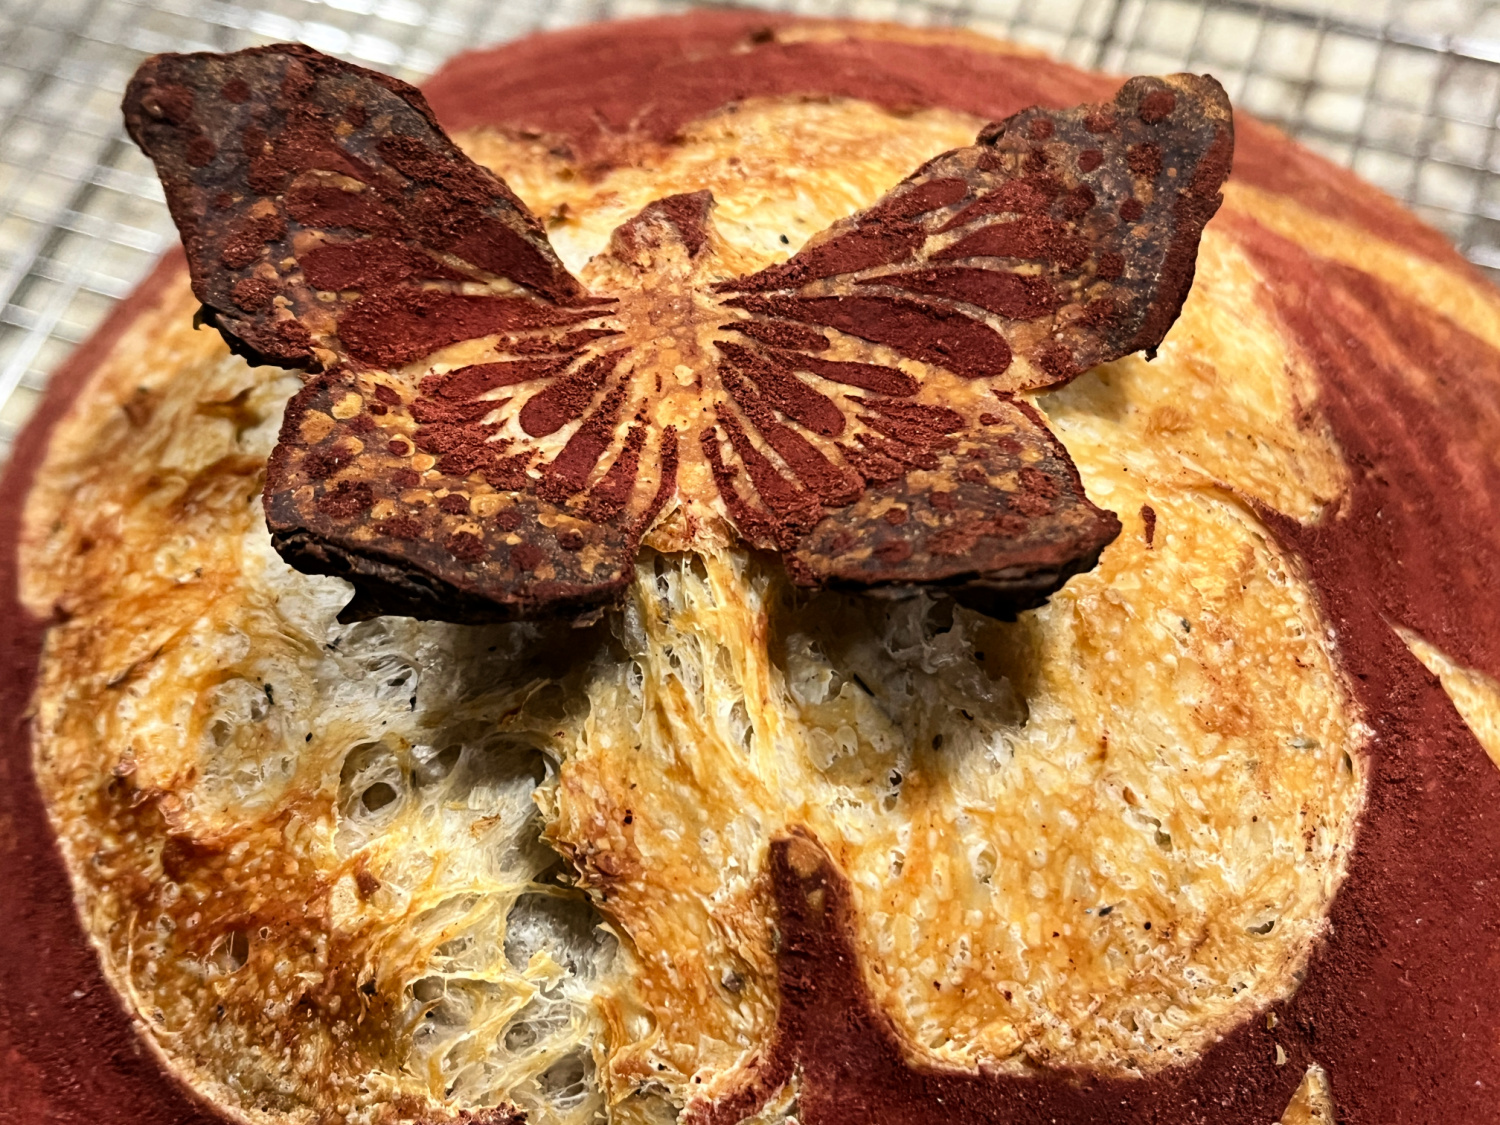
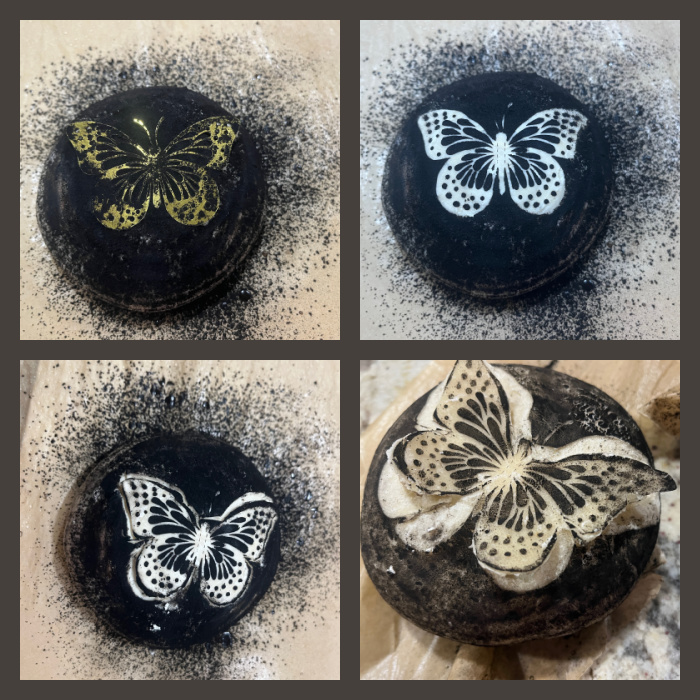
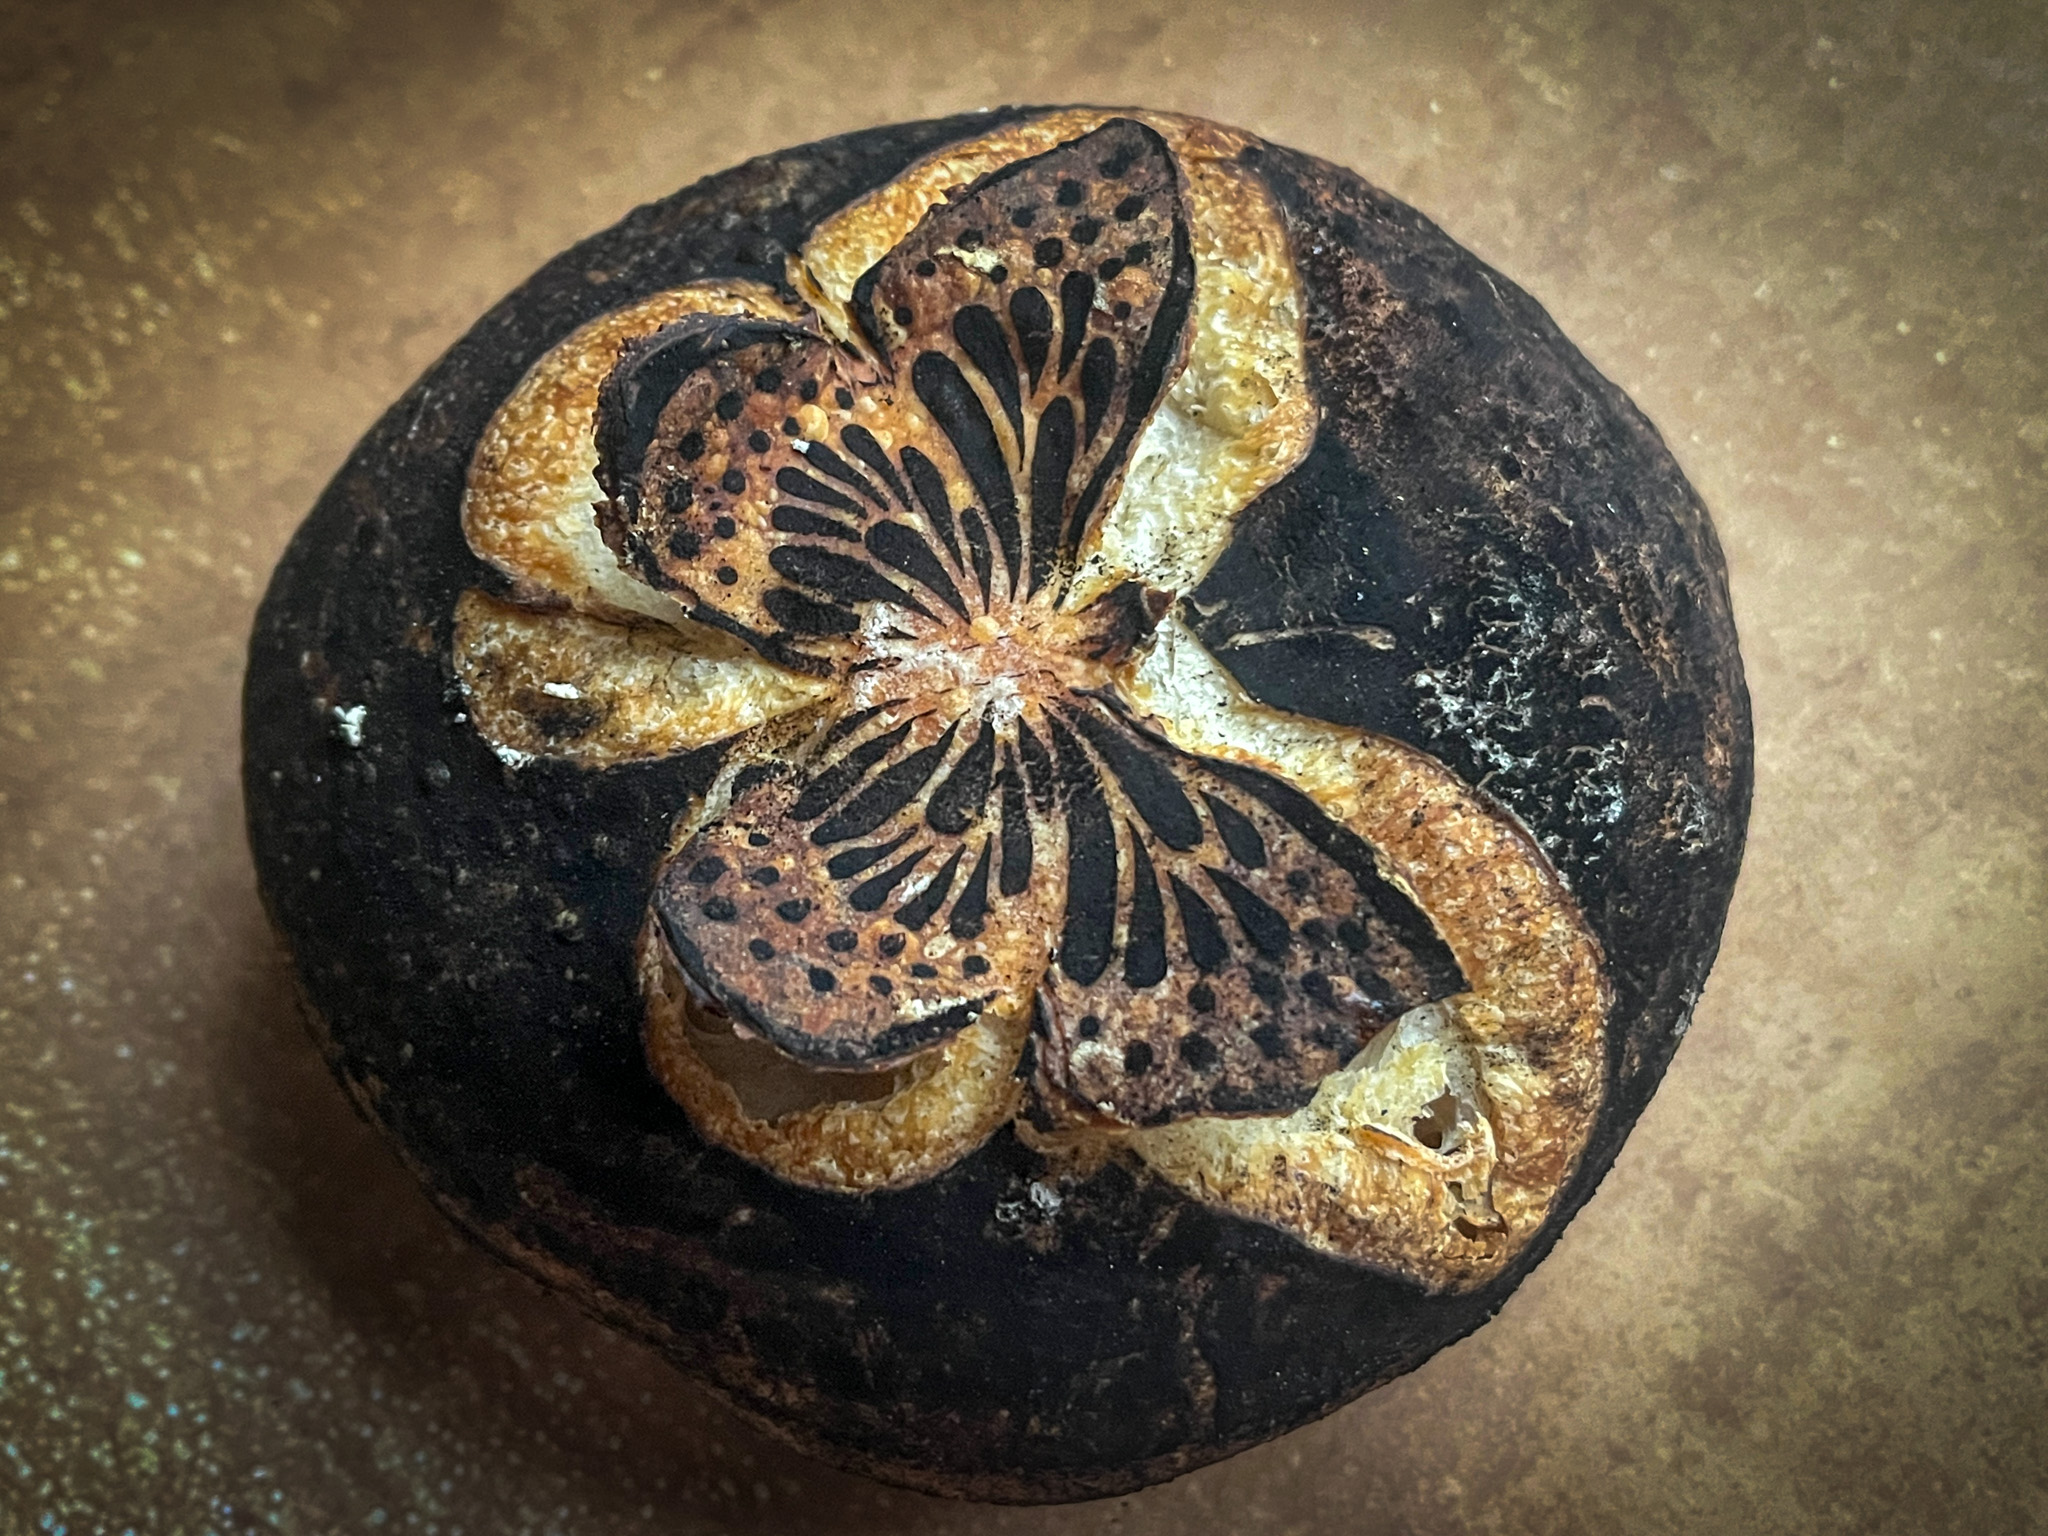
For this design, I rubbed the bread with back cocoa powder, and used a thin metallic stencil that I got recently (click here, it is part of a big series of stencils sold together in a bundle). After gently lifting the stencil, I cut around the edge of the butterfly, and lifted that area a bit. Baked for 7 minutes covered in a 450F oven, then carefully removed the bread from the oven and made the cuts deeper, adding a small ball of parchment paper on the four corners of the wings where I hoped for more lift. You can see the process below. The bottom right picture is what it looked like after 7 minutes in the oven, when I put the little balls underneath the wings. If you’d like a more detailed visual explanation, I will have a blog post exclusively about this type of decoration in a day or two. Stay tuned!

The bread was covered again, baked for additional 8 minutes covered, then 15 more minutes uncovered. Since it is a small loaf, it bakes faster, but the best approach is to check the internal temperature, aiming for 205-210F. As soon as it comes out of the oven, remember to remove the little balls of paper, or they will glue to the bread. I’ve had a lot of struggle to make this method work, finally realized that one very important thing is the material of the banneton you use for the proofing after shaping. The best ones for this type of scoring are wood pulp bannetons. They dry the skin of the dough much more efficiently. I was using a plastic wrap to facilitate removing the dough after overnight proofing, and that was the reason for all my disasters. The plastic did not allow the dough to dry, so there was no way to slice it nicely. Finally I changed to wood pulp, skipped the layering of plastic wrap, and things started to work better, not only for lifted designs, but scoring the bread in general. Keep that in mind if you are into decorating your bread.


This design requires just a razor blade and scissors, very simple and quite effective. Again, I froze the dough for 30 minutes before inverting it out of the banneton and proceeding with the scoring.

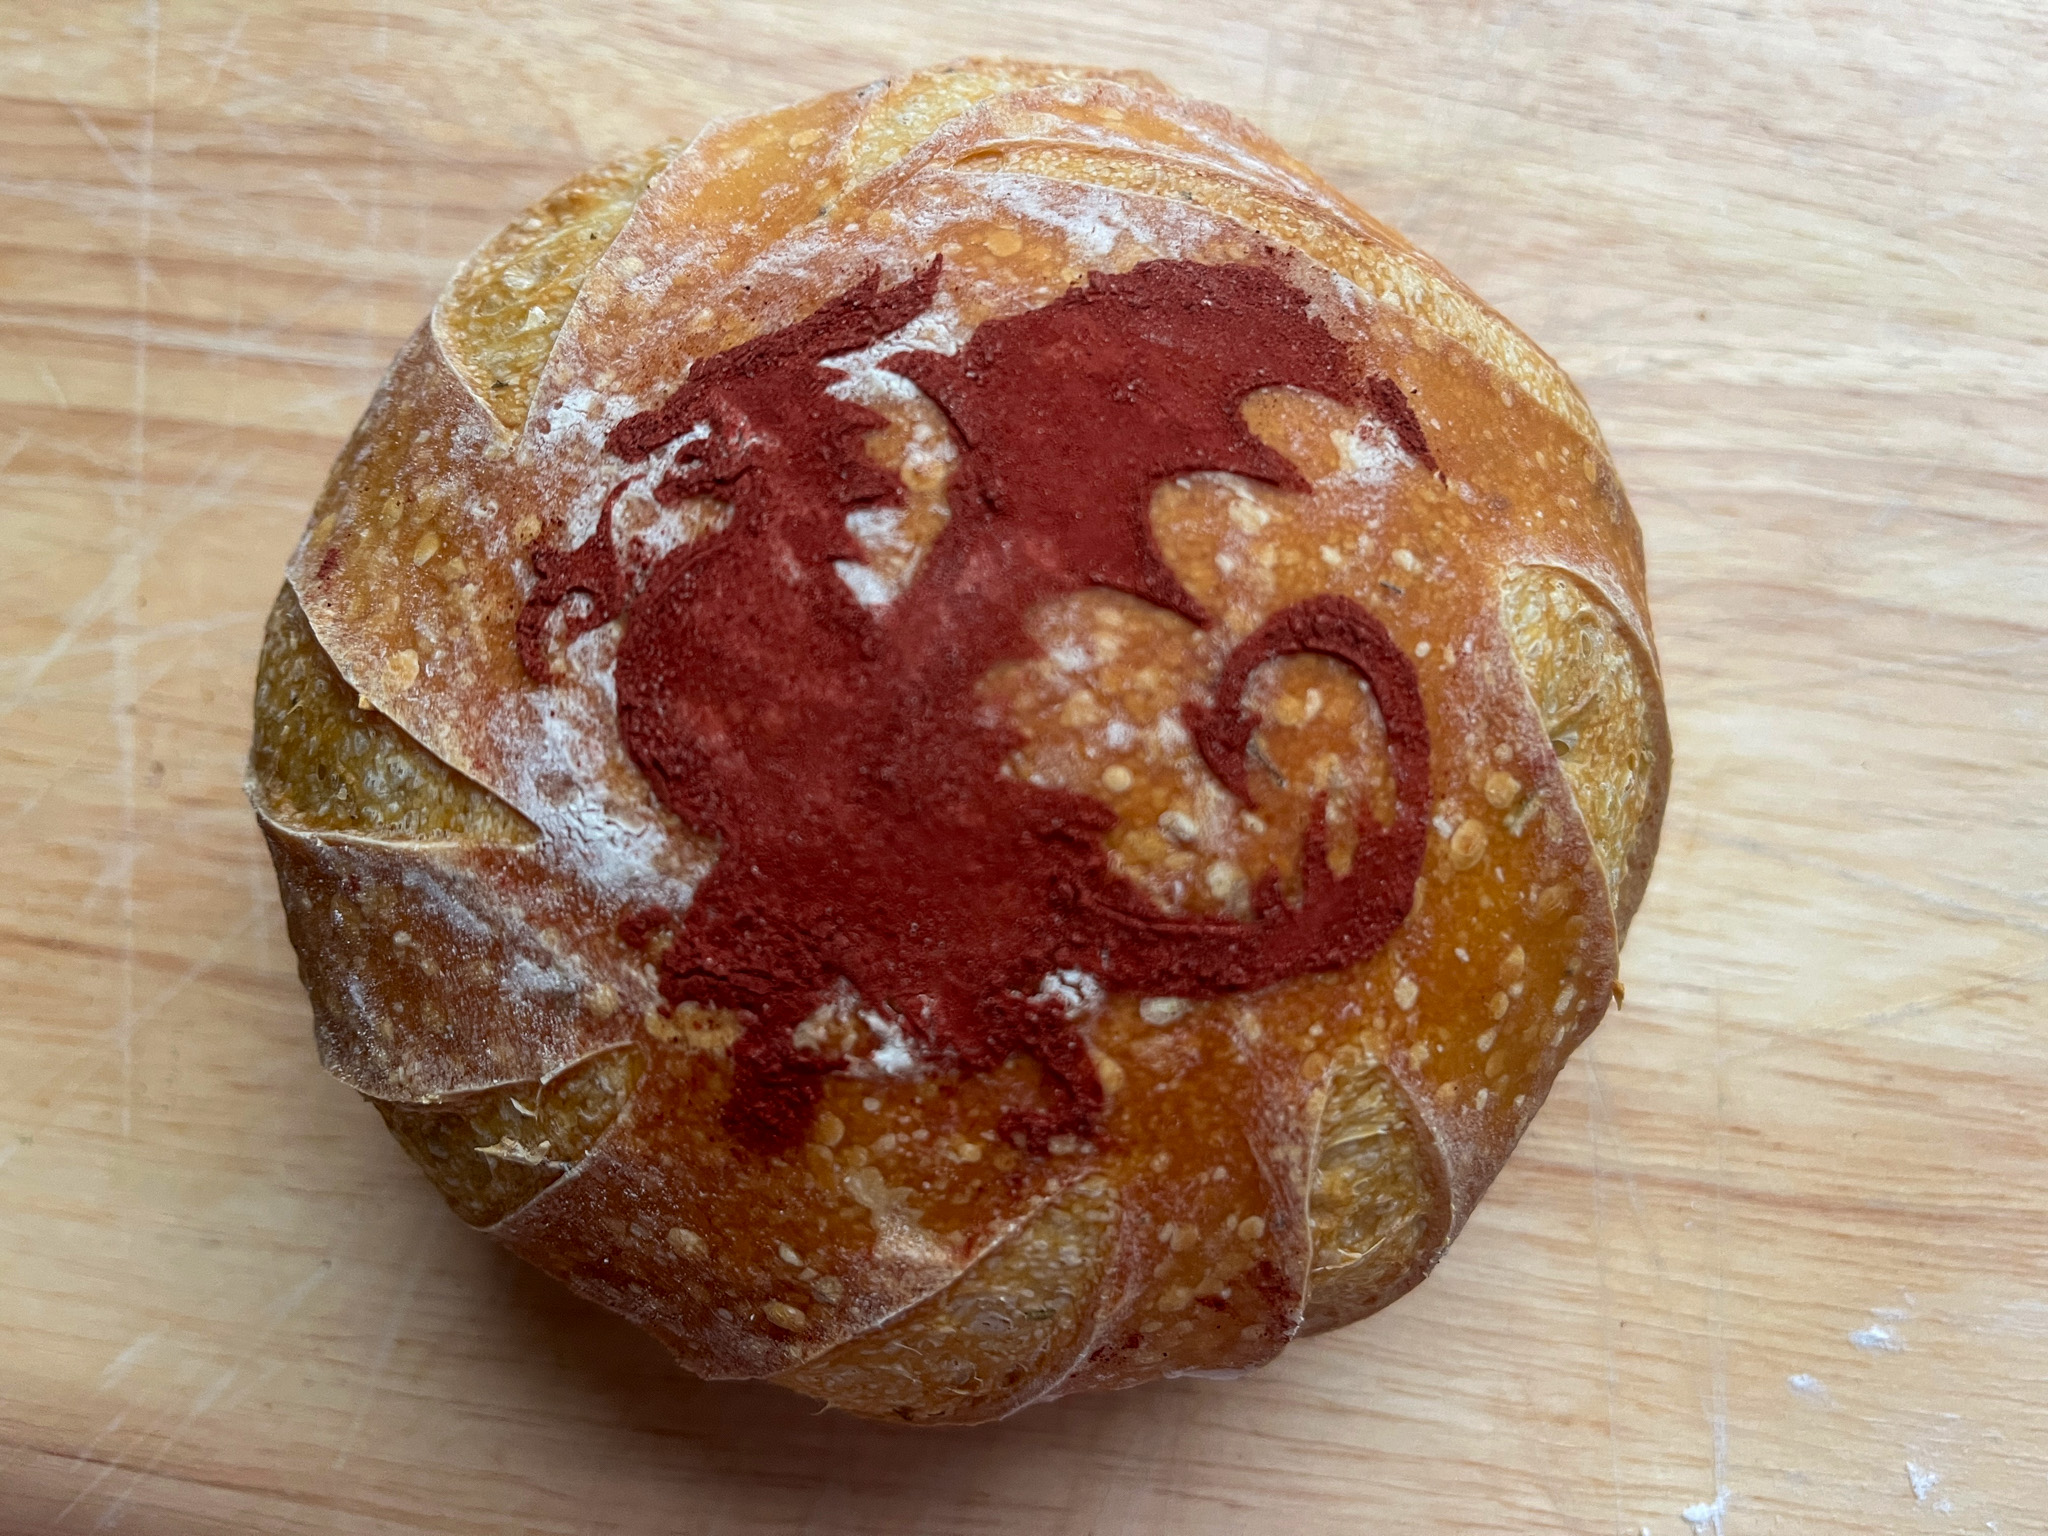
The simplest of the three, all I did was freeze the dough, wet the surface very lightly with a spray bottle, set the dragon stencil on top, and rub red yeast powder. Lift the stencil gently and make some cuts around it. Baked at 430F, covered for 15 minutes, uncovered for 15 more minutes.

You maybe noticed I started with 4 small boules of dough but you only see three baked breads. At first I thought I could bake two at a time, but it was not feasible. One of them sat at room temperature after scoring, it deflated pretty badly and it ended up as bread for croutons. Oh, well. Live and learn!

1 YEAR AGO: Cottage Cheese Flourless Muffins

2 YEARS AGO: Açai-Blackberry Sorbet

3 YEARS AGO: A Bouquet of Macarons

4 YEARS AGO: Chocolate-Hazelnut Tartlets

5 YEARS AGO: Turkey Taco Salad

6 YEARS AGO: Cheese and Pesto Emmer Roll-ups and Elaine’s Cookbook Review

7 YEARS AGO: Mango-Hazelnut Entremet Cake

8 YEARS AGO: Lebanese Lentil Salad and a Cookbook Review

9 YEARS AGO: Cottage Loaf

10 YEARS AGO: Sourdough Loaf with Cranberries and Walnuts

11 YEARS AGO: Sichuan Pork Stir-Fry in Garlic Sauce

12 YEARS AGO: Our Green Trip to Colorado

13 YEARS AGO: Ditalini Pasta Salad

14 YEARS AGO: Celebrate Wednesday with a Thai Seafood Curry

15 YEARS AGO:  Post-workout Breakfast

16 YEARS AGO: Semolina Barbecue Buns

17 YEARS AGO: Lavash Crackers

EAR OF CORN SOURDOUGH

I’ve been flirting with making this bread for a while, finally took a deep breath and did it! It was a lot easier than I anticipated. The idea and basic formula came from a super creative baker I follow on Instagram, and you can marvel at all her stuff clicking here.

EAR OF CORN SOURDOUGH BREAD
(slightly modified from crumbofherown)

for main dough:
265g bread flour 
170g water 
65g active starter (mine was at 60% hydration)
6g salt 
2 tiny drops yellow food coloring

for green dough (you will use only half of it for the husk)
160g flour 
85g water 
30g starter 
3g salt 
two tiny drops of green food coloring 

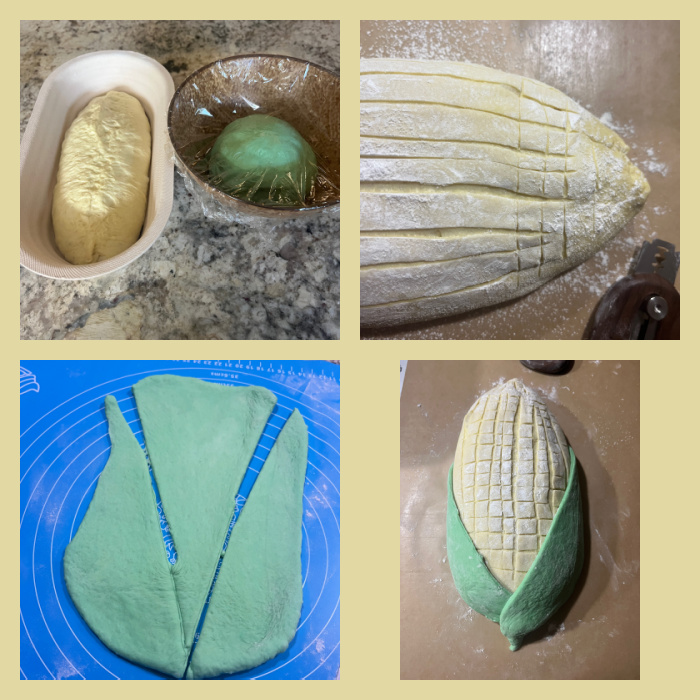
Start by making the main dough, adding first the water to the bowl of a KitchenAid type mixer, and diluting the yellow color in it. Add all other ingredients, mix with the dough hook for about 4 minutes. Transfer to an oiled bowl, and ferment at room temperature folding 4 times at 45 minute intervals.

Make the green dough, exactly the same way. It will be lower in hydration, so it won’t be as smooth as the other dough. Place in a small, oiled bowl, and ferment at room temperature. Do minimal kneading every time you fold the yellow dough.

After about 8 hours of mixing the dough, form the yellow dough as a batard, and place in a banneton. Leave the green dough in the bowl and place both components in the fridge overnight.

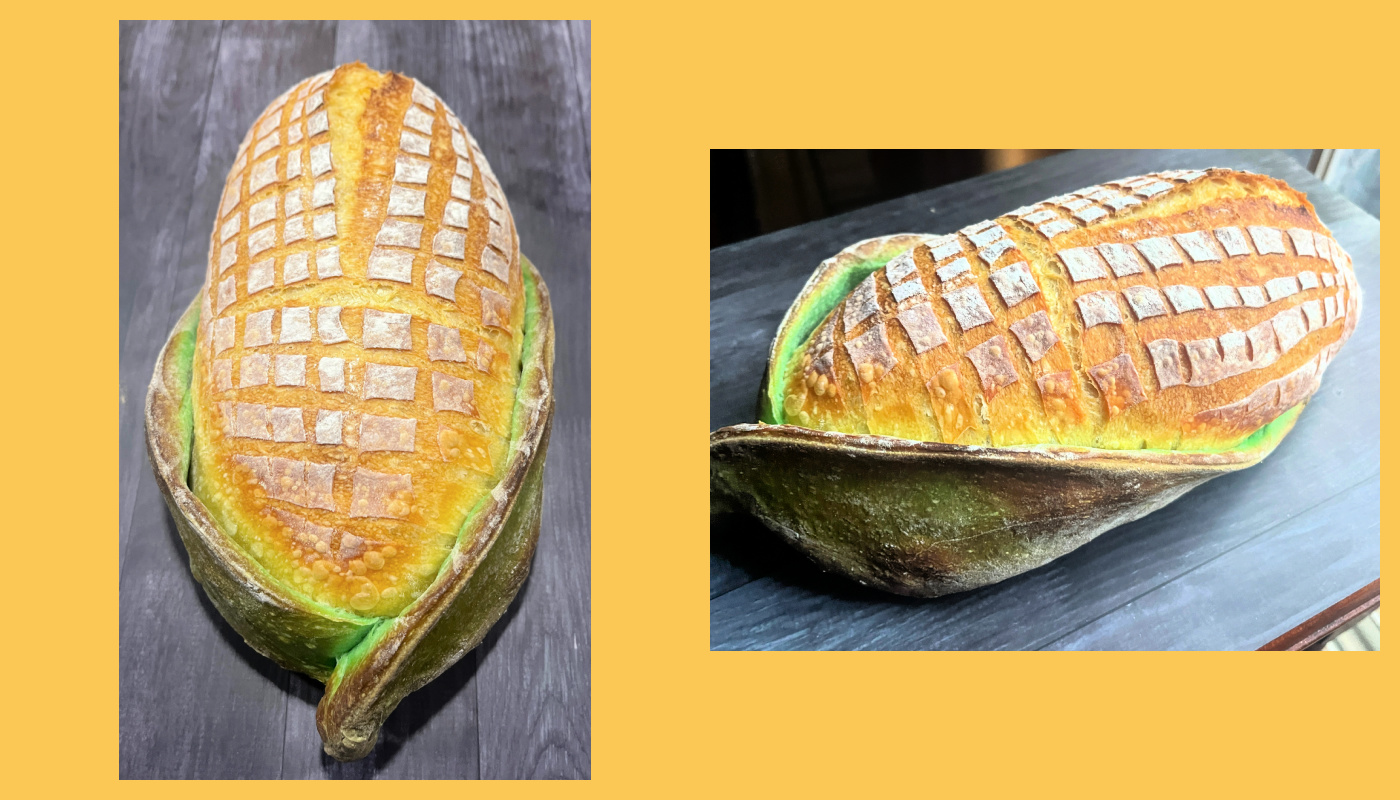
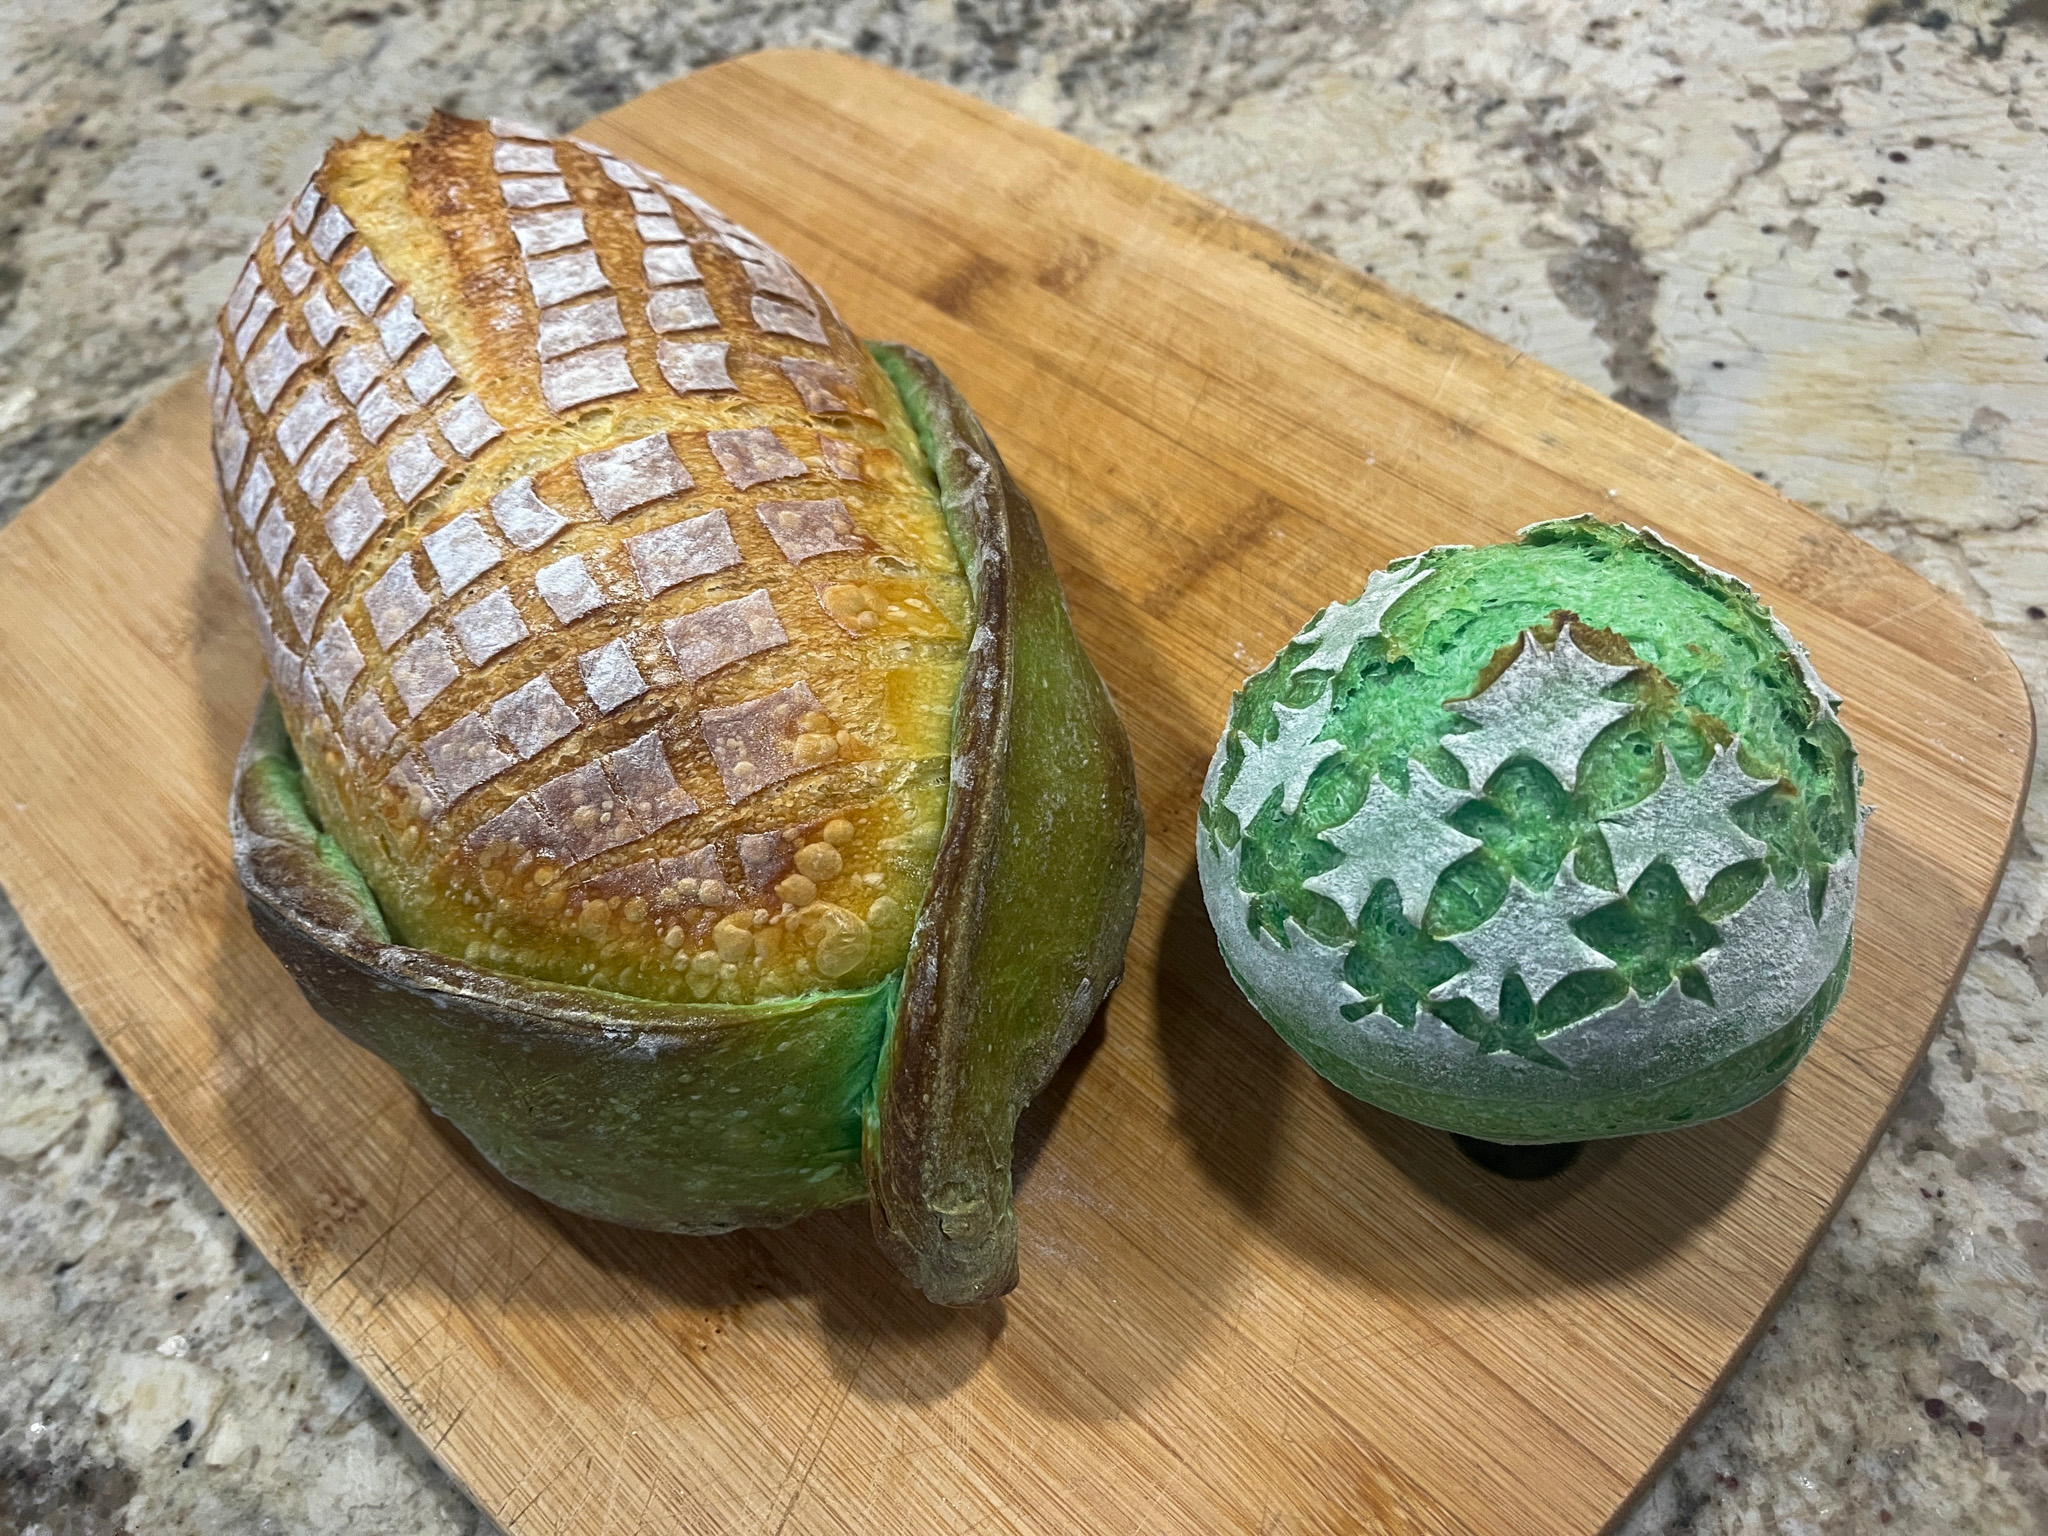
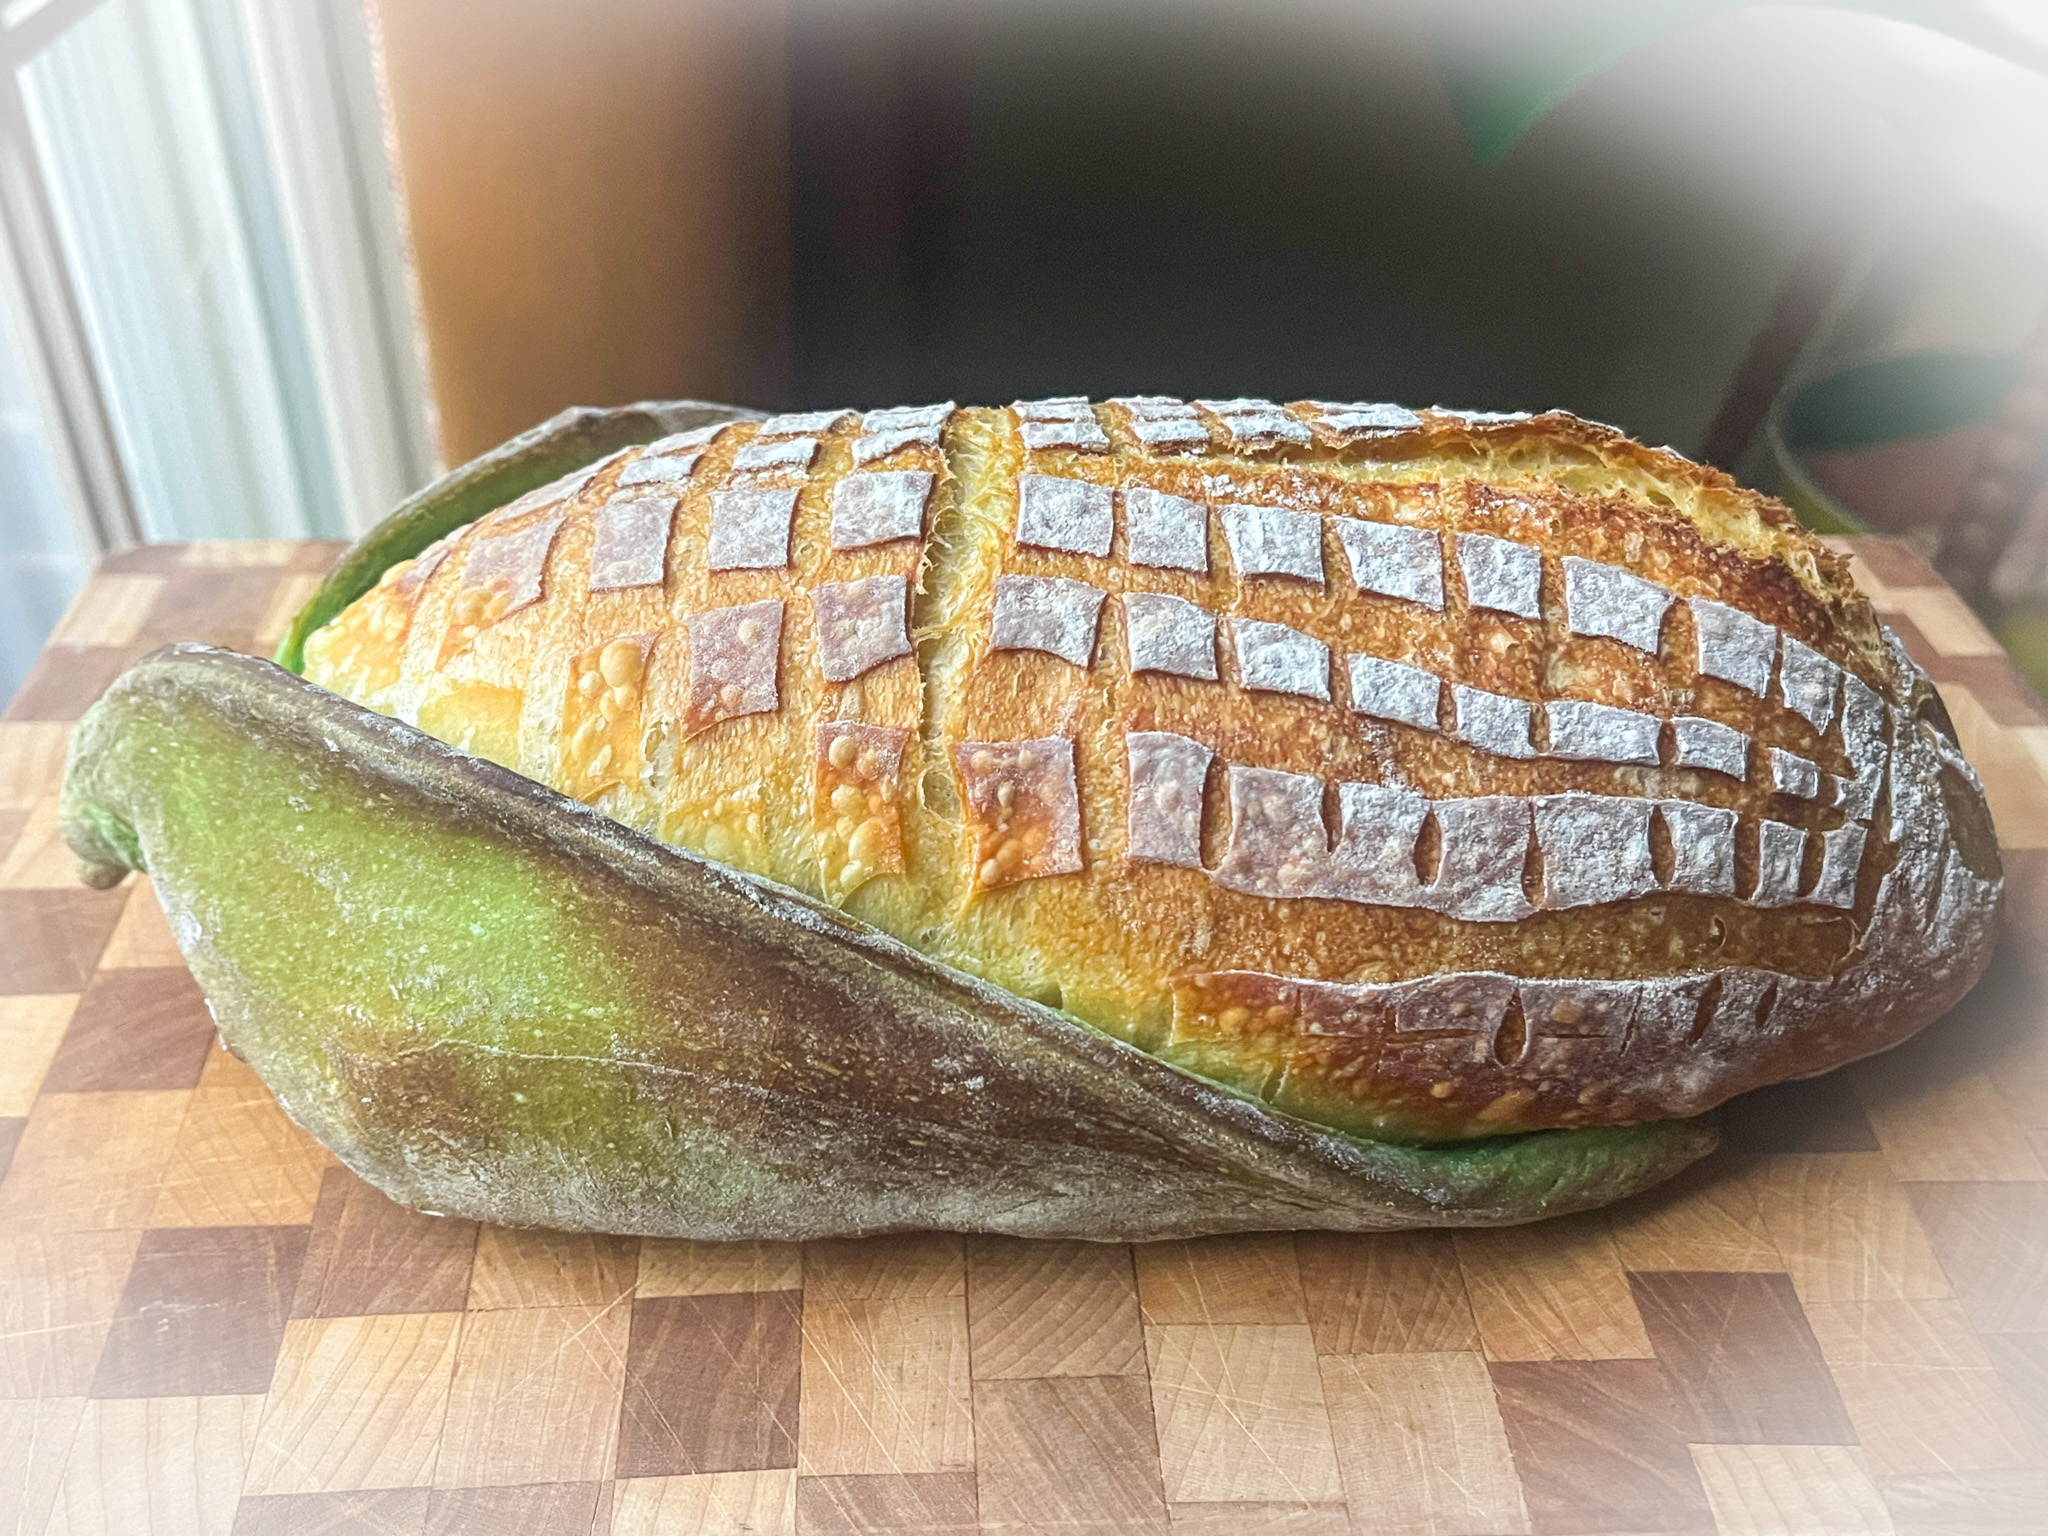
The next morning, the yellow dough out was gently shaped/pushed each batard into more of a corn-cob shape without completely reshaping the dough. I scored lengthwise first, then added horizontal scores across the entire loaf to create the individual kernels.

For the husks, I rolled the green dough out into a rectangle and cut out triangles. I placed the triangles over the yellow cob, folded the tips down, and added a small piece of green dough at the base for the stem.

I baked these individually at 450°F with the lid on for 23 minutes, then 425°F with the lid off for 8 minutes. If the green dough gets too much brown color, protect it with aluminum foil.

Let the bread cool completely before slicing.

ENJOY!

to print the recipe, click here

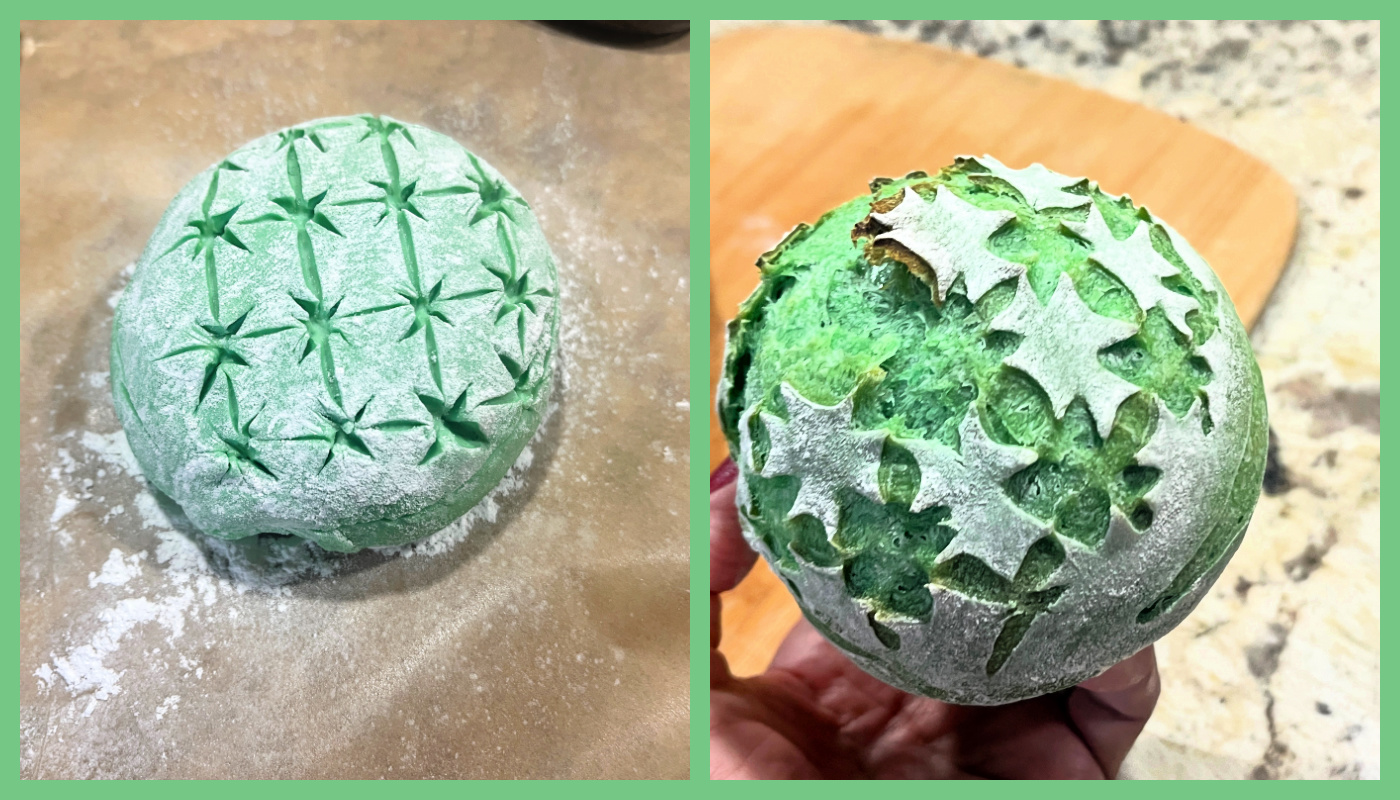
Comments: I have used food coloring in bread dough before, but had not added to the water before mixing. That makes all the difference in the world! Mixing the color once the dough is formed can be very tricky, and time consuming. Adding to the water makes it incorporate in the dough like a dream… The green dough will resist rolling at first, just allow it to rest a bit so the gluten relaxes, and continue trying. I did not want to make a very small amount of dough, so I used the full recipe. With the leftover dough I made a tiny little boule, scored it and baked after the big bread was out of the oven.

So there they are, my two babies, ready to be enjoyed! I am definitely going to play with this concept, it was quite straightforward to make, although I was a bit scared to try it at first.

I hope you visit @crumbofherown site on IG, it is quite amazing everything she does with sourdough in terms of shaping and adding colors. I want to try many different versions… So many breads, so little time!

1 YEAR AGO: Campfire Chocolate Cupcakes

2 YEARS AGO: La Couronne Lyonnaise, Two Ways

3 YEARS AGO: Have a Heart

4 YEARS AGO: Chocolate-Hazelnut Tartlets

5 YEARS AGO: Turkey Taco Salad

6 YEARS AGO: Cheese and Pesto Emmer Roll-ups and Elaine’s Cookbook Review

7 YEARS AGO: Mango-Hazelnut Entremet Cake

8 YEARS AGO: Lebanese Lentil Salad and a Cookbook Review

9 YEARS AGO: Cottage Loaf

10 YEARS AGO: Sourdough Loaf with Cranberries and Walnuts

11 YEARS AGO: Sichuan Pork Stir-Fry in Garlic Sauce

12 YEARS AGO: Our Green Trip to Colorado

13 YEARS AGO: Ditalini Pasta Salad

14 YEARS AGO: Celebrate Wednesday with a Thai Seafood Curry

15 YEARS AGO:  Post-workout Breakfast

16 YEARS AGO: Semolina Barbecue Buns

17 YEARS AGO: Lavash Crackers

MARBLED SWEET POTATO SOURDOUGH

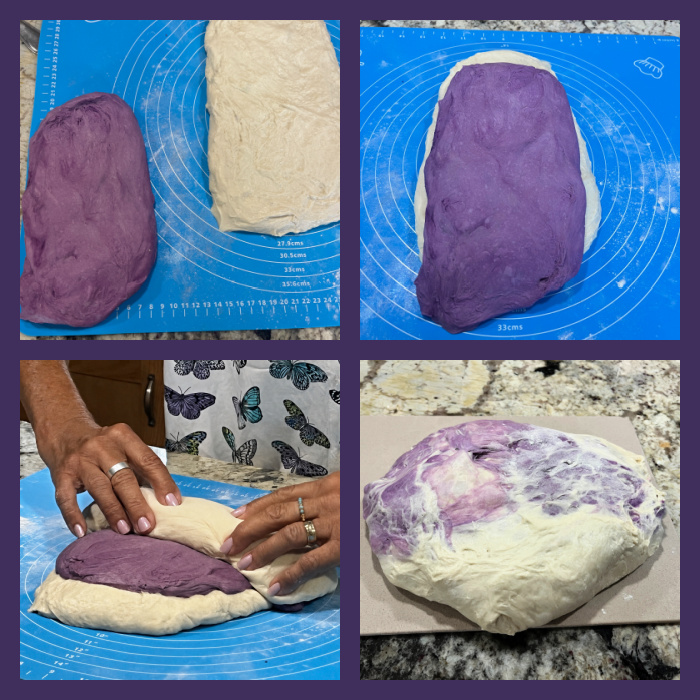
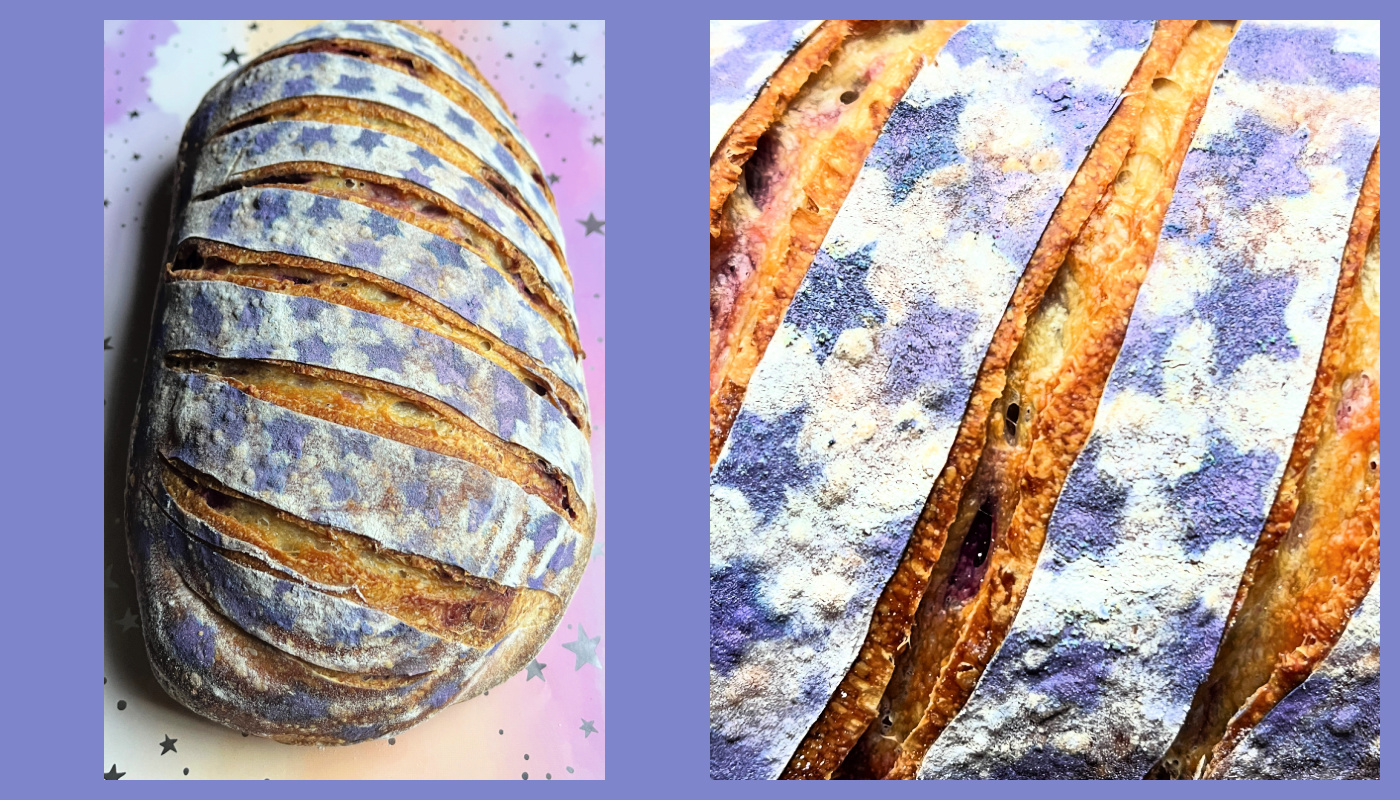
I had a blast making this bread, which I improvised beginning to end, including the decoration on top. I have a few ideas to adjust the design for a next adventure, but I am quite happy with the way this one turned out.

MARBLED SWEET POTATO SOURDOUGH
(from The Bewitching Kitchen)

500g bread flour
350g water
10g salt
75g sourdough starter (at 60 to 100% hydration)
25g sweet potato powder (I used this one)

Mix all ingredients except the sweet potato powder in the bowl of a KitchenAid type mixer fitted with the dough hook. Knead gently for about 3 minutes (first or second speed maximum). Weigh the dough, and remove approximately 1/3 of the amount to a smaller bowl. Continue kneading the white portion for another minute. Transfer to an oiled bowl. Place the smaller portion of the dough back into the mixer bowl, add the sweet potato powder and knead for another minute. You will probably have to knead by hand to incorporate the powder well into the dough, but no need to worry too much about it. Transfer that dough to a smaller, oiled bowl. Bulk ferment both portions folding them at every 45 minutes. Do that for 3 cycles, so the fermentation will last for about 2 hours and 15 minutes.

Forty five minutes after the last folding, stretch both doughs as a rectangle, ad place the purple on top of the white. Roll them together. Allow to ferment for another 90 minutes, with very gentle coil folds, twice, again, at 45 minute intervals.

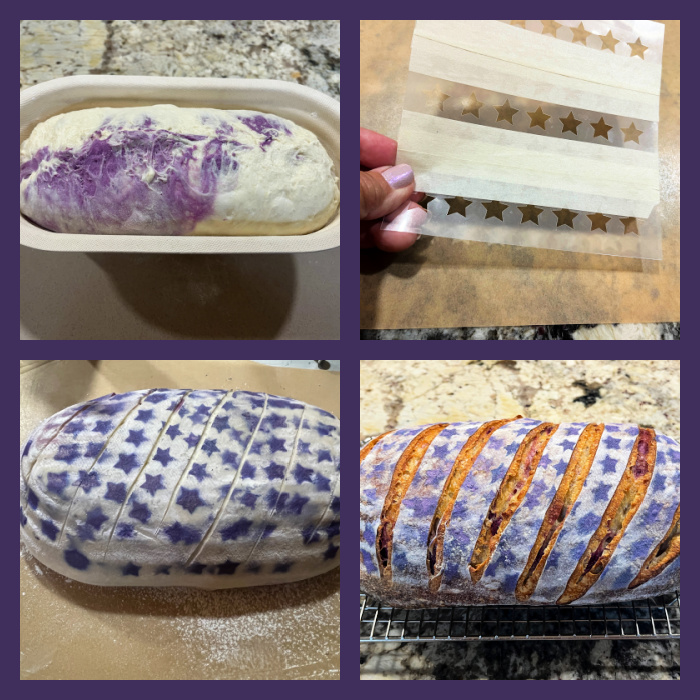
Once bulk fermentation is over, shape the dough as a oblong loaf and place in a banneton. Move it to the fridge, covered, and leave it there overnight.

Next day, freeze the dough for 30 minutes in the banetton, to make it easier to score later. Invert the dough on a paper liner, rub a fine layer of Thai rice flour, and decorate with slashes or if you want to add a pattern, use an air-brush and a stencil to do so.

Bake in a Dutch oven with the lid on at 450F for 30 minutes, open and allow the bread to brown for a further 15 minutes. Depending on the decoration chosen, you can do a deeper scoring at 7 minutes into baking.

Cool completely over a rack before slicing.

ENJOY!

to print the recipe, click here

Comments: When marbling sourdough, I like to mix the two colors at least 2 hours into the bulk fermentation. At that point the dough is nice to work with, has some “strength” and you can easily stretch and manipulate. Once that is done, two more cycles of folding help the colors mingle, but be gentle, that’ s why I change to coil folds instead of full folding. You can check youtube for the way to do coil folding, but the name is pretty self-explanatory.

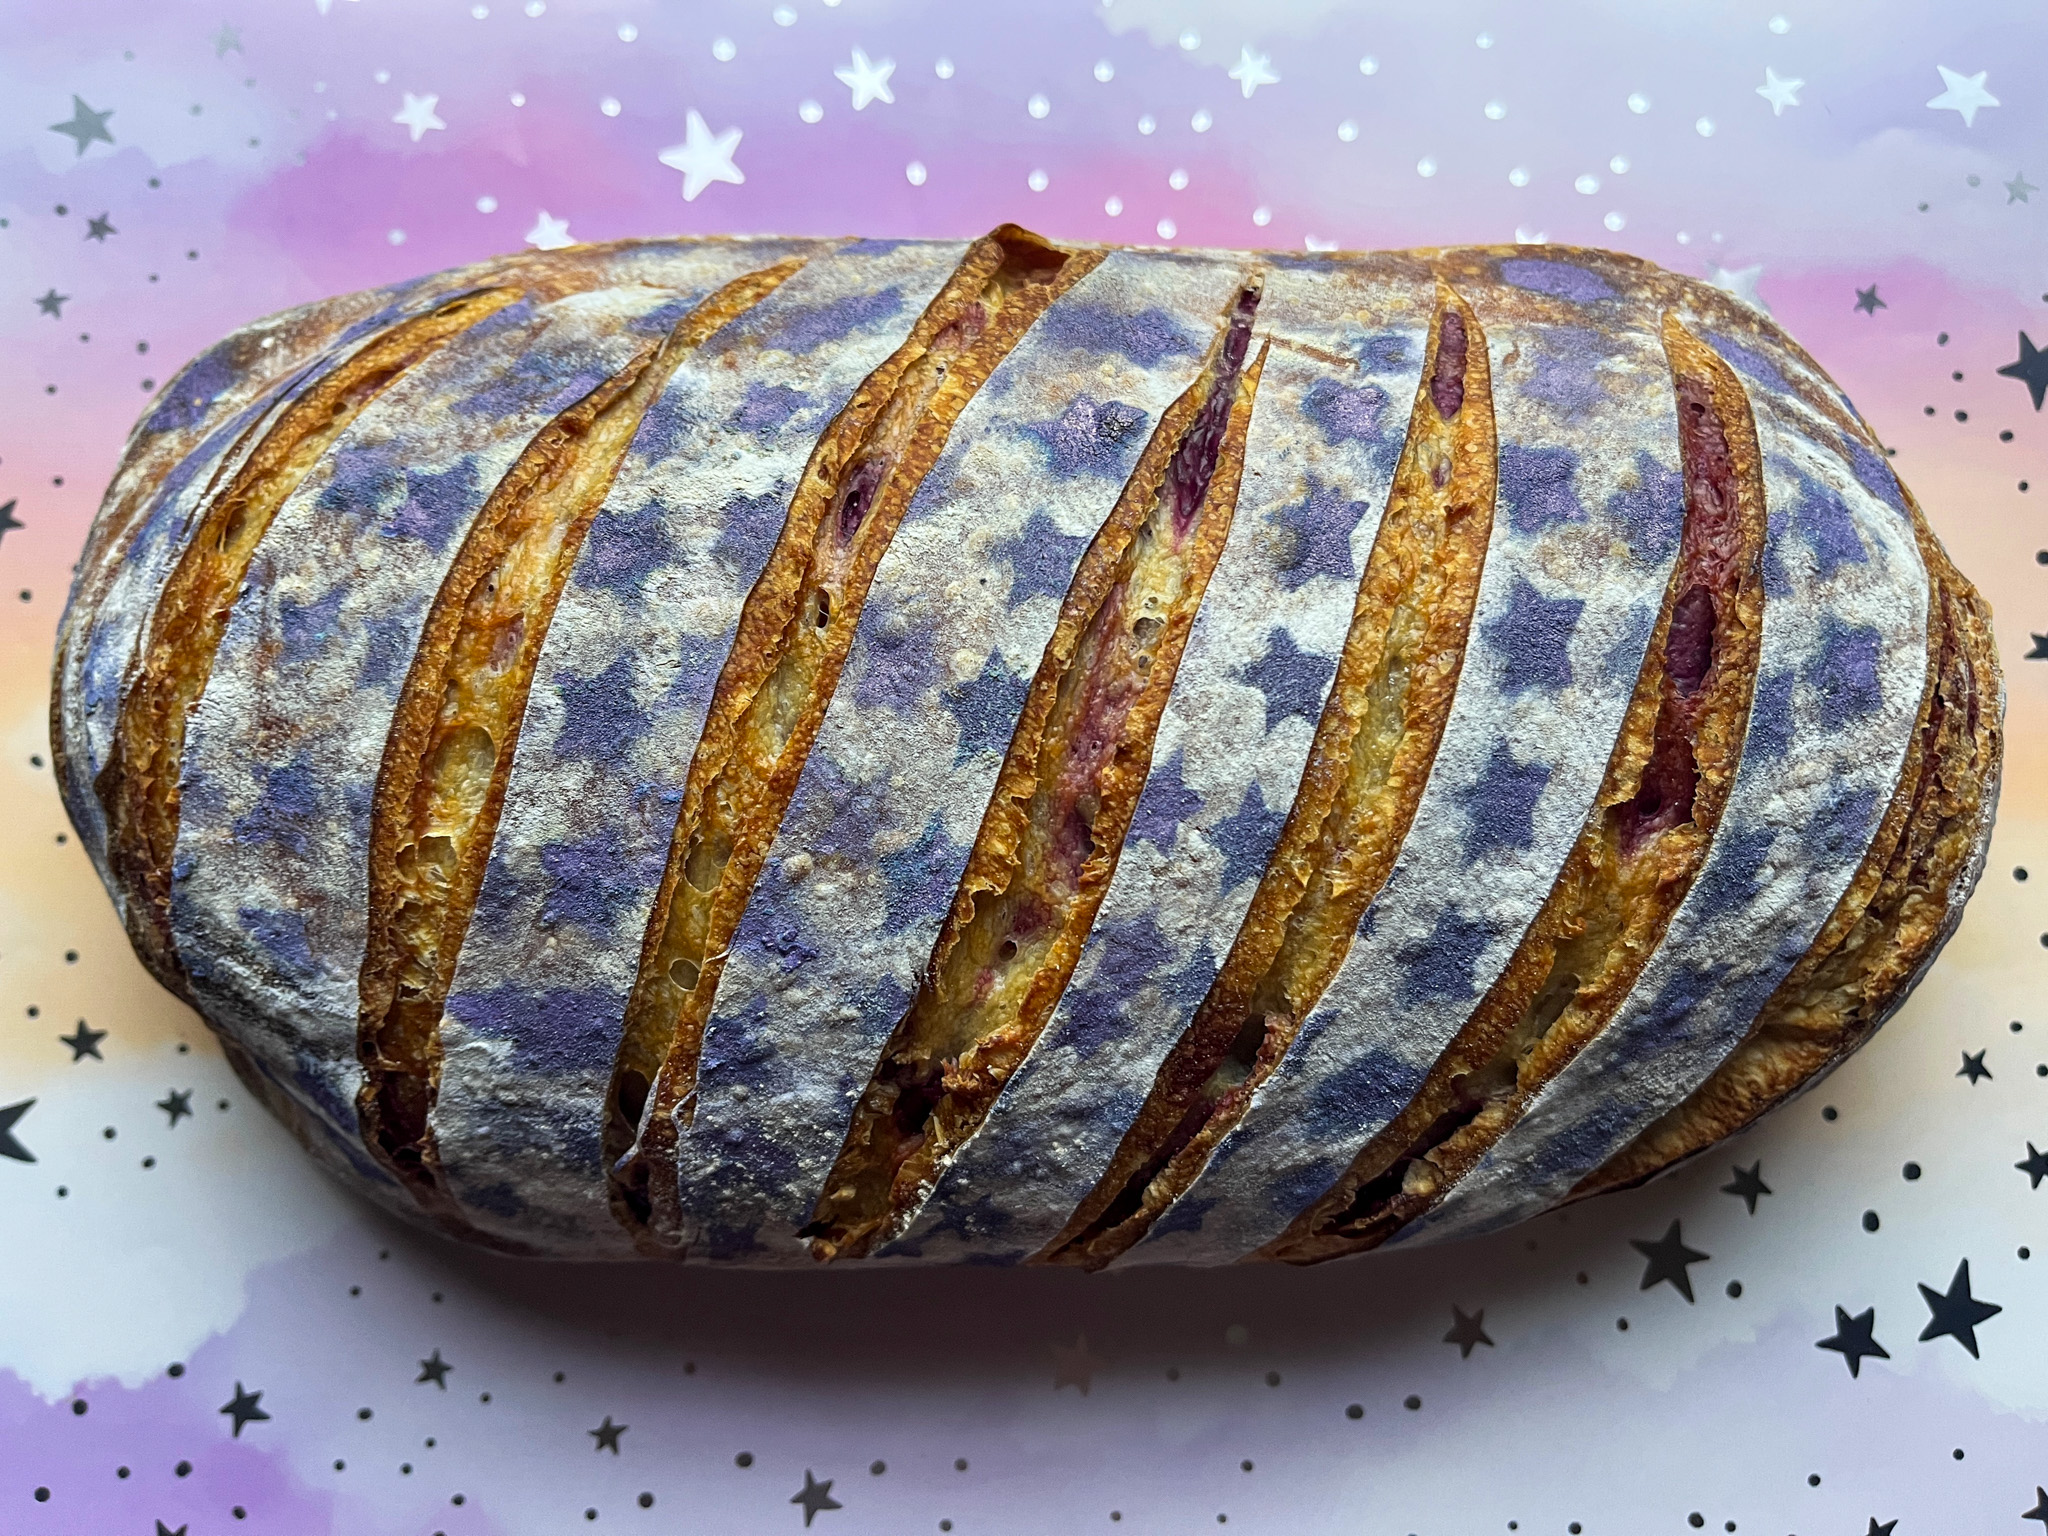
I used purple luster powder mixed with vodka in my air-brush, and a stencil that did not really have randomly placed stars, so I covered parts of it and arranged rows of stars all over. A few parallel cuts and into the oven it went…

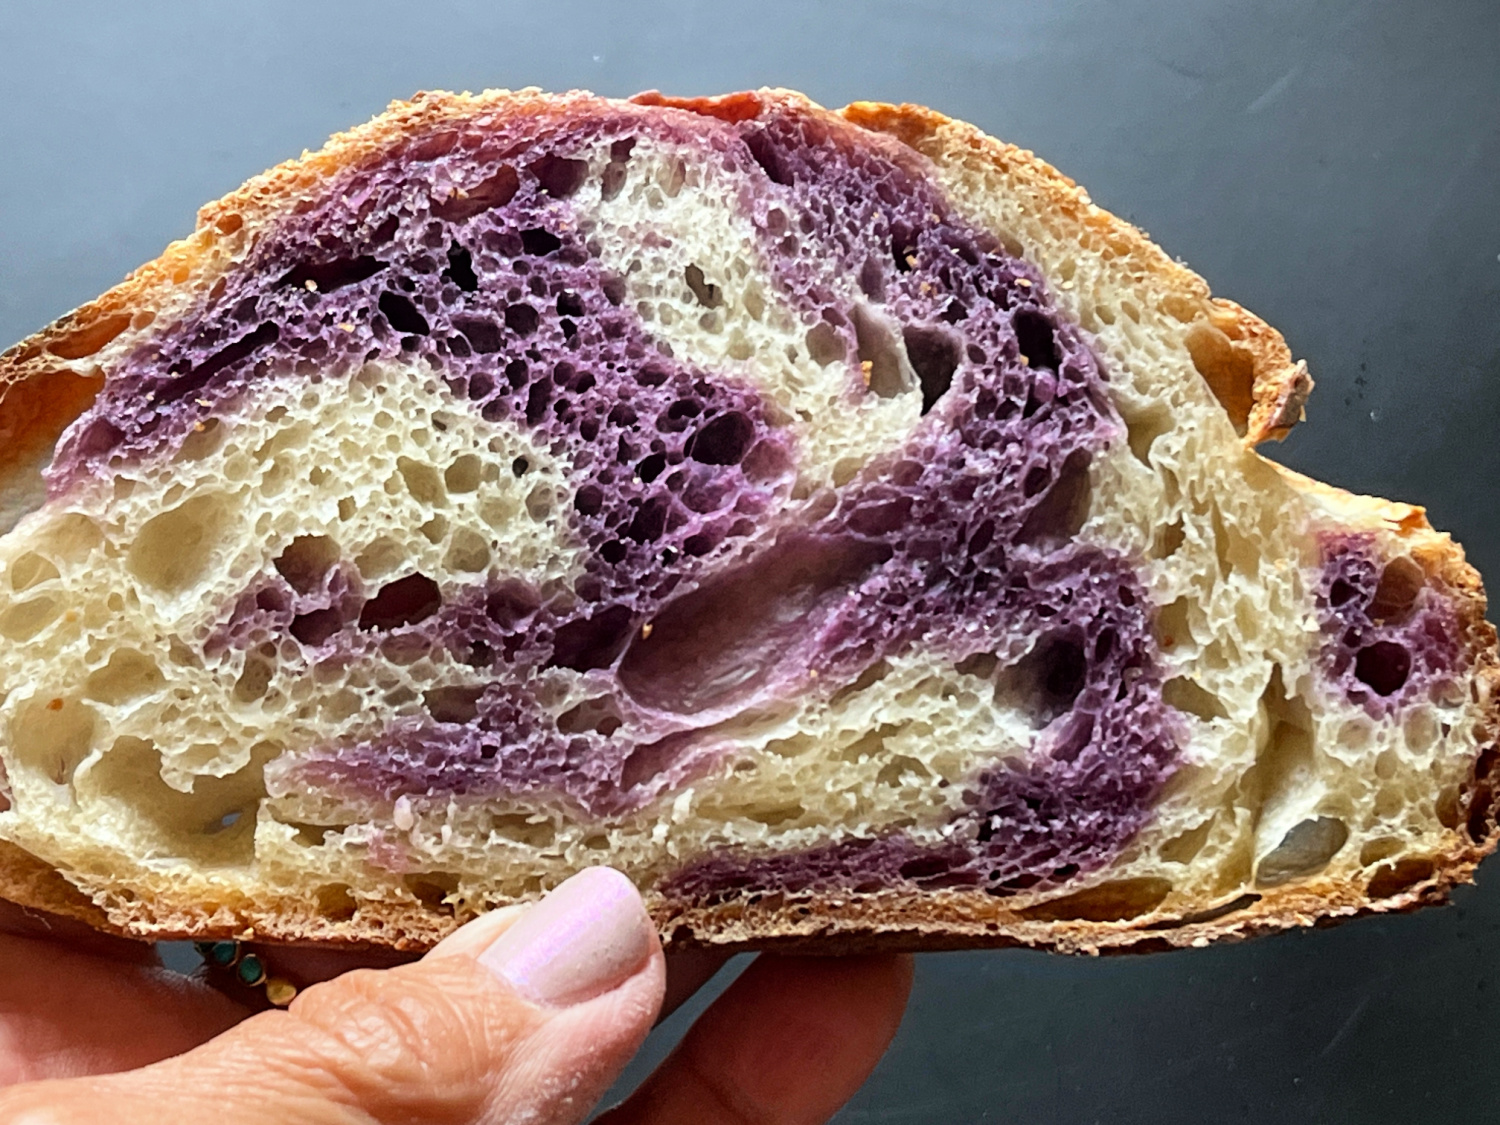
Of course, the crucial moment is slicing this baby, and hoping for a nice marbling effect inside…
What do you think? Did I get it right?

If anyone is curious, the flavor of the bread is not changed by the sweet potato powder. It does change slightly the texture of the dough, but once it is all fermented for several hours, it acts pretty much like a single-color batch does. I hope you give this method a try, you can use butterfly pea flower powder, beet powder (make sure to add some vitamin C to keep the red color), or even charcoal powder for a black and white version.

1 YEAR AGO: Three Royal Years with a Prince!

2 YEARS AGO: Cherry Macarons

3 YEARS AGO: Wafer Paper and Sourdough Baking

4 YEARS AGO: Banana Bread from the Experts

5 YEARS AGO: Shrimp Stir-Fry with Snow Peas and Cashews

6 YEARS AGO: Pickled-Roasted Chickpeas with Cashew Cream

7 YEARS AGO: Twice-Baked Goat Cheese Souffle

8 YEARS AGO: A Star from England in the Bewitching Kitchen

9 YEARS AGO: Hommage to the Sun

10 YEARS AGO:The Fabulous Three
.
11 YEARS AGO: Turkey-Chorizo Burger with Green Chile Dressing
.
12 YEARS AGO:Taco Salad
.
13 YEARS AGO: Semolina Sourdough Boule
.
14 YEARS AGO:Forgive me, for I have sinned
.

15 YEARS AGO: Cracked Wheat Sandwich Bread
.
16 YEARS AGO:  Au Revoir, my Bewitching Kitchen
.
17 YEARS AGO:French Bread