Maybe you know Haniela from her amazing cookie decorating skills, but she goes way beyond that: she is an accomplished baker on all sorts of areas. One of her husband’s favorite desserts is the Australian classic, Lamington. Hani has used this recipe for a long, long time and her blog post about it makes this potentially intimidating concoction pretty straightforward to make. Check her detailed article here.
COCONUT LAMINGTONS (from Haniela’s blog)
for the sponge cake: 2 + 1/3 cup all purpose flour (330 grams) 1 tbsp baking powder 1/2 tsp salt 4 large eggs, at room temperature 1 + 1/4 cup powdered sugar (150 grams) 6 tbsp oil (82-85 grams) 2 tbsp honey (45 grams) 1 tsp Vanilla Extract 1 cup milk, at room temperature (240-250 grams)
for the chocolate glaze: 2 + 1/2 cup powdered sugar (300 grams) 1/2 cup cocoa powder (50 grams) 6 tbsp milk (90-95 grams) 1 cup unsalted butter (226 grams) 1/2 tsp Vanilla Extract unsweetened coconut (1 + 1/2 5oz bags)
Heat oven to 350°F.
Line a 9×13-inch cake pan with parchment. Into a bowl, combine all-purpose flour, baking powder and salt. Set aside.
In a large bowl, beat 4 large eggs with powdered sugar on medium-high, for 5-8 minutes, until pale in color. Then gradually beat in oil untill well combined. Then beat in honey and lastly add vanilla extract. Beat well. Gradually, on medium speed beat in flour mixture, alternating with room-temperature milk.
Pour cake batter into a prepared 9×13 inch cake pan. Use a spatula to evenly distribute the batter into a pan. Bake the cake for 20-25 minutes, until a toothpick inserted in the center comes out clean. Cool the cake in the pan for 5-10 minutes. Invert the cake onto a cooling rack, cover it with a kitchen towel, and cool completely.
Trim the sides of the cake, about 1/4 to 1/2 inch off each side. Then cut the cake into 2-inch squares. Cover with a towel while you prepare the chocolate glaze so teh cake doesn’t crust around the edges.
Make the glaze: In a saucepan, combine powdered sugar, cocoa powder and milk. Heat on low heat until completely melted and smooth. Then, gradually add cut-up butter and heat the glaze until all the butter is melted. Whisk until the glaze is homogeneous. Remove from the heat, stir in vanilla extract. Keep chocolate glaze warm for dipping. Glaze thickens as it cools, simply warm it up as needed.
Pour glaze into a bowl, dip one square cake at a time. Use a fork to help you turn the cake to coat. Then let the cake sit on a fork and tap the fork or your wrist to release any excess glaze, allowing it to drip back into a bowl. Coat each glazed cake square in coconut.
Comments: The sponge cake component was a total dream to work with, perfect bake, flat, allowing me to cut square pieces without any struggle. I made the cake the day before, kept it covered with Saran wrap and a towel at room temperature. Next morning I cut the pieces, glazed and coated them with coconut. My advice is to work near a sink, rinse and dry your fingers after each piece that gets coated. It is a messy process but I thought it was going to be much worse. To coat in coconut, I dropped the glazed piece on the bowl, then used a fork to flip it. At that point I could hold the piece with my fingers touching the two sides that already had coconut on them, and coated the sides turning the piece with my hand. That worked well, using a fork was just too awkward for me. I donated the whole batch, but whenever I make a recipe for the first time, I save one for me and the husband to taste. Two thumbs all the way up, moist cake, delicious coating, chocolate and coconut make a wonderful match. I really hope you give Haniela’s recipe a try, it is a nice baking project to tackle, and you will feel quite accomplished later…
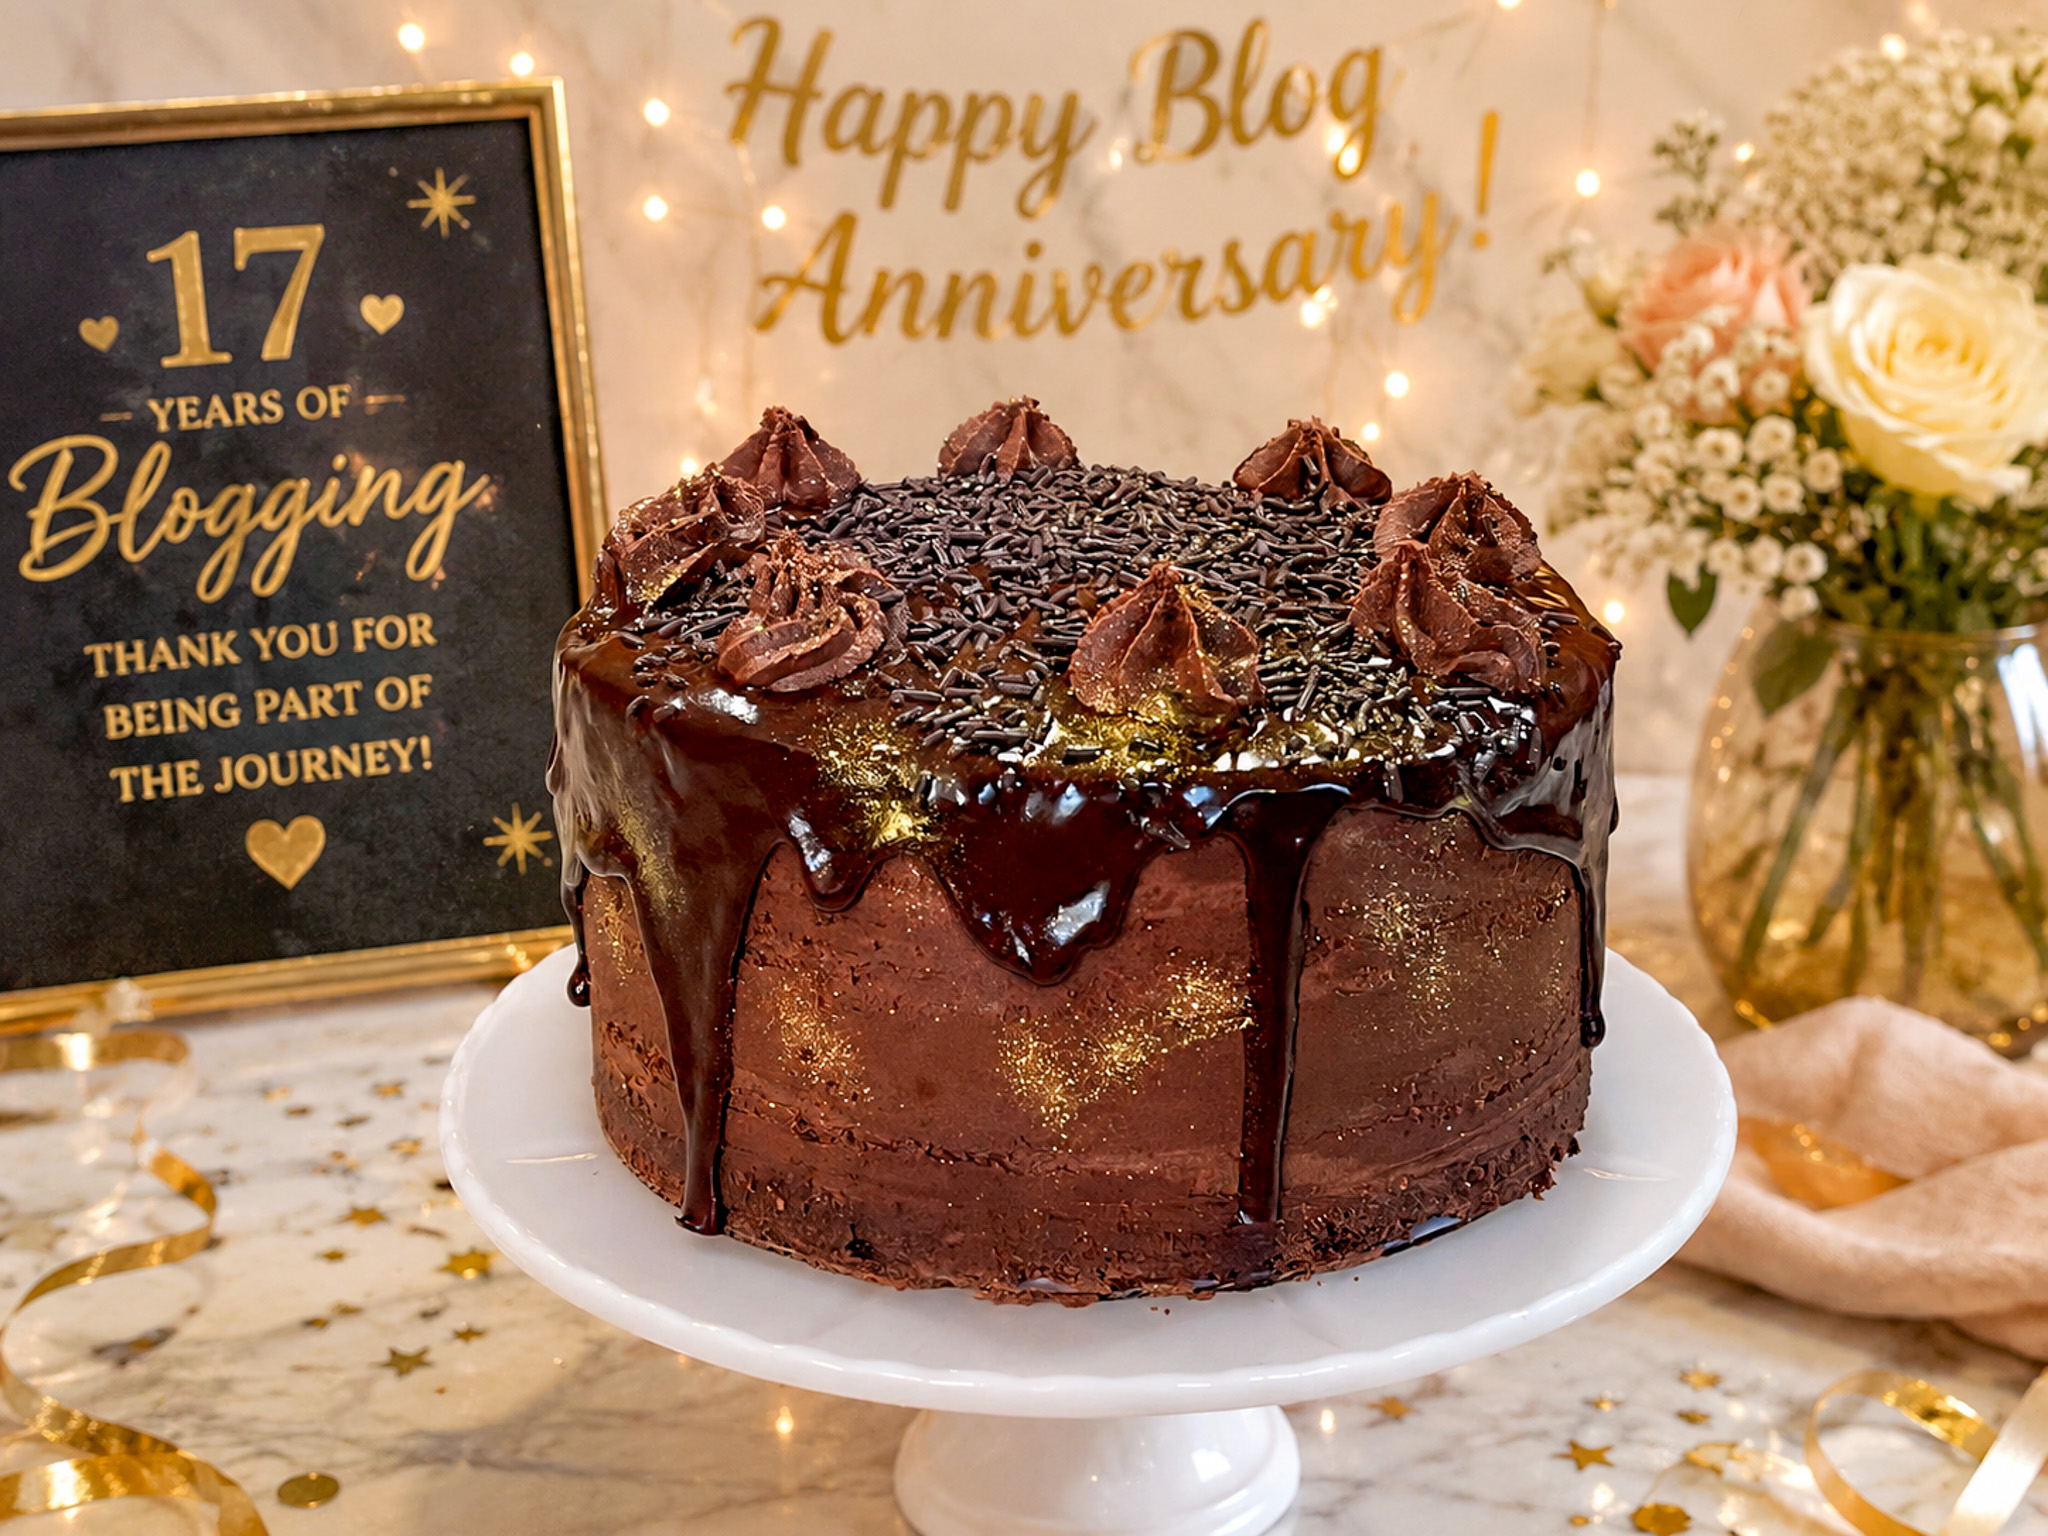
Sometimes I cannot quite believe that I’ve been doing this for seventeen years, but what is even more amazing to me, is that I still feel a wonderful thrill every time I hit “publish” on a new post. And yes, I realize I’ve said that before, after all, it’s been seventeen years of cooking and sharing joy. To celebrate the occasion, I baked a cake, but to be completely honest, there were a few issues, so I am not sharing the recipe. It comes from a pretty well-known cookbook. Enough said. Chocolate layer cake, with fudge buttercream and ganache drip. The issue was the buttercream, but I did my best to work around the problem.
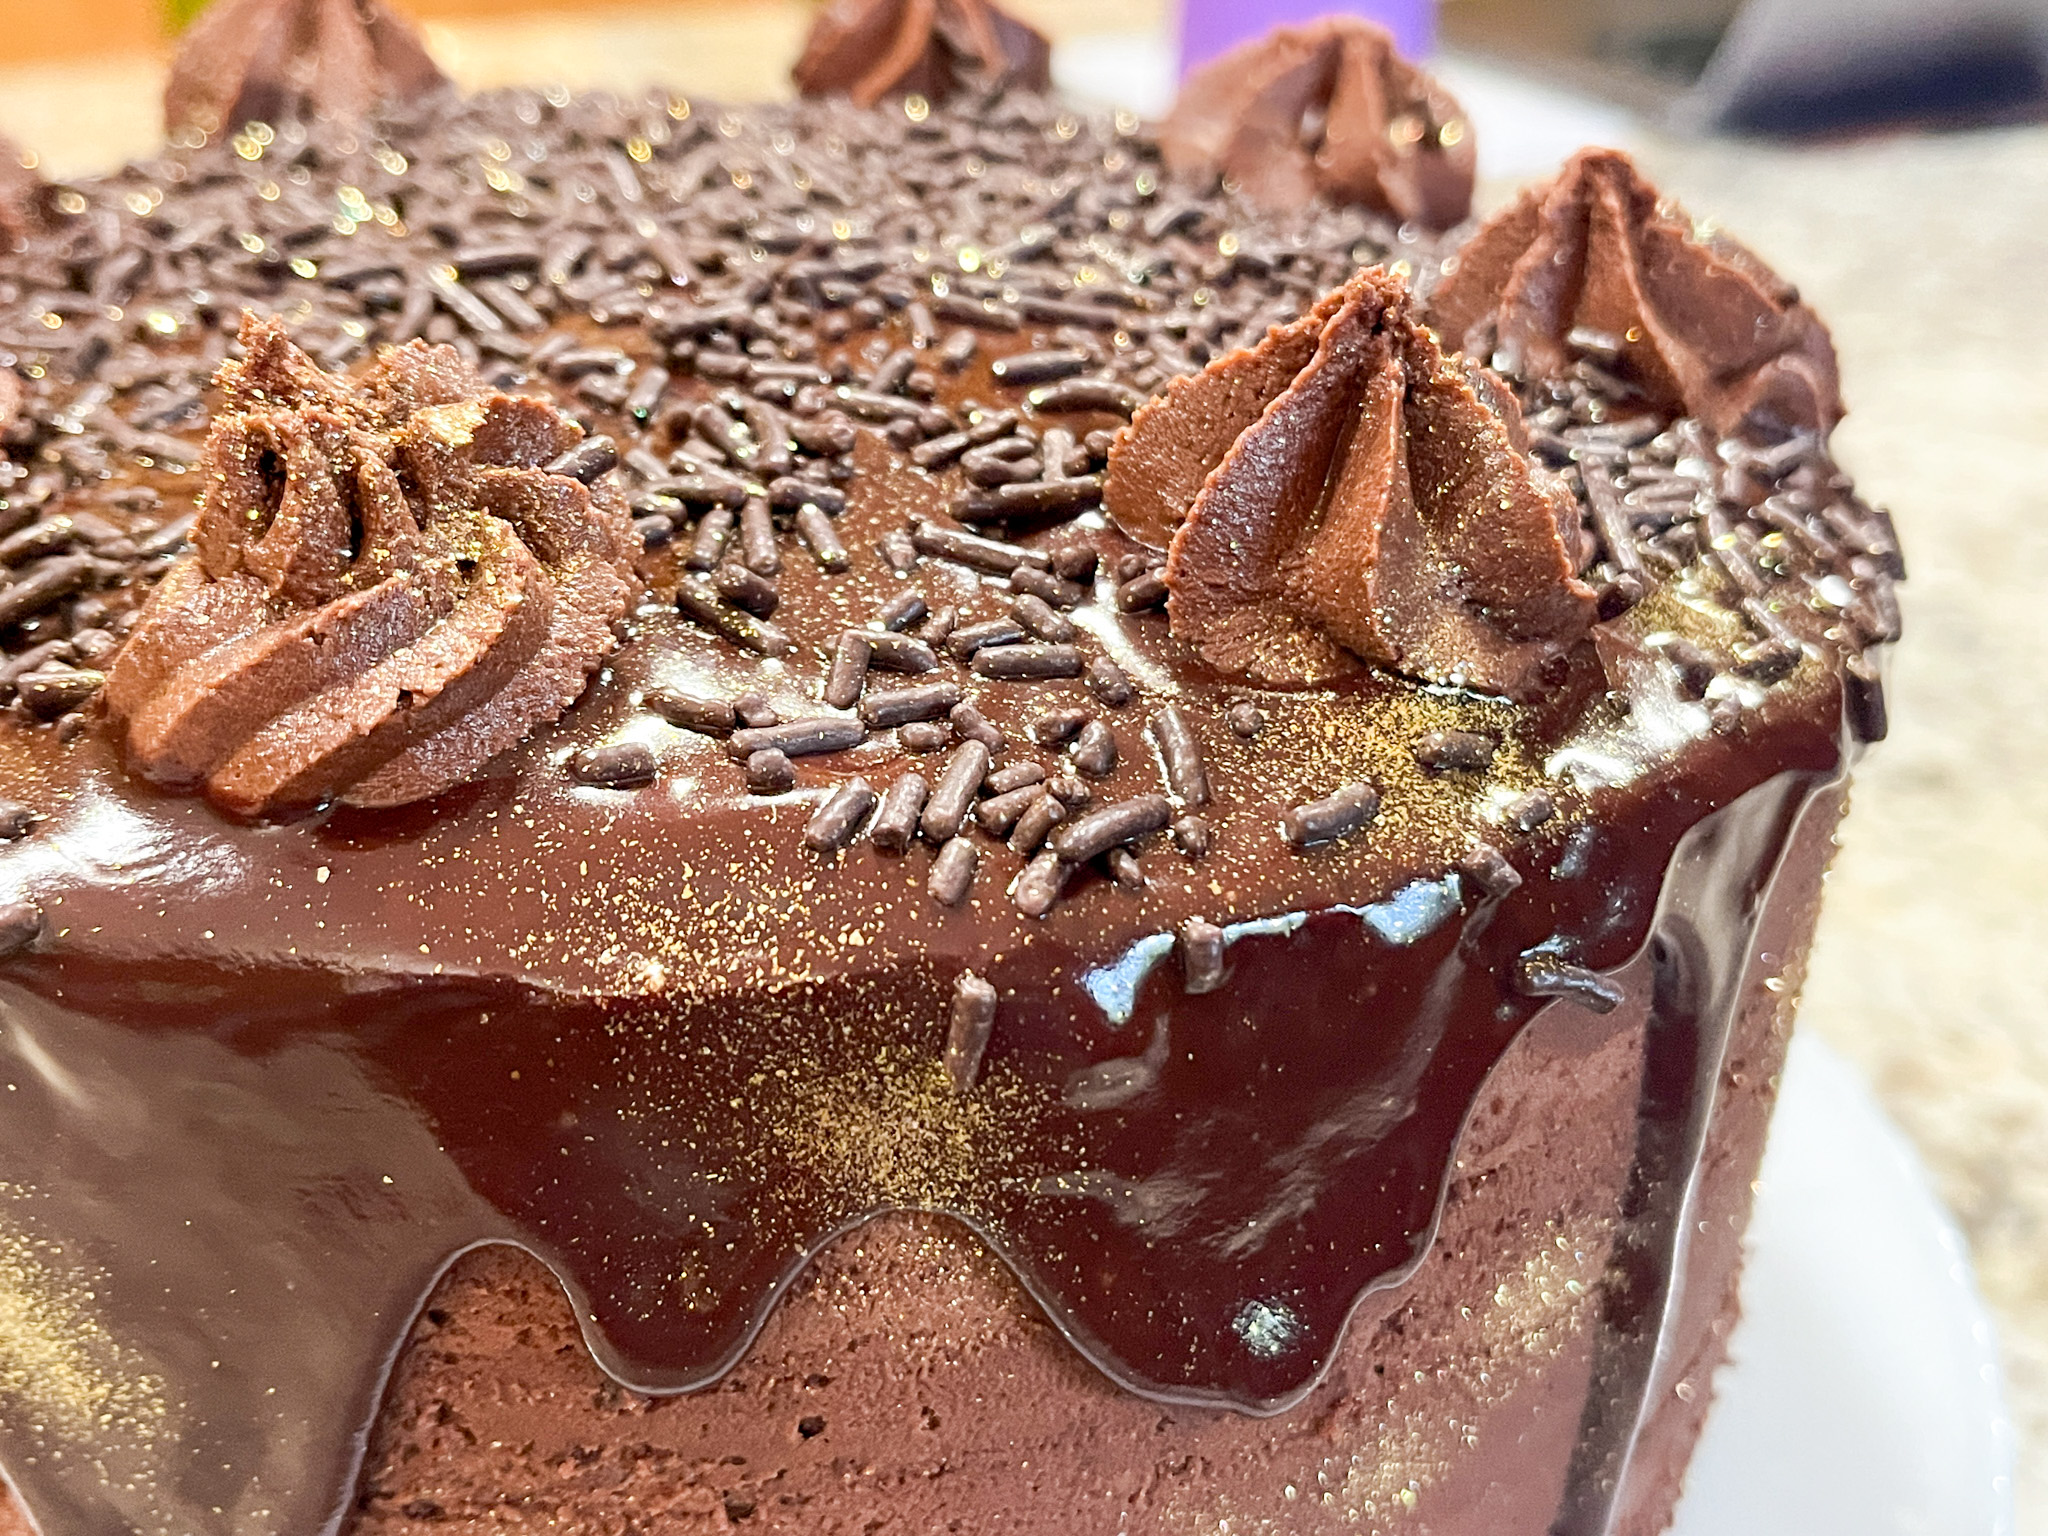
Four layers of chocolate cake, filling of fudge buttercream with bits of shortbread cookies, and a drizzle of caramel sauce. After frosting the cake, a dark chocolate ganache was poured on the flat top, allowing it to drip down the sides. A little extra buttercream to make rosettes on top, chocolate sprinkles and gold for good luck.
The cake was donated whole, so I cannot show the inside, but I heard it was very rich and delicious. As to the journey of blogging, mine will definitely keep going. Phil and I are officially retired for almost a full month, and want to expand a bit my horizon on cooking in general, attempting recipes that are a bit more exotic, maybe. Let’s see how it goes. If you’ve been here from the very beginning, thank you for hanging around for so long. If you are new to my little virtual spot, I hope you’ll find plenty of things to read about and maybe make in your own kitchen. Make it bewitching. And let’s step into the 18th year of food blogging, shall we?
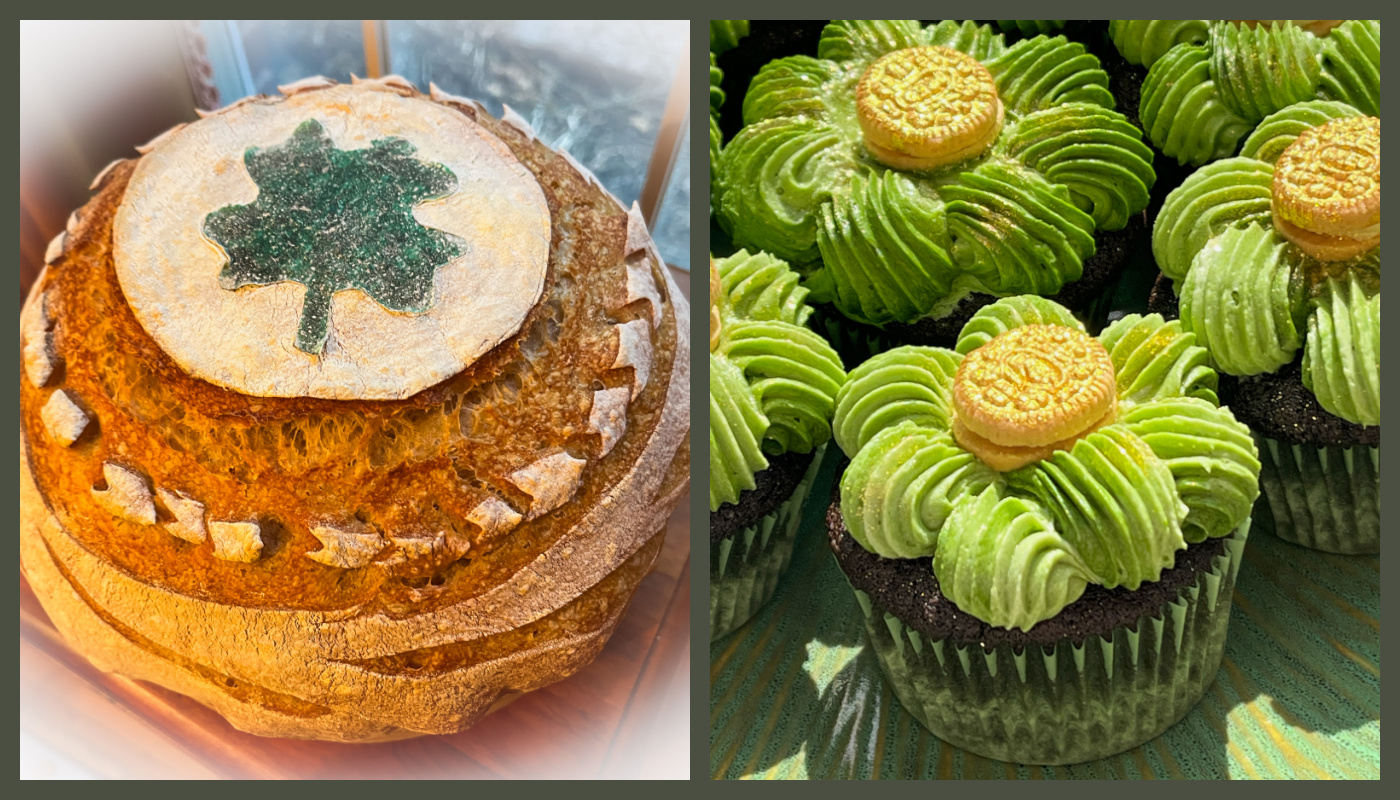
If you follow my baby blog, perhaps you’ve noticed I ran out of time to blog about St. Patrick’s cookies? It turns out I also got in trouble right here in the Bewitching Kitchen. Today I share a bread and a batch of cupcakes made in honor of that special holiday. Included in this post, a little cupcake decorating video, that you can find right after the recipe.
x
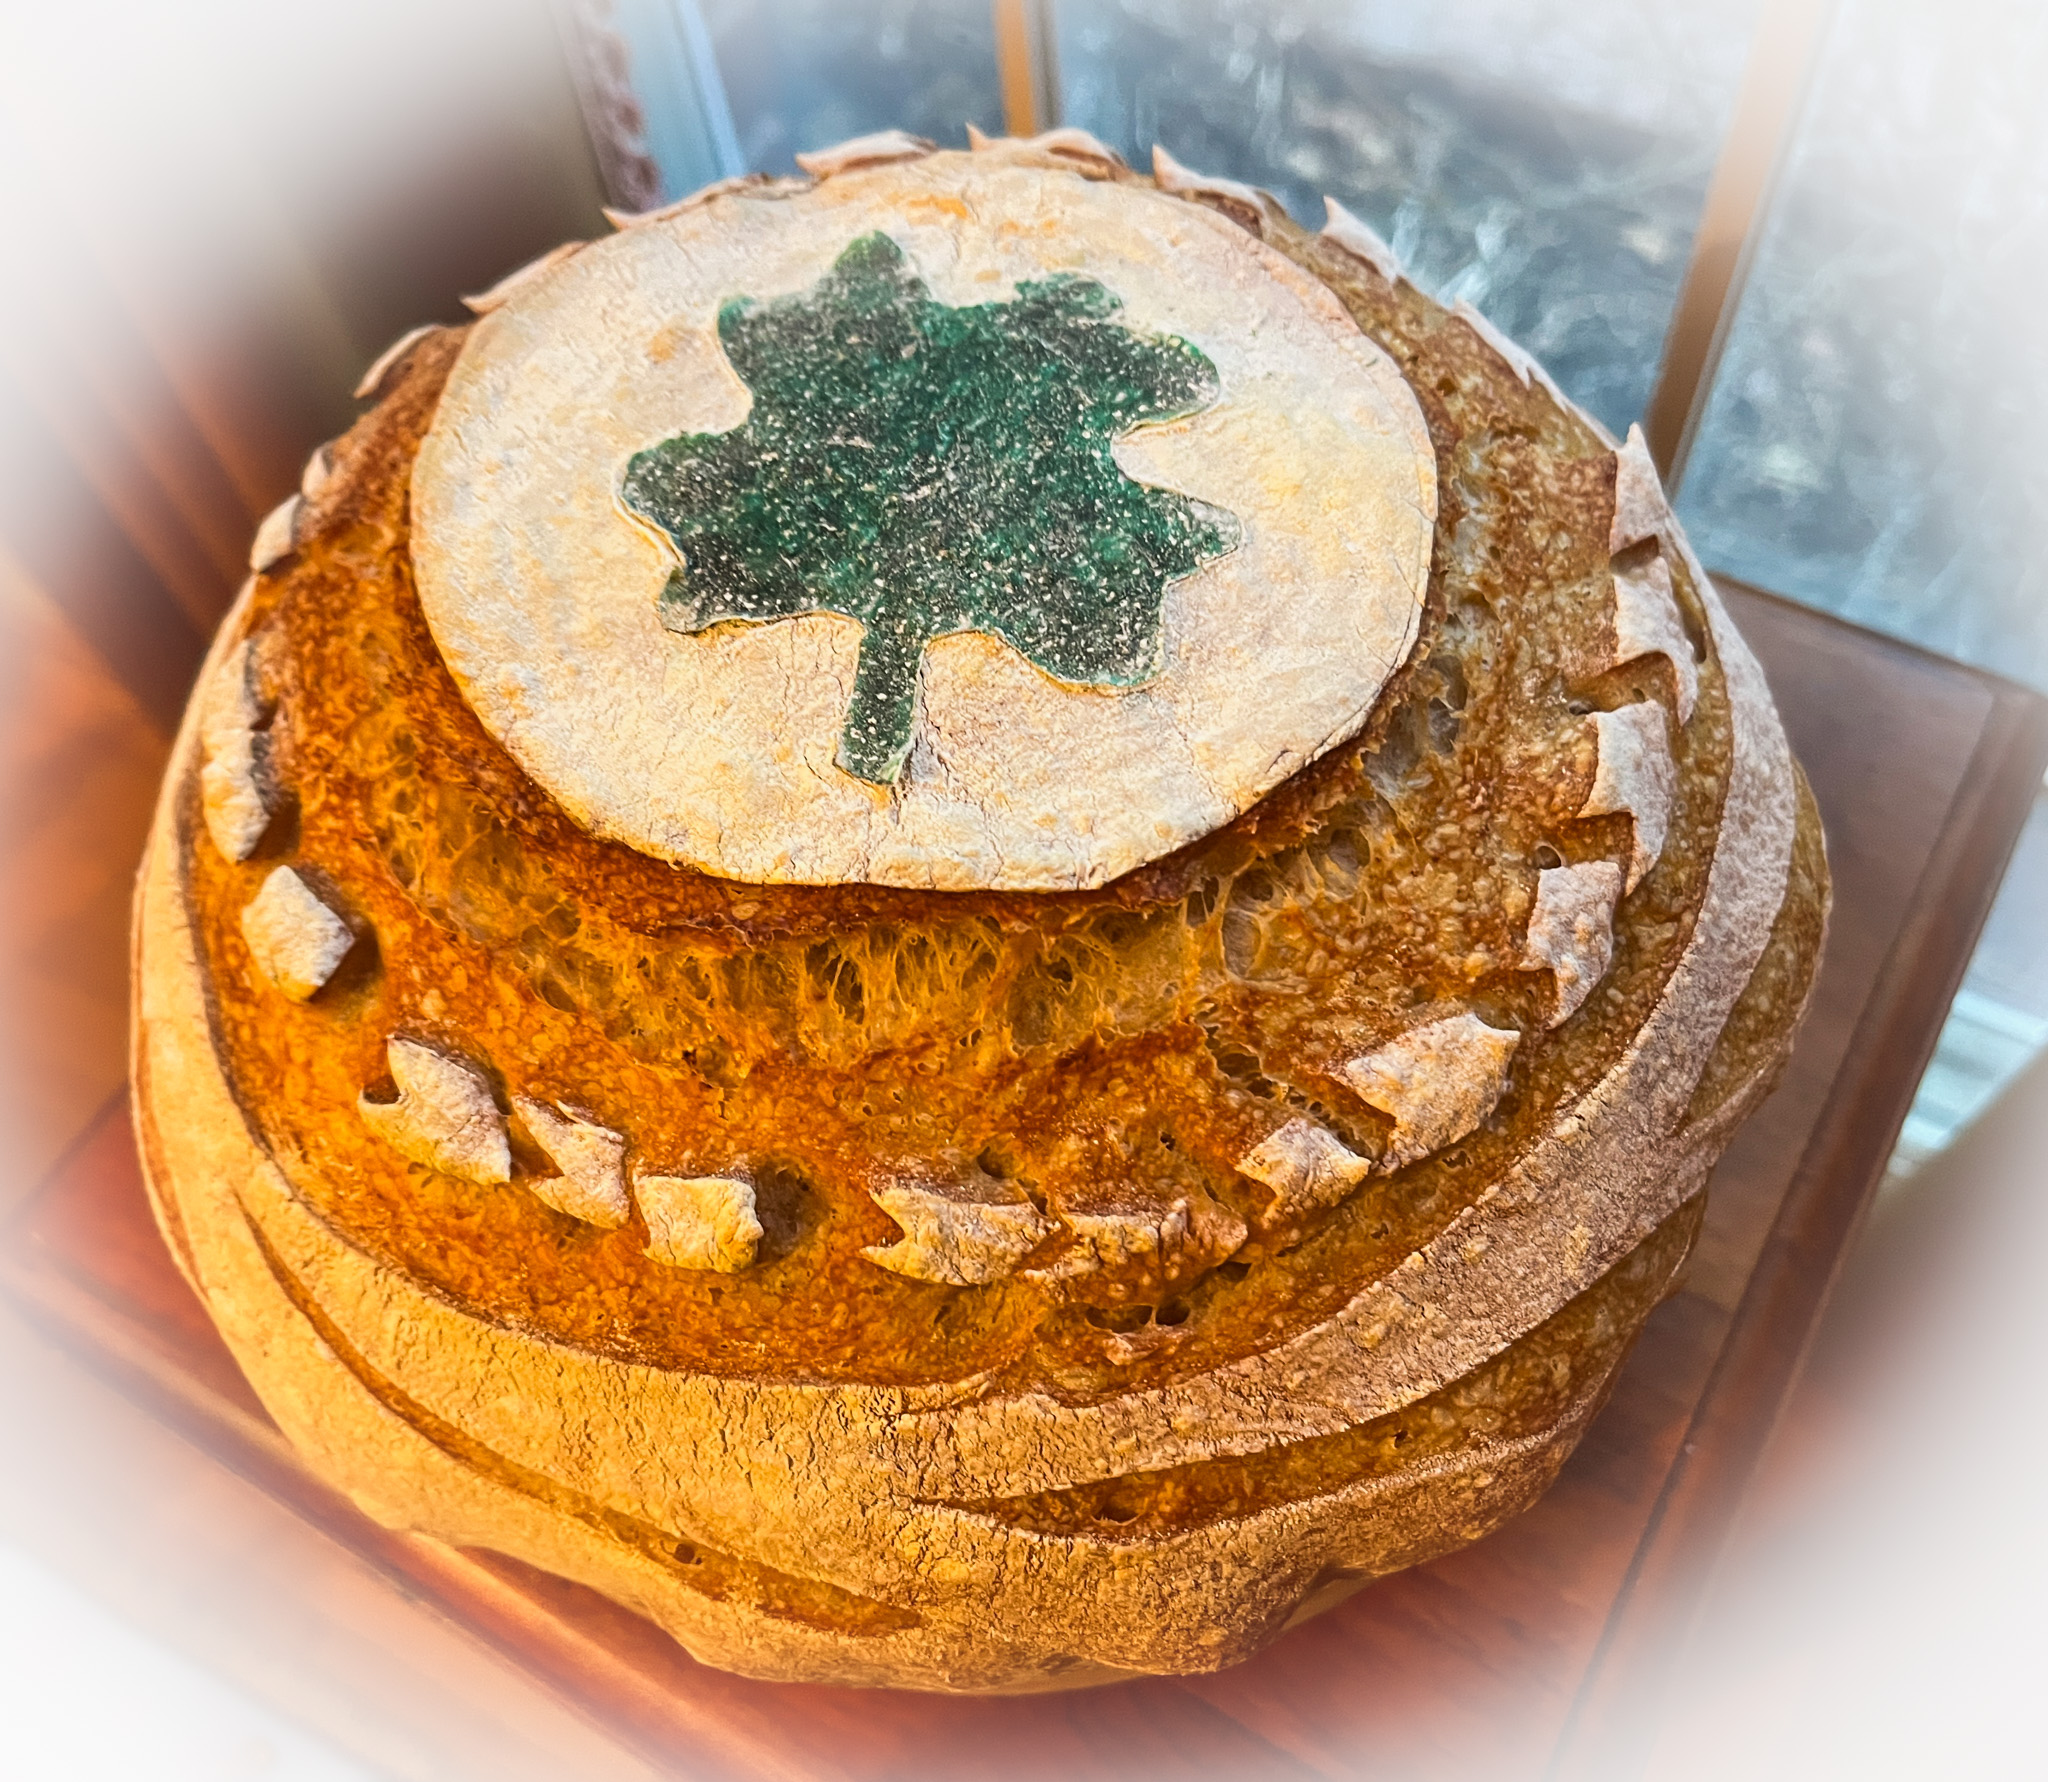
Better late than never, let’s start with the bread…
SHAMROCK SOURDOUGH (from The Bewitching Kitchen)
450g bread flour 25g spelt flour 25g dark rye flour 75g sourdough starter (stiff or 100% hydration) 10g salt 360g water Thai rice flour (or tapioca flour) shamrock shape cut from edible paper
Mix all ingredients in the bowl of a KitchenAid type mixer fitted with the dough hook. Knead gently for about 4 minutes (first or second speed maximum).
Transfer dough to a lightly oil bowl and do a bulk fermentation with 4 folds made 45 minutes apart. Before you start the fermentation , remove a very small amount of dough to a small glass container (like those that hold spices), and mark where the level of the dough is with a permanent marker. Keep that at room temperature to monitor fermentation.
After the last folding cycle, keep an eye on the fermentation using the small vial. Ideally you want to let the dough ferment until it is double in size. Depending on the day, temperature of your kitchen, it might take 8 hours or more.
Once bulk fermentation is over, shape the dough as a round ball. Place in the fridge overnight.
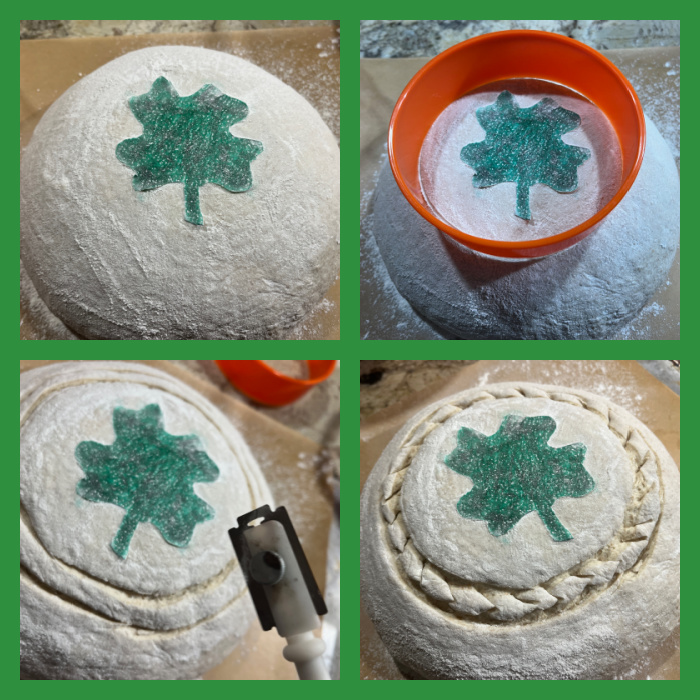
Next day, freeze the dough for 30 minutes in the banetton, to make it easier to score later. Invert the dough on a paper liner, add the shamrock shape in the center, and flour the region around it (I used Thai rice flour). To make the paper stick, you can spray the surface VERY LIGHTLY with water. Score the perimeter of the shamrock and the outer area of the dough, and place in a Dutch oven.
Close the pan and bake at 450F for 30 minutes, open and allow the bread to brown for a further 15 minutes.
Comments: I used my Supersonic blade to score the dough, but a sharp razor blade will do, of course. This composition of sourdough, with mostly white flour, but a touch of spelt and rye might very well be my favorite these days.
x
Moving on, time for cupcakes!
ST PATRICK CHOCOLATE CUPCAKES (from The Bewitching Kitchen)
makes 10 cupcakes
100g all-purpose flour 20g cocoa powder 140g granulated sugar 1/8 tsp salt 40g unsalted butter 1 large egg 120ml milk 1 + ½ tsp baking powder buttercream for topping Mini-golden Oreos painted with gold luster powder + vodka
Heat your oven to 350F and line a muffin tray with cupcake liners.
In a small, bowl, whisk the milk and egg with a fork. Reserve.
Put the flour, baking powder, cocoa powder, butter, sugar and salt into the stand mixer bowl with the paddle attachment. Mix on a medium speed until the butter turns into the consistency of sand.
Pour in half of the milk and egg mixture into the stand mixer bowl with your other ingredients and mix on a slow speed until it all fully combines and becomes a thick paste. Pour the remaining milk mixture and mix on low-speed until the batter is smooth.
Fill the lined pan with batter, a little more than halfway full. Bake for 16 minutes, testing with a toothpick. Leave to cool in the pan for 5 minutes, then remove the cupcakes to a rack to cool completely.
BASIC BUTTERCREAM FOR CUPCAKES
226g butter, unsalted, softened 452g powdered sugar pinch of salt Vanilla extract, about 1 tsp or more to taste a couple or more tablespoons of milk (to adjust consistency)
Place the softened butter in the bowl of a KitchenAid type mixer with the paddle attachment, add the pinch of salt, and whip at high speed for about 7 minutes. It needs to be really soft and lighter. Stop the mixer. Eyeball the amount of powdered sugar, add 1/3 and mix at low speed at first, once the sugar is starting to get incorporated, increase the speed to medium-high.
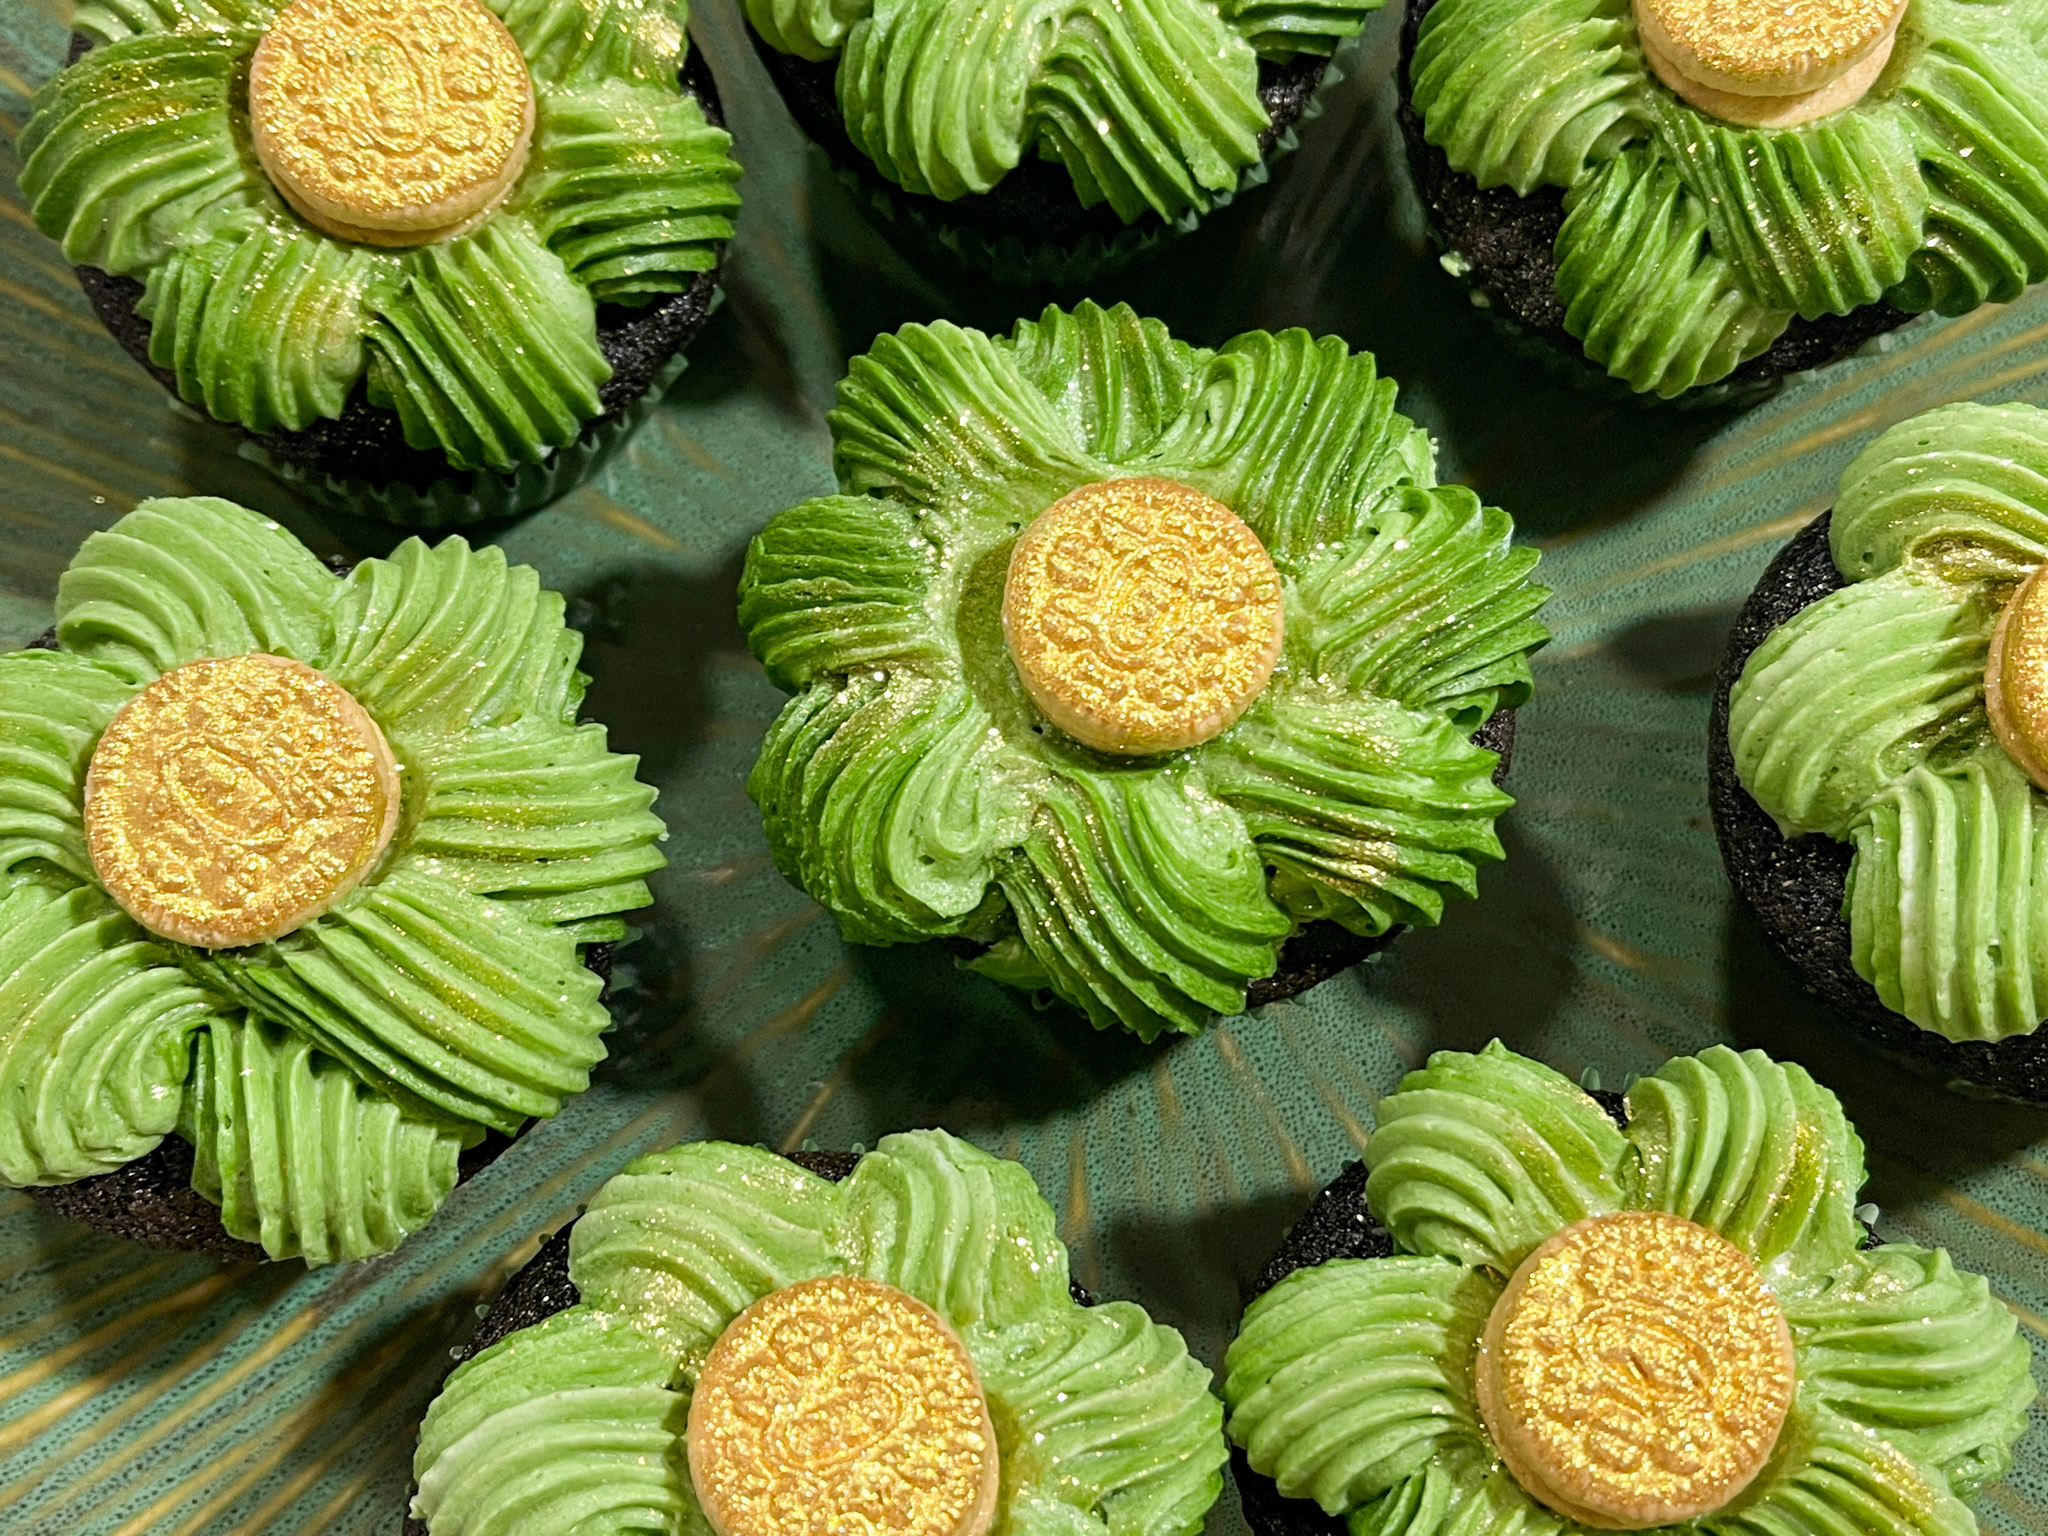
Add the second portion of the sugar, and incorporate the same way. Add the final portion, start at low speed, clean the sides of the bowl well with a spatula, add the vanilla and increase the speed slowly all the way to high. Whip it until very smooth. Add milk to desired consistency. Divide the buttercream in two portions, dye one with light green, one with darker green. Place both portions over a plastic wrap, enclose them as a sausage, drop inside a large piping bag fitted with an open star tip. Decorate the tops of the cupcakes as shown in the video. Add the gold Oreos.
Comments: I was pretty happy with the way these cupcakes turned out. It was fun to decorate, and to show the process in more detail, here is a little video for you.
Ready for a true labor of love? Full disclosure, it was a case of self-love, because I made it to celebrate my own Birthday! I spread the preparation over three days, you can definitely make it in two, but sometimes it is best not to rush. Since it’s been many years since I made this type of cake, I decided to take my time and enjoy the ride.
for the cake component: 3 large eggs 1 cup white sugar (220 g) 1 tsp vanilla extract 3/4 cup mayonnaise (180 g) 1 + 1/2 cup all purpose flour (180 g) 1/2 cup cocoa powder (45 g) 1 tsp baking powder 1/2 tsp baking soda 1/2 tsp salt 3/4 cup water (185 g)
for the ganache center: 1 Tbsp (15 g) white sugar 1 tsp glucose or Corn Syrup 1/2 cup (120 g) whipping cream 50 g dark chocolate 40 g milk chocolate 2 tsps of unsalted butter
for the chocolate mousse: 3/4 cup + 1 Tbsp whipping cream (200 g) 200 g dark chocolate 3/4 cup + 1 Tbsp heavy cream (200 g) 3 egg yolks 60 g white sugar 1/4 cup (60 g) water
for the chocolate mirror glaze: 1 cup granulated sugar (200 g) 1/3 cup + 1 Tbsp water (100 g) 2 drops red food coloring (optional) 1 cup heavy whipping cream (220 g) 1/3 cup + 1 Tbsp corn syrup or glucose (120 g) 1 + 1/2 cups cocoa powder (130 g) 6 gelatin sheets (16 g) – I used Platinum
Make the cake: Line a 1/4 inch sheet pan with parchment paper and heat oven to 350 F.
In a large bowl, combine the sugar, flour, cocoa powder, baking powder, baking soda, and salt. In a separate bowl, whisk together the eggs, vanilla extract, mayonnaise, and water. With an electric mixer, set on low speed, gradually add the wet ingredients into the bowl with the dry ingredients until combined. Then increase the speed to medium and continue to mix for one more minute until the batter is fully combined and smooth. Spread the batter onto the pan and bake for about 15 minutes or until the center of the cake is set.
Let the cake cool for 15 minutes, then remove from pan and cover in plastic wrap and freeze until you are ready to start assembling the cake.
Make the ganache: Break up the dark chocolate and milk chocolate into small pieces and place into a heat-proof bowl; set aside. In a medium-sized sauce pan, bring the cream, glucose or corn syrup, and sugar to a boil. Pour 1/3 of the hot cream mixture over the chocolate pieces, whisking vigorously until the chocolate starts to melt. Pour another 1/3 of the hot cream over the chocolate while whisking, continuing until the cream is all used up. Place the butter in a tall container or pitcher and pour the ganache over it. Using an immersion blender, mix the ganache and butter together until smooth and shiny. Pour the mixture into a bowl, cover with plastic touching the surface and let set for 5-6 hours at room temperature. You can also do that the day before.
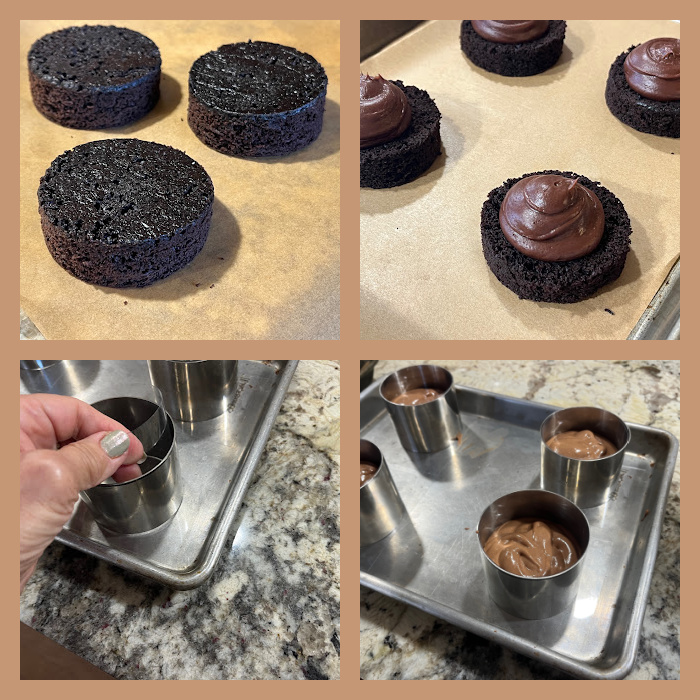
After the ganache has set, remove the chocolate cake from the freezer and use a 3-inch cake cutter to cut six small cake rounds (each cake round should be about 1/4 the height of your cake ring). Place the chocolate ganache into a piping bag and pipe about 2 teaspoons of ganache in the center of each cake round). Place in the freezer for at least one hour.
Make the chocolate mousse: the mousse is made up of three components: the whipped cream, the chocolate ganache, and the egg yolks whipped with hot syrup (pâte à bombe). First, whip the 200 g cream until soft peaks form and set aside. For the chocolate ganache, break up the dark chocolate into smaller pieces and place in a heat-proof bowl. Bring the 200g heavy cream to a boil and then pour 1/3 of the hot cream onto the chocolate, whisking vigorously. Working in thirds, continue to pour the hot cream onto the chocolate until all of the cream has been used, whisking in-between each addition. Set aside.
For the pâte à bombe, place your egg yolks into a heat-proof bowl. In a large saucepan, heat the sugar and water together until the temperature reaches 244 F. Slowly pour the hot mixture onto the bowl holding the egg yolks, whisking continuously until the mixture thickens and turns a pale yellow.
Combine all three components: first fold the whip cream into the ganache, then pour the egg yolk mixture into the bowl of the mixed chocolate ganache, then fold all ingredients until smooth. Transfer mousse to a piping bag and coat inside of each metal cake ring with cooking spray. Line inside of each cake mold with acetate. Pipe the mousse into each cake ring, filling 3/4 of the way to the top. Gently press each frozen cake ring (topped with the ganache) into the ring with the ganache facing downward. The mousse should gradually move up toward the top of the ring. Flatten out the mousse and scrape off any excess mousse. Freeze each cake overnight.
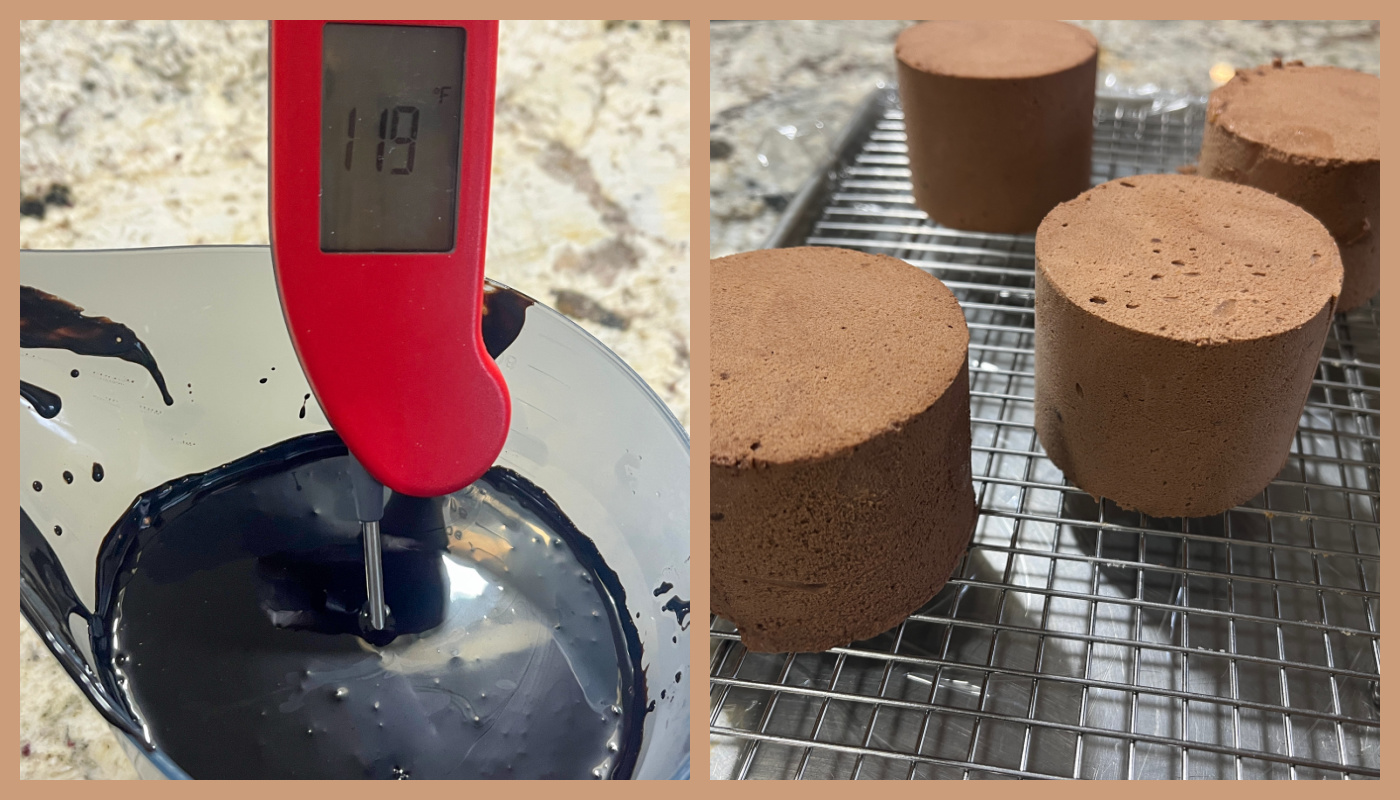
Make the chocolate mirror glaze: first, place your gelatin sheets in a bowl of cold water for about 5 minutes to soften. Heat the water, sugar, and a few drops of red food gel on the stovetop until the mixture reaches 222 F. In a separate bowl, mix the glucose (or corn syrup) and cream together then microwave for one minute until warm. Now pour this into the pan holding the sugar/water mixture, whisking continuously, then bring to a boil. Add the cocoa powder, remove from the heat and continue to mix.
Squeeze out the excess moisture from the gelatin leaves, then place in a pitcher or large measuring cup. Pour the sugar/cocoa mixture on top of the gelatin and mix with an immersion blender until all bubbles are gone. Let temperature reduce to 104 F (40 C) while preparing your cake molds.
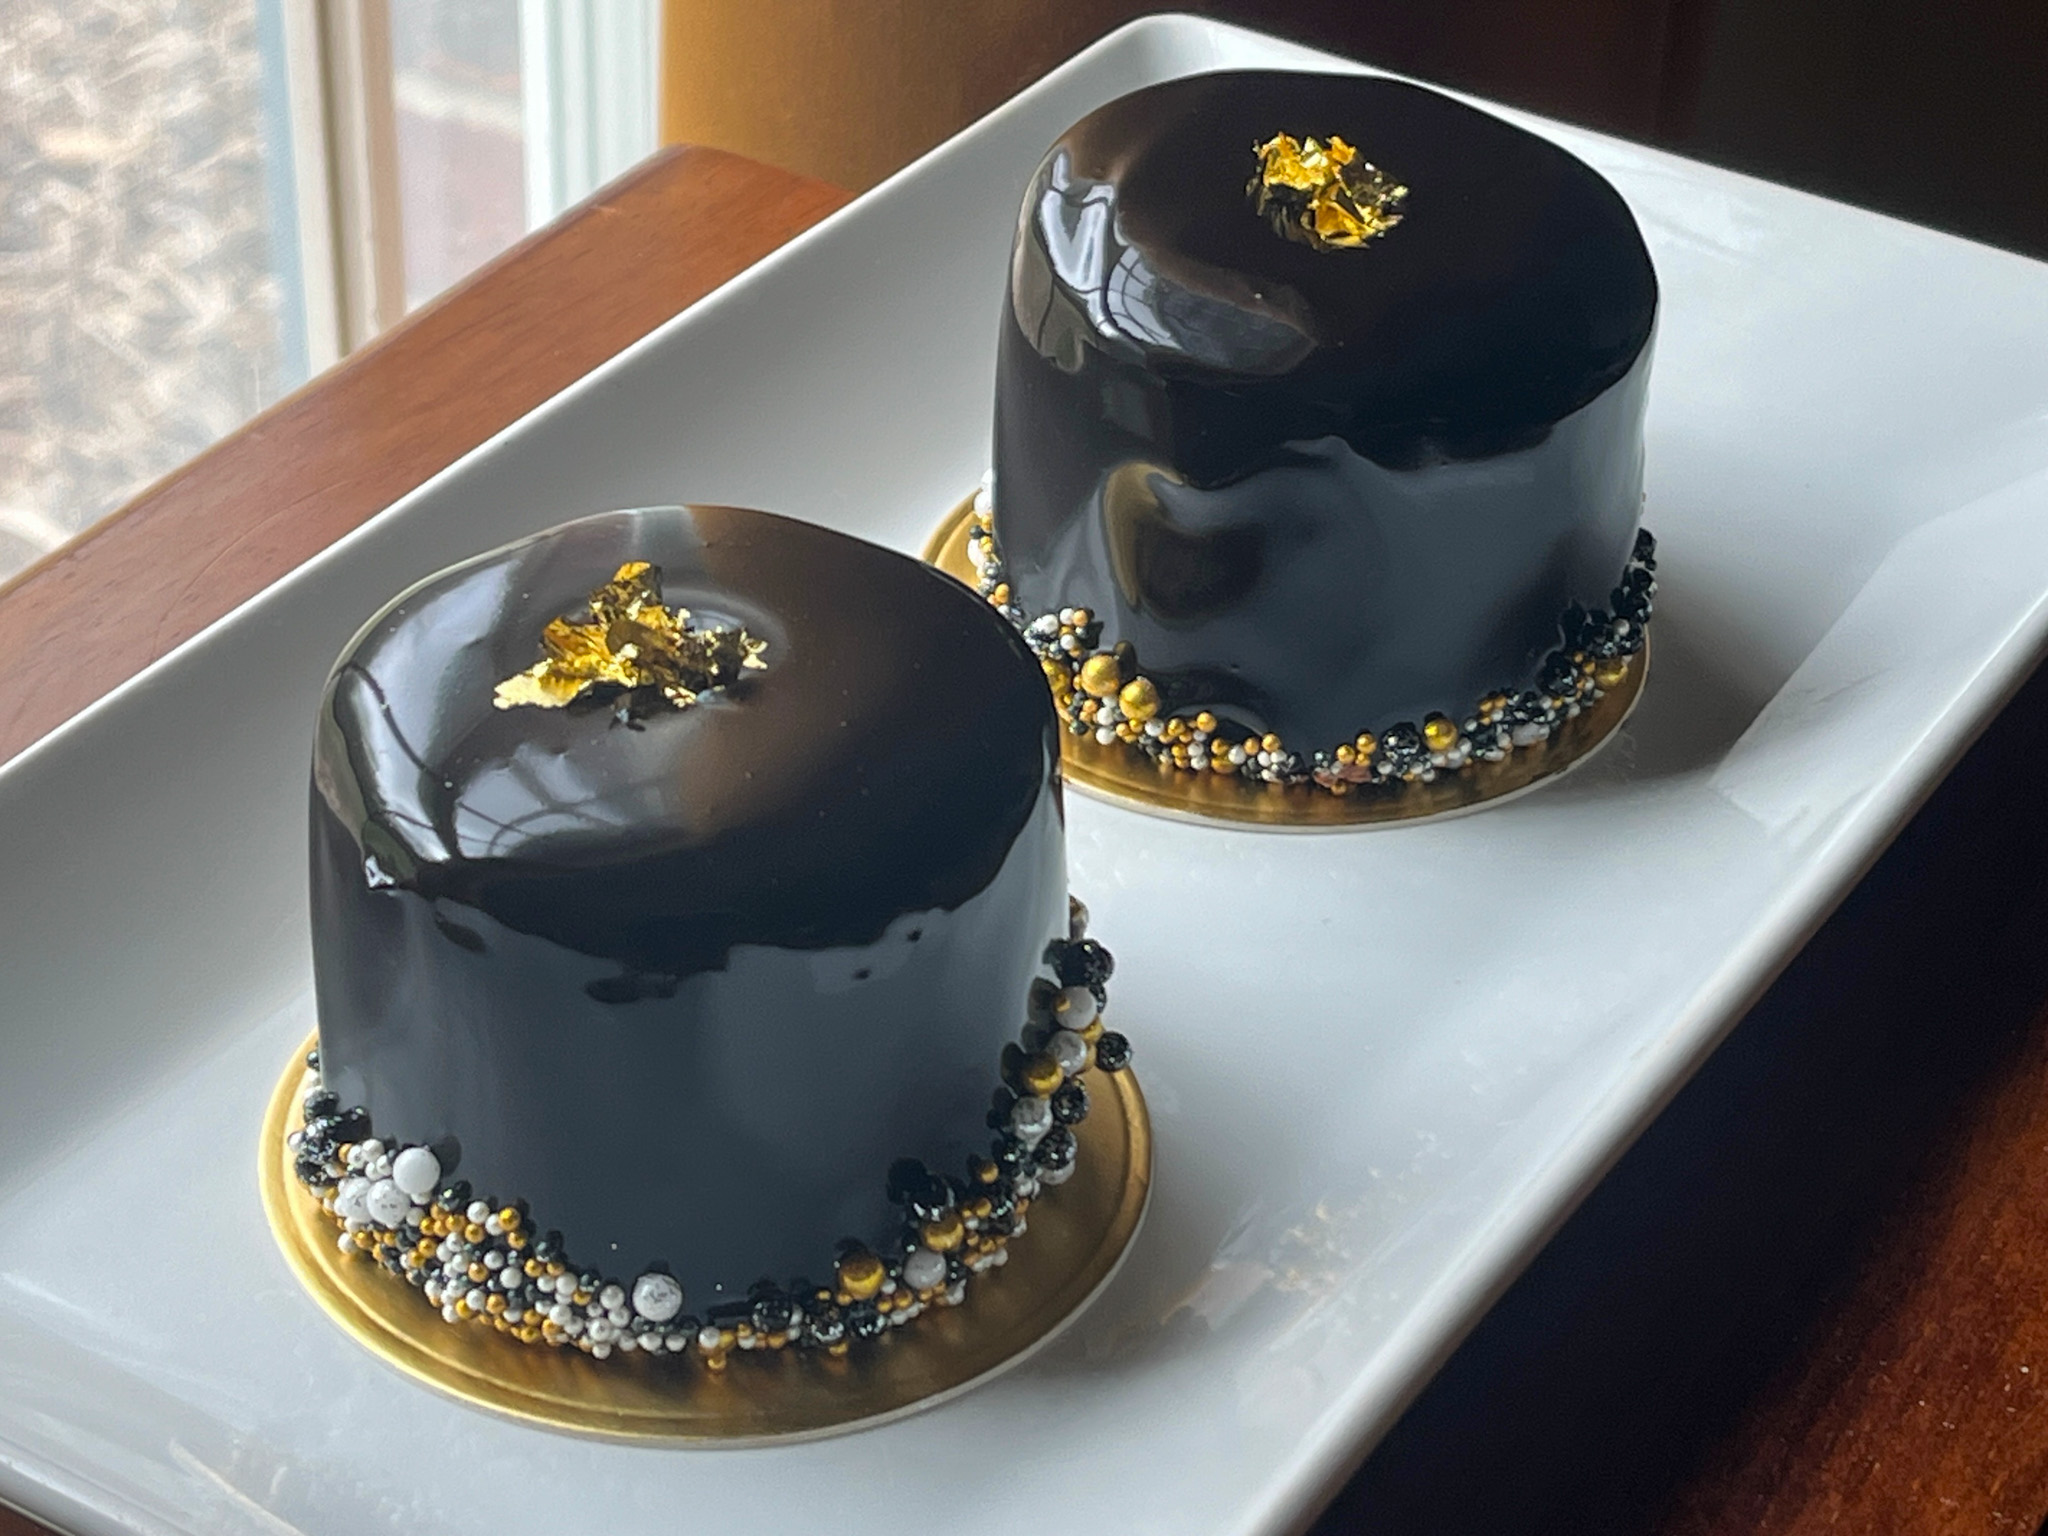
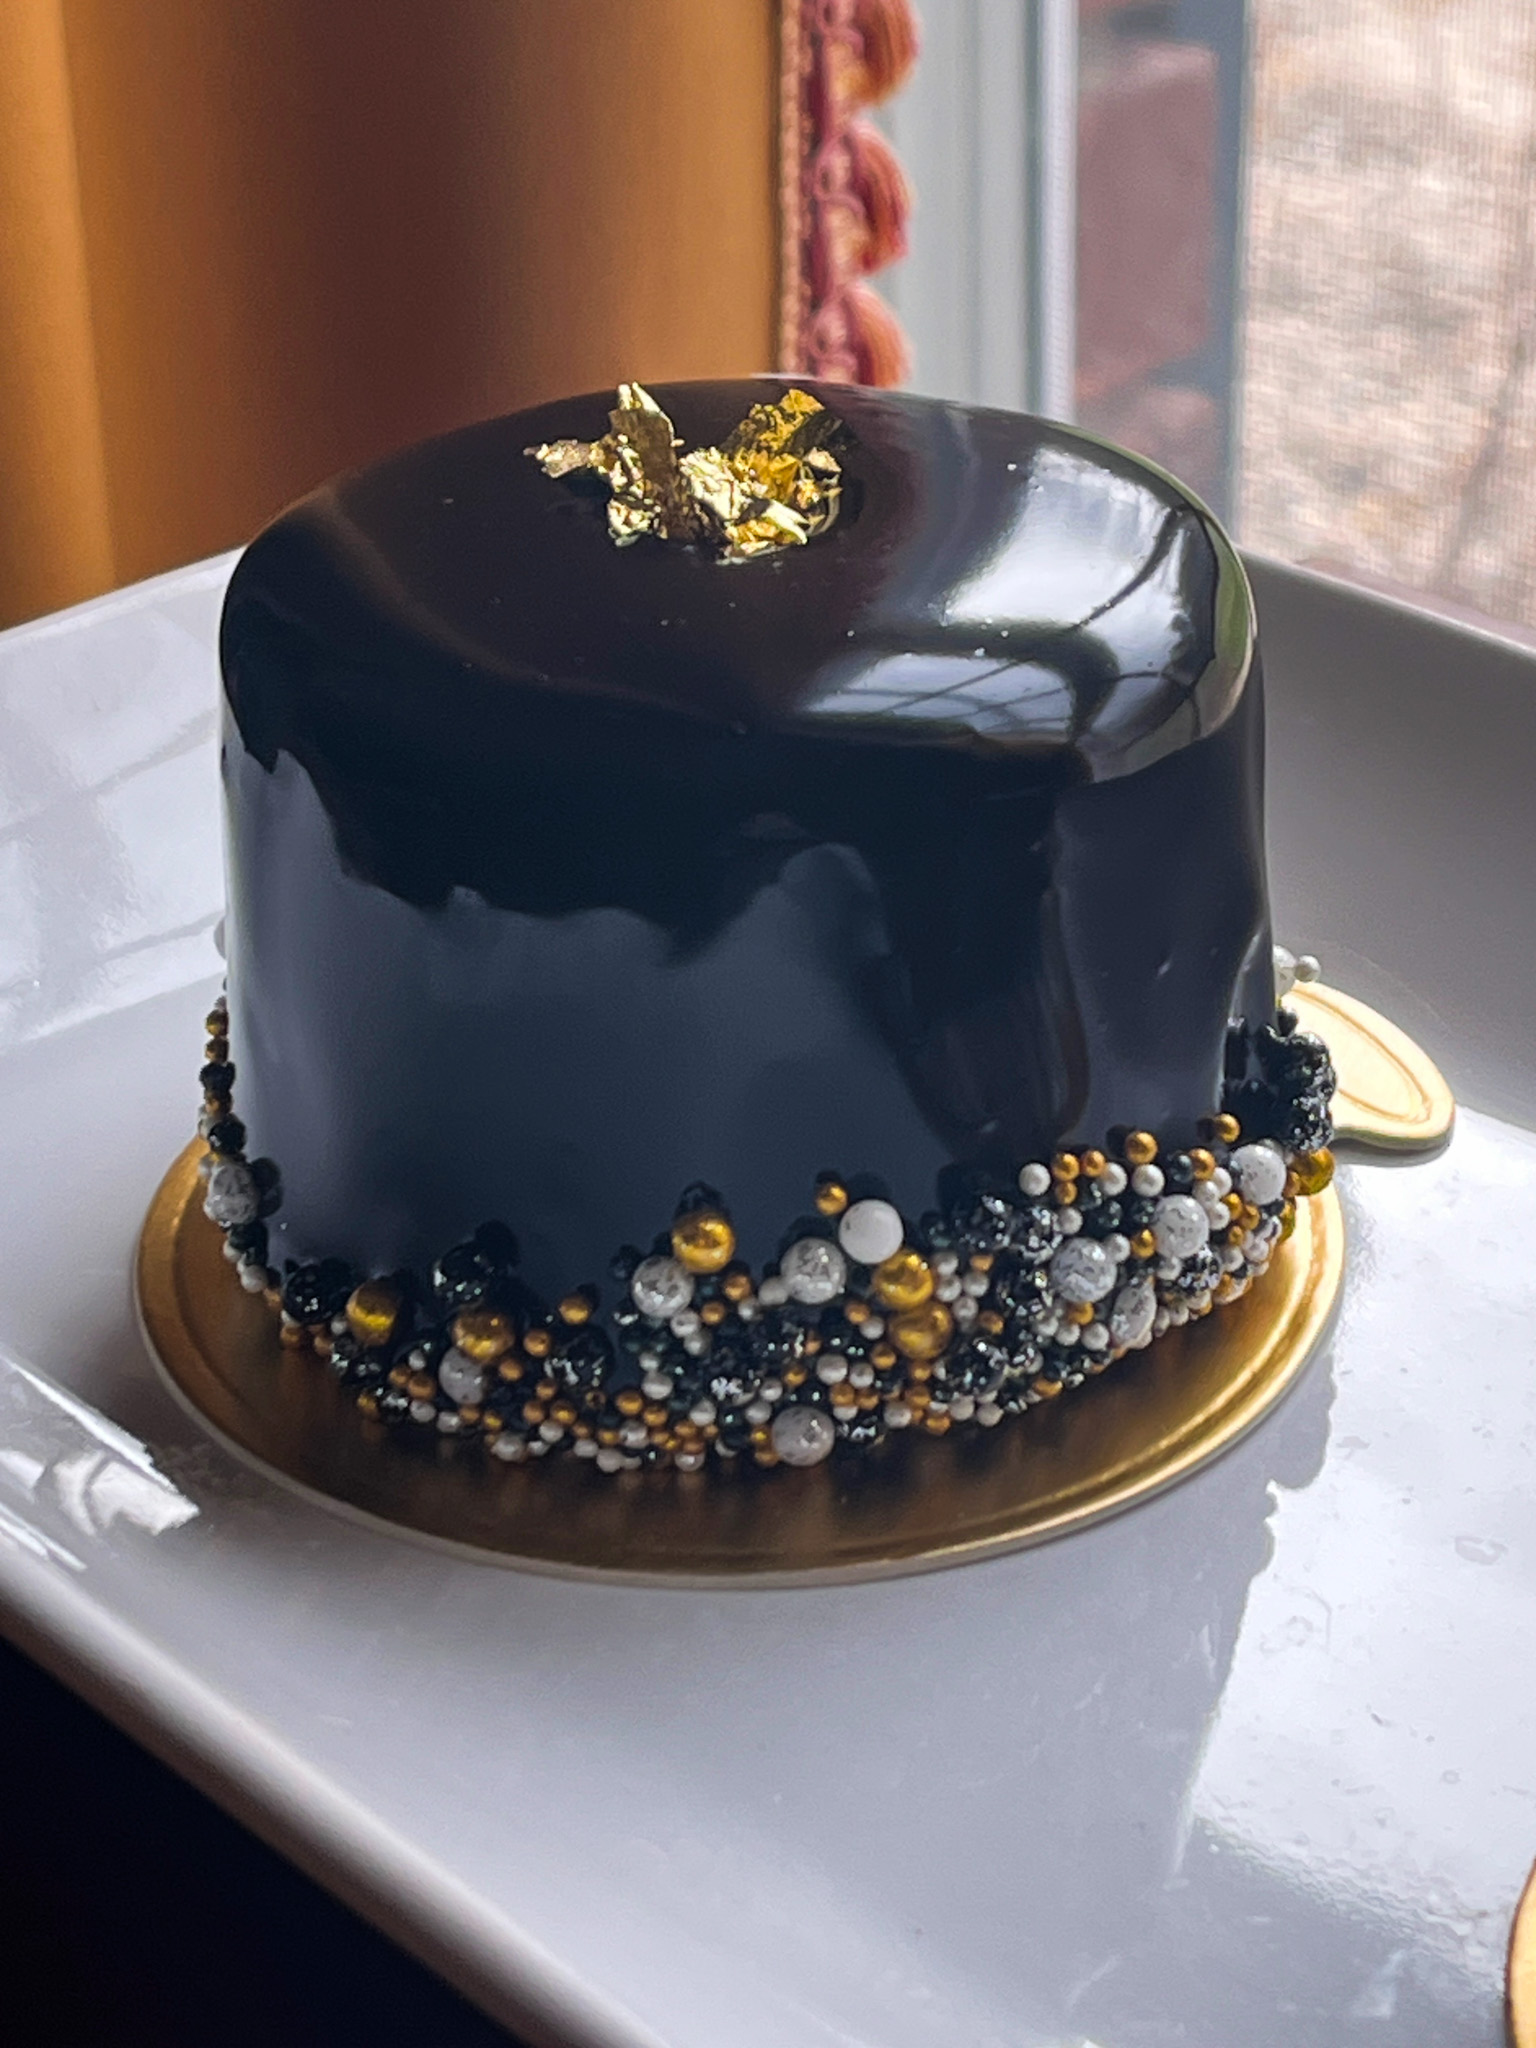
To unmold the frozen entremet cakes, use a hair dryer to heat up the sides of the cake ring for a few seconds, then gently push the cake out of the mold onto a cooling rack placed on top of a baking sheet. Remove the acetate sheet from the cake. Before applying the glaze to the cake, make sure the glaze temperature is 104 F (40 C). Gradually pour the glaze onto the cake starting from the center outwards, fully covering the top and sides. (The excess glaze that has accumulated in the pan can be scraped up and re-used).
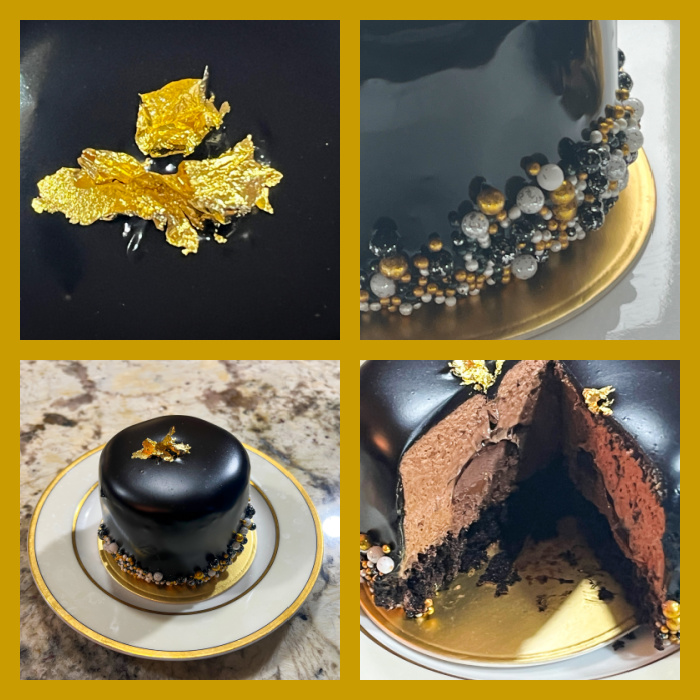
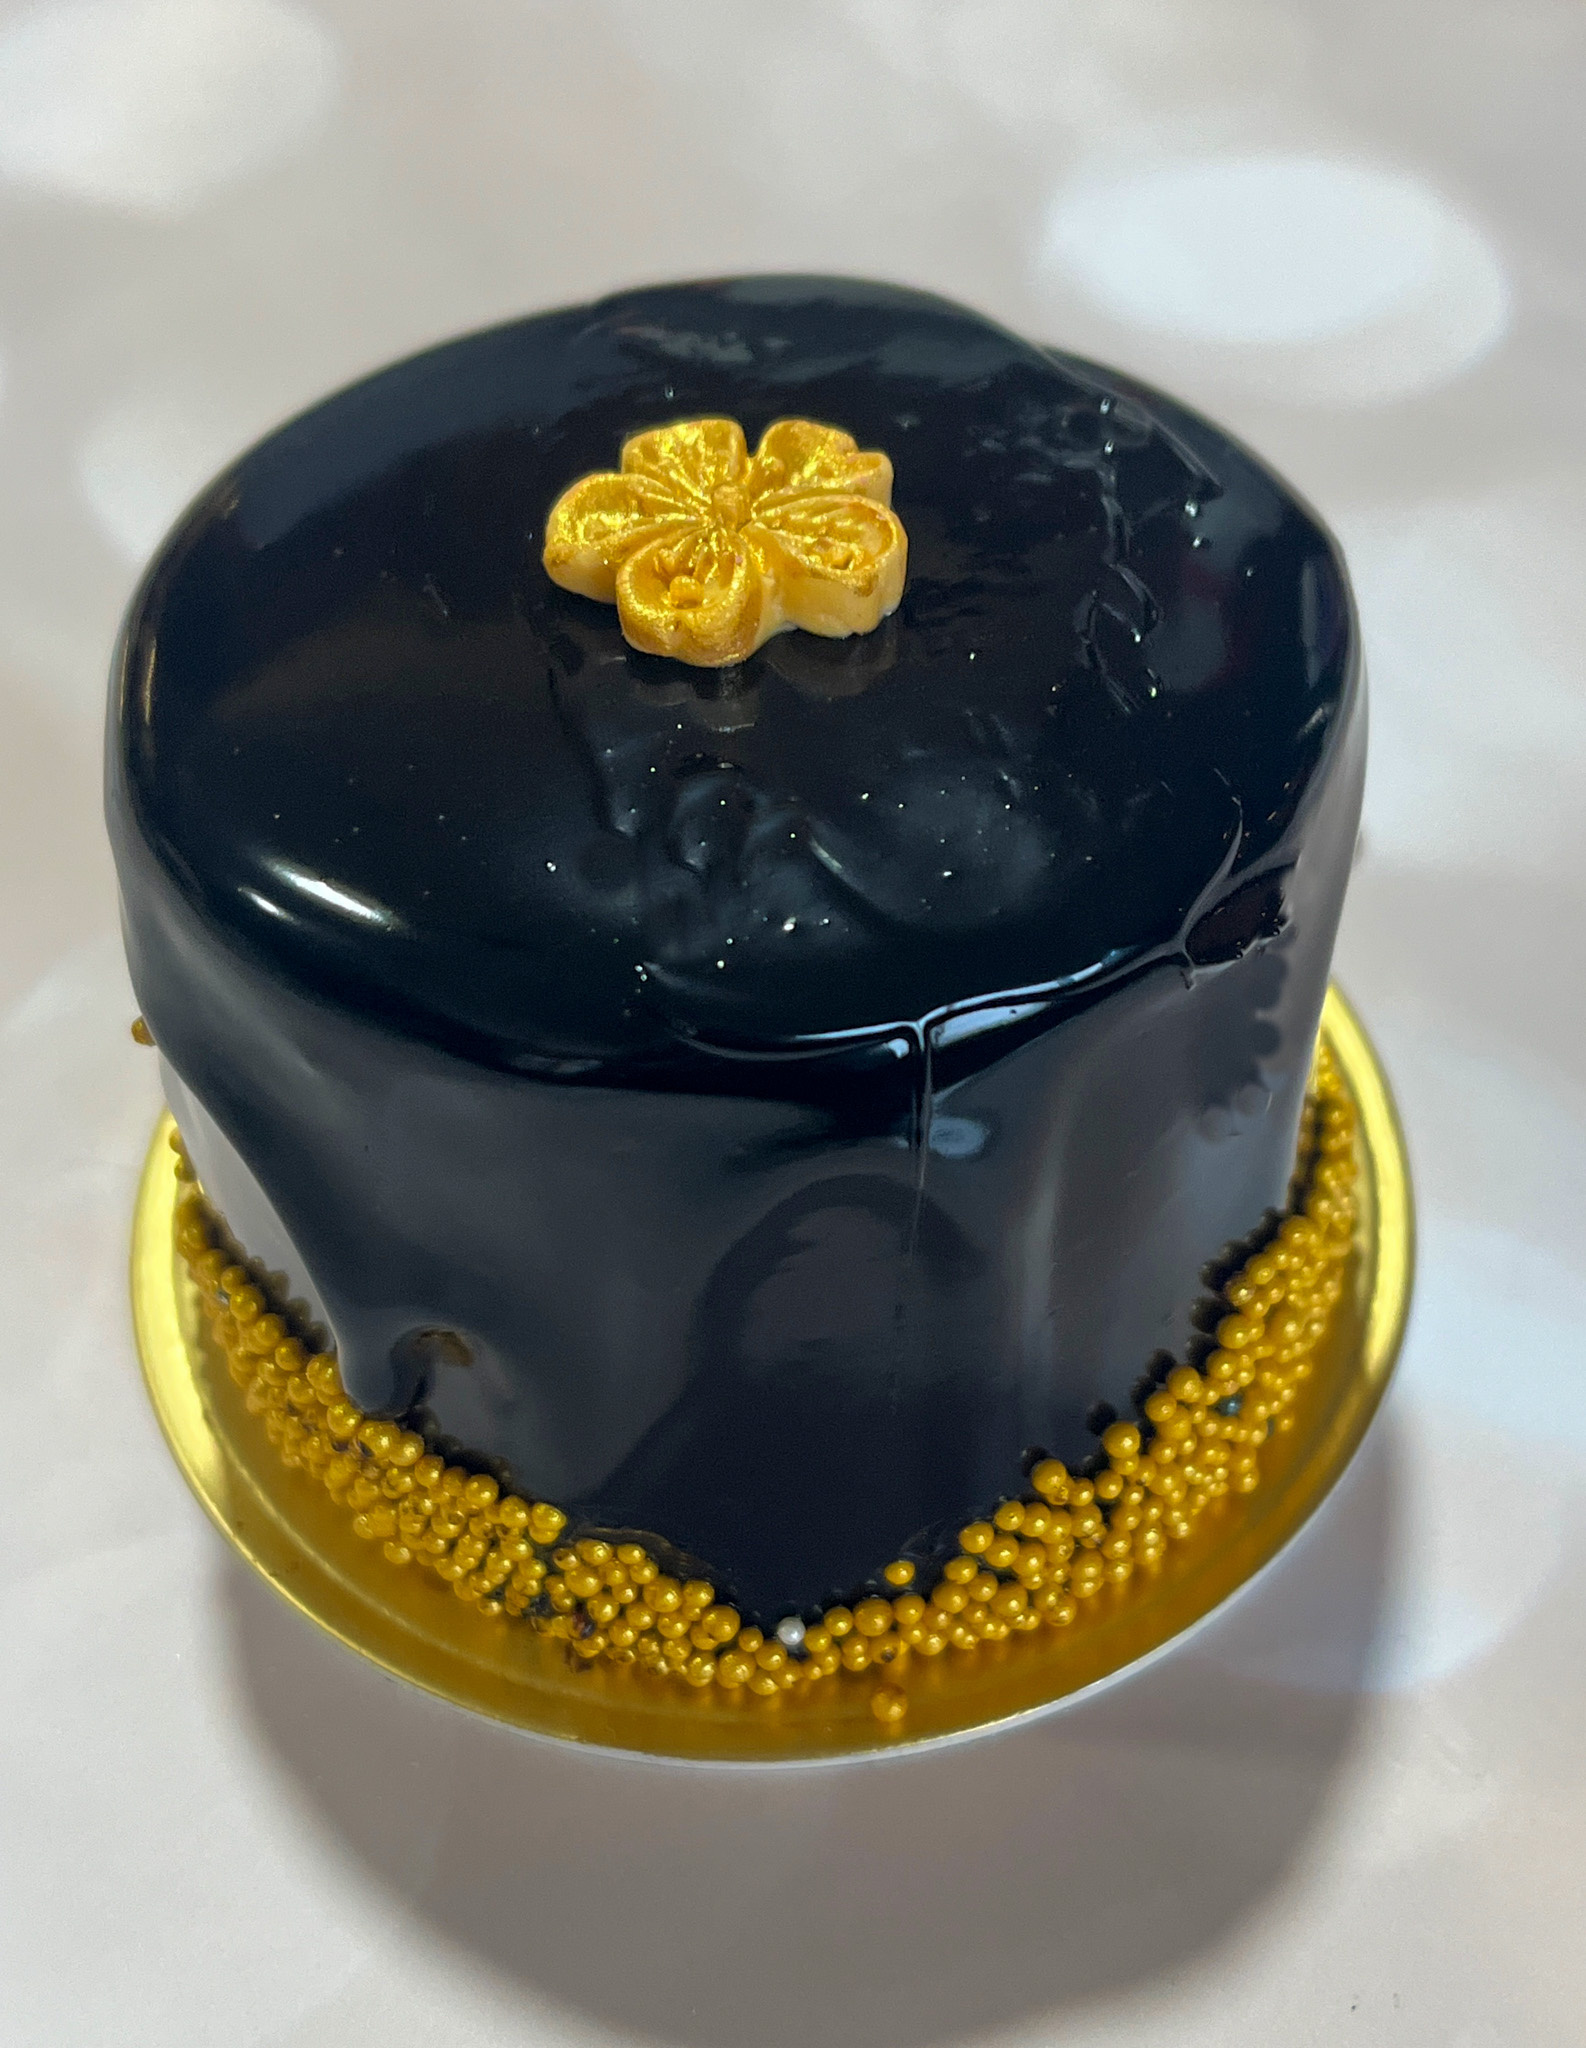
After the glaze settle a few minutes, transfer the cake to a serving dish; decorate with some gold leaf and serve.
Comments: The link associated with the recipe will take you straight to a video showing every single step of the preparation, so even if you have no previous experience with entremet cakes, you’ll be able to tackle it. Here is my way to approach this adventure:
Day one: baked the chocolate cake, wrapped it and froze it
Day two: made the ganache early in the morning, cut cake slices and topped with ganache around noon. Made the mousse and assembled the cake rings around 5pm. Froze everything overnight.
Day three: Made the chocolate mirror glaze, while it cooled to the pouring temperature (I used 110F instead of 104F), I removed the frozen cakes from the rings, took the acetate out, and placed them back in the freezer until the glaze was ready to pour.
The only problem I had – and that was a big problem that led into severe hyperventilation – was right after glazing the cakes. The video gave a super cool tip to hold the cake with a stick to roll the base over sprinkles, but it is VERY important that you do not stick that too deep, or you won’t be able to remove it without destroying the little cake. I almost lost my Zen. So, if you make them, insert the skewer just a little bit, it will be a bit wobbly but then you will remove it without issues, and the gold leaf or another decoration of your choice will hide the small hole left on the glaze.
I was totally thrilled with the outcome! Especially because I had not worked with mirror glaze in such a long time. Consider investing in a Bamix handheld mixer, it is the best tool to remove bubbles from this type of glaze, although for extra safety I always pass it through a fine sieve (they did not use it in the video, but I advise you to incorporate this extra step). I’ve had the Bamix for many years, found a great deal on eBay at the time, probably around 2018.
This is a real rich dessert, we shared one and then Phil had a couple of bites from the second one, leftover was his breakfast next day. If you don’t have gold leaf to decorate the top, a small fondant decoration or even sprinkles will do.
I truly enjoyed making these cakes, and now I wonder if I really need a super special occasion to justify bringing it to our table… Life is short, not a bad idea to indulge every once in a while, right?
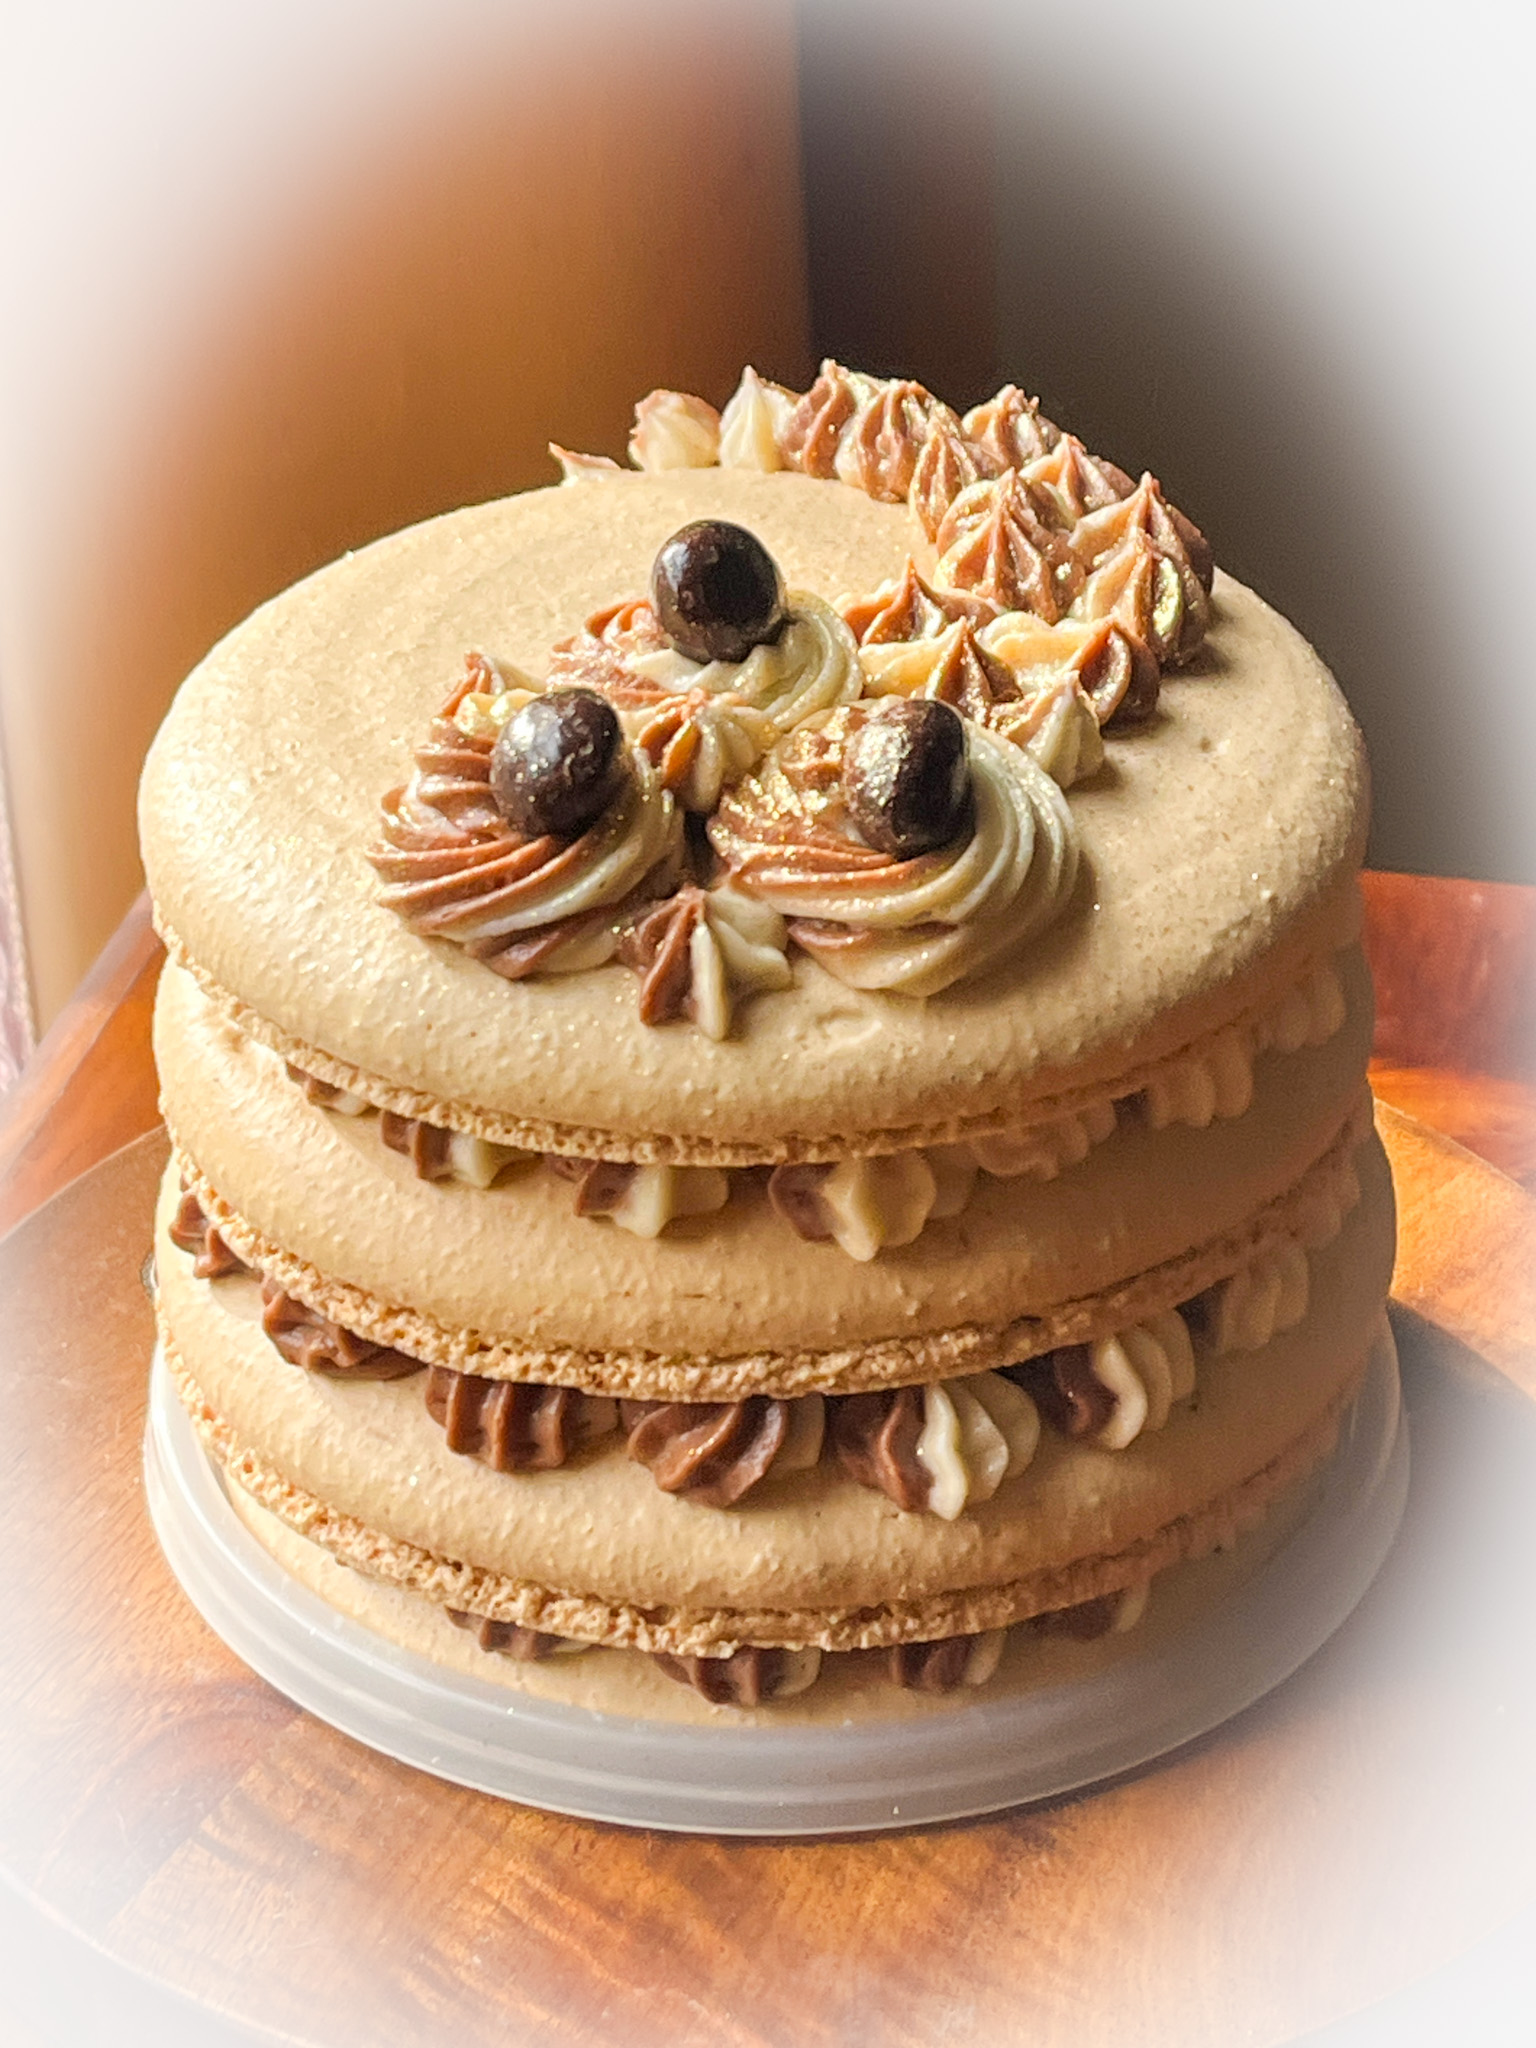
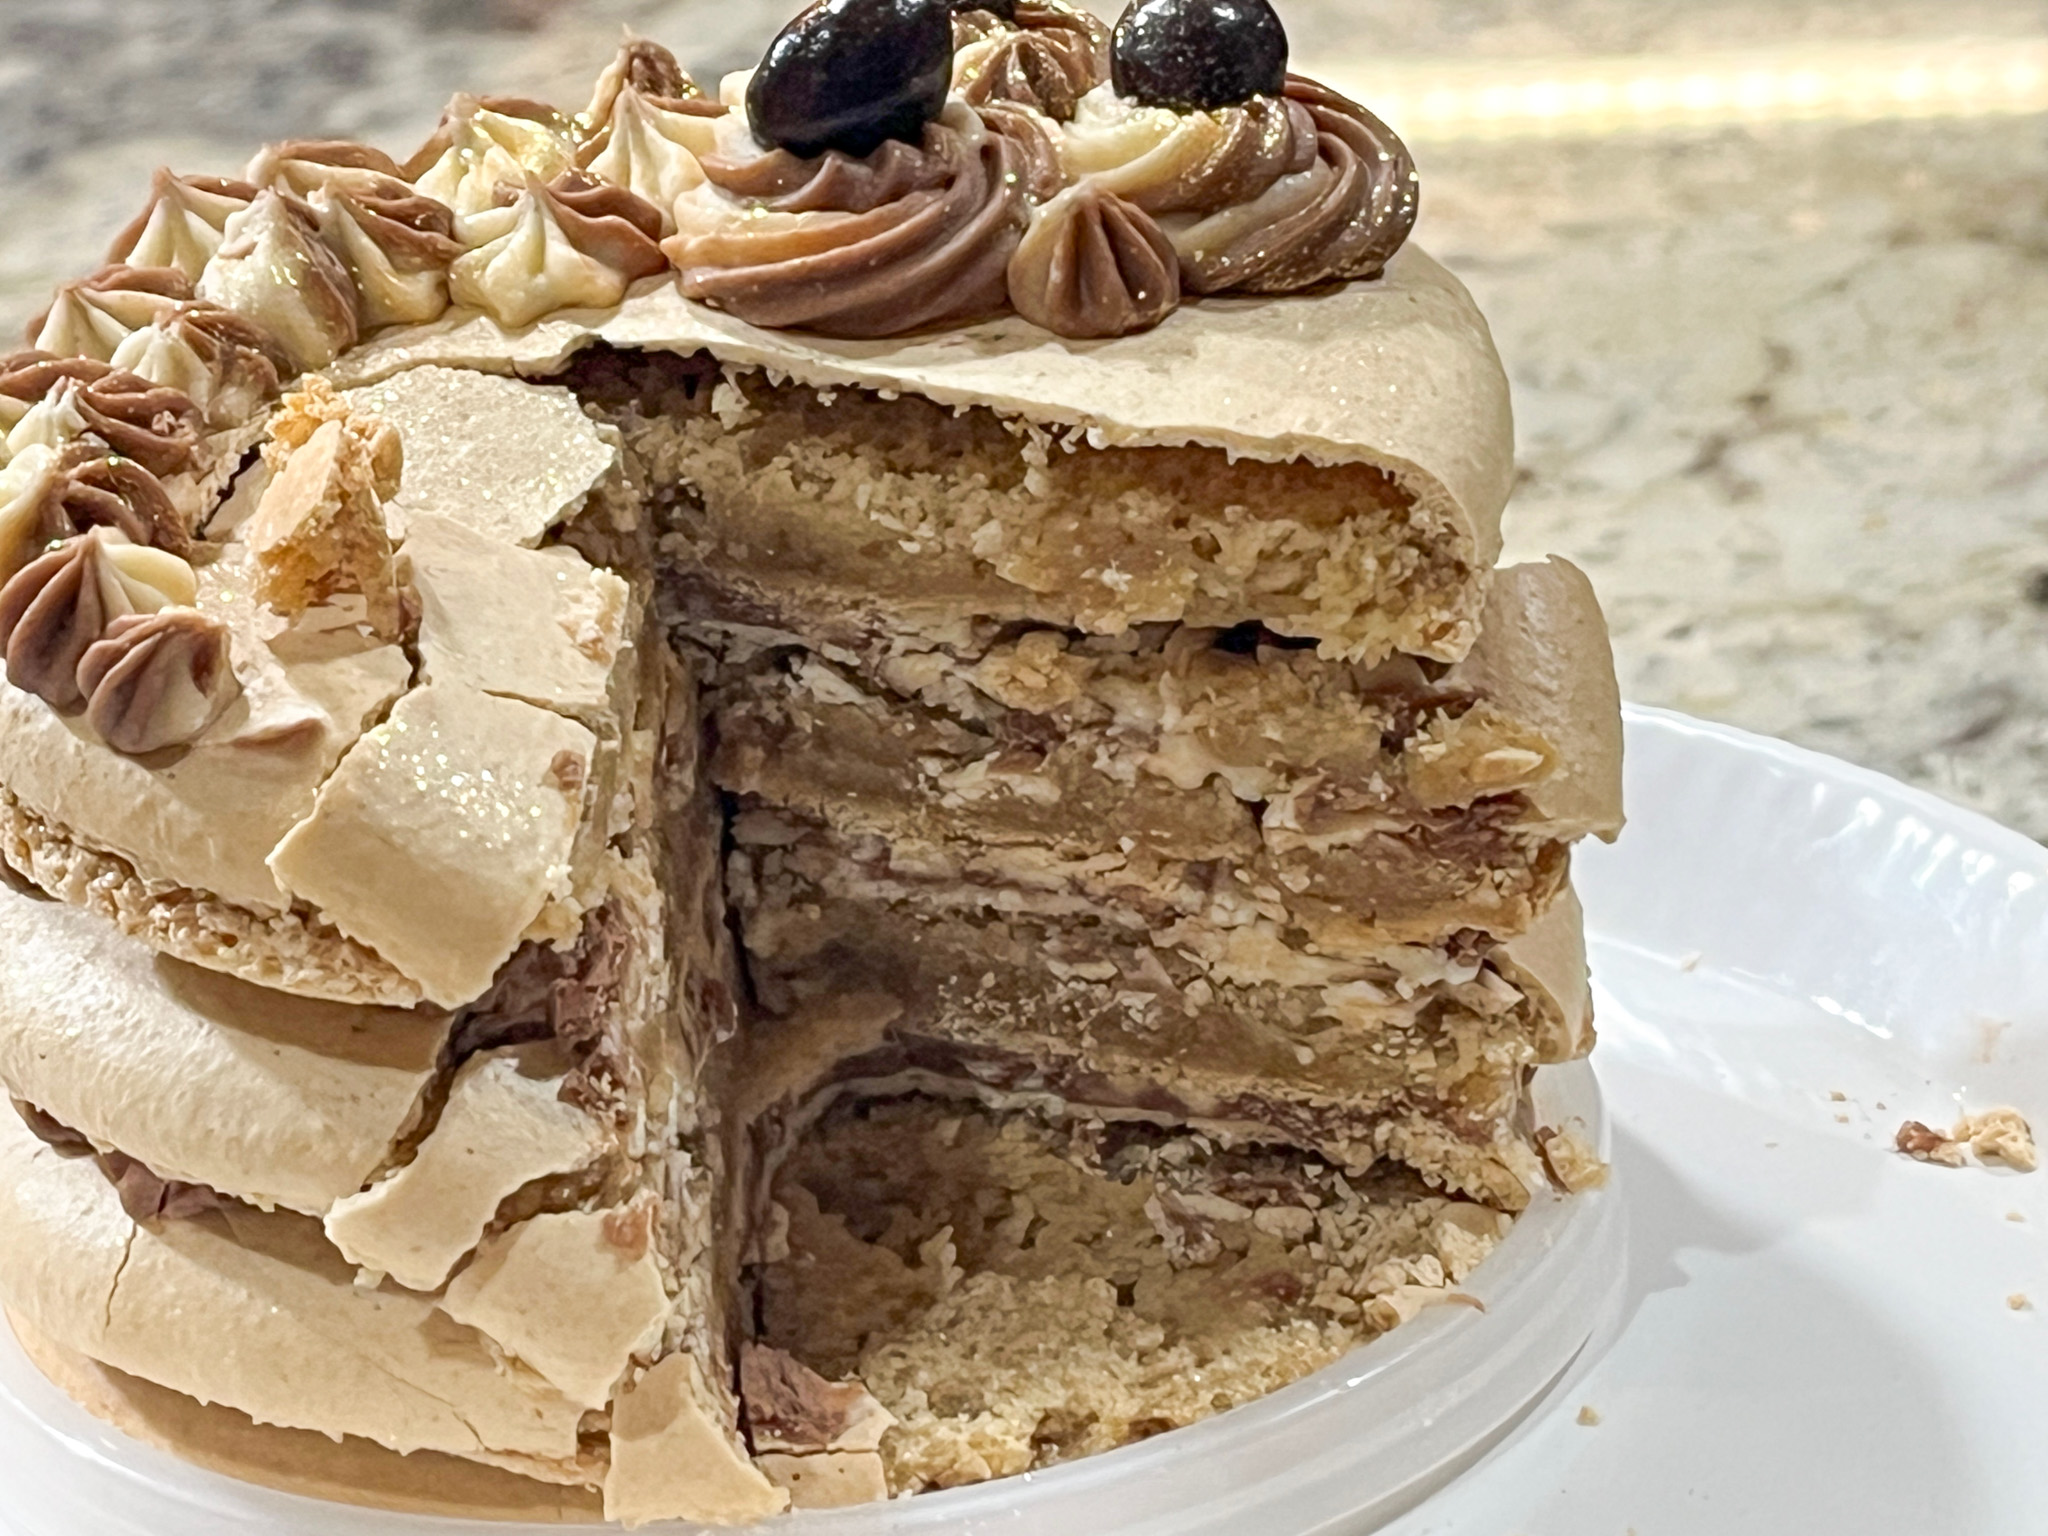
New Year’s Eve, we cooked our meal together, and decided not to have dessert, since a mighty Mont Blanc had been at our table just a few days earlier (read about it here). But I developed this intense desire to surprise my beloved husband, so one day in which he had to work in a very long experiment I went to work and made all I needed to assemble a mini-cake. Small in size, great in impact. Coffee and chocolate. And a ton of love.
for the shells: 100 grams egg whites 100 grams granulated sugar 4 grams egg white powder 105 grams almond flour 105 grams powdered sugar 1 teaspoon espresso powder
for the espresso and mocha filling: 1/4 cup cream cheese, softened (56 grams) 2 tbsp butter, softened (28 grams) 1 + 1/2 cup powdered sugar (187 grams) 1/2 tsp vanilla extract 1/2 tsp espresso powder 2 tbsp cocoa powder 1 tsp milk to adjust consistency (if needed)
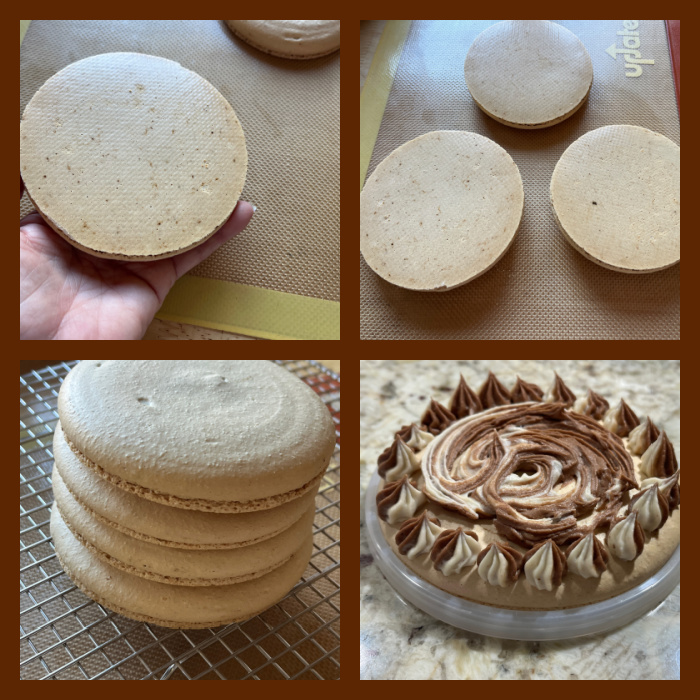
Prepare a large piping bag, fitted with a large round tip, I use a 1/2” diameter tip. Set aside. Line two baking sheets with parchment paper or silicone mat. Place a template with large circles – 4 inches in diameter – underneath it. You will need 4 circles.
Process the powdered sugar and almond flour for 20 seconds, pass through a sieve. Set it aside. Whisk the sugar and the egg white powder (if using) in a bowl, and place it over a pan with barely simmering water. Add the egg whites to the sugar and whisk the mixture until frothy and the sugar is completely melted. Transfer the syrup to the bowl of a stand mixer.
With the whisk attachment, start whisking mixture on low for about 30 seconds, then gradually start increasing speed to medium. Whisk on medium for one to two minutes, until the mixture is white and starting to become fluffy. Raise the speed to high, or medium-high and whisk for a few minutes until stiff peaks are formed. Pour the powdered sugar and almond flour into the stiff meringue. Perform the macaronage until it is glossy and has a thick flowing consistency. Add the espresso powder when the batter is almost ready to pipe.
Transfer the batter to the prepared piping bag. Place the piping bag directly 90 degrees over the center of a circle template. Apply gentle pressure and carefully pipe while keeping the bag in that vertical position. I piped each macaron about 3.5”, because they spread out considerably after piping, and then they reached a 4.” diameter after I banged the tray against the counter. Once you’ve piped the circles, bang the tray against the counter a few times. This will release air bubbles that are in the batter and prevent your macaron shells from cracking.
Let the trays sit for a while so the shells will dry out. Bake at 315F for about 20 minutes, until they don’t move around as you try to rotate the shells.
Make the filling: Cream the softened cream cheese and butter together in the bowl of an electric mixer, for about 2 minutes, until light and fluffy. With the mixer off, add the powdered sugar to the bowl. Turn mixer on low to incorporate the powdered sugar with the cream cheese and butter. Cream the mixture on medium high for one minute. Add vanilla extract and the espresso powder and mix to combine.
If the frosting is too runny, add more powdered sugar. And if the frosting is too stiff, add a teaspoon of water or milk to thin it out. Divide the frosting between two different bowls. Cover one bowl so that the frosting doesn’t dry out, that will be the Espresso Frosting.
To make the Mocha Frosting, add cocoa powder to the other half of the frosting you divided between the bowls. Cream until combined.
Lay out a piece of plastic wrap. Spread a stripe of the Mocha Frosting in the middle of the plastic wrap, across the narrow side. On top of the Mocha (brown) Frosting, spread some Espresso (white) Frosting. Roll the plastic wrap over itself to form a log. Line a piping bag with the piping tip of your preference. Insert the frosting log in the piping bag (watch the video on this page). Press evenly on all sides so both color frostings come out with the same intensity.
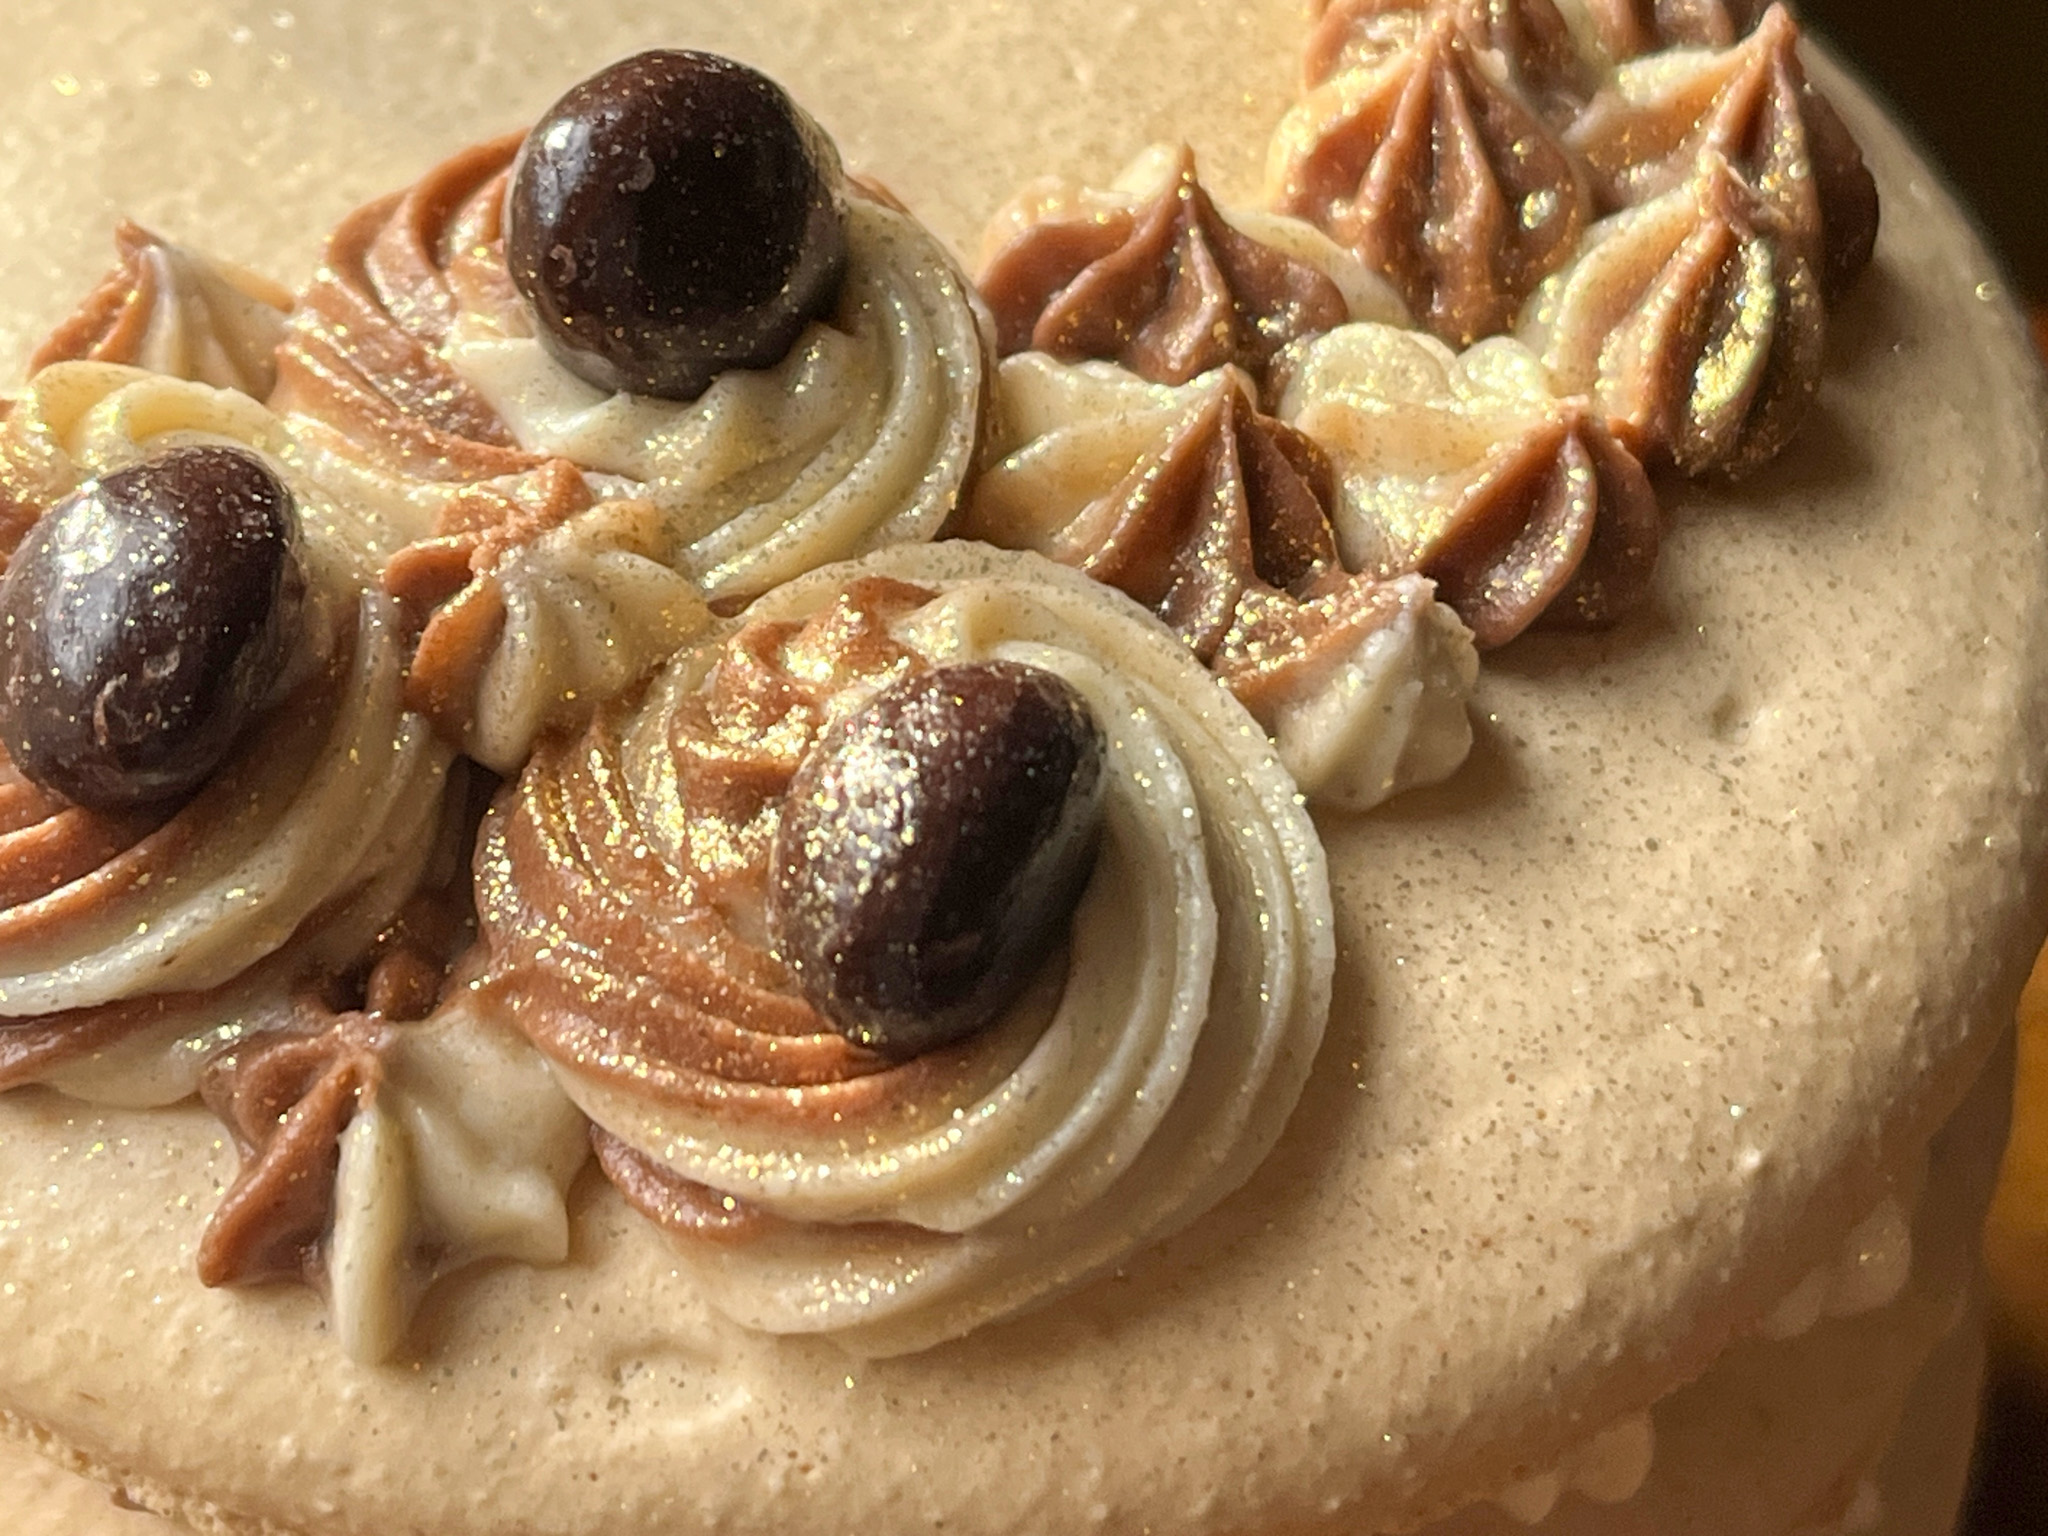
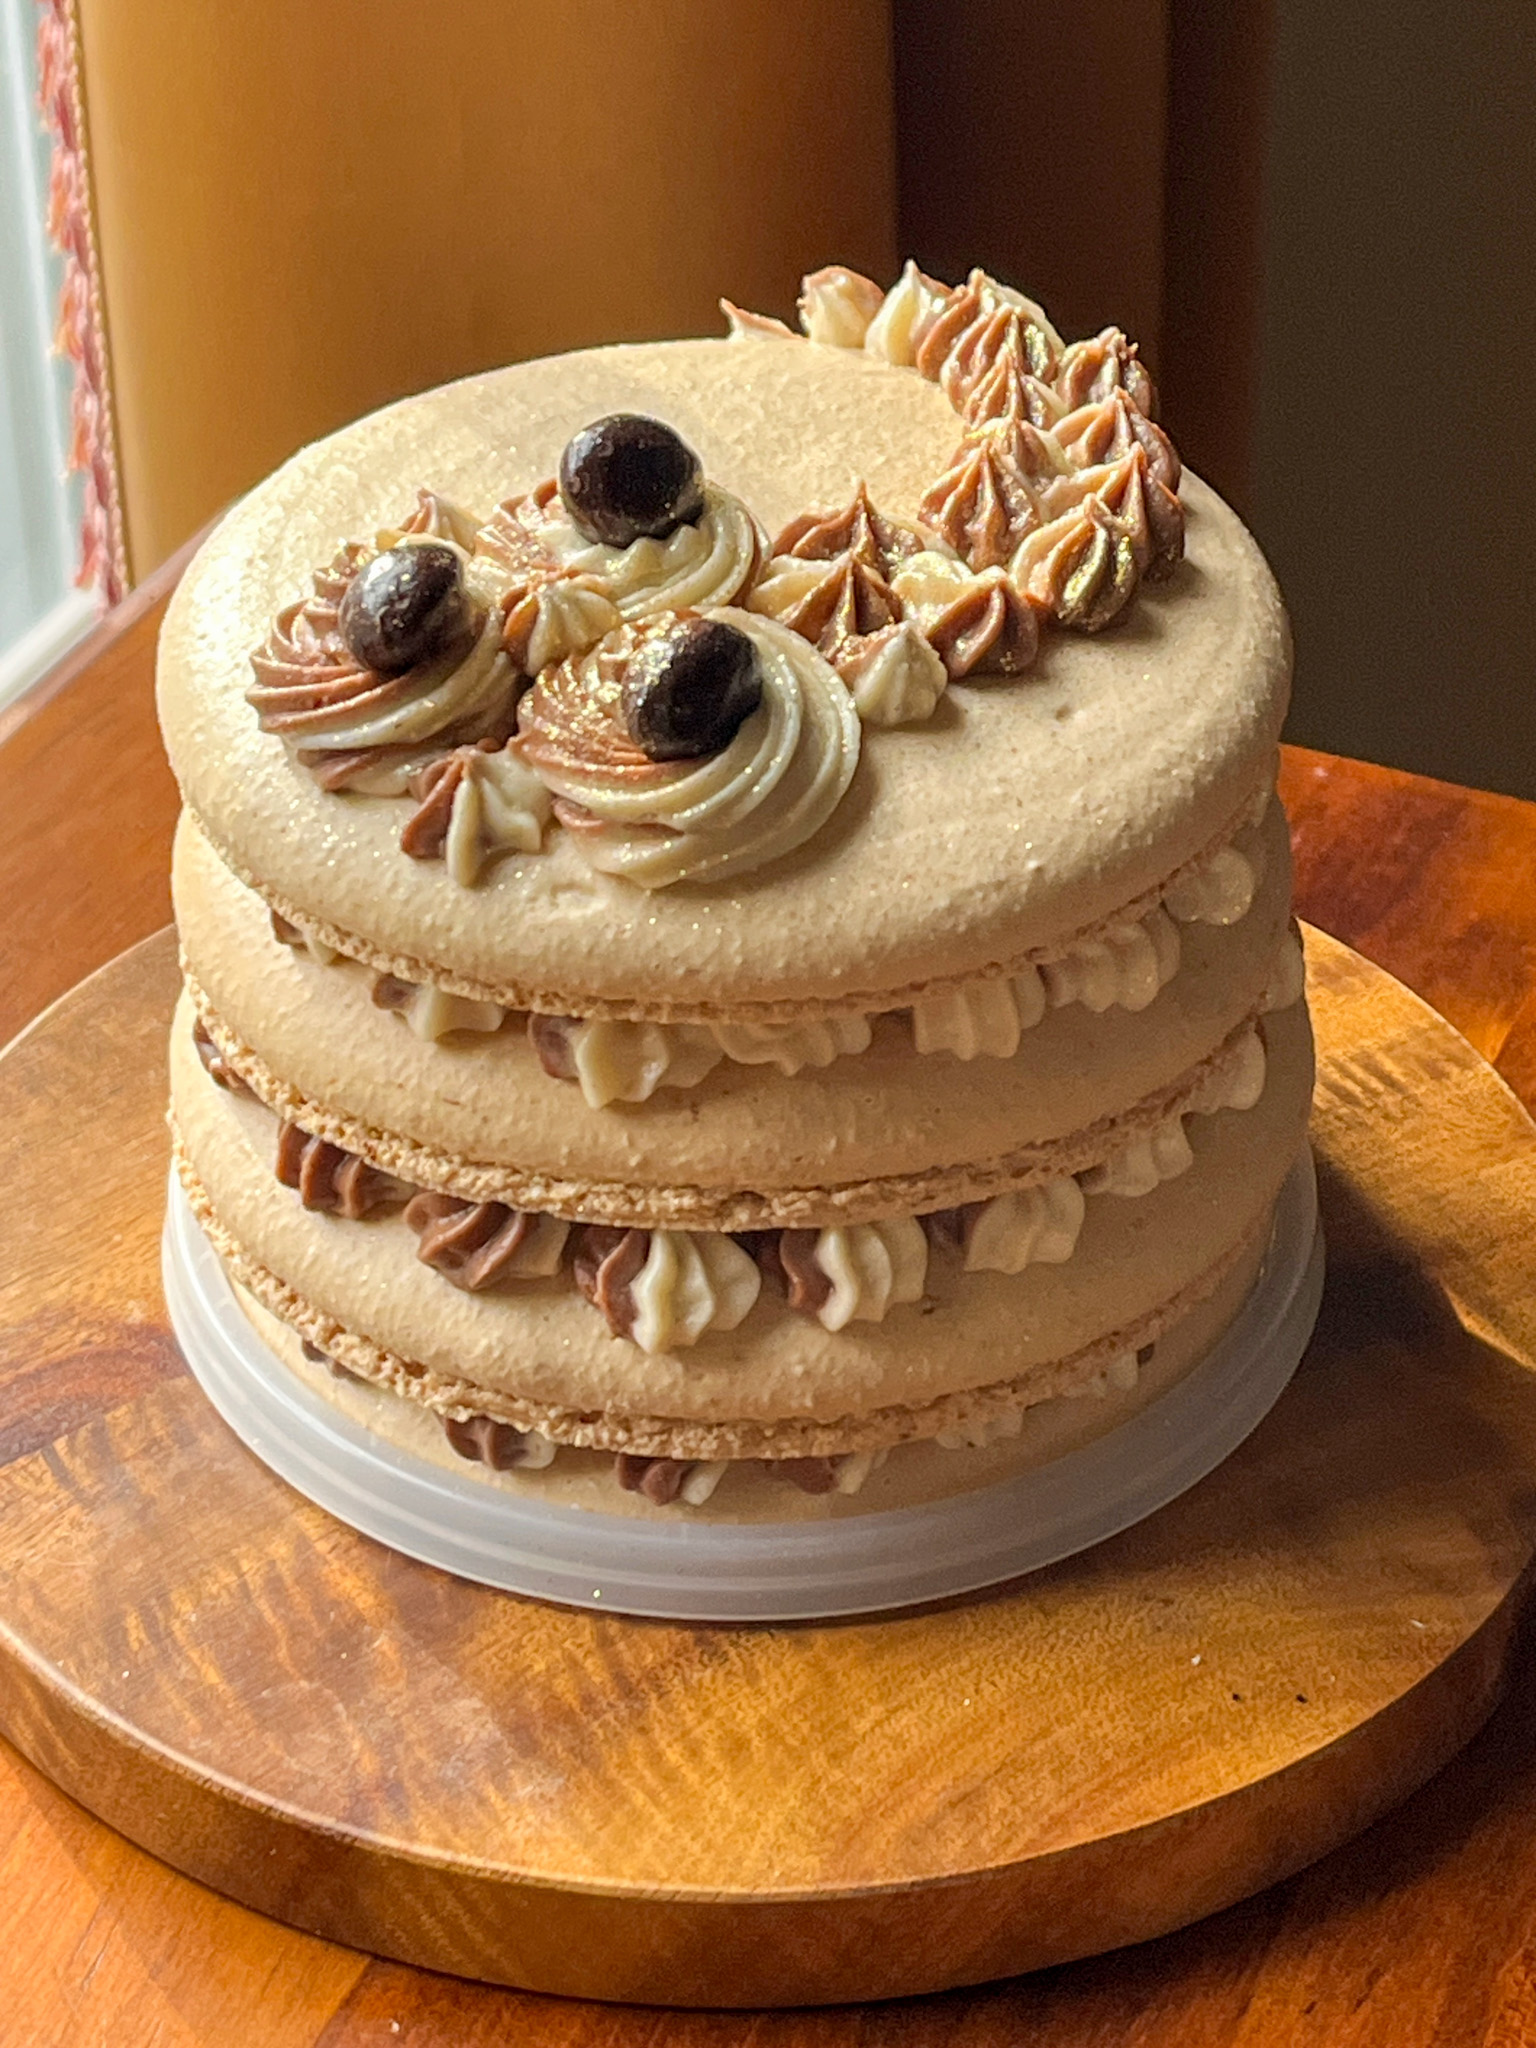
Place one macaron shell on top of a cake stand or plate. Pipe some frosting on top. Top with another shell. Pipe more frosting on top. Repeat until you reach the last shell. If desired, pipe some frosting on top of the macaron cake, and then decorate with chocolate covered espresso beans.
Let the macarons mature for 24 hour in the fridge before serving.
Comments: Did you know that Camila, the baker behind Pies and Tacos is originally from Brazil? She is an expert macaron baker, I’ve been following her site for years, and also have her cookbooks. I normally use the French meringue method, but this was my first time piping large shells and I decided to follow her exact method. Worked like a dream!
This was so incredibly delicious, but the best part was Phil’s face when I brought the dessert from the basement (we have a fridge in the basement which is perfect for hiding sweet surprises).
If you have a special celebration coming up, consider making a mini-macaron cake, you will thank me later. It is messy to eat, but totally worth it. Very important to let that rest for one or two days in the fridge, the layers meld together nicely. A dreamy dessert, no doubt!