108 ASIAN COOKIES


I am totally in love with this cookbook! I have a soft spot for baking that is not overly sweet, which might sound strange, as I bake so many sugar cookies, macarons, and cupcakes. But a recipe that calls for adding miso to a cookie gets me dreaming. Salted caramel? Same thing. This is actually my second cookbook from Kat Lieu, and I think both would be a great Christmas gift for bakers (wink, wink).

To order 108 Asian Cookies, click here

To order Modern Asian Baking, click here

Without further ado, here is a wonderfully delicious recipe for Masala Macaroons…

MASALA MACAROONS
(published with permission from 108 Asian Cookies)

One 14-ounce (396 g) can sweetened condensed milk
1 ripe small banana, mashed
1 teaspoon red miso
One 14-ounce (396 g) bag unsweetened shredded coconut
2 teaspoons garam masala
½ teaspoon ground cardamom
½ teaspoon ground ginger
About ⅓ cup (60 g) semisweet chocolate chips, plus more as needed
1 teaspoon neutral oil
Sea salt flakes, for garnish
Sprinkles, for garnish (optional)

Heat the oven to 350°F. Line two baking sheets with parchment paper. In a large mixing bowl, mix the condensed milk, mashed banana, and miso until combined. Add the shredded coconut, garam masala, cardamom, and ginger and mix until well combined and the dough can hold itself together.

Scoop heaping tablespoons of batter for each macaroon and place on the prepared baking sheet. Keep their rounded mound shapes and give each about 1 inch of space. Bake all the macaroons until the edges are crispy and golden brown and the tops are lightly toasted, 16 to 18 minutes.

Let the macaroons set on the baking sheets for 5 minutes before transferring to a wire rack to cool completely. While the macaroons are cooling, combine the chocolate chips and oil in a medium heatproof bowl and microwave in 30-second bursts, stirring after each interval, until the chocolate is melted and smooth. Dip the bottoms of the cooled macaroons into the melted chocolate. Place them back on the parchment-lined baking sheets to set. Drizzle additional melted chocolate on top of each macaroon. Before the chocolate sets completely, sprinkle a few flakes of sea salt and sprinkles on top of each macaroon.

ENJOY!

to print the recipe, click here


Comments: These were superb, I confess to stealing one from the donation box and being happy that I did… If you don’t like coconut, of course these are not for you, but if you love them, be ready for a treat! Easy to make, rich and luscious, one will satisfy your sweet tooth, but the spices and miso tone it down substantially. Truly special… You need them in your life.

As a teaser, these are chocolate chip cookies described by Kat as Best Chocolate Chip Cookies Ever. They take Ovaltine, molasses and miso. To die for, honestly. You need these cookies and this cookbook in your life.

Big thank you to Kat for allowing me to share this recipe today!

ONE YEAR AGO: Three Little Cookies for the Holidays

TWO YEARS AGO: Two Festive Cakes, Part One

THREE YEARS AGO: Broccoli Slaw Salad with Poppy Seed Dressing

FOUR YEARS AGO: Vegan Blueberry-Lemon Cheesecake

FIVE YEARS AGO: Green Tea Rice with Edamame and Butternut Squash

SIX YEARS AGO: Santa Hat Mini-Mousse Cakes

SEVEN YEARS AGO: Fun with Sourdough

EIGHT YEARS AGO: Pasteis de Nata

NINE YEARS AGO: New Mexico Pork Chile, Crockpot Version

TEN YEARS AGO: Chocolate on Chocolate

ELEVEN YEARS AGO: Double Chocolate and Mint Cookies

TWELVE YEARS AGO: The Story of my first Creme Brulle’

THIRTEEN YEARS AGO: Sourdough Mini-rolls

FOURTEEN YEARS AGO: Focaccia with Sun-dried Tomatoes and Gorgonzola

FIFTEEN YEARS AGO: Mediterranean Skewers

SIXTEEN YEARS AGO Fettuccine with Shrimp, Swiss Chard, and Tomatoes

COCONUT CUPCAKES GET FROSTY

Several components needed for this bake, but isn’t it all worth it? I cannot take credit for the idea, I saw it by total accident in this Instagram page and fell in love with it. I adapted to use my own cupcake recipe and Tanya – tent-baker-extraordinaire and amazing friend – helped me with a frosting that holds well at room-temperature.

FROSTED COCONUT CUPCAKES WITH SNOWMAN COOKIE DECORATION
(adapted from several sources, inspired by Constellation Inspiration)

For the cupcakes (makes 12):
170g cake flour
1 tsp baking powder
1/4 tsp baking soda
1/4 tsp salt
113g butter at room temperature
200g sugar
1 tsp vanilla extract or paste
80g egg whites
90g sour cream
85g coconut milk

Heat oven to 350F. Make sure that the butter, egg whites, coconut milk and sour cream are at room temperature. Fill a cupcake pan with paper liners. Reserve.

Sift the cake flour baking powder, baking soda and salt. Reserve. Cream butter and sugar with the paddle attachment of a KitchenAid type mixer for about 5 minutes. Add vanilla to the egg whites and slowly pour into the creamed butter/sugar, continuing to mix and medium-low speed. Mix the coconut milk with the sour cream, then add to the mixer 1/3 of the reserved dry ingredients, 1/2 of the milk/sourcream, followed by 1/3 of the dry, 1/2 liquids, and finally the remaining amount of dry ingredients.

Place in the lined cupcake pan. Bake for 22 to 25 minutes, until a toothpick inserted in the center comes out clean. Allow the cupcakes to cool completely before frosting.

COCONUT BUTTERCREAM
(from Tanya Ott)

1 cup butter, softened
3 cups powdered sugar
1/4 cup coconut milk

Whisk the butter with a Kitchen Aid type mixer and the paddle attachment for about 4 minutes. Add the powdered sugar in three batches, continue beating in medium-speed. Add the coconut milk, beat at medium-high for 2 minutes or so. Adjust consistency with powdered sugar if needed. Frost the cupcakes once they are at room temperature and immediately stick a snowman cookie on top.

SNOWMAN DECORATION

Bake rings of chocolate cookie dough small enough to fit over the cupcake. They will be fragile. Try to make them smaller than the ones I made, so they will have an easier time standing up on the frosted cake.

Once the rings are baked, use this recipe (minus the food gel color) to make the stained glass component. Pour inside the rings, let them set. Use Royal icing to create a snowy scene with a snowman.

ENJOY!

to print the recipe, click here

Comments: I absolutely loved making the stained-glass component with the snowman. You can do that a couple of days in advance, store at room temperature. They hold well. I made mine slightly too big, and at first I thought they would never stand up, but with “a little bit extra frosting” they did stay happily up. Consider decreasing the size a bit. Or, if you don’t mind the extra frosting, just go big!

The decorations matched very well our current situation in Manhattan, Kansas, aka The Little Apple.

We expect that by this weekend the snow will finally melt in our surroundings. It’s been a tough month of January. For too many reasons. Baking is keeping me reasonably sane. Or so everyone arounds me hopes.

ONE YEAR AGO: Mexican Bolillos

TWO YEARS AGO: Brazilian Style Banana Cake

THREE YEARS AGO: Tiger Shrimp in Chili Sauce

FOUR YEARS AGO: Tangzhong Hamburger Buns

FIVE YEARS AGO: Potato Soup with Spicy Shrimp

SIX YEARS AGO: Rose-Harissa Chicken Thighs

SEVEN YEARS AGO: Caramel-Chocolate Tartlets

EIGHT YEARS AGO: Chicken Korma-ish

NINE YEARS AGO: Sunday Gravy with Braciola

TEN YEARS AGO: In My Kitchen, February 2015

ELEVEN YEARS AGO: Avocado and Orange Salad with Charred Jalapeno Dressing

TWELVE YEARS AGO: Green Olive, Walnuts and Pomegranate Salad

THIRTEEN YEARS AGO: Romanian Flatbreads

FOURTEEN YEARS AGO: Ziti with Artichokes and Meyer Lemon Sauce

FIFTEEN YEARS AGO: Blasted Broccoli, Stove-top version

GERMAN CHOCOLATE MACARONS

These were made with a colleague from our department in mind, it was a big Birthday for our IT wizard who is also a lover of German Chocolate Cake. I decided to make a filling that started as a brigadeiro would, but with coconut for good measure. Some toasted pecans in the center. And a coating with chocolate. Gold luster powder to add the mandatory bling, as if you don’t sparkle on a Birthday there is something wrong with you!


GERMAN CHOCOLATE MACARONS
(from the Bewitching Kitchen)

For the shells:
200g powdered sugar
115 g almond flour, preferably super fine
115 g egg whites at room temperature (approx. 4 eggs)
1/8 tsp of cream of tartar (optional)
100 g granulated sugar
¼ tsp vanilla paste or extract
brown and a tiny bit of red gel food color

Line 3 heavy baking sheets with parchment/baking paper or Silpat mats. Layer the powdered sugar and almond flour in a food processor. Pulse until the mixture looks like fine meal, about 12 pulses. Pass through a sieve and transfer to a small bowl or to a sheet of parchment/baking paper. Set aside.

Place the egg whites and cream of tartar in the bowl of a stand mixer fitted with the whisk attachment. Make sure that the bowl and the whisk are impeccably clean. Starting on medium speed, whip the whites with the cream of tartar until they look like light foam. The whites should not appear liquid. The foam will be light and should not have any structure.

Slowly rain in the granulated sugar in five additions, trying to aim the stream between the whisk and the side of the bowl. Turn the speed up to high. Continue to whip the meringue until it is soft and shiny. It should look like marshmallow creme (marshmallow fluff). Add the vanilla. Whip the egg whites until the mixture begins to dull and the lines of the whisk are visible on the surface of the meringue. Check the peak. It should be firm. Transfer the whites to a medium bowl, add the gel color.

Fold in the almond flour mixture in two increments. Paint the mixture halfway up the side of the bowl, using the flat side of a spatula. Scrape the mixture down to the center of the bowl. Repeat two or three times, then check to see if the mixture slides slowly down the side of the bowl. Put the mixture in a piping bag fitted with your choice of piping tip (round, ¼ or ½ inch in diameter or 6 – 12 mm). Pipe circles. Slam each sheet hard four to six times on the counter/worktop. Let the unbaked macarons dry until they look dull but not overly dry. Drying time depends on humidity. In a dry climate, the macarons can dry in 15 to 20 minutes; in a humid climate, it can take 35 to 40 minutes.

While the macarons are drying, heat the oven to 300 F. Bake one sheet at a time on the middle rack. Check in 11 minutes. If the tops slide or move (independently of the ‘feet’ when you gently twist the top), then bake for 2 to 3 more minutes. Check one or two. If they move when gently touched, put them back in the oven for 1 to 2 more minutes until they don’t move when touched. Let the macaroons cool for 10 minutes before removing from the pan. The macarons should release without sticking.

Assemble the macarons: find two macarons similar in size and add a good amount of filling to the bottom of one of them. Place the other on top and squeeze gently to take the filling all the way to the edge. Store in the fridge for 24 hours for perfect texture.

For the filling:
1 can condensed milk
1 tablespoon butter
1/4 cup shredded unsweetened coconut
1 tbsp cocoa powder
toasted pecans, chopped fine
melted dark chocolate or candy melts
toasted sweetened coconut
golden luster spray (optional)

Before filling the shells, melt chocolate or candy melts and dip ONE shell that will be the top half way into it. Immediately sprinkle toasted coconut on top.

Make a “brigadeiro” mixture by adding condensed milk, butter, cocoa powder and coconut to a sauce pan. Heat in medium heat constantly stirring until the mixture releases from the bottom of the pan. Transfer to a bowl and let it cool, but do not refrigerate. You can pipe it on the shells if it is still slightly warm, but not too hot.

Add a circle of coconut brigadeiro to a bottom shell, sprinkle a little bit of pecans in the center. Cover with the decorated and fully set top shell. Spray gold luster if you like. Place shells in the fridge overnight.

ENJOY!

to print the recipe, click here

Comments: I normally prefer not to add cocoa to the shells, just to the filling, because macarons are finicky enough and sometimes “stuff happens” when you add cocoa. I had never used brigadeiro to fill them, and from the feedback I got, it worked quite well. I did not have a macaron but tried the brigadeiro mixture and that is one good tasting brigadeiro, I might repeat it and roll it like the traditional stuff.

ONE YEAR AGO: Dressing up the Oreo Cookie

TWO YEARS AGO: OMG Roasted Sweet Potatoes

THREE YEARS AGO: Air-Fried Eggplant Raita

FOUR YEARS AGO: Turkey-Pumpkin Roulade with Cider Sauce

FIVE YEARS AGO: Strawberry-Vanilla Mini-Cakes

SIX YEARS AGO: Bourbon-Glazed Pork Tenderloin with Pea Pesto

SEVEN YEARS AGO: Chocolate Chip Cookies from Naturally Sweet

EIGHT YEARS AGO: Little Bites of Paradise

NINE YEARS AGO: Maple-Glazed Pumpkin Bread

TEN YEARS AGO: In My Kitchen, October 2014

ELEVEN YEARS AGO: Grilled Steelhead Trout

TWELVE YEARS AGO: Brown Butter Tomato Salad

THIRTEEN YEARS AGO:  Spelt and Cornmeal Rolls

FOURTEEN YEARS AGO: Roasted Potato and Olive Focaccia

FIFTEEN YEARS AGO: Multigrain Bread Extraordinaire

THE BEWITCHING KITCHEN TURNS 11!

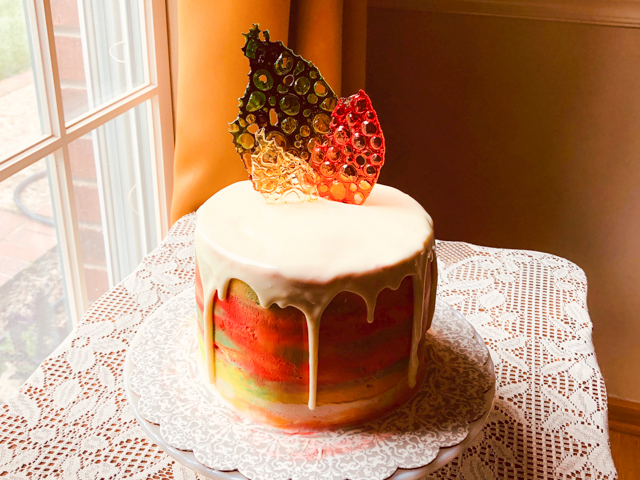
Eleven years ago I hit “publish” on my very first post, got a huge thrill when I did it, and right after went through many bouts of anxiety as I waited and waited… how many people would read what I just wrote? Could I keep the blog going for 6 months? For a year? Well, eleven years have passed, I went from cake-o-phobe to tent-baker, met a ton of wonderful people through this site, and have absolutely no desire to stop writing. I never get tired of it, it is always exciting to share stuff I make. Like this Blog-Birthday cake. I wanted it to have tropical flavors. Passion fruit and coconut sounded good. And I also wanted it to be colorful and fun. Buttercream and sugar work to the rescue!

BEWITCHING PASSION FRUIT AND COCONUT CAKE
(from the Bewitching Kitchen)

for the cake:
280 g  all-purpose flour
300 g granulated sugar
2 + 1/4 teaspoons baking powder
½ teaspoon salt
1 cup full-fat milk + squirt of lemon juice
3 large eggs
2 teaspoons pure vanilla extract
2 tsp Amoretti passion fruit flavor
½ cup unsalted butter, melted and cooled
¼ cup grapeseed oil

For the buttercream:
340 g unsalted butter, at room temperature
750 g confectioners’ sugar, sifted (you might not use the full amount)
3 tablespoons heavy cream
1 teaspoon clear vanilla extract
pinch of salt

for the coconut pastry cream:
(adapted from a recipe from Martha Stewart)
2 cups whole milk
1/4 cup cream of coconut
1/2 cup sweetened shredded coconut
1/2 tsp vanilla paste
4 large egg yolks
1/4 cup sugar
1 tablespoon cornstarch
pinch of salt

for drip icing:
2 tbsp white chocolate chips
100 g candy melts
43 g tbsp heavy cream (about 3 tablespoons)

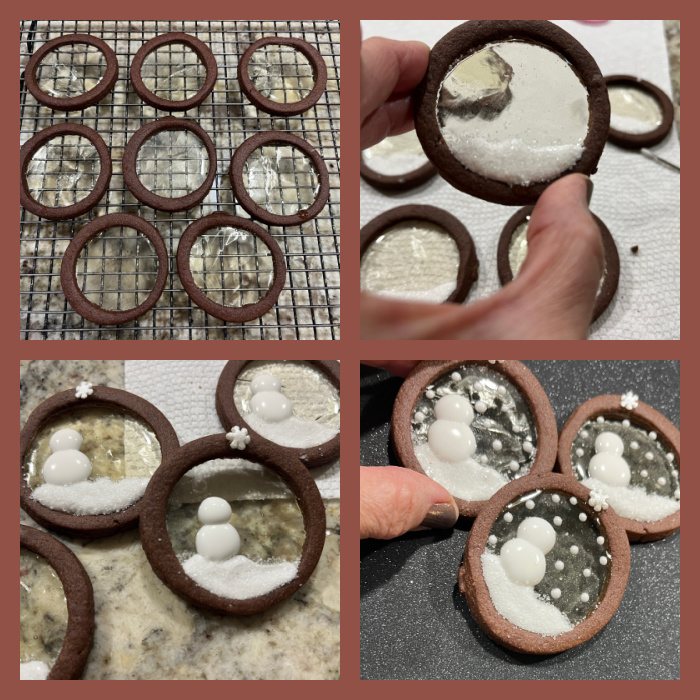
for the sugar decorations:
(following Kim-Joy’s youtube tutorial)
glucose
food gel dye, any color you like

Butter and flour three 6-inch cake pans. Melt the butter gently and reserve. Mix the milk with lemon juice and let it sit for a few minutes (congrats, you just made full-fat buttermilk). Sift together the flour, sugar, baking powder, and salt into a large bowl. In another bowl whisk together the buttermilk, eggs, vanilla, and passion fruit flavor. Pour the liquid mixture into the flour. Whisk the ingredients together to combine. Pour in the melted butter and oil. Stir everything together until the batter is smooth.

Divide the batter into the three prepared pans. Bake for about 30 minutes, until a toothpick inserted into the center of each cake comes out clean. Let the cakes cool on a wire rack for 15 minutes before removing from the pans. If making the cakes in advance, you can freeze them or keep in the fridge, they are easier to work with if completely cold.

Make the coconut pastry cream (preferably the day before assembling the cake). Bring milk, cream of coconut, coconut, and vanilla to a simmer in a medium pan over medium-high heat. Remove from heat. Cover and let it sit for 30 minutes at room temperature.

Put egg yolks, sugar, cornstarch, and salt in a bowl. Whisk with a hand-held blender until thick, about 5 minutes. Heat the coconut infused milk mixture until very hot. With mixer on medium-low speed, slowly pour in milk mixture. Transfer to saucepan. Cook over medium heat, whisking constantly, until boiling, and boil for a couple of minutes. Strain through a sieve. Let cool completely and store in fridge until assembling the cake (cover surface with plastic to prevent a skin from forming).

Make the buttercream. In the bowl of a stand mixer fitted with the paddle attachment, beat the butter on medium speed until smooth and creamy. With the mixer running on low, slowly add all but 1 cup (125 g) of the confectioners’ sugar, the heavy cream, vanilla, and salt. Once incorporated, turn the mixer up to medium-high and mix for 3 to 5 minutes, until the buttercream is white, fluffy, and smooth. Add the remaining cup of confectioners’ sugar as needed, a small amount at a time (I used about half of it), until it reaches good spreadable consistency.  Keep half of it white, divide the other half in four small bowls and use food dye to make four colors of your choice. Reserve.

Assemble the cake. Place one cake layer on a cake board over a turntable. Spread half of the coconut pastry cream. Top with a second cake layer and repeat. Place the final cake layer on top. Crumb coat the cake with white buttercream and chill in the refrigerator for 15 minutes. Add splashes of the different colors of buttercream and work them with a bench or cake scraper as you rotate the cake. Refrigerate for 1 hour.

Made the drip icing. Chop the chocolate chips into small pieces. Add the chips and candy melts to microwave safe bowl and pour heavy cream on top. Microwave for 20 second intervals, stirring in between each interval, until all the chocolate is melted. Let sit for 15-30 minutes, until it reaches 90 F. Pour over chilled cake, spreading towards the outside of the cake with the back of a spoon or small spatula so that it drips. Put back in the fridge to chill until ready to finish decorating. Transfer to a serving stand before adding the final sugar decorations on top.

Make the sugar decorations (can be made a couple of weeks in advance). Pour small amounts of glucose over a half-sheet lined with Silpat. Add drops of food gel dye, keep in mind a little goes a long way.  Bake at 300F for about 1 hour. Let it cool, break into pieces and use to decorate the cake.

ENJOY!

to print the recipe, click here

Comments: Social isolation makes baking pretty tricky. I can still bake for homeless meals on Fridays but everything must be individually wrapped for take-out, so that limits a lot what I can make. No frostings, no mousse cakes, no mirror glazes… I wasn’t even sure I should bake a cake for the Bewitching anniversary because we eat at most one slice each, sometimes we just share a single slice and call it a day. Our departmental colleagues enjoy most of it. But at the present time, no sharing food is permitted in our building. Problem solved: our two graduate students agreed to do the sacrifice and help us with this pressing matter. It was my first time doing this type of watercolor design, so I kept the buttercream recipe simple. It is a fun technique and I intend to do it again in the future, perhaps with more pastel tones and using Swiss meringue buttercream. The real fun part was making the sugar decorations. Interestingly enough, the cake baking started with them. I subscribe to Kim-Joy’s youtube channel and on May 15th she uploaded that tutorial. I was so smitten by the whole idea, I made them later that same day.

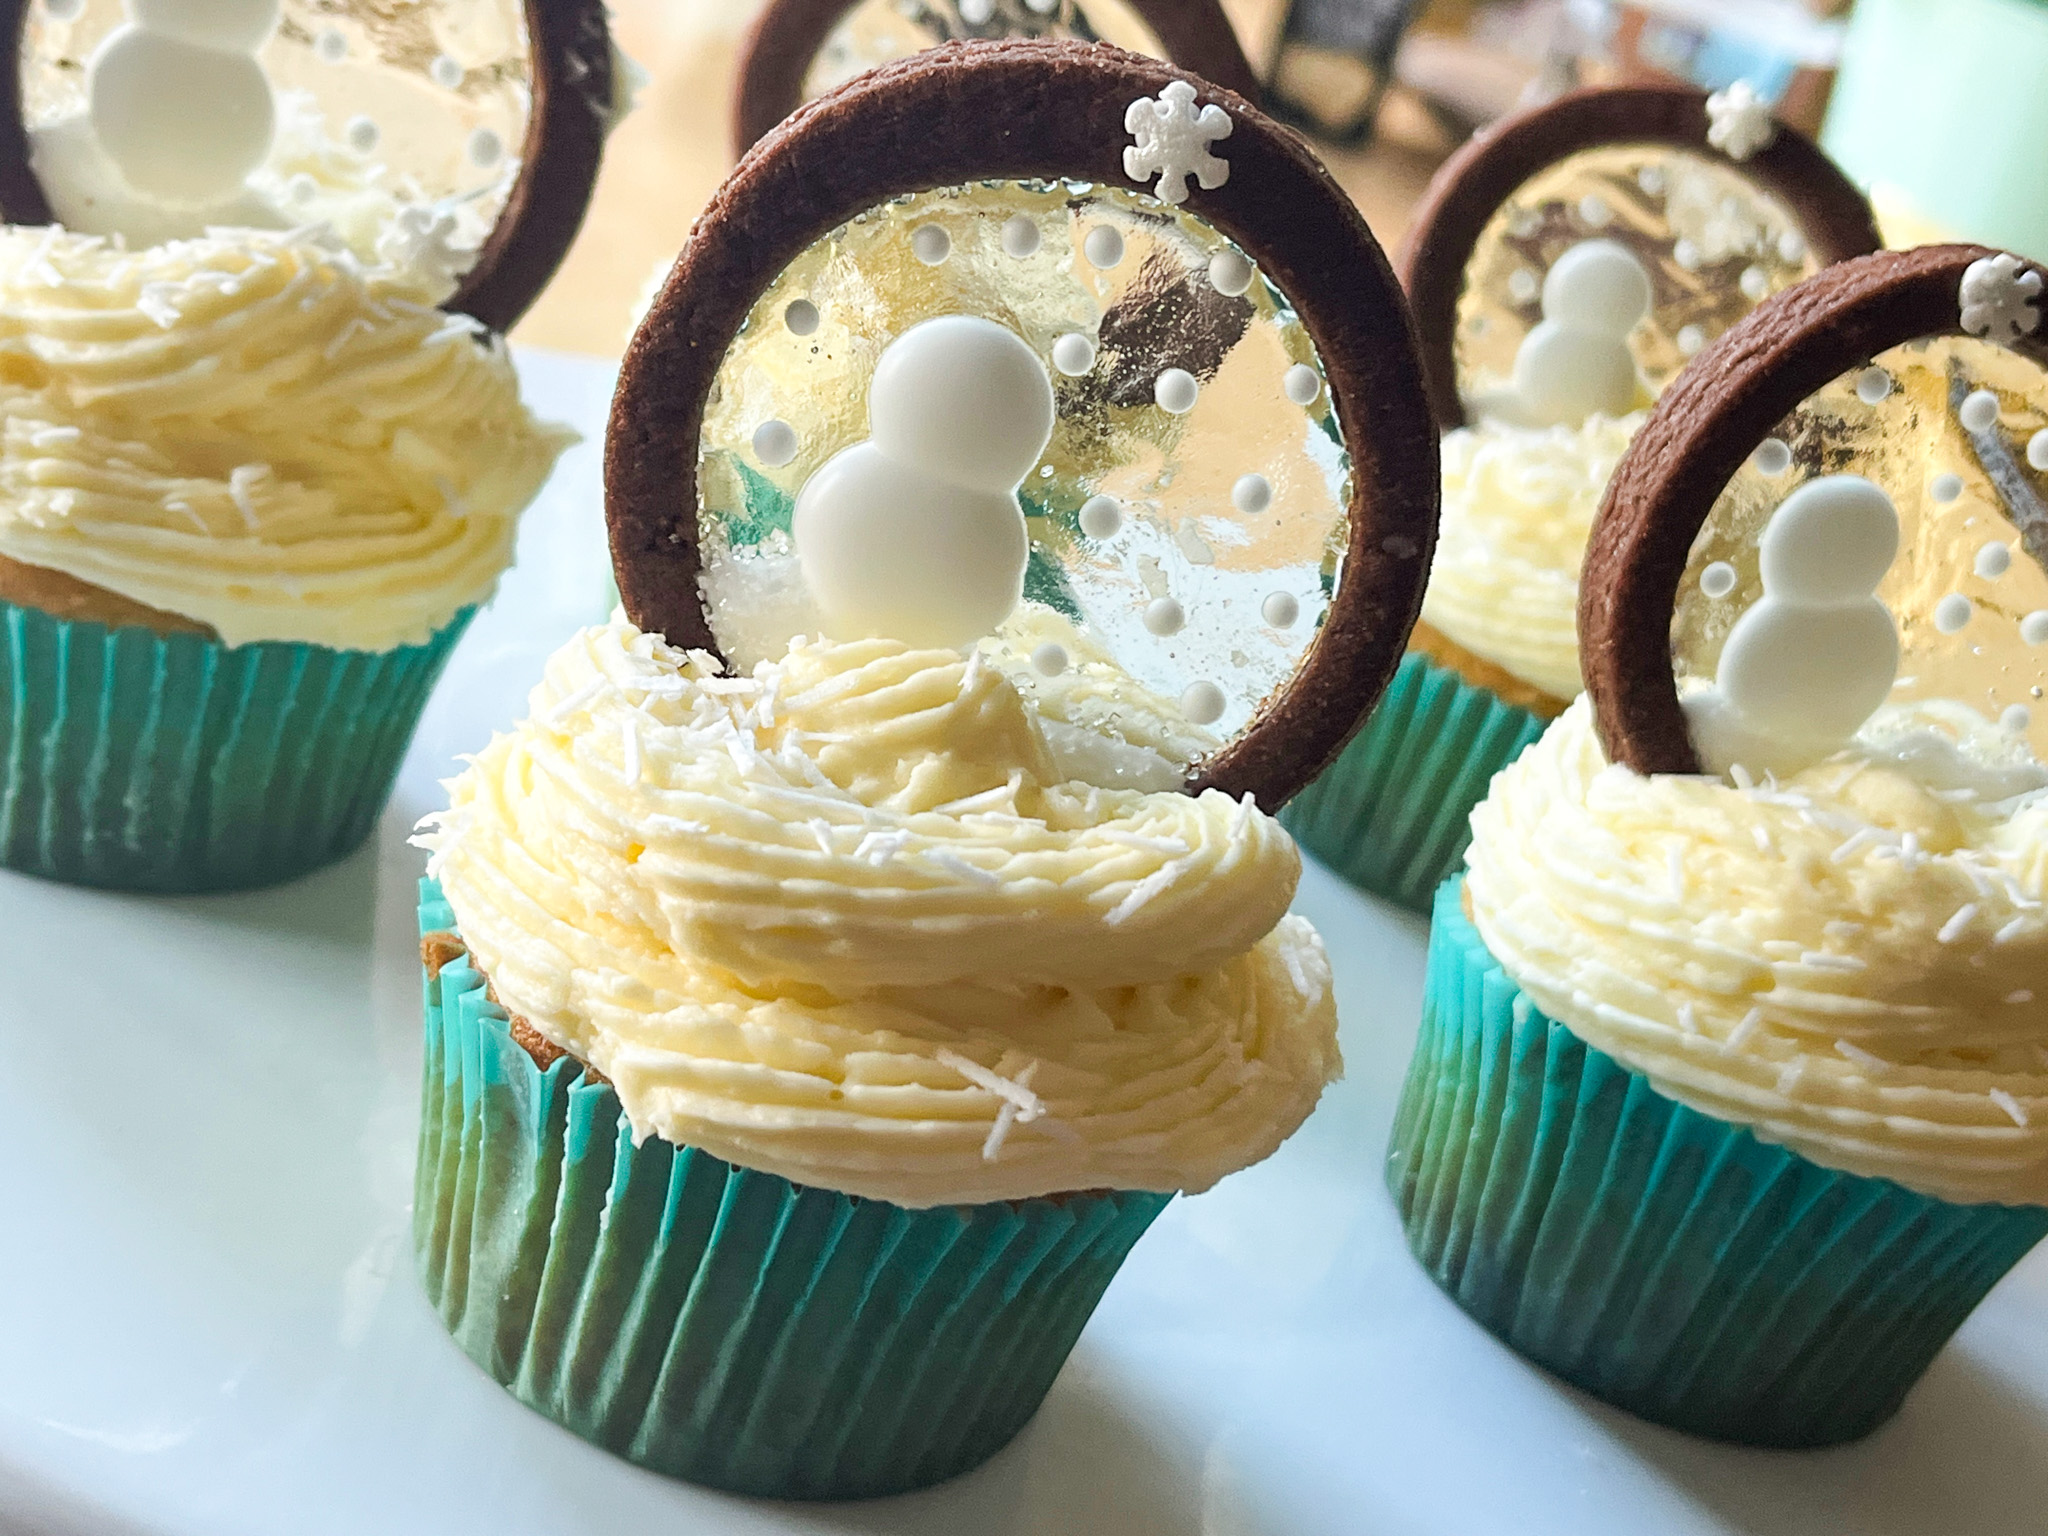
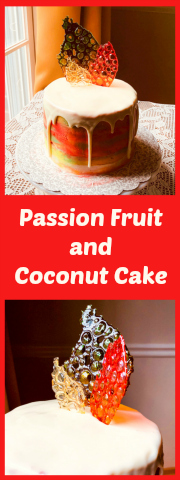
I made two batches, the first one definitely using more dye than needed, the second batch using a lot less. With less dye, you get the subtle effect shown on the right picture of the composite above.  You can play with colors and amounts, it is amazing to see the changes the whole thing goes through during baking. At first you will think it’s all going to be ruined. Just trust Kim-Joy, let the oven do its thing, it will all settle into a nice outcome. Make sure to watch her video to get a better idea of the whole method.

The sculpture was a gift from my sister Nyrma, during a trip to Brazil many years ago. I thought it matched the sugar decorations quite well…   And no, it was not intentional at all  😉

The sugar decorations change quite a bit depending on the light, which I find fascinating. And they hold so well! I made them without any precise goal about how or when to use them, but then realized that the blog would turn 11 soon, and a cake was needed. I hoped they would last long enough for that, and they did, just sitting at room temperature, in a single layer. Exposed to the air, not in a box or anything.  Keep that in mind if you want to include sugar decorations on cupcakes or other concoctions. You can make them way in advance.

I loved the cake, the flavor from Amoretti does a good job when you cannot have fresh passion fruit pulp to use. It paired well with the coconut pastry cream. I actually added back to the pastry cream some of the shredded coconut sieved out, just to add a bit of extra texture, but you don’t have to do that, as most of the flavor will have infused the milk anyway. Your call.

So here I am, at the beginning of the 12th  year of my blogging life. It does feel like yesterday, but it also feels it all started a lifetime ago. I don’t have any special plans for the future. This site is just a reflex of my daily life. I am sure year number 12 will continue with a lot of baking, but also regular cooking.  I’ve been exploring a bit more vegetarian and vegan options, not with intentions of changing my eating habits, but for the challenge they represent, particularly in baking.  I found out last year that one of the graduate students in our department is allergic to eggs. That means she could never enjoy any of the bakes I shared with our colleagues in the “Mondays with Sweetness.”  It made me so sad. At some point I will be able to bake again for the department, and intend to get some bakes especially for her. Who knows when it will be? But I am practicing and getting my baking mojo ready for it…


To my readers, thank you for being here, your support is truly what makes it all so special for me, it’s the fuel that keeps my blogging engine going…


ONE YEAR AGO: The Bewitching Kitchen Turns 10, and a Giveaway…

TWO YEAR AGO: The Bewitching Kitchen turns 9!

THREE YEAR AGO: The Bewitching Kitchen turns eight!

FOUR YEARS AGO: The Bewitching Kitchen Turns Seven!

FIVE YEARS AGO: Bewitching Kitchen Turns Six!

SIX YEARS AGO: The Bewitching Kitchen turns Five!

SEVEN YEARS AGO: The Bewitching Kitchen turns Four!

EIGHT YEARS AGO: The Bewitching Kitchen Turns Three! 

NINE YEARS AGO:  The Bewitching Kitchen turns Two!

TEN YEARS AGO:  Bewitching Birthday!

ELEVEN YEARS AGO: Welcome to my blog!


THE HOME BAKERS COLLECTIVE: APRIL PROJECT

Here we are, once again, baking together under the same theme, this month designed by Tanya. Doughnuts. Any kind. Baked, fried, yeast-raised, filled, glazed, or as she put it “any doughnut is a good doughnut.”  She is one smart cookie, that Tanya. I went tropical (surprised?).  Mine were flavored with coconut and lime, and they got a mango-glaze. The recipe was based on one from a former contestant of the Great American Baking Show, the lovely Cheryl. One of the positive aspects of passing by a certain tent is that I got to know (virtually at least) several of the former contestants and found out they are  incredibly nice people!

COCONUT AND LIME DOUGHNUTS WITH MANGO GLAZE
(slightly modified from Cheryl’s blog)

for doughnuts:
2 cups (260 grams) all-purpose flour
2 teaspoons baking powder
1 teaspoon kosher salt
2/3 cup (126 grams) granulated sugar
zest of 1 lime
2 large eggs at room-temperature
1 cup coconut milk at room-temperature
1/2 cup (100 grams) coconut oil, melted

for glaze:
1 + 1/2 cup (172 grams) powdered sugar
1 tablespoon coconut milk
1 tablespoon mango Artisan flavor (Amoretti)
sprinkles to decorate

Heat the oven to 400 degrees F.

Mix the sugar with the lime zest, rubbing it well. Let it sit for 5 minutes as you gather the other ingredients. Combine the flour, baking powder and salt in a medium bowl and whisk to combine. Melt the coconut oil and set aside.

In a large bowl mix the sugar-lime, milk and the egg and whisk until the sugar is dissolved. Add the melted coconut oil (which should be cooled but still liquid) to the liquid ingredients in a steady stream and whisk constantly.  Add the dry ingredients and use a spatula to fold the ingredients until you cannot see any bits of flour.

The easiest way to fill the pan is to add the batter into a piping bag, no need to add a piping tip, just cut the end. Add the batter to 12 doughnut wellsand bake for 10-12 minutes. The doughnuts are done when the you press them with your finger, and they spring back. Turn the doughnuts out on a wire rack to cool completely.

While the doughnuts are cooling combine the powdered sugar, coconut milk, mango extract and if needed adjust the consistency with lime juice or water.
Dip the doughnuts into the glaze and swirl to coat the tops and halfway down the sides. Place on a rack or parchment paper. Decorate with sprinkles.

ENJOY!

to print the recipe, click here

Comments: These turned out delicious! The flavor of the coconut was perfect, delicate and subtle, and I had to add some lime zest because I find that combination a classic.  I made them to donate for the Common Table meal, and as usual, I like to think about the things that some people are not too fond of.  I know that shredded coconut is a bit iffy for some, that’s why I did not do the toasted coconut topping (but please see Cheryl’s original post if you want to do it her way). I love Amoretti flavors, and had this mango bottle in my pantry begging to be used. It tastes delicious, and the glaze complemented the doughnuts the way I expected.

If you want to bake along with us, tag us in Instagram with #homebakerscollective. To see what all my baking-buddies did this month, visit our group blog,  The Home Bakers Collective (post might be published later today or tomorrow morning, so keep that in mind)

Before I leave you, here is a picture of my contribution to the Common Table meal a couple of weeks ago.


Chocolate Chip Cookies (recipe from Doubletree Hilton, recently made public),  Almond Tea Cakes with Boysenberry Jam, Springerle Cookies (coming soon to a food blog near you), and the doughnuts from this month’s group project.

Tanya, thank you for the challenge, I had fun planning and making them, and now I look forward to our next adventure…
Cheryl, thank you for a great recipe!

ONE YEAR AGO: Asian-Style Eggplant Meatballs

ONE YEAR AGO: Uzbek Flatbread

TWO YEARS AGO: First Monday Favorite – Black Sesame Macarons

THREE YEARS AGO: Chocolate Orange Mini-Cakes

FOUR YEARS AGO: In My Kitchen, May 2015

FIVE YEARS AGO: P90X3, a Review of Tony Horton’s Latest Fitness Program 

SIX YEARS AGO: Pasta and Mussels in Saffron Broth

SEVEN YEARS AGO: Triple Chocolate Brownies

EIGHT YEARS AGO: Shanghai Soup Dumplings

NINE YEARS AGO: Bite-sized Chocolate Pleasure