HOME BAKERS COLLECTIVE WARM UP FOR THANKSGIVING

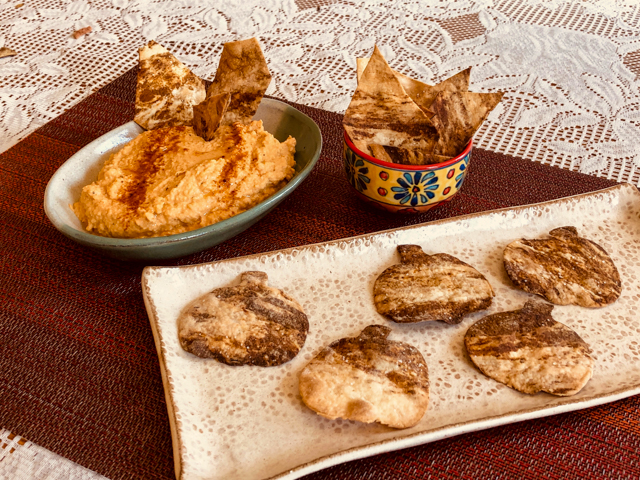
If you are like me, and learned how to ski as an adult, you are familiar with that fear as you slide downhill catching speed and see curves coming up, trees on both sides, overwhelmed by that feeling of “this might not have a happy ending.” That is pretty much what 2020 feels like. Eleven months and counting of sliding downhill feeling out of control. But 2020 cannot rob us of Thanksgiving. There are many things to be grateful for, including the fact that we are still hanging on to the ski poles, and braving the elements. To warm us all up for my favorite American holiday, the Home Bakers Collective got together to share a few recipes inspired by the season. Here is my little contribution. Pumpkin Crackers and hummus. To start your meal on a festive note.

PUMPKIN CRACKERS
(from the Bewitching Kitchen)

for the white dough:
60g all-purpose flour 1 cup all purpose flour
1/4 tsp salt
1 tsp olive oil
about 2 tablespoons water

for the pumpkin dough:
50g all-purpose flour
10g pumpkin flour (or all-purpose)
1 tablespoon pumpkin puree (canned)
1/4 tsp salt
1 tsp olive oil
about 1 tablespoon water

Hheat the oven to 400 degrees. Prepare a baking pan by lining with parchment paper.

Make the white dough: in a small bowl, combine all ingredients and knead by hand to form a dough. Adjust water, you don’t want the dough to be too sticky. Reserve.

Make the pumping dough by mixing all the ingredients, again adjusting with more all-purpose flour in case it is too sticky (the pumpkin puree will add quite a bit of moisture). Reserve.

Allow both balls of dough to sit at room temperature for about 20 minutes. Divide each dough in two and marble the two colors. Roll each piece very thinly, the best way is using a pasta rolling machine or Kitchen Aid attachment, but you can definitely do it by hand. Cut in pumpkin shapes using a cookie cutter or simply in small pieces.

Bake for about 10 minutes, depending on how thin you rolled them, until they start to get brown and crisp. They will get slightly harder as they cool. Serve with your favorite dip.

ENJOY!

to print the recipe, click here

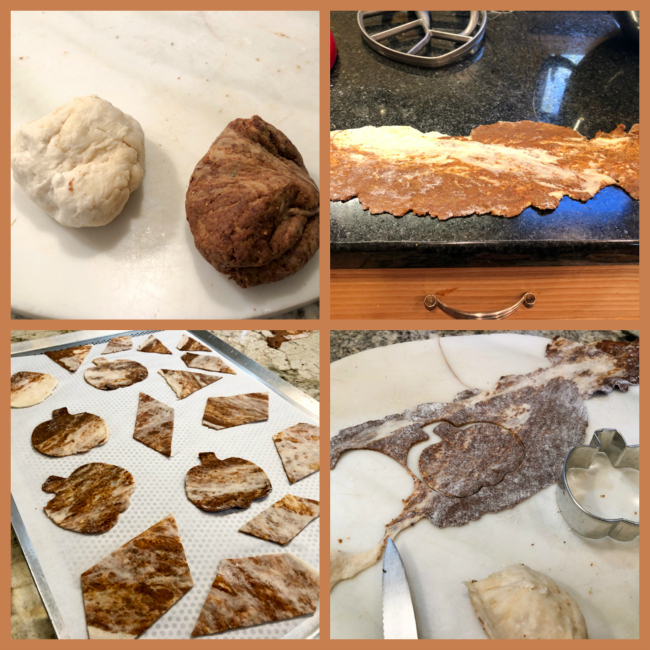
Comments: Pumpkin flour is a great ingredient when you want to get flavor without adding too much moisture. It works well in cookies also. Since it contains no gluten, it behaves completely different from all-purpose flour. You will have to play a bit with the dough to get a similar texture in both the white and pumpkin components. As usual when you marble two colors, the dark will be dominant, so keep that in mind. You can always use more of the white dough and marble with 1/4 of the amount of dark. The recipe I shared makes a small batch of crackers. Since it is just me and the husband around, I did not want to make a huge amount. The recipe will double easily.

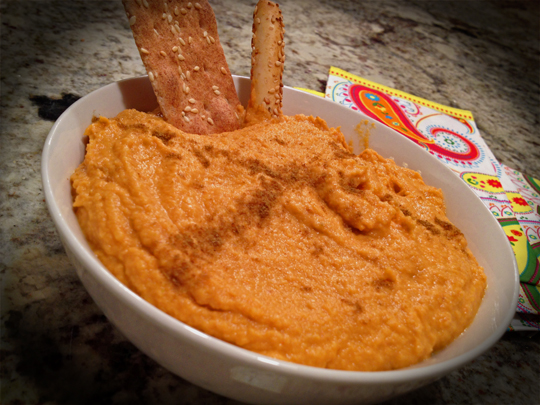
For the pumpkin hummus, visit my old blog post with a click here. And of course, stop by The Home Bakers Collective to see what everyone else decided to share. One blink of the eye and Thanksgiving will be here. Make sure you keep you and your loved ones safe.

(post might take a couple of hours to be published in the Collective, check later if not yet there)

ONE YEAR AGO: Black Sesame Japanese Milk Bread

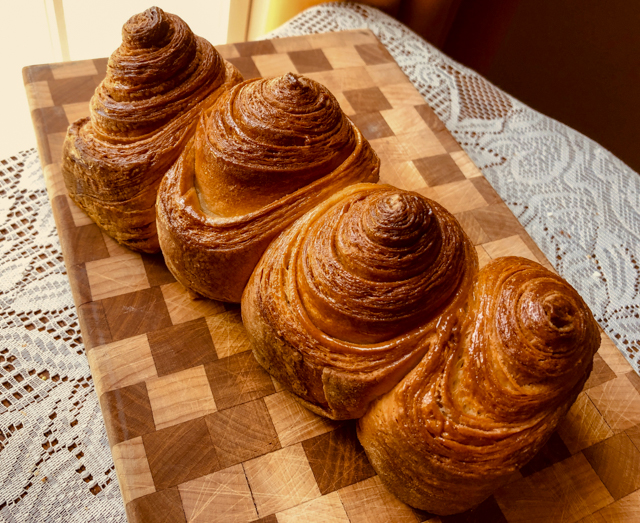
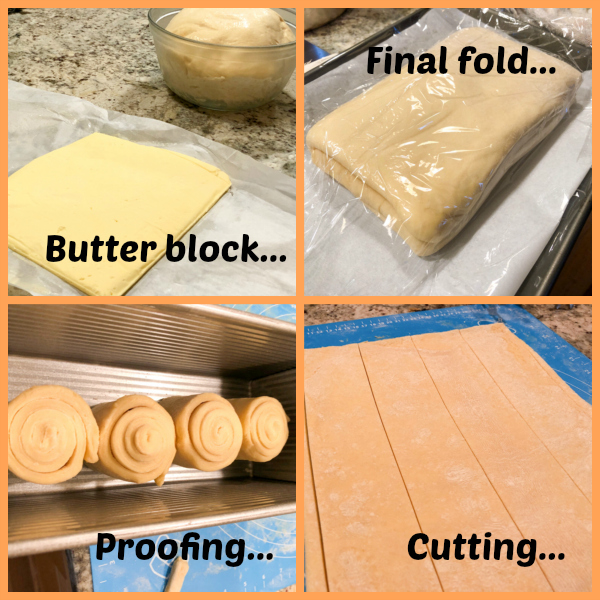
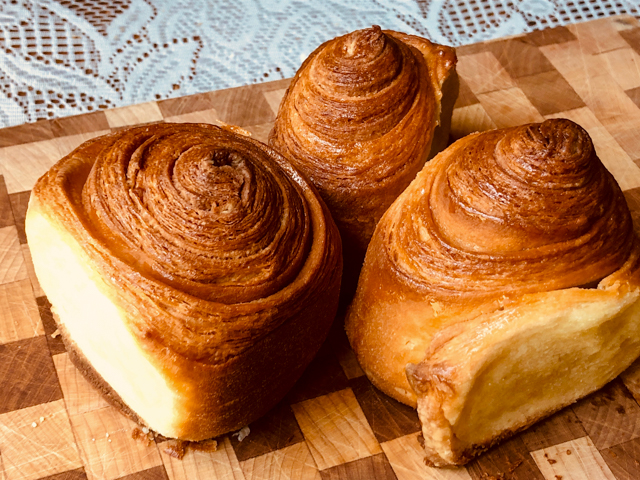
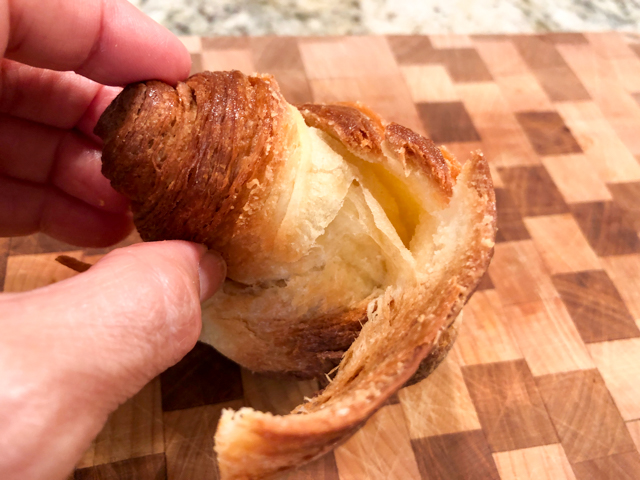
TWO YEARS AGO: Swirls and Whirls

THREE YEARS AGO: The Tabatiere

FOUR YEARS AGO: Curry Turmeric Sourdough

FIVE YEARS AGO: Brigadeiros de Morango

SIX YEARS AGO: Feta-Stuffed Turkey Meatloaf

SEVEN YEARS AGO: Artichoke-Saffron Souffle

EIGHT YEARS AGO: Cinnamon-Wreath

NINE YEARS AGO:
  Yeastspotting 11.11.11

TEN YEARS AGO:
 Oven-baked Risotto

ELEVEN YEARS AGO:
  Potato-Roquefort Cakes with Ripe Pears

HOME BAKERS COLLECTIVE: AUGUST PROJECT

One year ago, filming of Season 5 of The Great American Baking Show was coming to an end. In fact it was probably right this very day a year ago that Dana, Marissa and Brother Andrew faced their last baking challenges in that dreamy tent. Amazing that with this assignment we went full circle, and all the bakers who participate in “the collective”, proposed challenges on a monthly basis. It makes my heart sing. Dana chose a very cool project for the month of August.  Recreate your favorite childhood treat.  I had to give it some thought, but then my friend Denise (who grew up in Rio) reminded me of something called Nhá Benta. No need to panic, I will explain to you exactly how to say it (after the comments).  Nhá Benta is a kind of sweet that is found in many countries under names like Marshmallow Puff, Tunnock’s Tea Cakes, Mallomars. The Brazilian version had a very thin base and a ton (I mean a real huge amount) of marshmallow on top. It was very messy to eat, which was a bit of a turn-off for me. Both my late Dad and I, we shared a little quirk: intense dislike of sugary mess. Even as a child, you would never see me with ice cream melting down my arm or lips. The very idea would leave me paralyzed. But it was so tasty, I could never resist it for very long. My re-make of this Brazilian classic is “user-friendly” and “Dad-approved.”  A bigger, sturdier cookie base, and just the right amount of marshmallow to allow you to bite into it and not lose your dignity. To make it even more Brazilian, a green-and-yellow decoration, because sprinkles make my world go around.

NHÁ BENTA
(from the Bewitching Kitchen)

for the cookie base:
100g flour
25g whole wheat flour
25g hazelnut flour (or hazelnuts, finely ground)
50g brown sugar
½ tsp salt
113g unsalted butter (½ cup) cold, cubed
2 tbsp milk
1 tsp vanilla

for the marshmallow (makes more than you’ll need): 
200 g sugar
¼ cup water
5 sheets gelatin
2 egg whites
¼ fine salt

For the chocolate coating:
250g chocolate couverture, tempered
1 tsp coconut oil, melted
drizzle: white chocolate, melted and dyed with oil-soluble food dye
sprinkles

Heat oven to 350F.

In a food processor, pulse together the flours, sugar and salt. Add the butter and pulse until mixture resembles coarse crumbs. Add the milk and vanilla and pulse until dough holds together when squeezed. Turn the dough out onto the counter and knead gently to bring together. Dust the counter with flour and roll the dough to ¼-inch thickness. Cut into rounds and place on a parchment-lined baking sheet. Freeze for 10 minutes. Bake until firm and beginning to brown on the edges, 12 to 15 minutes. Cool for 2 minutes on baking sheet, then transfer to a wire cooling rack to cool completely.

Make the marshmallows only when the cookies are ready and cool, because it sets reasonably quickly.  Soak the gelatin sheets in cold water. Add the sugar and water in a small saucepan and bring to a boil over medium-high heat. Start whipping the egg whites so that they are at soft peaks within 5 minutes or so. Reduce the heat in the saucepan to medium and boil until mixture reaches 235-240F. Remove from heat and allow bubbling to subside.

With the mixer running on medium-high, gradually stream in the sugar syrup and drained gelatin sheets along the side of the mixing bowl into the egg whites. Continue to beat until glossy, thick and cooled to room temperature, about 6 to 8 minutes. Add the salt and mix for 1 minute.

Spoon the mixture into a piping bag fitted with a medium round piping tip and pipe over the cookies to form a dome. If dome needs smoothing, moisten fingers with water and gently smooth dome. Set aside to cool.

Temper the chocolate and add the coconut oil, mixing gently to incorporate. Immediately dip the cookies, marshmallow side down, into the chocolate. Flip to coat the bottom and place them gently over Silpat or parchment paper (do not place over a grid like a drying rack because that will mess up the coating at the bottom). Melt white chocolate and dye yellow. Place in a small piping bag, cut a very thin opening, and drizzle the surface of the covered cookies. Add sprinkles right away.  Cool and serve, they can be stored in the fridge.

ENJOY!

to print the recipe, click here

Comments: First of all, if you want to make a version closer to the authentic one sold in Brazil by Kopenhagen, roll the cookie very thin, and pile that marshmallow as if you are trying to reach the ceiling. Good luck coating it all with tempered chocolate… but I bet it can be done. This was messy enough for me, I tell you.  The drizzles are optional and are never found in the commercially available Nhá Bentas.


So what about its name? It would be best translated as Ms Benta. Nhá is a contraction of the word sinhá, a term commonly used in rural areas of the country decades ago. Basically, they are both  variations of the formal “Senhora” still used today as a respectful way to refer to an older woman. For instance, my friends addressed my Mom as “Senhora Salete”, and my Dad as “Senhor Danillo.”  The pronunciation of the word can be tricky for foreigners, so here we go, repeat after me…

This was my first time making Nha’ Bentas and I had no idea 2 egg whites would produce such a big volume of marsmallow. If your mixer handles 1 egg white, consider halving the recipe that part of the recipe.  I also had quite a bit leftover tempered chocolate, and saved it for future adventures…

Follow your heart…

Dana, this was such a clever challenge, I am looking forward to the flash-back into childhood of our tent-baking friends. I invite my readers to stop by the Home Bakers Collective to read all about it.

ONE YEAR AGO: The Best, The Very Best Hummus

TWO YEARS AGO: Chicken Katsu

THREE YEARS AGO: Whole-Lemon Marinade: Long Overdue

FOUR YEARS AGO: Tomato and Cucumber Salad with Almond Vinaigrette

FIVE YEARS AGO: Eggplant Tomato Stacks

SIX YEARS AGO: The Couscous that Wasn’t

SEVEN YEARS AGO: Apple-Cinnamon Bread

EIGHT YEARS AGO: Blueberry Galette

NINE YEARS AGO: In My Kitchen, August 2011

TEN YEARS AGO: Journey to a New Home

ELEVEN YEARS AGO: Friday Night Dinner

HOME BAKERS COLLECTIVE: JUNE PROJECT

We just passed Summer solstice. It always makes me sad, knowing that days will be getting shorter and my beloved sun will stay around less and less time each day. Covid-19 is showing its ugly face again, adding more uncertainty to a year that has been full of it from the beginning. But for every yin there is always a yang, and the month of June also brought another group challenge by the tent bakers. This time Alex Tent Baker Extraordinaire came up with the theme, and he was quite straightforward with it. Laminate something. That was his  brief. A brief brief. I loved it! I had quite a few options dancing in my mind, but quickly settled on a Brioche Feuilletée, because it is all about the lamination, no distractions from it. So, without further ado, my assignment is here for you.

BRIOCHE FEUILLETÉE
(recipe from Matt Adlard’s Bake it Better)

for the dough:
415g all-purpose flour
8g salt
50g sugar
85g eggs
153g whole milk
42g soft, unsalted butter
9g instant yeast

for the butter block:
250g unsalted butter

OVERVIEW OF THE RECIPE 
(simplified version, original recipe is copyrighted)

The dough is prepared using all the ingredients and allowed to proof for one hour. It is next transferred to the fridge overnight. At that time, the butter block is made with dimensions of approximately 7 x 8 inches and also placed in the fridge.

Next day the butter block is enclosed in the dough and three folds are performed. First a double fold, the other two single folds. The dough is rolled out and cut into four strips, about 2.5 inches in width. Each strip is rolled and placed inside a loaf pan for a final proofing of 2 to 2 and a half hours.

Bake in a 325F oven for 45 minutes to 1 hour, until deep golden. Remove from the pan and allow it to cool completely.

ENJOY!

to print the recipe overview, click here

Comments: If you want to know all the details and tips that make this recipe easier to follow, you will have to join Matt Adlard’s site. It would not be fair to publish his detailed instructions here, plus his video is a great help. I’ve been a member of his online group for a few months and highly recommend it for those interested in all areas of patisserie. I will write a full blog post about it in the near future. Not only you learn a lot, but you get to interact with a lot of cool, baking-fanatic folks. See what they bake, follow their progress, share failures and victories.


Matt bakes it in a slightly different way. He adds a baking sheet and a heavy weight to the top of the pan, so that as the dough rises during baking, it gets squished on top, ending in a cool rectangular shape, laminated on all sides, but flat. I did not have a pan with the appropriate dimensions to achieve that effect, so I went with the regular baking in which it all freely explodes upwards.


No matter how you bake it, the result will be the same: layers of buttery goodness that you roll out and enjoy. Nothing else is needed, as the bread is quite rich and indulgent as it is, but if you want to spread it with jam, more butter, clotted cream, you will not hurt my feelings. And I bet Matt will not mind a bit either.

Alex, thanks for a great challenge this month… It is hard to believe that one year ago   we were all frantically practicing for the show in our own homes, wondering  who were the other bakers, how would we get along…  Good times.

For my readers, make sure to stop by the Home Bakers Collective, to see what my friends laminated this month… If the link is not yet published, try again a little later in the day.

ONE YEAR AGO: In My Kitchen, June 2019

TWO YEARS AGO: In My Kitchen – July 2018

THREE YEARS AGO: In My Kitchen, July 2017

FOUR YEARS AGO: Secret Recipe Club: Falafel and a Bonus Recipe

FIVE YEARS AGO: Chocolate Toffee Banana Bread

SIX YEARS AGO: In My Kitchen, June 2014

SEVEN YEARS AGO:  Strawberry Frozen Yogurt

EIGHT YEARS AGO: Baked Coconut and “The Brazilian Kitchen”

NINE YEARS AGO: Honey-Glazed Chicken Legs

TEN YEARS AGO: French-Style Rolls

ELEVEN YEARS AGO: Chicken Breasts, Coffee, and Serendipity

THE HOME BAKERS COLLECTIVE: MAY PROJECT

Another month in this crazy year is coming to its end. For May, the Bakers Collective challenge was set up by Bianca (check her site with a click here). I love how she shook things up a bit. We had to bake something savory but not using yeast. It’s a nice change from sweets, and getting yeast out of the equation makes it a tad more challenging. I settled on my choice almost immediately, because I’ve been flirting with soda bread for a long time. Perfect opportunity to give it a go.

PANCH PHORAN SODA BREAD 
(from Nadiya Hussain)

for Panch Phoran mix (all as whole seeds):
1 tsp fenugreek
1 tsp nigella
1 tsp cumin
1 tsp black mustard
1 tsp fennel seeds

for bread:
250g whole-wheat flour
250g bread flour
1 tsp fine salt
1 tsp baking soda
1 tbsp panch phoran (made from mixture above)
400ml buttermilk

Heat the oven to 400F.

Mix all seeds in a small bowl (you will have mixture leftover).

Put the flours, salt, baking soda and 1 tablespoon of five-spice mixture into a large bowl and mix well. Make a well in the center and add a little over half the buttermilk. Bring the dough together by hand, adding more of the buttermilk if needed (I used the full amount).

As soon as all the flour is absorbed and the dough comes together, lightly flour the work surface, tip the dough onto it and roll into a neat ball. Place on the baking tray. Using a sharp knife, make a cross cut almost all the way down to the bottom of the bread, but do not separate the pieces.

Bake on the middle shelf for 30 minutes, until the bread is golden and sounds hollow when tapped on the base. Allow it to cool completely before slicing.

ENJOY!

to print the recipe, click here


Comments: Soda Bread does not get high marks in the beauty department, I admit. It takes rustic to unprecedented levels, but I promise you Nadiya’s version is very tasty. That mixture of spices is perfect. You can buy packages of the mixture, but it’s really quite simple to prepare it yourself, and I happened to have all those seeds already in my pantry. I had fun browsing amazon and reading the comments from people who bought the mix. Some were furious because “it does not have nearly enough fenugreek.” So if you want to make sure to use the authentic “five spice mixture”, make it yourself. I actually loved so much the flavor of this bread, that I intend to make a sourdough version using those spices. Stay tuned.

Although quick breads leavened with baking powder and with little fat in theory do not stay good for more than a day or so, I was surprised by how good the bread tasted after FOUR days once toasted. We froze half of it because with just the two of us there is a limit to how much bread we can consume. But I know I will be making this and other versions in the near future.

Bianca, thanks for such a cool challenge that made me bake something I had never baked before. I am no longer a Soda Bread Virgin!

To see what my tent-baker friends came up for their challenge, visit the Home Bakers Collective site…. (post might take a few hours to show up, so keep that in mind)

ONE YEAR AGO: Purple Star Macarons

TWO YEAR AGO: Smoked Salmon, Fait Maison

THREE YEARS AGO: Kouign-Amann, Fighting Fire with Fire

FOUR YEARS AGO: In My Kitchen, Yin and Yang

FIVE YEARS AGO: Chocolate Toffee Banana Bread

SIX YEARS AGO: In My Kitchen, June 2014

SEVEN YEARS AGO:  Strawberry Frozen Yogurt

EIGHT YEARS AGO: Baked Coconut and “The Brazilian Kitchen”

NINE YEARS AGO: Honey-Glazed Chicken Legs

TEN YEARS AGO: French-Style Rolls

THE HOME BAKERS COLLECTIVE: APRIL PROJECT

Here we are, once again, baking together under the same theme, this month designed by Tanya. Doughnuts. Any kind. Baked, fried, yeast-raised, filled, glazed, or as she put it “any doughnut is a good doughnut.”  She is one smart cookie, that Tanya. I went tropical (surprised?).  Mine were flavored with coconut and lime, and they got a mango-glaze. The recipe was based on one from a former contestant of the Great American Baking Show, the lovely Cheryl. One of the positive aspects of passing by a certain tent is that I got to know (virtually at least) several of the former contestants and found out they are  incredibly nice people!

COCONUT AND LIME DOUGHNUTS WITH MANGO GLAZE
(slightly modified from Cheryl’s blog)

for doughnuts:
2 cups (260 grams) all-purpose flour
2 teaspoons baking powder
1 teaspoon kosher salt
2/3 cup (126 grams) granulated sugar
zest of 1 lime
2 large eggs at room-temperature
1 cup coconut milk at room-temperature
1/2 cup (100 grams) coconut oil, melted

for glaze:
1 + 1/2 cup (172 grams) powdered sugar
1 tablespoon coconut milk
1 tablespoon mango Artisan flavor (Amoretti)
sprinkles to decorate

Heat the oven to 400 degrees F.

Mix the sugar with the lime zest, rubbing it well. Let it sit for 5 minutes as you gather the other ingredients. Combine the flour, baking powder and salt in a medium bowl and whisk to combine. Melt the coconut oil and set aside.

In a large bowl mix the sugar-lime, milk and the egg and whisk until the sugar is dissolved. Add the melted coconut oil (which should be cooled but still liquid) to the liquid ingredients in a steady stream and whisk constantly.  Add the dry ingredients and use a spatula to fold the ingredients until you cannot see any bits of flour.

The easiest way to fill the pan is to add the batter into a piping bag, no need to add a piping tip, just cut the end. Add the batter to 12 doughnut wellsand bake for 10-12 minutes. The doughnuts are done when the you press them with your finger, and they spring back. Turn the doughnuts out on a wire rack to cool completely.

While the doughnuts are cooling combine the powdered sugar, coconut milk, mango extract and if needed adjust the consistency with lime juice or water.
Dip the doughnuts into the glaze and swirl to coat the tops and halfway down the sides. Place on a rack or parchment paper. Decorate with sprinkles.

ENJOY!

to print the recipe, click here

Comments: These turned out delicious! The flavor of the coconut was perfect, delicate and subtle, and I had to add some lime zest because I find that combination a classic.  I made them to donate for the Common Table meal, and as usual, I like to think about the things that some people are not too fond of.  I know that shredded coconut is a bit iffy for some, that’s why I did not do the toasted coconut topping (but please see Cheryl’s original post if you want to do it her way). I love Amoretti flavors, and had this mango bottle in my pantry begging to be used. It tastes delicious, and the glaze complemented the doughnuts the way I expected.

If you want to bake along with us, tag us in Instagram with #homebakerscollective. To see what all my baking-buddies did this month, visit our group blog,  The Home Bakers Collective (post might be published later today or tomorrow morning, so keep that in mind)

Before I leave you, here is a picture of my contribution to the Common Table meal a couple of weeks ago.


Chocolate Chip Cookies (recipe from Doubletree Hilton, recently made public),  Almond Tea Cakes with Boysenberry Jam, Springerle Cookies (coming soon to a food blog near you), and the doughnuts from this month’s group project.

Tanya, thank you for the challenge, I had fun planning and making them, and now I look forward to our next adventure…
Cheryl, thank you for a great recipe!

ONE YEAR AGO: Asian-Style Eggplant Meatballs

ONE YEAR AGO: Uzbek Flatbread

TWO YEARS AGO: First Monday Favorite – Black Sesame Macarons

THREE YEARS AGO: Chocolate Orange Mini-Cakes

FOUR YEARS AGO: In My Kitchen, May 2015

FIVE YEARS AGO: P90X3, a Review of Tony Horton’s Latest Fitness Program 

SIX YEARS AGO: Pasta and Mussels in Saffron Broth

SEVEN YEARS AGO: Triple Chocolate Brownies

EIGHT YEARS AGO: Shanghai Soup Dumplings

NINE YEARS AGO: Bite-sized Chocolate Pleasure