SUMMERTIME MACARON DUET

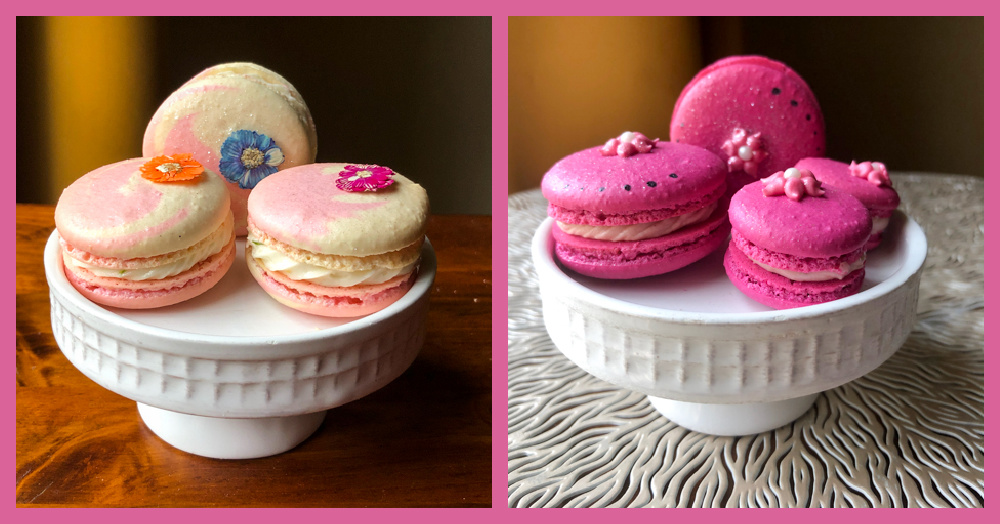
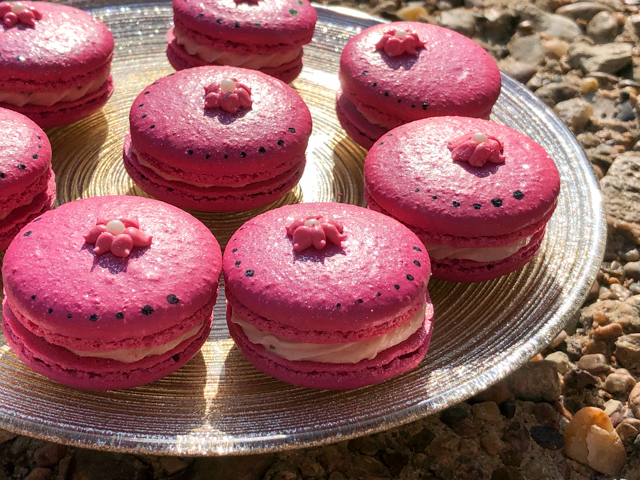
Flavors that scream summer: Passion Fruit-Lime, and Strawberry-Rose. In macaron format. Recipe is my default, a French-meringue method that almost never fails me. Almost, because… macarons!

For the recipe to make the shells, see this post

PASSION FRUIT AND LIME MACARONS
(from the Bewitching Kitchen)

Decoration of shells:
Batter divided in two portions: half dyed pink, half left plain.
Place each batter in a small piping bag. Insert bags by-side in a larger bag.
(this prevents the colors from over-mixing)
Edible dried flowers (like these from Etsy)
Diamond Dust

for filling:
60 g unsalted butter softened
160 g powdered sugar
zest of 1/2 lime
1 to 2 tsp Amoretti passion fruit flavor
pinch of salt
heavy cream if needed to adjust consistency

Use a hand-held electric mixer and whisk the butter until creamy. Add the other ingredients except the heavy cream, and whisk until creamy and smooth. If needed, add a bit of heavy cream to loosen the mixture.

Assemble the macarons: find two macarons similar in size and add a good amount of filling to the bottom of one of them. Place the other on top and squeeze gently to take the filling all the way to the edge. Store in the fridge for 24 hours for perfect texture.

To decorate, sprinkle the surface with Diamond dust, and glue a little edible flower, off-center, using Royal icing.

ENJOY!

to print the recipe, click here

Comments: This was my first time using dried edible flowers, but certainly won’t be the last. I think they will be great on Royal iced cookies, so stay tuned, they might show up on my cookie blog. The lime in the filling helps cut the sweetness of the buttercream, without interfering too much with the passion fruit flavor. I will definitely make this filling again in the future.

STRAWBERRY-ROSE MACARONS
(from the Bewitching Kitchen)

for the shells:
Fuchsia color from Sugarflair (a gift from my friend Caro)
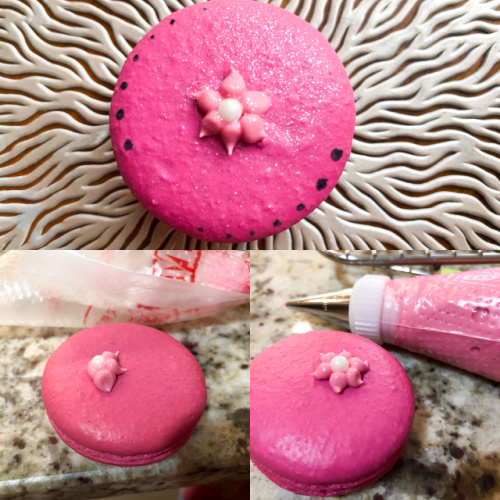
Royal Icing in piping consistency to make a flower
food pen to add little dots

for the filling:
60g butter
160g powdered sugar
3 tablespoons strawberry jam
1/8 tsp rose water
1 tablespoon heavy cream

Use a hand-held electric mixer and whisk the butter until creamy. Add the other ingredients and whisk until creamy and smooth. If needed, adjust with powdered sugar or heavy cream.

Match two shells, add filling and close them. Decorate with Royal Icing, adding a white edible pearl to the center, then piping little petals around it. A little extra decoration with a black food pen is optional.

ENJOY!

to print the recipe, click here

Comments: I find the combination of strawberry and rose water very appealing, BUT be careful with the amount you use, because you are not making soap, you are making a cookie. Hitting the perfect balance is not easy, so I suggest using only 1/8 tsp and not a drop more. It will also depend on the brand of rose water you use. I used this one.

I’d like to remind you that if you are a mac-o-phobe, but would like to try baking a batch, I have a video tutorial available that covered this exact recipe. Check it out here.

ONE YEAR AGO: Pain de Mie Dressed up for Party

TWO YEARS AGO: Five-Stranded Bread

THREE YEARS AGO: Green Olive Salad

FOUR YEARS AGO: Coffee Macarons Dressed up to Party

FIVE YEARS AGO: Blogging Hiatus

SIX YEARS AGO: Tomato Tatin

SEVEN YEARS AGO: Headed to Colorado!  

EIGHT YEARS AGO: Farofa Brasileira

NINE  YEARS AGO: Thai-Inspired Pork Tenderloin

TEN YEARS AGO: A yummy Brazilian cake: Bolo de Fuba’

ELEVEN YEARS AGO:  Summer’s Tomatoes

TWELVE YEARS AGO: Leaving on a jet plane… 

PASSION FRUIT MILLIONAIRE’S SHORTBREAD

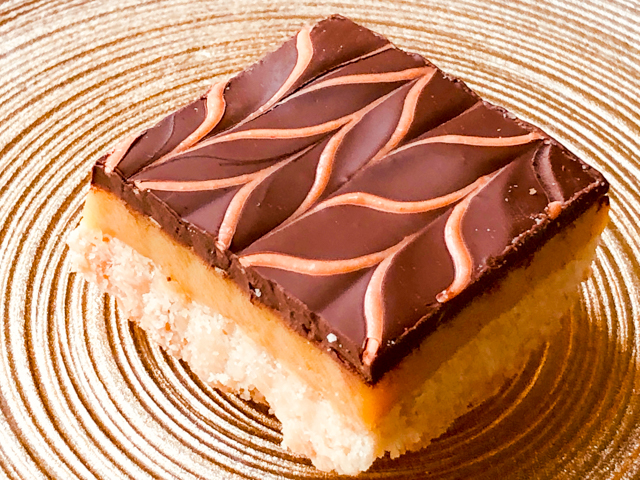
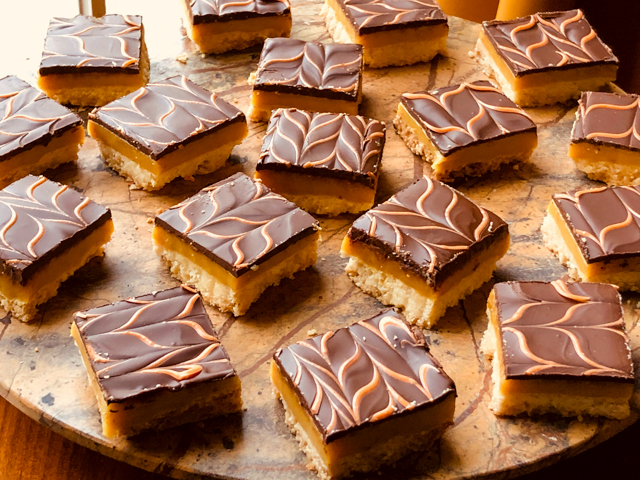
Millionaire’s Bars are undoubtedly a classic. This version brings a bright tropical twist that works quite well. Very rich, a small piece will satisfy even those with a super sweet tooth.

PASSION FRUIT MILLIONAIRE’S SHORTBREAD
(inspired by this article)

for the shortbread base:
2½ cups (312g) all-purpose flour
½ cup (100g) granulated sugar
¾ teaspoon salt
16 tablespoons (226g) unsalted butter, melted

for the caramel:
1 can (396g)sweetened condensed milk
1 cup (210g) brown sugar
1/4 cup heavy cream
1/4 cup corn syrup
1/4 cup passion fruit pulp
1-2 tsp passionfruit flavor from Amoretti (optional)
8 tablespoons (113g) unsalted butter
½ teaspoon salt

for the topping:
225g dark chocolate
1/4 cup Candy Melts, white dyed orange with food gel

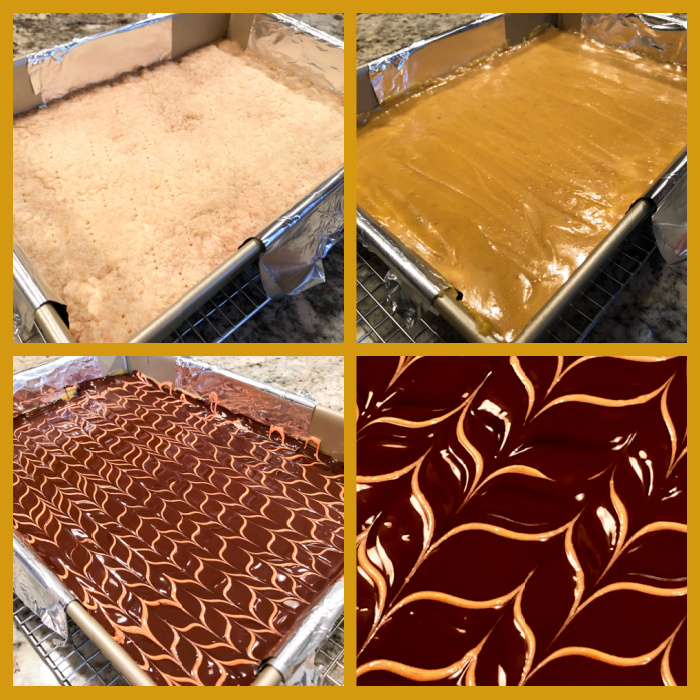
Heat oven to 350F. Butter a 9 x 13 baking pan and line it with foil, leaving pieces hanging on both the long and short sides of the pan, for easy lifting of the bar later. Make the shortbread by combining flour, sugar, and salt in medium bowl. Add melted butter and stir with a silicone spatula until no dry crumbs of flour remain. Crumble the dough evenly over the pan, and pat into even thickness with your fingers. Pierce with a fork many times all over the surface. Bake until light golden brown and firm to touch, 25 to 30 minutes. Transfer pan to wire rack. Let crust cool for 20 to 30 minutes.

Make the caramel: Stir all ingredients together in large, heavy-bottomed saucepan. Cook over medium heat, stirring frequently, until mixture reaches 238 F. This will take around 20 minutes. Pour over crust and spread to even thickness. Let cool completely, a couple of hours.

Once set, melt the chocolate in the microwave in 30-second bursts until glossy and smooth. Place the dyed candy melt in a piping bag and make a small hole. Smooth the chocolate over the caramel shortbread, then quickly add lines of the dyed candy melts. Do a feathering effect with a toothpick or a needle. Leave it set, then cut into squares.

ENJOY!

to print the recipe, click here

Comments: I made this quite some time ago, March 2020 to be precise. It was one of the last items I was able to share with our department before Covid-19 hit. I hoped to have intense passion fruit flavor in the caramel, and that was not very easy to achieve. By mixing fruit pulp with a touch of Amoretti flavor, I think I got it as intense as it could possibly be without affecting the caramel texture. If you don’t have Amoretti products hanging around, just omit it. The passion fruit by itself will be a nice touch, taming the sweetness of the caramel layer. But, as I mentioned in the opening paragraph, this is rich. They call it Millionaire’s Shortbread for good reason!

ONE YEAR AGO: Chai-Mango Rosette Macarons

TWO YEARS AGO: Common Table, Something New in My Life

THREE YEAR AGO: The Daisy, a Bread with Brioche Alter-Ego

FOUR YEARS AGO: Pork Tenderloin, Braciole Style

FIVE YEARS AGO: Raspberry Buckle

SIX YEARS AGO: Seafood Gratin for a Special Dinner

SEVEN YEARS AGO: Cooking Sous-Vide: Sweet and Spicy Asian Pork Loin

EIGHT YEARS AGO:  Farewell to a Bewitching Kitchen

NINE YEARS AGO: In My Kitchen. June 2012

TEN YEARS AGO: Goodbye L.A.

ELEVEN YEARS AGO: 7-6-5 Pork Tenderloin

THE BEWITCHING KITCHEN TURNS 11!

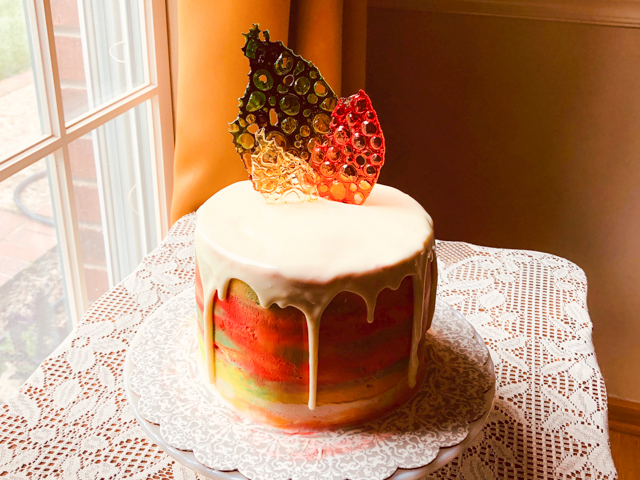
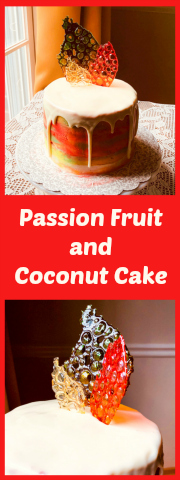
Eleven years ago I hit “publish” on my very first post, got a huge thrill when I did it, and right after went through many bouts of anxiety as I waited and waited… how many people would read what I just wrote? Could I keep the blog going for 6 months? For a year? Well, eleven years have passed, I went from cake-o-phobe to tent-baker, met a ton of wonderful people through this site, and have absolutely no desire to stop writing. I never get tired of it, it is always exciting to share stuff I make. Like this Blog-Birthday cake. I wanted it to have tropical flavors. Passion fruit and coconut sounded good. And I also wanted it to be colorful and fun. Buttercream and sugar work to the rescue!

BEWITCHING PASSION FRUIT AND COCONUT CAKE
(from the Bewitching Kitchen)

for the cake:
280 g  all-purpose flour
300 g granulated sugar
2 + 1/4 teaspoons baking powder
½ teaspoon salt
1 cup full-fat milk + squirt of lemon juice
3 large eggs
2 teaspoons pure vanilla extract
2 tsp Amoretti passion fruit flavor
½ cup unsalted butter, melted and cooled
¼ cup grapeseed oil

For the buttercream:
340 g unsalted butter, at room temperature
750 g confectioners’ sugar, sifted (you might not use the full amount)
3 tablespoons heavy cream
1 teaspoon clear vanilla extract
pinch of salt

for the coconut pastry cream:
(adapted from a recipe from Martha Stewart)
2 cups whole milk
1/4 cup cream of coconut
1/2 cup sweetened shredded coconut
1/2 tsp vanilla paste
4 large egg yolks
1/4 cup sugar
1 tablespoon cornstarch
pinch of salt

for drip icing:
2 tbsp white chocolate chips
100 g candy melts
43 g tbsp heavy cream (about 3 tablespoons)

for the sugar decorations:
(following Kim-Joy’s youtube tutorial)
glucose
food gel dye, any color you like

Butter and flour three 6-inch cake pans. Melt the butter gently and reserve. Mix the milk with lemon juice and let it sit for a few minutes (congrats, you just made full-fat buttermilk). Sift together the flour, sugar, baking powder, and salt into a large bowl. In another bowl whisk together the buttermilk, eggs, vanilla, and passion fruit flavor. Pour the liquid mixture into the flour. Whisk the ingredients together to combine. Pour in the melted butter and oil. Stir everything together until the batter is smooth.

Divide the batter into the three prepared pans. Bake for about 30 minutes, until a toothpick inserted into the center of each cake comes out clean. Let the cakes cool on a wire rack for 15 minutes before removing from the pans. If making the cakes in advance, you can freeze them or keep in the fridge, they are easier to work with if completely cold.

Make the coconut pastry cream (preferably the day before assembling the cake). Bring milk, cream of coconut, coconut, and vanilla to a simmer in a medium pan over medium-high heat. Remove from heat. Cover and let it sit for 30 minutes at room temperature.

Put egg yolks, sugar, cornstarch, and salt in a bowl. Whisk with a hand-held blender until thick, about 5 minutes. Heat the coconut infused milk mixture until very hot. With mixer on medium-low speed, slowly pour in milk mixture. Transfer to saucepan. Cook over medium heat, whisking constantly, until boiling, and boil for a couple of minutes. Strain through a sieve. Let cool completely and store in fridge until assembling the cake (cover surface with plastic to prevent a skin from forming).

Make the buttercream. In the bowl of a stand mixer fitted with the paddle attachment, beat the butter on medium speed until smooth and creamy. With the mixer running on low, slowly add all but 1 cup (125 g) of the confectioners’ sugar, the heavy cream, vanilla, and salt. Once incorporated, turn the mixer up to medium-high and mix for 3 to 5 minutes, until the buttercream is white, fluffy, and smooth. Add the remaining cup of confectioners’ sugar as needed, a small amount at a time (I used about half of it), until it reaches good spreadable consistency.  Keep half of it white, divide the other half in four small bowls and use food dye to make four colors of your choice. Reserve.

Assemble the cake. Place one cake layer on a cake board over a turntable. Spread half of the coconut pastry cream. Top with a second cake layer and repeat. Place the final cake layer on top. Crumb coat the cake with white buttercream and chill in the refrigerator for 15 minutes. Add splashes of the different colors of buttercream and work them with a bench or cake scraper as you rotate the cake. Refrigerate for 1 hour.

Made the drip icing. Chop the chocolate chips into small pieces. Add the chips and candy melts to microwave safe bowl and pour heavy cream on top. Microwave for 20 second intervals, stirring in between each interval, until all the chocolate is melted. Let sit for 15-30 minutes, until it reaches 90 F. Pour over chilled cake, spreading towards the outside of the cake with the back of a spoon or small spatula so that it drips. Put back in the fridge to chill until ready to finish decorating. Transfer to a serving stand before adding the final sugar decorations on top.

Make the sugar decorations (can be made a couple of weeks in advance). Pour small amounts of glucose over a half-sheet lined with Silpat. Add drops of food gel dye, keep in mind a little goes a long way.  Bake at 300F for about 1 hour. Let it cool, break into pieces and use to decorate the cake.

ENJOY!

to print the recipe, click here

Comments: Social isolation makes baking pretty tricky. I can still bake for homeless meals on Fridays but everything must be individually wrapped for take-out, so that limits a lot what I can make. No frostings, no mousse cakes, no mirror glazes… I wasn’t even sure I should bake a cake for the Bewitching anniversary because we eat at most one slice each, sometimes we just share a single slice and call it a day. Our departmental colleagues enjoy most of it. But at the present time, no sharing food is permitted in our building. Problem solved: our two graduate students agreed to do the sacrifice and help us with this pressing matter. It was my first time doing this type of watercolor design, so I kept the buttercream recipe simple. It is a fun technique and I intend to do it again in the future, perhaps with more pastel tones and using Swiss meringue buttercream. The real fun part was making the sugar decorations. Interestingly enough, the cake baking started with them. I subscribe to Kim-Joy’s youtube channel and on May 15th she uploaded that tutorial. I was so smitten by the whole idea, I made them later that same day.

I made two batches, the first one definitely using more dye than needed, the second batch using a lot less. With less dye, you get the subtle effect shown on the right picture of the composite above.  You can play with colors and amounts, it is amazing to see the changes the whole thing goes through during baking. At first you will think it’s all going to be ruined. Just trust Kim-Joy, let the oven do its thing, it will all settle into a nice outcome. Make sure to watch her video to get a better idea of the whole method.

The sculpture was a gift from my sister Nyrma, during a trip to Brazil many years ago. I thought it matched the sugar decorations quite well…   And no, it was not intentional at all  😉

The sugar decorations change quite a bit depending on the light, which I find fascinating. And they hold so well! I made them without any precise goal about how or when to use them, but then realized that the blog would turn 11 soon, and a cake was needed. I hoped they would last long enough for that, and they did, just sitting at room temperature, in a single layer. Exposed to the air, not in a box or anything.  Keep that in mind if you want to include sugar decorations on cupcakes or other concoctions. You can make them way in advance.

I loved the cake, the flavor from Amoretti does a good job when you cannot have fresh passion fruit pulp to use. It paired well with the coconut pastry cream. I actually added back to the pastry cream some of the shredded coconut sieved out, just to add a bit of extra texture, but you don’t have to do that, as most of the flavor will have infused the milk anyway. Your call.

So here I am, at the beginning of the 12th  year of my blogging life. It does feel like yesterday, but it also feels it all started a lifetime ago. I don’t have any special plans for the future. This site is just a reflex of my daily life. I am sure year number 12 will continue with a lot of baking, but also regular cooking.  I’ve been exploring a bit more vegetarian and vegan options, not with intentions of changing my eating habits, but for the challenge they represent, particularly in baking.  I found out last year that one of the graduate students in our department is allergic to eggs. That means she could never enjoy any of the bakes I shared with our colleagues in the “Mondays with Sweetness.”  It made me so sad. At some point I will be able to bake again for the department, and intend to get some bakes especially for her. Who knows when it will be? But I am practicing and getting my baking mojo ready for it…


To my readers, thank you for being here, your support is truly what makes it all so special for me, it’s the fuel that keeps my blogging engine going…


ONE YEAR AGO: The Bewitching Kitchen Turns 10, and a Giveaway…

TWO YEAR AGO: The Bewitching Kitchen turns 9!

THREE YEAR AGO: The Bewitching Kitchen turns eight!

FOUR YEARS AGO: The Bewitching Kitchen Turns Seven!

FIVE YEARS AGO: Bewitching Kitchen Turns Six!

SIX YEARS AGO: The Bewitching Kitchen turns Five!

SEVEN YEARS AGO: The Bewitching Kitchen turns Four!

EIGHT YEARS AGO: The Bewitching Kitchen Turns Three! 

NINE YEARS AGO:  The Bewitching Kitchen turns Two!

TEN YEARS AGO:  Bewitching Birthday!

ELEVEN YEARS AGO: Welcome to my blog!


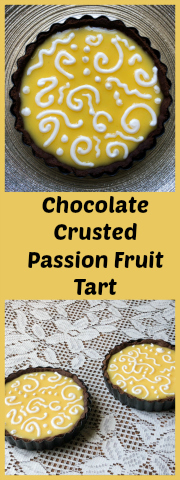
CHOCOLATE CRUSTED PASSION FRUIT TART AND A COOKBOOK REVIEW

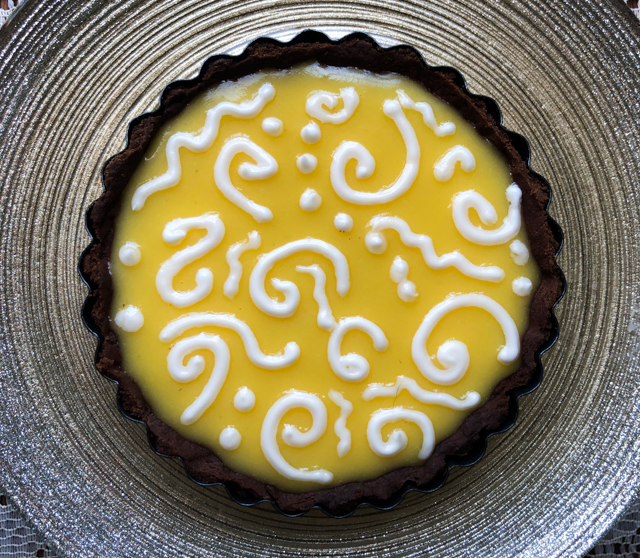
This review is long overdue. I first contacted Nancy Birtwhistle to ask permission to blog on a recipe from her first cookbook, Sizzle and Drizzle, in December last year.  But a lot happened to all of us. Life turned upside down, and it will quite likely never go back to what it used to be. To that normal I suppose we all took for granted. Better late than never, I am sharing today a recipe that feels very special to me. Nancy made it in a certain tent during the Great British Bake Off and I remember falling in love with it the first time I watched that episode. How could I not? It joined chocolate and passion fruit. And she decorated it in a simple yet very elegant way. Instead of making a single, larger tart, I made two individual portions. In isolation times, we have no one to share this type of dessert with, so a smaller portion was the ticket.
CHOCOLATE CRUSTED PASSION FRUIT TART
(from Nancy Birtwhistle’s Sizzle and Drizzle)

1 tart pan, 9 inch (23 cm) in diamater, preferably fluted edges, loose bottom

for the crust:
125g flour
20g cocoa powder
90g salted butter, cold, cut in small dice
30g powdered sugar
1/2 tsp Chinese five-spice mixture (optional)
2 Tablespoons egg yolks, beaten

for the filling:
(use half if making two individual size tarts)
6 eggs
200g granulated sugar
100g softened butter cut into dice
200mL passion fruit juice
5 gelatin leaves (I used Platinum)

for the decoration:
1 egg white
100g powdered sugar, sifted

Heat oven to 400F.

Make the tart crust. Place the flour, cocoa, sugar and spice in the food process and blitz to mix. Add the cold butter and process until everything is combined, this will take just a few pulses. With the motor running, pour the egg yolks and process until it starts to come together. Stop and gather everything over a plastic wrap. Press into a flat disk and refrigerate for 30 minutes.

Roll the pastry very thin (I like to do it over wax paper and with a plastic wrap on top), then use it to cover your tart pan. Freeze for 10 minutes. Cover the bottom with parchment paper and fill with pie weights, beans or rice. Blind bake for 10 minutes, remove the beans and bake for 5 minutes more. Trim the edges with a serrated knife, and allow to cool completely.

Make the filling. Soak the gelatin leaves in cold water. Mix the sugar and passion fruit juice in a sauce pan, heating it gently until it fully dissolved. In a bowl, whisk the egg yolks vigorously, then add the warm juice slowly, whisking non-stop. Put the mixture back in the sauce pan and heat to 185 F (85 Celsius). Be careful and keep whisking, remove from heat if needed for a few seconds to make sure no curdling of egg yolks happen.

Remove from heat, add the drained gelatin sheets, pass it through a sieve. Add the butter, whisk very well to emulsify. Allow the curd to cool slightly then pour into the pastry case all the way to the top. It is better to do this already in the fridge so you don’t have to move the tart around.

When the tart is set, decorate with the Royal icing mixture that you make by whisking the sugar and egg white together for about 4 minutes in a KitchenAid type mixture.  Adjust the consistency to make it right for piping. Serve at room temperature.

ENJOY!

to print the recipe, click here
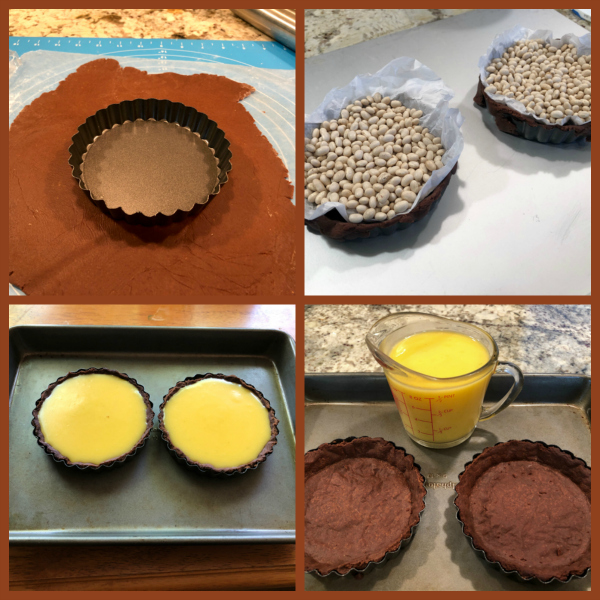
Comments: I used the full amount of dough but made smaller tarts, I find it easier to work with larger amounts and not get into pie dough anxiety as I’m rolling it out and trying to make sure it covers the whole surface of the pan. I halved the amount of filling, so if you are considering making just two small tarts, pay attention to that. Of course, the passion fruit curd is delicious and having some extra hanging around in the fridge is not a bad idea.
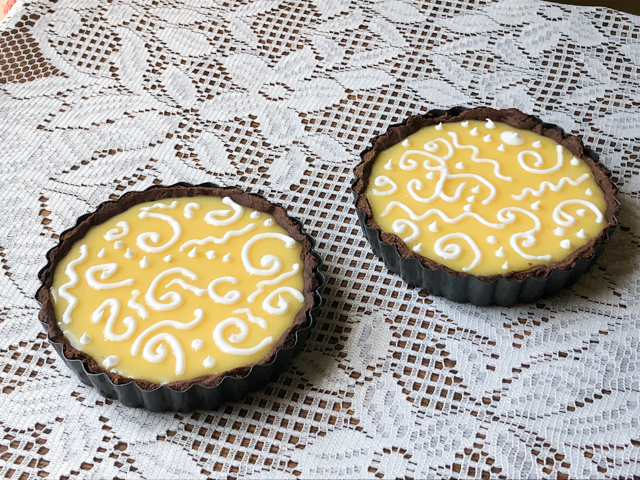

Nancy gives two important tips: roll the pastry thin, as thin as you can do it. And transfer the empty blind-baked shells to the fridge to fill them. That ensures you can fill them to the top and not spill over the side as you try to carry them to the fridge. Small details matter. As I was piping the swirls, I transported my mind back to the tent, and imagined Nancy grabbing the piping bag with the Royal icing, taking a deep breath and knowing she had to do as perfect a job as possible, with the cameras on her, and the shiny surface of the passion fruit curd ready and waiting. She did such a beautiful job! No wonder she went on to win the whole thing!
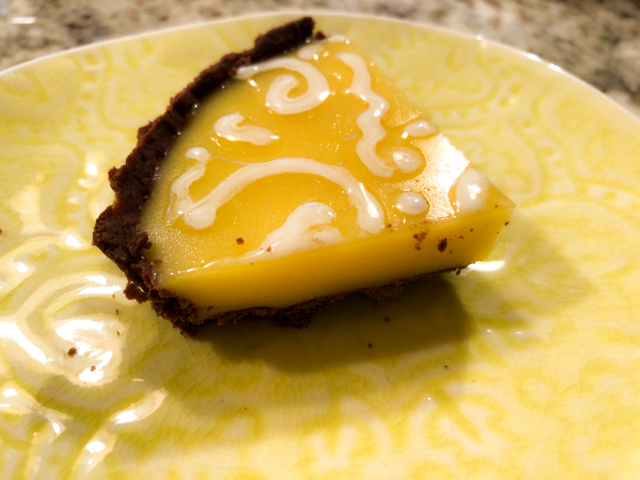
This was absolutely delicious, and I urge you to make it if you have access to passion fruit (you will need 8 to 9 fruits to make the full amount of filling). I have still quite a bit of frozen passion fruit pulp, and it worked well for this purpose.

And now a small overview of Nancy’s book, Sizzle and Drizzle.

If I had to define the book with a simple statement, I would summarize it as “superb baking instruction and tips with Nancy’s personality shinning through the whole book.”  One of the things that was evident from her performance in the show, is that she has  a ton of self-confidence and knowledge. She tested her recipes and was not afraid to stand up to Paul. Just one small example, she defended her method to speed up proofing of an enriched dough using the microwave. To Paul, of all people, the Bread King… And I loved when she was proved right (sorry for the lousy pun).  In the book, she mentioned that her first show-stopping challenge in the Great British Bake Off was making 36 mini-cakes. Everybody had butter over their counters (remember, the recipes are all submitted in advance and they set up the ingredients). Nancy was THE ONLY ONE with margarine. She felt a little “wobble in her confidence” but then said to herself – my cake tastes good. I have nothing to worry about. Guess what? She was Star Baker that week. We should all keep her experience in mind when that inner voice starts nagging us with self-doubt.
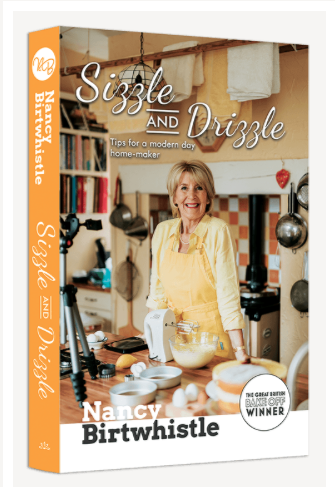
Her cookbook was entirely conceived, written, photographed, and published by her. And it has a very nice feature (she calls it “Let me show you”): you get access to videos in which she demonstrates parts of her recipes, by using your smartphone to decode a little bar printed on the pages. Very VERY cool. Here is an overview chapter by chapter with a few examples from each. Every chapter starts with her top tips for success.

BISCUITS AND SCONES. I pretty much would like to bake every single item of this chapter. Her approach is to use less sugar than most recipes would call for, and also keep the dough a bit on the dry side, rolling always in between plastic sheets.  My favorites would be Lemon Shortbread, Spiced Christmas Shortbreads, Brandy Snaps, Rose and Chocolate Macarons (how can I resist those?), Rye and Fennel Thins, Cherry Bakewell Scones,  and Cheese Scones. Every single recipe has the “Let me show you” link available so you can watch her making it. Just amazing!

BREADS. “It is better to over bake than under bake bread.”  Music to my ears. I see so many pictures that people share online of breads that clearly needed another 10 to 15 minutes in a hot oven to really shine. From this chapter, I want to bake her Crusty Topped Bloomer (remember Tiger Rolls? this is similar), her Hot Cross Buns, Stromboli, and Yorkshire Teacakes (adorable).

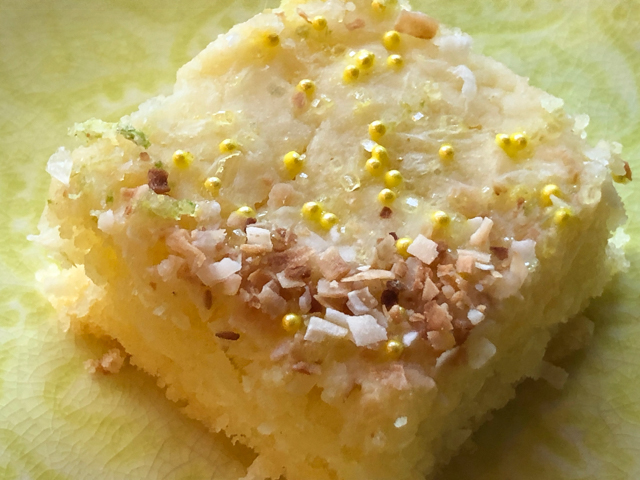
CAKES. “An over baked sponge will have a dark crust on its sides, bottom, and maybe even the top. The perfect sponge should be the same color all over.”  Yes, yes, and YES! Might be my favorite chapter.  Chocolate Fudge Cake (with tips on what to do if your fudge separates), the classic Lemon Drizzle Cake, Pistachio and Raspberry Ripple Swiss Roll, Simnel Cake (on my list to do!), Raspberry Ripple Cupcakes, Gluten-Free Coffee and Walnut Cake (she swears you cannot tell it’s gluten-free), Vegan Lemon Cake. But let me tell you that I baked one of her cakes and will include it here as a teaser. A Coconut and Lime Traybake.  Absolutely delicious!
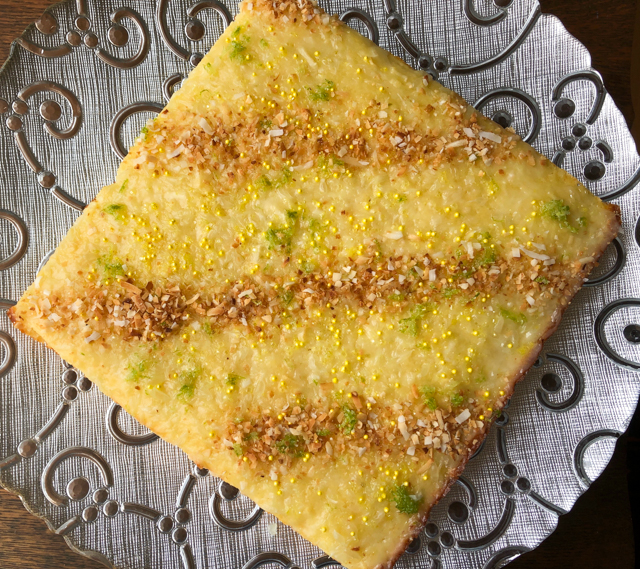
PASTRY. I lied. This is my favorite chapter. Nancy learned pastry from her Grandma, a huge influence in her life. Her initial description on how to make the perfect shortcrust pastry is worth the whole book, in my opinion. The featured recipe was from this chapter. My other favorites: School Dinners Meat Pie (gorgeous), Courgette Quiche (stunning presentation), Single Serve Whole Apple and Blackberry Pies, Rich Chocolate Tart, Luxury Mince Pies (plenty of tips on how to pull perfect ones, plus her great video tutorial),  Choux Pastry, Puff Pastry, Eclairs, Sausage Rolls

PUDDINGS AND DESSERTS.  This chapter stretched my horizons a bit, as I am not too familiar with some of the UK classics. I am very intrigued by Steamed Treacle Sponge (it does look great), Nancy’s Christmas Pudding, Eve’s Pudding, and obviously at some point I need to make the Queen of Puddings, as it was a technical I missed because a gingerbread sculpture collapsed and I was shown the exit door of a beloved tent (insert discreet tears). Half Sugar Almond Meringues are also calling my name, as well as Summer Lemon and Elderflower Cheesecake, and a stunning Raspberry and White Chocolate Bundt Cake.

HOME TIME. In this closing chapter, she goes over her way of life, growing a lot of the things she eats, preserving things, coming up with clever systems for cleaning that avoid strong chemicals or store-bought products. Everything with the videos ready and waiting for you.

I hope you enjoyed this little review. Her cookbook was clearly a labor of love form page 1 to page 416. Nancy is an author who wants you to succeed in the kitchen, she wants to make sure you can bake every single one of those recipes without issues. I will never forget her last showstopper challenge in the tent, in which she made a Moulin Rouge sculpture with sugar work. To conceive that was amazing, but to pull it all IN THE TENT, with the “male judge” hovering nearby,  just blows my mind.  So I am thrilled that a person with so much talent decided to share it in a cookbook, and we can all profit from it.

Thank you, Nancy, for giving me permission to share the Passion Fruit Tart recipe, and for your support….
ONE YEAR AGO: Lemony Shredded Brussels Sprouts with Almonds

TWO YEAR AGO: Savory Oatmeal with Bacon and Cheddar

THREE YEARS AGO: Air-Fried Carrots, Two Ways (most popular post on my blog!)

FOUR YEARS AGO: Five Minutes in L.I.T (a tour of our laboratory!)

FIVE YEARS AGO: Chicken Thighs with Artichokes and Capers

SIX YEARS AGO: Pea Pancakes with Herbed Yogurt

SEVEN YEARS AGO: Mushroom Stroganoff

EIGHT YEARS AGO: Tomato Sourdough

NINE YEARS AGO: Gamberetti con rucola e pomodori

TEN YEARS AGO: Flirting with Orzo


A BRAZILIAN HUMMINGBIRD

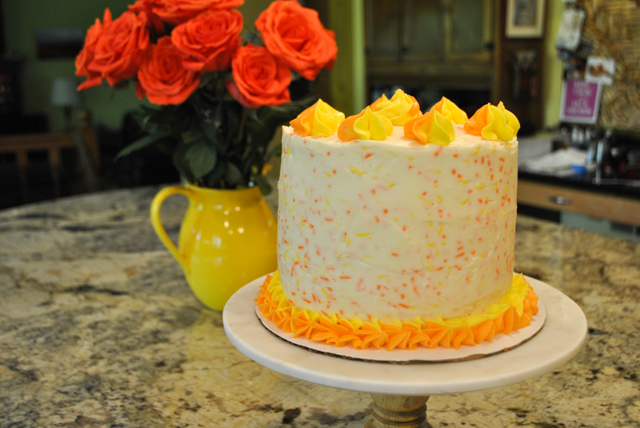
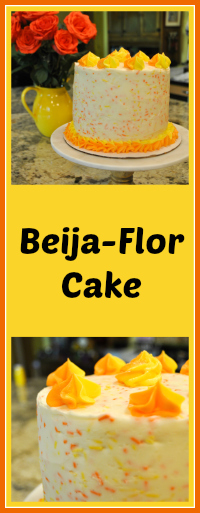
Hummingbird Cake is a classic concotion quite common in Southern regions of the US. Today I share with you my Brazilian take on this classic, which I am calling Beija-Flor Cake. As you may have guessed, Beija-Flor is Portuguese for hummingbird. A three-layer cake very moist with banana, mango, and passion fruit, with a bit of texture given by Brazil nuts. Everyone loved it, including the resident critic, grandson and son of fantastic bakers, the man I married 19 years ago.  He actually said (and I should have captured it in a video) that the frosting was as good as his Grandma’s.  My heart missed 3 beats in a row. Obviously, I am very happy with this bake!

BEIJA-FLOR CAKE
(from the Bewitching Kitchen, inspired by this recipe)

recipe is enough for 4 cakes,  only 3 cake layers were used for the final dessert)

1 + 1/4 cup chopped Brazil nuts
3 cups (370g) all-purpose flour
1 teaspoon baking soda
1 and 1/2 teaspoons mixed spice (or use cinnamon plus a touch of cloves)
1/2 teaspoon salt
1 cup mashed banana
1 cup mango coarsely pureed
½ cup passionfruit pulp
3 large eggs, at room temperature
1/2 cup grapeseed oil
1 cup (200g) packed brown sugar
3/4 cup (150g) granulated sugar
1 teaspoons vanilla paste   

Heat the oven to 300°F. Spread Brazil nuts onto a lined baking pan. Toast for 8 minutes. Remove from the oven. Turn oven up to 350°F, then grease and lightly flour four 6-inch cake pans.

Whisk the flour, baking soda, mixed spice and salt together in a large bowl. Whisk the rest of the cake ingredients in a medium bowl. Pour wet ingredients into dry ingredients and whisk until completely combined. Fold in the nuts. Spread batter evenly between the 4 prepared cake pans. Bake for 25-30 minutes or until a toothpick inserted in the center comes out clean.

Remove cakes from the oven and allow to cool completely in the pans set on a wire rack. Once completely cooled, remove cakes from pan and level the tops off if necessary to make them completely flat.

CREAM CHEESE FROSTING
(adapted from Sweet Bake Shop)  

2 cups (450 g) unsalted butter, room temperature
½ cup (110 g) cream cheese, softened
5½ cups (700 g) confectioners’ sugar
1 teaspoon pure vanilla extract
2 to 3 drops yellow and orange gel food dye
¾ cup yellow and orange sprinkles

In the bowl of a stand mixer fitted with the paddle attachment, beat together the butter and cream cheese on medium speed until smooth.

With the mixer running on low-speed, slowly add the confectioners’ sugar. Add the vanilla, then turn the mixer up to medium speed and beat until light and fluffy, about 2 minutes. Stop the mixer and scrape down the sides and bottom of the bowl, then beat again on medium speed again for a few seconds. Use immediately or store in the fridge for a couple of days.

CAKE ASSEMBLY:  Place 3/4 cup frosting in a small bowl and dye it yellow. Place 3/4 frosting in another small bowl and dye it orange. Prepare two small piping bags (with no icing tips) containing the two colors, each in one bag. Carefully cut the tips with scissors, and place them delicately in a larger piping bag fitted with a 1M tip or any other tip of your choice. Make sure the opening of both bags are at the same distance of the 1M tip. Test that both colors are coming out together. Reserve.  Add sprinkles to the rest of the frosting that was not dyed.

Place the first cake on a board, cut side up.  Add a layer of frosting with sprinkles. Add another cake on top, cut side up.  Spread a bit more frosting, top with the final cake, cut side down (this makes sure that the top will be smooth and leveled).  Add a thin layer of frosting and refrigerate the cake for 30 minutes, or place in the freezer for about 10 minutes to set the frosting.

Frost the cake, top and sides, then use the two-color frosting to pipe decorative swirls on the bottom and top.  Refrigerate and bring to room temperature 30 minutes before serving.

ENJOY!

to print the recipe, click here

Comments: Hummingbird Cake originated in Jamaica, containing banana and pineapple as the main flavors, plus pecans and spices such as cinnamon and cloves. It is normally covered with cream cheese frosting. I wanted to make a version with Brazilian flavors, so I used mangos and passionfruit. I kept the banana component since I imagined it would be important in the texture of the cake.  Brazil nuts seemed a natural choice, and with that in mind, my “Beija-Flor Cake” was born. In the composite below, you can see that the cake is not as massive as it might seem.  It is not a small cake, but definitely not humongous. See the little yogurt bottle next to it for perspective.

Traditionally, Hummingbird Cakes have a homey, rustic look which I find quite appealing, but I wanted to try something a bit different, and opted for a smooth frosting with yellow and orange sprinkles to reflect the fruits used in the cake. A small amount of sprinkle-free frosting was dyed in the same two colors and used for piping. The frosting is very easy to make and much more forgiving to spread than a classic buttercream, so if you are absolutely paranoid about a bit afraid of frosting a cake, this is a very good starting point.

My apologies for not showing the picture of a slice. We cut one slice to “test-taste” it the evening before, but the first slice never cuts too well. We took the cake to the department next morning, and I completely forgot all about it. By the time I got to the mail room hoping to snap a picture, it was too late. It was a big hit with our colleagues and graduate students. I liked how moist and flavorful it turned out, but in my opinion the passionfruit flavor was not prominent enough. Next time I will skip the banana, and maybe stick with two fruits only, for instance mango and passionfruit. Those are the ideas floating in my mind for a new version. The frosting will stay exactly the same.  A total winner, that will show up again in future bakings. You can count on that.

ONE YEAR AGO: A Cookbook Review

TWO YEARS AGO: Air-Fried Carrots, Two Ways

THREE YEARS AGO: Sweet Potato Crust Quiche

FOUR YEARS AGO: Chicken Thighs with Artichokes and Capers

FIVE YEARS AGO: Pea Pancakes with Herbed Yogurt

SIX YEARS AGO: Mushroom Stroganoff

SEVEN YEARS AGO: Tomato Sourdough

EIGHT YEARS AGO: Gamberetti con rucola e pomodori

NINE YEARS AGO: Flirting with Orzo