Today I share a small series of cupcakes that celebrate Easter and Spring…
For the cupcakes I have used either this recipe (for chocolate flavor), or this one for a basic vanilla. The buttercream used this basic recipe.
.
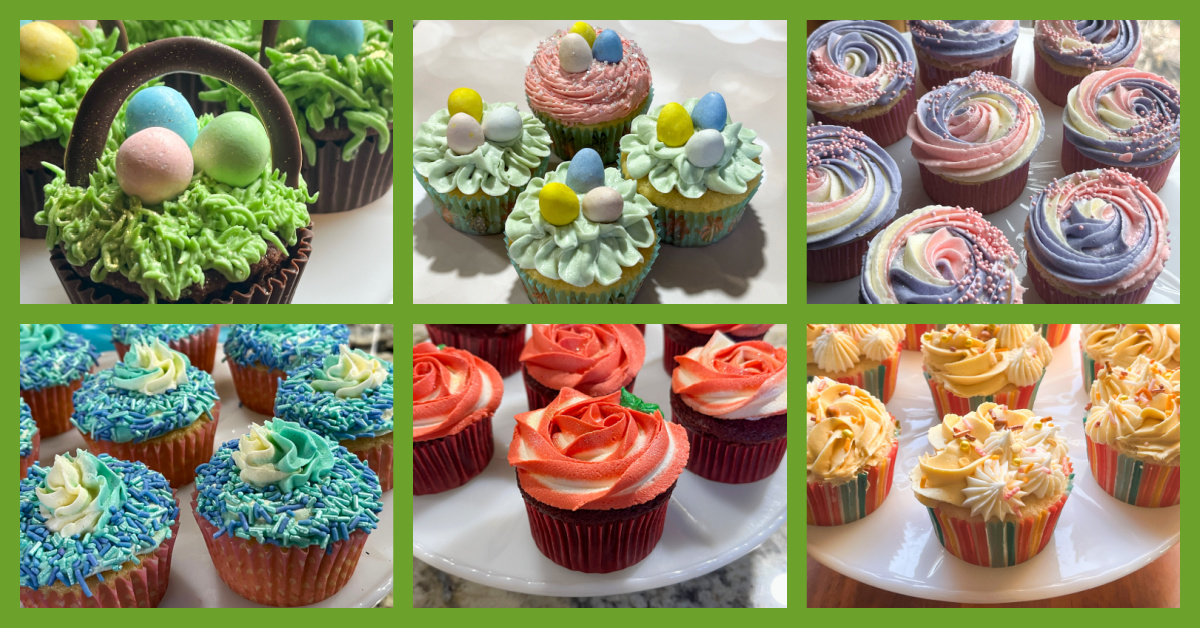
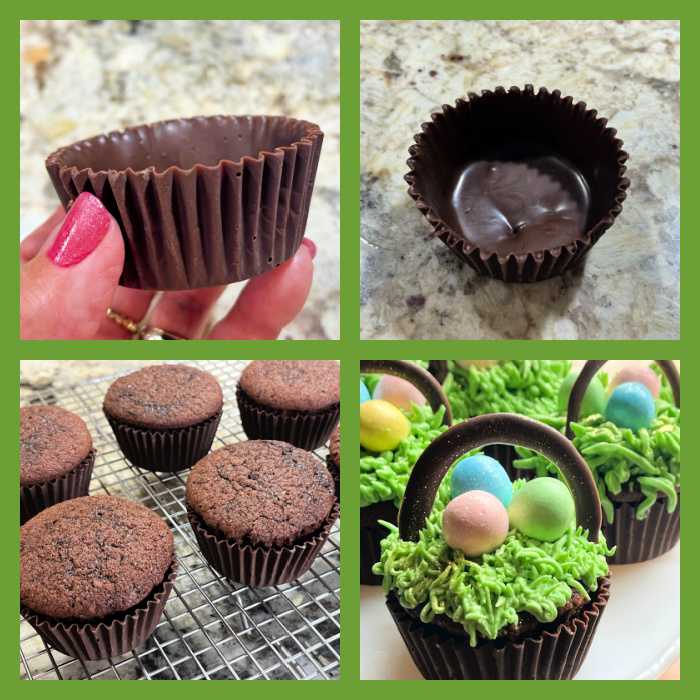
EASTER EGG BASKET CUPCAKES
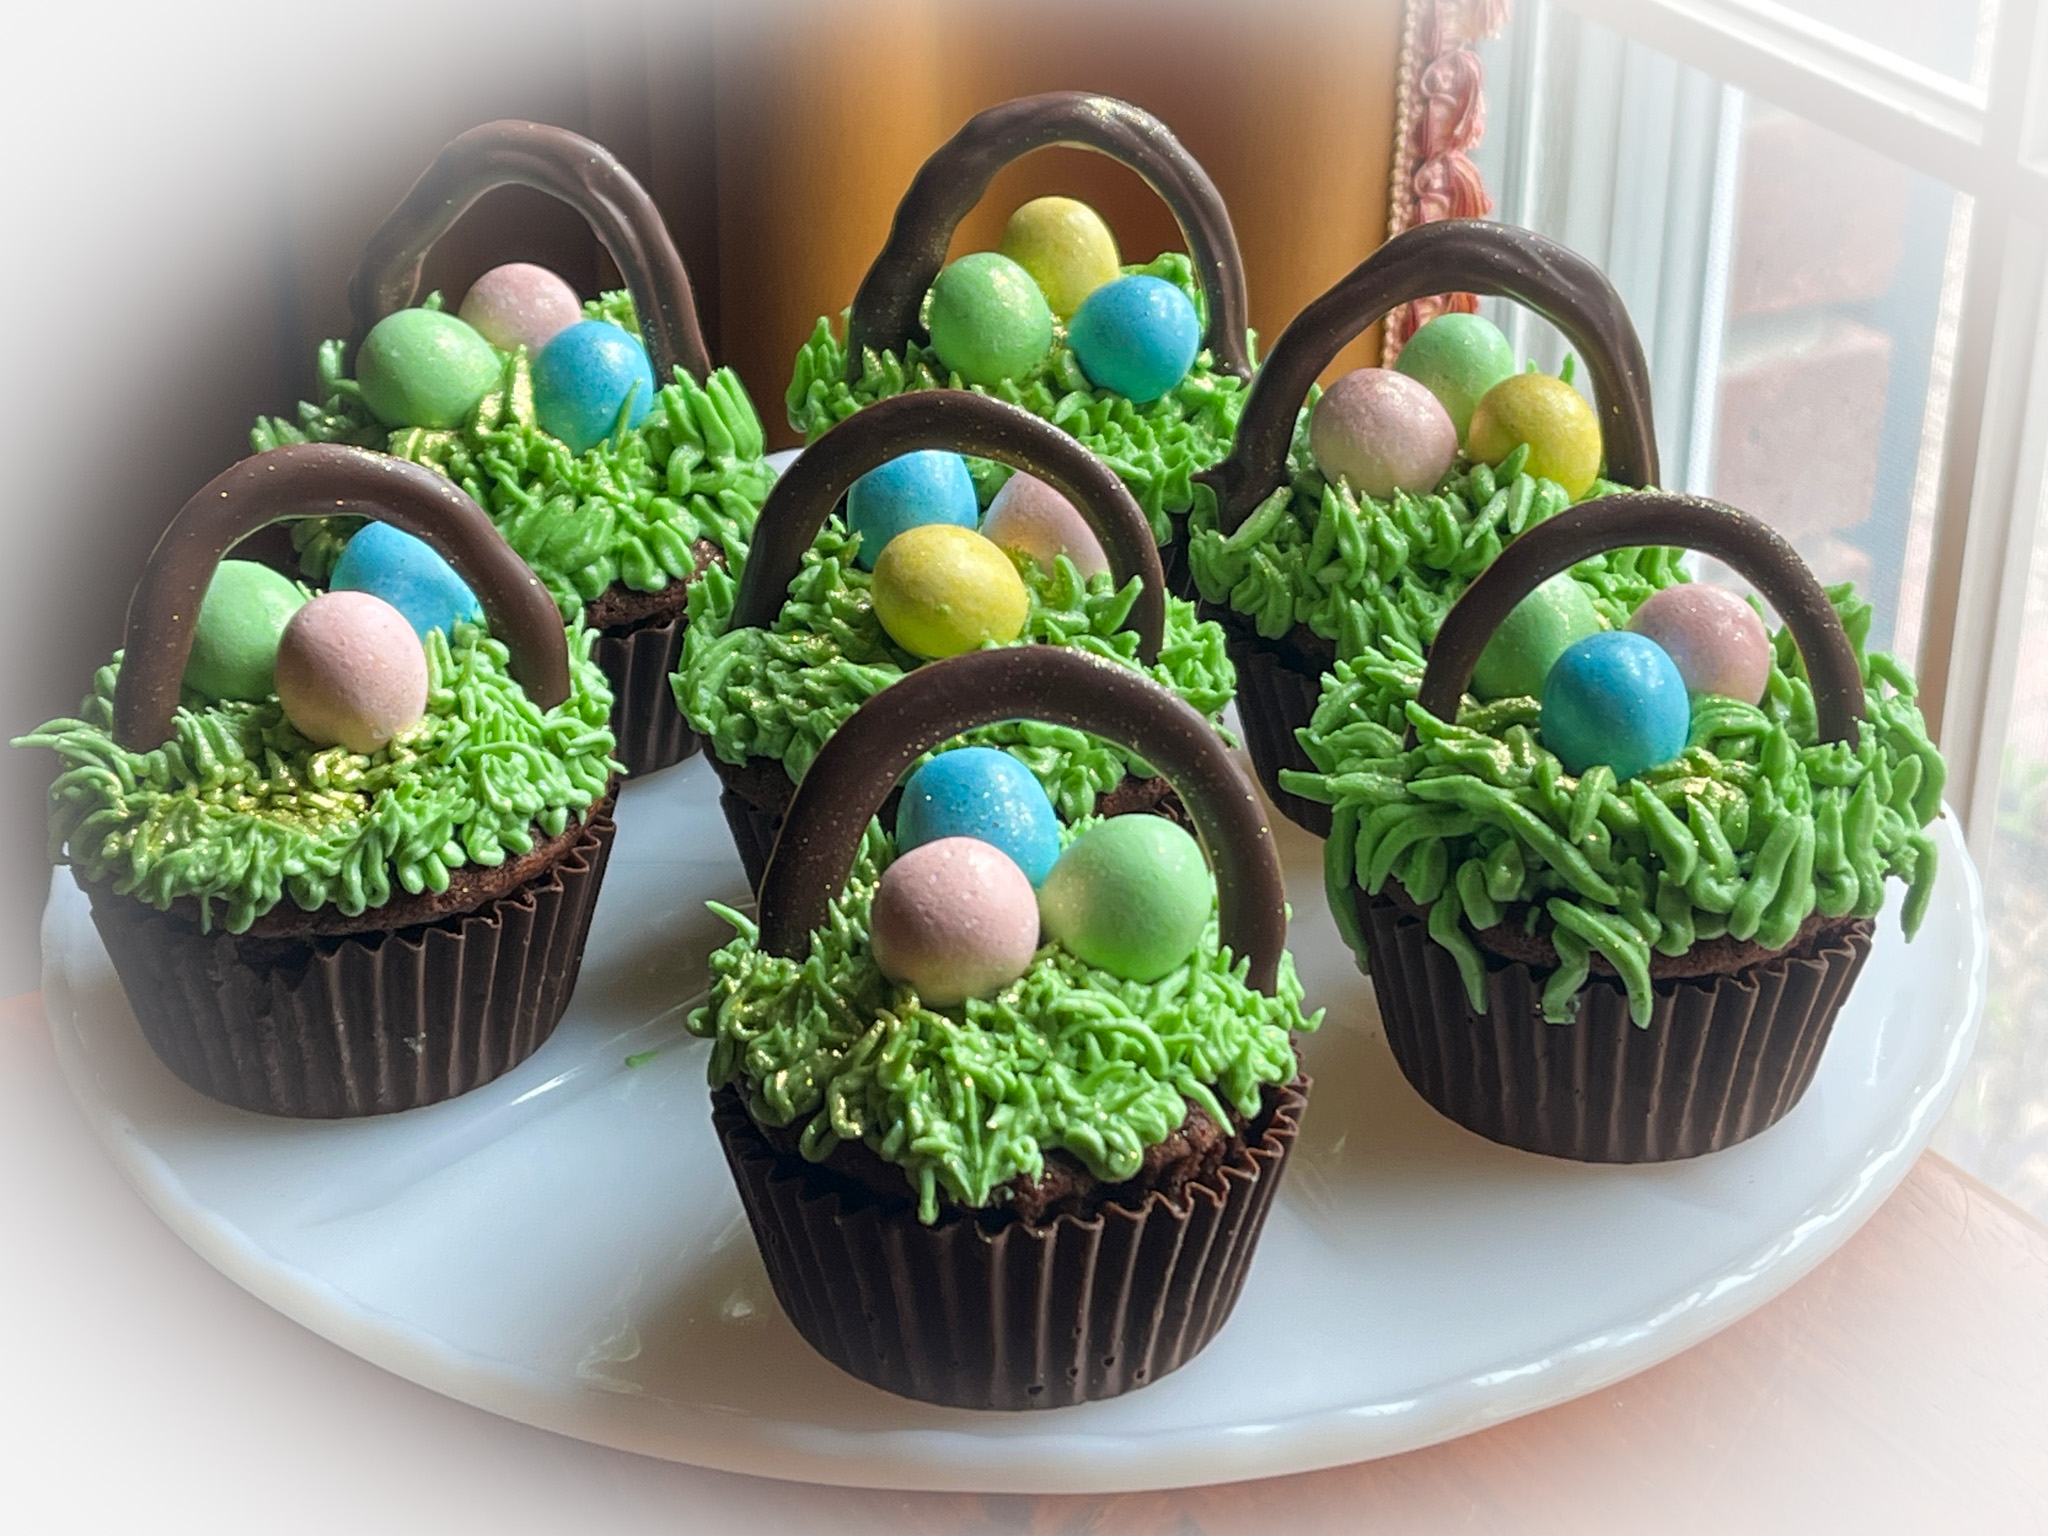
The cupcakes were chocolate, and to make these more special, I made the wrapper component as a compound chocolate concoction, so the whole thing was edible. I painted aluminum foil cupcake wrappers with melted compound chocolate, in two steps, to make them sturdy. First step I left them at room temperature for 15 minutes, painted once more and put in the fridge for 10 minutes. Then carefully peeled off the paper wrapper, and laid the baked cupcakes inside. The handles were also made with compound chocolate piped on parchment sheets and carefully placed over the buttercream while still soft. I used a grass piping tip to cover the cupcakes, and placed three eggs on top.
.
I love the way these turned out!
.

.
x
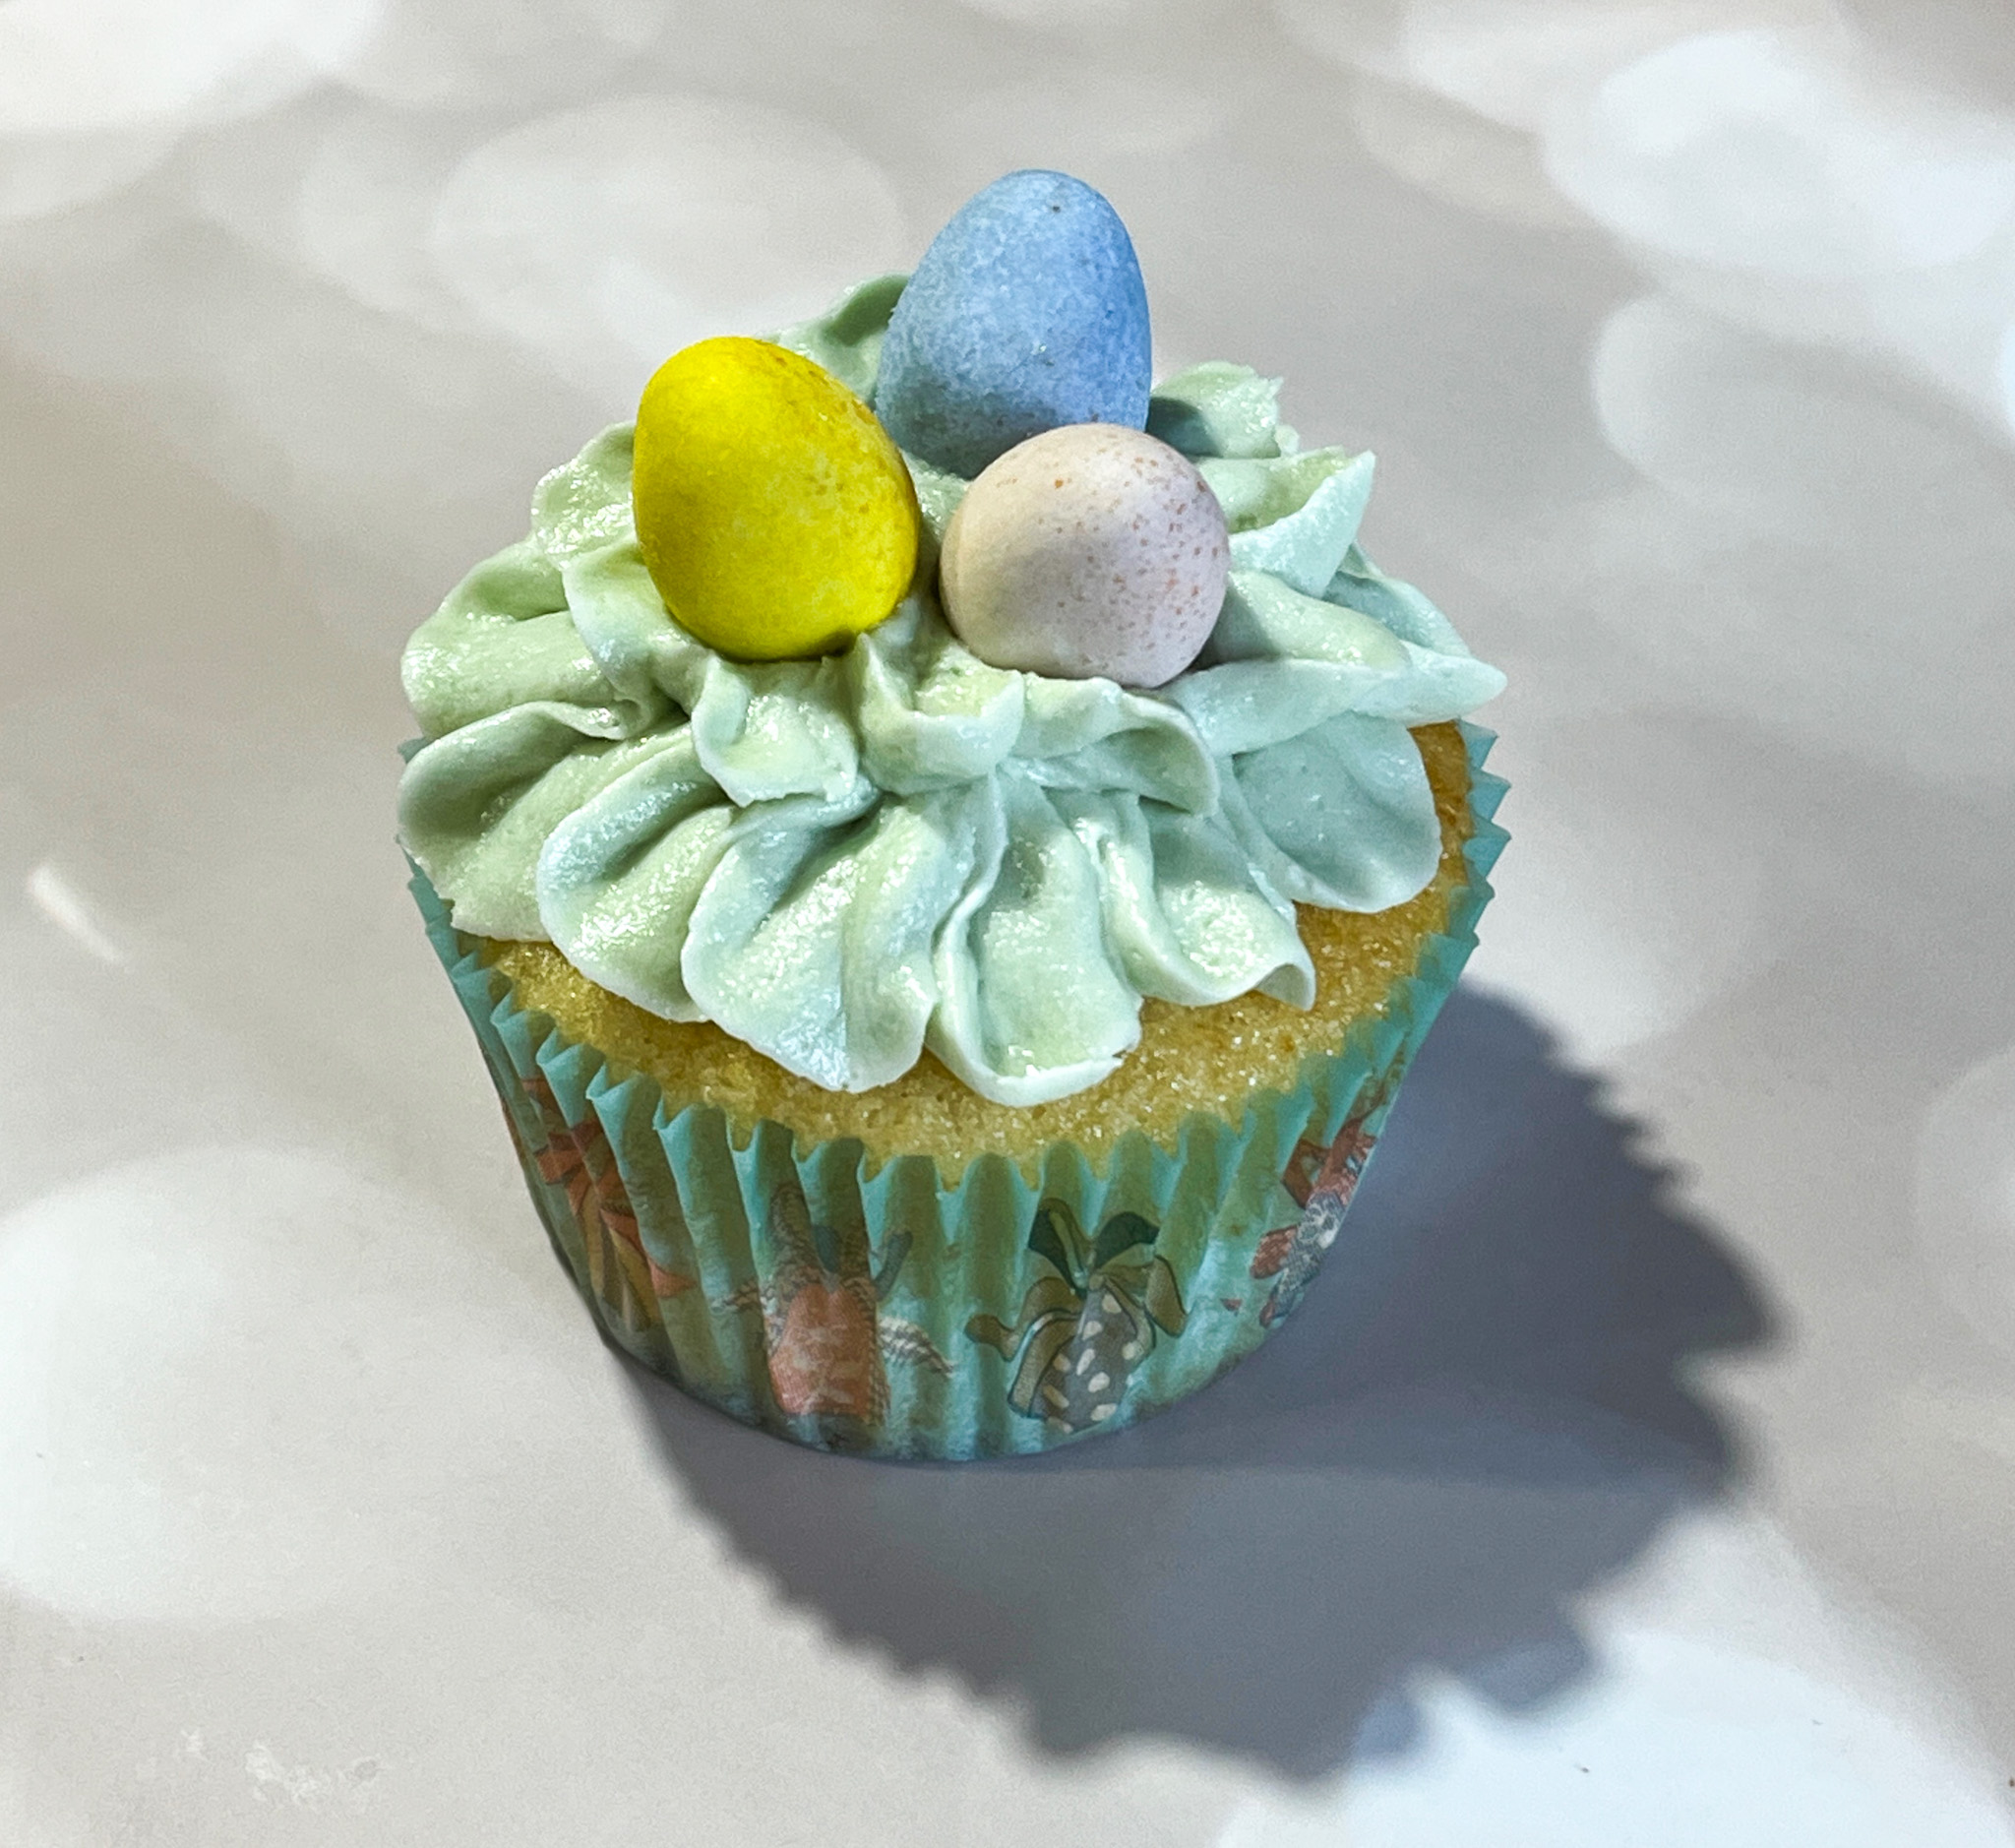
EASTER EGG NESTS CUPCAKES
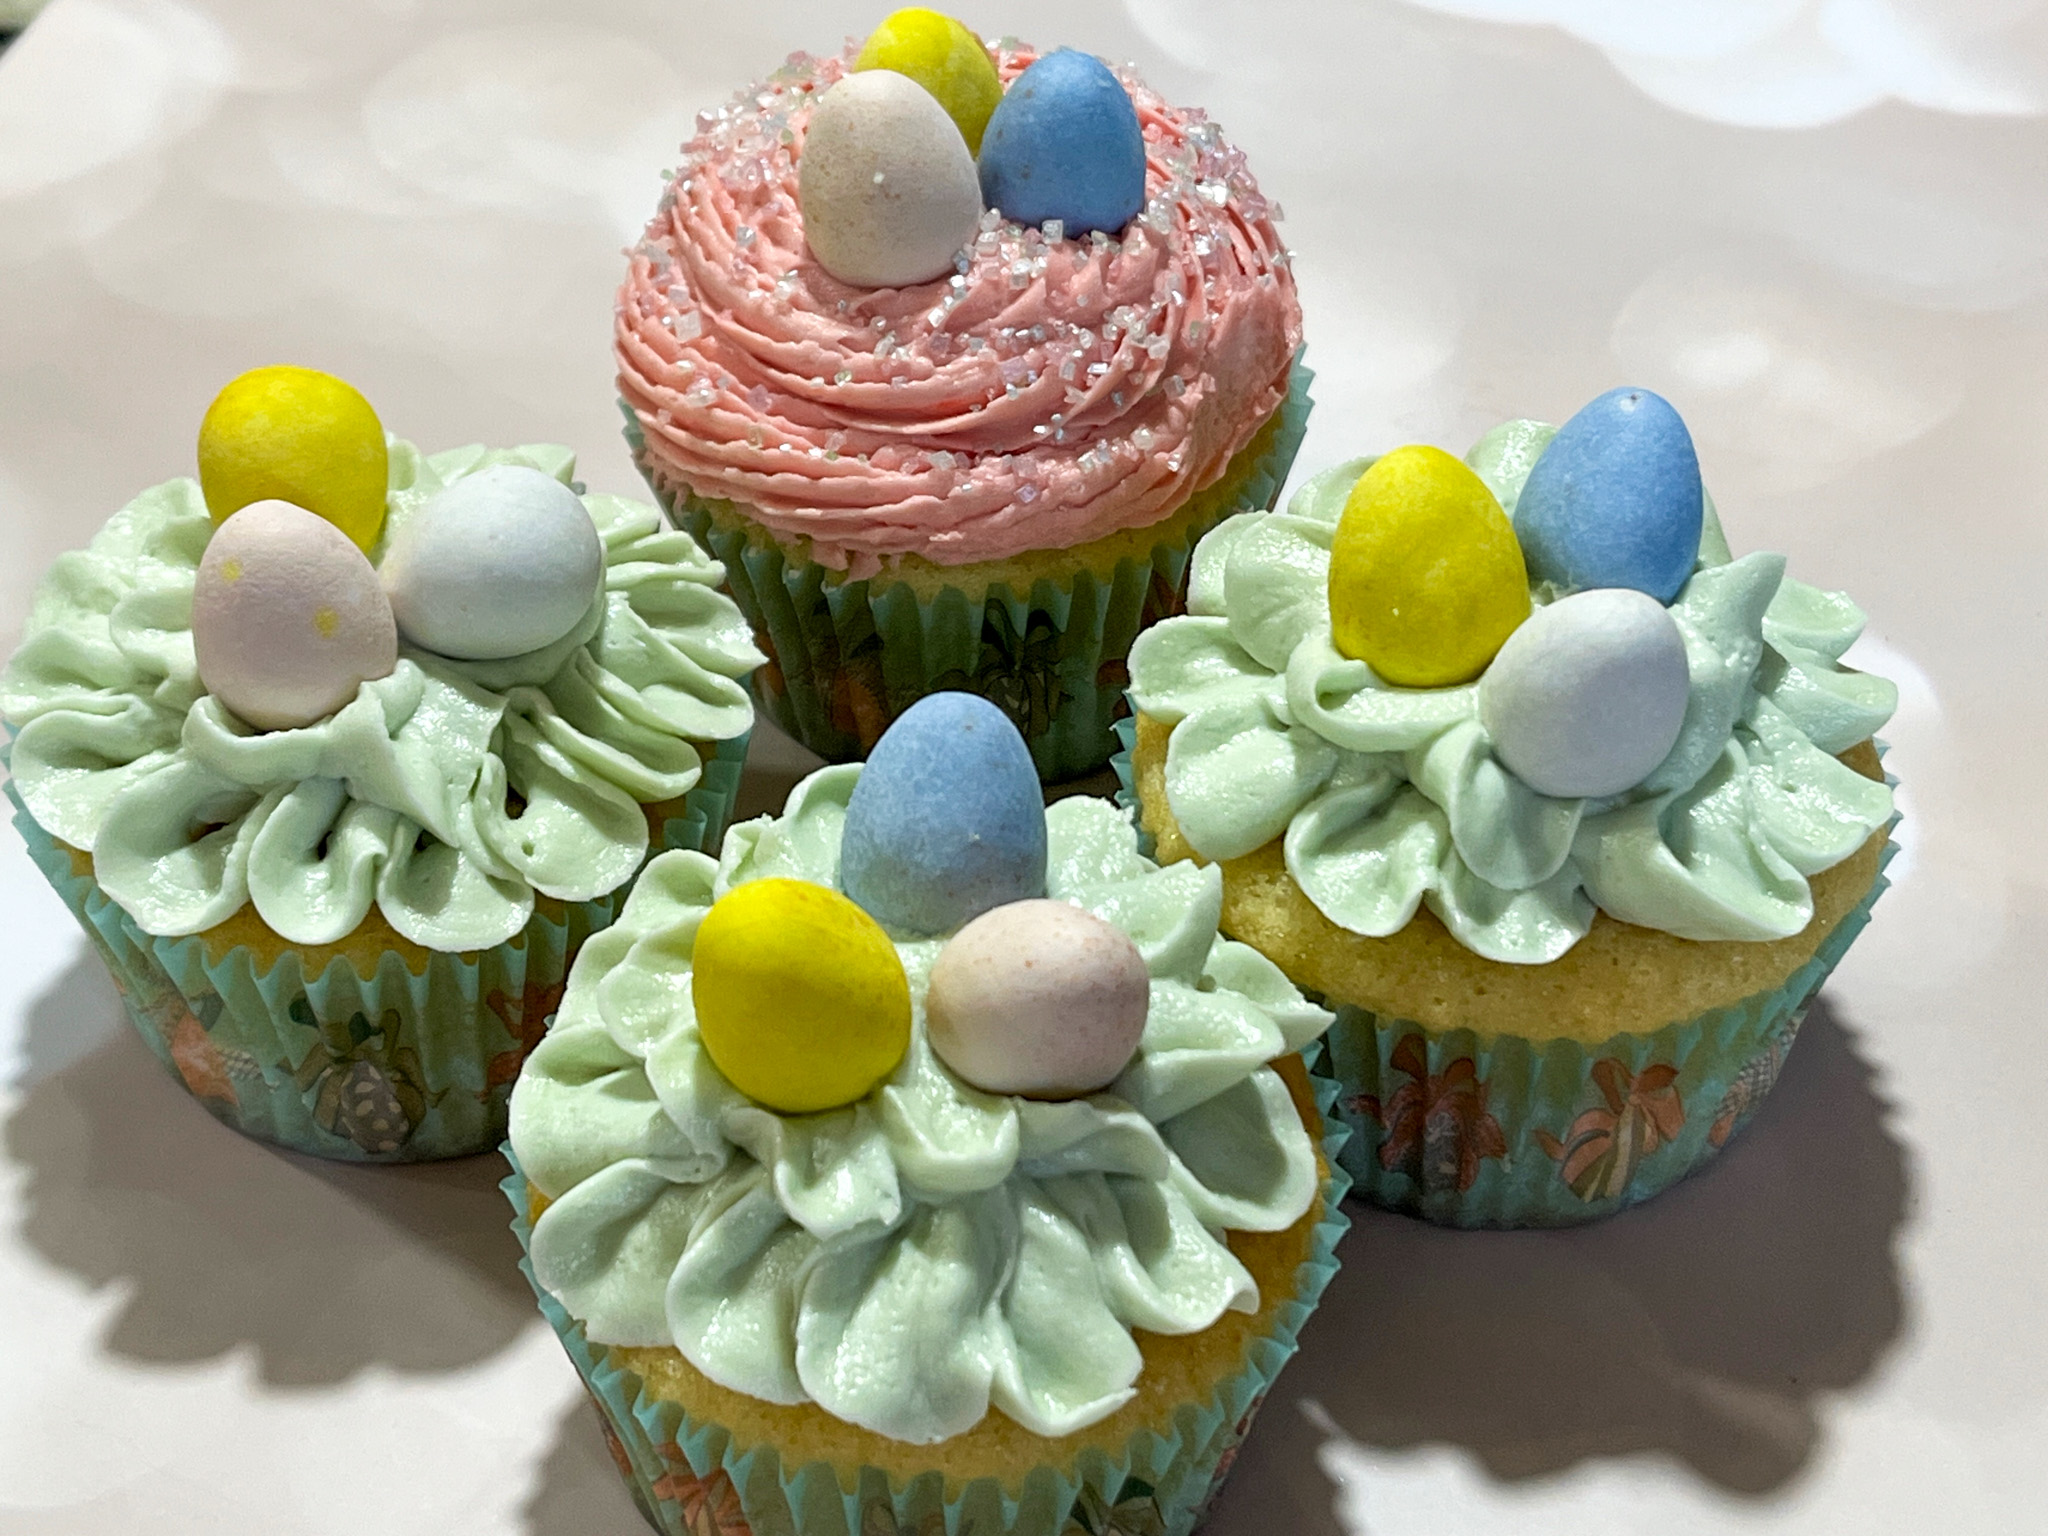
These were vanilla cupcakes, the buttercream was dyed pastel green or pink, and piped with a petal tip (#104) or a closed star tip. Little eggs added on top…
.
x
TRICOLOR SWIRL CUPCAKES
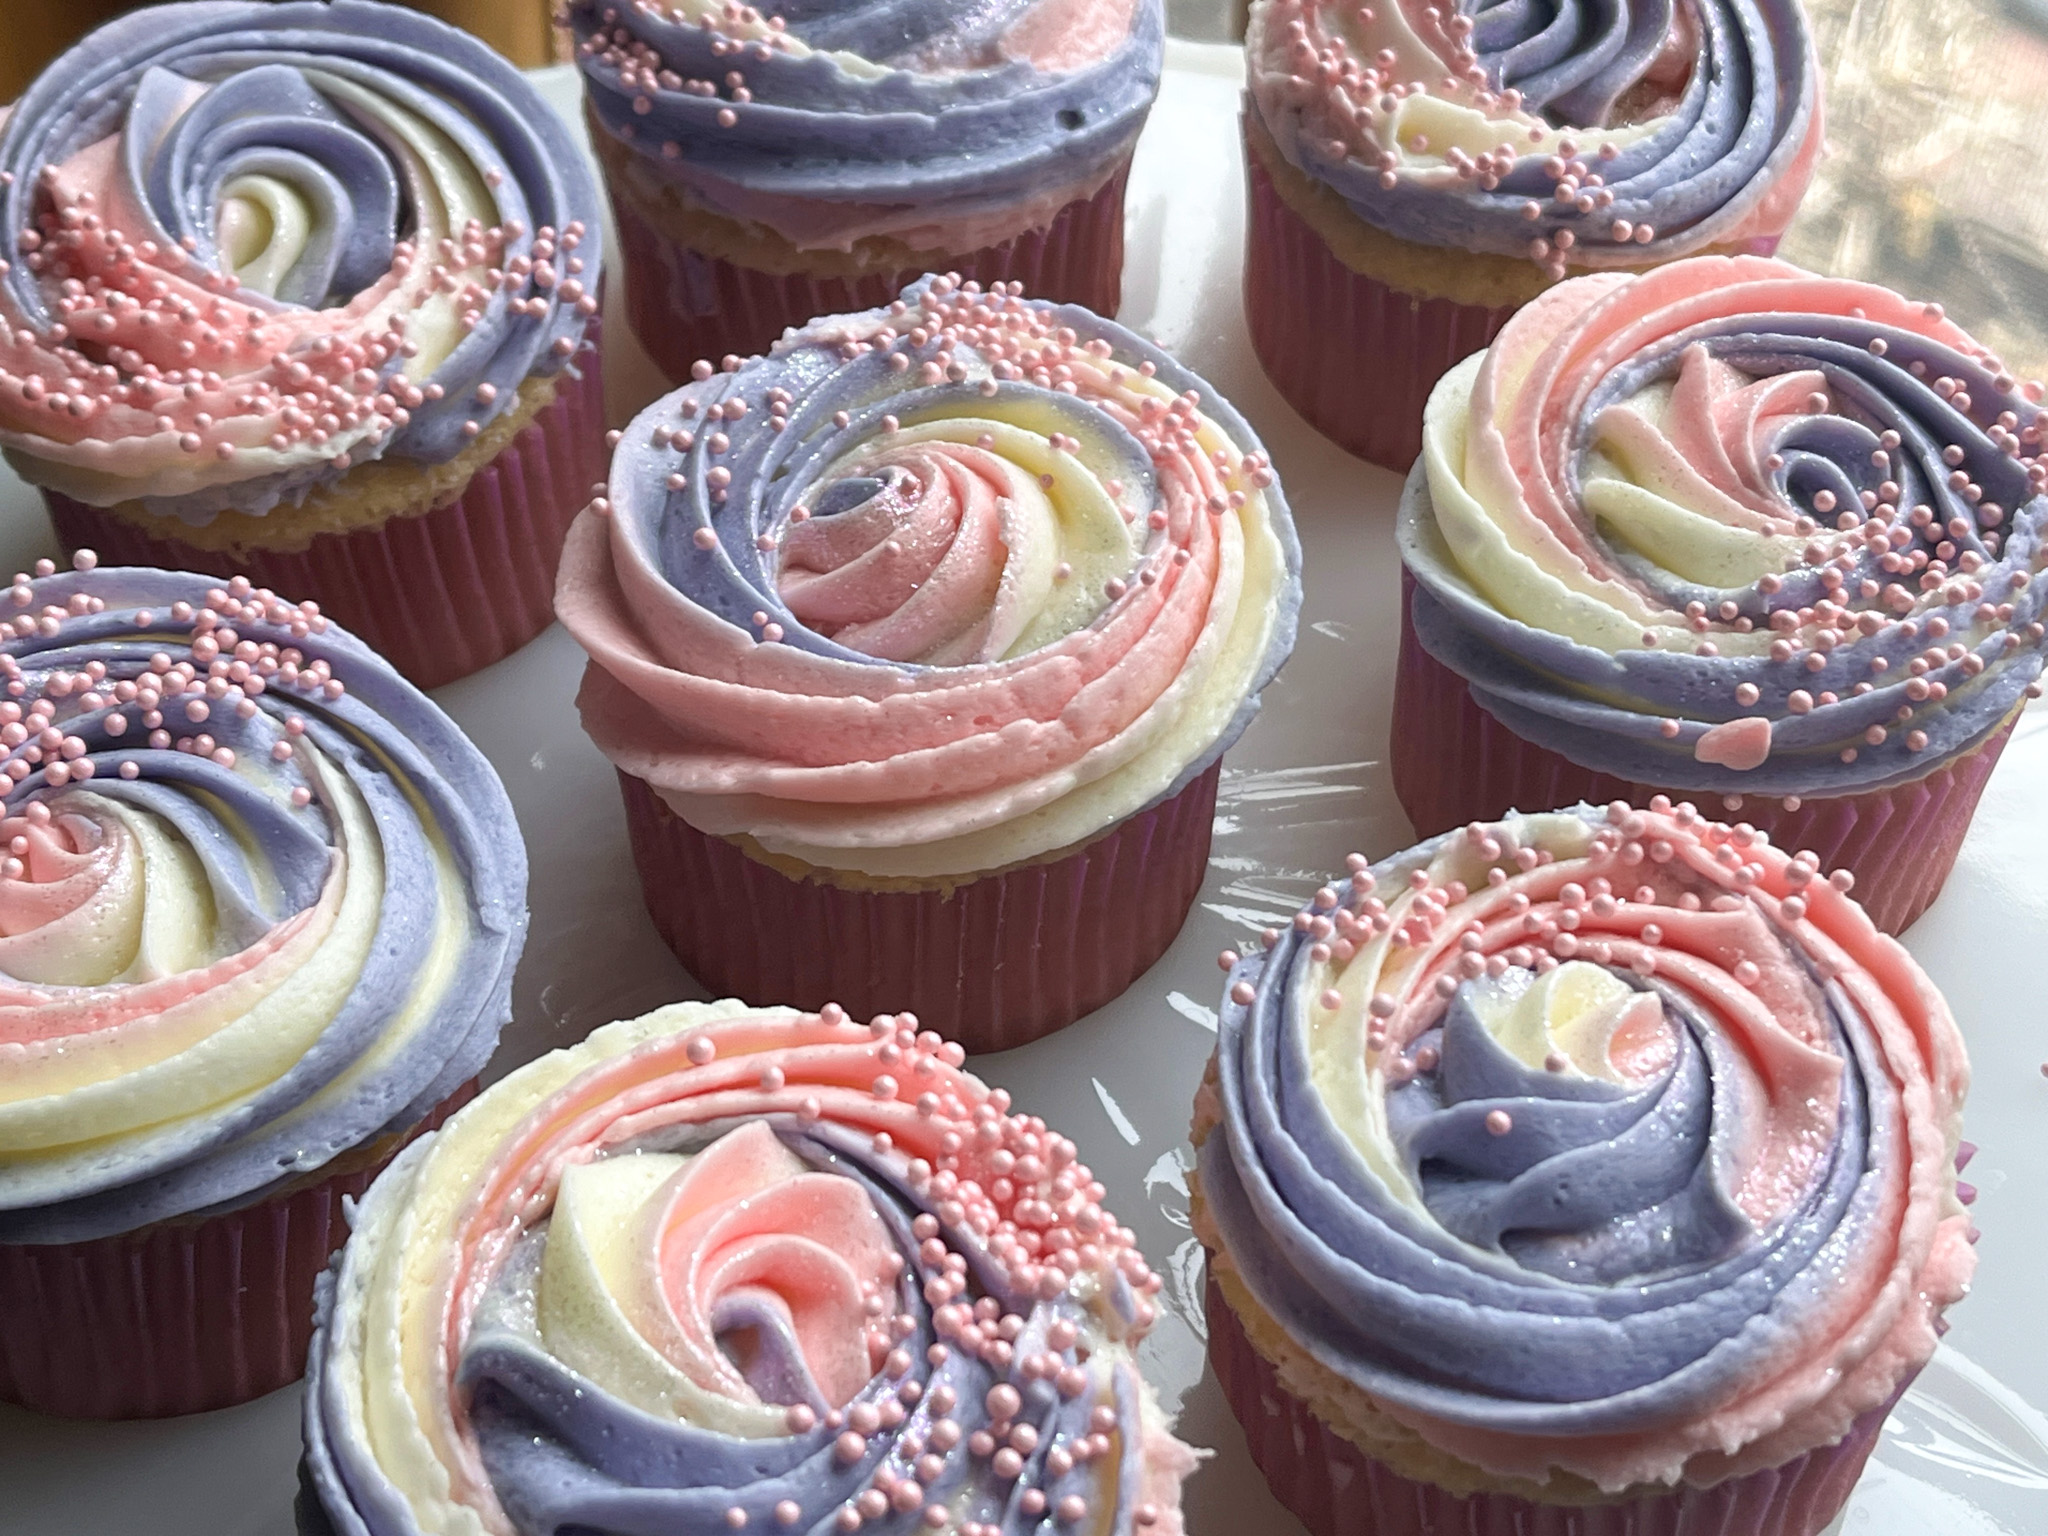
Chocolate Cupcakes were frosted with buttercream divided in three portions and dyed pink, blue and the third portion left without any color. The buttercream was laid over plastic wrap in three straight lines, closed as a sausage and piped using a 1M icing tip. Sprinkles added right after piping.
.
x
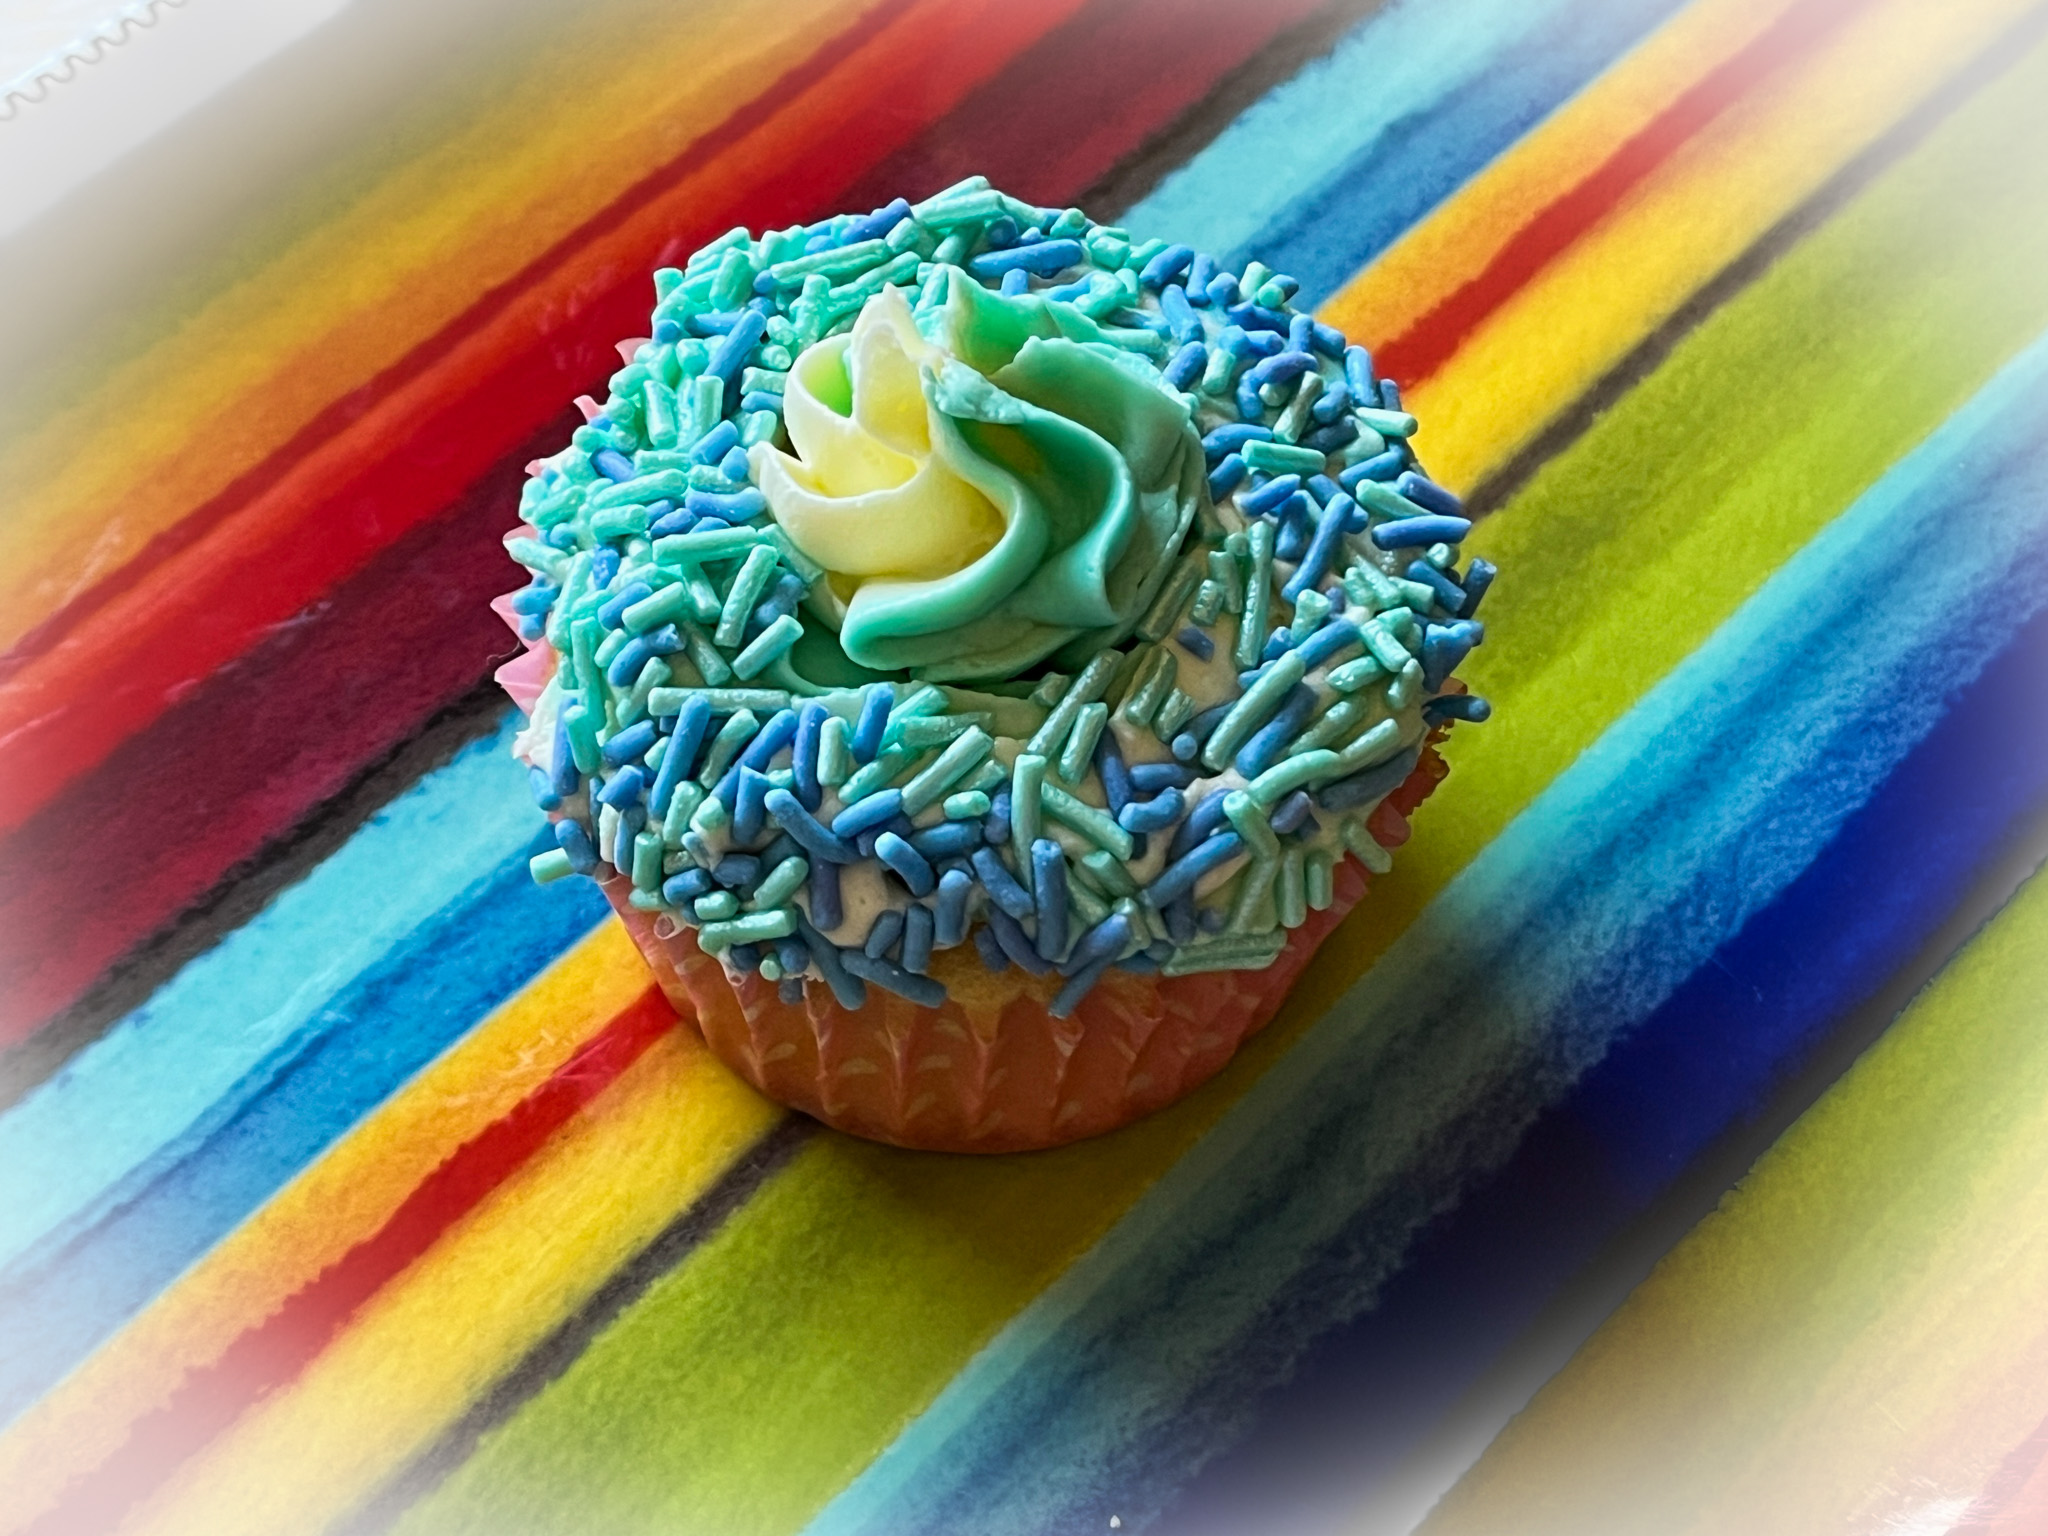
SPRINKLE BORDER CUPCAKES
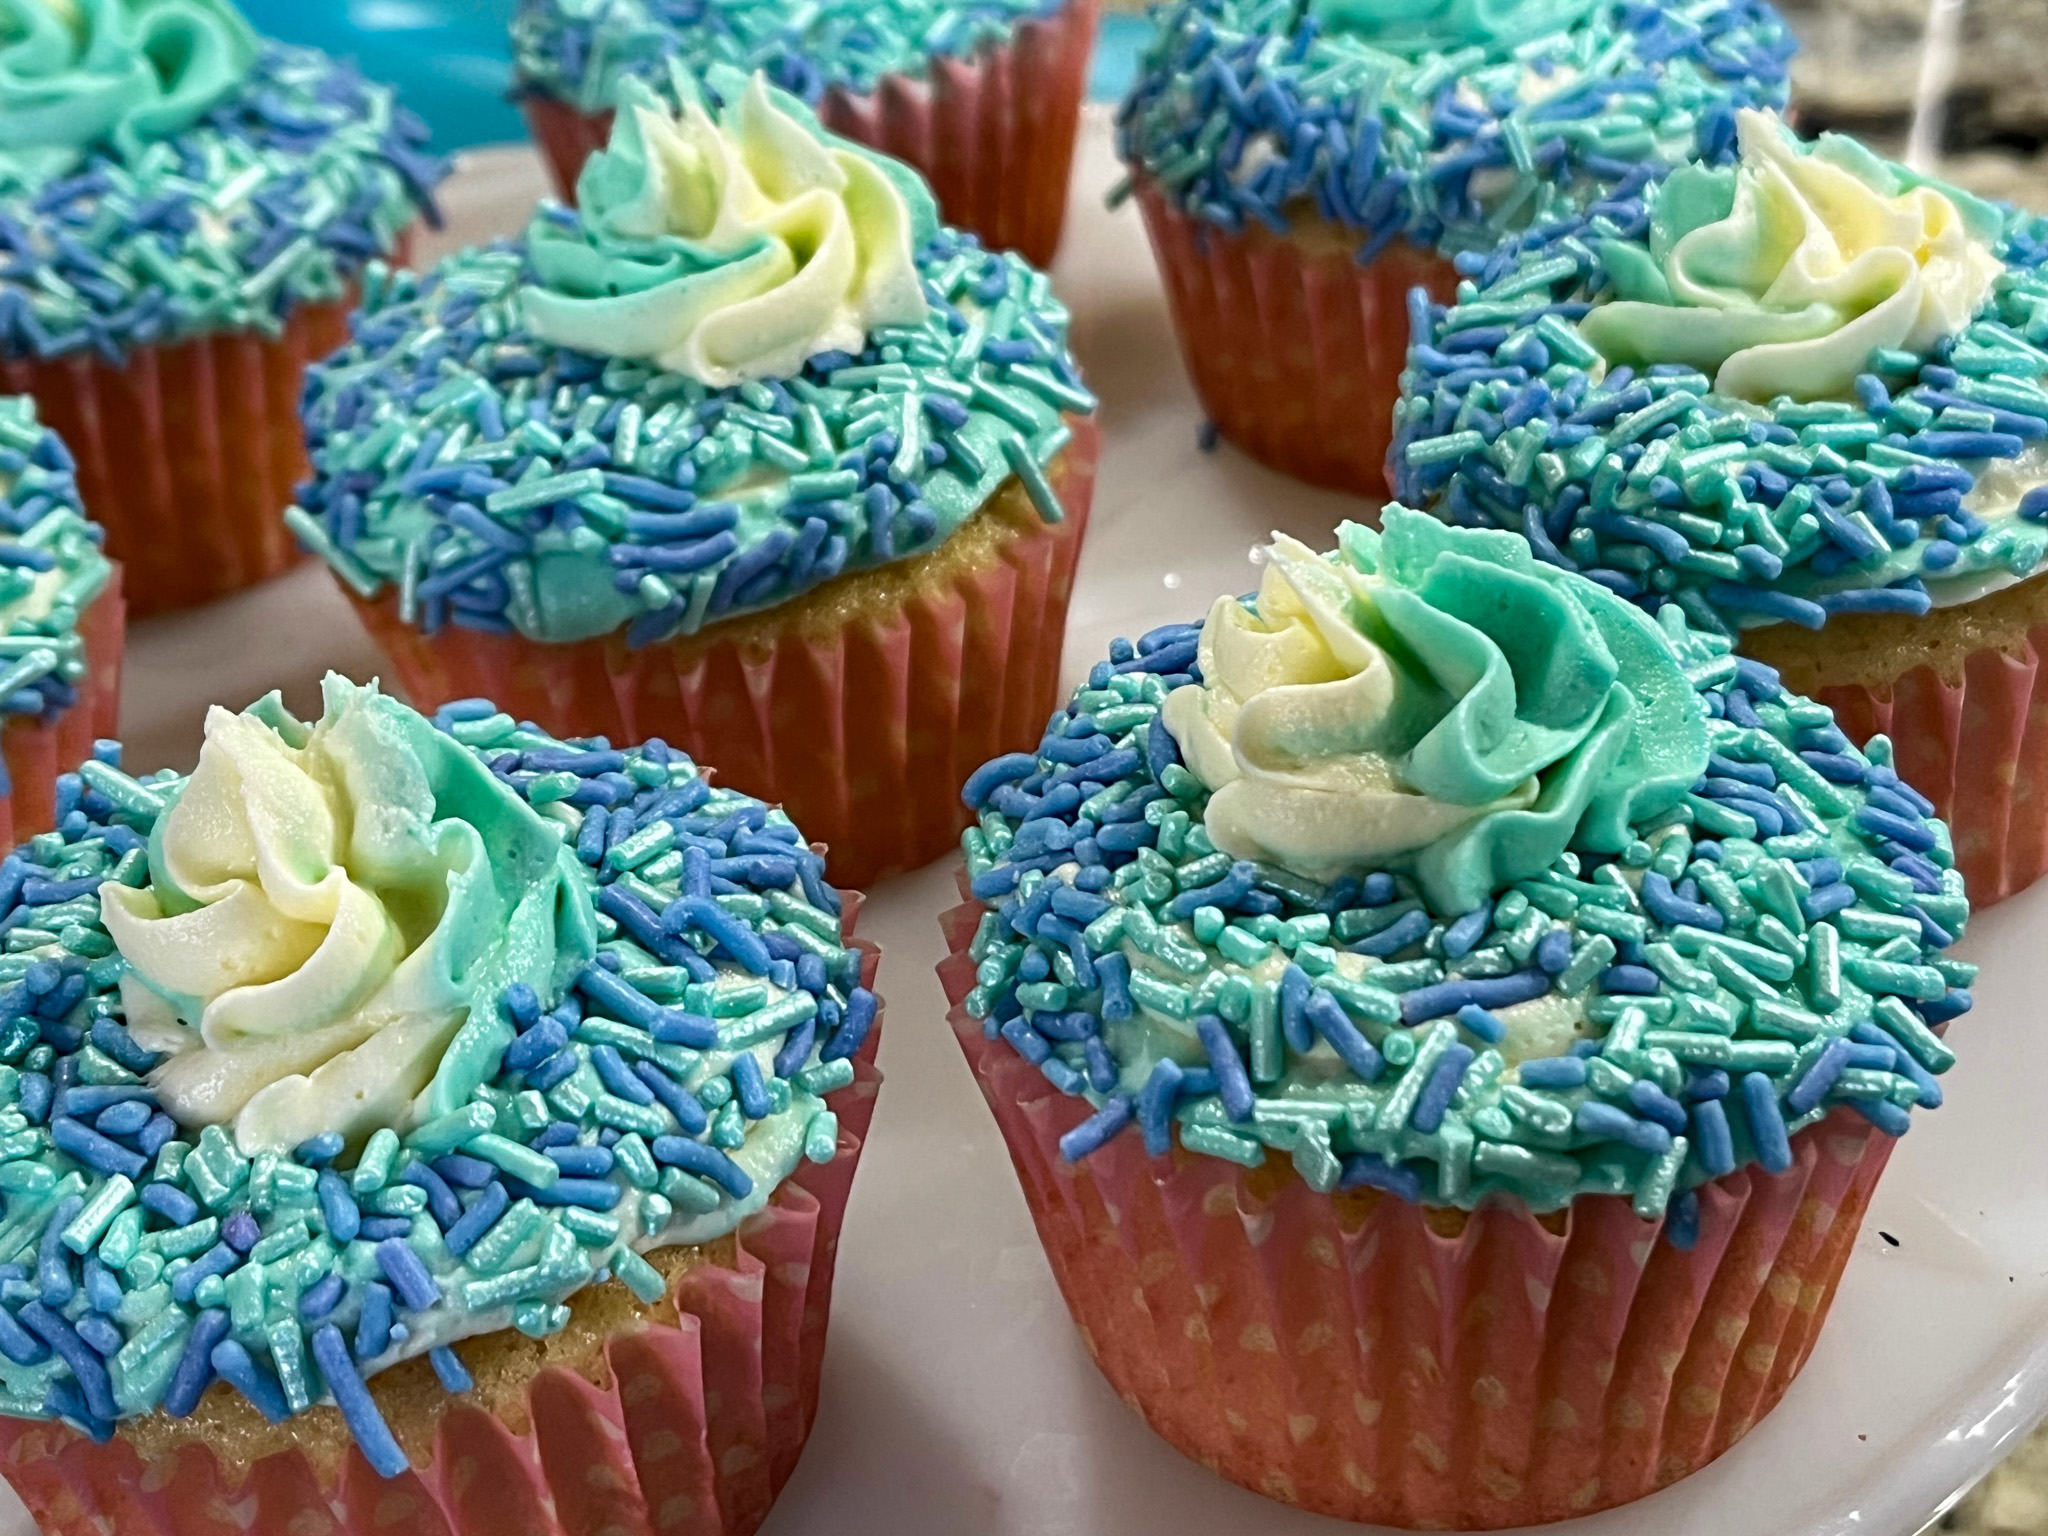
Cupcakes were vanilla. Buttercream was divided in two portions, half dyed teal and half left white. Buttercream was placed in a large piping bag, piped as a border and immediately covered with sprinkles. The center was piped right after.
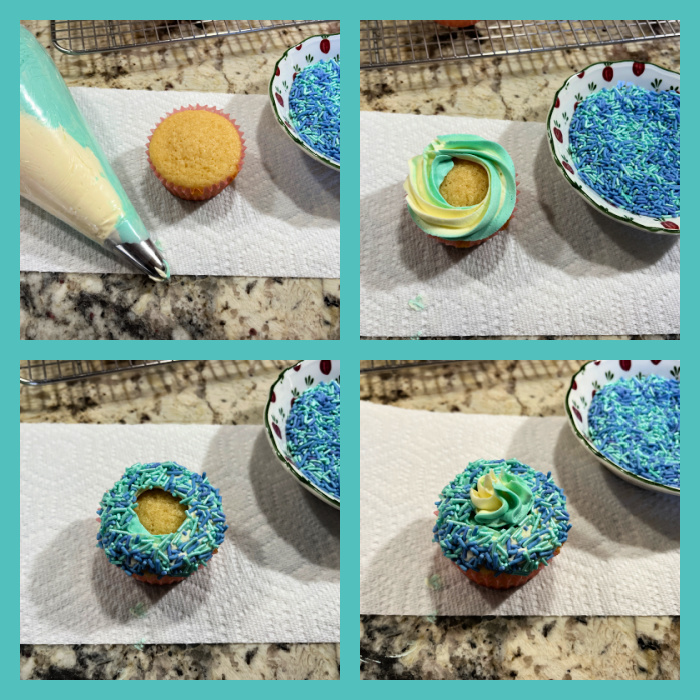
These technique will work with many color combinations, of course…
.
x
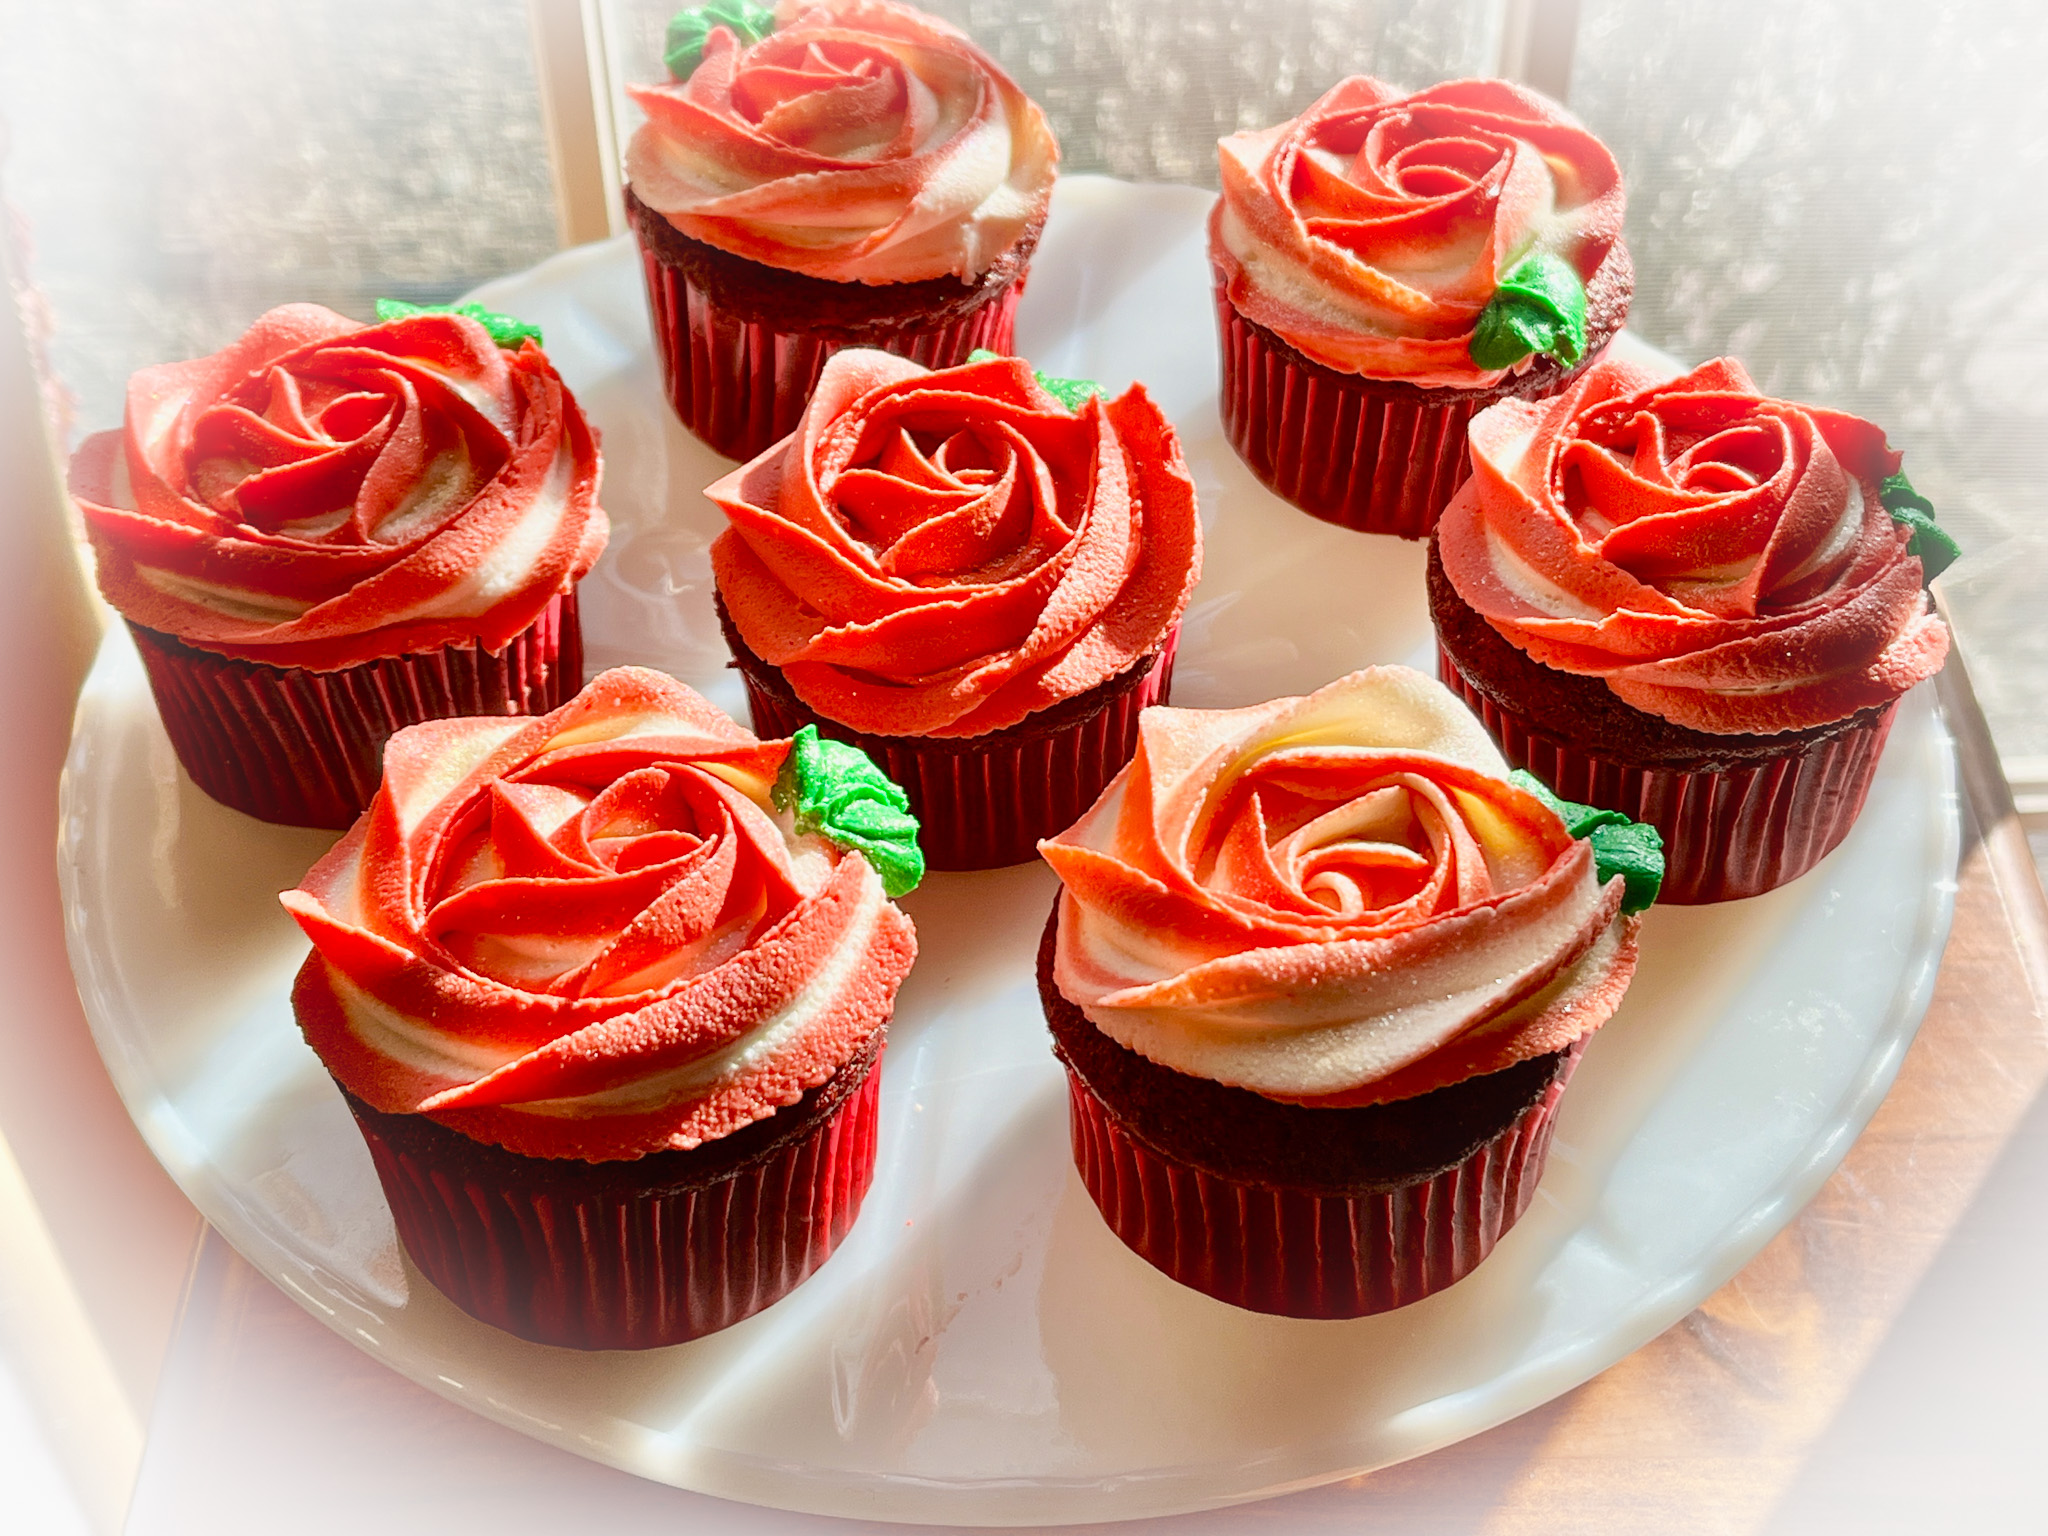
RED AND WHITE ROSE CUPCAKES
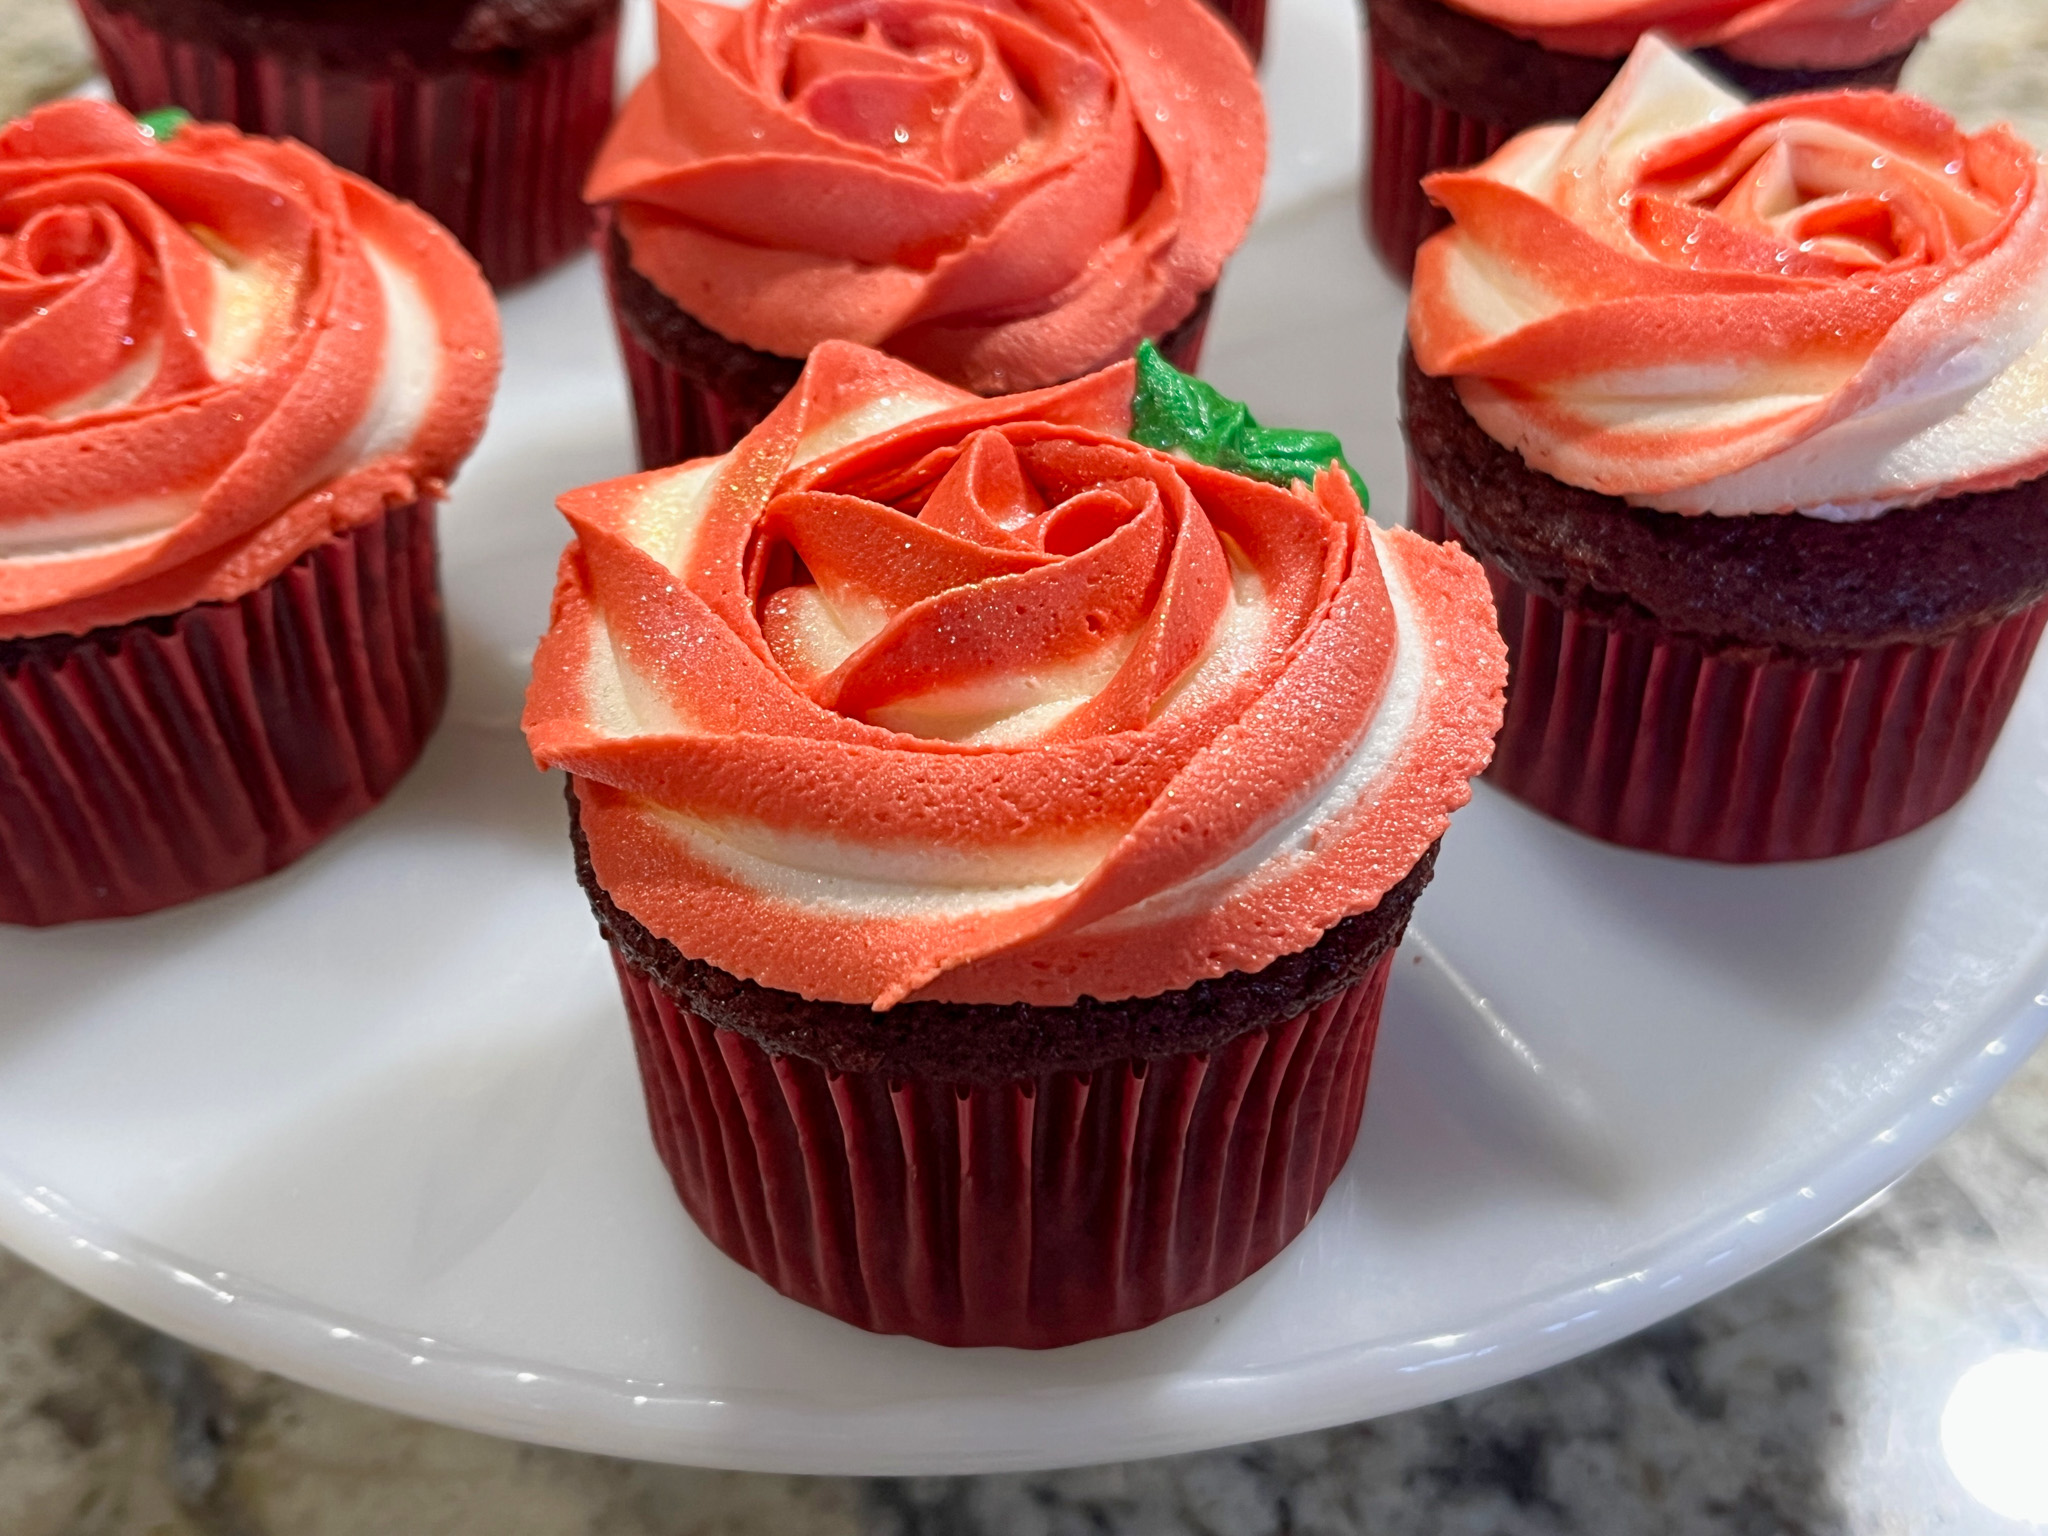
Cupcakes were chocolate. To get this precise two-tone effect, the buttercream was dyed in two portions, red and white. A very small amount was dyed green for the leaves. The red buttercream was carefully laid inside the piping bag covering the edges, and the white placed at the center. Piping tip 1M was used to pipe the flower. The leaf was added right after piping the rose. You can see exactly how to prepare the piping bag watching this youtube video.
.
x
SPRING CELEBRATION CUPCAKES

For these vanilla cupcakes, I made buttercream dyed pastel yellow and white, and used a variety of piping tips to pipe swirls (1M tip) and little blobs (French star tip). Golden sprinkles added a final festive look.
.
1 YEAR AGO: Pasta Frolla for Linzer Type Cookies
2 YEARS AGO: Ravioli Cookies, the Shortest Path to Insanity
3 YEARS AGO: Peanut Butter and Jelly Babka and a Cookbook Review
4 YEARS AGO: Painted Sourdough
5 YEARS AGO: Over-the-Moon Blueberry Lemon Macarons
6 YEARS AGO: Springtime Macarons Bake-Along
7 AGO: Macarons for a Little Princess
8 YEARS AGO: Gilding the Sourdough Loaf
9 YEARS AGO: Lolita Joins the Bewitching Kitchen
10 YEARS AGO: Cashew Cream Sauce
11 YEARS AGO: Blood Orange Margaritas
12 YEARS AGO: Smoked Salmon Appetizer
13 YEARS AGO: Clementine Cake
14 YEARS AGO: Springtime Spinach Risotto
15 YEARS AGO: The end of green bean cruelty
FIFTEEN YEARS AGO: Torta di Limone e Mandorle