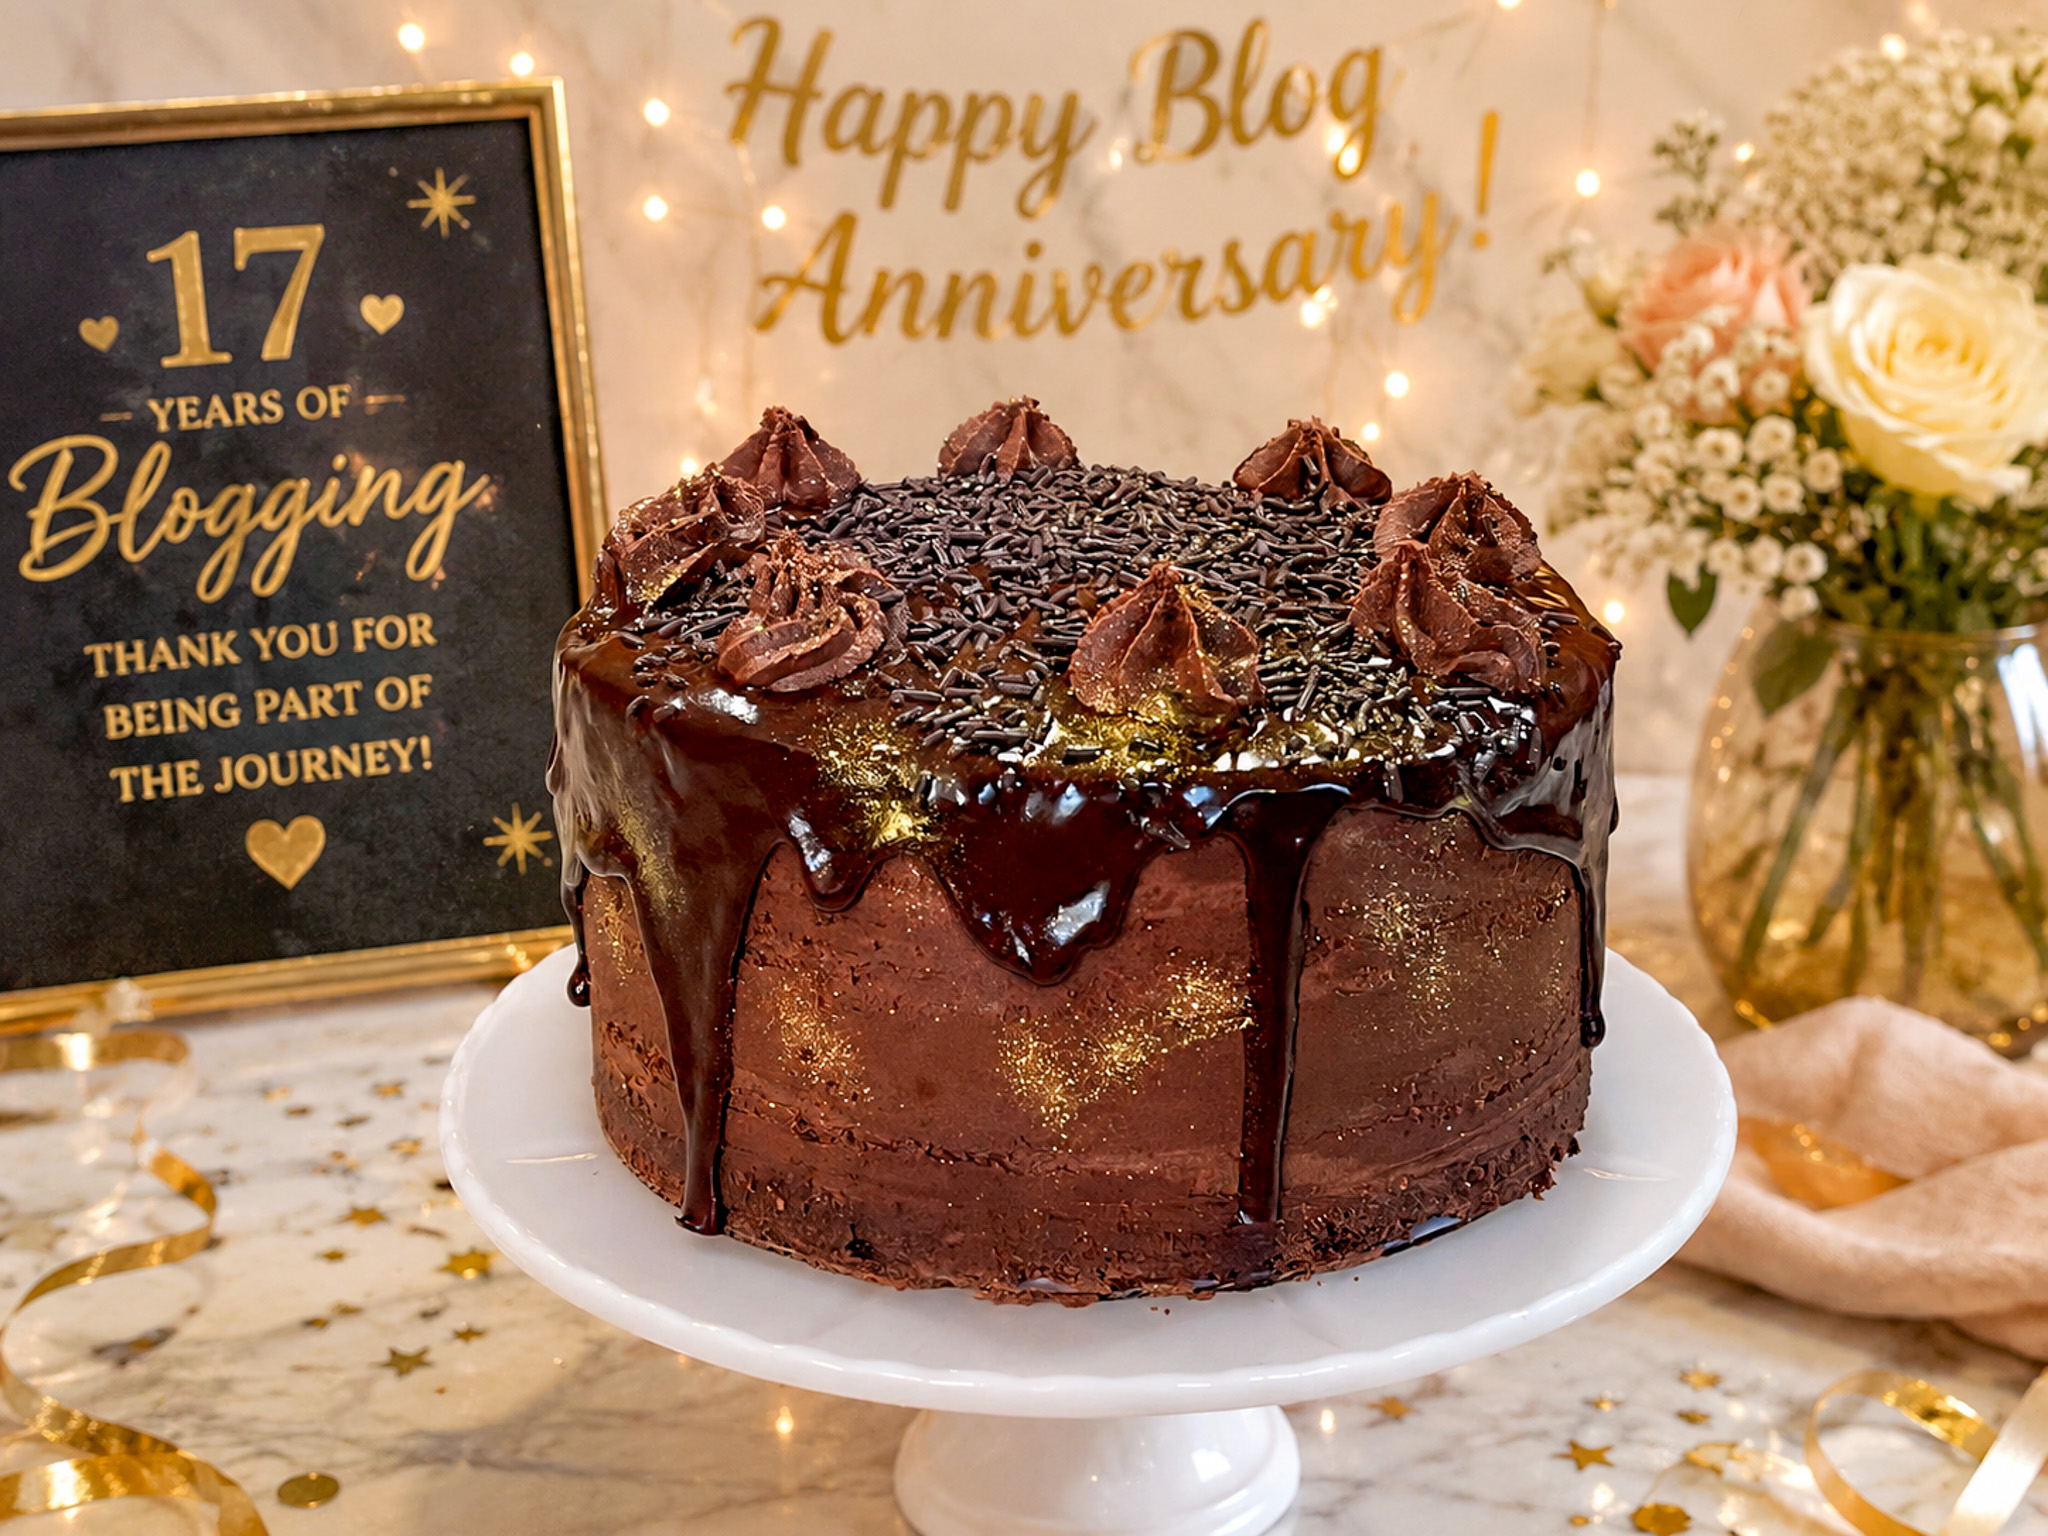
Sometimes I cannot quite believe that I’ve been doing this for seventeen years, but what is even more amazing to me, is that I still feel a wonderful thrill every time I hit “publish” on a new post. And yes, I realize I’ve said that before, after all, it’s been seventeen years of cooking and sharing joy. To celebrate the occasion, I baked a cake, but to be completely honest, there were a few issues, so I am not sharing the recipe. It comes from a pretty well-known cookbook. Enough said. Chocolate layer cake, with fudge buttercream and ganache drip. The issue was the buttercream, but I did my best to work around the problem.
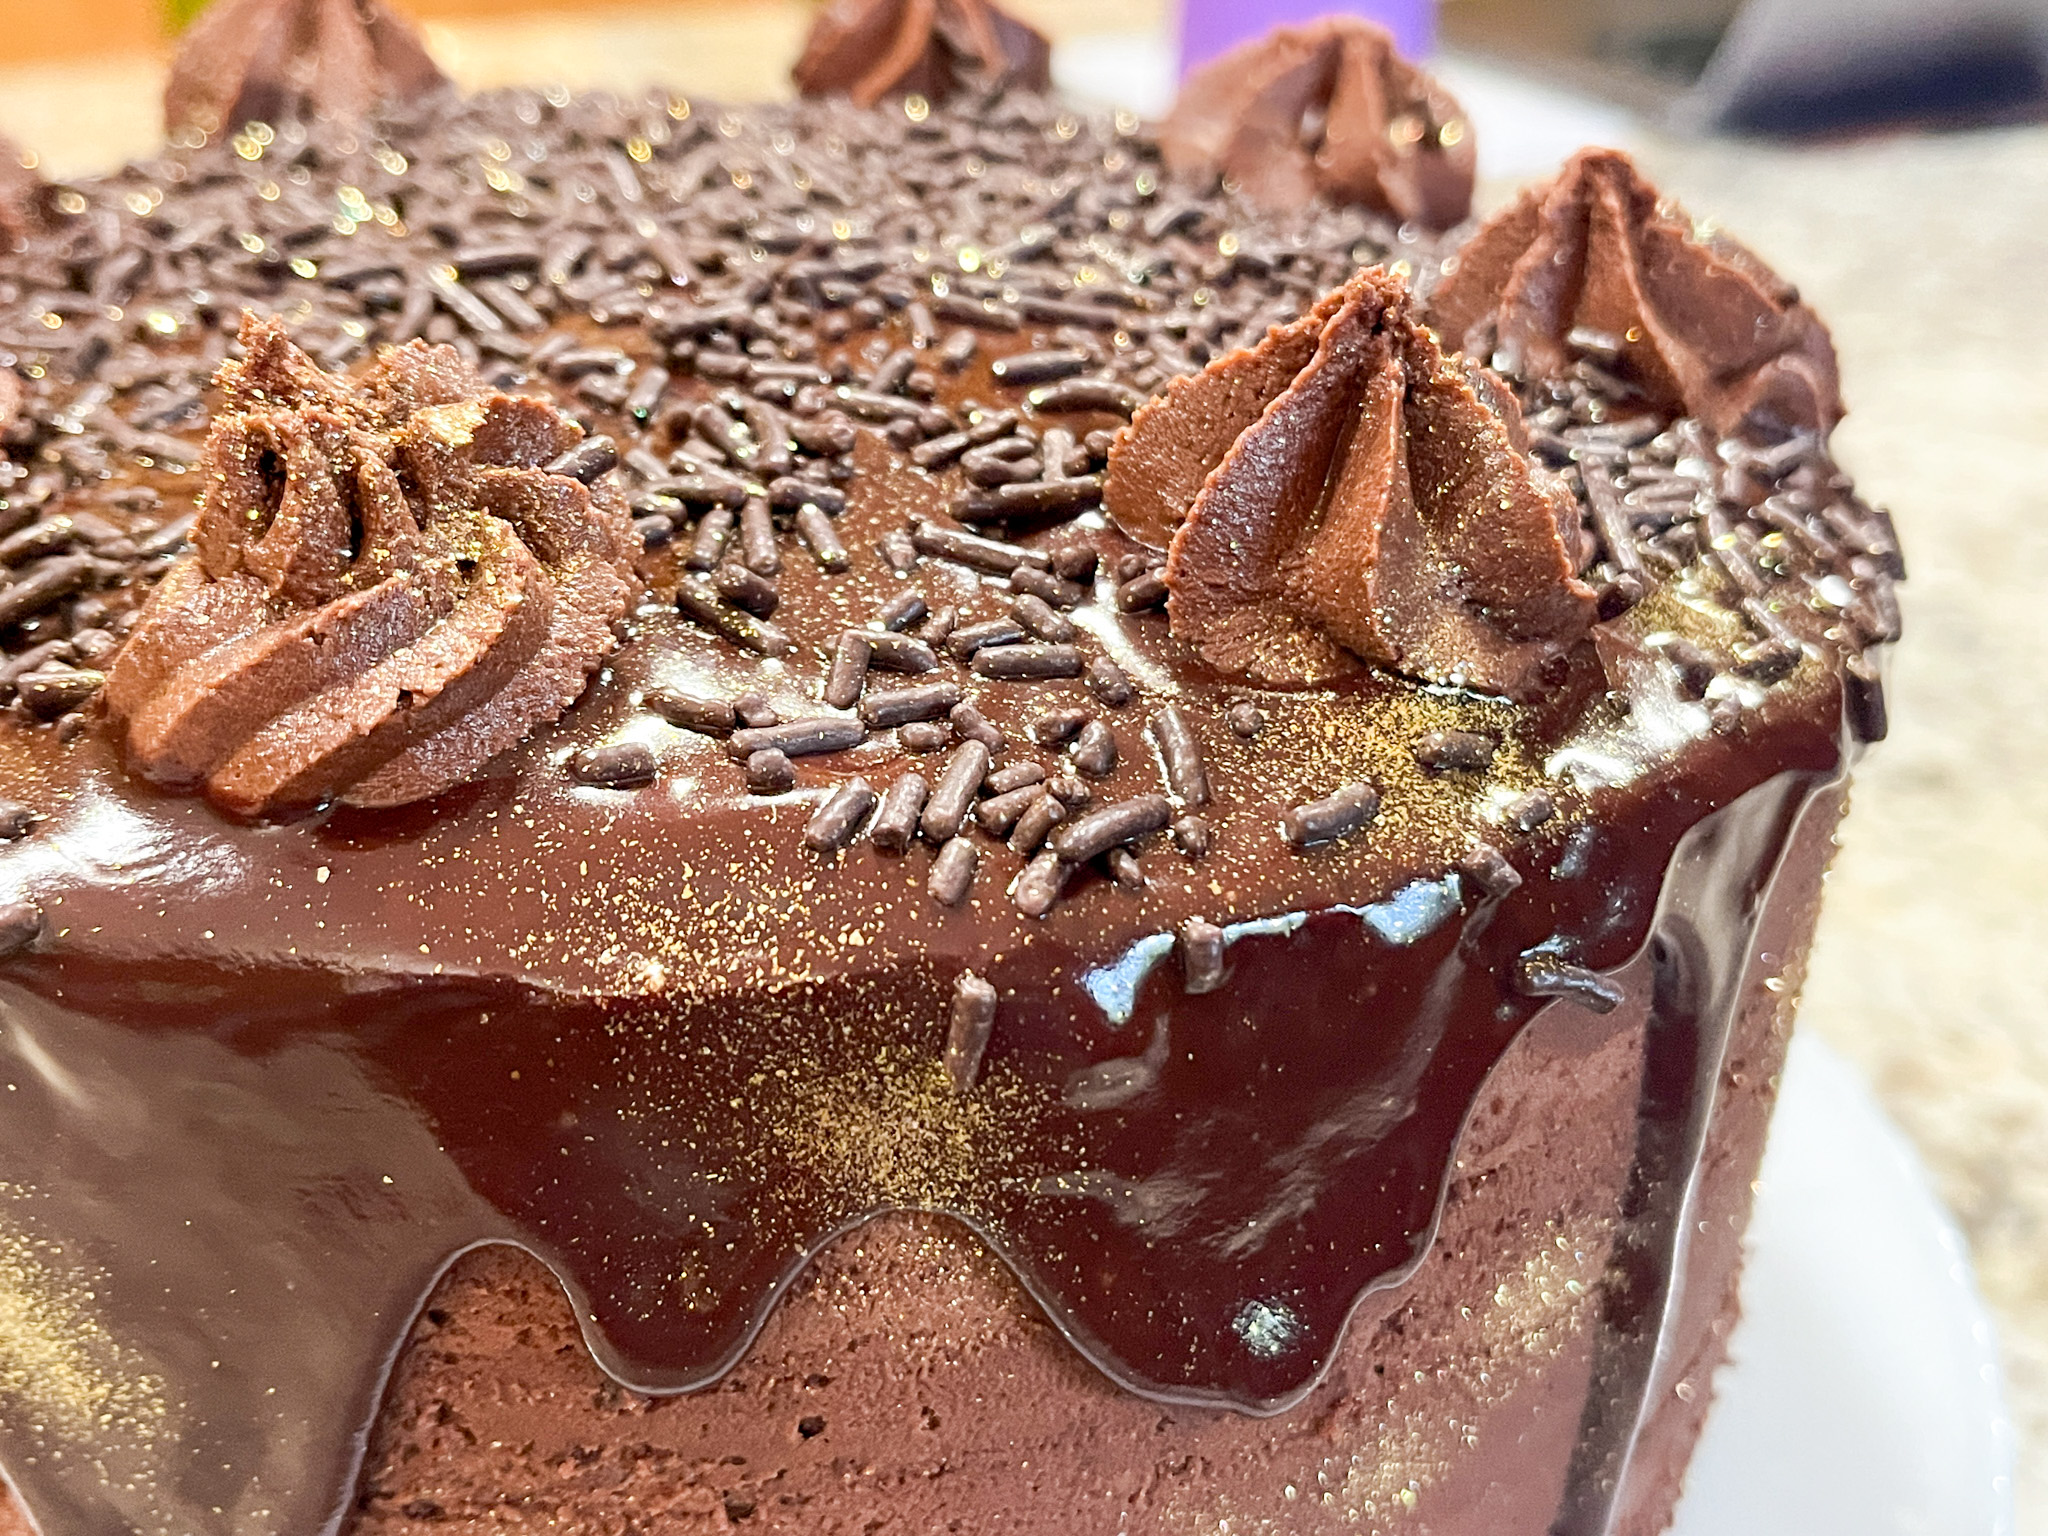
Four layers of chocolate cake, filling of fudge buttercream with bits of shortbread cookies, and a drizzle of caramel sauce. After frosting the cake, a dark chocolate ganache was poured on the flat top, allowing it to drip down the sides. A little extra buttercream to make rosettes on top, chocolate sprinkles and gold for good luck.
The cake was donated whole, so I cannot show the inside, but I heard it was very rich and delicious. As to the journey of blogging, mine will definitely keep going. Phil and I are officially retired for almost a full month, and want to expand a bit my horizon on cooking in general, attempting recipes that are a bit more exotic, maybe. Let’s see how it goes. If you’ve been here from the very beginning, thank you for hanging around for so long. If you are new to my little virtual spot, I hope you’ll find plenty of things to read about and maybe make in your own kitchen. Make it bewitching. And let’s step into the 18th year of food blogging, shall we?
Cake is pretty much mandatory, right? This blog anniversary caught me by surprise, as we are currently away. I got a bit confused and thought that the big day was later in the month. My plan was to bake for the occasion once we arrived back home. Good thing I double-checked… Full disclosure: this cake was produced in a bit of a hurry as we prepared to leave for a 2-week trip to the East Coast. Without further ado, I share with you today a lemon cake with raspberry filling and Swiss meringue buttercream. Maybe made in a hurry, but with a huge amount of love!
LEMON LAYER CAKE WITH RASPBERRY FILLING (adapted from The New York Times)
¾ cup/170 grams unsalted butter, softened 3 cups/385 grams all-purpose flour 2 cups/400 grams granulated sugar, divided 3 medium lemons 1½ cups/360 milliliters whole milk 2 teaspoons baking powder ½ teaspoon baking soda 1½ teaspoons kosher salt ¼ cup/60 milliliters neutral oil (I used grapeseed) 4 large eggs, at room temperature
1 cup raspberry jam (store-bought or home-made)
1 recipe for Swiss meringue buttercream, starting with 400g butter (details here)
Heat oven to 325 degrees. Spray three (8-inch) cake pans with baking spray and line each with parchment paper.
Make the cake: Add 350 grams of the granulated sugar to the bowl of a stand mixer fitted with the paddle, then zest the lemons directly into the sugar. Use your fingers to rub the zest into the sugar until it looks moist and sandy.
Juice the zested lemons into a small bowl. Transfer ¼ cup of juice to a large measuring cup and stir in the milk. Let it sit while you prepare the rest of the cake, reserving the remaining juice for the lemon syrup.
To the bowl with the lemon sugar, add the flour, baking powder, baking soda and salt, and mix on low to combine. Add the softened butter to the bowl all at once. Mix on low until the butter is evenly distributed and the mixture looks sandy. Add the oil and eggs to the measuring cup with the milk mixture and mix with a fork to combine. With the mixer on low, slowly stream in the milk mixture. When the batter is moistened, stop the mixer and scrape the bottom and sides of the bowl to ensure there aren’t any dry pockets. Adjust mixer speed to medium and mix for 1 minute more. Divide the batter among the prepared pans, spread evenly and tap the pans on a countertop to release any large air bubbles.
Bake the cakes until slightly risen and a toothpick inserted in the center comes out clean, 20 to 25 minutes. Set the pans on a wire rack and let the cakes cool for about 15 minutes. Then, run a thin knife along the edges of the pan and carefully turn the cakes out onto the rack to cool completely.
While the cakes cool, make the syrup: Measure ¼ cup lemon juice from the remaining reserved juice. Combine the juice and the remaining 50 grams sugar in a small saucepan and bring to a boil over medium-high, stirring occasionally. Cook until the sugar has dissolved, then pour into a heat-safe container to cool.
Make the Swiss meringue buttercream. Reserve 1/3 of the amount and dye red (I used Tulip Red). Dye a very small amount with green for the stems. I used Laurel color. Dye the rest of the buttercream with Fuchsia or any other color you like.
Assemble the cake: Place one layer of cake onto a serving plate, top side up. Brush the cake with lemon syrup. Spread raspberry jam over the top of the cake. Repeat with the second layer on top of the filling, top side down, and press gently. Add the final layer. Brush the cake with syrup, then cover the top and sides of the cake with a thin layer of fuchsia frosting. Refrigerate until firm, about 30 minutes. Frost the cake with fuchsia, smoothing the surface. Let that set for 30 minutes, then pipe stems with green buttercream and a tip 3. Using the tulip red buttercream, pipe the flowers with a petal 101 tip, a border at the bottom with an open star tip (like #20) and a border on top with 1M tip.
Comments: Hard to believe it’s been 16 years. Hard to find what to say about it without getting cheesy or highly predictable. So I won’t say much. I’m still having fun blogging, I’m still excited every time I hit “publish” on a new post. I am not stopping quite yet. Let’s step into the 17th year of my blogging journey, and if you’ve been following me for a while, THANK YOU! If you are new here, I hope you’ll find things that inspire you to cook, bake, and be passionate about. Life is too short not to enjoy what each day brings.
Apologies for not showing pictures of the cake cut to reveal the layers and filling. It was donated whole, so I also never got to see it. And that ends up as being part of its charm… Or so I hope…
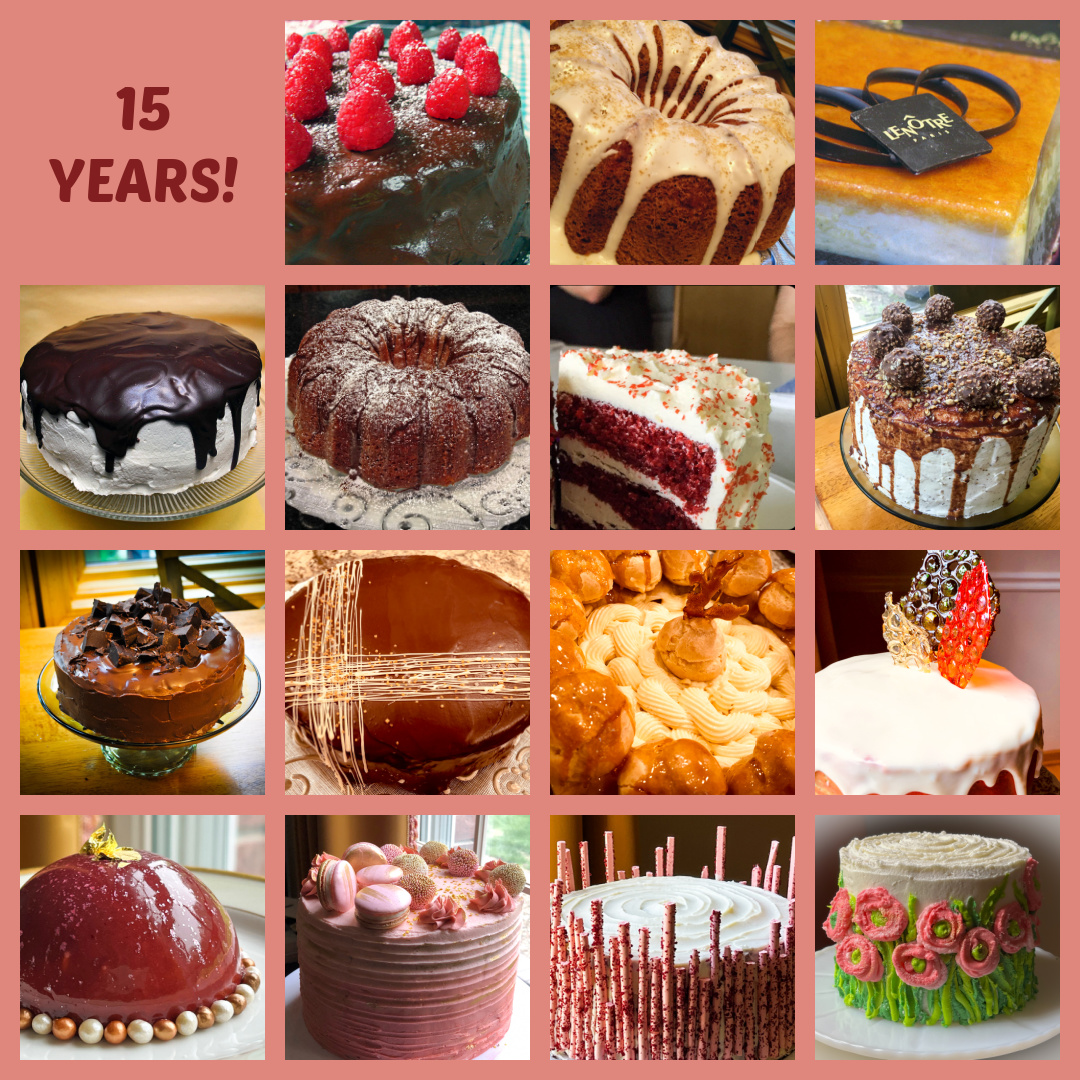
Wow! Just WOW! Talk about a blogging milestone, I am having a hard time believing that for 15 years I’ve been cooking, baking, taking pictures, writing posts, and hitting PUBLISH, without a break… Last year I was feeling a bit discouraged and debating whether to quit, but I don’t feel the same way now. My love for blogging is renewed, maybe even a bit stronger. But what matters most in the anniversary of a blog is how to celebrate it. That brings cake to mind. And cake is what I have for you!
CONFETTI CAKE WITH RANUNCULUS BUTTERCREAM PAINTING (cake from Sally’s Baking Addiction, buttercream and tutorial for cake painting from MyCakeSchool)
for the cake: 207g cake flour (1 + 3/4 cup) 3/4 teaspoon baking powder 1/4 teaspoon baking soda 1/4 teaspoon salt 113g unsalted butter, softened to room temperature (1/2 cup) 200g granulated sugar (1 cup) 3 large egg whites, at room temperature 120g full-fat sour cream, at room temperature (1/2 cup) 2 teaspoons pure vanilla extract 120ml whole milk, at room temperature (1/2 cup) 1/2 cup rainbow sprinkles
for the buttercream: 910g confectioners’ sugar (2 pounds) 113 g unsalted butter softened (1/2 cup) 286 g solid vegetable shortening such as Crisco (1 + 1/2 cup) 2 Tablespoons clear vanilla extract ¼ cup milk 57 g full-fat milk (1/4 cup) ½ teaspoon salt to cut the sweetness
Heat the oven to 350°F. Grease three 6-inch cake pans, line with parchment paper rounds, then grease the parchment paper. Whisk the cake flour, baking powder, baking soda, and salt together. Set aside. Using a handheld or stand mixer fitted with a paddle or whisk attachment, beat the butter and sugar together on high speed until smooth and creamy, about 3 minutes. Beat in the egg whites on high speed until combined, about 2 minutes, then beat in the sour cream and vanilla extract. Scrape down the sides and up the bottom of the bowl as needed.
With the mixer on low speed, add the dry ingredients just until combined. With the mixer still running on low, pour in the milk and mix just until combined. Gently fold in the sprinkles. The batter will be slightly thick.
Pour batter evenly into cake pans. Bake for around 18-21 minutes or until the cakes are baked through. To test for doneness, insert a toothpick into the center of the cake. If it comes out clean, it’s done. Allow cakes to cool completely in the pans set on a wire rack.
Make the buttercream: Cream butter, shortening , salt and extracts until creamy and smooth. Add powdered sugar and milk. Mix thoroughly on medium speed for approximately 8 minutes. For the last two minutes decrease the mixing speed to very slow until creamy and smooth. Scrape the sides of the bowl occasionally during the mixing process. Frost the cake fully with white frosting, make portions of buttercream with the colors needed, and follow the instructions on the video to decorate the cake.
Comments: I wanted a colorful cake for the 15th anniversary of the Bewitching, and felt that this Springtime motif would be perfect… Now for a little bit of “behind the scenes” disclosure: while you read this post, we will be in Europe, in fact almost getting ready to fly back home. It turns out that before we left I prepared a bunch of posts to be published while we were away, but thought the anniversary of the blog was later in the month. I noticed my mistake just a few days before our departure… My first reaction was to forget all about it, deal with it later, but Phil said “you’ve been in the tent, you can do this! pretend it is a technical challenge”. What can I say? He definitely knows me well, so the outcome is this blog post… This was a cake baked in full frantic mode, my friends… what won’t I do for the love of blogging?
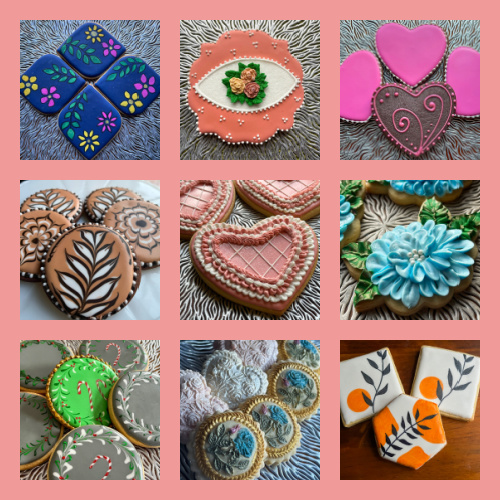
Thrilled to share that my little baby cookie blog turns THREE YEARS OLD TODAY! Three years, three hundred and thirty cookie posts published… Would love if you pay me a visit (click here)
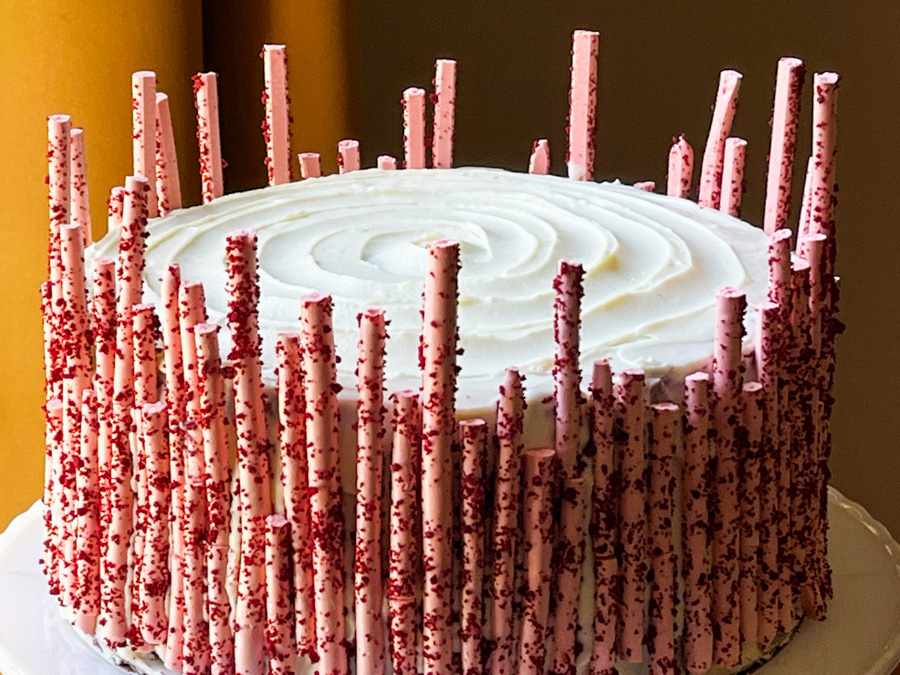
Fourteen years. One thousand, six hundred and thirty eight posts published. I confess this is the first anniversary that finds me with a little less gas in the tank. Am I going to stop? No, not yet. I still love sharing recipes and little bits about our life, the kitchen, the pups. So I am committed to one more year to make it to fifteen, and will re-evaluate at that point. To celebrate this day, I offer you a cake: Red Velvet with White Chocolate Cream Cheese Frosting. Made a little more special by decorating it with meringue sticks, not too complicated to make, and so striking to look at! Recipe from Kirsten Tibballs at Savour Cooking School.
RED VELVET CAKE WITH CREAM CHEESE FROSTING (from Kirsten Tibballs)
Recipe is copyrighted and I did not get permission to publish it, so you need to be a member of Savour School to obtain it. Click here for details.
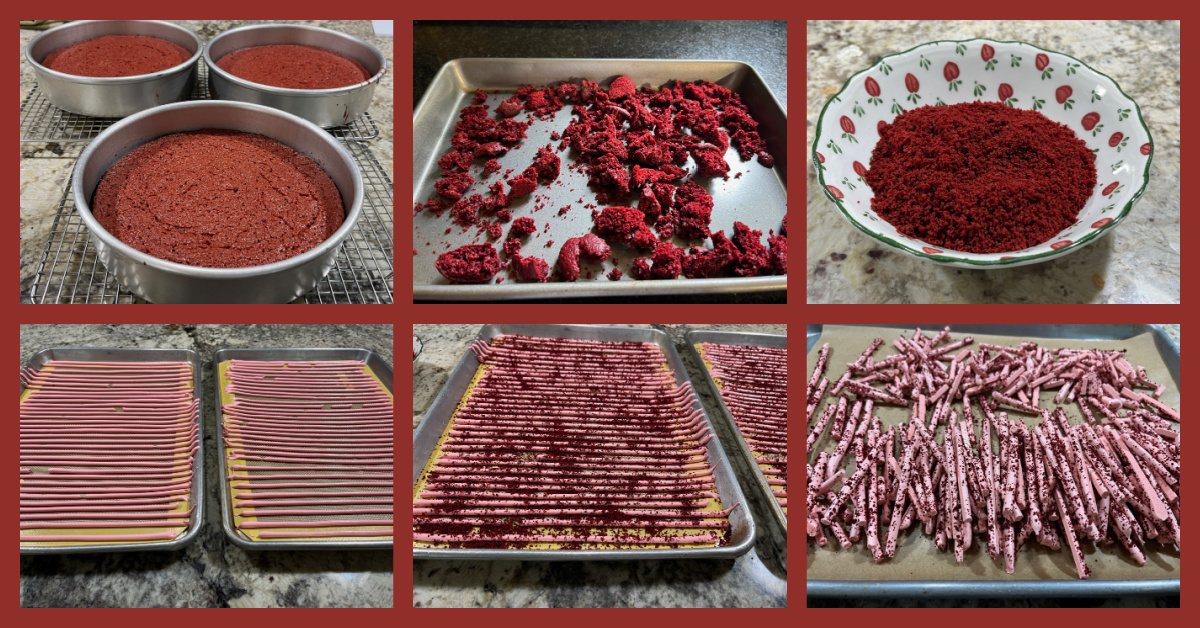
Comments: The cake is actually quite simple to put together. You can definitely use any red velvet cake recipe you are fond of, they are pretty similar with all the usual suspects. Make three cakes, 8 inch in diameter. When you trim the top of the cakes, use that part to make cake crumbs (I dried mine in a very low oven for 3 hours).
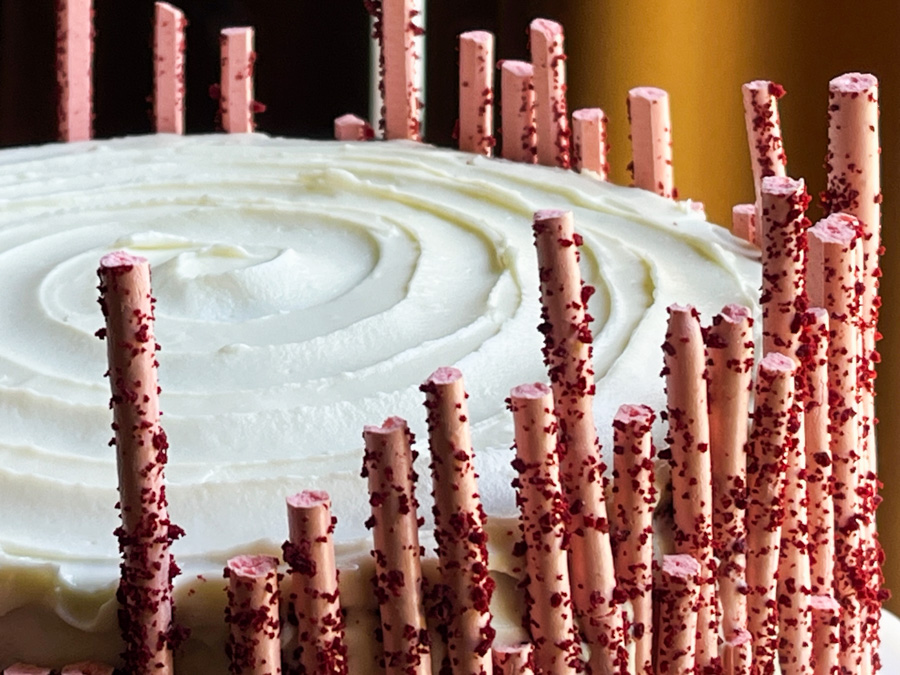
I loved making the meringue sticks, with a simple Swiss meringue method. A piping bag with a 4mm round tip is used to pipe lines that get coated with cake crumbs and baked for 2 and a half hours at low temperature, like required for meringues. Once the cake is iced, just glue the sticks of varying size all around.
.
Without further ado, let’s start the journey into my 15th year of food blogging!