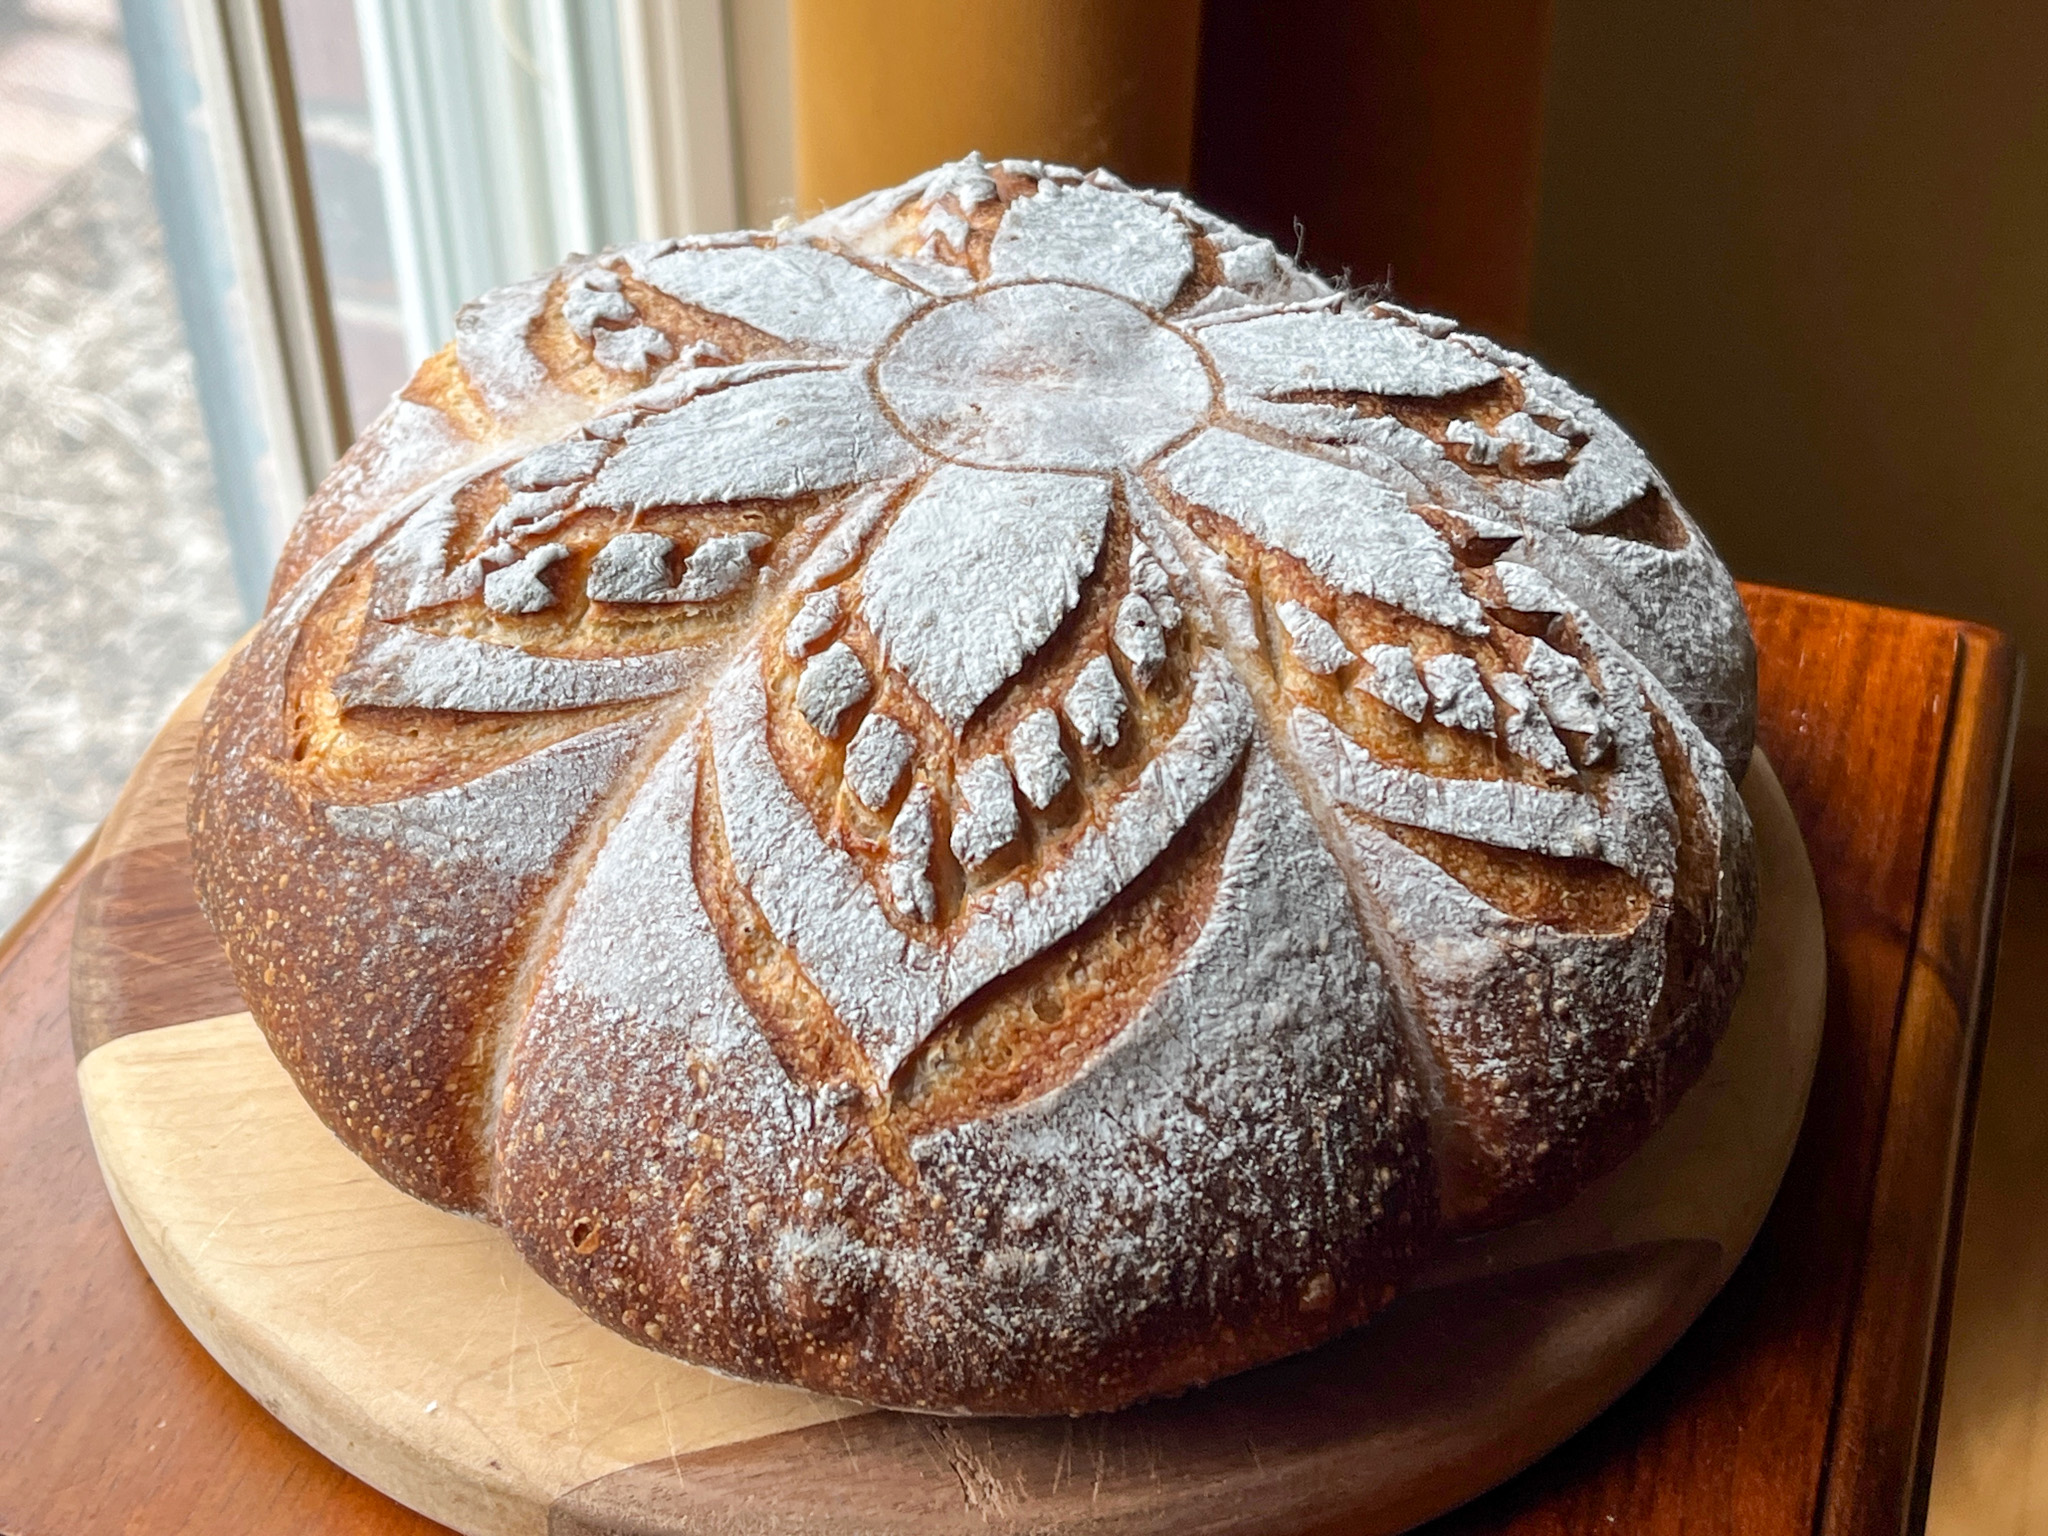
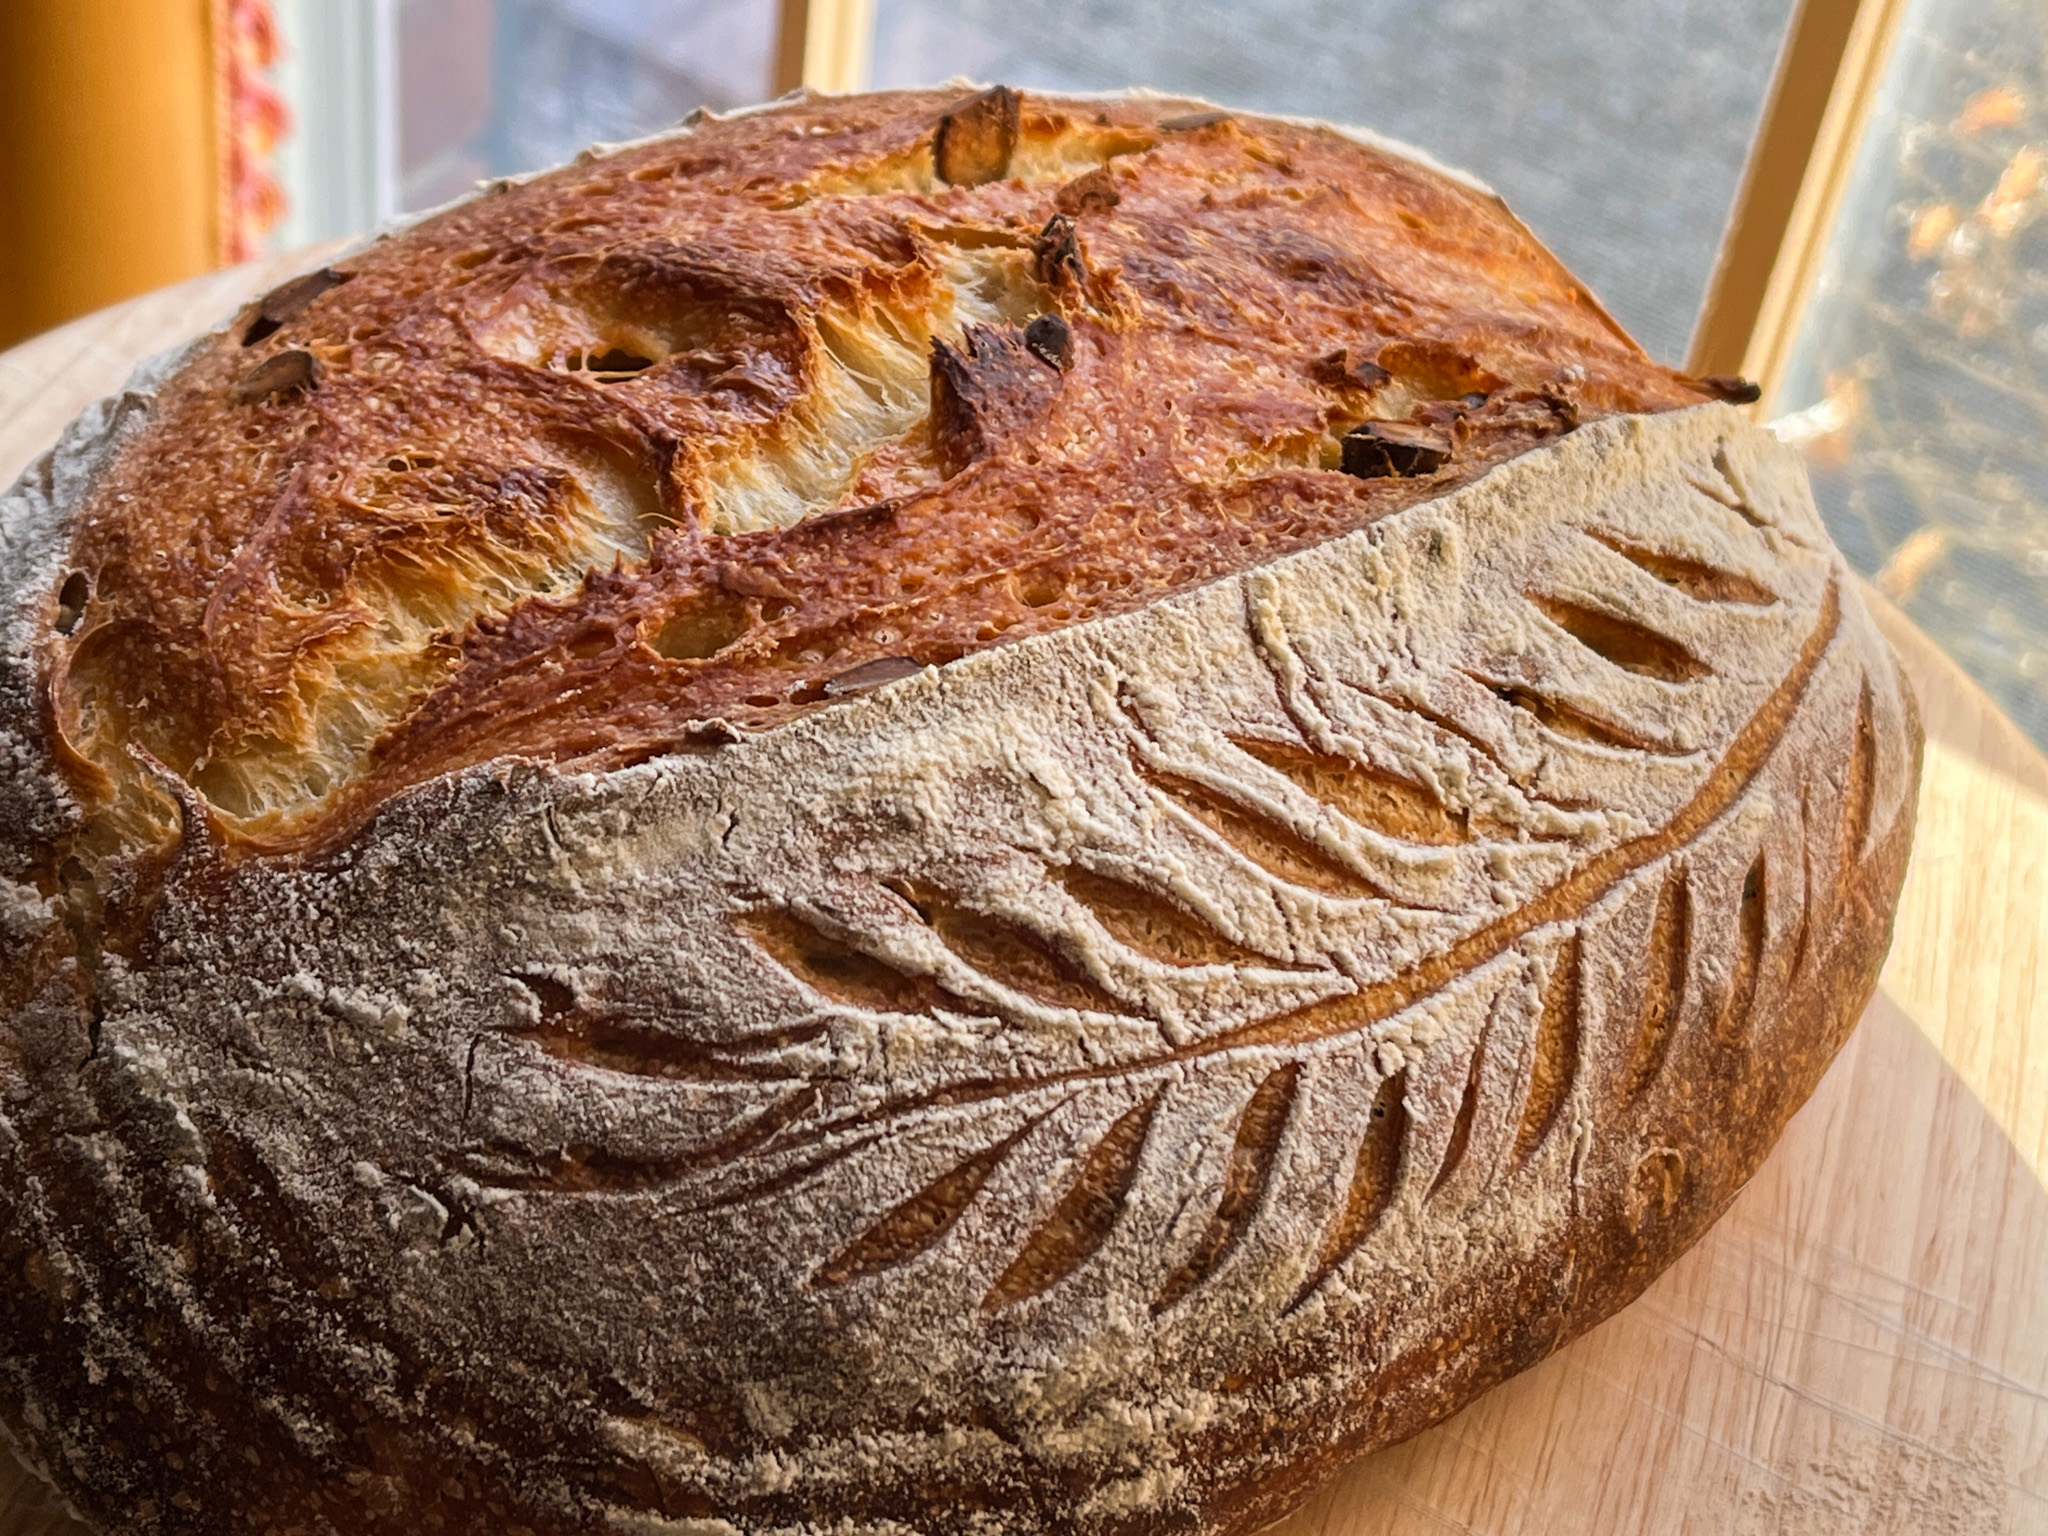
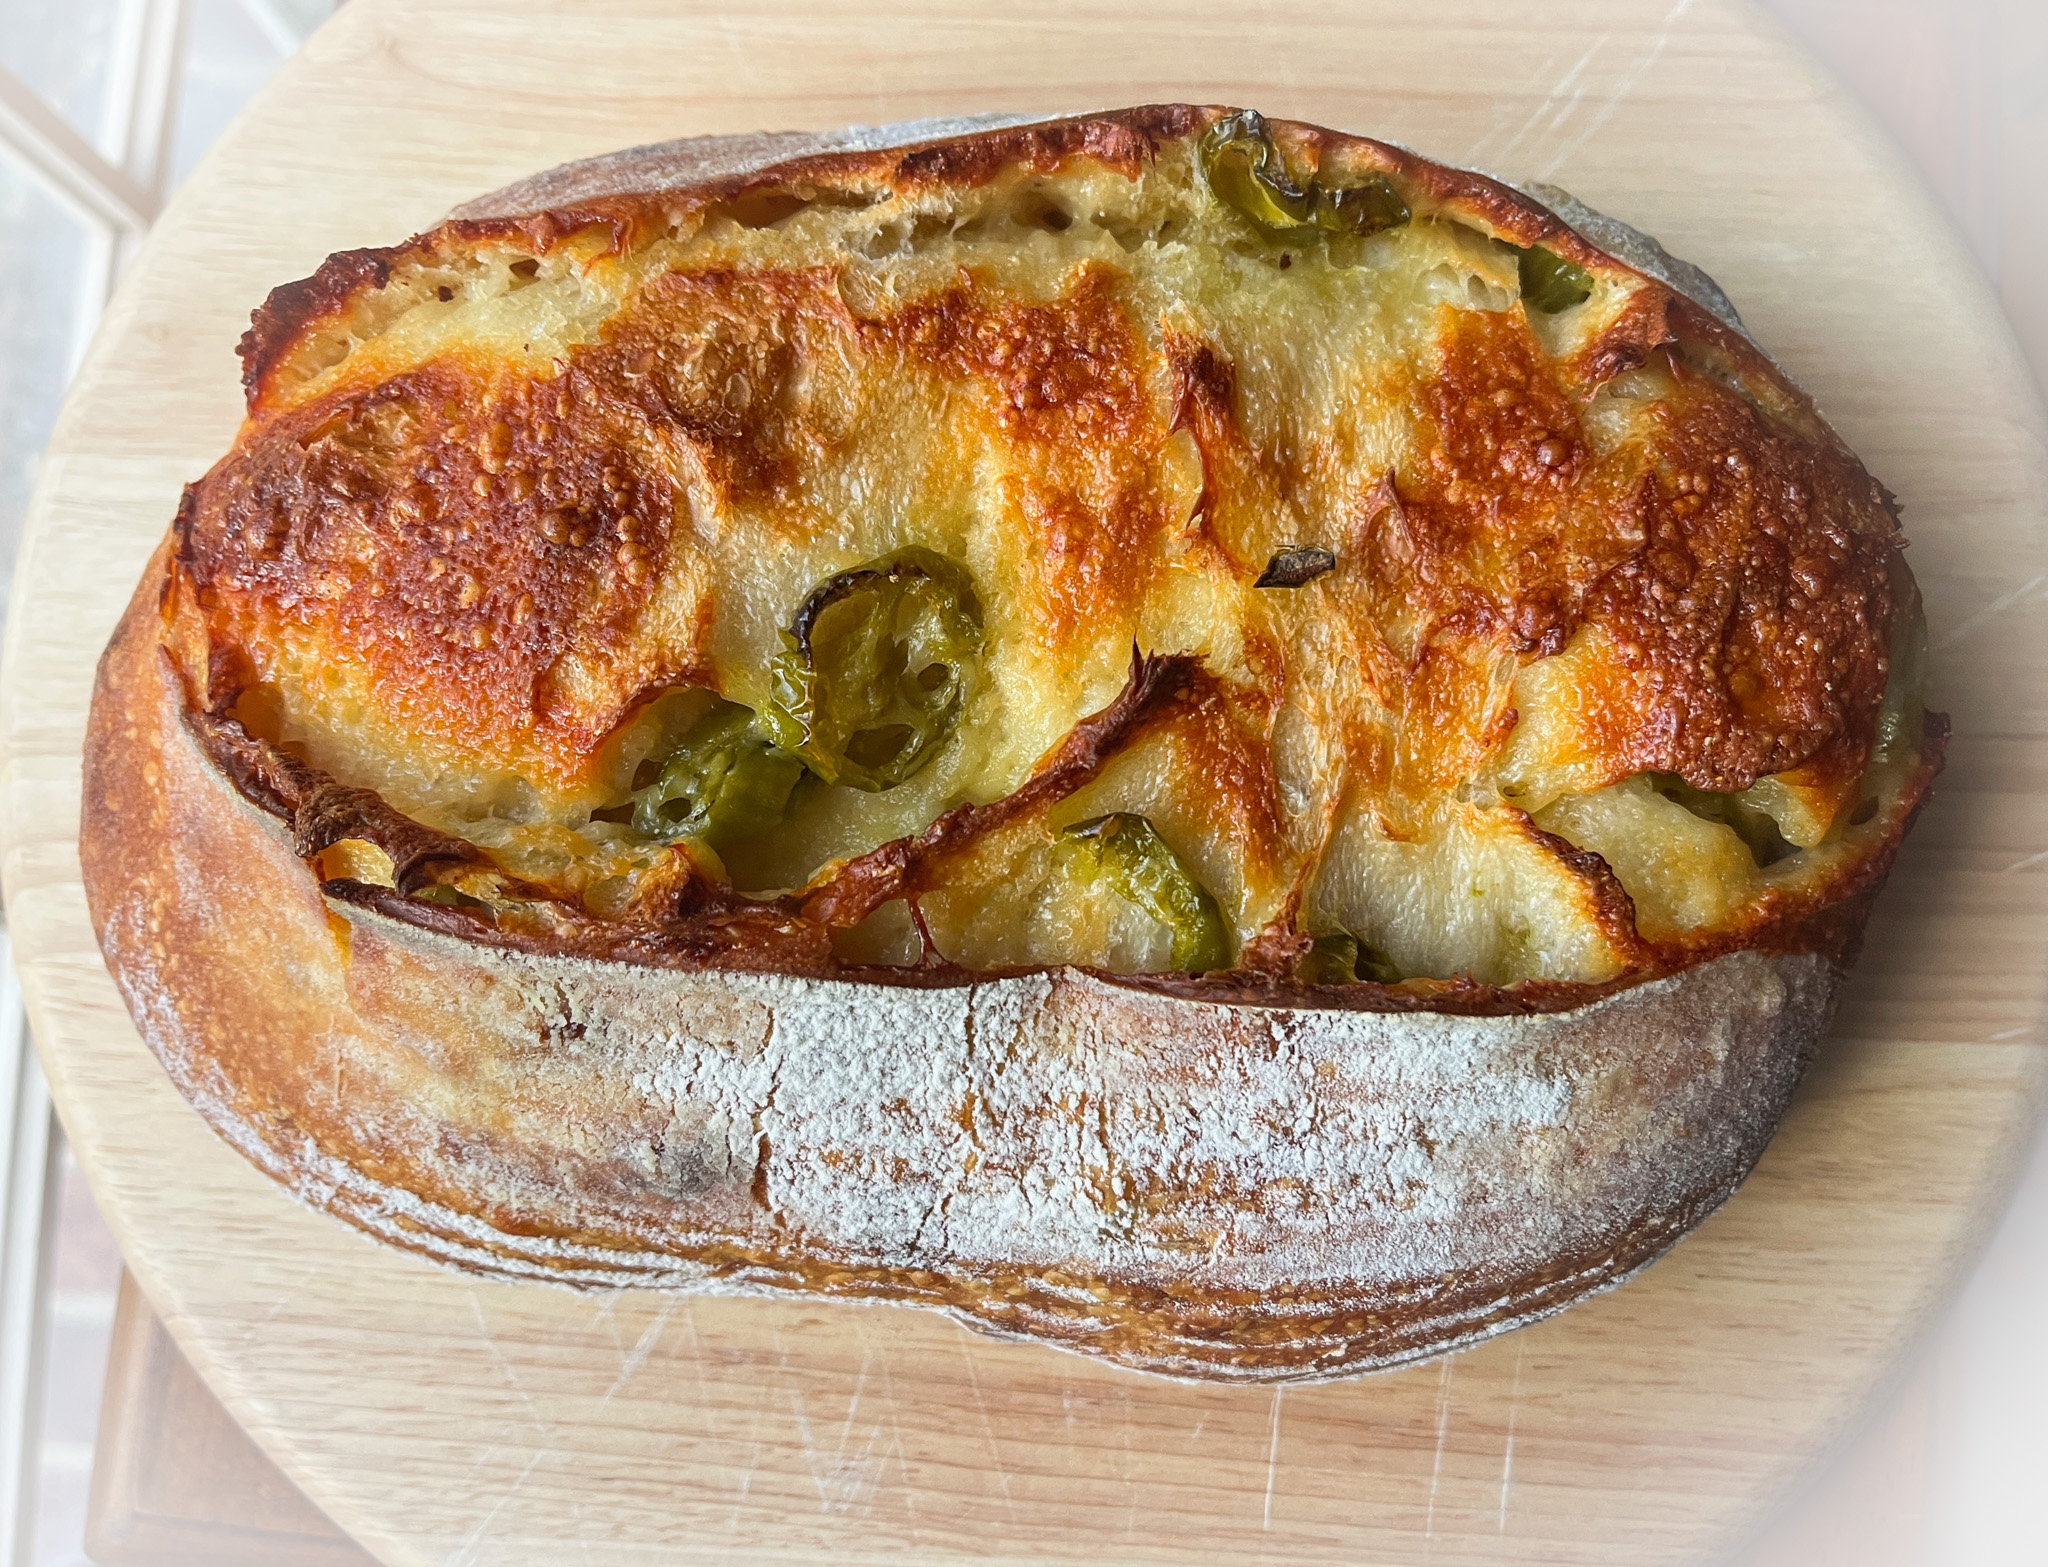
I am beyond excited about this blog post because not only it features one of the very best sourdough breads I’ve ever baked, but it allows me to review Elaine Boddy’s FOURTH cookbook (click here to order The Sourdough Bible), published just a couple of weeks ago. Without further ado, take a look at this beauty!
CHEDDAR AND JALAPEÑO SOURDOUGH BREAD
(printed with permission from Elaine Boddy’s The Sourdough Bible)
50 g (¼ cup) starter
350 g (1½ cups) water
500 g (4 cups) strong white bread flour, plus more for dusting
7 g (1 tsp) salt, or to taste (I used 10g)
Filling 200 g (1 cup) grated cheese
100 g (¾ cup) sliced jarred jalapeños, well drained (I used 80g)
In a large bowl, roughly mix together all the dough ingredients. Cover and leave the bowl on the counter.
After 2 hours, perform a set of pulls and folds on the dough. Cover and leave once again.
After 1 hour, perform two more sets of pulls and folds. Cover the bowl again and leave it on the counter after each set. Leave to proof until the dough has doubled in size. Once doubled, place the bowl of dough, covered, in the fridge for at least 1 hour.
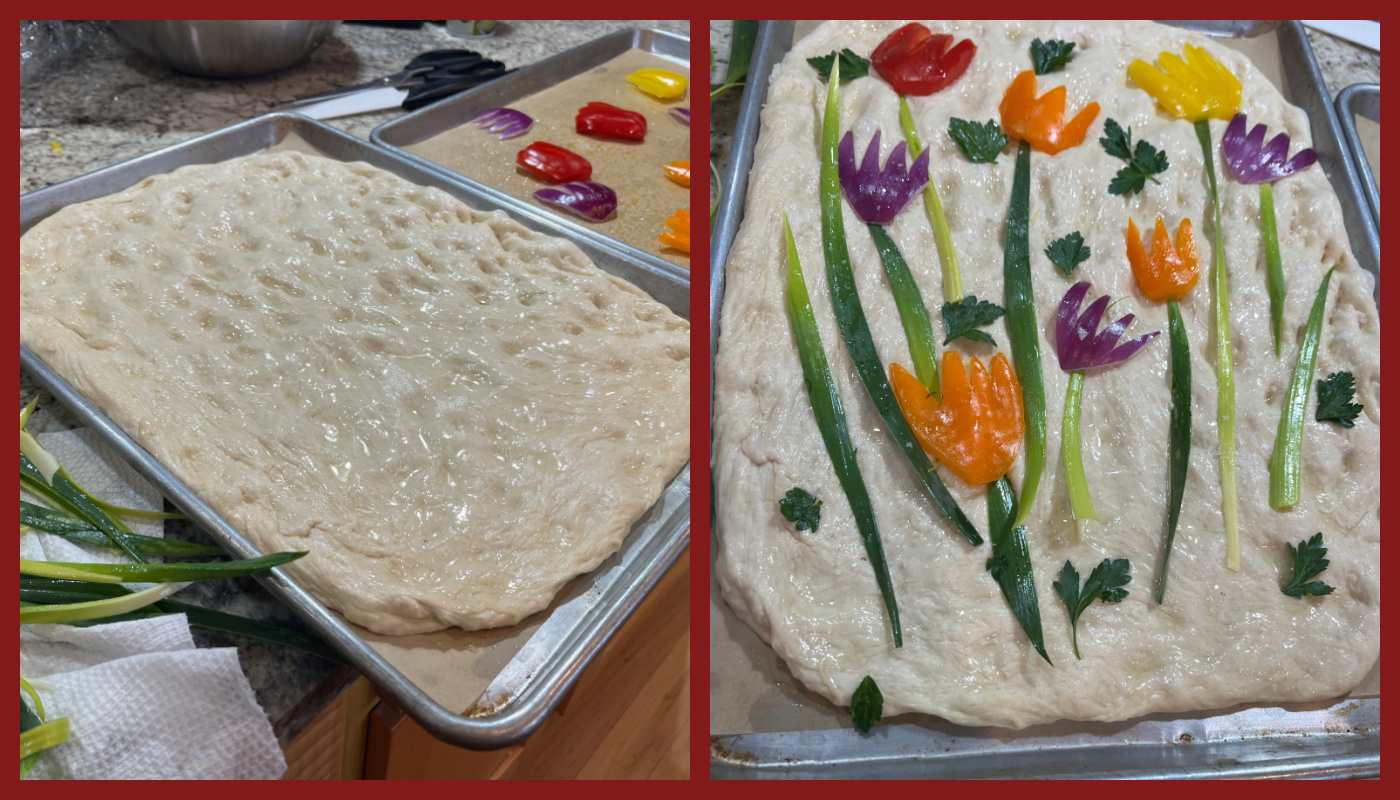
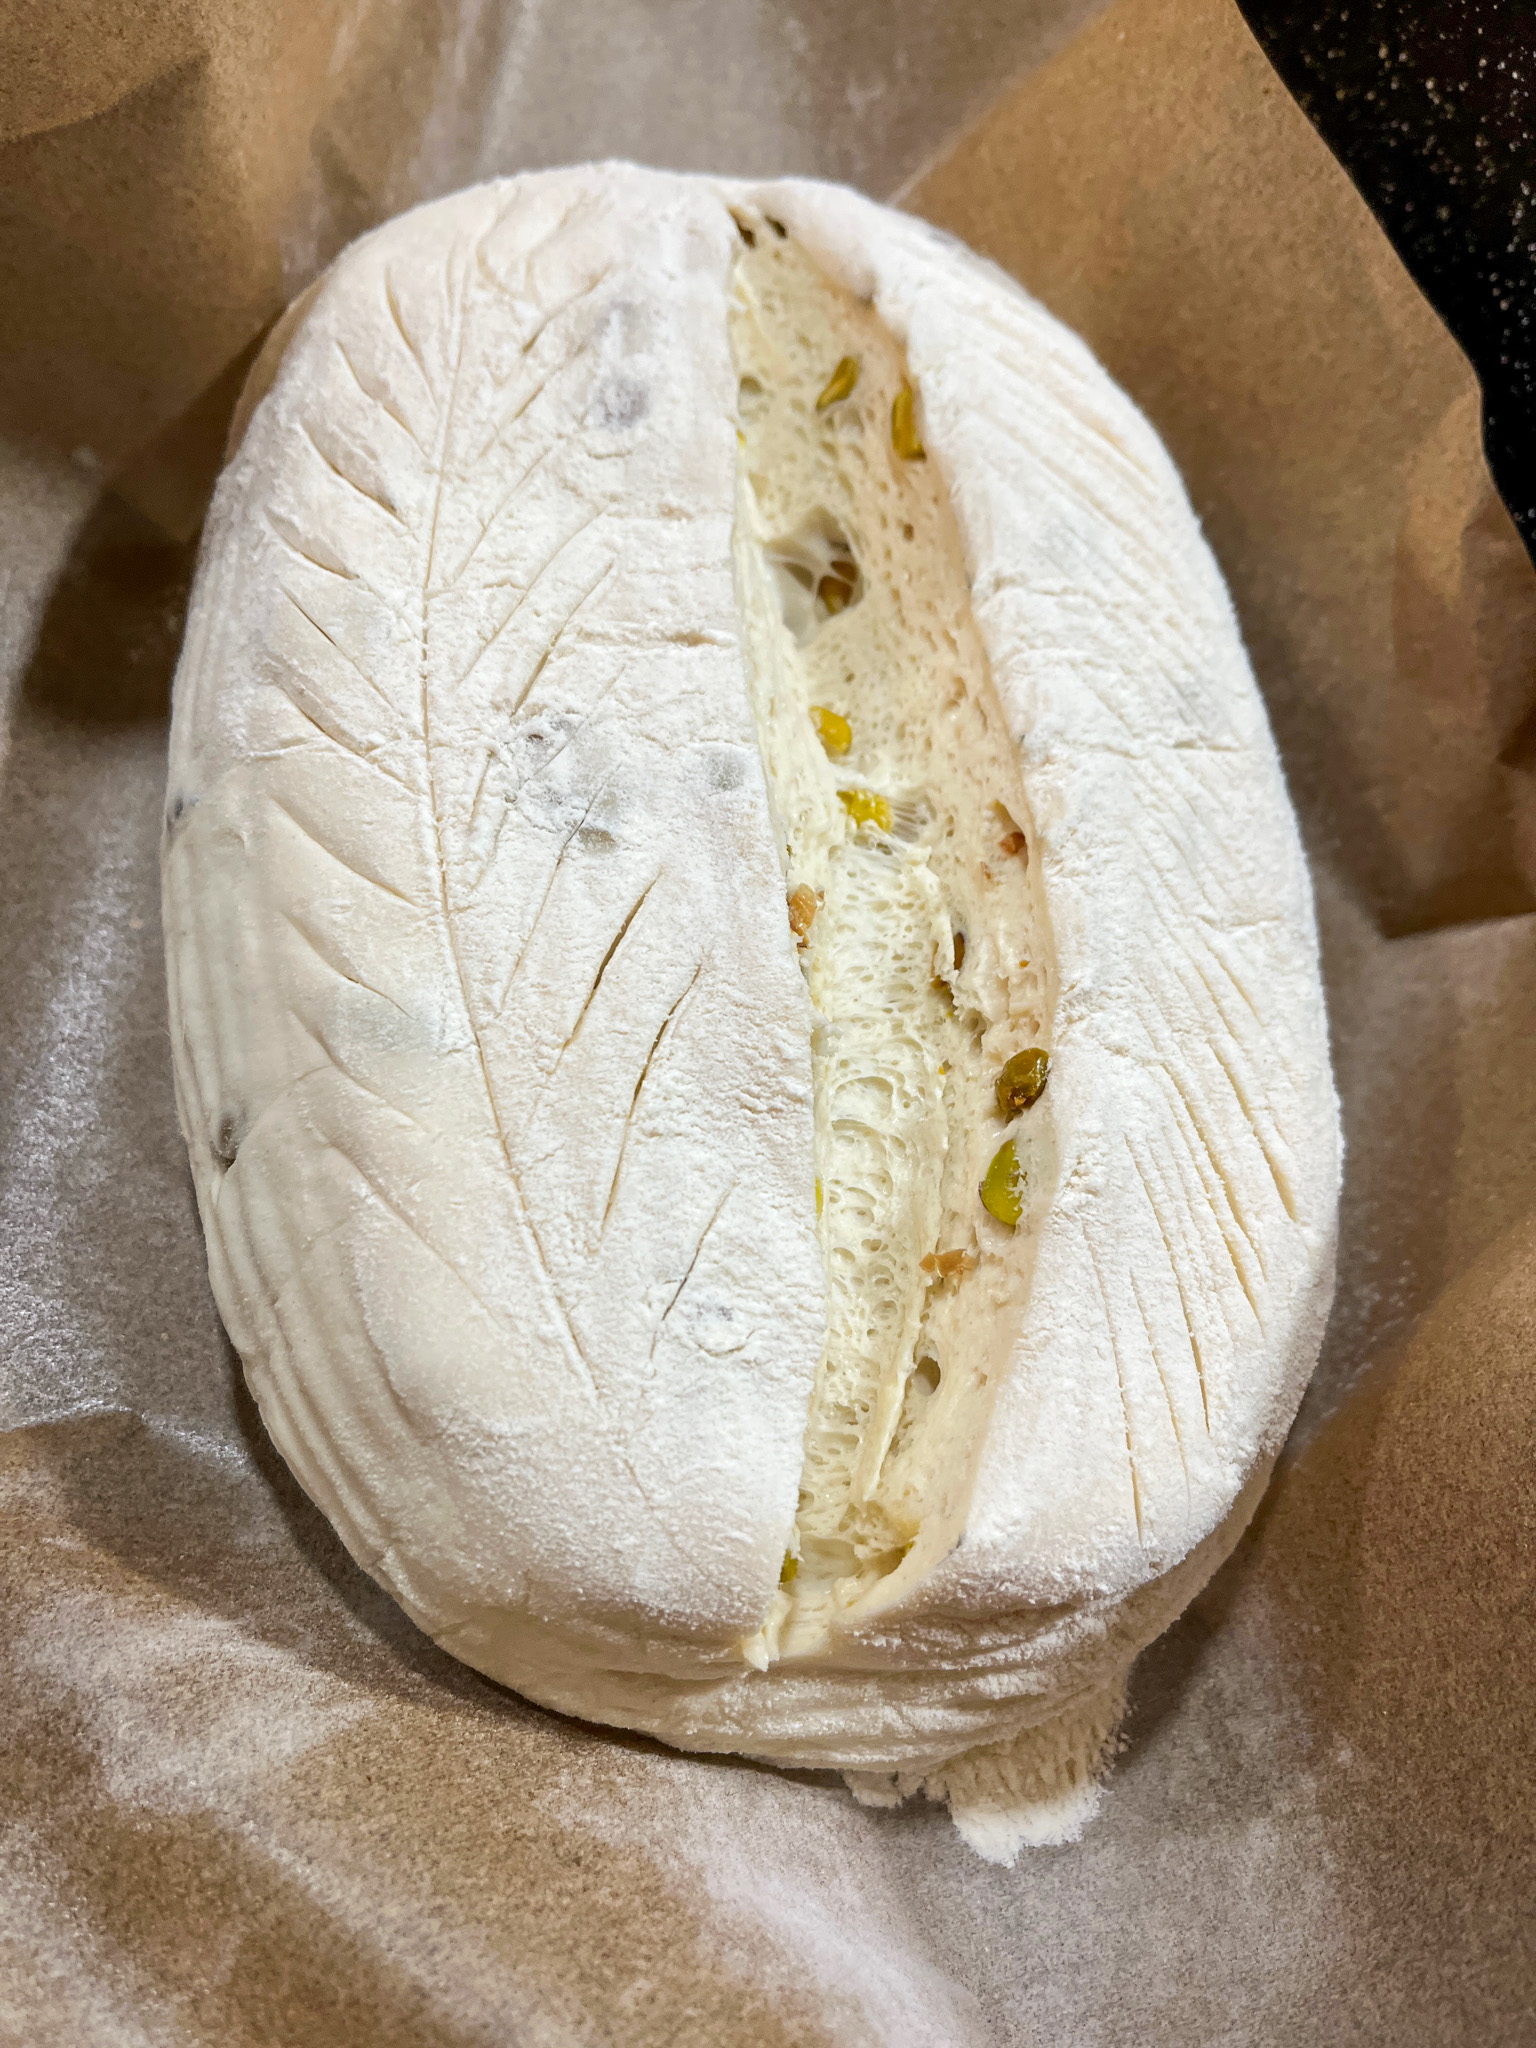
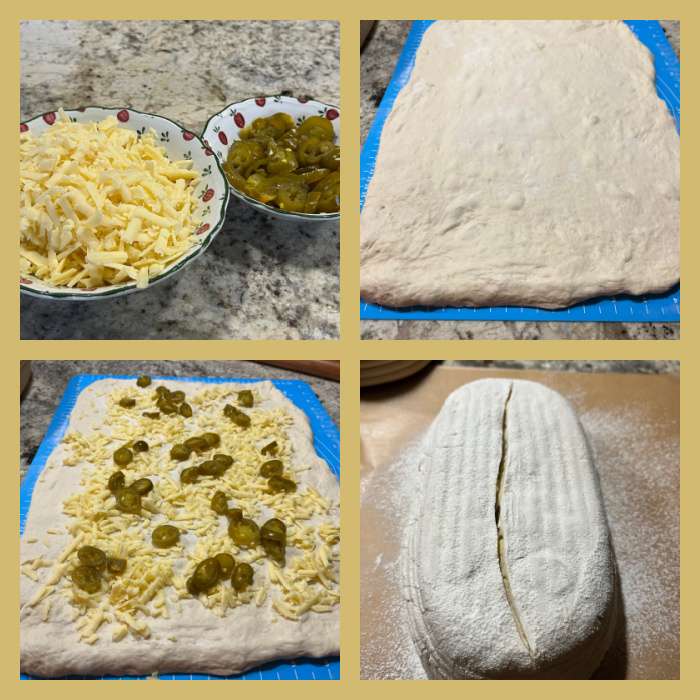
Sprinkle flour over your kitchen counter. Ease the risen dough from the bowl onto the counter. Use your fingertips to push out the dough, until it becomes an 18 x 12–inch (46 x 30–cm) rectangle and an even thickness all over. The dough will want to pull back as you stretch it; continue to pull it gently, being careful not to make holes in the dough. Sprinkle the cheese and jalapeños filling evenly over the stretched dough. Roll up the dough from one of the shorter edges toward the other to make an even roll of dough. Lift the dough and place it, smooth side down, in the banneton. Cover, and refrigerate for at least 3 hours to proof again. Transfer the cold dough to your lined pan, and score it.
If you’ve chosen to preheat your oven, heat to 425°F (220°C) convection or 450°F (230°C) conventional. Bake at the above temperatures for 50 to 55 minutes from preheated. Or, if baking from a cold start, bake for 55 to 60 minutes. Remove from the oven and pan, and allow to cool fully before slicing.
ENJOY!
to print the recipe, click here
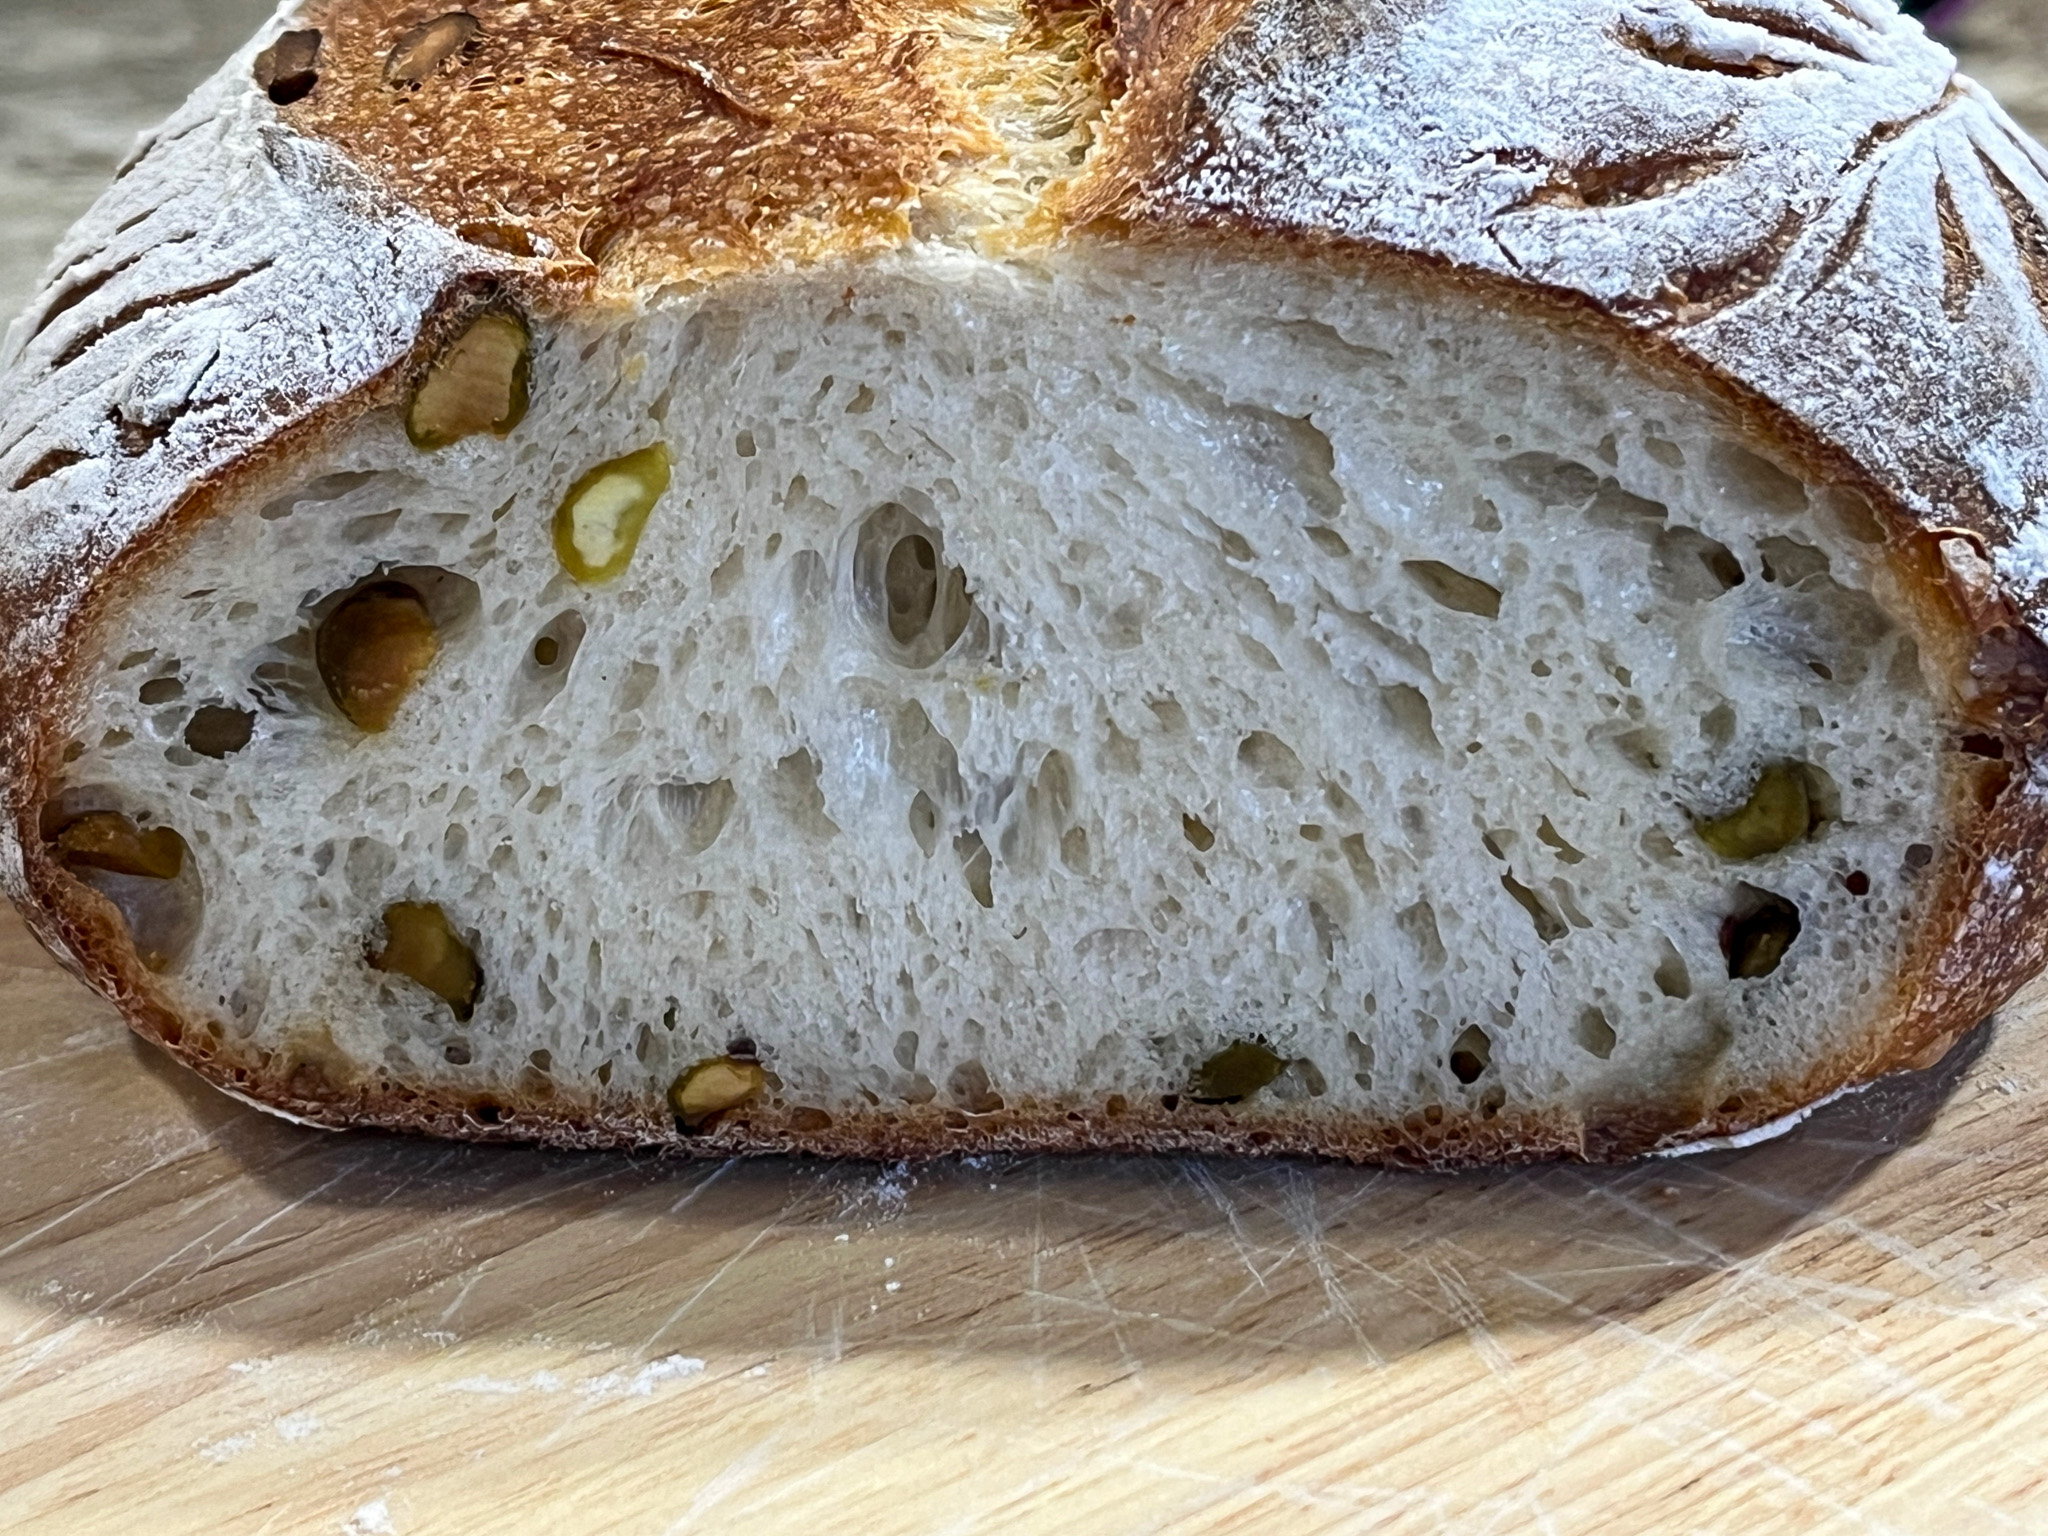
Comments: If you’ve never mixed a sharp cheese with pickled jalapeños and invited them both for a little sourdough party, you are missing quite important things in life. It is a brand new year, do what is RIGHT! The bread is simply outstanding, I normally exercise restraint when consuming bread, but I will admit I had zero power against this baby.
The level of spice was just right for us, I used slightly less than Elaine did, about 20% less. Use the sharpest, best Cheddar you can find. The color of the crust is enough to make a grown up cry in anticipation of great things to come.
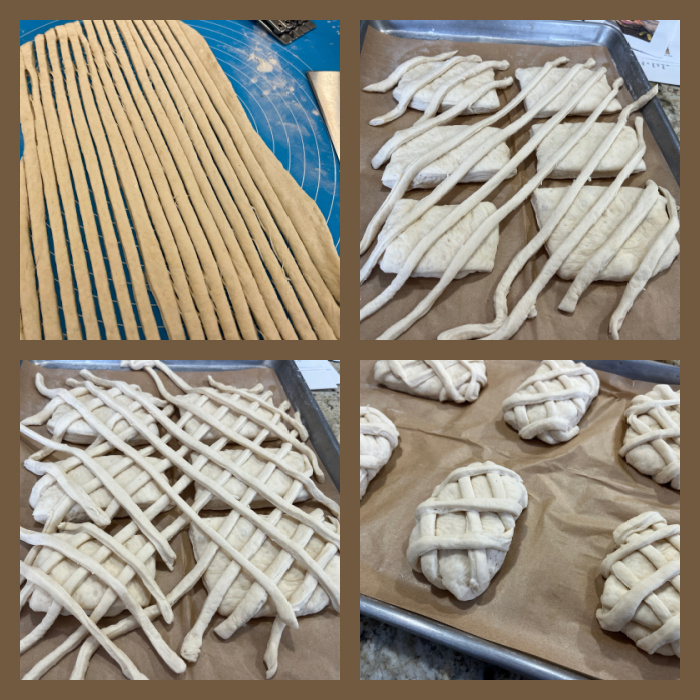
The bread uses the method of lamination to incorporate the goodies, although as Elaine says, you could conceivably just add everything as you mix the dough. She is always making sure you can go the simple route if so desired. That brings me to her masterpiece, The Sourdough Bible.
THE SOURDOUGH BIBLE
I adore the cover! So modern, and unusual, incredibly stylish… But what really matters is what’s inside, so let’s take a tour together.
The book is divided in three parts. Part I will explain simply everything about making a starter, keeping it alive and using it to make dough. If you know someone who flirts with the idea of embracing sourdough baking but feels insecure, this book is the best gift ever. Anyone will be able to produce a healthy sourdough starter using her detailed explanation. Even if you are an experienced sourdough baker, you will find great tips and suggestions in this section of the book, like how to use different flours, swap the water for other liquids, laminate, add seeded crusts. Wonderful source of information.
Part 2 is where all the recipes will be. It starts with her MASTER RECIPE, which is the essence of all her breads. The master recipe is like a canvas that she uses to create more complex variations, not only in flavor, but shape. This section of the book has a huge number of photos of the process involved in each bread, beautiful shots, on a blue background that makes the white dough shine. A pleasure for the eyes, and dense with info and details.
Here are some of the recipes included that made my mouth water: Whole Grain Spelt and Poppy Seed Loaf, Beer and Mixed Grains Loaf, Rye and Caraway Loaf, Cheese and Jalapeño Loaf (featured today), Chocolate and Chili Loaf (OMG, must absolutely make this one), Cranberry and Hazelnut Loaf, just to name a few.
Her series of mini-loaves is wonderful, starting with her Master Baby Loaf, and moving on to Whole Grain Spelt and Seeds, Cumin and Carrot Loaf, and other tasty options to make a small loaf, great if you don’t have a huge family, or if you just want to experiment with new flavors.
Moving on, she introduces breads that are baked in a loaf pan, starting once again from her Master Sandwich Loaf Recipe, and adding complexity as new ingredients are added. Enriched Brioche-Style Loaf, Potato Water Spelt Loaf, Cheese and Chipotle Ketchup Babka (Sally faints!) are some examples included. Have I mentioned the photos are gorgeous?
So that brings me to
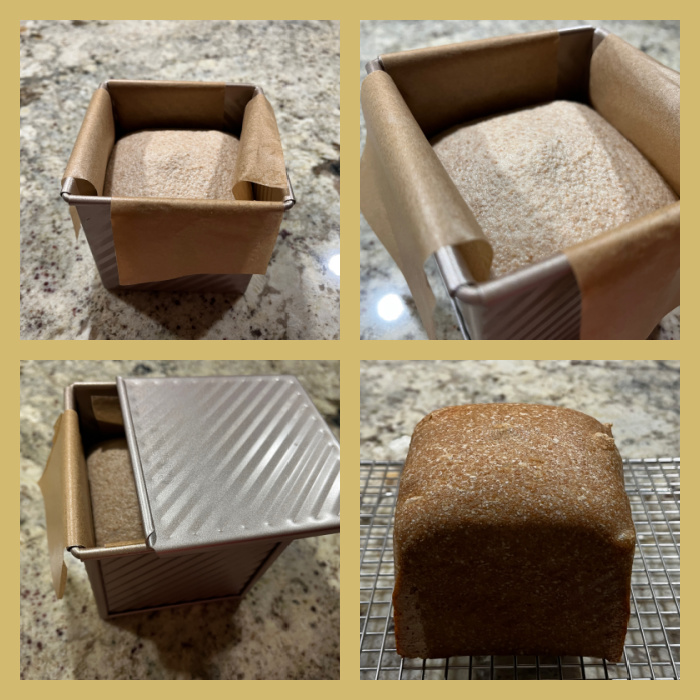
THE TEASER RECIPE
This tiny little bread is made in a mini-pan with the shape of a cube. I am soooo totally in love with it, the flavor was outstanding, and what a fun bread to make…
This one is her Whole Grain Spelt Cube Loaf. Several other recipes using this pan with or without a lid are waiting for you, so place an order for her book, if you haven’t yet already. For instance, you can use the cube pan to make a Chocolate-Filled Vanilla Swirl Loaf, or a Banana Walnut Swirl Loaf. All adorable… What are you waiting for?
Focaccia: Amazing collection of goodies. From the master recipe she creates Red Onion and Chive Focaccia, and playing with small versions she shares Blue Cheese and Fig Baby Focaccia, so cool for a dinner party. In another departure of shaping, you will find Wedge Rolls, a super clever way to deal with a batch of sourdough. My favorite of this section is the Seeded Wedge Rolls, for sure. I need to bake a batch.
Yet another creative way to play with the concept of bread, Elaine makes a series of “Snug Rolls” , in which goodies are incorporated by lamination and the rolls treated as you would a cinnamon roll type bake. Garlic Butter, Cinnamon Rolls, Cheese and Caramelized Onion Jam are some examples of “snug rolls” in this part of The Sourdough Bible.
Maybe you rather have your rolls kiss gently instead of hug together? Go for her series of “Round Rolls” that features Herby Za’atar is there… Whole Grain and Chocolate Hot Cross Buns, both called my attention right away.
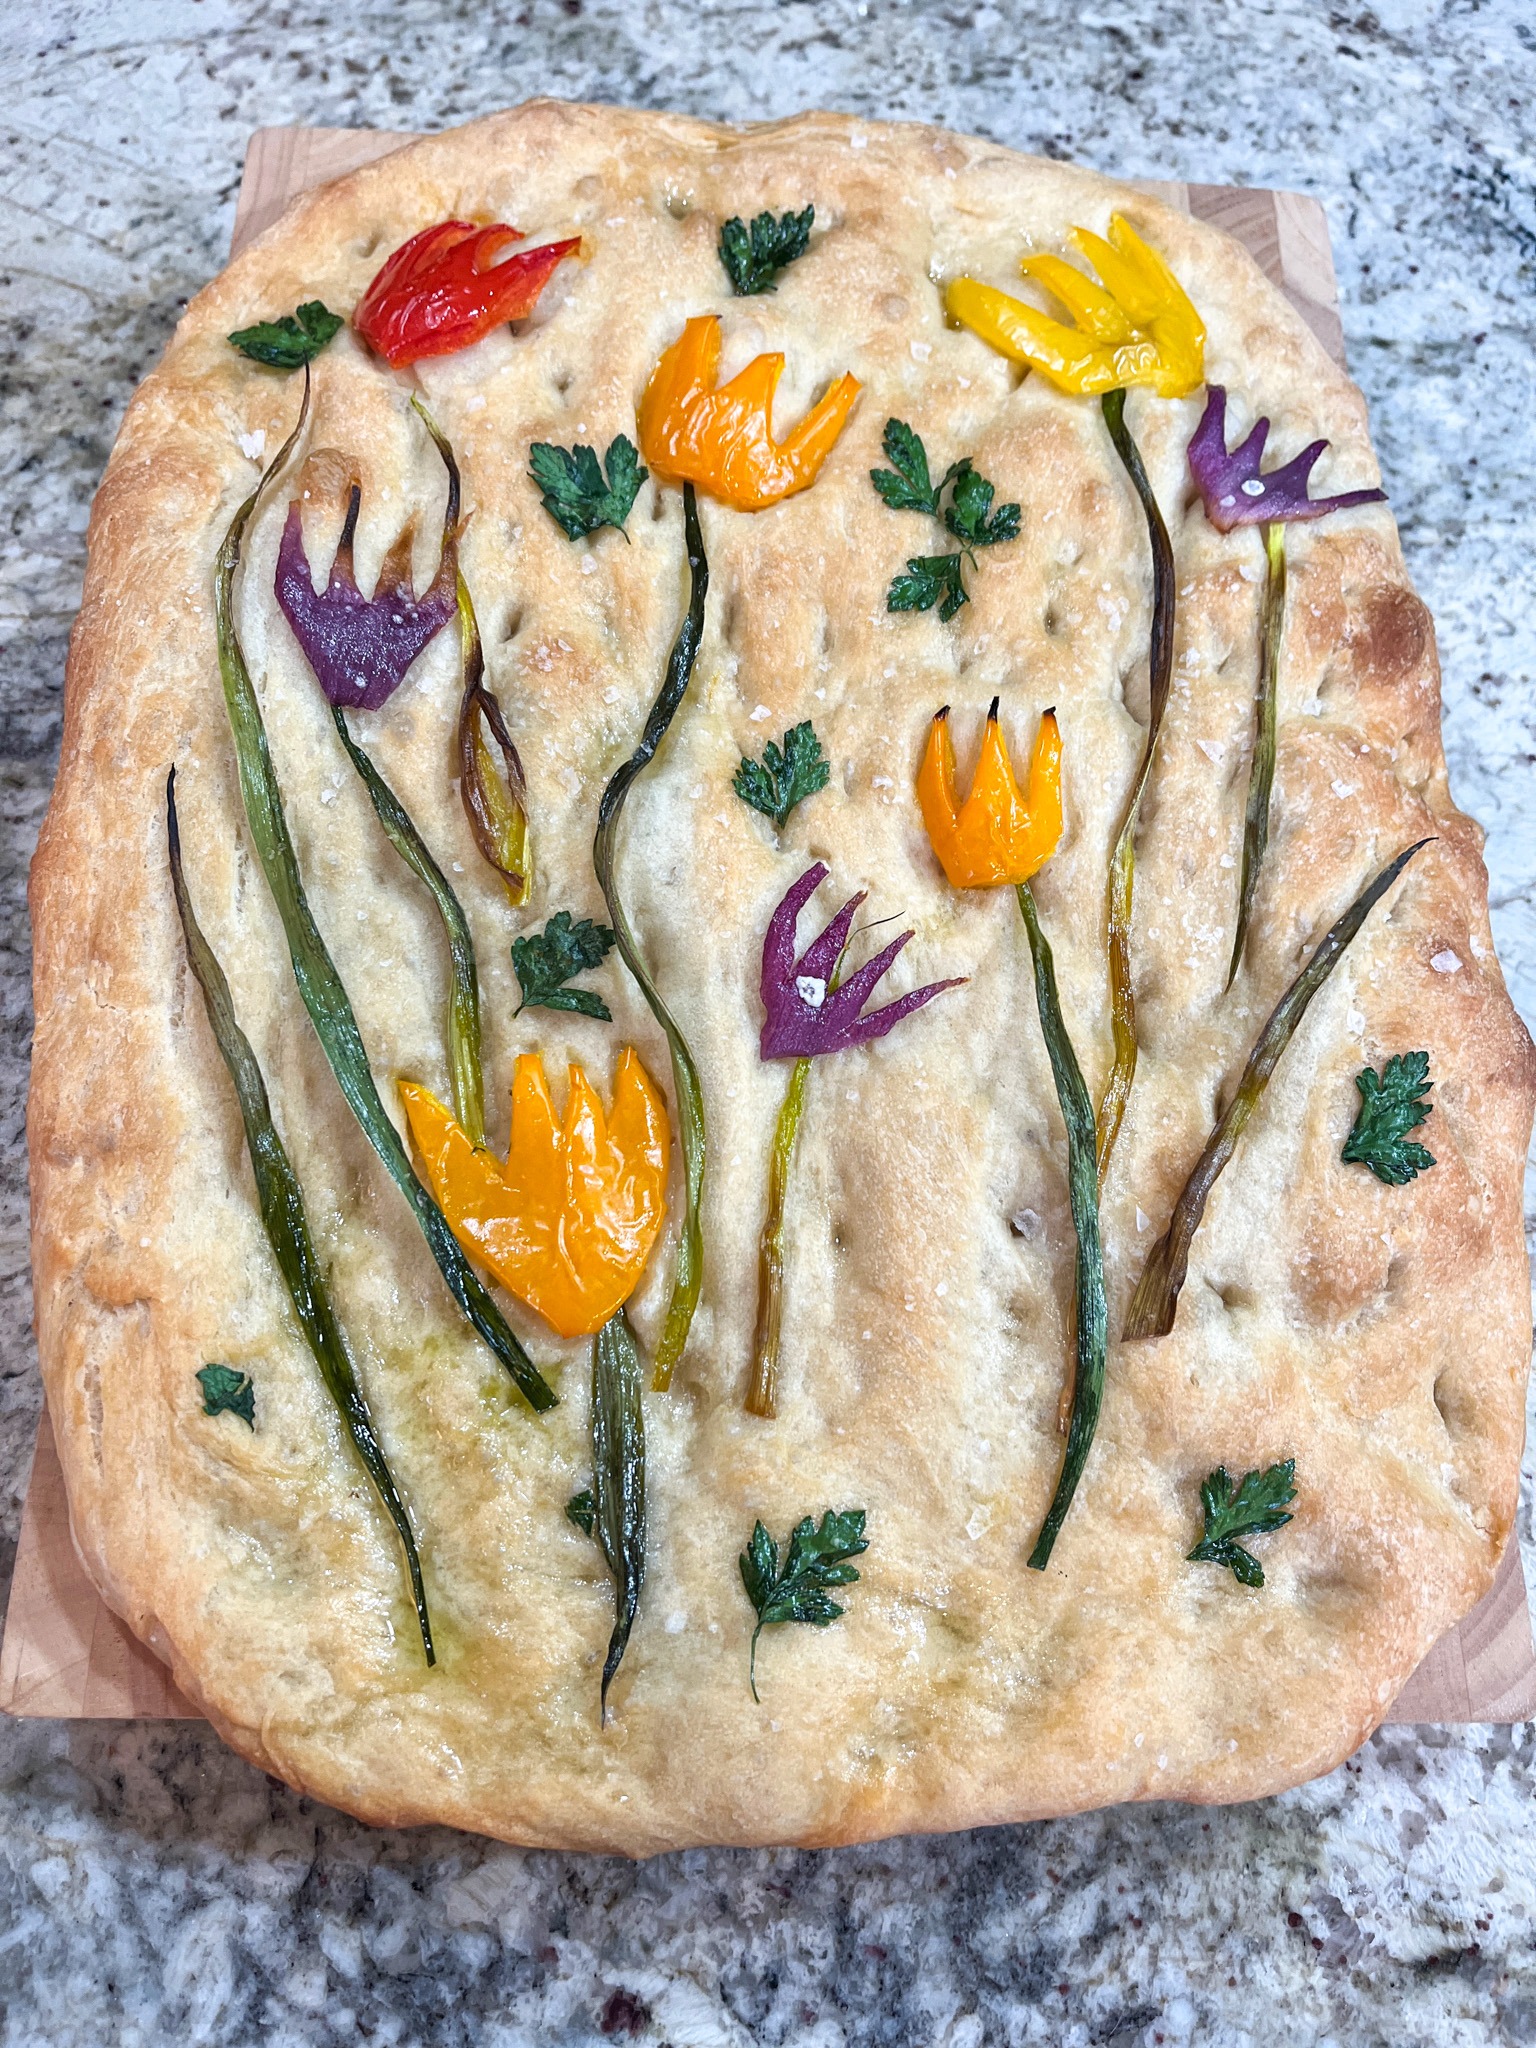
Flatbread and Pizza comes next, from the Master Recipe to variations such as Herb and Parmesan Flatbreads, Spinach and Goat Cheese Pizza, Pomegranate Molasses Roasted Vegetables Flatbread.
If you think Bundt pans cannot bake sourdough bread, think again. Elaine puts them to great use, making showstopper loaves with all sorts of flavor and flour combinations. Chocolate Orange Loaf, Cheese and Pickle (I am sure we would LOVE this one!) and, ready for this? A COOKIE LOAF! Just amazing…
This part of the book closes with recipes using discard sourdough, and my favorite is the Uzbek flatbread, as I have those gadgets and love putting them to use. Crepes, Chocolate Chip Rye Pancakes, Everything but the Bagel Crackers are other examples.
We arrived at the final, Part 3 of the book. This section covers Tips and Tricks for Mastering Sourdough. No matter your level in brea baking, it is a great source of information, but beginners in particular will benefit from it. Essentially every single question a person might have about sourdough baking is covered in this chapter. A must-read.
I have every one of Elaine’s books, but I will have to say she outdid herself with The Sourdough Bible… it is a must-have for anyone interested in sourdough baking, and the best source for beginners because it offers a simplified, straightforward approach to sourdough, without unnecessary complications and endless, rigid rules. Go have fun in the kitchen, bake great sourdough bread, let Elaine be your guide!
ONE YEAR AGO: La Buche de Noel
TWO YEARS AGO: Incredibly Simple Apple Carpaccio
THREE YEARS AGO: Chocolate-Cherry Miroir Cake, A Vegan Showstopper
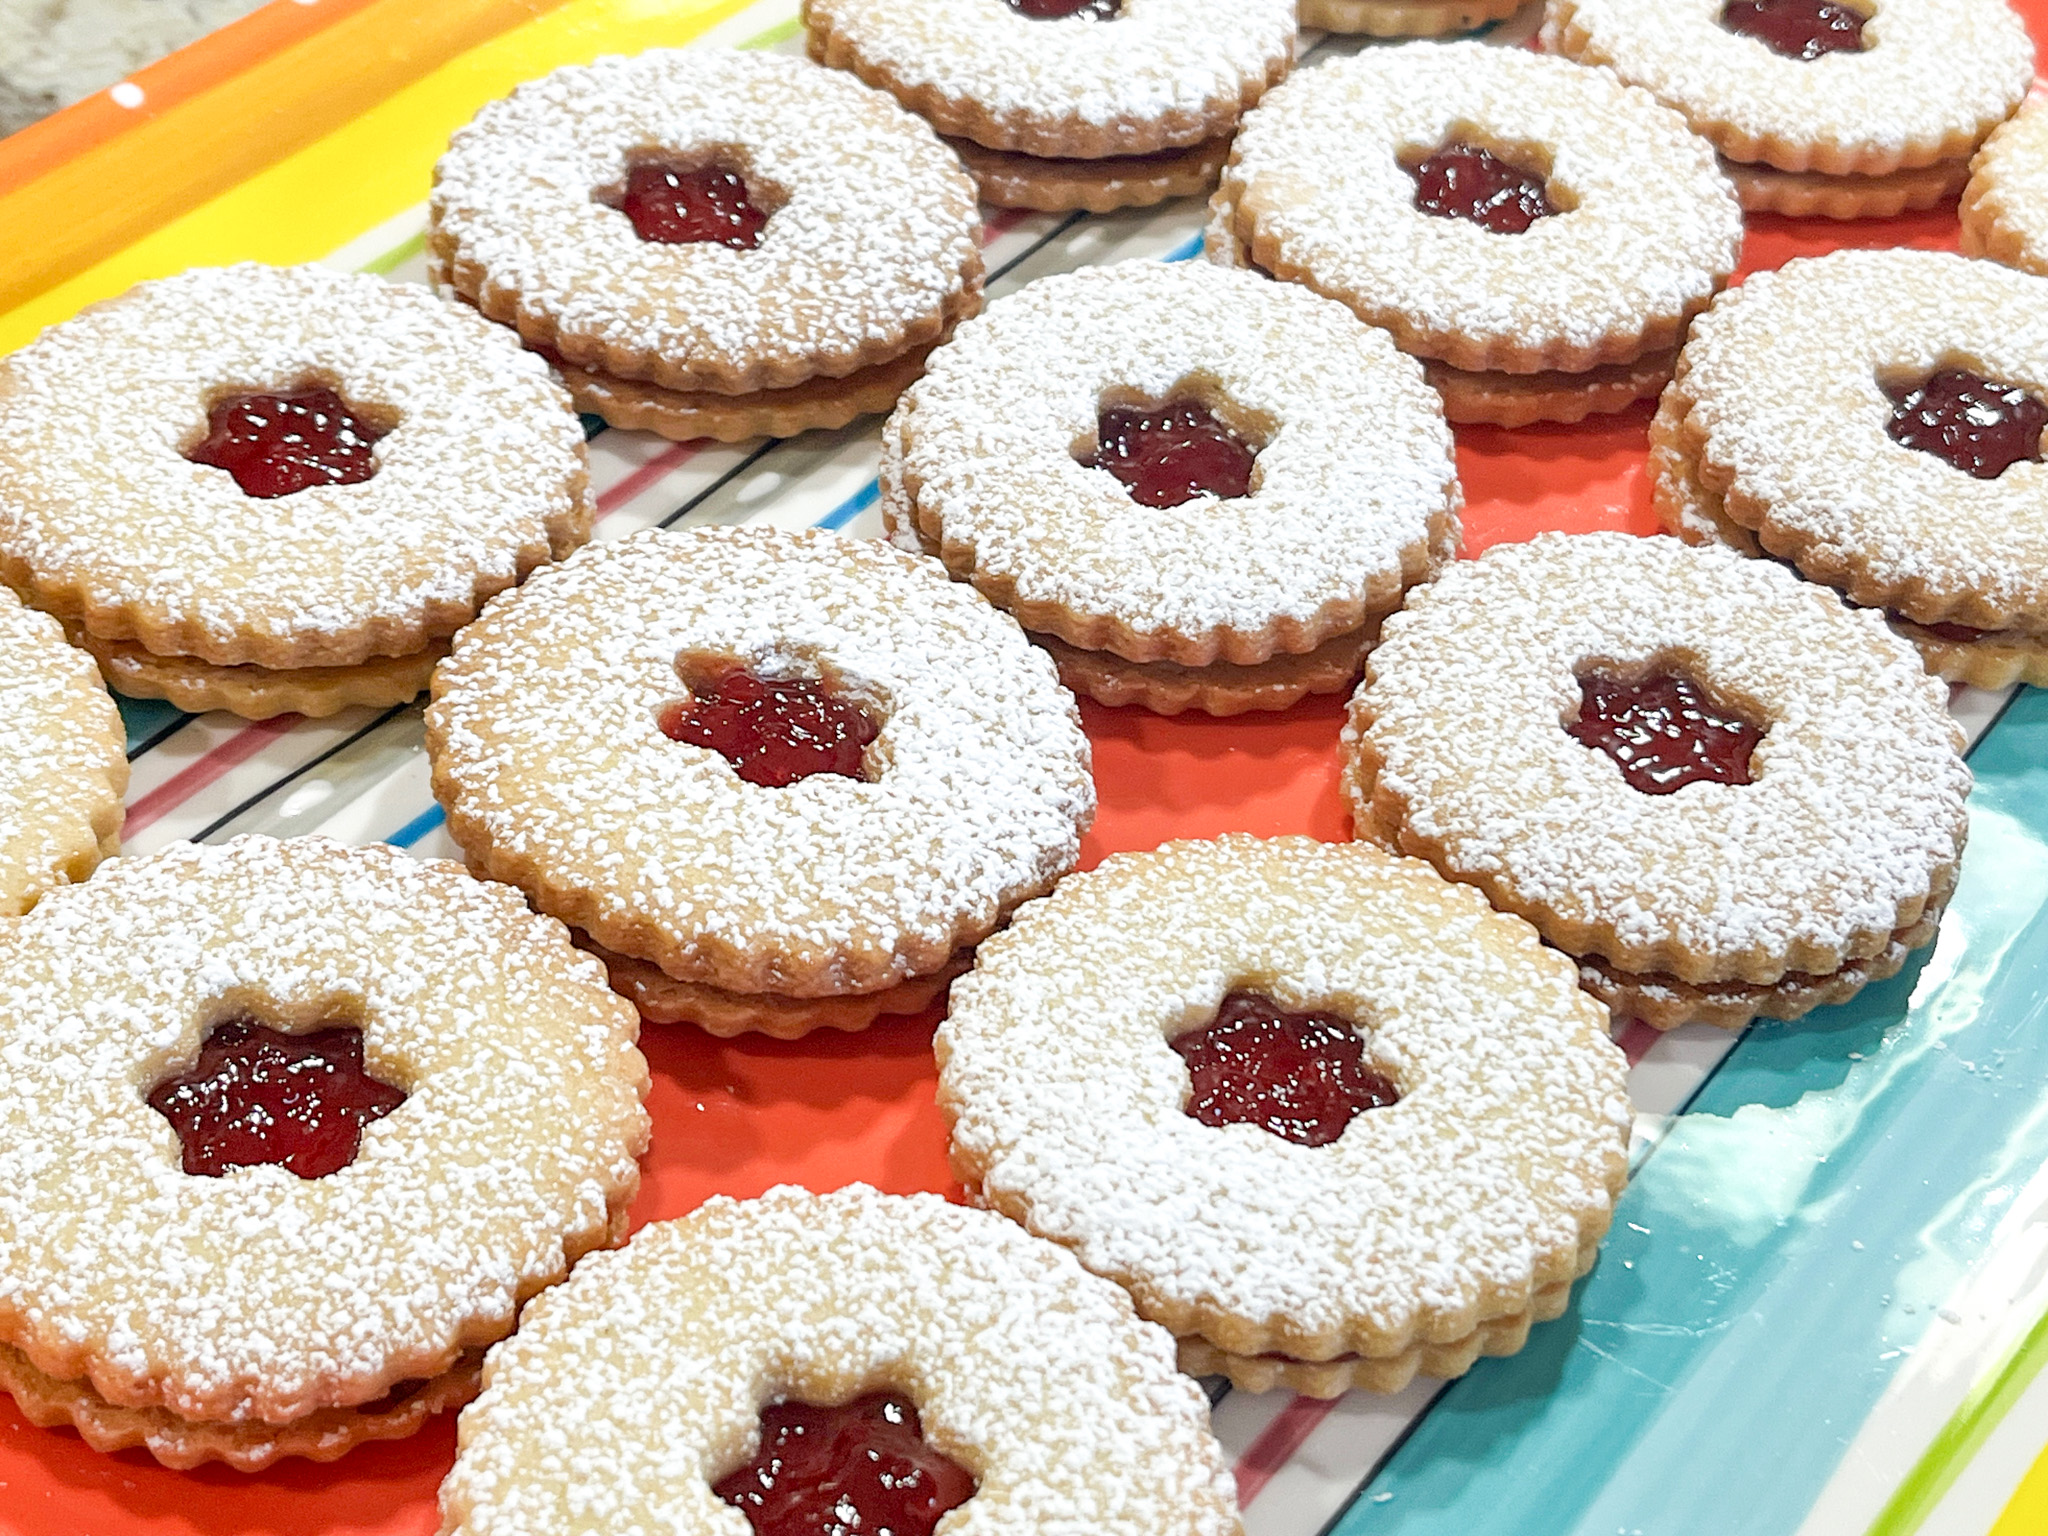
FOUR YEARS AGO: Bee Happy Honey Macarons
FIVE YEARS AGO: Episode 7 of Great American Baking Show, Canapes, Opera Cake and Running out of Gas
SIX YEARS AGO: Raspberry Ganache Macarons
SEVEN YEARS AGO: Pain au Chocolat
EIGHT YEARS AGO: Two Unusual Takes on Roasted Veggies
NINE YEARS AGO: Kadoo Boranee: Butternut Squash Perfection
TEN YEARS AGO: Creamy Broccoli Soup with Toasted Almonds
ELEVEN YEARS AGO: Fennel and Cheddar Cheese Crackers
TWELVE YEARS AGO: A Festive Pomegranate Dessert
THIRTEEN YEARS AGO: My First Award!
FOURTEEN YEARS AGO: A Message from WordPress
FIFTEEN YEARS AGO: Turkish Chicken Kebabs