REVVING THE ENGINES FOR HALLOWEEN!


It is almost time!!!! I share with you three baking ideas to keep you appropriately spooked…

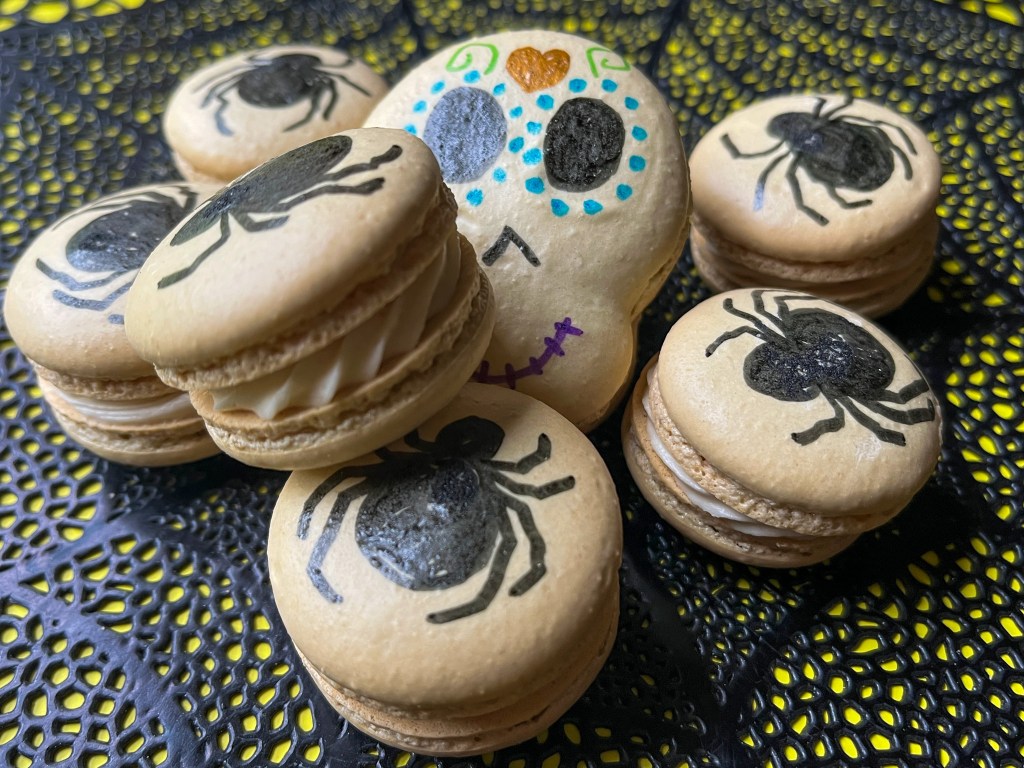
SKULL AND SPIDER MACARONS

The idea for these came from my friend Dorothy, who tagged me on Instagram after seeing this post. I opted for a filling of Caramel Buttercream and Apple Jelly for these scary creatures.

CARAMEL AND APPLE MACARONS
(from the Bewitching Kitchen)

for the shells, use my default recipe.
I dyed the shells with a very small amount of AMERICOLOR CORK

For the filling:
60g butter
120g powdered sugar
pinch of salt
5 soft caramels (Werther’s)
2 tablespoon milk
apple jelly (store-bought is ok)

Pipe the shells in skull shape or round (if you prefer to simplify). Bake them, let them cool, and pair them.

Draw the design of your choice (skull or spider) on the shells.

Make the buttercream: beat the room temperature butter for a couple of minutes. Add the salt and powdered sugar, beat until almost incorporated (mixture will be dry). Microwave the caramels with the milk until very hot, and whisk the caramels to dissolve. Let them cool slightly and add to the buttermilk. Finish creaming everything together, you should not need to add any more liquid, but if necessary, add a few drops of milk to achieve piping consistency.

Add a circle of buttercream to the bottom shell, a little blob of apple jelly in the center, and close the macaron with the top shell. Keep in the fridge for 24 hours before eating.

ENJOY!

to print the recipe, click here


Comments: The idea for the filling came from this post. That is a great site for macaron ideas, by the way. I did not make a template for the skulls, just improvised them starting from a regular circle, so they are not all the same shape, which I think is even better for a spooky bake.


SPOOKY CHOCOLATE-COVERED OREOS
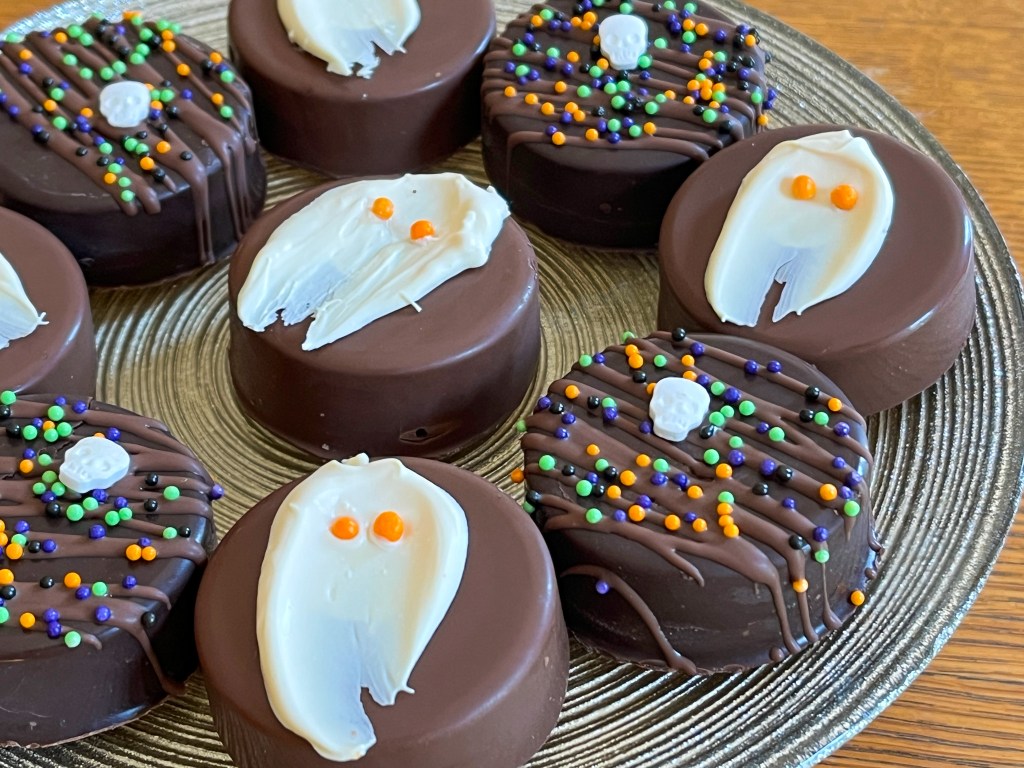
Use your regular mold for covering Oreos and use a contrasting color of chocolate to drizzle and glue sprinkles. The ghost is made with a smear of white compound chocolate on parchment paper, and orange sprinkles for the eyes. Once that is set (within a few minutes), place on the covered Oreo with a tiny amount of melted chocolate.


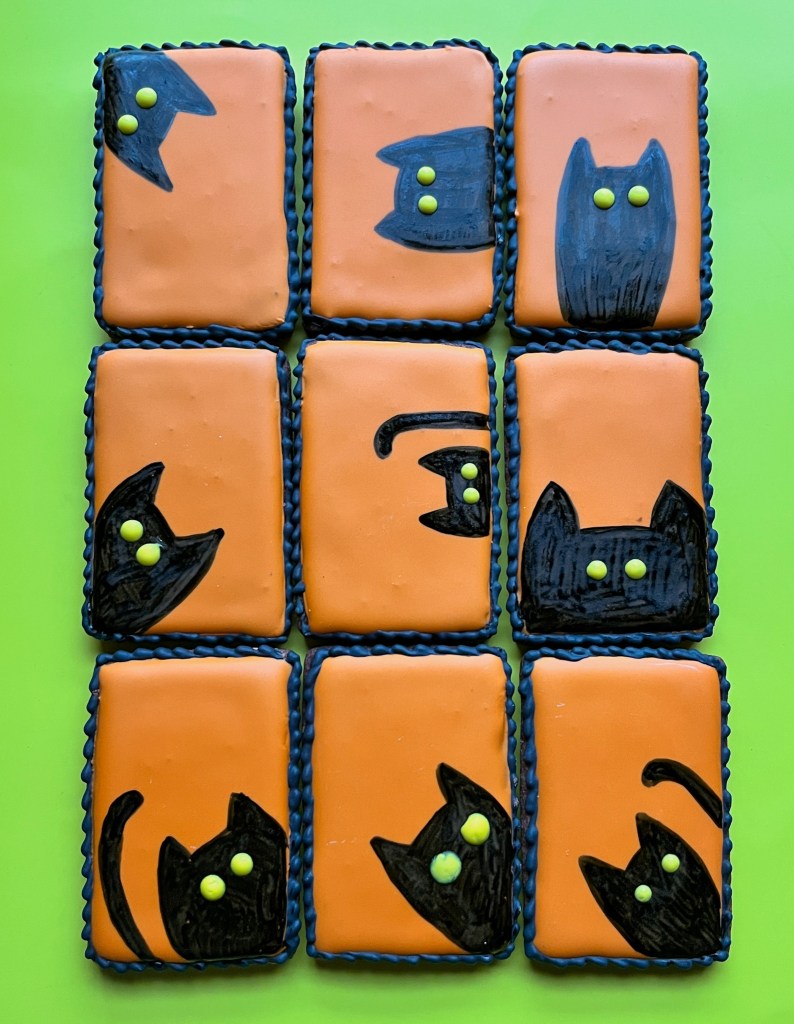
NINE BLACK CATS

These are my default Chocolate-Chipotle cutout cookies, iced with orange Royal icing and painted with Sugarprism. I just did a free-hand drawing, following the design of Kathy Barbro (IG page here).

ONE YEAR AGO: Happy Halloween from my Cookie Blog to You!

TWO YEARS AGO: Incredibly Simple Carrots

THREE YEARS AGO: Sarah Bernhardt’s Cookies

FOUR YEARS AGO: A Really Big Announcement

FIVE YEARS AGO: Stir-Fried Chicken in Sesame-Orange Sauce

SIX YEARS AGO: Monday Blues

SEVEN YEARS AGO: A New Way to Roast Veggies

EIGHT YEARS AGO: Two Takes on Raspberries

NINE YEARS AGO: Spice Cake with Blackberry Puree

TEN YEARS AGO: Own Your Kitchen with Cappuccino Panna Cotta

ELEVEN YEARS AGO: Chicken Parmigiana, the Thriller

TWELVE YEARS AGO: Wild Mushroom Risotto

THIRTEEN YEARS AGO: Tartine Bread:  Basic Country Loaf 

FOURTEEN YEARS AGO:  Pugliese Bread

MY VERY FIRST VIDEO TUTORIALS

Recently I was asked to demonstrate how to make the Uzbek cookies that I blogged about last month (read about it here). Because the pattern can be easily lost during baking, I’ve been trying it with different cookie recipes and the one I shared in that post is one of my favorites. I used it for these video tutorials.

.

Here is the first video, with special thanks to Prince Freckles of Tatarrax, for his guest appearance.

.

The second video shows how I paint the cookies, using Sugarprism.

I made the cookies using pistachio flour, but you can substitute almond or pecan flour, and flavor it with any extract of your choice. Once you add all the ingredients, you might have to add a little more flour (like I mentioned in the video) because depending on the size of your egg and the moisture of your flours, the dough might require a little extra.

I hope you find the tutorials useful. I need to learn my way better, paying more attention to centering the image and also avoid banging the holder of the cell phone with my arm. But I had a lot of fun making the videos and might do others in the future…

Let me know what you think!

PISTACHIO SUGAR COOKIES, THE UZBEK WAY

I am absolutely in love with this recipe, which I adapted from past adventures to incorporate pistachio flour to the party. It is hard for me to pick a favorite cutout sugar cookie recipe, but this is a very strong contender. Plus, it has the advantage of keeping the shape for patterns from molds, rolling pins, and…. a bread stamp! Yes, this post joins bread with cookies, by using the Uzbek stamp to create a design. I tell you, I am over the moon with these! To see the bread stamp used for its intended purpose, visit this old post of mine by clicking here.

PISTACHIO SUGAR COOKIES
(from The Bewitching Kitchen)

150 g butter, room temperature
90 g powdered sugar
1 g salt
1 egg (45 to 50g)
30 g pistachio flour
250 g all purpose-flour
1/2 tsp pistachio bakery emulsion (I used this one from LorAnn)
1/2 tsp vanilla extract

Cut the butter in small pieces, add to the bowl of a Kitchen Aid type mixer with the sugar and salt. Mix on medium-speed until creamy and light.

In a small bowl, whisk the egg with the flavor emulsions. Add to the creamed sugar in low speed, in three additions. Scrape the sides of the bowl with a spatula to make sure everything is mixing homogeneously. Once the butter and egg are mixed, add the flours. Mix on low speed until it starts to form a dough, remove from the bowl and gently knead by hand until smooth.

Form a disc and refrigerate for 30 minutes. Roll the dough, cut cookies and gently press with the Uzbek stamp tool dipped in flour to prevent it to stick to the dough. Depending on how soft your dough is, you might need to brush a little flour on top before pressing the design.

Freeze the cut and stamped cookies for 10 to 15 minutes before baking at 325F until it starts to get dark on the edges. Fifteen to twenty minutes, depending on your oven. Remove to a cooling rack and paint once the cookies are at room temperature.

ENJOY!

to print the recipe, click here

Comments: Take a look at that speckled dough! The pistachio flour adds wonderful taste and texture to the cookies. Please give it a try. Cookies will be great even baked without any adornment. Of course, if you sandwich them with some lemon buttercream or a pistachio ganache, I won’t hold any of it against you.

For more ideas on how to paint them, and details on the Uzbek stamp, please visit my cookie blog with a click here.

ONE YEAR AGO: Carrots and Zucchini Stir-Fry with Peanut Sauce

TWO YEARS AGO: Cookie Therapy, Anyone?

THREE YEARS AGO: The Quasi-Vegan Quiche

FOUR YEARS AGO: Not Quite Moqueca

FIVE YEARS AGO: Roasted Butternut Squash with Cashew Nuts

SIX YEARS AGO: Mississippi Roast and the Open Mind

SEVEN YEARS AGO: Walnut-Raisin Bran Muffins

EIGHT YEARS AGO: A Star is Born!

NINE YEARS AGO: Chestnut Flour Sourdough Bread

TEN YEARS AGO: Kinpira Gobo and Japanese Home Cooking

ELEVEN YEARS AGO: Walnut Sourdough

TWELVE YEARS AGO: Thai Chicken Curry

THIRTEEN YEARS AGO: Zen and the art of risotto

SUGARPRISM PAINTED LINZER COOKIES


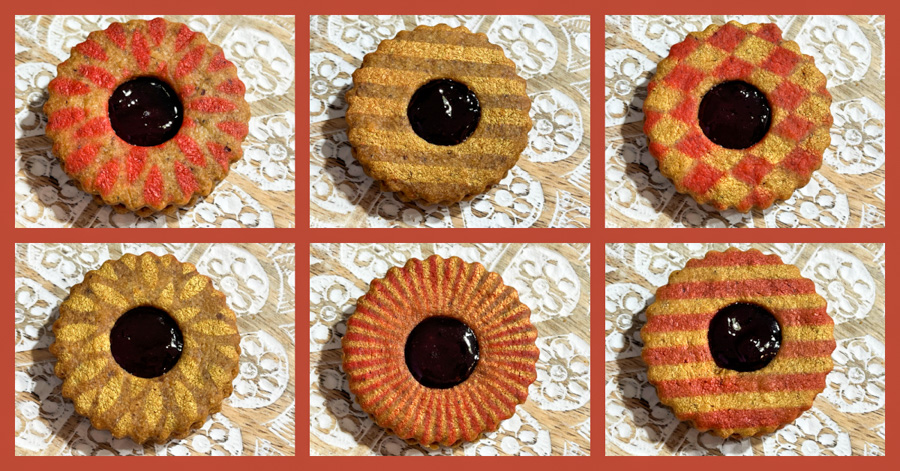
Linzer Cookies are one of my favorites and this recipe starts by toasting hazelnut flour. Do not skip this step, because it is a huge flavor boost to your cookies. Traditionally, they are finished with a dusting of powdered sugar, making them a little messy to eat. Inspired by Michele, the very inventor of Sugarprism, I skipped that and coupled Sugarprism in Red Lipstick color with a few stencils for a totally different look. I also used some air-brush gold from Chefmaster to create contrast, as my cookies were a little dark to start with.


SUGARPRISM PAINTED RASPBERRY LINZER COOKIES
(adapted from Food Duchess)

75 g hazelnut flour
160 g all-purpose flour
1/4 tsp salt
3/4 cup unsalted butter, at room temperature
100 g granulated sugar
1 tsp cinnamon
25 g egg yolk (about 1 large)
1 tsp vanilla
1/4 cup seedless raspberry jam

Sugarprism diluted to air-brush consistency in Lipstick Red (optional)
Chefmaster air-brush gold (optional)

Heat oven to 350°F. Cover a baking sheets with parchment. Evenly spread hazelnut flour onto the paper and bake for 5 to 10 minutes, moving it around often so that no spots get overly roasted. Remove the toasted flour from the oven and allow to cool for 30 minutes.

In a medium mixing bowl, whisk together the cooled hazelnut flour, all purpose flour, and salt. Set aside.

In a stand mixer fitted with the paddle attachment, beat together the butter, sugar, and cinnamon, until light and fluffy – about 3-5 minutes. Add egg yolk and vanilla, then beat again until well-combined. Add flour mixture to the stand mixer and beat until just combined and a crumbly looking dough has formed.

Remove dough from stand mixer and lightly form into a disk shape with your hands. Place dough-disk onto a heavily floured surface, and roll the dough out to about ⅛-¼” thick. Cut the cookies in you desired shape and size, cutting a hole in the center of half the cookies. Those will be the top. Bake for about 10 minutes, until the edges start to get darker. Remove from the oven and allow to cool before proceeding.

Use a stencil to add a pattern to the cutout cookies. Spread jam on the cookie base, top with the decorated cookie.

ENJOY!

to print the recipe, click here

Comments: I used 4 different stencils and coupled them either with a single color (Sugarprism Lipstick Red or Chefmaster gold) or with both combined, by moving the stencil to expose adjacent regions. It is hard for me to pick a favorite, but I might go with the one below…

It was fun to play with different patterns…


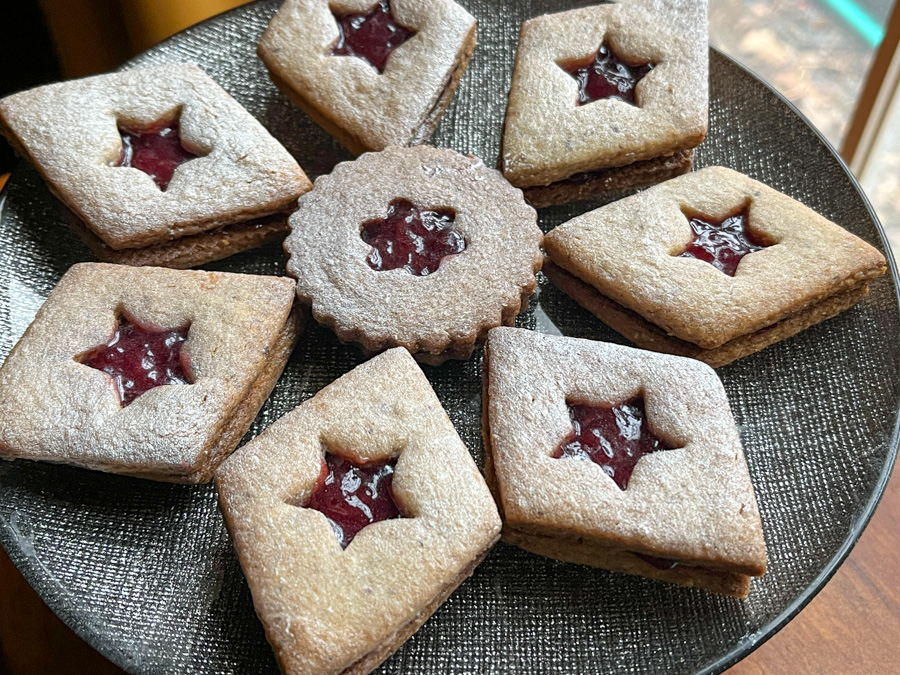
Another very easy way to give Linzer a new face, is simply spraying the top cookie with PME or Wilton pearl spray right on the baked cookie, before assembling.

The spray leaves no after-taste, so it won’t interfere with the cookie flavor. The possibilities of decoration are endless, so stay tuned for future important experiments on this subject…

ONE YEAR AGO: Kamut and Broccoli Salad

TWO YEARS AGO: Charcoal Peanut Sourdough

THREE YEARS AGO: Chocolate Cake with Coconut Buttercream

FOUR YEARS AGO: Berry Rebellion Tarts 

FIVE YEARS AGO: Bergamot-Cherry Macarons

SIX YEAR AGO: Roasted Veggies with Queso Cotija Dressing

SEVEN YEARS AGO: Creamy Broccoli and Mushroom Casserole

EIGHT YEARS AGO: Maple Walnut Biscotti

NINE YEARS AGO: Barley Risotto with Peas

TEN YEARS AGO: Oatmeal Fudge Bars

ELEVEN YEARS AGO: Cauliflower Steaks

TWELVE YEARS AGO: Soft Spot for Chevre

THIRTEEN YEARS AGO: Quick sun-dried Tomato Crostini

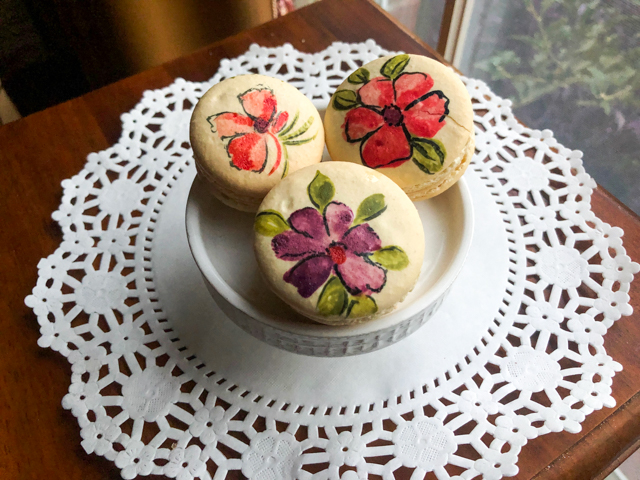
SUGARPRISM WATERCOLOR MACARONS

In case you’ve missed it, I’ve been keeping a second blog dedicated exclusively to cookies (click here to visit For the Love of Cookies). Back in July, I wrote a post about Sugarprism, a new product I fell in love with. Michelle, the inventor of Sugarprism hosts a page in Facebook entitled “Painting with Sugarprism“, and I highly recommend that you visit and join if the subject interests you. She is an amazing artist, and offers FREE – you read that right: FREE – tutorials of specific painting techniques. I took her 90 min lesson on watercolor painting of macarons and could not wait to share my babies here. So there you go. I took the class on Sunday, and the post is ready 36 hours later. That’s because I am over the moon with the whole experience! Can you tell?

VEGAN COFFEE GANACHE MACARONS
(adapted from Pies and Tacos)

for shells:
110 grams almond flour
110 grams powdered sugar
75 grams aquafaba
1/4 teaspoon cream of tartar
66 grams granulated sugar
tiny amount of Americolor GOLD food gel dye

for vegan coffee ganache:
1/3 cup coconut cream
60g semisweet chocolate chips (vegan)
2 tsp espresso powder

Process the almond flour and powdered sugar in a food processor for about 20 seconds total using short pulses. Sift the mixture and reserve.

Place the aquafaba in the bowl of a mixer. Start whipping on low speed and add the cream of tartar. Whip for about 30 seconds, until the aquafaba starts getting white and thick like soup. Raise the speed to medium and continue to whip for another couple of minutes, until you are able to see streaks left by the whisk on the aquafaba. Raise the speed to high, and start to add the granulated sugar, slowly, a bit at a time. Continue to whip until the aquafaba achieves stiff peaks, which can take 10 minutes or more, depending on your mixer. Add the food color close to the end of whipping.

Add the sifted dry ingredients to the whipped aquafaba. Start folding with a spatula slowly. Fold the batter forming a letter J with the spatula. You will fold until the batter is flowing slowly but effortlessly off the spatula.  Transfer the batter to the piping bag. Pipe circles on a baking sheet lined with silicon mat. Slam the trays against the counter to release air bubbles. Let the trays rest for 30-45 minutes until the shells are dry.

Heat the oven to 285ºF. Bake one tray at a time for a total of 20 minutes, or until the macarons tops do not twist independently of the bottom if you try to rotate them.

Make the filling: Heat up the coconut cream until hot. Pour over chocolate chips. Whisk until all chocolate chips have melted, add the espresso powder and whisk until fully smooth. Chill it in the fridge for a few hours. Remove from the fridge about 40 minutes before you wish to fill the macarons. This will help the ganache have the perfect consistency. Assemble shells, fill with ganache, and decorate as desired. Leave in the fridge for 24 hours for perfect consistency.

to print the recipe, click here

Comments: Never in a million years I imagined I could paint in real time as the instructor is showing the technique and be very happy with the outcome. Michelle shows exactly how to do it, it’s all in the angle of the brush, the amount of paint, and how you move the brush to get the different styles of petals. You would think that painting macarons would be super time-consuming but once you get the gist of it, it goes fast and it is oh-so-very-Zen…

The vegan coffee ganache surprised me by how much I liked it. Very easy to make, and contrary to regular cream-based ganache, it reaches piping consistency faster in the fridge. I will be trying different versions, not necessarily to couple with vegan shells.

Michelle, I cannot thank you enough for the great tutorial,
I enjoyed each minute!

ONE YEAR AGO: Dutch Macarons and a cookbook review

TWO YEARS AGO: Yogurt Tart

THREE YEAR AGO: Grilled Lamb-Stuffed Pita Bread

FOUR YEARS AGO: Elderflower Macarons

FIVE YEARS AGO: A Duet of Sorbets

SIX YEARS AGO: Sobering Peach Sorbet

SEVEN YEARS AGO: Spiralizer Fun

EIGHT YEARS AGO: Beer-Marinated Grilled Skirt Steak

NINE YEARS AGO:  Secret Recipe Club: Corn Chowda

TEN YEARS AGO: Page-A-Day Calendar (Pits and Chief 5 minutes of fame…)

ELEVEN YEARS AGO: Home Sweet Home (our beloved Pits in one of his last photos)

TWELVE YEARS AGO: Marbled Rye