SILIKOMART RAGGIO

I have quite a few Silikomart cake molds for the most part acquired before the Great Pandemic of 2020, when I was baking cakes to include in my donation box. Once Covid hit, I went through a long time of donating exclusively stuff that could be individually wrapped, and cakes went into the back burner. Now I am set on trying to bring my molds to play, and plan to bake one cake every week. Should be a fun little adventure. Today it is time for Raggio to shine! ( Mold available here).


RAGGIO VANILLA AND CHOCOLATE CAKE
(adapted from several sources)

for the cake:
3 large eggs at room temperature
140 g white sugar (about 2/3 cup)
180 g butter, softened (about 3/4 cup)
1 tsp vanilla extract
225 g all-purpose flour (about 1 + 3/4 cup)
1 tsp baking powder
1/2 tsp salt
90 ml milk at room temperature (about 1/3 cup + 1 tablespoon)
60 g dark chocolate, finely chopped

for the ganache:
60 g dark chocolate
30 ml whipping cream
sprinkles of your choice


Heat oven to 350F.

Sift the flour, baking powder and salt together in a medium bowl. Reserve.

In the bowl of a KitchenAid type mixer, cream the butter together with the sugar for several minutes, until light and fluffy. Gradually add the eggs to and mix each time until incorporated, then the vanilla extract.

Turn off the mixer. Add the sifted mixture of flour, and the milk, dividing the flour in three portions, and the milk in two. Start and end with the flour, eye-balling the amount it totally fine. Once all is incorporated, fold the chopped chocolate gently.

Spray your Silikomart or other Bundt pan (about 1.5 L volume). Pour the batter into the pan and level it gently with an offset spatula. Bake at 350F for 40-50 minutes or until a toothpick inserted in the center of the cake comes out clean.

Remove from the oven and wait until the cake is warm before removing it from the pan. I left it sit for about 30 minutes and it un-molded easily.

Make the ganache: Heat the cream until almost boiling and pour over the chocolate. Wait a few minutes, then whisk gently to combine. It should be smooth and shiny. Once it cools a bit, but it is still runny, pour over the cake. It is important that the consistency is right, so that it won’t simply run off the edges. Decorate with sprinkles before it is fully set, so they glue to the surface.

ENJOY!

to print the recipe, click here

Comments: The cake has such a beautiful shape that it would stand nicely with just a shower of powdered sugar. But the ganache is a perfect way to make it even more luscious. I cannot give personal feedback on the taste, as I donated the cake whole, but I heard that people really loved it… It is a simple cake, but the bits of chocolate add a lot, and of course the ganache makes it very festive. I hope that if you are like me, and have some Silikomart pans hiding in the depths of your basement, you’ll bring them to play…. Stay tuned for more in the future!

ONE YEAR AGO: Cremino a la Nociolla

TWO YEARS AGO: Roasted Broccoli and Apple Salad with Tahini Dressing

THREE YEARS AGO: A Different Kind of Cookie Swap

FOUR YEARS AGO: Scary Good Recipes for your next Halloween

FIVE YEARS AGO: Pumpkin Sourdough

SIX YEARS AGO: First Monday Favorite

SEVEN YEARS AGO: Secret Recipe Club: Paalak Paneer, a Farewell Post

EIGHT YEARS AGO: In My Kitchen, November 2015

NINE YEARS AGO: Helen Fletcher’s Oatmeal Cookies

TEN YEARS AGO: Thai-Style Pesto with Brown Rice Pasta

ELEVEN YEARS AGO: Shrimp with Spicy Orange Sauce

TWELVE YEARS AGO:  A Simple Appetizer (Baked Ricotta)

THIRTEEN YEARS AGO: Sour Cream Sandwich Bread

FOURTEEN YEARS AGO: Pasta with Zucchini Strands and Shrimp

A VERSATILE SILICONE PAN

Baking in silicone pans can be tricky, so my advice is to always use a good quality product. I stand by Silikomart, all the way. If you’ve been around my blog for a while, you know that I never accept products to review, and only recommend things I love. This little pan makes the cutest, two-bite size cakes. I share today four different bakes using it. The most important thing is to bake a little longer than you would in a metal baking pan, and allow the cakes to fully cool before trying to un-mold them. You can even let them come to room temperature and then place the pan in the fridge for 10 minutes to ensure a perfect release. For all these bakes I used the Silikomart Savarin Mold, medium. Available here. I always spray the inside very lightly with PAM baking spray.

CHOCOLATE CHIP FINANCIER MINI-CAKES

CHOCOLATE CHIP FINANCIER MINI-CAKES
(adapted from foodohfood)

80 g unsalted butter, diced
50 g almond flour
140 g powdered sugar
60 g all-purpose flour
1/2 tsp baking powder
1/2 tsp salt
150 g egg whites
50 g mini chocolate chips
chocolate ganache, or melted chocolate and sprinkles for decoration

Heat oven to 360F.

Make the brown butter. Put the diced butter in a pan and melt it over low heat. Simmer the butter until the water is evaporated, it should get a light caramel color and a nutty smell. Pass it through a sieve and allow it to cool.

In a bowl, mix the almond flour, powdered sugar, flour, baking powder and salt. Mix on low speed with the electric mixer or with the leaf attachment and gradually add the egg whites and then cold brown butter. Finally, add the chocolate chips. The batter is quite liquid, so use a piping bag to distribute it in the pan, filling almost 3/4 height.

Bake until a toothpick comes out clean, 15 to 20 minutes, depending on your oven. Let it cool completely before un-molding. Fill the center with ganache or melted chocolate, or leave it plain. Decorate with sprinkles, if desired.

ENJOY!

to print the recipe, click here

Comments: For the financier, filling not quite to the 3/4 height was perfect. I love the texture of these mini-cakes. You need tiny chocolate chips for this recipe (I’ve featured the ones I like in my last In My Kitchen post) If you don’t have it, cut regular chips in very small pieces. It is hard to pick a favorite, but these were truly delicious on all counts.

RED VELVET MINI-CAKES

Recipe used: America’s Test Kitchen Red Velvet as published in their book The Perfect Cake. I could not get permission to publish the recipe. If you have the book, my only change was to make half the amount. I still had batter leftover after making 10 mini-cakes, and that was enough for two regular size cupcakes. Recipe for the frosting below.

SMALL BATCH CREAM CHEESE FROSTING
(adapted from several sources)

2 ounces cream cheese softened
2 ounces unsalted butter, softened
1/4 teaspoon vanilla extract
80g powdered sugar, or more if you prefer a stiffer frosting
Pinch of salt

In a medium bowl, combine cream cheese, butter, and vanilla extract. Beat until well-mixed and fluffy.

Add powdered sugar and salt and continue to beat until sugar is completely incorporated and frosting is smooth and creamy. For a stiffer frosting, add more powdered sugar. Add the frosting to the cavity of the mini-cakes, and decorate with sprinkles, if desired.

ENJOY!

to print the recipe, click here

BROWNIE MINI-CAKES

I used my default recipe for brownie cupcakes and it worked very well in this shape. I filled the center with ganache and added sprinkles, because as you know, sprinkles make life better.

BROWNIE CUPCAKE
(from Bewitching Kitchen)

1 package Baker’s Unsweetened Chocolate (4oz)
1 stick (1/2 cup, 113 g) unsalted butter
265g sugar (1 + 1/3 cup)
2 room temperature eggs
1/2 tsp vanilla extract
1 cup (125g) all-purpose flour
1/2 tsp salt
1/2 tsp baking powder

Heat the oven to 350F.

Chop the chocolate and butter in pieces, place them in a microwave-safe bowl and melt at 50% power just until the chocolate is almost fully melted. Finish melting by whisking gently until smooth. Allow it to cool for 5 to 10 minutes.

In another bowl, mix flour, salt and baking powder. Reserve.

To the melted chocolate, add the sugar and mix with a handheld mixer, when the sugar is incorporated (it won’t be smooth), add the eggs, one at a time, then the vanilla extract. Whisk until smooth, for a couple of minutes medium-speed. Gently sift the flour mixture on top, whisk just until the flour is incorporated and no dry bits can be found.

Fill each cavity of the savarin mold a little less than 3/4 full. Bake for 15 to 20 minutes, until a toothpick inserted in the center comes out slightly moist. Cool completely before un-molding.

ENJOY!

to print the recipe, click here

Any of the icings I shared in my original post will work for these cupcakes, just pick sprinkles that match the flavor. But, for a simpler bake you can just dust them with powdered sugar. The shape is beautiful no matter now you finish it.

BLACK SESAME & CHAI MINI-CAKES

These cakes were made from a recipe found in the cookbook Masala and Meatballs, by Asha Shivakumar. I’ve had this book for several years and everything I made from it turned out excellent. I highly recommend it. For these mini-cakes, the batter takes black sesame paste, and I used my own icing from the Chai-Brownie Cupcake in this post. In Asha’s recipe, the icing was made with sweetened condensed milk as a base plus powdered sugar, so I opted for something a little less sweet.

I hope you’ll consider baking with little savarin molds, especially if you are sharing these with friends or co-workers. They are very small, and the format allows for just a little icing. I am always impressed by the beauty of iced cupcakes, but they can be quite over-indulgent. If you like to enjoy sweets but prefer some moderation, these have your name written all over…

ONE YEAR AGO: Buffalo Chickpeas

TWO YEARS AGO: Bi-Color Croissant and Pain au Chocolat

THREE YEARS AGO: Lemon-Blueberry Entremet Cake

FOUR YEARS AGO: Walk Strong3: Jessica Smith’s latest workout program

FIVE YEARS AGO: Pork Medallions with Black Berry Compote

SIX YEARS AGO: Indian-Spiced Chicken with Chickpeas and Spinach

SEVEN YEARS AGO: Curry Cardamon Cookies

EIGHT YEARS AGO: In My Kitchen, March 2014

NINE YEARS AGOBoeuf Bourguignon for a Snowy Evening

TEN YEARS AGO: Chickpea Salad

ELEVEN YEARS AGO: Soft Spot for Chevre

TWELVE YEARS AGO: Roasted Onion and Asiago Cheese Miche

MINI-HEART CAKES FOR YOUR VALENTINE


Valentine’s Day is so commercial. Who needs a special day to celebrate love and friendship? No one. We should all just ignore it. With that in mind, let me say I have no problem with a special day to shower all those special persons in your life with attention and affection. A partner, a special friend, that family member you look up to and adore. Today I share a recipe that seems a bit involved, but when you break it down into its components, it is quite simple. Trust me. I almost always speak the truth.

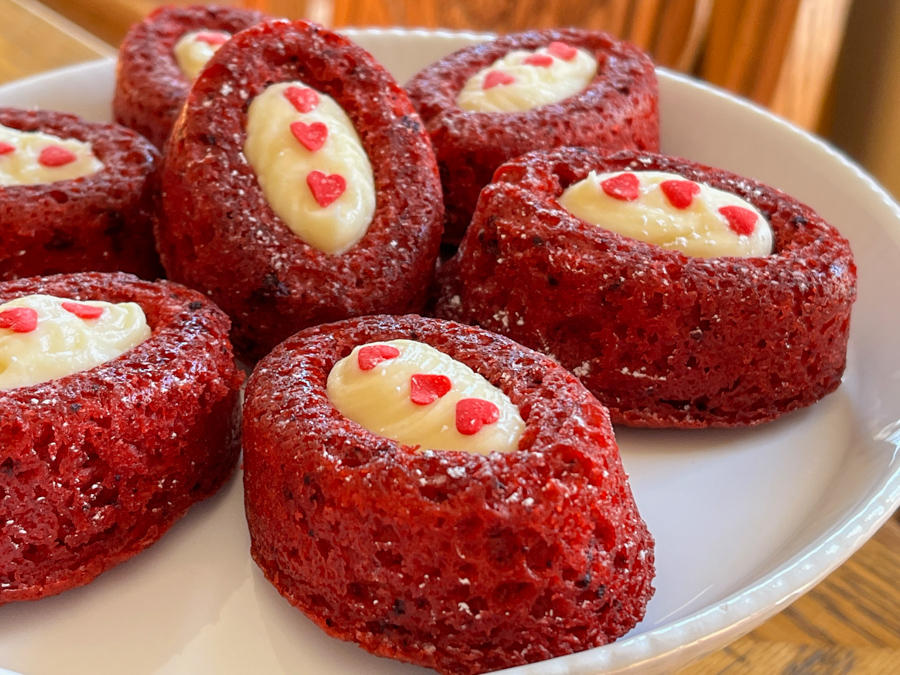
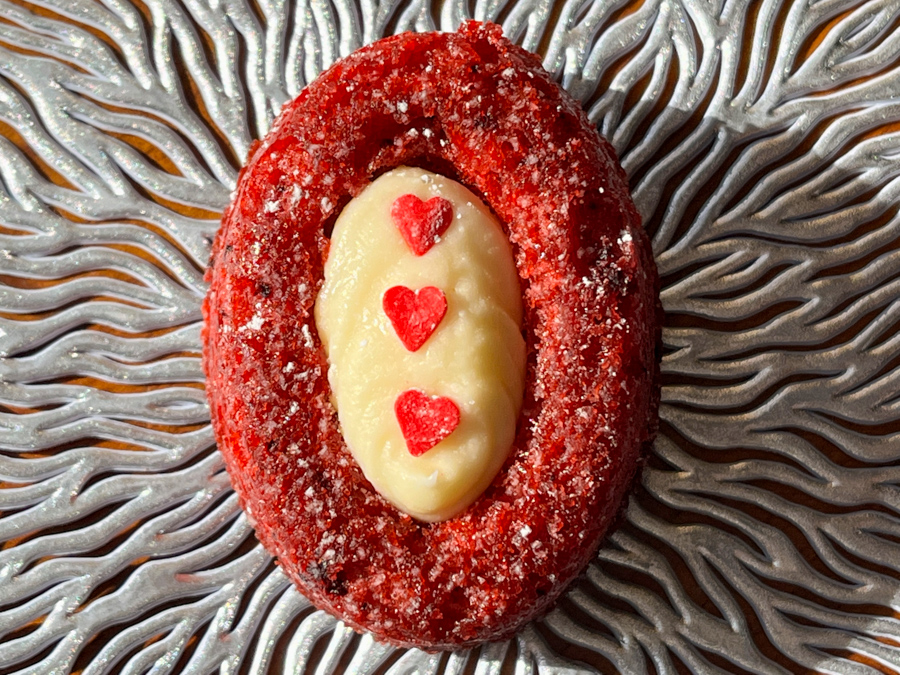
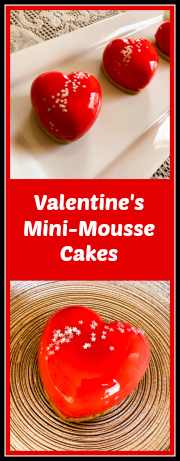
VALENTINE’S MINI-HEARTS MOUSSE CAKES
(inspired from many sources)

for the sable base:
120 g cold butter, cut in pieces
65 g powdered sugar
260 g all-purpose flour
30 g almond flour
pinch of salt
1 egg

Heat oven to 375 F.

Add the sugar, flour, almond flour and salt to the bowl of a KitchenAid type mixer fitted with the paddle attachment. Mix at low speed for about 30 seconds just to incorporate the ingredients together. Add the cold butter and process until the butter gets in small pieces, a bit smaller than pea-size. Add the egg and mix just until it starts to glue together as a dough, but stop before it all gets into a single mass to avoid gluten formation.  Gather the dough on a piece of plastic wrap and gently form it as a disk with your hand.

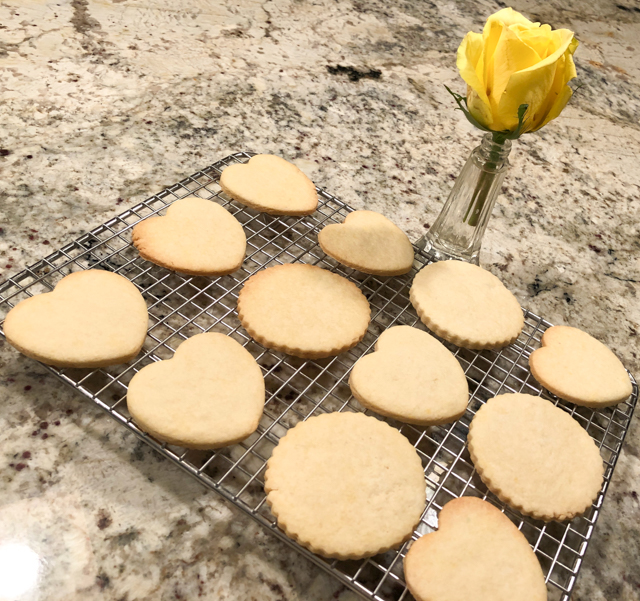
Roll the pastry between plastic or parchment paper to a 3mm thickness. Cut heart or round shapes. Place over parchment paper on a baking sheet and freeze for 10 minutes.  Bake for about 10 minutes until it starts to get golden around the edges.  Reserve.

for the quinoa-crisp:
115 g white chocolate
20 g pistachio paste (or almond butter)
20 g puffed quinoa (or rice Krispies)
for home-made puffed quinoa, click here

Bake the puffed quinoa in a 325 F oven for 10 minutes.  Meanwhile, melt the white chocolate in a microwave very gently. Mix the melted chocolate with the pistachio paste.  Add the quinoa and spread  in a 4 mm (1/8 inch) thickness in between two sheets of parchment paper. It will be a little sticky, try to level it as best as you can. When it is cooled down a bit, cut the exact dimension of the bigger mold you will use for the dessert. Reserve in freezer until  needed.

For the Raspberry Mousse insert:
2 g of Platinum gelatin (1 sheet)
100 g mashed raspberries (fresh or frozen), seeds sieved out
20 g granulated sugar
100 g whipping cream, cold

First, put the gelatin leaves, in a bowl with very cold water to bloom for 10 minutes.  In a small saucepan, heat the raspberry puree until it boils. Remove from heat, wait 5 minutes, drain the gelatin and add to the mixture. Mix until completely dissolved. Let cool to about 95 F.

Meanwhile, whip the cream to soft peaks. Gradually incorporate the cream into the raspberry mixture. Place the mousse in the semi-spheres and freeze overnight.

For the mascarpone mousse:
6 g Platinum gelatin (3 sheets)
80 ml whipping cream
55 g egg yolks
80 g granulated sugar
160 g mascarpone cheese
1/4 tsp vanilla paste
320 g heavy cream

Bloom the gelatin in cold water for 10 minutes. Combine egg yolks with sugar, whisking well and set aside. In a saucepan, heat 80 ml of cream until it boils. Remove from heat, and slowly pour a bit of the hot liquid into the egg yolk mixture, to temper it gently. Add the rest of the cream and transfer all the mixture to a saucepan.

Over low heat, cook until 180 F stirring constantly. Remove from heat, drain the gelatin, and add to the mixture, stirring until completely dissolved. Let the mixture cool down to around 140 F. Add the mascarpone cheese, mix until the cheese is incorporated. Process with a hand mixer, to emulsify. Add the vanilla paste, and let it cool to around 95 F.

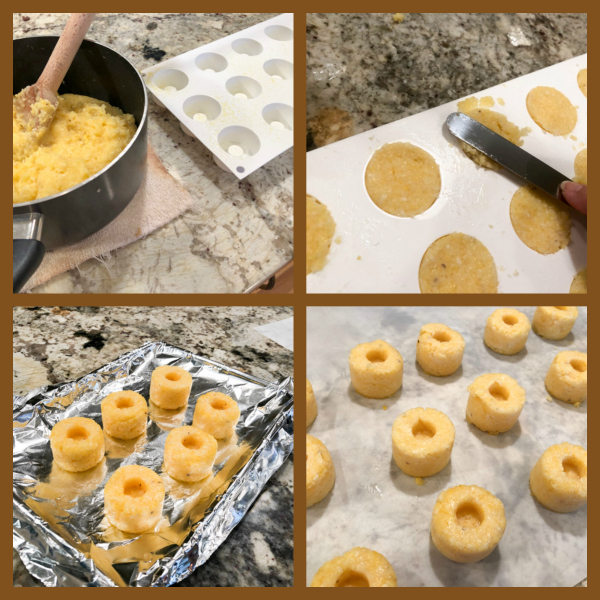
Meanwhile, whip the 320 ml of cream to soft peaks. Incorporate the  cream gradually to the mascarpone mixture. Place in the mini-hearts mold, 1/2 to the volume, spread gently with a spoon around the sides to avoid air bubble.  Drop the frozen raspberry inserts, cover with mousse almost to the top, place the crunchy quinoa layer on top, press gently and freeze overnight.

For mirror glaze:
3 sheets Platinum grade sheet gelatin
120ml water
150 g liquid glucose
150 g granulated or caster sugar
1 tsp agar-agar
100 g condensed milk
150 g white chocolate, chopped fairly small
½ tsp titanium oxide (optional, but advisable)
red gel food coloring

Put the water, sugar, liquid glucose and agar-agar in a small pan and bring to simmering point, stirring occasionally to dissolve the sugar. Remove from the heat and let it stand for about 5 minutes. This is the base syrup for the glaze.  Meanwhile, soak the gelatin in some cold water for about 5 minutes. Squeeze out the excess water and stir into the hot water, sugar and liquid glucose mixture to dissolve. Stir in the condensed milk and the titanium oxide.

Put the chocolate in a medium bowl and pour this hot mixture slowly over the chocolate, stirring gently to melt it, avoid making bubbles. Add the red food gel dye. A stick immersion blender works great, but you must keep the blades fully submerged at all times. If bubbles are present, pass the mixture through a fine sieve.

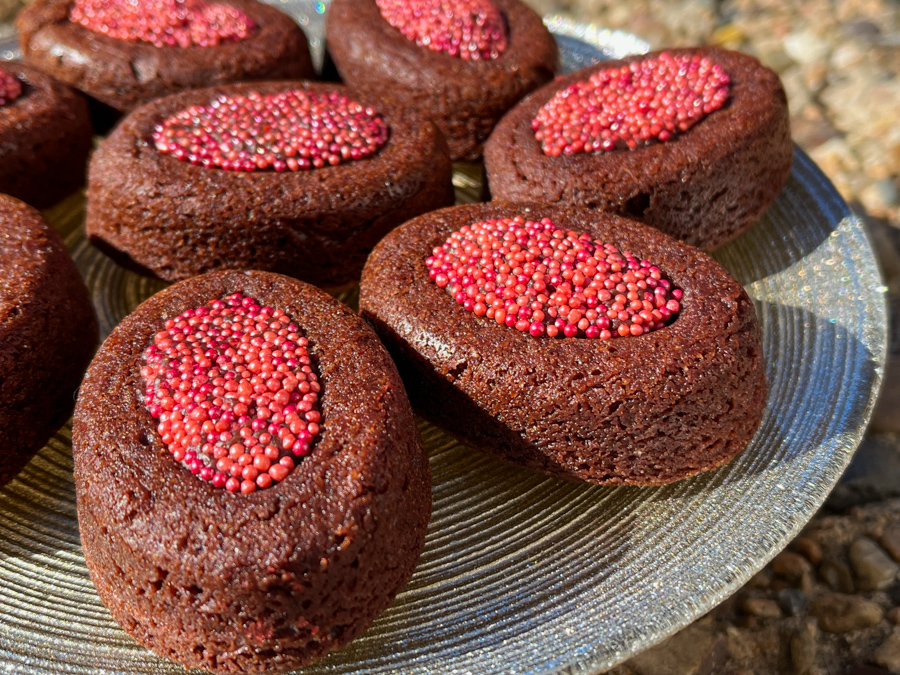
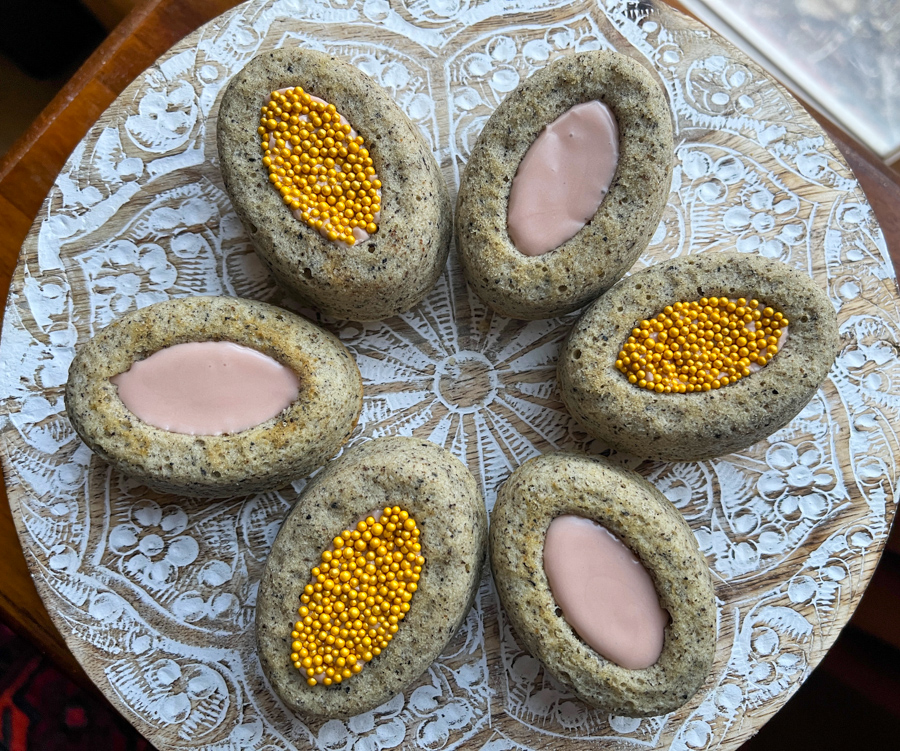
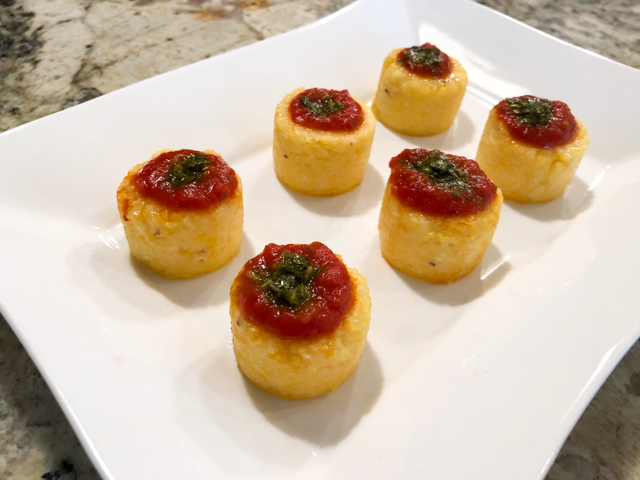
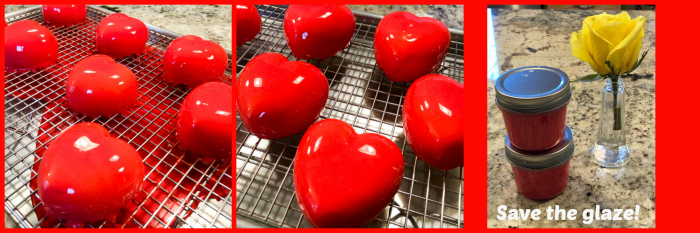
The ideal temperature to glaze is 92 to 94 F. Glaze the frozen mousse cakes, decorate with sprinkles if desired.

Defrost 2 hours in fridge before serving.

 ENJOY!

to print the recipe, click here

Comments: For this dessert I used a mini-heart mold from Silikomart and a mini-half-sphere mold. The mini-heart mold I bought came with a cookie cutter with the exact dimension to made a cookie base. I am not sure every single mold sold comes with the cutter (I got mine at ebay a while ago), but any heart-shaped cookie cutter will work, if the dimensions are approximately right.

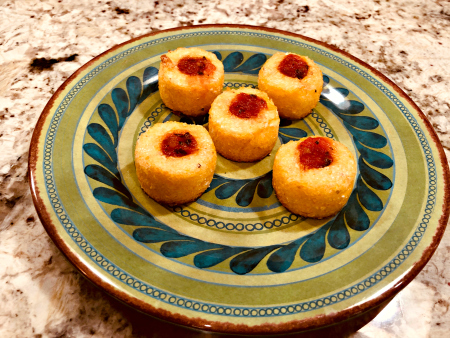
Start your preparation two days before serving, by making the raspberry centers. In this case I used a mousse, which tones down the sharpness of the raspberry a bit. If you prefer a sharper, more intense taste, consider using just the puree thickened with gelatin, like I shared in this post. You can also make the crunchy base with puffed quinoa (or rice Krispies) and the sable base two days in advance. Or even earlier. Stick the crunchy layer in the freezer, keep the sable at room temperature.

The day before serving make the mascarpone mousse and assemble the little cakes. Freeze everything and if you want to make your life very easy on serving day, prepare the mirror glaze emulsion and store it in the fridge.

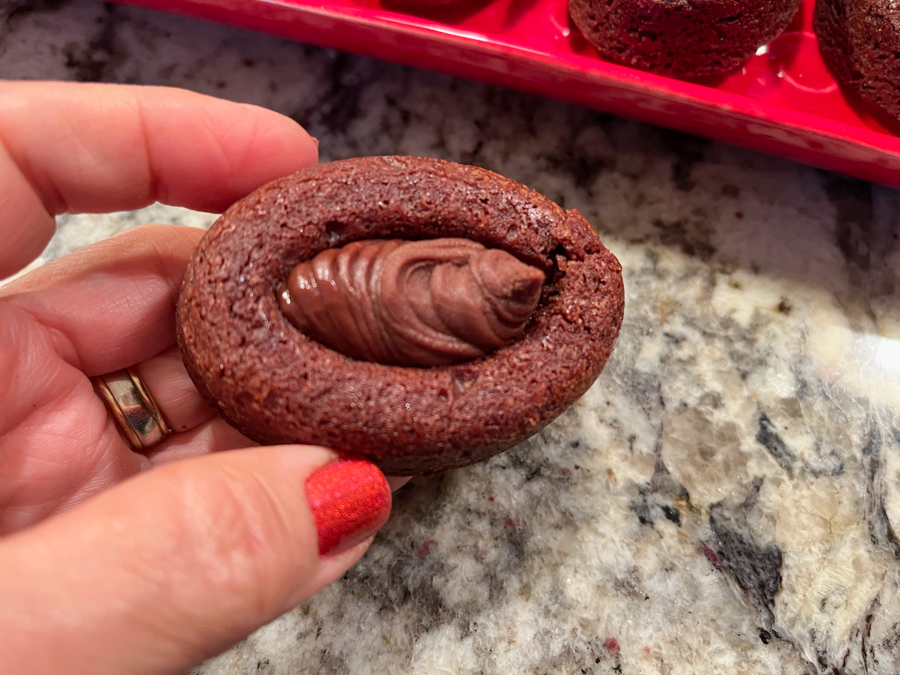
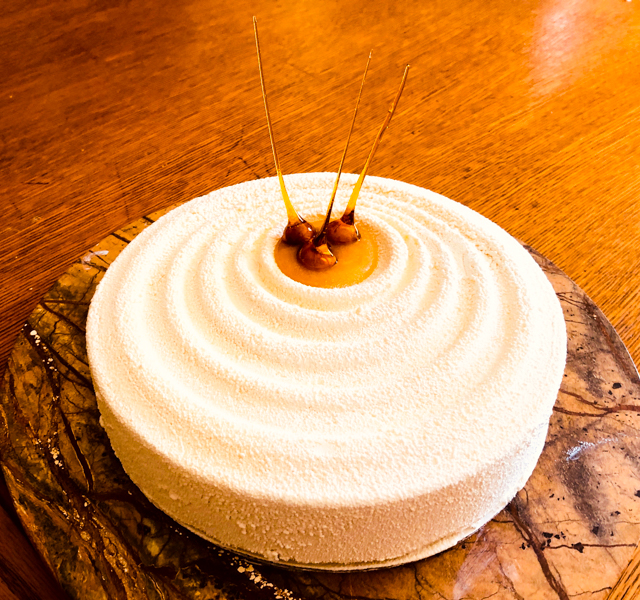
On serving day, glaze those babies and keep in the fridge to defrost for a couple of hours. It is a process I love making, no matter how many times I do the mirror glaze thing, I am always in awe…

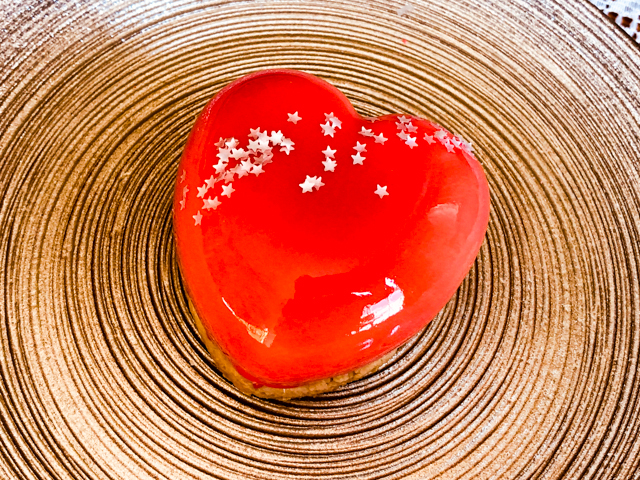
I had to add sprinkles because that’s how I roll… Also, they work wonders if you have a small boo-boo here and there on the glaze. Just drop a silver star on it, and call it a day.

You could omit the crunchy later with puffed quinoa but it is so simple to make and it does add a lot to the dessert. You can buy puffed quinoa or quickly make some, following the instructions here. If you don’t have  pistachio paste, use a bit of almond butter softened in the microwave just to make it a tad more spreadable. It won’t be exactly the same, but it will work.

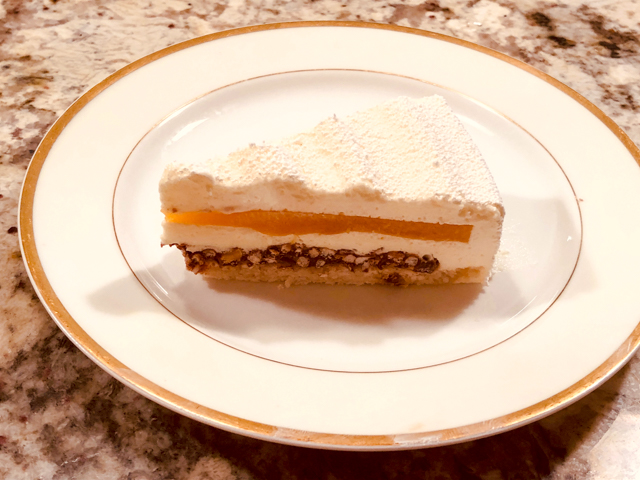
I am pretty happy with the way these little hearts turned out. Both mousses combined well in flavor and texture. If you don’t have the hear-shaped mold, use large half-spheres. You can also go for dessert rings and make the insert as a smaller component with any shape that is convenient for you. Just keep in mind the volumes you will need. Every component can be scaled up easily if necessary, but the raspberry mousse already makes more than you’ll need for 8 mini-cakes. I had enough for 15 inserts and only used 8.  Leftovers are in the freezer, patiently waiting for a next opportunity to play.

Finally, when you pour the mirror glaze, do it over a baking sheet lined with Saran wrap, so you can easily store leftovers. They freeze well and if you accumulate several colors you can go Pollock on your next dessert…

ONE YEAR AGO: Blue Moon Milk

TWO YEARS AGO: Slow-Cooked Chicken Meatballs

THREE YEARS AGO: Zesty Flourless Chocolate Cake

FOUR YEARS AGO: Maple Pumpkin Pecan Snacking Cake

FIVE YEARS AGOSilky Gingered Zucchini Soup

SIX YEARS AGO: Sweet Fifteen!

SEVEN YEARS AGO: Sesame and Flaxseed Sourdough

EIGHT YEARS AGO: Green Beans with Miso and Almonds

NINE YEARS AGO: Saturday Morning Scones

TEN YEARS AGO: White Bread


POLENTA BITES WITH SPICY TOMATO SAUCE

I like to think I’m a person who resists temptations. You know, self-control, determination, that sort of thing. It all goes reasonably well until I am confronted with a new, sexy silicone mold. Or a pair of colorful earrings. But that’s about it. Ok, maybe nail polish is hard to say no to at times. I swear, that’s it now. Back to cooking. Silikomart has been my obsession for a very long time. Today I share with you a cute appetizer idea using one of their molds: Sushi. Adorable. Can you make it without the mold? Absolutely!  But… if you also suffer from Silikomart-weakness, maybe you should bring one home…

POLENTA BITES WITH SPICY TOMATO SAUCE
(from the Bewitching Kitchen)

200 g corn flour (for polenta, quick-cooking or regular)
500 ml water
salt to taste
1 T butter
1 cup tomato sauce (store bought or home made)

for the spicy cilantro sauce (makes more than you’ll need):
1 cup cilantro leaves
1/4 cup lime juice
2 tsp Asian fish sauce
1/8 cup rice vinegar
2 tsp sugar
1 tsp Sriracha sauce 

Bring salted water to a boil in a saucepan. Pour the corn flour slowly constantly stirring with a spoon. Cook according to the brand of corn flour you are using. I used regular polenta, and it took about 30 minutes to get fully smooth. Once the polenta is cooked, stir in the butter.

Make the spicy cilantro component. Place the cilantro leaves in a food processor and whirl until finely minced. Add the remaining ingredients and process until well combined. Reserve. Leftovers keep a few days in the fridge. 

Pour the polenta into the Sushi Maki silicone moulds and level with a spatula. Let rest until solidified, then unmold them, spoon the tomato sauce in the small cavity, and a touch of spicy cilantro dressing.

Serve warm or cold.

ENJOY!

to print the recipe, click here

Comments: These polenta bites can stand very well with just the tomato sauce and if you like, a bit of cheese on top, a quick run under the broiler. It turns out I had made a mahi-mahi sous-vide just a couple of days before, and the spicy cilantro sauce was part of that recipe. I decided to add just a little touch to top the tomato sauce and it all worked surprisingly well, so I incorporated in this post. I realize that I went overboard with the sauce and hid the nice little hole on the top of the mold. Oh, well… no major harm done. But I exercised a little more restraint on my second batch…

In this case, I finished them with a brushing of olive oil and a visit to the air-fryer for about 10 minutes at 390 F. Delicious texture, probably even better if serving tem as finger food. If you don’t have an air-fryer, just place them in a 450 F oven until golden brown.  Then top with some warm sauce, and serve.

You can use mini-muffin tins to make the exact same type of preparation, but there’s something about the Sushi mold that I find pretty irresistible. I got mine on ebay last year, but The Place that Sells it All carries it. Obviously.

ONE YEAR AGO: Vague Mousse Cake

TWO YEARS AGO: Cottage Loaf, my very own technical challenge

THREE YEARS AGO: Pork Ribs: Sticky, Spicy and Awesome

FOUR YEARS AGO: Sobering Peach Sorbet

FIVE YEARS AGO: Buttermilk-Blueberry Breakfast Cake

SIX YEARS AGO: Silky Cauliflower Puree with Almond Milk


NINE YEARS AGO:
 Popeye-Pleasing Salad
.
TEN YEARS AGO: Summer’s Finale


MANGO HAZELNUT ENTREMET CAKE

It’s been a while since I made what is probably my favorite type of dessert. As far as entremet goes, this is a reasonably simple example, with a single insert in the center (mango gelée) and only two components in the base, a hazelnut dacquoise and a crunchy chocolate layer. I used the Silikomart Vague mold, I love its design and how easy it is to remove the frozen cake for final decoration, which involved chocolate spray and a few caramel-coated hazelnuts.

MANGO HAZELNUT ENTREMET CAKE
(from the Bewitching Kitchen)

For the hazelnut dacquoise:
75 g egg whites, at room temperature
50 g sugar
70 g hazelnut flour (I processed toasted hazelnuts)
50 g sugar
20 g all-purpose flour

Heat oven to 350F.

Beat the egg whites (with whisk attachment) until you can see a trail forming as the beater moves through them. Add the sugar slowly and beat until firm peaks form, but do not overbeat or it will get grainy (and ruined).  Add the hazelnut flour mixed with remaining 50 g of sugar and the flour, folding delicately. Pour or pipe the mixture in a circle about 8-in diameter over parchment paper. Cook for about 10 minutes, let it cool on a rack, while still a bit warm cut a circle of the exact dimension of the mold you’ll use to make the dessert (if using Vague mold, that will be 20 cm or 7 and 3/4 in).

For the mango insert:
150 g mango puree (I used frozen mango chunks)
25 g sugar
5 g gelatin in sheets (230 Bloom)

Soak the gelatine cut into pieces in cold water for 10 minutes.

Bring the puree together with the sugar to 120F, add the drained gelatin, mix and pour in a 6-inch ring, covered on the bottom with film and placed on a tray. Remove a small amount (about 2 tablespoons) for the decoration on top.

for the chocolate-crisp:
113 g Lindt milk chocolate with hazelnuts
10 g pistachio paste (or add 2 tsp coconut oil)
10 g puffed quinoa (or rice crisps cereal, or crumbled corn flakes)

Toast the puffed quinoa in a 350F oven for a few minutes, until fragrant. Melt the chocolate gently and mix it with the toasted quinoa and the pistachio paste. Spread as a thin circle on parchment paper, with dimensions a bit bigger than the bottom of the dessert mold.  Once it cools slightly,  cut it to fit exactly on top of the hazelnut dacquoise (20cm or 7 and 3/4 in).

For the white chocolate mousse:
175 g whole milk
35 g sugar
70 g egg yolks
7 g gelatin in sheets
175 g white chocolate
1/4 tsp vanilla paste
350 g cream

Soak the gelatin in cold water for 10 minutes. Break up the chocolate and place it in a bowl with the vanilla paste.

Bring the milk to a simmer in a saucepan. Whisk the egg yolks and sugar by hand in a bowl, pour over a bit of the simmering milk to temper it, then transfer the whole mixture to the pan and bring the temperature to 180F. Remove from heat, add the squeezed gelatin, pour into the bowl with the chocolate and emulsify using an immersion blender or a whisk. Make sure it is all very well combined and smooth. Allow it to cool.

Meanwhile whip the heavy cream to a consistency of melted ice cream. When the custard is around body temperature or just a bit warmer, fold the cream into it. Pour about 1/3 of the mixture into the Vague mold , place the frozen mango insert, pour chocolate mousse almost to the top, allowing just enough room for the crunchy chocolate layer and the dacquoise.  Add them, and fill any gaps on the sides with mousse. Wrap with plastic and freeze overnight.

for the chocolate spray:
300 g white chocolate
200 g cocoa butter

Melt together and place in sprayer at 90 F (I use a normal paint sprayer dedicated to chocolate only).

Turn out the frozen cake and spray immediately with a light coating of white chocolate suspension.  Melt the reserved mango gelatin very gently, and spoon some in the center of the mold. Keep in the fridge for at least 4 hours before serving. Decorate with caramel-coated hazelnuts.

ENJOY!

to print the recipe, click here

Comments: I am very happy with the flavors and textures of this baby. The tricky part of this type of dessert is assembling it, because it’s a process that is a bit “in the dark”, so to speak. With a regular layered cake, you can visualize the layers well, because you either bake them individually or cut slices from a bigger cake. As the cake is assembled, it is also easier to judge how much filling to add so that the layers end up as uniform as you want them to be. In mousse cakes like this one, it becomes a bit of a guessing game. For instance, how much to allow the insert to sink in, how to make sure it is properly leveled,  how to prevent large air bubbles to form, or to make sure the sides are smooth.  Small details can go wrong, but you may not realize until unmolding the frozen cake next day. Talk about cake-anxiety…  😉

You can see that part of the mango insert got a little wavy. That happened because when I first made the insert and set it in the fridge overnight, the pan got a bit tilted and I had to melt the layer again and re-freeze it, not an ideal situation. Lesson learned.  It is crucial to have space in your freezer that allows all components to lay flat and absolutely leveled.

The most fun part? Making the hazelnut with the pointy caramel bits. I followed the method described in Martha Stewart’s site, and it worked like a charm. My only advice is that you make more hazelnuts than you need. Some end up cracking as you stick the skewer, so it’s better to start with more. Also, some might roll a bit as the caramel drips compromising the shape of the drip. It is very important to let the caramel rest before coating the hazelnuts, but once it reaches the right viscosity, you must work fast. It is possible to re-warm the caramel briefly to continue using it, but it’s a bit of a hassle. I prefer to hit that magical point and work with it right away.

Finally, don’t let the lack of a Silikomart mold stop you from making this dessert. A simple ring or springform pan will work, as long as you have a second ring with smaller diameter to form the insert. And the velvet coating is also optional (although you can also buy a spray can with the suspension ready to use; be ready for sticker shock!). The surface is very smooth to start with (see the large photo in the composite picture), so you could leave it as it is, or melt some white chocolate and drizzle it all over the top, in a Pollock-manner.  You could dye the chocolate orange and then add the hazelnuts here and there.

ONE YEAR AGO: Lebanese Lentil Salad and a Cookbook Review

TWO YEARS AGO: Cottage Loaf

THREE YEARS AGO: Sourdough Loaf with Cranberries and Walnuts

FOUR YEAR AGO: Sichuan Pork Stir-Fry in Garlic Sauce

FIVE YEARS AGO: Our Green Trip to Colorado

SIX YEARS AGO: Ditalini Pasta Salad

SEVEN YEARS AGO: Celebrate Wednesday with a Thai Seafood Curry

EIGHT YEARS AGO:  Post-workout Breakfast

NINE YEARS AGO: Semolina Barbecue Buns

TEN YEARS AGO: Lavash Crackers