NUT-FREE LADY GREY MACARONS

Nut allergies. They prevent a human being from enjoying one of the most beloved cookies in the known universe. Such cruel fate. But this recipe uses sunflower seeds instead of almonds and I can tell you the outcome is quite amazing. The batter is slightly more grainy, but the macs baked with very nice feet and good texture. Please use caster sugar (super fine). It does make a difference, particularly in this version.

NUT-FREE LADY GREY MACARONS
(from the Bewitching Kitchen)

For the shells:
200g powdered sugar
115 g sunflower seed meal (or finely ground sunflower seeds)
115 g egg whites at room temperature (approx. 4 eggs)
1/8 tsp of cream of tartar (optional)
100 g caster sugar (or regular sugar made finer in a food processor)
¼ tsp vanilla paste or extract
Americolor food gel Super Black
Americolor food gel Fog
Americolor food gel Tulip Red
Royal Icing, thick consistency

for filling:
1/4 cup butter
170g powdered sugar
1/2 cup milk
1 bag Lady Grey tea
chai extract (optional, I used Olive Nation)

Line 3 heavy baking sheets with parchment/baking paper or Silpat mats. Layer the powdered sugar and sunflower seed meal in a food processor. Pulse until the mixture looks like fine meal, about 12 pulses. Pass through a sieve and transfer to a small bowl or to a sheet of parchment/baking paper. Set aside.

Place the egg whites and cream of tartar in the bowl of a stand mixer fitted with the whisk attachment. Make sure that the bowl and the whisk are impeccably clean. Starting on medium speed, whip the whites with the cream of tartar until they look like light foam. The whites should not appear liquid. The foam will be light and should not have any structure.

Slowly rain in the granulated sugar in five additions, trying to aim the stream between the whisk and the side of the bowl. Turn the speed up to high. Continue to whip the meringue until it is soft and shiny. It should look like marshmallow creme. Add the vanilla. Whip the egg whites until the mixture begins to dull and the lines of the whisk are visible on the surface of the meringue. Check the peak. It should be firm. Transfer the whites to a medium bowl.

Fold in the sunflower seed mixture in two increments. When the mixture is more or less homogeneous (but before you smash it to deflate it), separate a very small amount of batter into a bowl and add black food gel to it. Proceed to fully mix it (macaronage step), and place it in a small piping bag, no need to use icing tip. Reserve. Go back to the main mixture and add a few drops of fog gel color to it. Paint the mixture halfway up the side of the bowl, using the flat side of a spatula. Scrape the mixture down to the center of the bowl. Repeat two or three times, then check to see if the mixture slides slowly down the side of the bowl. Put the mixture in a piping bag fitted with your choice of piping tip (round, ¼ or ½ inch in diameter or 6 – 12 mm). Pipe shells, I like to count numbers in my head and use the same count for each shell so they end up similar in size. After piping 5 or 6 shells, get the piping bag containing the black batter and make a cut. Pipe dots all over the shells.

Slam each sheet hard four to six times on the counter/worktop. Let the unbaked macarons dry until they look dull but not overly dry. Drying time depends on humidity. In a dry climate, the macarons can dry in 15 to 20 minutes; in a humid climate, it can take 35 to 40 minutes.

While the macarons are drying, heat the oven to 300 F. Bake one sheet at a time on the middle rack. Check in 11 minutes. If the tops slide or move (independently of the ‘feet’ when you gently twist the top), then bake for 2 to 3 more minutes. Check one or two. If they move when gently touched, put them back in the oven for 1 to 2 more minutes until they don’t move when touched. Let the macaroons cool for 10 minutes before removing from the pan. The macarons should release without sticking.

Make the filling: Infuse the milk with the bag of tea for 15 min. Remove the bag, squeezing it well to release all the tea flavor into the milk. Let it cool. Whisk the room temperature butter with a handheld mixer until creamy. Add the powdered sugar, 2 tablespoons of infused milk (you won’t need it all) and chai extract (if using). Whisk for a couple of minutes. Adjust consistency with more infused milk or powdered sugar, if needed.

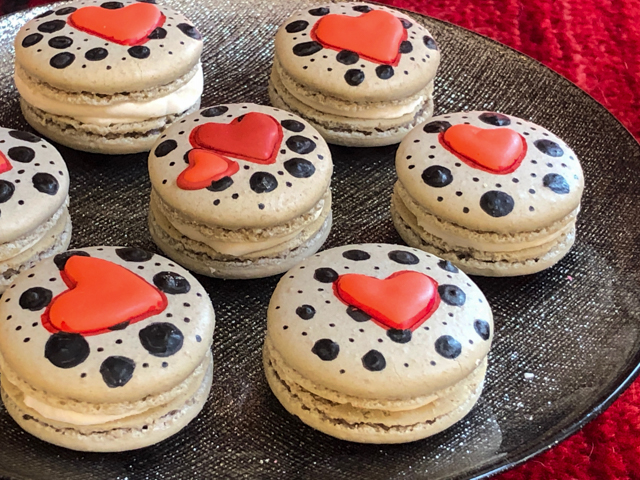
Assemble the macarons: find two macarons similar in size and add a good amount of filling to the bottom of one of them. Place the other on top and squeeze gently to take the filling all the way to the edge. Store in the fridge for 24 hours for perfect texture.

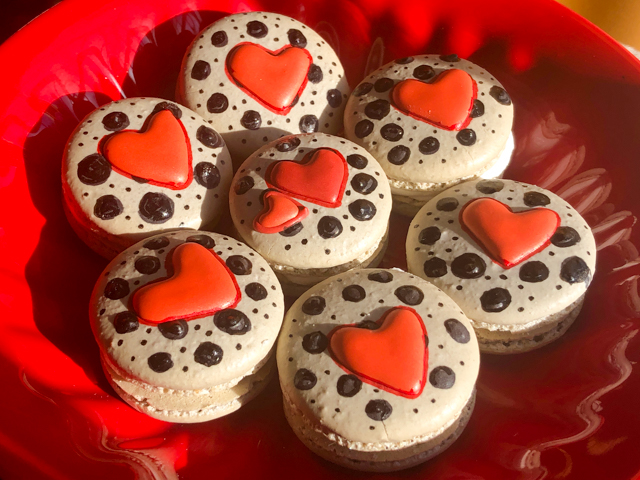
To decorate: pipe hearts with Royal icing dyed red. Use a black food pen to smooth the edges of the black dots, if needed, and a red pen to draw the edge of the heart (optional).

ENJOY!

to print the recipe, click here

Comments: I’ve made macarons last Summer using a little bit of sunflower seed for flavor, but this time I replaced the full amount of almond flour with sunflower seed meal (I used this product instead of grinding the seeds myself). The batter was slightly harder to mix (the macaronage stage), and had a slightly denser structure, but I was surprised by how tall the feet were during baking (they always deflate a bit as they cool).

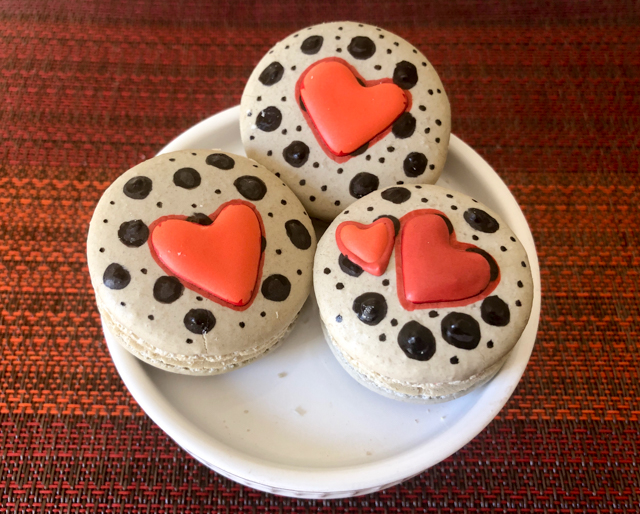
A few words on the decoration. Because the batter turned out a bit on the thick side, the dots I made with black batter were not perfectly round, and many ended up with ragged edges. So I smoothed things out with a black food pen after baking, which I also used to make the little dots all over. The heart was piped with Royal Icing, thick consistency (like you would use for transfers), because it gives the hearts a plump look that I find pretty attractive. I also used a red food pen to trace the edge, but that step can be omitted, I don’t think it added that much to the whole design.

I really enjoyed the flavor of the tea-chai-buttercream. If you brew the tea strong enough, it will have enough flavor but using chai extract is definitely a nice touch. I love Olive Nation products, and was searching for an opportunity to put my chai extract to use. This basic decoration design will come back in the future. Different colors, piping different shapes, I have a few ideas brewing. Or, should I say… macaroning?

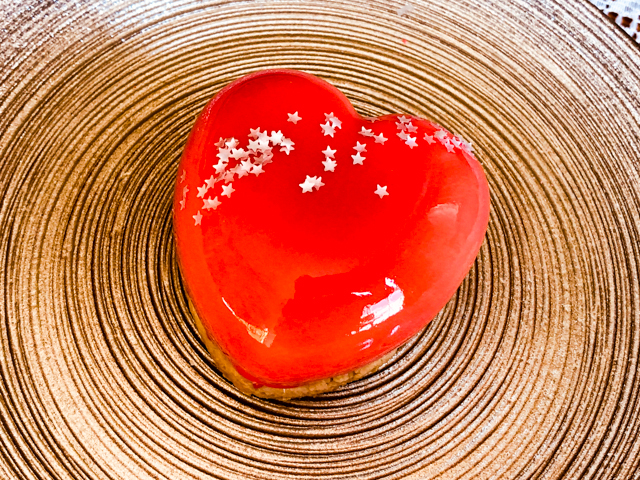
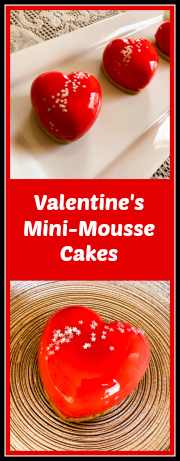
ONE YEAR AGO: Mini-Heart Cakes for your Valentine

TWO YEARS AGO: Blue Moon Milk

THREE YEARS AGO: Slow-Cooked Chicken Meatballs

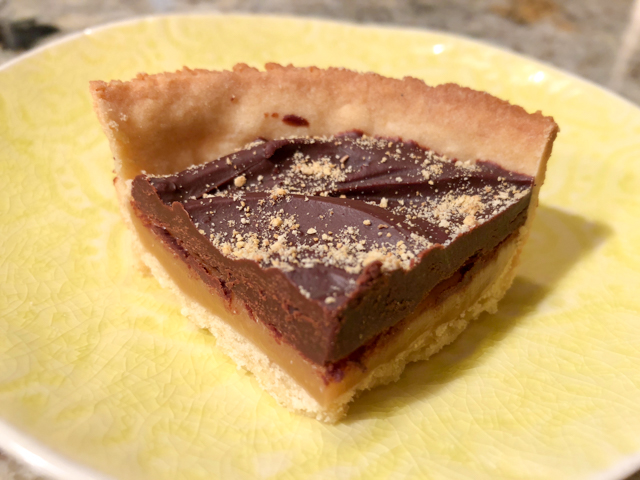
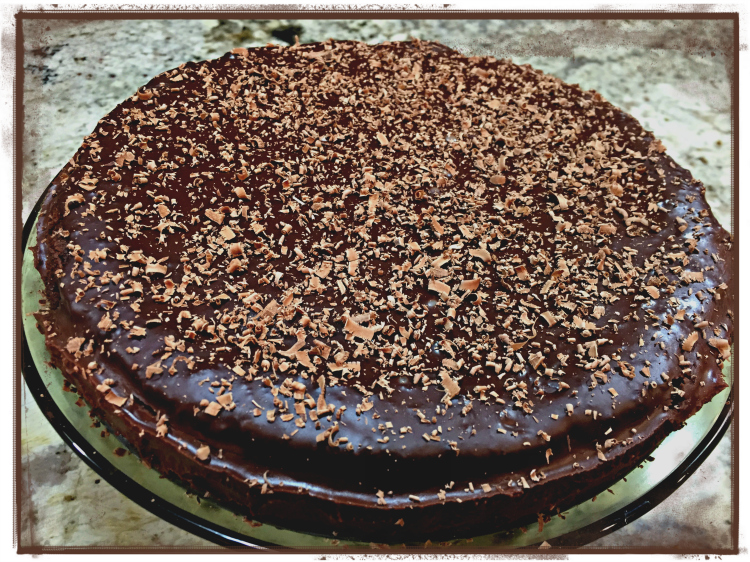
FOUR YEARS AGO: Zesty Flourless Chocolate Cake

FIVE YEARS AGO: Maple Pumpkin Pecan Snacking Cake

SIX YEARS AGOSilky Gingered Zucchini Soup

SEVEN YEARS AGO: Sweet Fifteen!

EIGHT YEARS AGO: Sesame and Flaxseed Sourdough

NINE YEARS AGO: Green Beans with Miso and Almonds

TEN YEARS AGO: Saturday Morning Scones

ELEVEN YEARS AGO: White Bread

MINI-HEART CAKES FOR YOUR VALENTINE


Valentine’s Day is so commercial. Who needs a special day to celebrate love and friendship? No one. We should all just ignore it. With that in mind, let me say I have no problem with a special day to shower all those special persons in your life with attention and affection. A partner, a special friend, that family member you look up to and adore. Today I share a recipe that seems a bit involved, but when you break it down into its components, it is quite simple. Trust me. I almost always speak the truth.

VALENTINE’S MINI-HEARTS MOUSSE CAKES
(inspired from many sources)

for the sable base:
120 g cold butter, cut in pieces
65 g powdered sugar
260 g all-purpose flour
30 g almond flour
pinch of salt
1 egg

Heat oven to 375 F.

Add the sugar, flour, almond flour and salt to the bowl of a KitchenAid type mixer fitted with the paddle attachment. Mix at low speed for about 30 seconds just to incorporate the ingredients together. Add the cold butter and process until the butter gets in small pieces, a bit smaller than pea-size. Add the egg and mix just until it starts to glue together as a dough, but stop before it all gets into a single mass to avoid gluten formation.  Gather the dough on a piece of plastic wrap and gently form it as a disk with your hand.

Roll the pastry between plastic or parchment paper to a 3mm thickness. Cut heart or round shapes. Place over parchment paper on a baking sheet and freeze for 10 minutes.  Bake for about 10 minutes until it starts to get golden around the edges.  Reserve.

for the quinoa-crisp:
115 g white chocolate
20 g pistachio paste (or almond butter)
20 g puffed quinoa (or rice Krispies)
for home-made puffed quinoa, click here

Bake the puffed quinoa in a 325 F oven for 10 minutes.  Meanwhile, melt the white chocolate in a microwave very gently. Mix the melted chocolate with the pistachio paste.  Add the quinoa and spread  in a 4 mm (1/8 inch) thickness in between two sheets of parchment paper. It will be a little sticky, try to level it as best as you can. When it is cooled down a bit, cut the exact dimension of the bigger mold you will use for the dessert. Reserve in freezer until  needed.

For the Raspberry Mousse insert:
2 g of Platinum gelatin (1 sheet)
100 g mashed raspberries (fresh or frozen), seeds sieved out
20 g granulated sugar
100 g whipping cream, cold

First, put the gelatin leaves, in a bowl with very cold water to bloom for 10 minutes.  In a small saucepan, heat the raspberry puree until it boils. Remove from heat, wait 5 minutes, drain the gelatin and add to the mixture. Mix until completely dissolved. Let cool to about 95 F.

Meanwhile, whip the cream to soft peaks. Gradually incorporate the cream into the raspberry mixture. Place the mousse in the semi-spheres and freeze overnight.

For the mascarpone mousse:
6 g Platinum gelatin (3 sheets)
80 ml whipping cream
55 g egg yolks
80 g granulated sugar
160 g mascarpone cheese
1/4 tsp vanilla paste
320 g heavy cream

Bloom the gelatin in cold water for 10 minutes. Combine egg yolks with sugar, whisking well and set aside. In a saucepan, heat 80 ml of cream until it boils. Remove from heat, and slowly pour a bit of the hot liquid into the egg yolk mixture, to temper it gently. Add the rest of the cream and transfer all the mixture to a saucepan.

Over low heat, cook until 180 F stirring constantly. Remove from heat, drain the gelatin, and add to the mixture, stirring until completely dissolved. Let the mixture cool down to around 140 F. Add the mascarpone cheese, mix until the cheese is incorporated. Process with a hand mixer, to emulsify. Add the vanilla paste, and let it cool to around 95 F.

Meanwhile, whip the 320 ml of cream to soft peaks. Incorporate the  cream gradually to the mascarpone mixture. Place in the mini-hearts mold, 1/2 to the volume, spread gently with a spoon around the sides to avoid air bubble.  Drop the frozen raspberry inserts, cover with mousse almost to the top, place the crunchy quinoa layer on top, press gently and freeze overnight.

For mirror glaze:
3 sheets Platinum grade sheet gelatin
120ml water
150 g liquid glucose
150 g granulated or caster sugar
1 tsp agar-agar
100 g condensed milk
150 g white chocolate, chopped fairly small
½ tsp titanium oxide (optional, but advisable)
red gel food coloring

Put the water, sugar, liquid glucose and agar-agar in a small pan and bring to simmering point, stirring occasionally to dissolve the sugar. Remove from the heat and let it stand for about 5 minutes. This is the base syrup for the glaze.  Meanwhile, soak the gelatin in some cold water for about 5 minutes. Squeeze out the excess water and stir into the hot water, sugar and liquid glucose mixture to dissolve. Stir in the condensed milk and the titanium oxide.

Put the chocolate in a medium bowl and pour this hot mixture slowly over the chocolate, stirring gently to melt it, avoid making bubbles. Add the red food gel dye. A stick immersion blender works great, but you must keep the blades fully submerged at all times. If bubbles are present, pass the mixture through a fine sieve.

The ideal temperature to glaze is 92 to 94 F. Glaze the frozen mousse cakes, decorate with sprinkles if desired.

Defrost 2 hours in fridge before serving.

 ENJOY!

to print the recipe, click here

Comments: For this dessert I used a mini-heart mold from Silikomart and a mini-half-sphere mold. The mini-heart mold I bought came with a cookie cutter with the exact dimension to made a cookie base. I am not sure every single mold sold comes with the cutter (I got mine at ebay a while ago), but any heart-shaped cookie cutter will work, if the dimensions are approximately right.

Start your preparation two days before serving, by making the raspberry centers. In this case I used a mousse, which tones down the sharpness of the raspberry a bit. If you prefer a sharper, more intense taste, consider using just the puree thickened with gelatin, like I shared in this post. You can also make the crunchy base with puffed quinoa (or rice Krispies) and the sable base two days in advance. Or even earlier. Stick the crunchy layer in the freezer, keep the sable at room temperature.

The day before serving make the mascarpone mousse and assemble the little cakes. Freeze everything and if you want to make your life very easy on serving day, prepare the mirror glaze emulsion and store it in the fridge.

On serving day, glaze those babies and keep in the fridge to defrost for a couple of hours. It is a process I love making, no matter how many times I do the mirror glaze thing, I am always in awe…

I had to add sprinkles because that’s how I roll… Also, they work wonders if you have a small boo-boo here and there on the glaze. Just drop a silver star on it, and call it a day.

You could omit the crunchy later with puffed quinoa but it is so simple to make and it does add a lot to the dessert. You can buy puffed quinoa or quickly make some, following the instructions here. If you don’t have  pistachio paste, use a bit of almond butter softened in the microwave just to make it a tad more spreadable. It won’t be exactly the same, but it will work.

I am pretty happy with the way these little hearts turned out. Both mousses combined well in flavor and texture. If you don’t have the hear-shaped mold, use large half-spheres. You can also go for dessert rings and make the insert as a smaller component with any shape that is convenient for you. Just keep in mind the volumes you will need. Every component can be scaled up easily if necessary, but the raspberry mousse already makes more than you’ll need for 8 mini-cakes. I had enough for 15 inserts and only used 8.  Leftovers are in the freezer, patiently waiting for a next opportunity to play.

Finally, when you pour the mirror glaze, do it over a baking sheet lined with Saran wrap, so you can easily store leftovers. They freeze well and if you accumulate several colors you can go Pollock on your next dessert…

ONE YEAR AGO: Blue Moon Milk

TWO YEARS AGO: Slow-Cooked Chicken Meatballs

THREE YEARS AGO: Zesty Flourless Chocolate Cake

FOUR YEARS AGO: Maple Pumpkin Pecan Snacking Cake

FIVE YEARS AGOSilky Gingered Zucchini Soup

SIX YEARS AGO: Sweet Fifteen!

SEVEN YEARS AGO: Sesame and Flaxseed Sourdough

EIGHT YEARS AGO: Green Beans with Miso and Almonds

NINE YEARS AGO: Saturday Morning Scones

TEN YEARS AGO: White Bread


CARAMEL CHOCOLATE TARTLETS


With this post I become a life-time member of The Craftsy Cheerleading Club.  Quite likely the oldest member of the organization, but my enthusiasm matches that of a sophomore. This class in particular Pies and Tarts for Every Season, is taught by  Gesine Bullock-Prado. I’m a bit distant from TV (except for binge watching stuff like Broadchurch, Outlander, Black Mirror) so I had no clue she is such a hot commodity in the media. Deservedly so. Teaching is a bit of a performing act. You need to capture the attention of your students and at the same time convey your message in a clear and efficient way. Lightening up a lecture using jokes and funny analogies is a nice way to make sure your audience stays with you. However, balance is everything. There is a delicate line to negotiate between lightness and solid info, and she really shines at it. I learned a lot about pie crusts, how to manipulate each kind, how to choose which crust to bake depending on the type of filling. All in a fun, relaxed way.  I am always amazed at the quality of online classes offered by Craftsy, and the reviews by users are for the most part spot on. Before buying any class, you can browse through to see exactly what you’ll be getting, and the feedback from other users. A win-win situation. Now, for the bit of bad news. I could not get permission to publish the recipe, so if you are interested in the exact formula Gesine used for crust and filling, you’ll have to get it from the site.

OVERVIEW OF THE RECIPE

It all starts with the crust. You have several options. You can make a single larger tart, or shape about 50g of dough per tartlet, using muffin rings or a tartlet pan like I did. Compared to a muffin ring, my tarts were a tad bit bigger, so I used 60g of dough for each one. Her recipe has some cute twists, like using condensed milk in the dough. It gives not only a more intense sweetness, but it browns nicely in the oven.  Following her detailed instructions, I was happy to get all tarts to bake evenly, no soggy bottoms (who wants to have that? not me!), and basically zero shrinkage (scary thought).

I added my own little twist to the preparation by placing the pie weights (and dried beans) into the shells using food grade plastic wrap instead of parchment paper. It does not melt in the oven, as long as you crumble it on top preventing it from touching the metal of the pan, you’ll be fine.  I love the way it allows the beans and ceramic balls to reach the edge of the tart. As long as you don’t bake the shells in a higher than 400F oven, no problem.  After the initial baking with weights, I removed them, got the shells back in a baking sheet and baked with the bottoms up in the air as shown in the photo. I just wanted to prevent any soggy bottom phenomenon (watching Great British Bake Off made me traumatized about those).

For her caramel recipe, she uses a bit of maple syrup in addition to usual suspects. Any caramel recipe you enjoy will do, make sure to cook it to the correct temperature, 240 F, that will provide the perfect texture. No caramel running out when you slice the tartlet, no biting into a rock either.  It hardens very quickly, but I still allowed the filled tartlets to rest at room temperature for a good 45 minutes before adding the chocolate ganache.  Again, any recipe will do, but you need to have it almost cool to room temperature, so that it pipes nicely using a 1/4 inch piping tip.

You can be creative, do swirls, waves, fill it solid and play with the surface using an off-set spatula. Once it’s set, sprinkle Graham cracker crumbs on top, or anything else you might like. A drizzle of white chocolate? Oreo crumbs? Gold leaf in pieces? Or as Gesine does in the video,  top with toasted mini-marshmallows and call them Caramel Smore’s Tarts.   Brilliant!  You can probably see a picture on Craftsy. Adorable stuff.

I had a blast making these… and the taste? Spectacular, even if I say so myself

That’s what you want… A nice layer of caramel in between the crunchy crust and the luscious chocolate ganache. Next time I will use muffin rings, so that the top of the crust will be leveled with the chocolate. If you have muffin rings, give them a try as tartlet containers.

Did I mention these would be amazing on Valentine’s Day?

Gesine, thank you for your helpful comments,
I have quite a few of your projects on my list of stuff to try soon….  

ONE YEAR AGO: Chicken Korma-ish

TWO YEARS AGO: Sunday Gravy with Braciola

THREE YEAR AGO: In My Kitchen, February 2015

FOUR YEARS AGO: Avocado and Orange Salad with Charred Jalapeno Dressing

FIVE YEARS AGO: Green Olive, Walnuts and Pomegranate Salad

SIX YEARS AGO: Romanian Flatbreads

SEVEN YEARS AGO: Ziti with Artichokes and Meyer Lemon Sauce

EIGHT YEARS AGO: Blasted Broccoli, Stove-top version

SaveSave

SaveSave

SaveSave

SaveSave

SaveSave

SaveSave

SaveSave

ZESTY FLOURLESS CHOCOLATE CAKE

VALENTINE’S DAY IS COMING UP!

Flourless Chocolate Cake is one of our favorite desserts. Creamy, chocolate-y, sweet, intense, decadent but not too much. Not until I took it to a new level, that is. First, I added orange zest to the batter. Not a lot, but enough to give the cake a brighter flavor. Chocolate and orange is another one of those culinary matches made in heaven, if you ask me. This cake proves it.  But what really took care of decadence was adding a ganache on top, and then shaving Valrhona chocolate all over. OMG, this was stupendously good.

flourlesschoccake


ZESTY FLOURLESS CHOCOLATE CAKE
(adapted from this recipe)

7 oz extra bittersweet chocolate
14 Tbs unsalted butter  (1 + 3/4 sticks)
5 large eggs, separated
1 Tbs vanilla extract
3/4 cup granulated sugar
zest of half a large orange
pinch of salt
2 Tbs unsweetened cocoa powder
for the ganache:
1 cup heavy whipping cream
8 ounces semi-sweet chocolate, cut in small pieces
1/4 teaspoon vanilla extract

Shaved chocolate to taste for final decoration

Heat the oven to 350F. Grease a 10-inch springform pan.

In a small bowl, sift the sugar and combine it with the orange zest. Rub the zest with your fingers to release the oils into the sugar. Reserve.

Combine the chocolate and butter in a double boiler over simmering water, heating until fully melted and smooth.  Transfer to a bowl, let it cool slightly for a few minutes, and whisk in the egg yolks and vanilla.  Add the sugar/orange mixture,  salt, and cocoa powder, while constantly stirring.

Whip the egg whites to soft peaks.  Gently mix about one-third of them into the chocolate mixture, fold the remaining whites trying to deflate them as little as possible. Pour the mixture into the prepared springform pan.  Place in the lower rack of the oven and bake for 25-28 minutes.

Remove the cake to a rack and immediately loosen the sides of the pan. Allow the cake to cool before icing. If the cake is too uneven, shave the protruding parts with a serrated knife to even out the surface, but no need to make it perfectly flat. Usually the edges will be a bit too high, with a collapsed center.

Make the ganache by heating the whipping cream in a small saucepan until bubbles appear along the sides. Place the chocolate in a small bowl, and add the hot whipping cream and the vanilla on top. Mix gently until the chocolate is fully incorporated, very smooth. Let it cool for 10 minutes, then pour over the cool cake. I like to do that by placing the cake back in the springform pan, so that the icing is contained. Refrigerate for a couple of hours. Open the pan and remove the iced cake to a serving platter, leaving it at room temperature for half an hour or so before slicing it (a wet knife is a must).

ENJOY!

to print the recipe, click here

banner

Comments: I’ve always been partial to a classic flourless cake in which at most a delicate shower of powdered sugar would be added for cosmetic reasons. The surface of a flourless cake tends to be a bit cracked and uneven, as the cake puffs up in the oven, but then collapses in all its fugdy glory.  A dollop of whipped cream would show up in real special situations. But those who follow my blog might remember that my husband firmly believes that a cake is not a cake without frosting. Or icing. Or whatever indulgent concoction is added on top of it. Powdered sugar would not suffice. I made this cake the day before we would be hosting a reception at home, and Phil started his Movement For Frosting right away. I caved. Made a simple ganache and poured all over it early next morning. Then shaved some Valrhona chocolate on top. Decadent? Perhaps. But I tell you, this was one awesome cake.  Try it, serve it for your friends, sit back and wait for the compliments. Once they stop moaning, that is…

I apologize for not sharing a picture of the sliced cake, but I do not like to take pictures when we are having a get-together. Just imagine a very dense, moist, perfect slice, that when you cut with your fork, will leave a nice coating of slightly melted chocolate on its tines. You then use your lips – with as much elegance as humanly possible –  to clean the fork, and repeat the process. Ad libitum.

flourless-chocolate-cake-from-bewitching-kitchen

Have I mentioned that Valentine’s Day is coming up?
(wink, wink)

Add to FacebookAdd to DiggAdd to Del.icio.usAdd to StumbleuponAdd to RedditAdd to BlinklistAdd to TwitterAdd to TechnoratiAdd to Yahoo BuzzAdd to Newsvine

ONE YEAR AGO: Maple Pumpkin Pecan Snacking Cake

TWO YEARS AGOSilky Gingered Zucchini Soup

THREE YEARS AGO: Sweet Fifteen!

FOUR YEARS AGO: Sesame and Flaxseed Sourdough

FIVE YEARS AGO: Green Beans with Miso and Almonds

SIX YEARS AGO: Saturday Morning Scones

SEVEN YEARS AGO: White Bread


RASPBERRY CHOCOLATE TRUFFLES

I feel the need to redeem myself after sharing a recipe that reduced my life expectancy a little, and added considerable more gray hair around my face. Maybe you are like us and prefer to stay home in Valentine’s Day? After all, it’s hard to beat a home-cooked dinner with the fireplace going and a nice glass of wine… Maybe you are planning on a store-bought dessert to make your life easier?  Well, I am here to change your mind. This is one of the simplest ways to end a romantic meal, and so easy to put together it is almost a non-recipe.  You can make it the day before, you can make it in the morning, you can make it just a couple of hours before showtime, whatever suits your schedule.  Come to think of it, it is the antithesis of a sugar cookie with royal icing.  And, let’s face it, a truffle is a lot more elegant and grown up. Plus no need to spend 1 hour and 49 minutes cleaning up the kitchen when you’re done. The recipe comes from the new FoodTV show Giada Entertains, which truth be told puts me in a compulsive eye-roll mode. Still, some recipes seem like winners, and this is definitely one. She called them poppers, I am calling them truffles, and you’ll soon understand why.

Raspberry Chocolate Truffles

RASPBERRY CHOCOLATE TRUFFLES 
(from Giada de Laurentiis)

3/4 cup heavy cream
8 ounces dark chocolate (70 percent), chopped fine
Three 0.33-ounce packages cherry Pop Rocks
12 raspberries

Add the heavy cream to a small saucepan and warm it gently over medium heat until small bubbles form around the edges. Place the chopped chocolate in a medium bowl and pour the hot cream over the chocolate. Let sit for about 2 minutes, then stir with a whisk, working from the center of the bowl outwards, until the ganache mixture is smooth and well incorporated.

To a 12-cup silicone mini muffin pan, sprinkle 1/2 teaspoon Pop Rocks in each cup. Divide the ganache evenly among the cups and press the raspberries on top. Refrigerate until set, at least 2 hours. I refrigerated them overnight. Just before serving, unmold the tarts.

ENJOY!

to print the recipe, click here

compositegiada

Comments: As you know, I did not grow up in the US, so most  kid-friendly candies are unknown to me. For instance, popping candy, or pop rocks. I was clueless about them, but when I saw Giada’s face as she poured some in her mouth, I could not wait to try some myself. Problem is, they were nowhere to be found. I searched all grocery stores, even tried Walgreens, but no luck. So I did what any sensible human being does, took a virtual stride to amazon.com and placed an order. I specified the flavor used in the show, Original Cherry.  The package took forever to arrive, but when it did, watermelon pop was inside. Oh, well, it’s also pink, and it pops. I decided to go with it.

The crystals made cute noises  when I poured the ganache on top, but by the time we enjoyed the truffles, no one could tell there was anything in them apart from chocolate and the crowning raspberry. Still, they were perfectly delicious, fantastic texture, creamy, luscious, dream-inducing… just pop-less.  Oh, well. Maybe you need to consume them within a couple of hours so that the candy won’t completely dissolve in the truffle?  A carefully controlled experiment is needed. At any rate, if you don’t have popping candy around, don’t let that stop you.  They will be perfect to close your romantic meal…

Untitled design-2

Happy Valentine’s Day!


ONE YEAR AGO: Red Velvet Cupcakes

TWO YEARS AGO: Happy Valentine’s Day!

THREE YEARS AGO:  A Few Blogging Issues

FOUR YEARS AGO: Dan Dan Noodles

FIVE YEARS AGO:  Sophie Grigson’s Parmesan Cake

SIX YEARS AGO: Antibiotics and Food