PORK TENDERLOIN ADOBADO

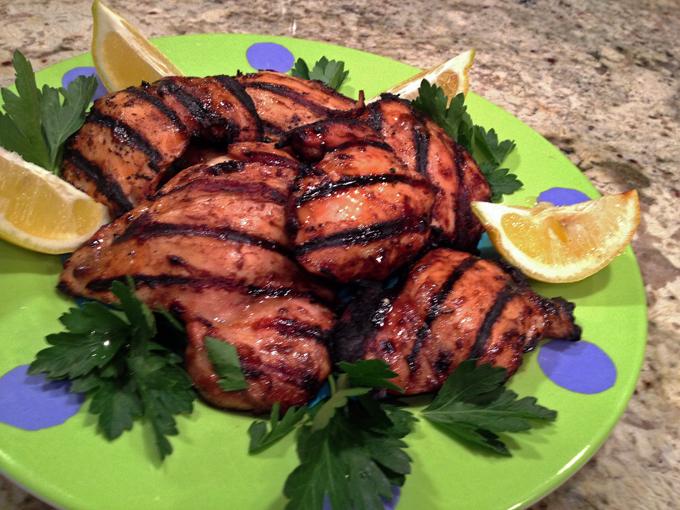
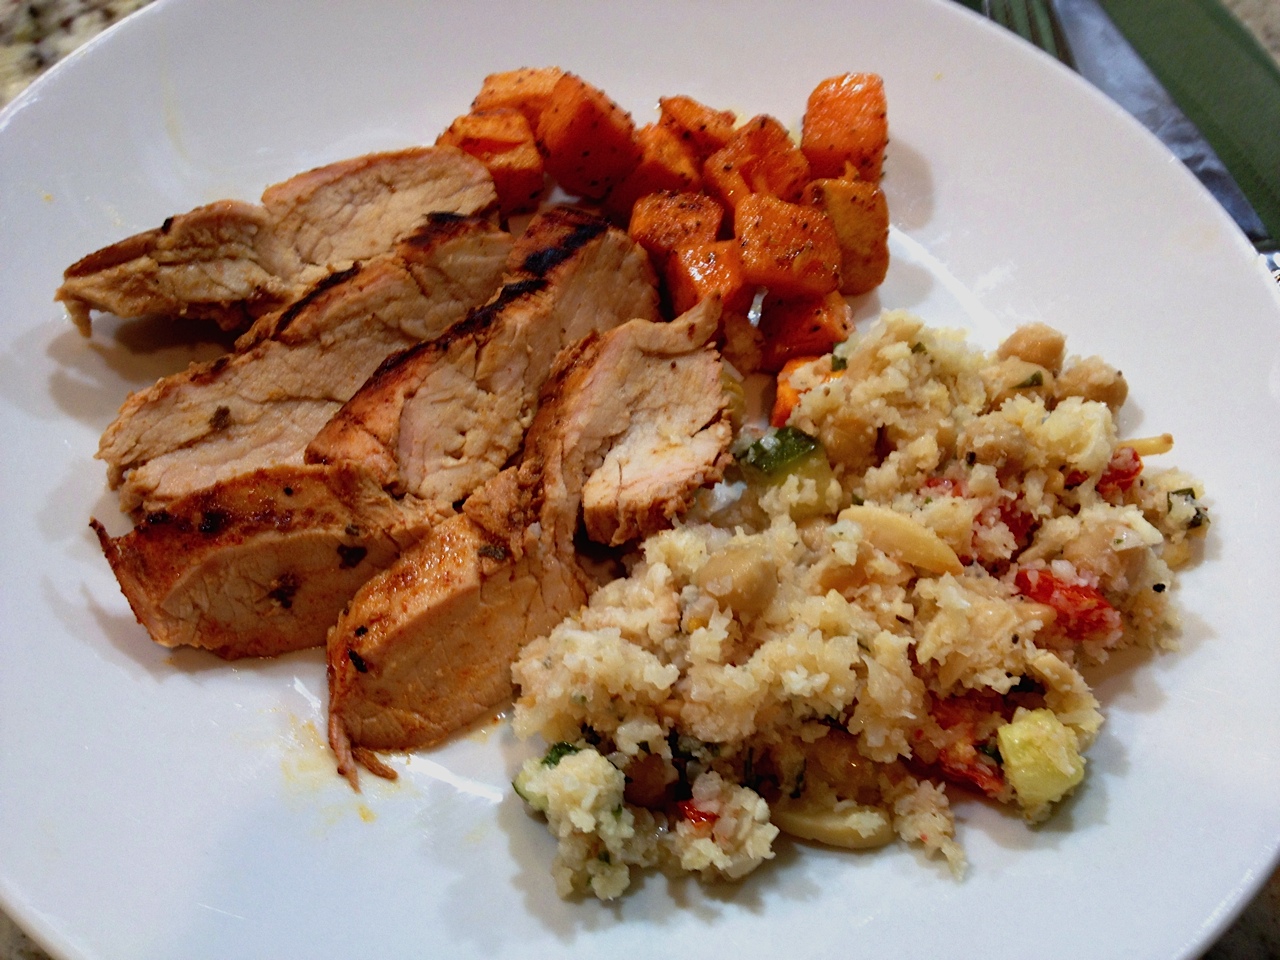
One of the cuts of meat that is always present in our weekly rotation is pork tenderloin, because it cooks fast and goes well with many types of seasonings. For that reason, I am always searching for new ways to prepare it. I found this recipe through a Google search, decided to give it a try without any  intention of blogging about it. Sometimes it’s nice to simply cook and eat dinner like normal people do. You know, without the need to scream at your partner “DO NOT DARE TOUCHING IT, I HAVE TO TAKE A PICTURE!”. It does get old after a while. So, I sliced the meat, served it, and Phil, very surprised asked me “You won’t be blogging about this?”.  No, I’ll let this one slide by.  Then, he took a first bite, and told me “Sally, this has got to be in the blog, it’s very good!”.   I had to agree, it turned out super tasty, and deserves to be shared with my readers. A picture was quickly snapped,  and we moved on with our dinner.

PorkAdobado

PORK ADOBADO
(adapted from Elly Says Opa)

1 Tbsp. grape seed oil
1 clove garlic, minced
1/3 cup ancho chile powder
2 Tbsp. cider vinegar
1 tsp. dried oregano, preferably Mexican
1/2 tsp. sugar
3/4 tsp. salt
3/4 cup water
1 pork tenderloin, around 1.25 lb, butterflied

In a small saucepan, heat the oil over medium heat. Add the garlic and saute until fragrant and golden, about 1 minute. Stir in the chile powder, vinegar, oregano, sugar, salt, and water. Simmer over medium-low heat, stirring occasionally, for 5-10 minutes until flavors are combined. Let cool to room temperature (or, if making ahead, refrigerate). Set aside about 1/4 of the marinade.

Place the remaining marinade and the pork tenderloin in a shallow bowl or resealable bag, making sure to coat the pork with the marinade. Marinate for several hours or overnight.

Sprinkle a little extra salt on the tenderloin. Grill to your desired degree of doneness, brushing with the reserved marinade half way through cooking. Allow to rest for 5-10 minutes before slicing.

ENJOY!

to print the recipe, click here

Comments: If you want to learn more about the concept of “carne adobada” in Mexican cooking, Wikipedia is waiting for you with a click here. This preparation ends up with a subtle heat, and the acidity of the vinegar brightens up the flavors. Very nice take on pork tenderloin, which should work equally well on boneless chicken breasts. You can cook the pork on a cast iron pan and finish it in the oven, or use any type of preparation you are comfortable with.  I always butterfly it to speed up cooking, but the original recipe did not call for it.

As I mentioned many times, we grill 12 months of the year. Phil grew up in Michigan and a little snow (less than 3 feet, that is) doesn’t scare him.  Me?  I inform that we will be grilling, which means “Darling, you light the grill, monitor the cooking, and bring it all back to the warmth of our home once it’s done”.  Sometimes I amaze myself at my efficiency.

unnamed

ONE YEAR AGO: Braised Fennel with Saffron and Tomato

TWO YEARS AGO: Revenge of the Two Derelicts

THREE YEARS AGO: Plum-Glazed Duck Breasts

FOUR YEARS AGO: Peppery Cashew Crunch

FIVE YEARS AGO: Baked Shrimp and Feta Pasta


SPIRALIZER FUN

In five years of blogging, I probably mentioned this before once or twice: I am not too wild about cooking fads, and usually avoid them.  For instance, that one from years ago, foams.  You could not go to a restaurant that considered itself slightly upscale without foams bubbling around your plate.  Then we have the more recent bacon-mania. Because 90% of humans adore bacon, all of a sudden bacon started popping up in every single culinary item.  Chocolate-covered bacon?  Yes, it is out there!  Bacon ice cream?  Why not? Well, if I have to explain it, I guess we are from different planets. And let’s not get me started on the fried egg topping everything lately. I guess this fad is still in its exponentially growing phase. Having said all that, I am heavily into the spiral cutter thing. And I insist, this is not a fad. It is a nice way to treat vegetables, easy to use, fast to prepare, and a ton of fun to eat.  Zucchini is by far my favorite target,  and I’ve shared one of the ways we enjoy it almost weekly, uncooked, bright and fresh. Strands of zucchini can get mushy very quickly when cooked, but now I think I hit the perfect method to deal with them.

ZucchiniPasta1
LEMONY ZUCCHINI NOODLES & WHOLE-WHEAT SPAGHETTI
(from the Bewitching Kitchen)

Whole-wheat spaghetti (1/3 of your regular portion)
3 medium zucchini, ends removed, cut in a spiral cutter
1 Tbsp olive oil
1 shallot, minced
1/2 red bell pepper, diced (substitute tomatoes, spinach, anything you feel like)
lemon juice and zest
salt and pepper to taste

Cook the pasta in plenty of salted boiling water. As the pasta cooks, heat the olive oil, saute the shallot and red bell pepper until the shallots are translucent and with a little bit of color, and the red bell pepper starts to soften. Season lightly with salt, add the zest of the lemon on top of the warm mixture, cover the pan and let it rest while you finish dealing with the pasta.

Ten seconds before the end of cooking time, add the zucchini strands to the pot.  Time ten seconds and immediately drain it, reserving a little of the cooking water.  Return it to the hot, empty pot, add the sautéed shallots and red bell pepper, squeeze a little lemon juice,  toss it all gently, and adjust with pasta cooking water if necessary.   Taste for seasoning, adding ground black pepper if you like.

ENJOY!

to print the recipe, click here

One of the things I love about this type of recipe is that you can vary the amount of pasta in it according to your mood or goals.  In the recipe I shared today, zucchini was prominent, pasta played a secondary role.  The resulting meal felt light and bright. A few weeks ago, I went the opposite way, and made the zucchini stay in the background. At that time I added wilted kale and sun-dried tomatoes to the dish. It was slightly heavier, and quite appropriate for the sorry evenings ahead, when the temperature will fall below 90 F, and I will go through a few boxes of Kleenex to deal with it.

zucchinikalepasta

If you are over the fence about getting a spiralizer, jump to the right side, the side where I am ready to play with you. You will not regret it, especially if you have kids who are over the fence about eating their veggies.  They might profess zoodles – like this tasty version from Mike’s blog –  their favorite dish ever!

ONE YEAR AGO: Beer-Marinated Grilled Skirt Steak

TWO YEARS AGO:  Secret Recipe Club: Corn Chowda

THREE YEARS AGO: Page-A-Day Calendar (Pits and Chief 5 minutes of fame…)

FOUR YEARS AGO: Home Sweet Home (our beloved Pits in one of his last photos)

FIVE YEARS AGO: Marbled Rye

GRILLED CHICKEN WITH TAMARIND AND COCONUT GLAZE

For most people, there is such thing as a grilling season, and it’s starting right about now.  For us, the grill is going all year-long, no matter the temperature outside. We never stop. Of course, it is a lot nicer to be out  moving stuff around the grill wearing shorts and a t-shirt instead of a down jacket. Let me rephrase that: it’s a lot nicer to do anything wearing shorts and a t-shirt.

This is the perfect recipe for those busy days.  Boneless chicken thighs stay the whole day in the fridge, marinating in coconut milk, tamarind, and a few selected spices.  When you get home, bring the chicken to room temperature as you heat your grill and get your side dishes going.  The meat will be moist, tender, with the right amount of heat.  You will love this!

ChickenCoconutTamarind2

GRILLED CHICKEN WITH TAMARIND AND COCONUT GLAZE
(slightly modified from One Perfect Bite)

1/2 cup coconut milk (or yogurt)
1 tablespoons tamarind paste
1 clove garlic, minced
1/2 tablespoon kosher salt
1/2 tablespoon garam masala (or ground cumin)
1/8 teaspoon cayenne
6 boneless, skinless chicken thighs
1 lemon, cut in wedges
Sprigs of fresh cilantro for serving (optional)

In a large bowl, combine coconut milk, tamarind paste, garlic, salt, garam masala and cayenne. Add chicken and turn to coat well with marinade. Cover and refrigerate for 4 to 8 hours.

Remove chicken from  marinade, and grill for 8 to 10 minutes per side. You could also brown chicken in a skillet on stove, place on a baking sheet and finish cooking in a 375 degree oven for 20 minutes.

Garnish with lemon wedges and cilantro.

ENJOY!

to print the recipe, click

composite2

The classic substitution suggested for tamarind paste is lime juice, as the main purpose of the tamarind is to bring acidity into the equation. Of course, it’s acceptable, but the paste is one of those ingredients that once you start using, you will get more and more fond of.   Just like miso, it keeps forever.  You can use it in drinks, in desserts, in all sorts of recipes. Not sold yet? Let me share a few delicious options:

Tamarind-Glazed Honey Shrimp, from A_Boleyn

Chickpeas and Chana Dal Cooked Together in a Mint Sauce, from Eats Well with Others

Thai Red Curry with Pork Belly, from Rachel Cooks Thai

Creamy Peanut Chutney, from Love Food Eat

Prawn Sambal, from Sea Salt with Food

Indian-Spiced Pulled Pork with Tamarind Barbecue Sauce, from Angela’s Food Love

Tamarind Date Cake, from Dan Lepard

Tamarind and Fresh Ginger Cake with Lime Glazing, from Anh’s Food Blog

Mozambique Chicken, from The Perfect Pantry

Tamarind Rice (Puli Sadham), from Chitra’s Food Book

Agua de Tamarindo, from A_Boleyn

+++++++++++++++++++++++++++++++++++++++++++++++++++++++

ONE YEAR AGO: Chicken-Apricot Skewers

TWO YEARS AGO:  Asparagus Quiche

THREE YEARS AGO: Two-stage Pea and Prosciutto Risotto

FOUR YEARS AGO: Mellow Bakers: Corn Bread

CRISPY CHICKPEA AND CAPER SPAGHETTI

Absolutely delicious and a cinch to put together, I dare say that even chickpea haters might appreciate these little creatures when presented this way.  This was my first time roasting capers, but it won’t be the last. Great boost of flavor for an ingredient that already has quite a strong personality.

Pasta with Roasted Chickpeas and Capers
CRISPY CHICKPEA AND CAPER SPAGHETTI
(slightly adapted from Real Simple)

3/4 pound spaghetti
1 can chickpeas (15 ounce)  rinsed and patted dry
1/2 cup panko bread crumbs
1/4 cup capers, drained
1/4 cup olive oil  (I probably used a little less)
1/2 teaspoon ground coriander
salt and black pepper
1/4 cup minced cilantro leaves
2 tablespoons lemon juice

Heat oven to 400° F.  Combine the chickpeas, panko, capers, oil, coriander, and ½ teaspoon each salt and pepper on a rimmed baking sheet. Roast, tossing once, until crispy, 18 to 22 minutes.

While the chickpeas are roasting, cook the pasta in plenty of salted boiling water. Once the pasta is cooked, drain it and return it to the pan.

Add the chickpeas, cilantro, and lemon juice to the pasta and toss to combine.

ENJOY!

to print the recipe, click here

roasted

Comments:  What a great, simple recipe this was! I’ve roasted chickpeas before, but they always turned a little mushy. The addition of panko-style bread crumbs brought a very pleasant crunch to the mixture.  Roasted capers were another very pleasant surprise. I love their sharp, pungent taste in any type of recipe. Roasting changes that sharpness quite a bit, I would say it takes some of it away, but at the same time intensifies the pure caper flavor.  Am I making sense?  😉  Make this pasta and see what you think.

served111Dinner is served! 
Grilled lemony chicken breasts and snow peas completed our meal…

ONE YEAR AGO: Leaving on a jet plane

TWO YEARS AGO: Crispy Herb-Crusted Halibut

THREE YEARS AGO: Almond Butter Cake

FOUR YEARS AGO: Bonjour!

SUPERNOVA MEETS WOK

My wok is 18 years old, it was one of the first gifts I received when I moved from France to the US, back in 1995.  Thank you, dear friend, you know who you are…  😉  I used it a lot in Oklahoma, even though our stove was not powerful enough to bring the best in stir-frying.  The wok patiently waited for me inside a box when we traveled for two sabbaticals, and into the box it went again when we moved to the Little Apple and co-existed with an electric stove that even Benjamin Franklin would consider sub-par.  Once Supernova was installed, I went to the basement to retrieve my old friend, apologized for the neglect inflicted upon him, and said his loyalty would be compensated: he would meet a superstar and they would live happily ever after…   Happy to report that it was love at first flame!

wok1

HOISIN CHICKEN WITH CASHEWS
(inspired by Fine Cooking magazine & Barbara Tropp)

2 Tbs peanut oil
1 medium shallot,  sliced
2 Piquillo peppers, sliced
1 lb. boneless, skinless chicken breasts, cut into 3/4-inch chunks and velveted
Salt and freshly ground black pepper
6 oz. snow peas, trimmed
Crushed red chile flakes
2 tsp. minced fresh ginger
1/3 cup hoisin sauce diluted with 2 Tbs water
1/3 cup roasted cashews

The day before or a few hours before your meal, velvet the chicken using this method. Heat 1 Tbs. of the oil in a wok over medium-high heat. Add the shallot slices and cook for 2 to 3 min. Add the Piquillo peppers  (I buy them jarred) and cook until both the pepper and onion are browned around the edges. Remove the vegetables from the skillet; set aside. Pour the remaining 1 Tbs. oil in the skillet. Sprinkle the chicken with salt and pepper, add it to the oil, and cook, stirring frequently, so that all sides brown, 2 to 3 min. Stir in the snow peas and sprinkle in some red chile flakes. Add the ginger. Reduce the heat to medium low and stir in the thinned hoisin sauce. Simmer for 1 min. to wilt the snow peas and finish cooking the chicken.  Sprinkle with the cashews and serve over rice.

ENJOY!

to print the recipe, click here

served2Comments:  Velveting the chicken makes this type of stir-fry so much better that it’s worth investing the small amount of work to do it.  Since the chicken can stay in the egg white mixture for up to 24 hours, you could conceivably do it the evening before you intend to make it for dinner.  I prefer to do this preparation either when I wake up, or if time allows, at lunch time. Piquillo peppers are from Spain, so their use in this dish qualifies as “fusion-cooking”.  In reality, I had an open jar in my fridge and wanted to use it up.  So there. 😉

What I love the most about this recipe is the simplicity of the finishing sauce, a mixture of hoisin and water, no cornstarch to deal with.  The snow peas barely got in touch with any heat, so they stayed bright green and with a little crunch that was perfect to add that extra something to the dish.  A real keeper for a weeknight, there were only three little pieces of chicken left, which made for a super light lunch next day. But, at least I did not have to share…

Hoisin Chicken with Cashews

ONE YEAR AGO: 500 Posts and The Best Thing I ever made

TWO YEARS AGO: Back in Los Angeles

THREE YEARS AGO: White House Macaroni and Cheese

FOUR YEARS AGO: Korean-Style Pork with Asian Slaw