I am a bit surprised that I never blogged on this particular recipe, adapted over the years from several sources, including a version from Phil’s family. It uses a small amount of baking soda, that makes the cookie puff a little bit but not spread too much. My current favorite version includes ground star anise, I am kind of smitten by its flavor.

GINGERBREAD CUTOUT COOKIES
(from The Bewitching Kitchen)
375g flour
1/2 tsp baking soda
1/4 tsp salt
2 tsp ground ginger
1 + 1/2 tsp cinnamon
1/2 tsp nutmeg
1/2 tsp cloves
1/2 tsp cardamoon
1/2 tsp ground star anise
3/4 cup brown sugar
3/4 cup butter (170g)
1/2 cup molasses
1 egg
Mix flour, baking soda and spices in a large bowl. Reserve.
To a mixer, add butter at room temperature and brown sugar. Beat until smooth, 2 to 3 minutes. Add molasses, mix until incorporated. Add egg and mix. Add the flour mixture in two steps, mixing at low speed.
Place dough in fridge for 1 hour to overnight. Roll out, cut shapes, bake preferably from frozen for 10 min, at 350F.
Decorate if desired, when at room temperature.
ENJOY!
to print the recipe, click here
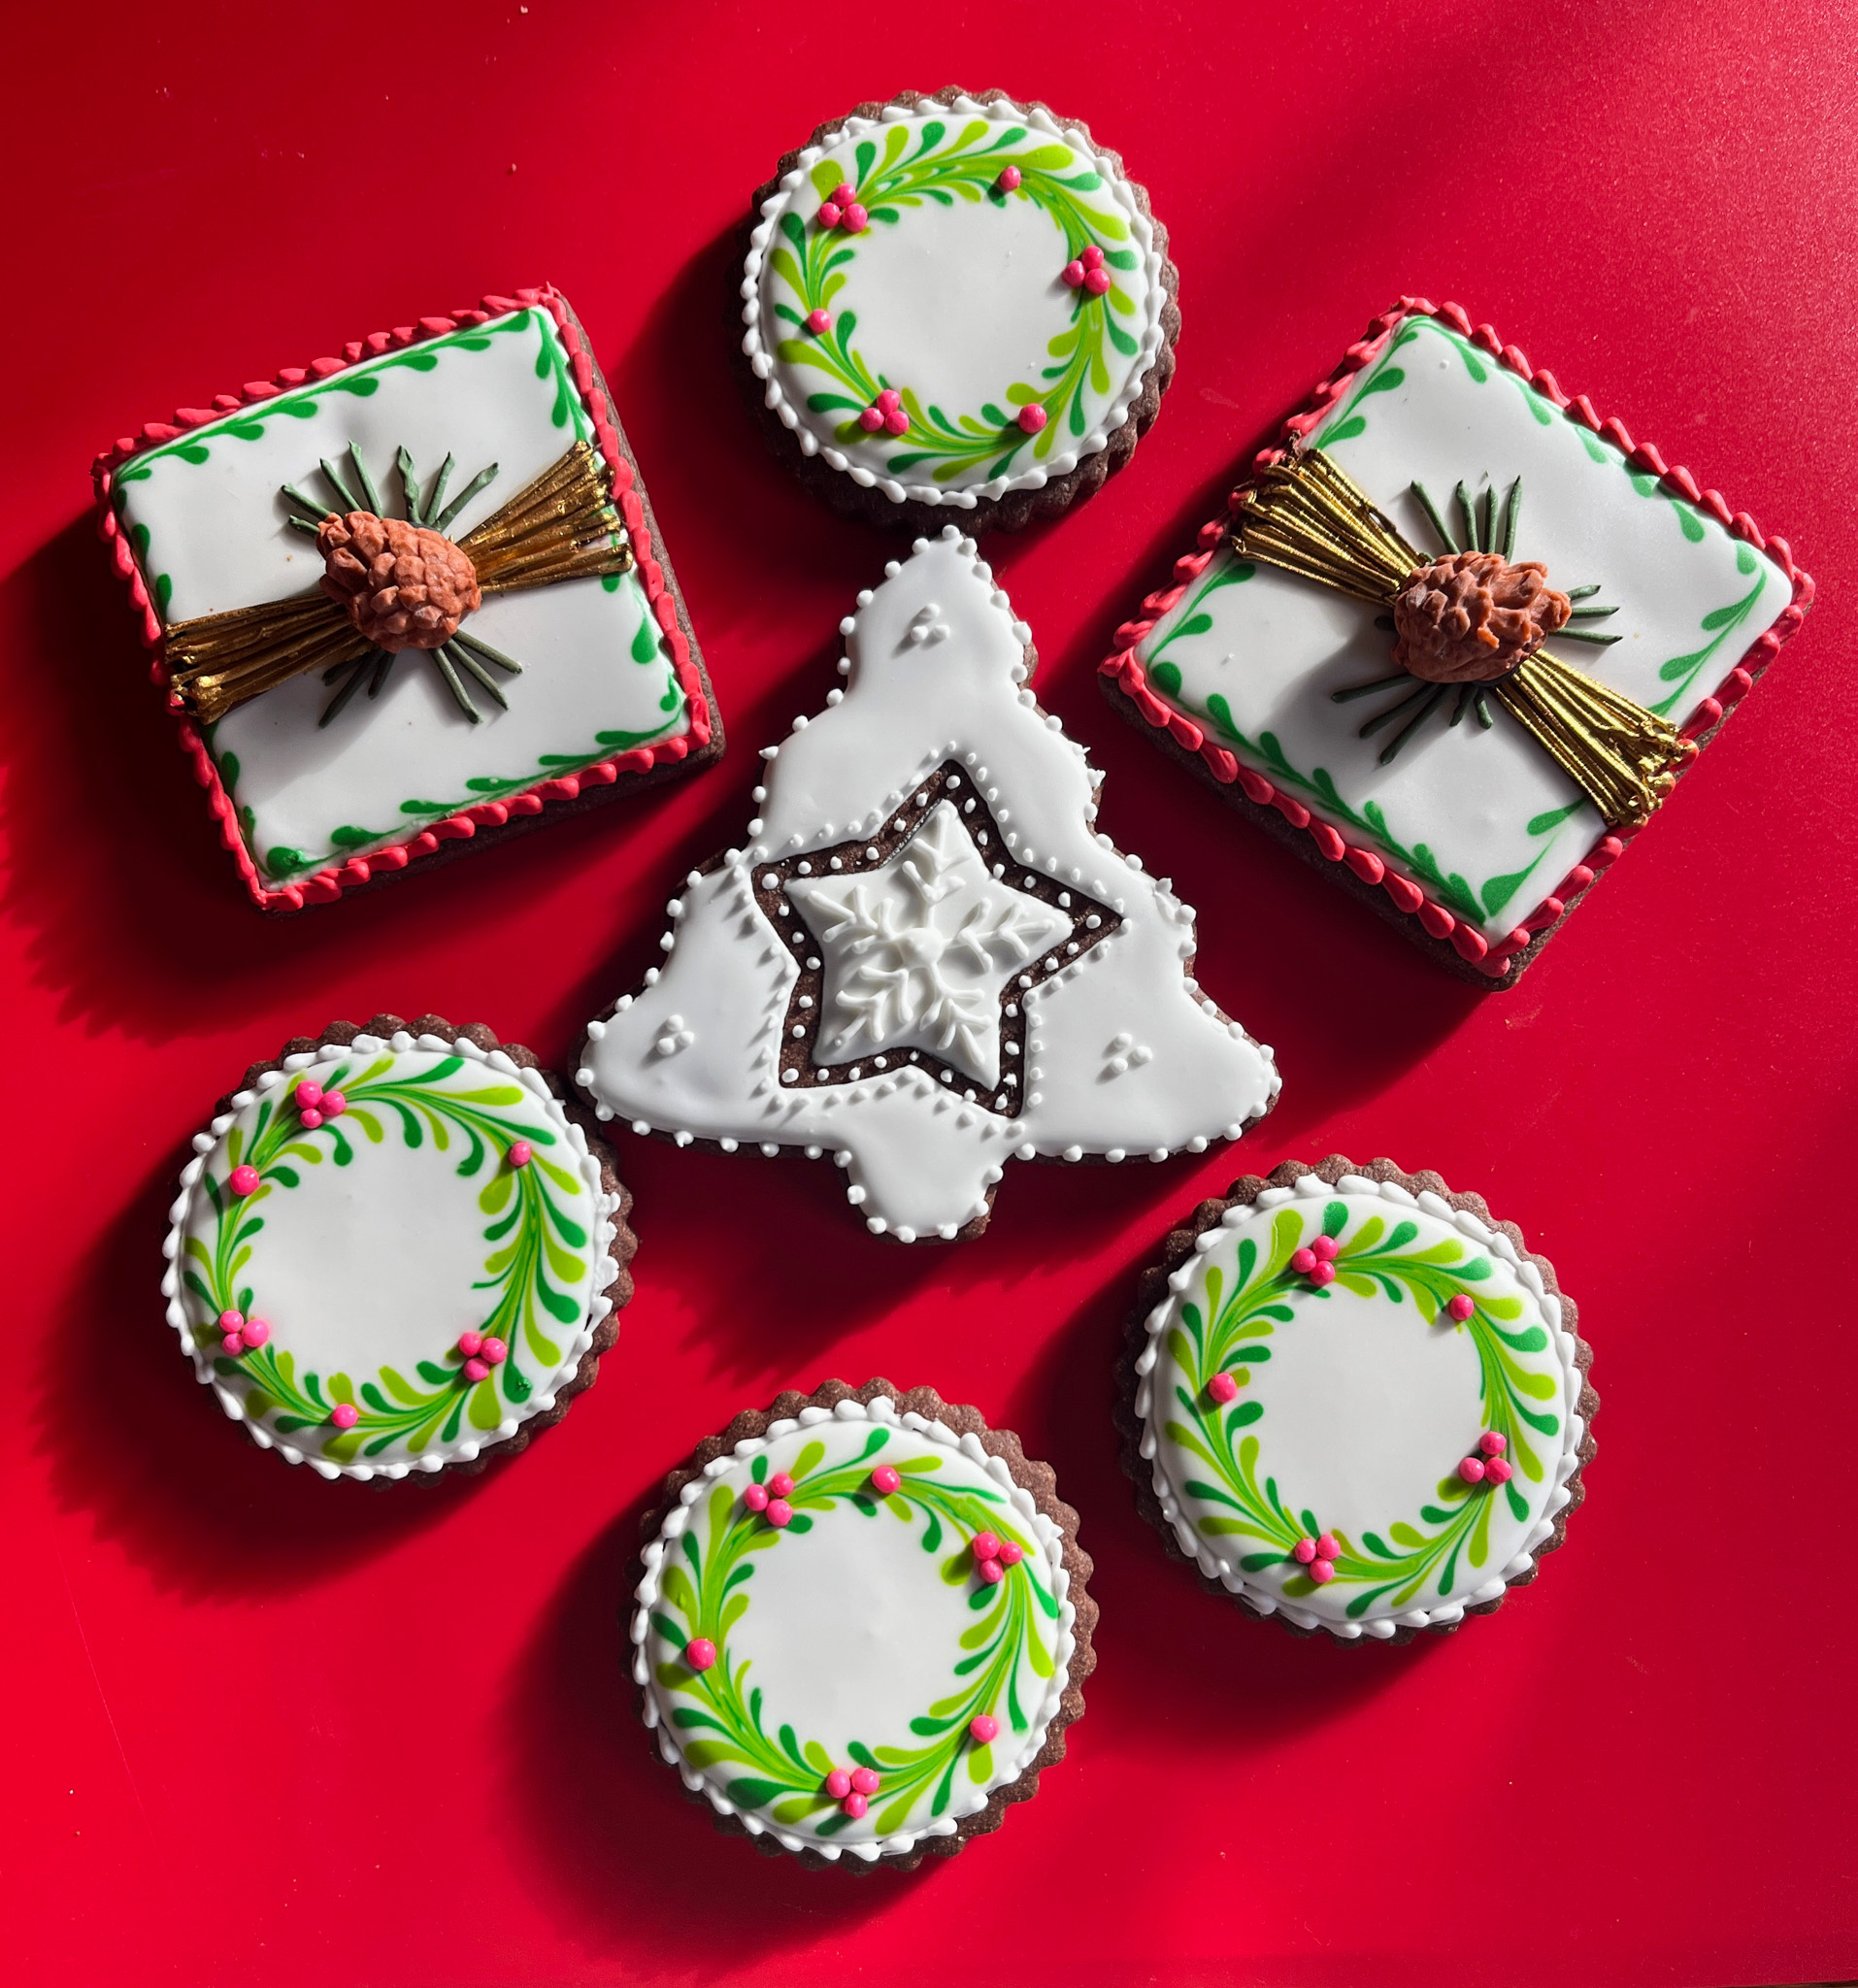
I love the smell of these cookies while baking and also as they sit later at room temperature. The star anise is a fantastic addition, a tip I got a few years ago from Haniela.

ONE YEAR AGO: Ube Linzer Cookies
TWO YEARS AGO: Four Festive Macarons
THREE YEARS AGO: Cuccidati, from Tina to You
FOUR YEARS AGO: Festive Macarons to Welcome 2021!
FIVE YEARS AGO: Episode 6, Cookies in The Great American Baking Show
SIX YEARS AGO: Brazilian Chicken and Heart of Palm Pie
SEVEN YEARS AGO: Roasted Butternut Squash with Walnuts and Tahini Sauce
EIGHT YEARS AGO: The Complicit Conspiracy of Alcohol
NINE YEARS AGO: Candy Cane Cookies
TEN YEARS AGO: Macarons: Much better with a friend
ELEVEN YEARS AGO: Our Mexican Holiday Dinner
TWELVE YEARS AGO: The Ultimate Cranberry Sauce
THIRTEEN YEARS AGO: Edamame Dip
FOURTEEN YEARS AGO: Gougeres
FIFTEEN YEARS AGO: Beef Wellington on a Special Night