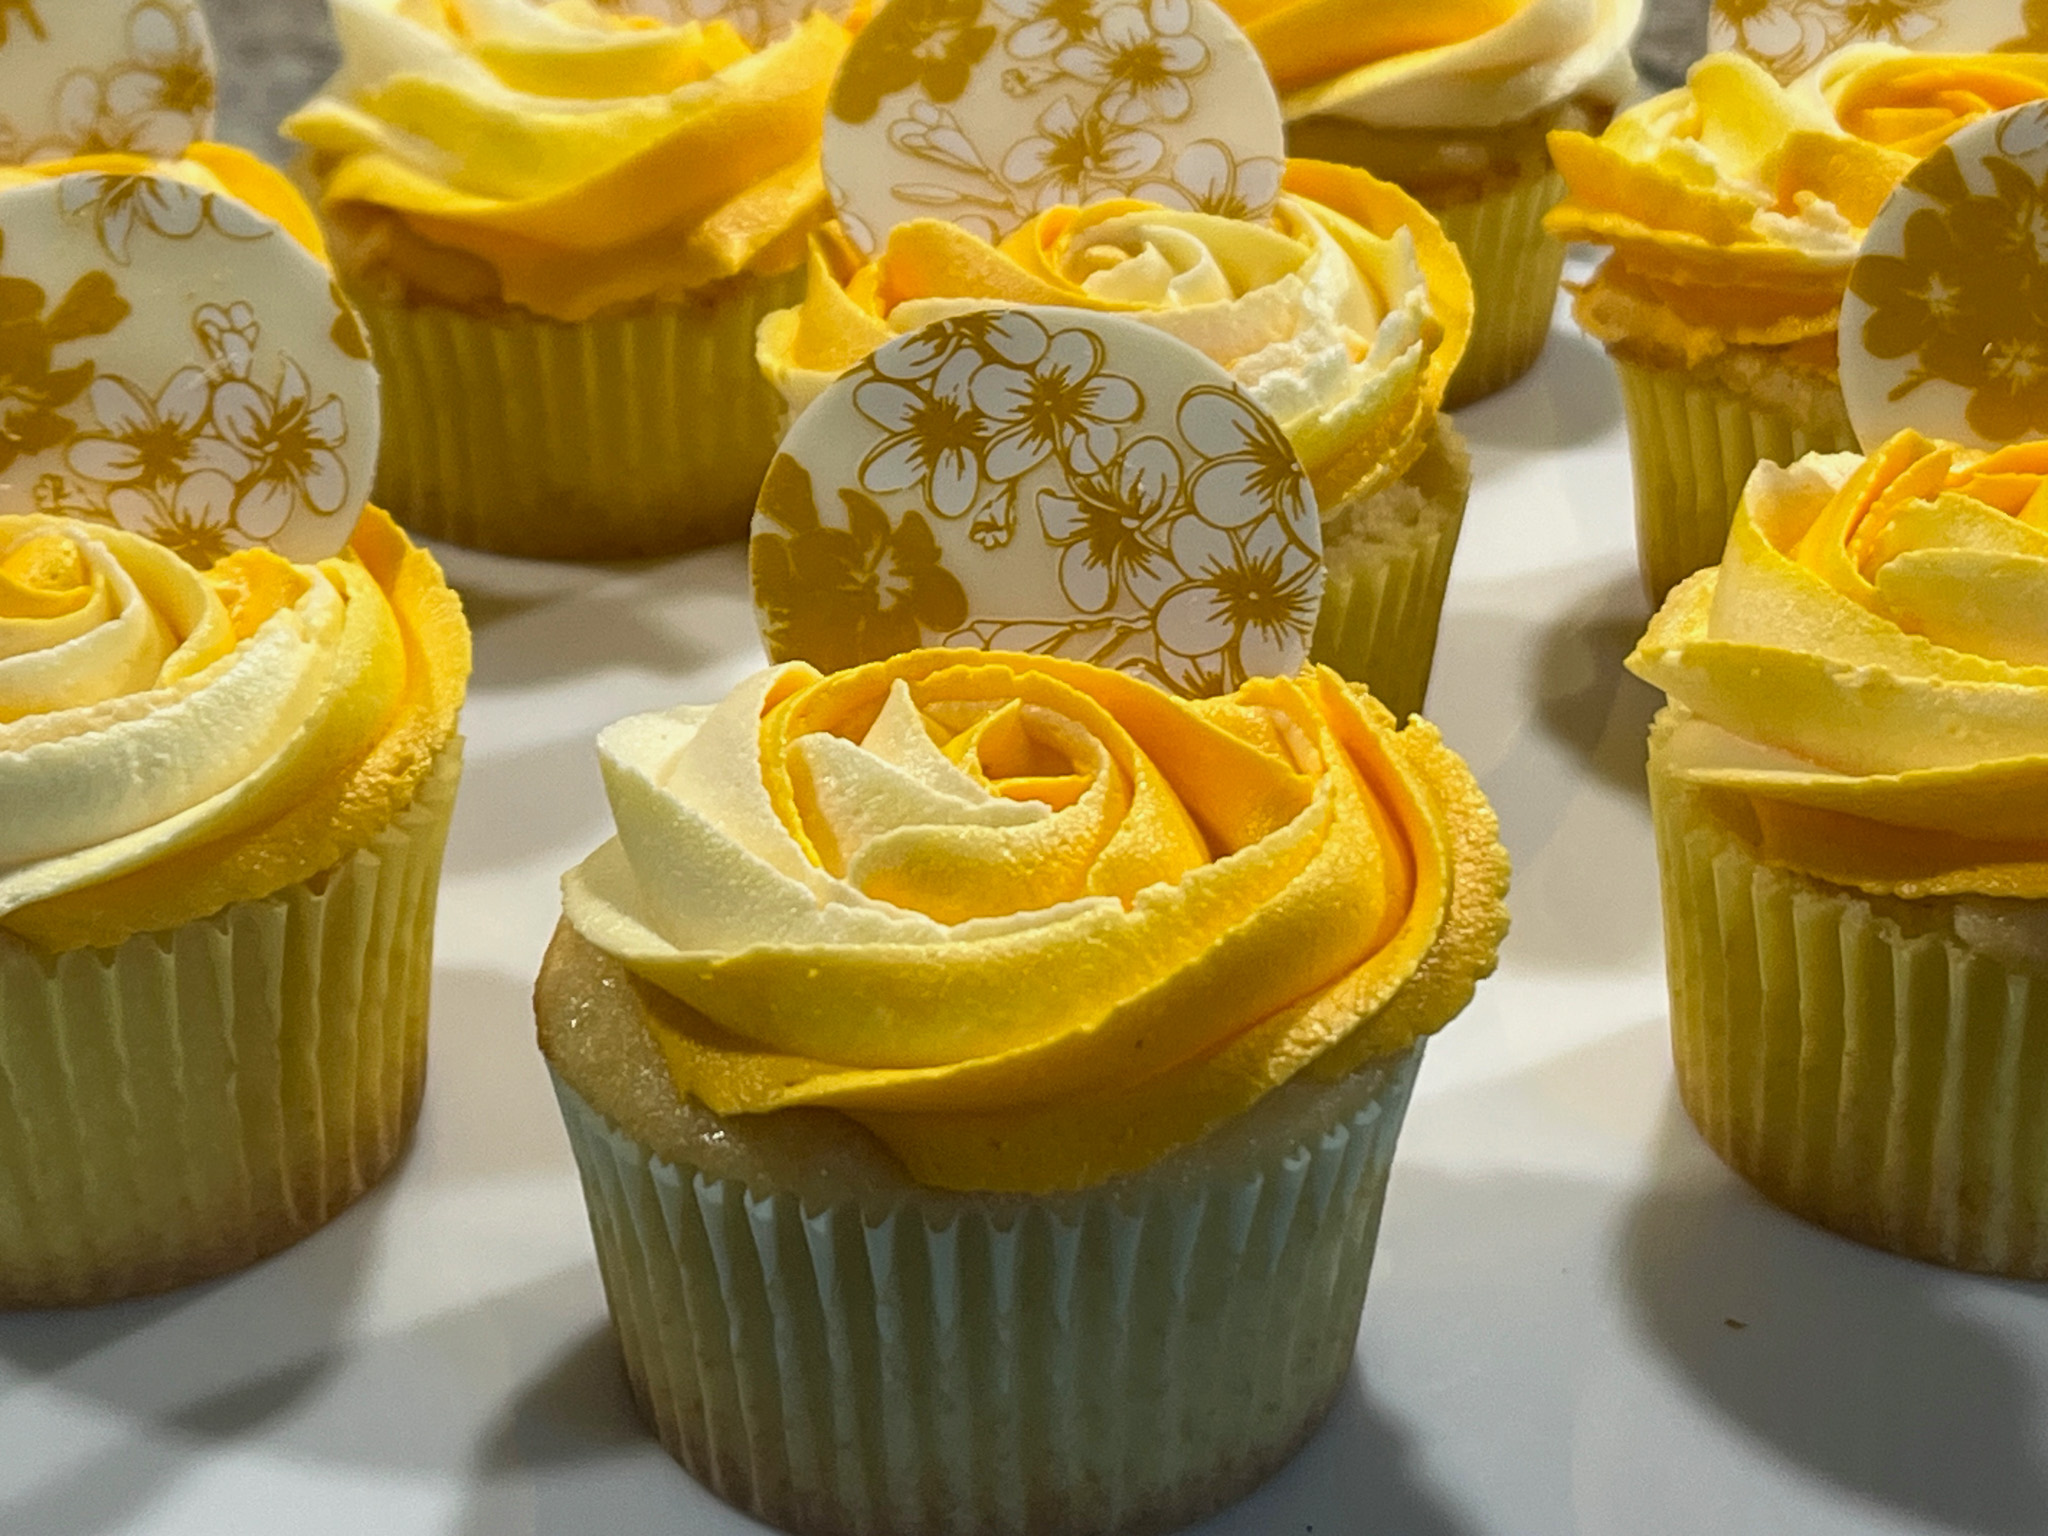
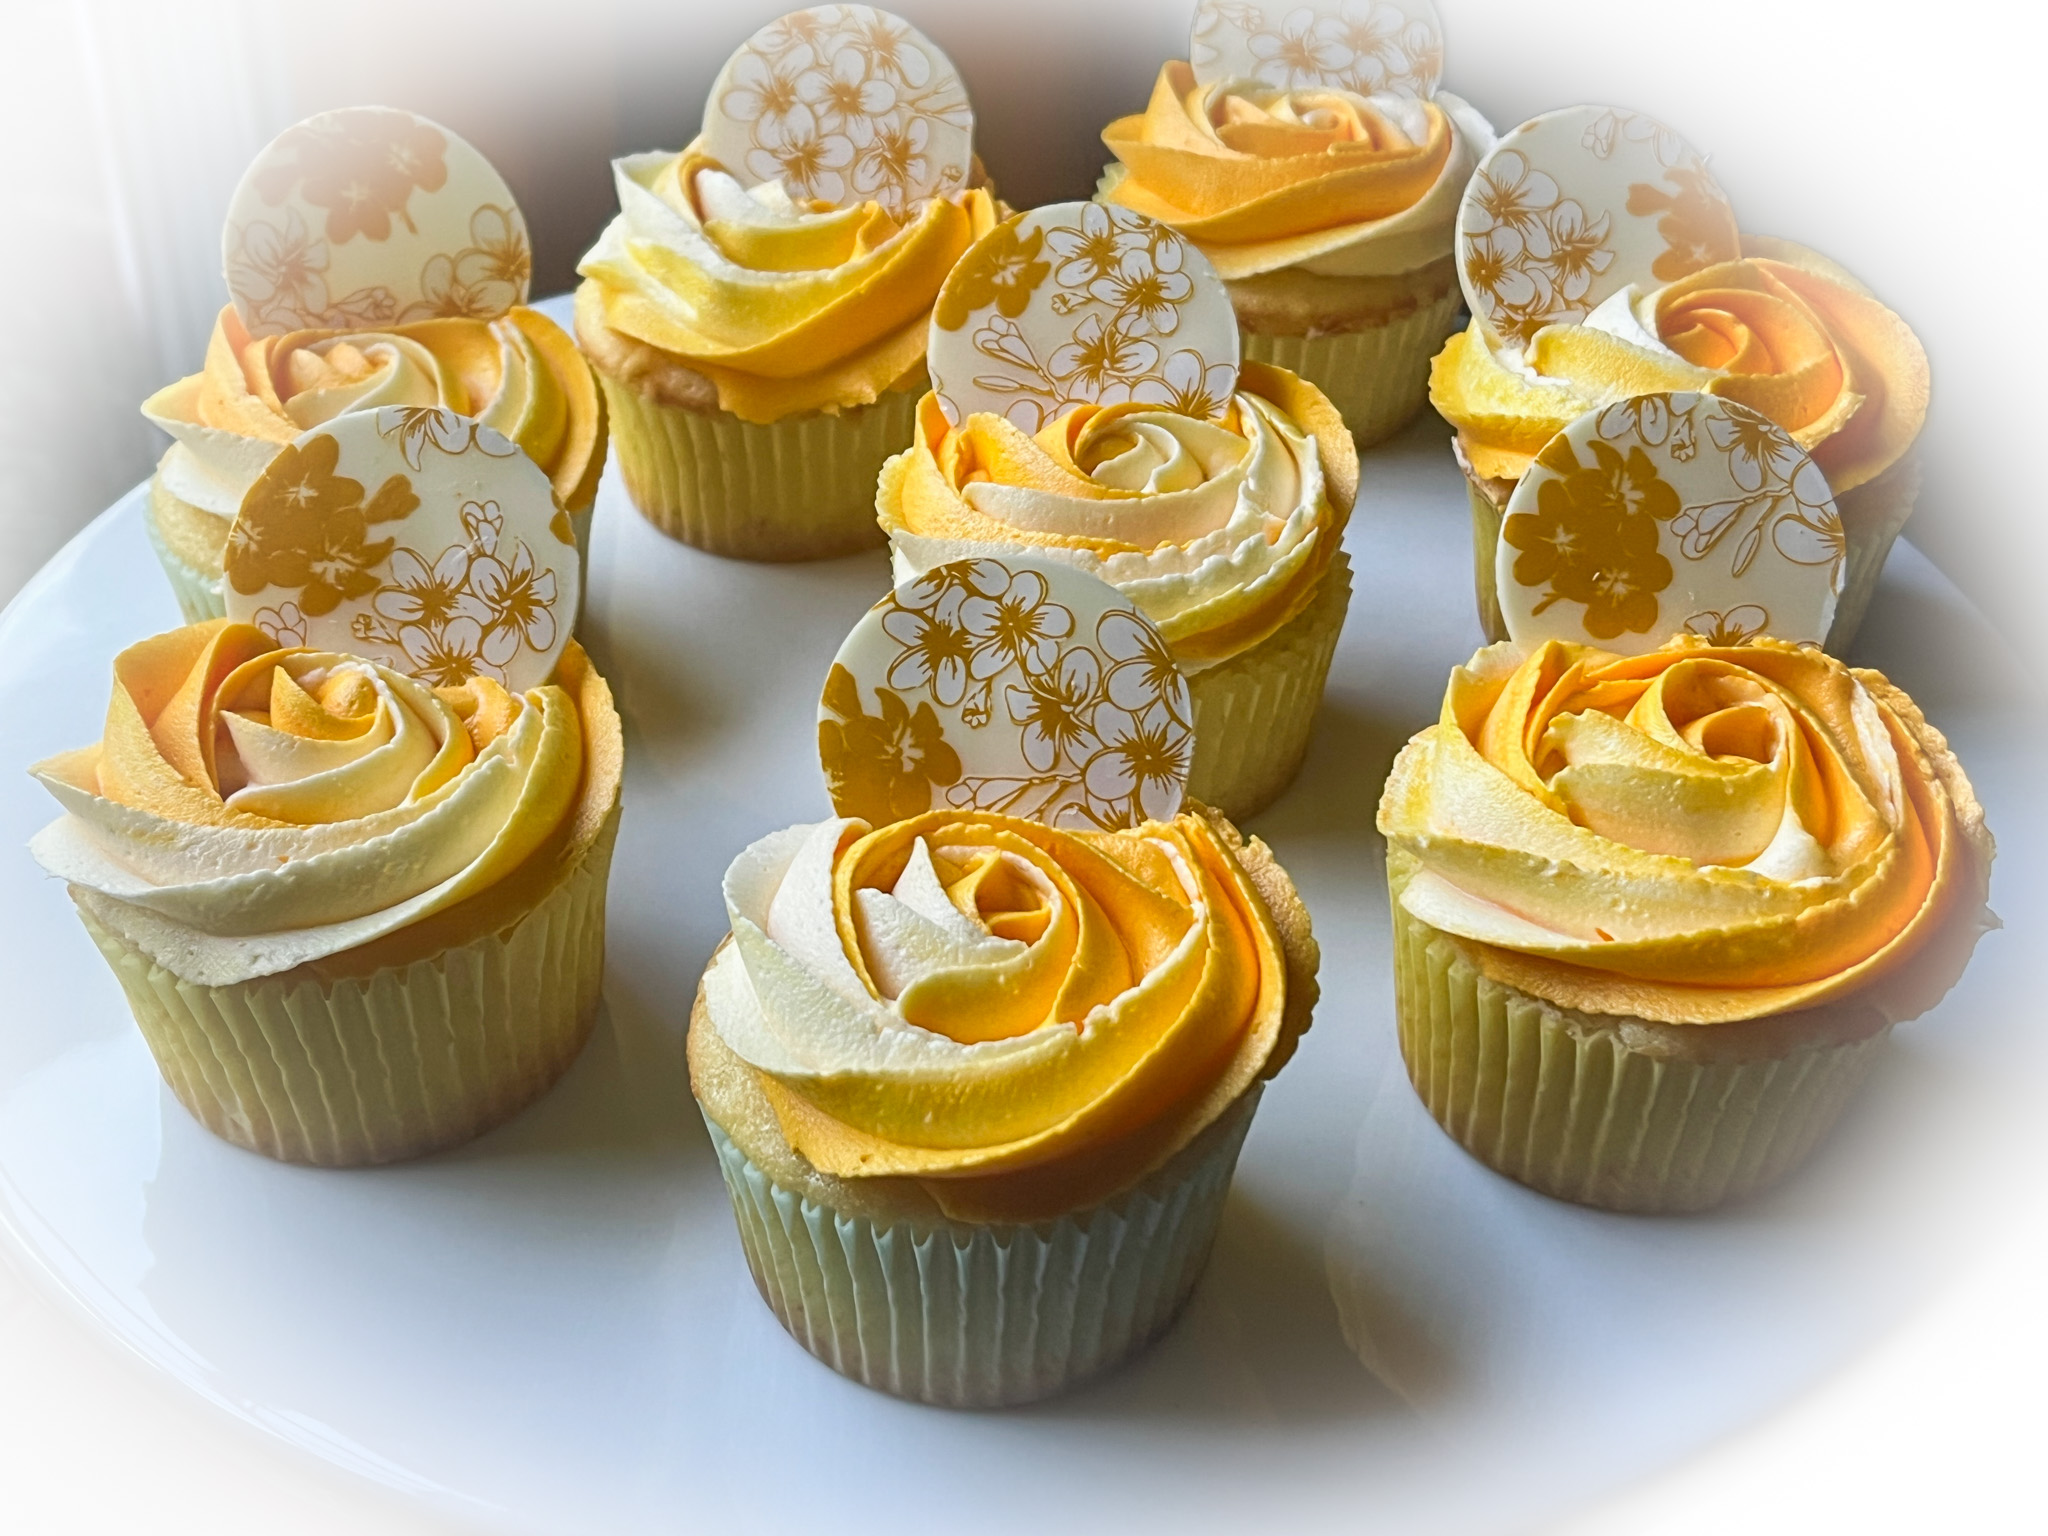
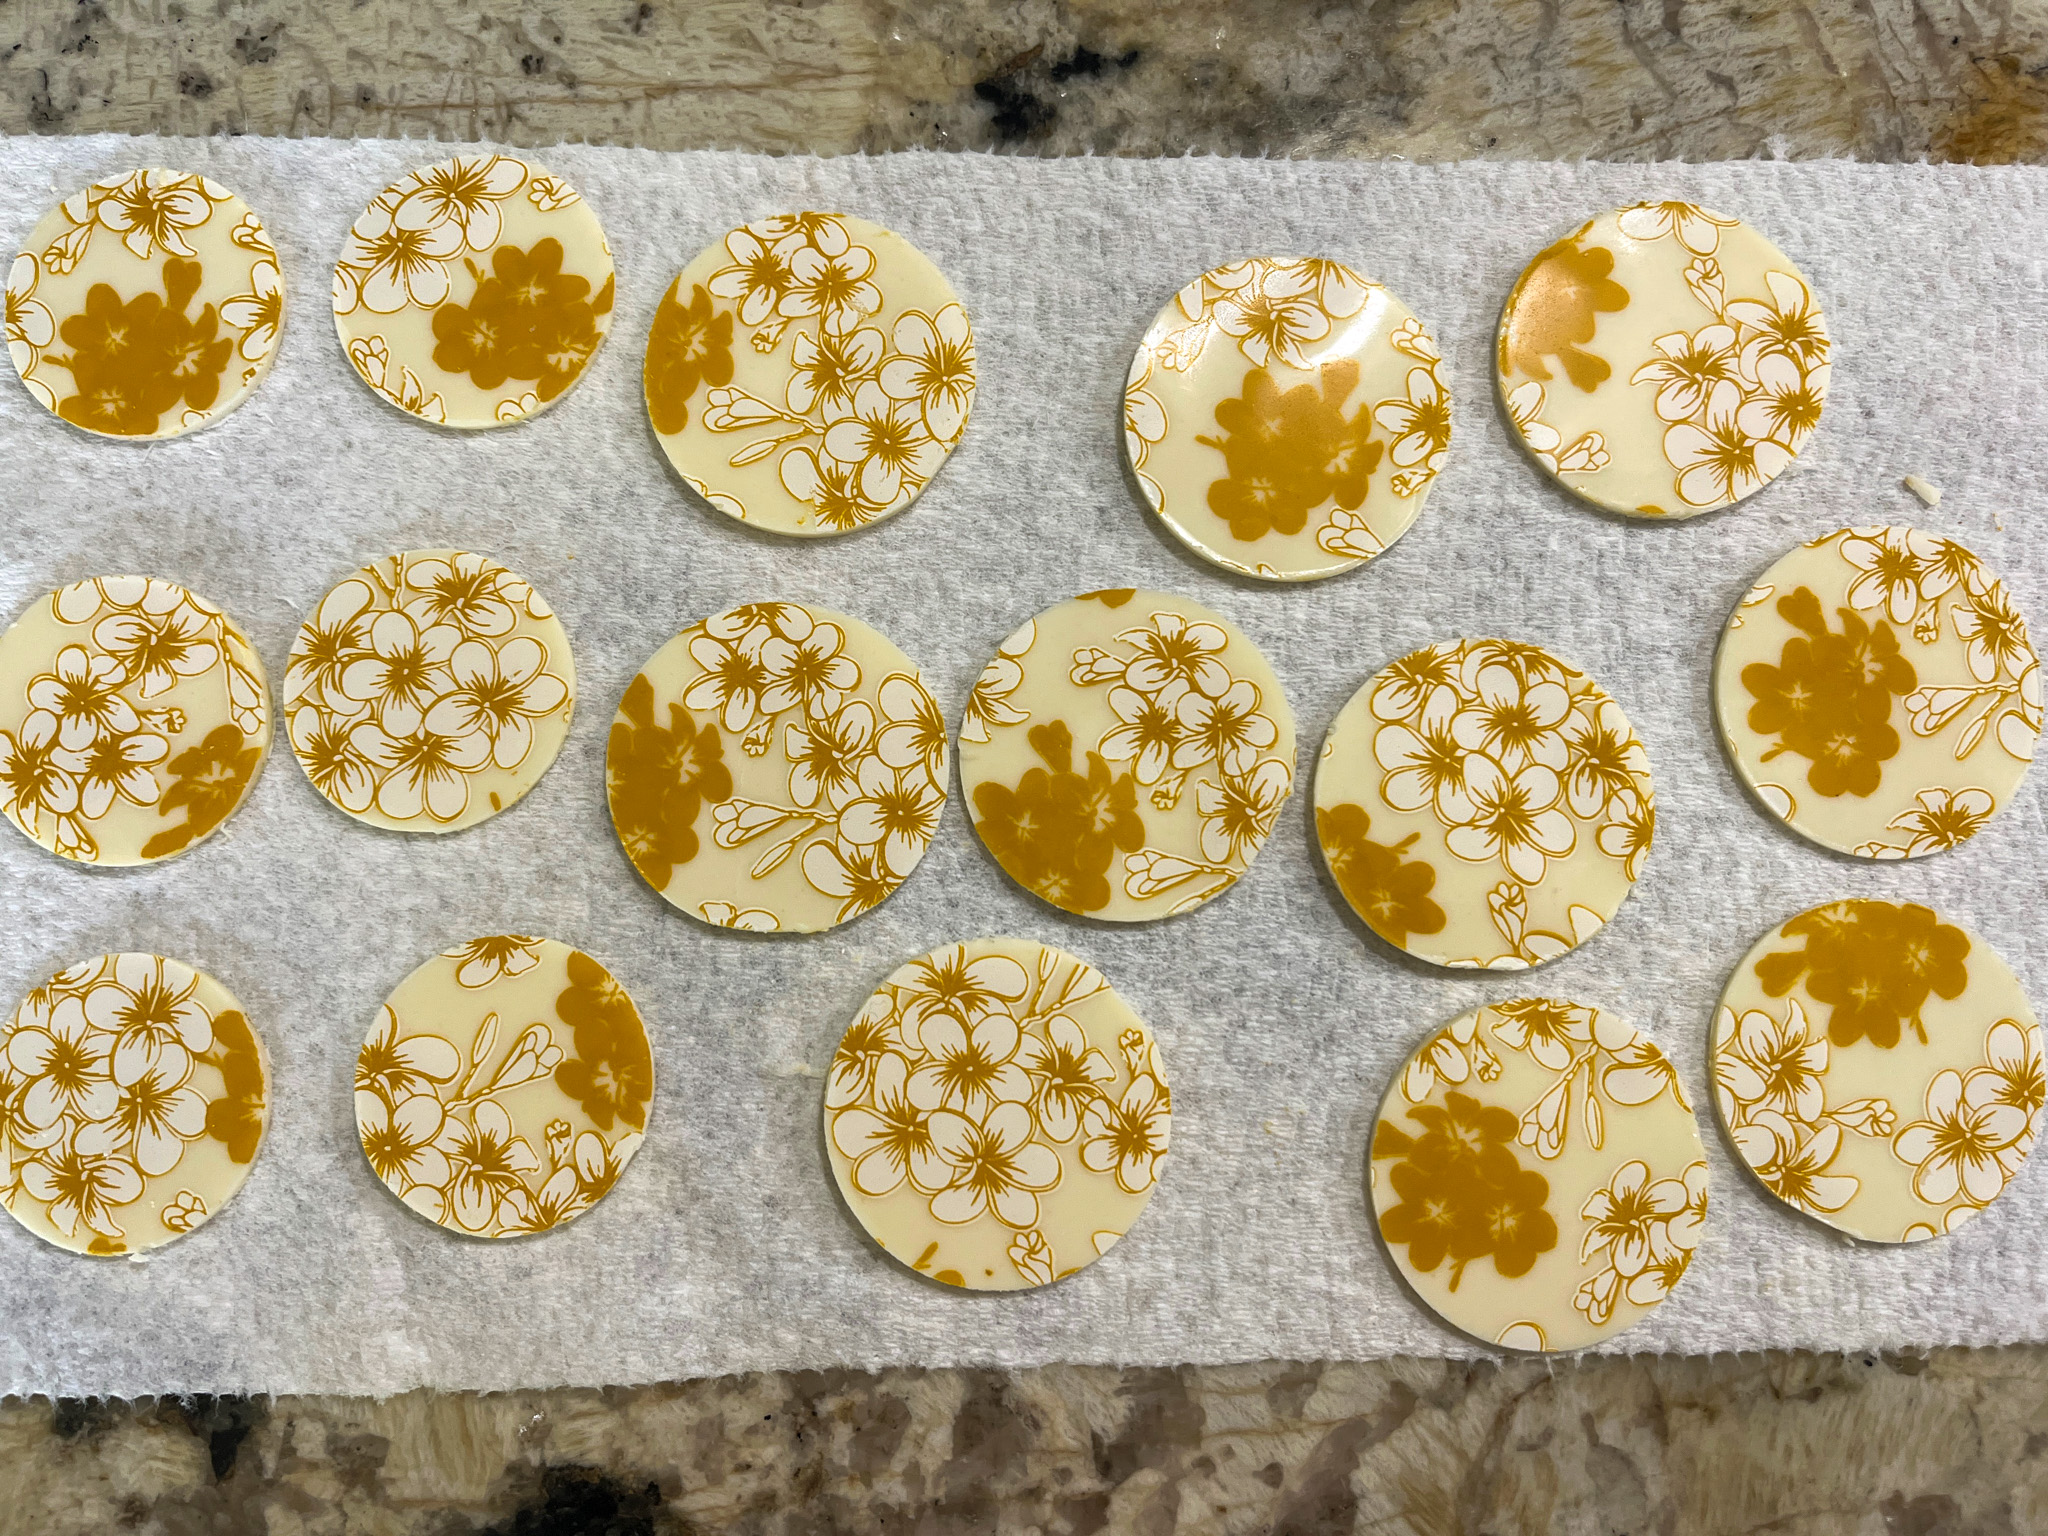
These cupcakes are like little bursts of sunshine on a plate… apart from a marbled buttercream, I added compound chocolate discs made by spreading the melted product over transfer sheets (click here for my favorite source), allowing to set and cutting small circles with a cookie cutter.
BANANA CUPCAKES WITH HONEY BUTTERCREAM FROSTING (adapted from several sources)
makes 16 cupcakes
2 cups ( 260g) all-purpose flour 1 teaspoon baking soda 1 teaspoon ground cinnamon 3/4 teaspoon salt 1 and 1/2 cups (350g) mashed bananas 1/2 cup (113g) unsalted butter, softened to room temperature 1/2 cup (100g) packed dark brown sugar 1/2 cup ( 100g) granulated sugar 2 large eggs, at room temperature 1/4 cup ( 60g) sour cream at room temperature 2 teaspoons pure vanilla extract 1/2 cup (120ml) buttermilk, at room temperature
Heat the oven to 350°F. Line muffin pans with cupcake liners.
Whisk the flour, baking soda, cinnamon, and salt together. Set aside. Cream the butter and both sugars together on high speed until smooth and creamy, about 2 minutes. Add the eggs, sour cream, and vanilla, then beat on medium-high speed until combined. Beat in the mashed banana. With the mixer on low speed, add the dry ingredients until just incorporated. With the mixer still running on low, slowly pour in the buttermilk until combined.
Spoon the batter into the liners to no more than 2/3 full. Bake for 18-20 minutes, or until a toothpick inserted in the center comes out clean. Allow the cupcakes to cool completely before frosting.
HONEY BUTTERCREAM FROSTING
2 + ½ cups (300g) confectioners’ sugar 1 cup (2 sticks) unsalted butter, room temperature 2 tablespoons honey ¼ teaspoon ground cinnamon
With an electric mixer on medium speed, beat all ingredients until smooth.Divide in two portions, leave one white, and yellow food coloring to the other half. Add both batters side by side into a piping bag fitted with a tip 1M to add a swirl to the top of each cupcake. Stick a little decoration if so desired.
Comments: I have not tried the cupcakes but got very nice reviews once I donated them. The chocolate decor is a nice touch, but of course, can be omitted to make life easier. I usually make the discs every time I use chocolate transfer sheets to make chocolate-covered Oreos, so I simply save them in a little plastic container at room temperature.
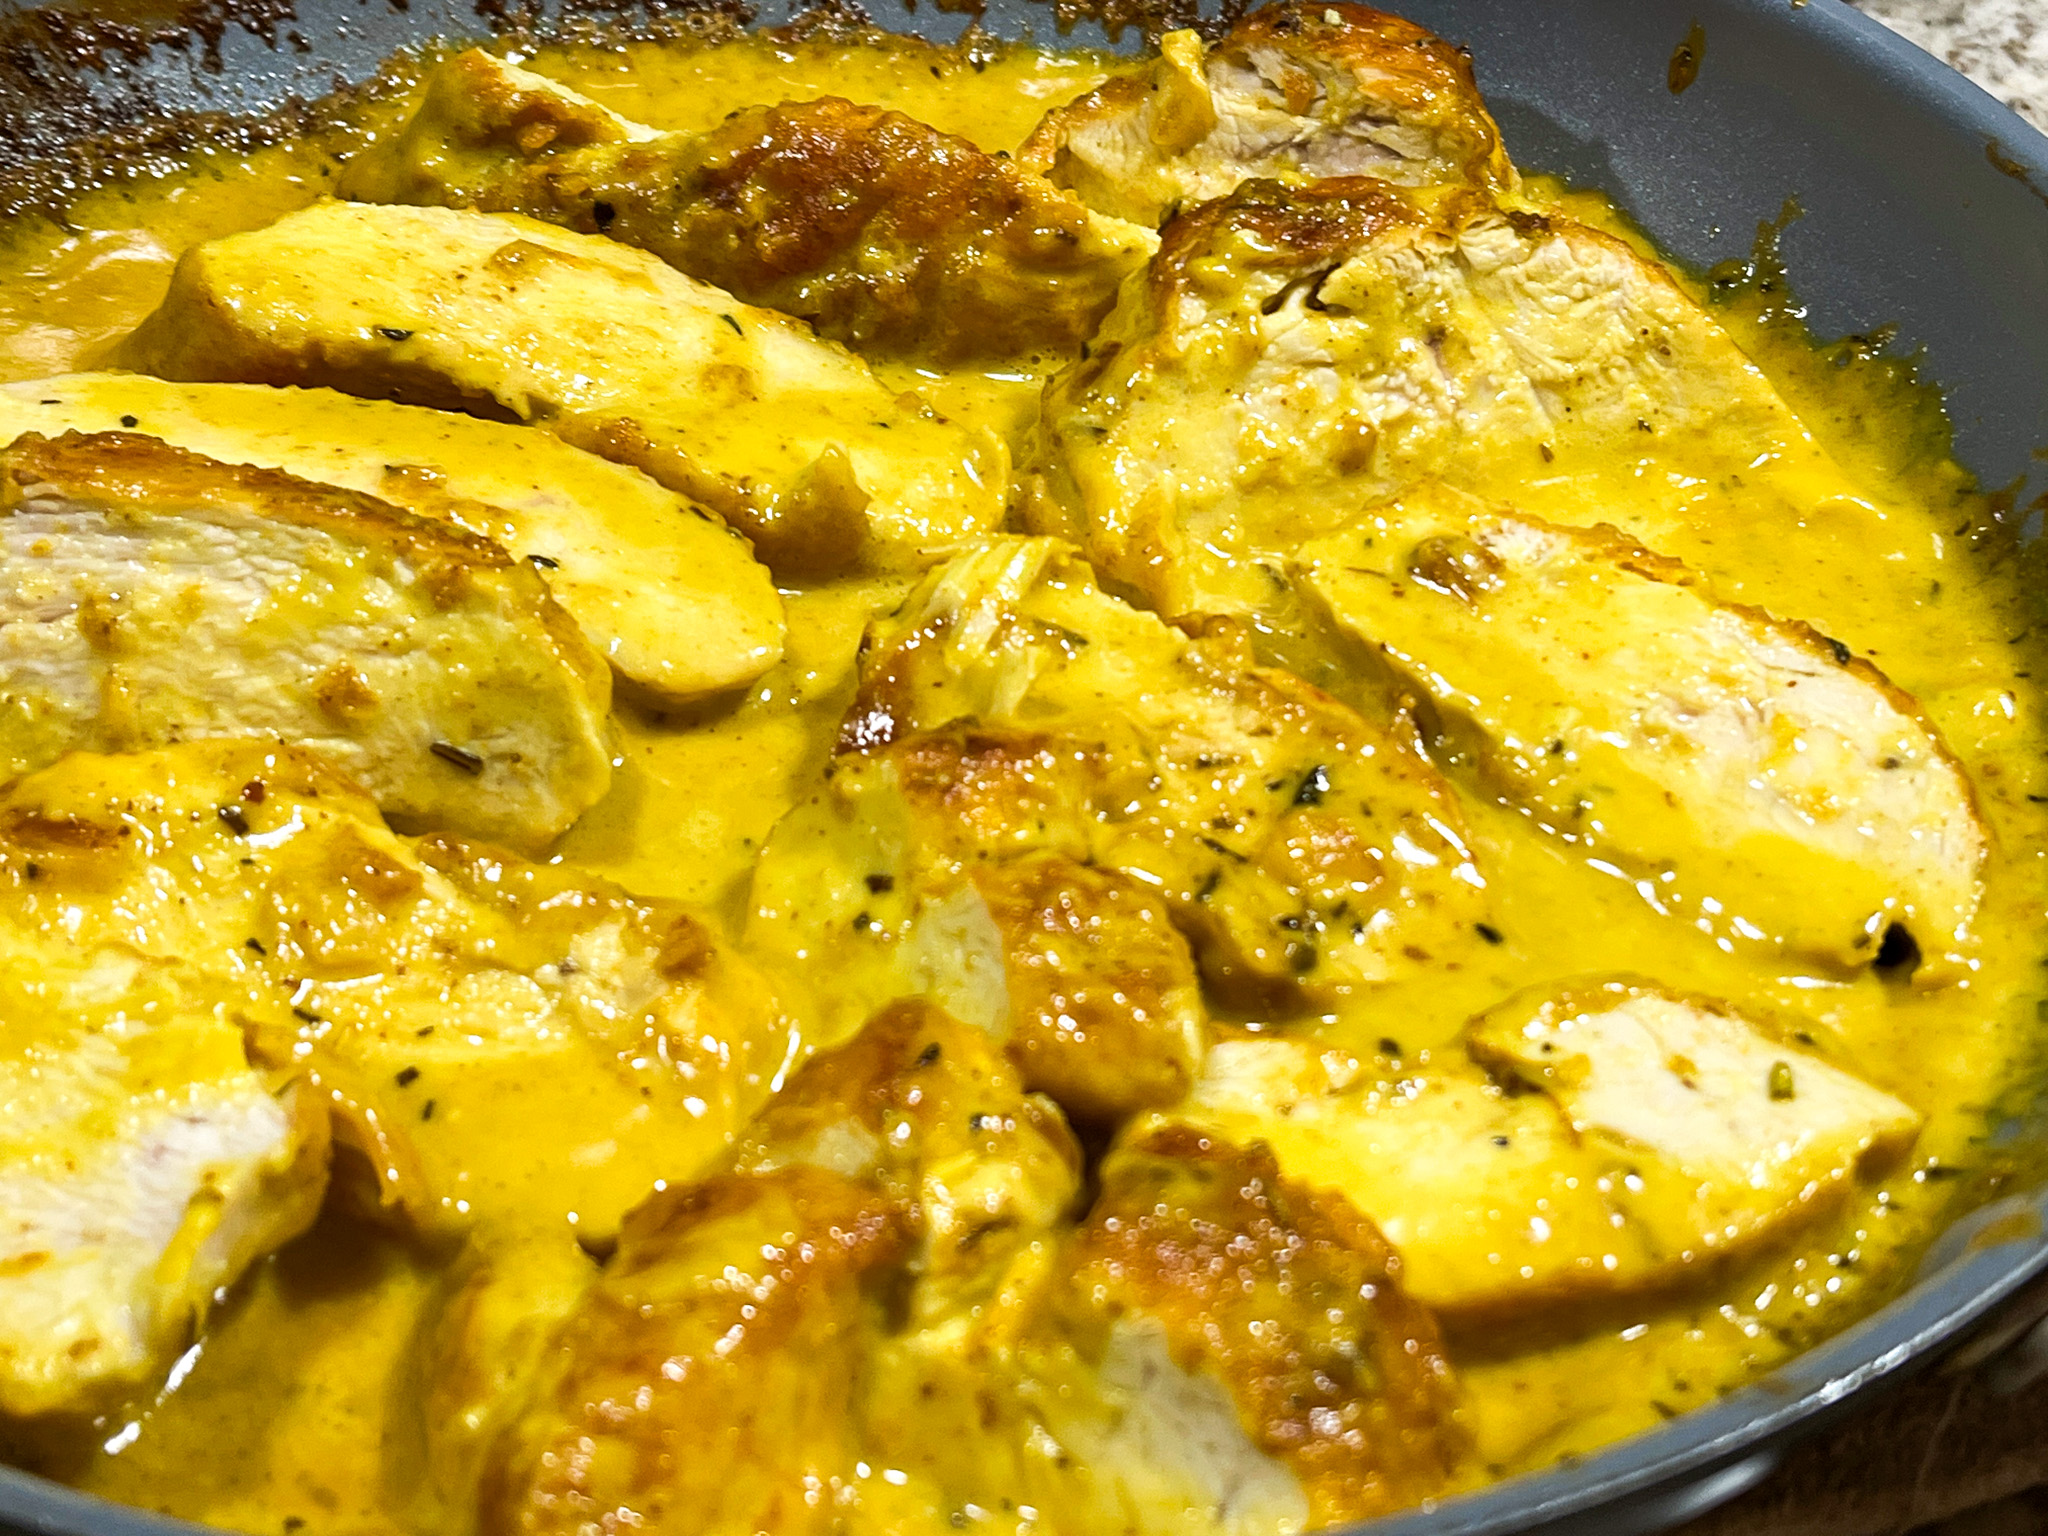
This is very rich with heavy cream, but if you don’t mind splurging a bit for a special meal, totally worth it. Boneless chicken breasts can dry up easily but in this method they stay moist and tender.
CHICKEN BREASTS IN CREAMY TURMERIC-MUSTARD SAUCE (adapted from epicurious)
1 Tbsp. all-purpose flour ¾ tsp kosher salt, divided 1 + ½ tsp. ground turmeric, divided 2 skinless, boneless chicken breasts 2 Tbsp. extra-virgin olive oil, divided 2 medium shallots, thinly sliced Herbes de Provence, to taste 1 cup heavy cream 2 Tbsp. whole grain mustard 1 Tbsp. honey 1 tsp. freshly ground pepper
Heat oven to 375°. Mix 1 Tbsp. all-purpose flour, ½ tsp salt and 1 tsp. ground turmeric in a small bowl to combine. Sprinkle 2 skinless, boneless chicken breasts all over with flour mixture.
Heat 1 Tbsp. extra-virgin olive oil in a medium ovenproof skillet over medium-high. Cook chicken until golden brown on both sides, about 5 minutes per side; transfer to a plate. Reduce heat to medium; heat remaining 1 Tbsp. extra-virgin olive oil in same skillet. Cook the shallots sprinkled with Herbes de Provence until soft and fragrant. Add the heavy cream, turmeric, mustard, honey, black pepper and the remaining salt. Bring to a simmer, then return chicken and any accumulated juices to skillet.
Transfer skillet to oven and bake until sauce is slightly reduced and chicken is cooked through, 20–25 minutes.Remove skillet from oven (HANDLE WILL BE HOT!) and transfer chicken to a cutting board. Let rest 5 minutes, then slice against the grain ¼” thick. Return chicken to sauce, place back on the stove for a couple of minutes just to warm up the slices in the sauce. Serve right away.
Comments: Normally I do not make recipes with so much cream and saturated fat, so this was a departure from the way we eat. It was delicious indeed! I was afraid the heavy cream would dry out too much during baking, uncovered, but it was not the case. Keep an eye on it, add a little water if it is getting burned. I love turmeric… And PLEASE be sure to remember the handle will be hot. I did not, and paid a painful price. Enough said.
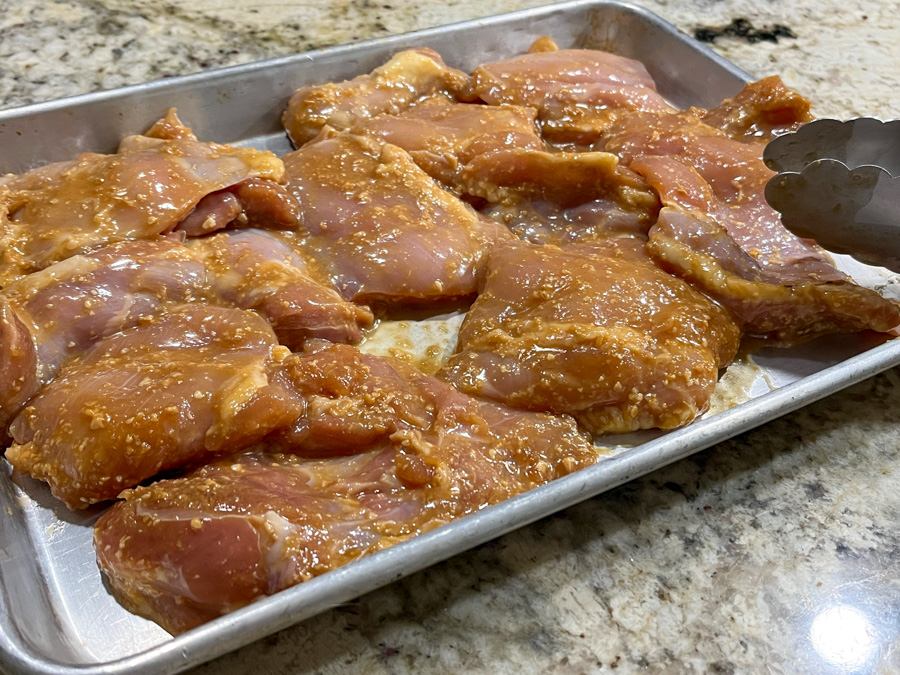
I cannot lie, I have a fascination with all things miso, both sweet and savory. In this preparation, the miso really comes through, so if you are part of my cheerleading team, MAKE IT! Sooner rather than later…
Make the marinade: In a bowl, whisk together the miso, honey, soy sauce, rice vinegar, ginger, chili crisp sauce -garlic sauce, oil and water. Reserve a little bit of the marinade for serving.
Place the chicken in a shallow dish or zip-top bag and pour the remaining marinade over the top. Toss the chicken until coated and let marinate in the refrigerator for 30 minutes.
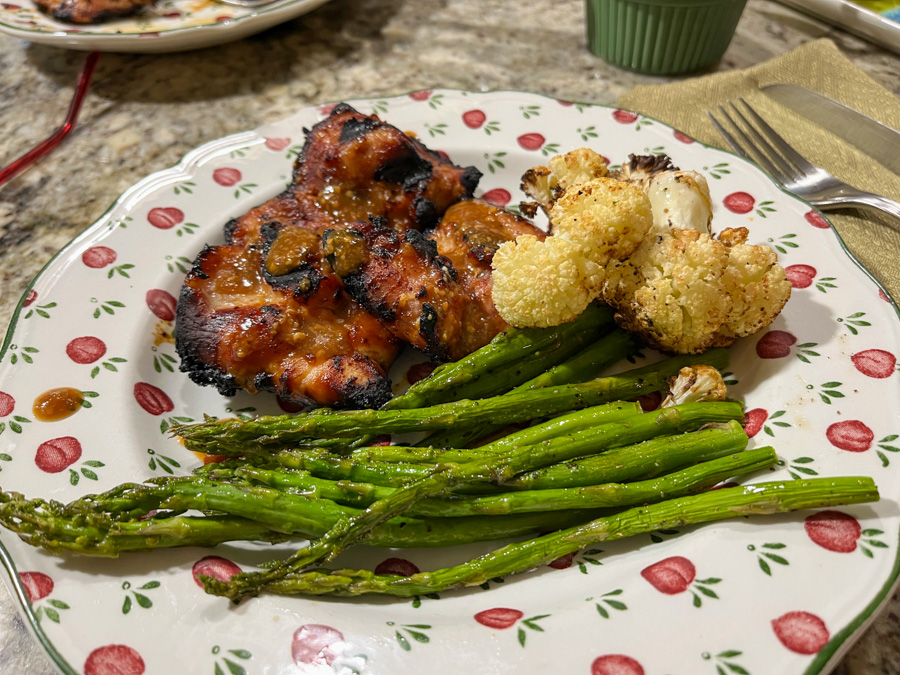
Grill the chicken for about 15 minutes, turning the pieces halfway through the cooking time. Serve with the reserved marinade. Adjust seasoning if needed, but remember miso is very salty so you should not need to add additional salt.
Comments: This one goes into our regular rotation for sure, I love the flavor and the way the honey gives that amazing color to the meat as it grills. We enjoyed it with asparagus and air-fried cauliflower, and leftovers were still delicious next day, which is a real bonus. We love our leftovers…
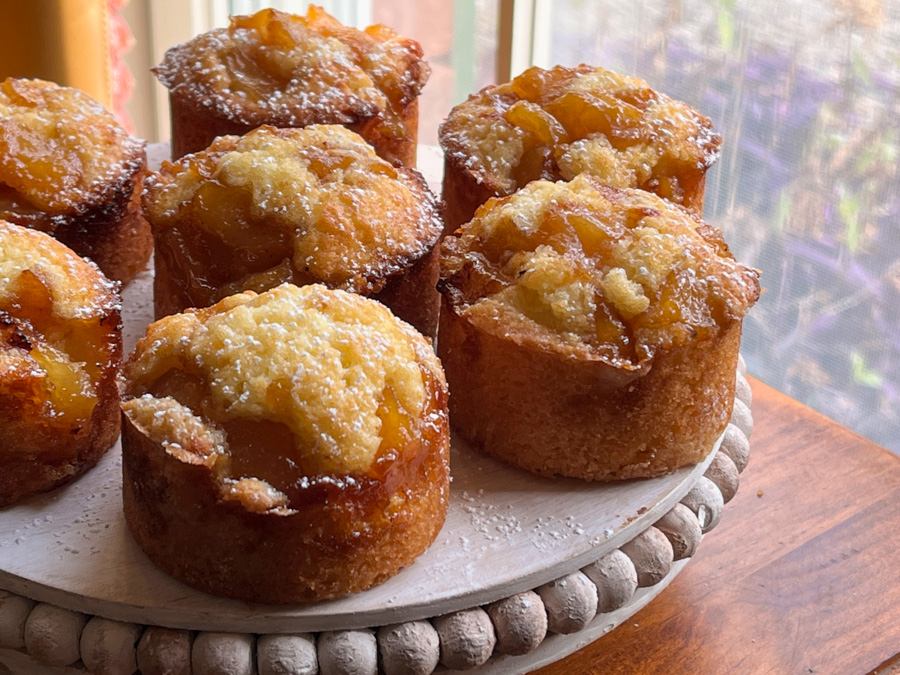
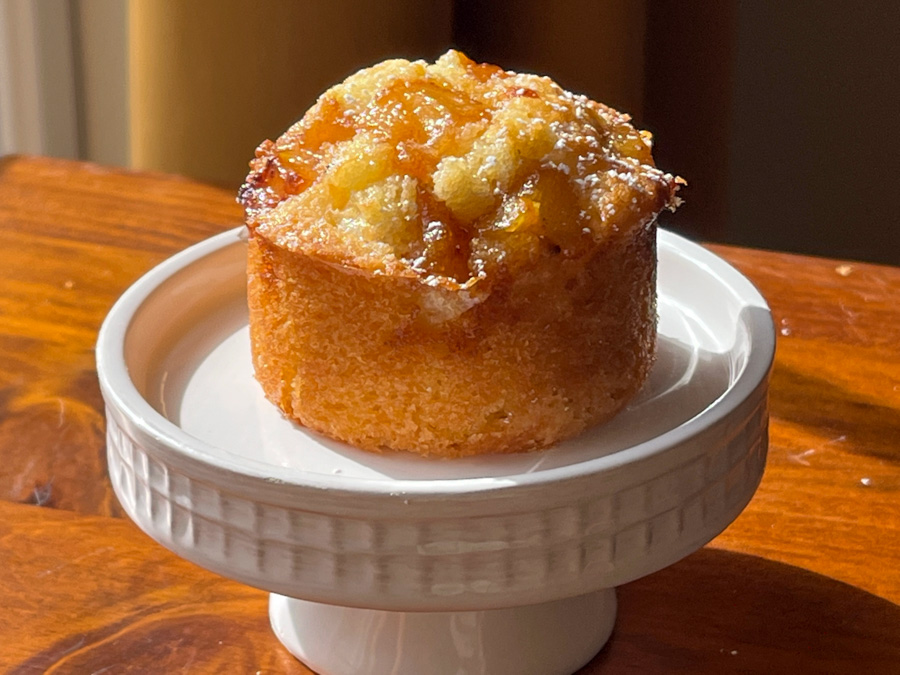
The cake batter for these cupcakes is very simple to make, the only other step needed is preparing the pear topping, but if you want to make your life real easy, you can do that the day before and keep it in the fridge. They don’t need anything but a light shower with powdered sugar.
VANILLA MINI-CAKES WITH HONEY PEARS (adapted from several sources)
for the pear topping: 2 tablespoons (1/4 stick) butter 4 Anjou pears, peeled, cored, cut in small cubes 1/3 cup (65g) golden brown sugar 2 tablespoons honey
for the cakes: 3/4 cup (185g) unsalted butter, room temperature 1 cup (200g) sugar 4 large (200g) eggs 1 teaspoon vanilla extract 1 + 1/3 cups (160g) all purpose flour 1 teaspoon baking powder 1/2 teaspoon salt
powdered sugar
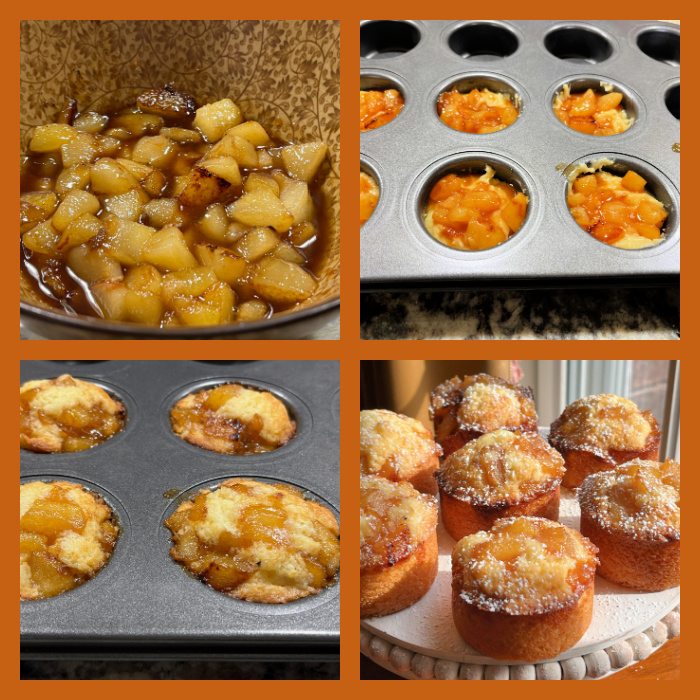
Melt butter in a large non-stick skillet, add the pears and sauté for 5 minutes, until tender. Add brown sugar and honey, cook until pears are evenly coated, about a minute or so. Transfer to a small bowl, cover and put in the fridge until needed.
Heat oven to 350°F. Coat 8 mini-cake pans with non-stick spray. Beat butter and sugar until smooth. Add eggs, one at a time, beating constantly. Add the vanilla. Which the flour, baking powder and salt in a bowl, and sift that mixture into the butter/egg, mixing gently until combined.
Divide the batter among cups, filling a little more than half-full. Spoon 1 to 2 tablespoons of the pear mixture on top of the batter. Bake until a toothpick inserted in the center comes out mostly clean, about 25 minutes. Let rest 15 minutes before un-molding. Right before serving, add a little powdered sugar on top with a sieve.
Comments: For the cakes, I used one of my favorite pans, which I bought a long time ago on eBay. I have not been able to find a source to get it in the US, but you can see it here. It is the same pan I’ve used for mini Victoria cakes (flash back post here). It bakes like a dream, and since the bottom is loose, you can push the cakes out easily. I love the look of the mini-cakes, they get perfectly straight edges. If you don’t have a similar pan, use a regular cupcake pan. Maybe the number and size of your cakes will be different but it will work.
The same approach will work with other fruits, and I also think pineapple could be wonderful, so that’s an idea for future adventures…
The year ended with macarons, the new year starts with them. French macarons launched me on the path of baking, so they will always have a very special place in my heart. But if you are a reader of my blog, you know that already. I wanted my first macarons of 2021 to be happy and uplifting. And sweet. Sweet as honey. Like life should be.
MANUKA HONEY & MASCARPONE MACARONS (from the Bewitching Kitchen, decoration inspired by Sugar and Cloth)
For the shells: 200g Icing/powdered sugar 115 g almond flour 115 g egg whites at room temperature (approx. 4 eggs) 1/8 tsp of cream of tartar (optional) 100 g granulated sugar ¼ tsp vanilla paste or extract gold or yellow food gel color (I used gold from Sunny Side Up Bakery)
For filling: 30 g unsalted butter softened 60 g mascarpone cheese, at room temperature 1 tbsp manuka honey (or another intense honey) 185 g powdered sugar 1/8 tsp lime oil or extract
Line 3 heavy baking sheets with parchment/baking paper or Silpat mats. Layer the powdered/icing sugar and ground almonds/almond meal in a food processor. Pulse until the mixture looks like fine meal, about 12 pulses. Pass through a sieve and transfer to a small bowl or to a sheet of parchment/baking paper. Set aside.
Place the egg whites and cream of tartar in the bowl of a stand mixer fitted with the whisk attachment. Make sure that the bowl and the whisk are impeccably clean. Starting on medium speed, whip the whites with the cream of tartar until they look like light foam. The whites should not appear liquid. The foam will be light and should not have any structure.
Slowly rain in the granulated sugar in five additions, trying to aim the stream between the whisk and the side of the bowl. Turn the speed up to high. Continue to whip the meringue until it is soft and shiny. It should look like marshmallow creme (marshmallow fluff). Add the vanilla and food colors. Whip the egg whites until the mixture begins to dull and the lines of the whisk are visible on the surface of the meringue. Check the peak. It should be firm. Transfer the whites to a medium bowl.
Fold in the ground almond/almond meal mixture in two increments. Paint the mixture halfway up the side of the bowl, using the flat side of a spatula. Scrape the mixture down to the center of the bowl. Repeat two or three times, then check to see if the mixture slides slowly down the side of the bowl. Put the mixture in a piping bag fitted with your choice of piping tip (round, ¼ or ½ inch in diameter or 6 – 12 mm). If you don’t have a macaron mat, draw circles on baking/parchment paper about 2inches/5cm in diameter & turn the paper over before placing on the baking sheets. Pipe shells, I like to count numbers in my head and use the same count for each shell so they end up similar in size. If making snowmen, make a template with two circles joined together to form head and body, and pipe each section.
Slam each sheet hard four to six times on the counter/worktop. Let the unbaked macarons dry until they look dull but not overly dry. Drying time depends on humidity. In a dry climate, the macarons can dry in 15 to 20 minutes; in a humid climate, it can take 35 to 40 minutes.
While the macarons are drying, heat the oven to 300 F. Bake one sheet at a time on the middle rack. Check in 11 minutes. If the tops slide or move (independently of the ‘feet’ when you gently twist the top), then bake for 2 to 3 more minutes. Check one or two. If they move when gently touched, put them back in the oven for 1 to 2 more minutes until they don’t move when touched. Let the macaroons cool for 10 minutes before removing from the pan. The macarons should release without sticking.
For the filling, use a hand-held electric mixer and whisk the butter and mascarpone cheese until creamy. Add the honey and lemon extract, whisk a minute longer. Add the powdered sugar, whisk in low-speed at first, the increase speed and whisk until creamy and smooth. If needed, add a very small amount of milk or heavy cream.
Assemble the macarons: find two macarons similar in size and add a good amount of filling to the bottom of one of them. Place the other on top and squeeze gently to take the filling all the way to the edge. Store in the fridge for 24 hours for perfect texture.
Comments: I must confess something. The filling was going to be slightly different: I wanted to make a buttercream or ganache with burnt honey. Recently one of my tent-baking friends made a cake and used it for the filling. Apparently the flavor is just amazing. But I got lazy. So I decided to part with a tablespoon of my Manuka honey because its flavor is so intense, it could (maybe) compensate for my laziness. And it really did. I love the way these macs turned out. The lemon extract cuts a bit through the sweetness, so don’t omit it.
The decoration requires a little time but is pretty simple. You will need a very small amount of Royal Icing dyed yellow-orange. Pipe small cylinders where you want each little bee to be (ooops, sorry about that). Let it set. Next, make the little dots to represent their flying path with a fine tip food pen. Use the same pen to draw antennas and wings. Please note that the antennas should go opposite to the end of the flying path (after a few bees it is easy to make a mistake). To make the black lines on the body, it is best to use a marker with a soft tip (like these), but if you don’t have one, let the bodies set for at least 4 hours and then go gently with a regular food pen. The surface is obviously very fragile. I am truly in love with these babies!
So there you have it, my first batch of macarons for the year 2021: