I cannot lie, I have a fascination with all things miso, both sweet and savory. In this preparation, the miso really comes through, so if you are part of my cheerleading team, MAKE IT! Sooner rather than later…

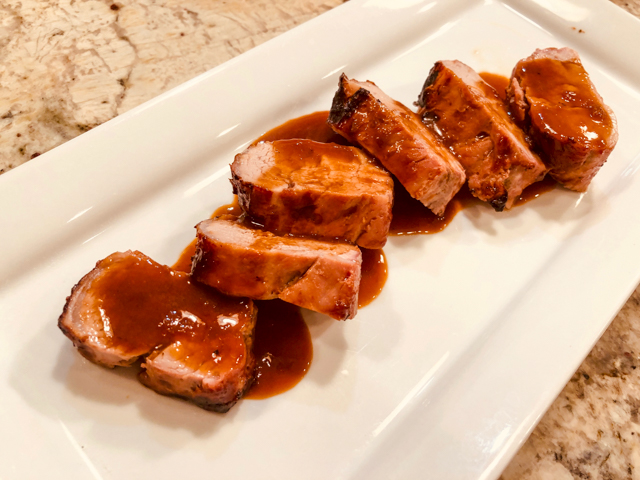
MISO-HONEY GRILLED CHICKEN THIGHS
(adapted from The New York Times)
4 tablespoons white miso
4 tablespoons mild honey
4 tablespoons soy sauce
1 tablespoon rice vinegar
2 teaspoons finely grated fresh ginger
2 teaspoons chili crisp
2 tablespoons canola oil
2 tablespoons water
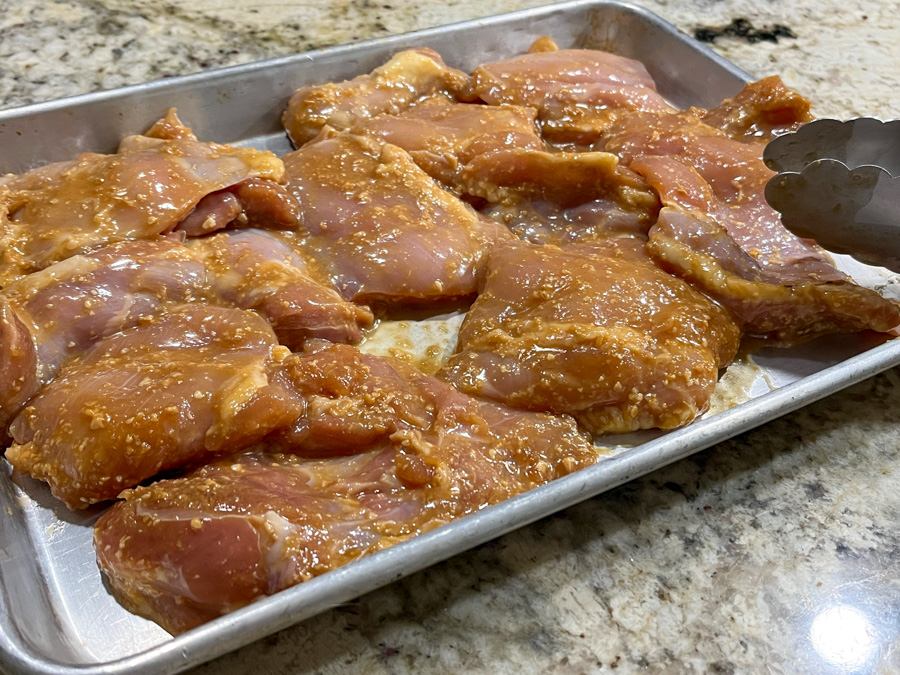
8 boneless, skinless chicken thighs
Make the marinade: In a bowl, whisk together the miso, honey, soy sauce, rice vinegar, ginger, chili crisp sauce -garlic sauce, oil and water. Reserve a little bit of the marinade for serving.
Place the chicken in a shallow dish or zip-top bag and pour the remaining marinade over the top. Toss the chicken until coated and let marinate in the refrigerator for 30 minutes.
Grill the chicken for about 15 minutes, turning the pieces halfway through the cooking time. Serve with the reserved marinade. Adjust seasoning if needed, but remember miso is very salty so you should not need to add additional salt.
ENJOY!
to print the recipe, click here
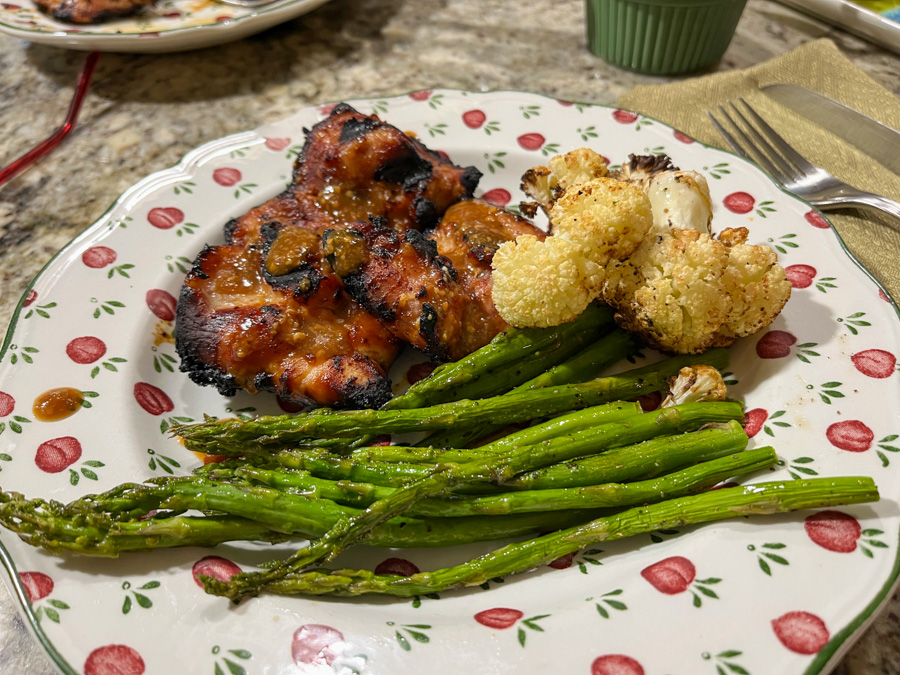
Comments: This one goes into our regular rotation for sure, I love the flavor and the way the honey gives that amazing color to the meat as it grills. We enjoyed it with asparagus and air-fried cauliflower, and leftovers were still delicious next day, which is a real bonus. We love our leftovers…
ONE YEAR AGO: Raw Zucchini and Chickpea Salad with Tahini Yogurt
TWO YEARS AGO: Black Tahini Shortbread Cookies
THREE YEARS AGO: A Fruitful Trio (of Macarons)
FOUR YEARS AGO: Halloween Entremet Cake
FIVE YEARS AGO: Pork with Prunes, Olives and Capers
SIX YEARS AGO: Kansas Corn Chowder
SEVEN YEARS AGO: Impossibly Cute Bacon and Egg Cups
EIGHT YEARS AGO: Pulling Under Pressure
NINE YEARS AGO: Cooking Sous-vide: Two takes on Chicken Thighs
TEN YEARS AGO: Miso Soup: A Japanese Classic
ELEVEN YEARS AGO: On my desk
TWELVE YEARS AGO: A must-make veggie puree
THIRTEEN YEARS AGO: Vegetarian Lasagna
FOURTEEN YEARS AGO: Brazilian Pão de Queijo