A bit of an unusual flavor, but so much fun! Cupcakes or cookies? You decide!
.
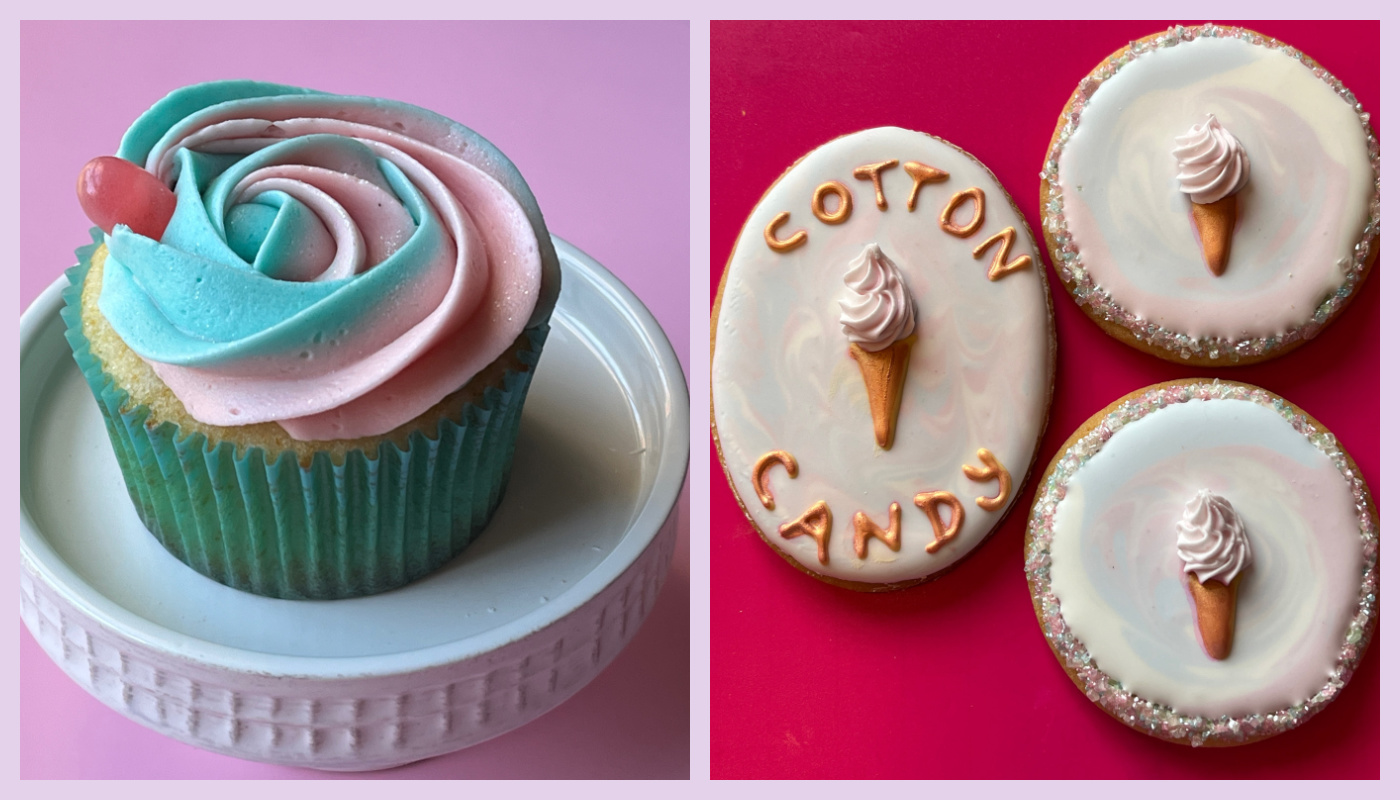
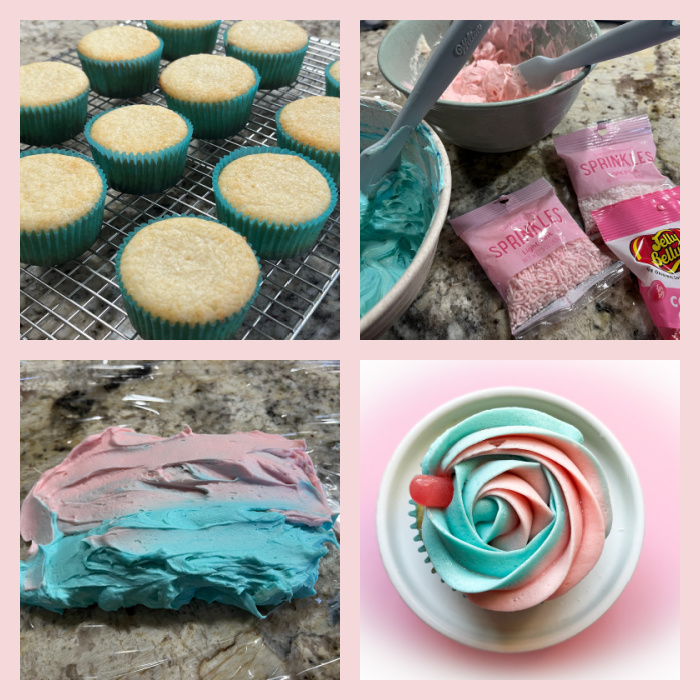
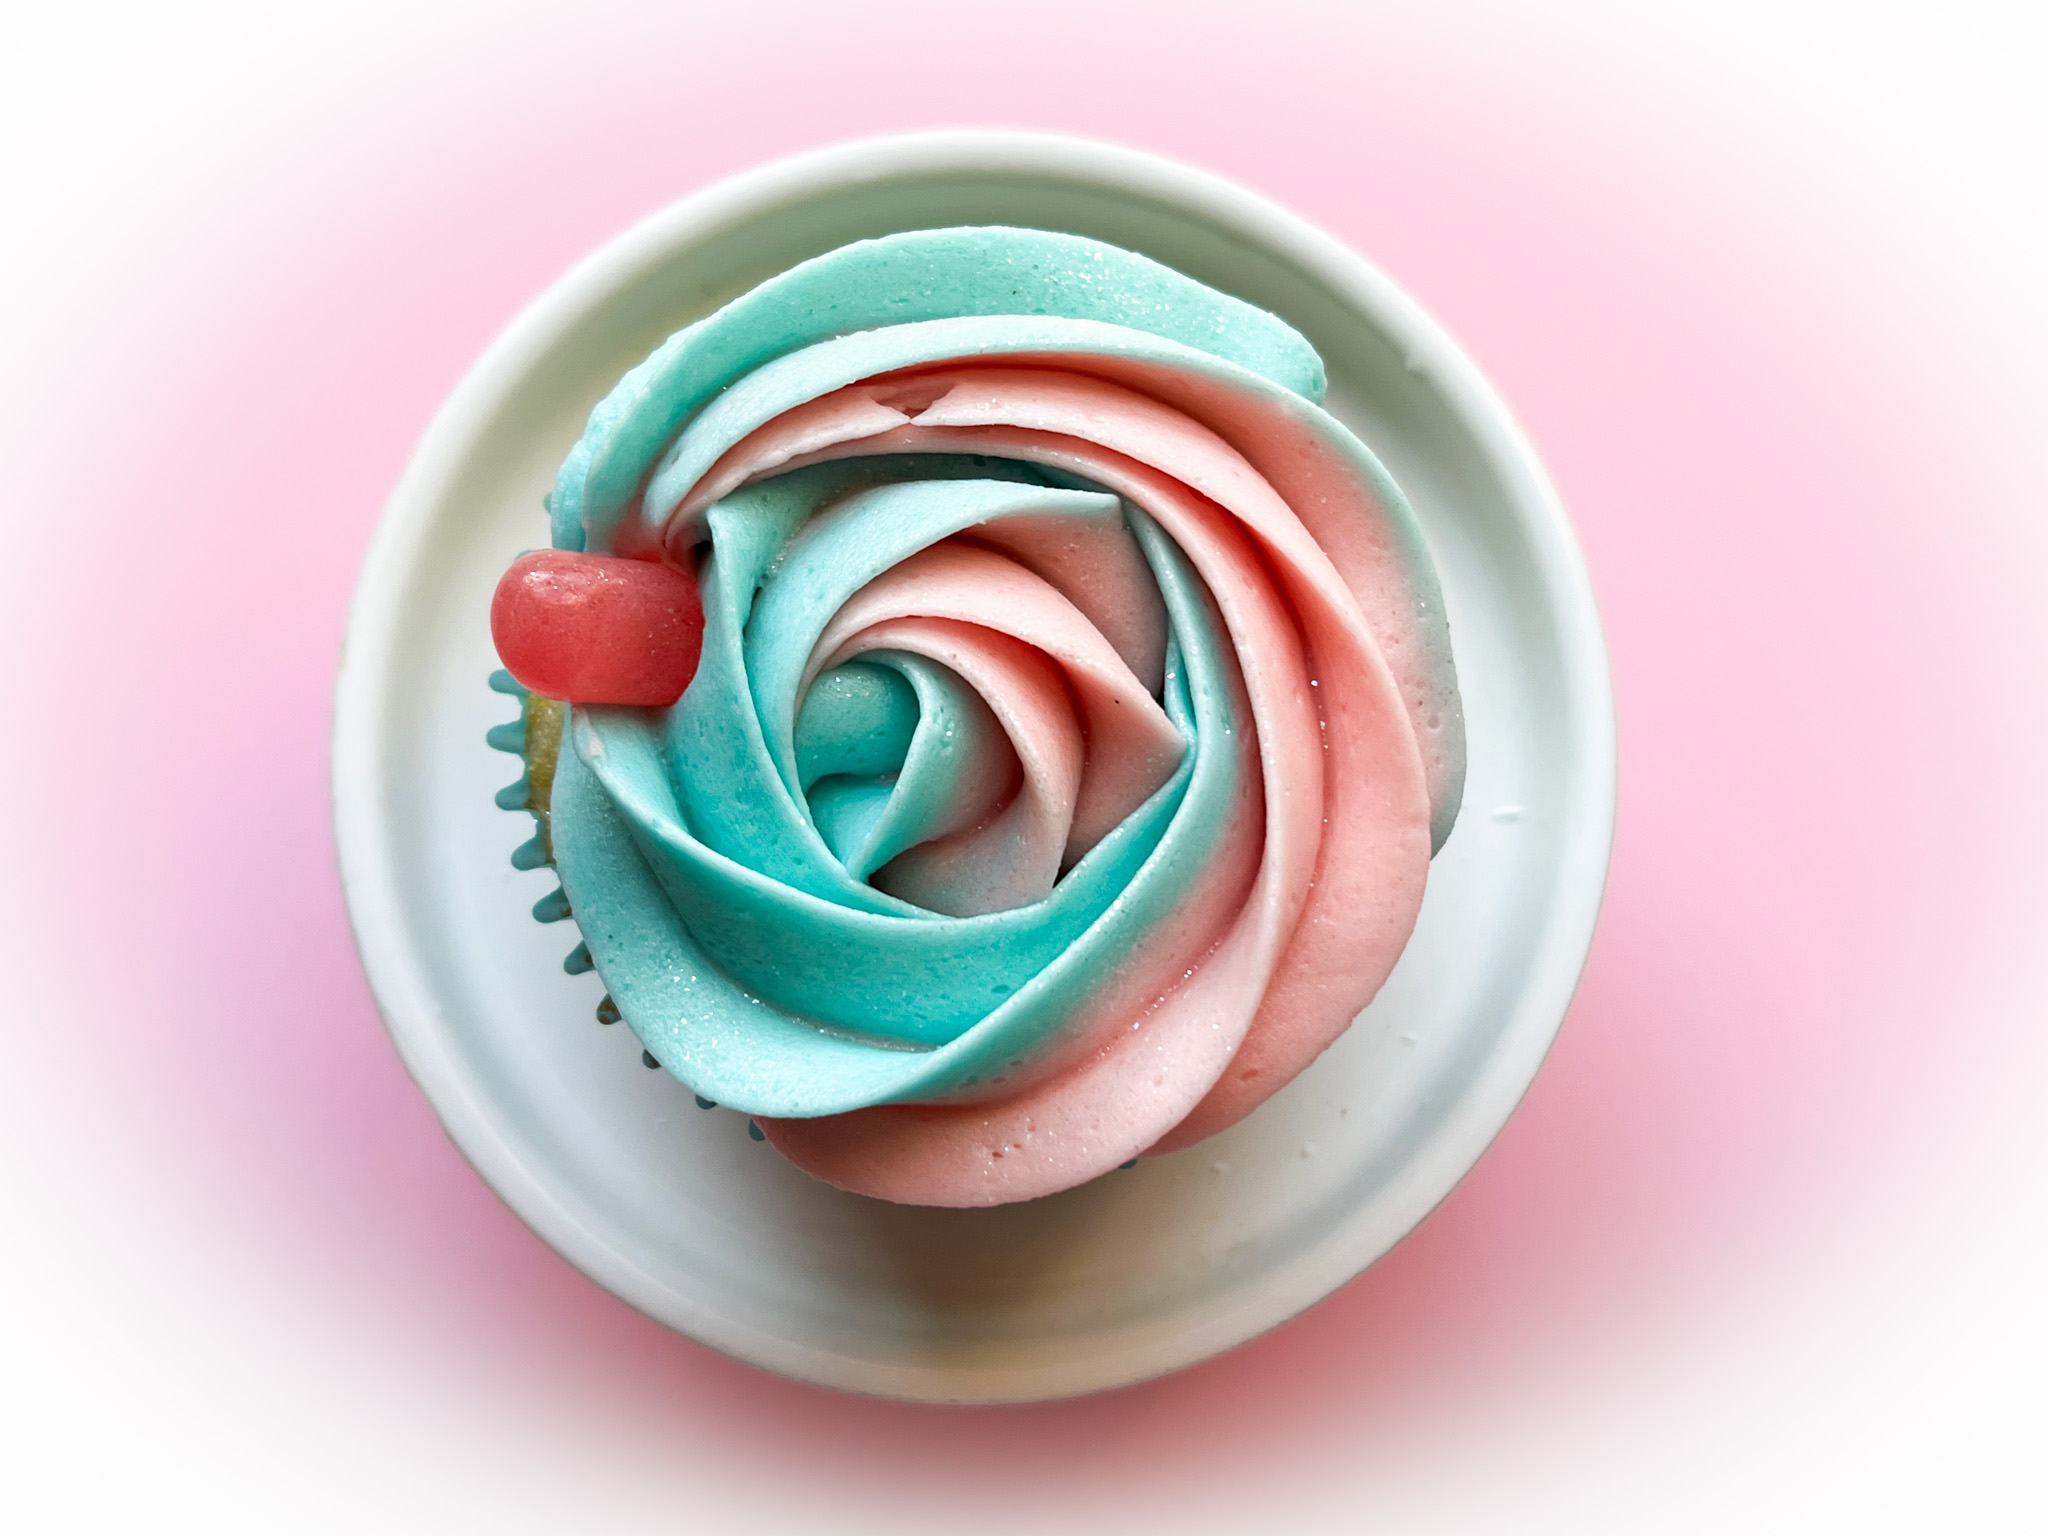
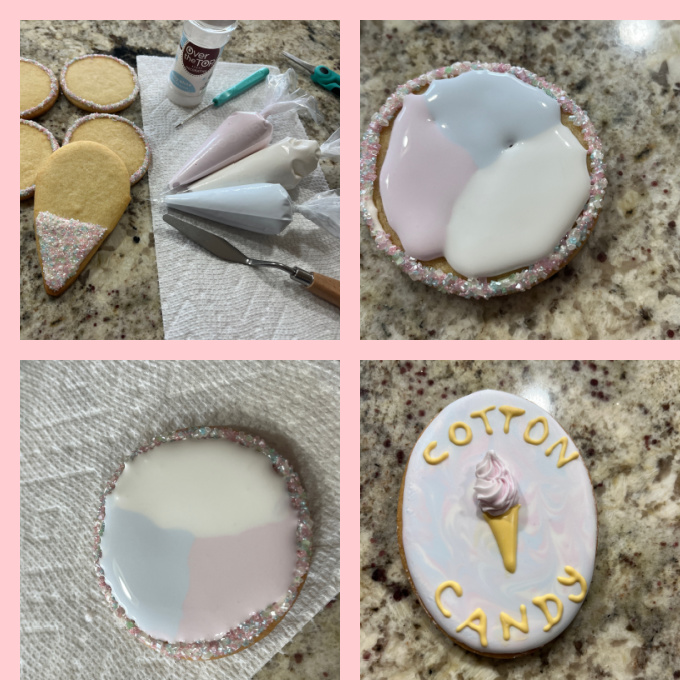
COTTON CANDY CUPCAKES
I cannot share the recipe for the cupcakes, but the cookbook is a definite must-have if you like to bake cakes. It is full of fun ideas, unexpected flavor combinations and cute decoration ideas. Girls Just Want to Bake Cupcakes, by Courtney Carey. It is inspired by the 80’s and each recipe has a song associated with it. Huge trip down memory lane! I adore this cookbook…
In the book they suggest dividing the batter in two portions and adding pink to half, blue to half. I totally forgot about it. So my cupcakes were pure white. The frosting is marbled and the cotton candy flavor comes from LorAnn (click here). I used Cotton Candy jelly bean to decorate each cake.
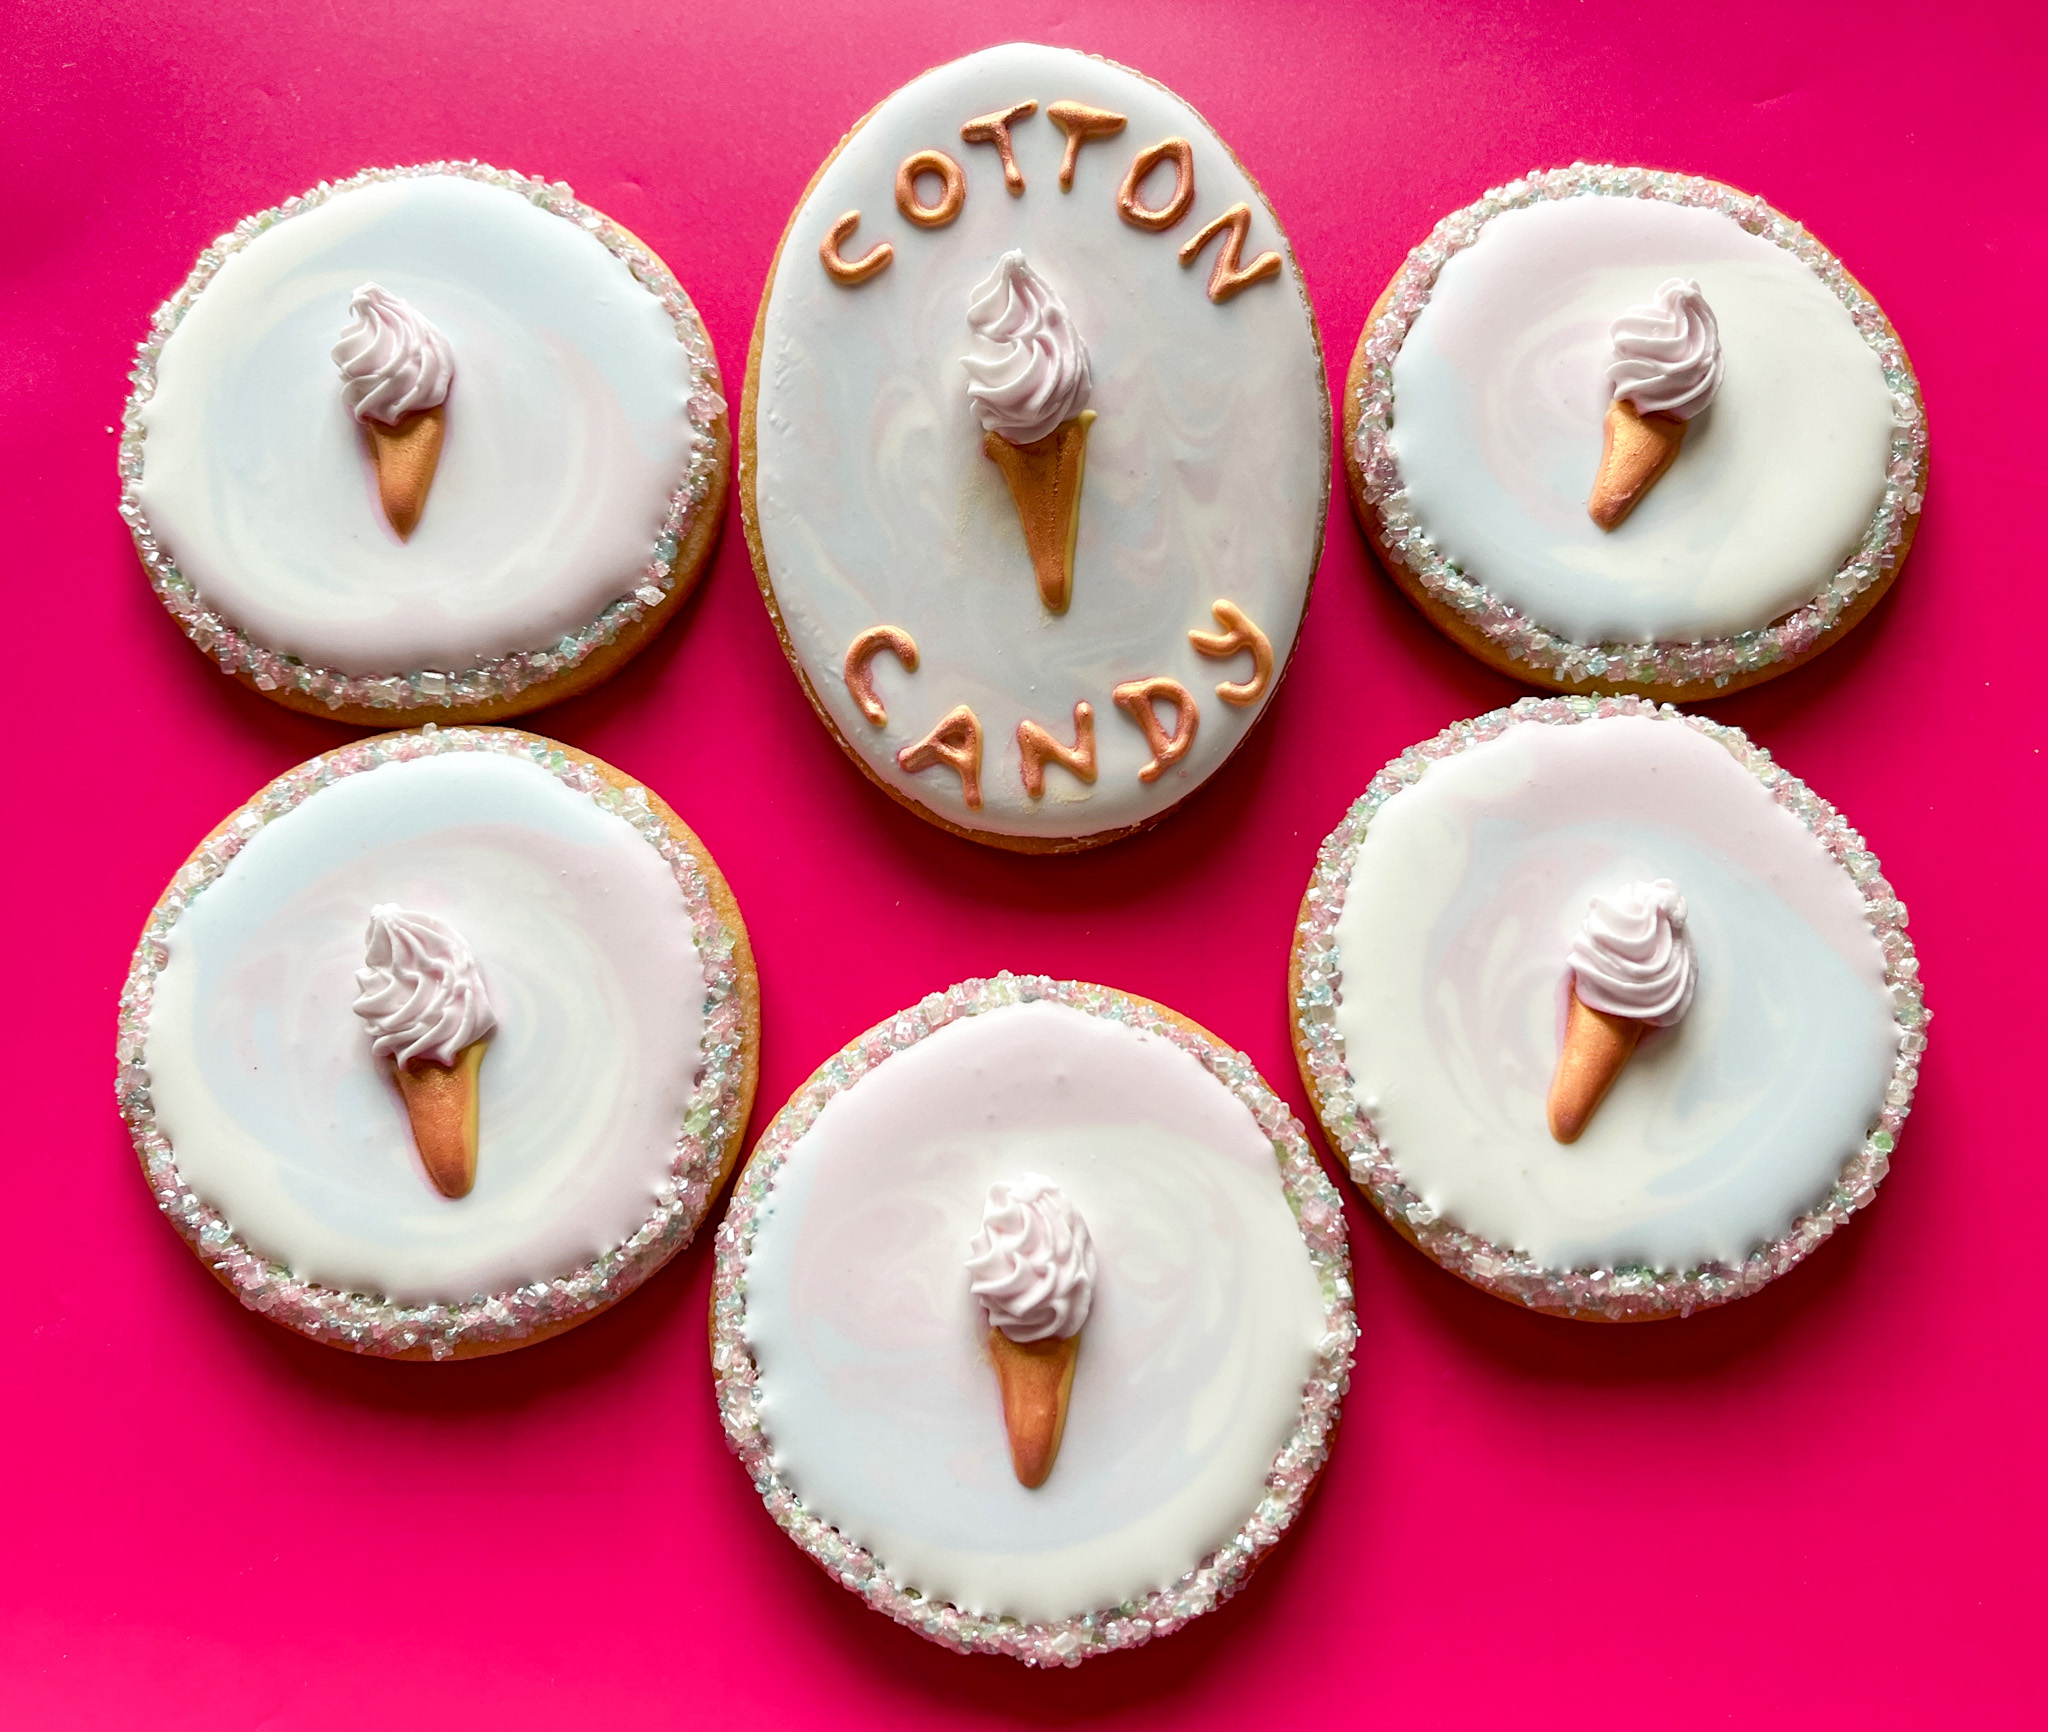
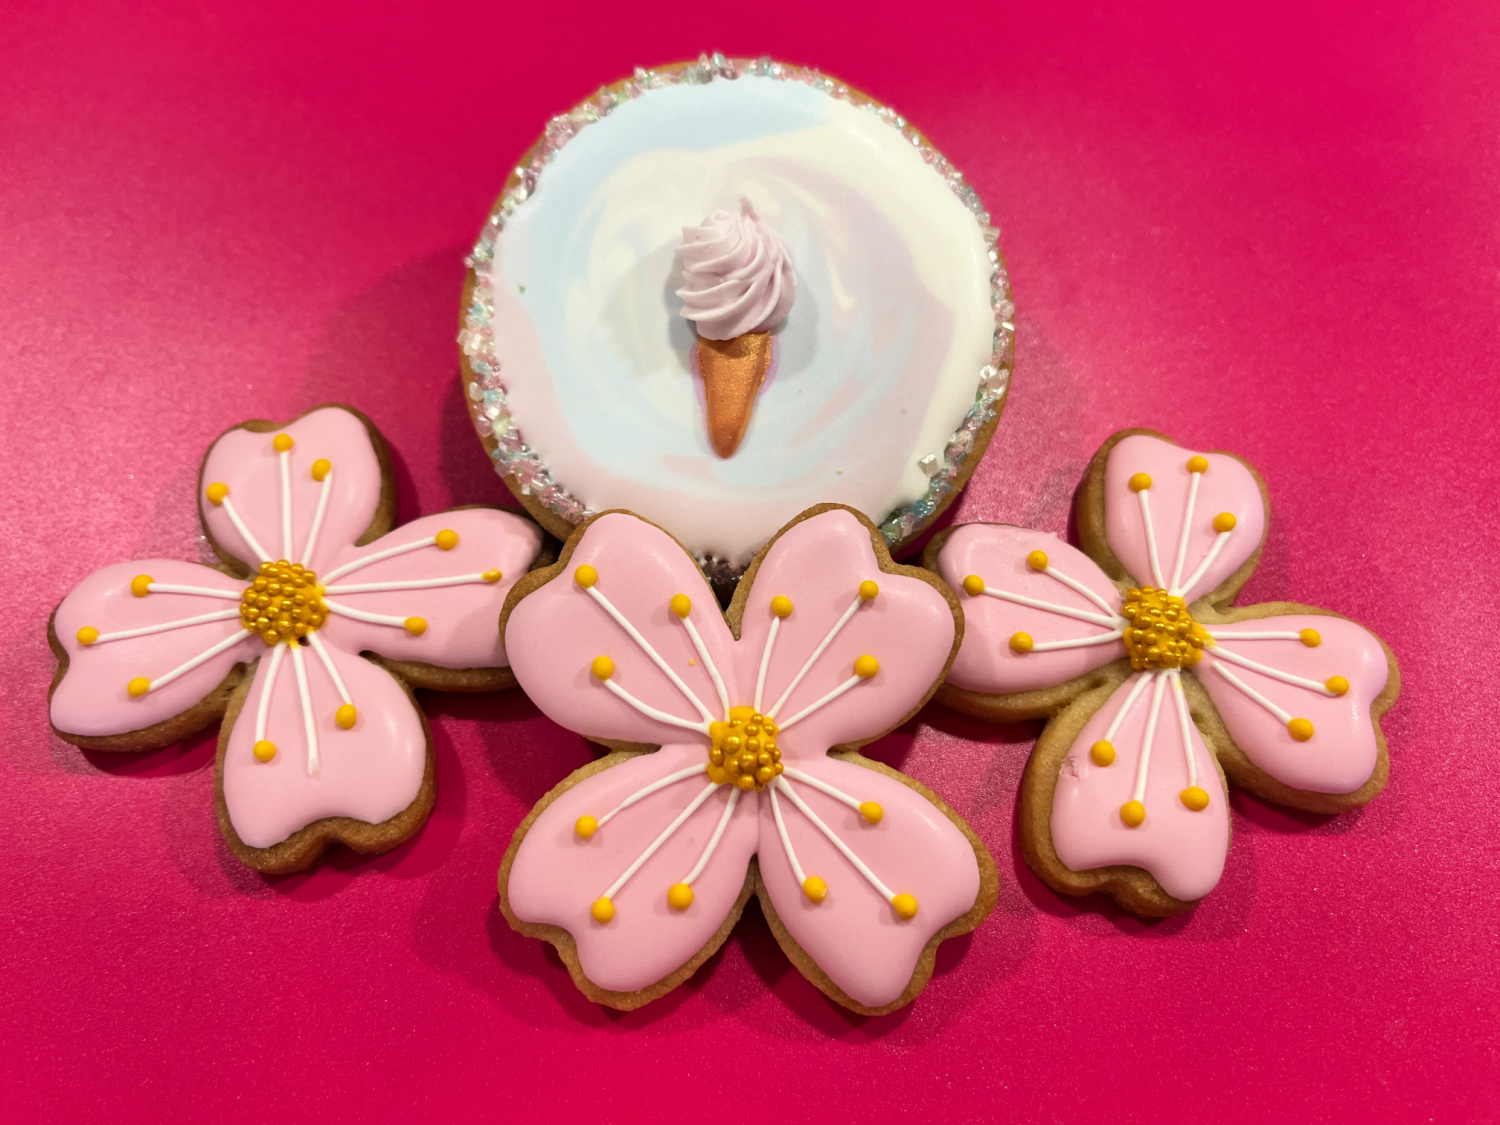
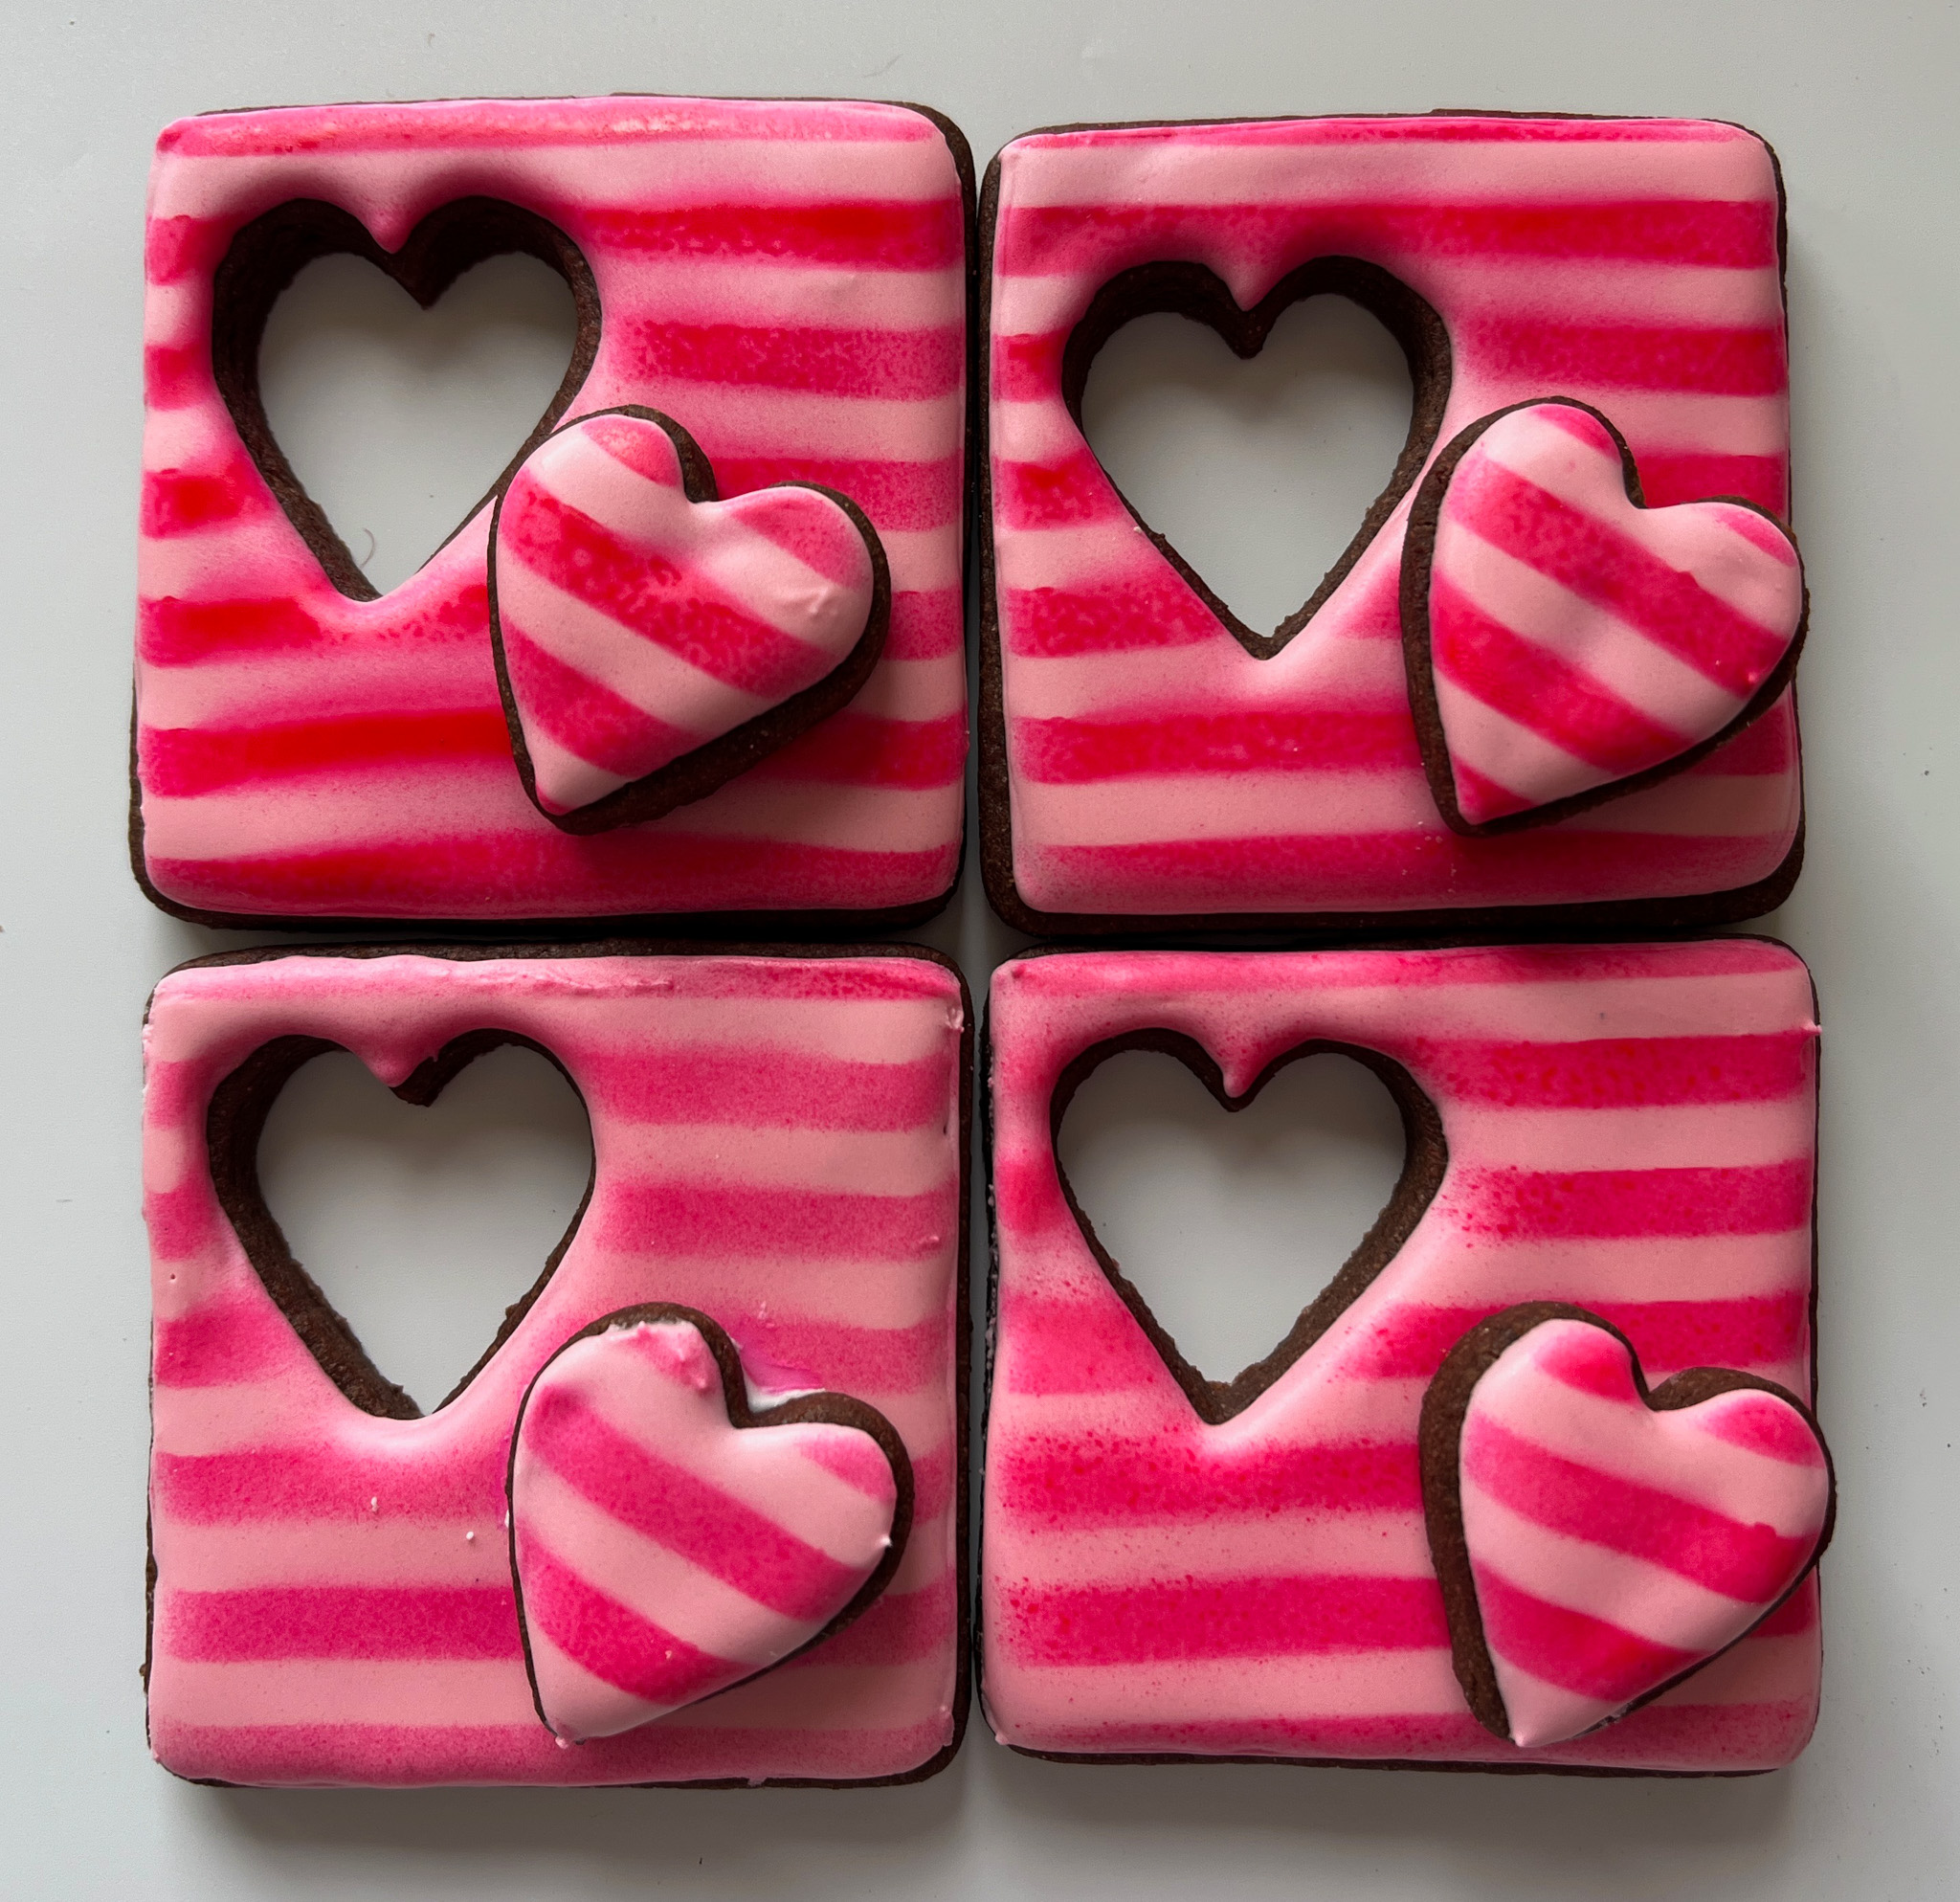
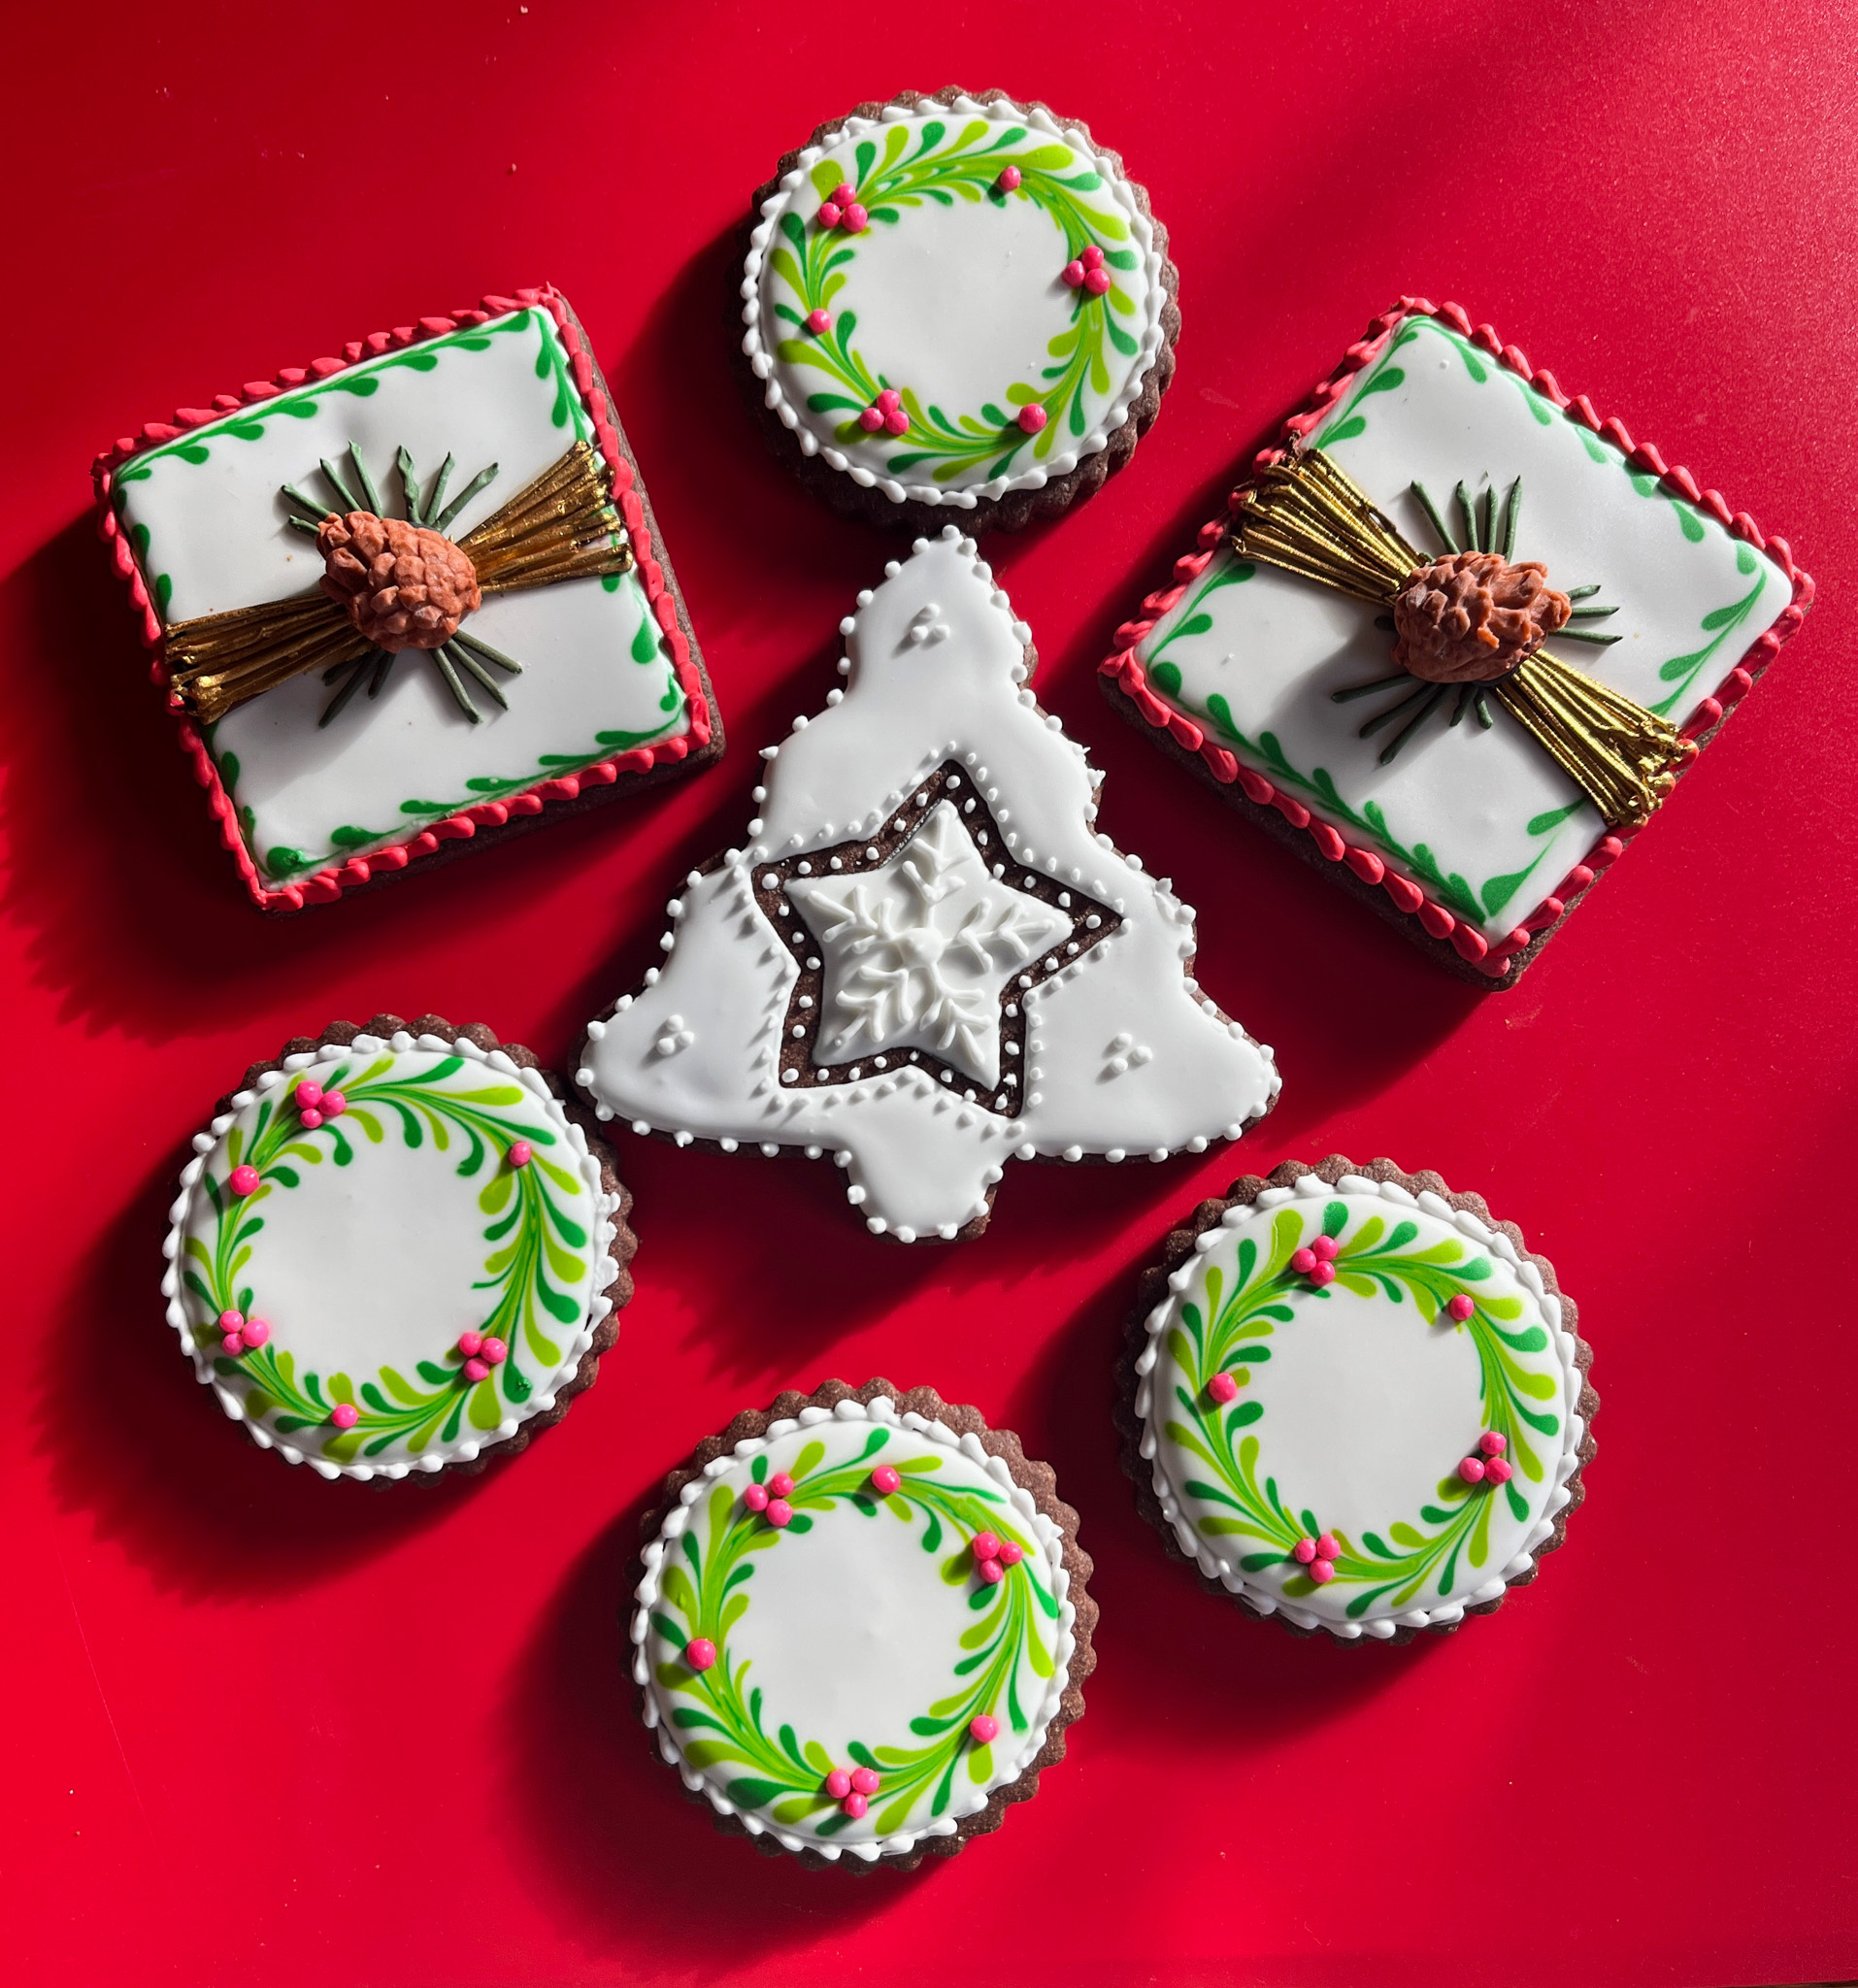
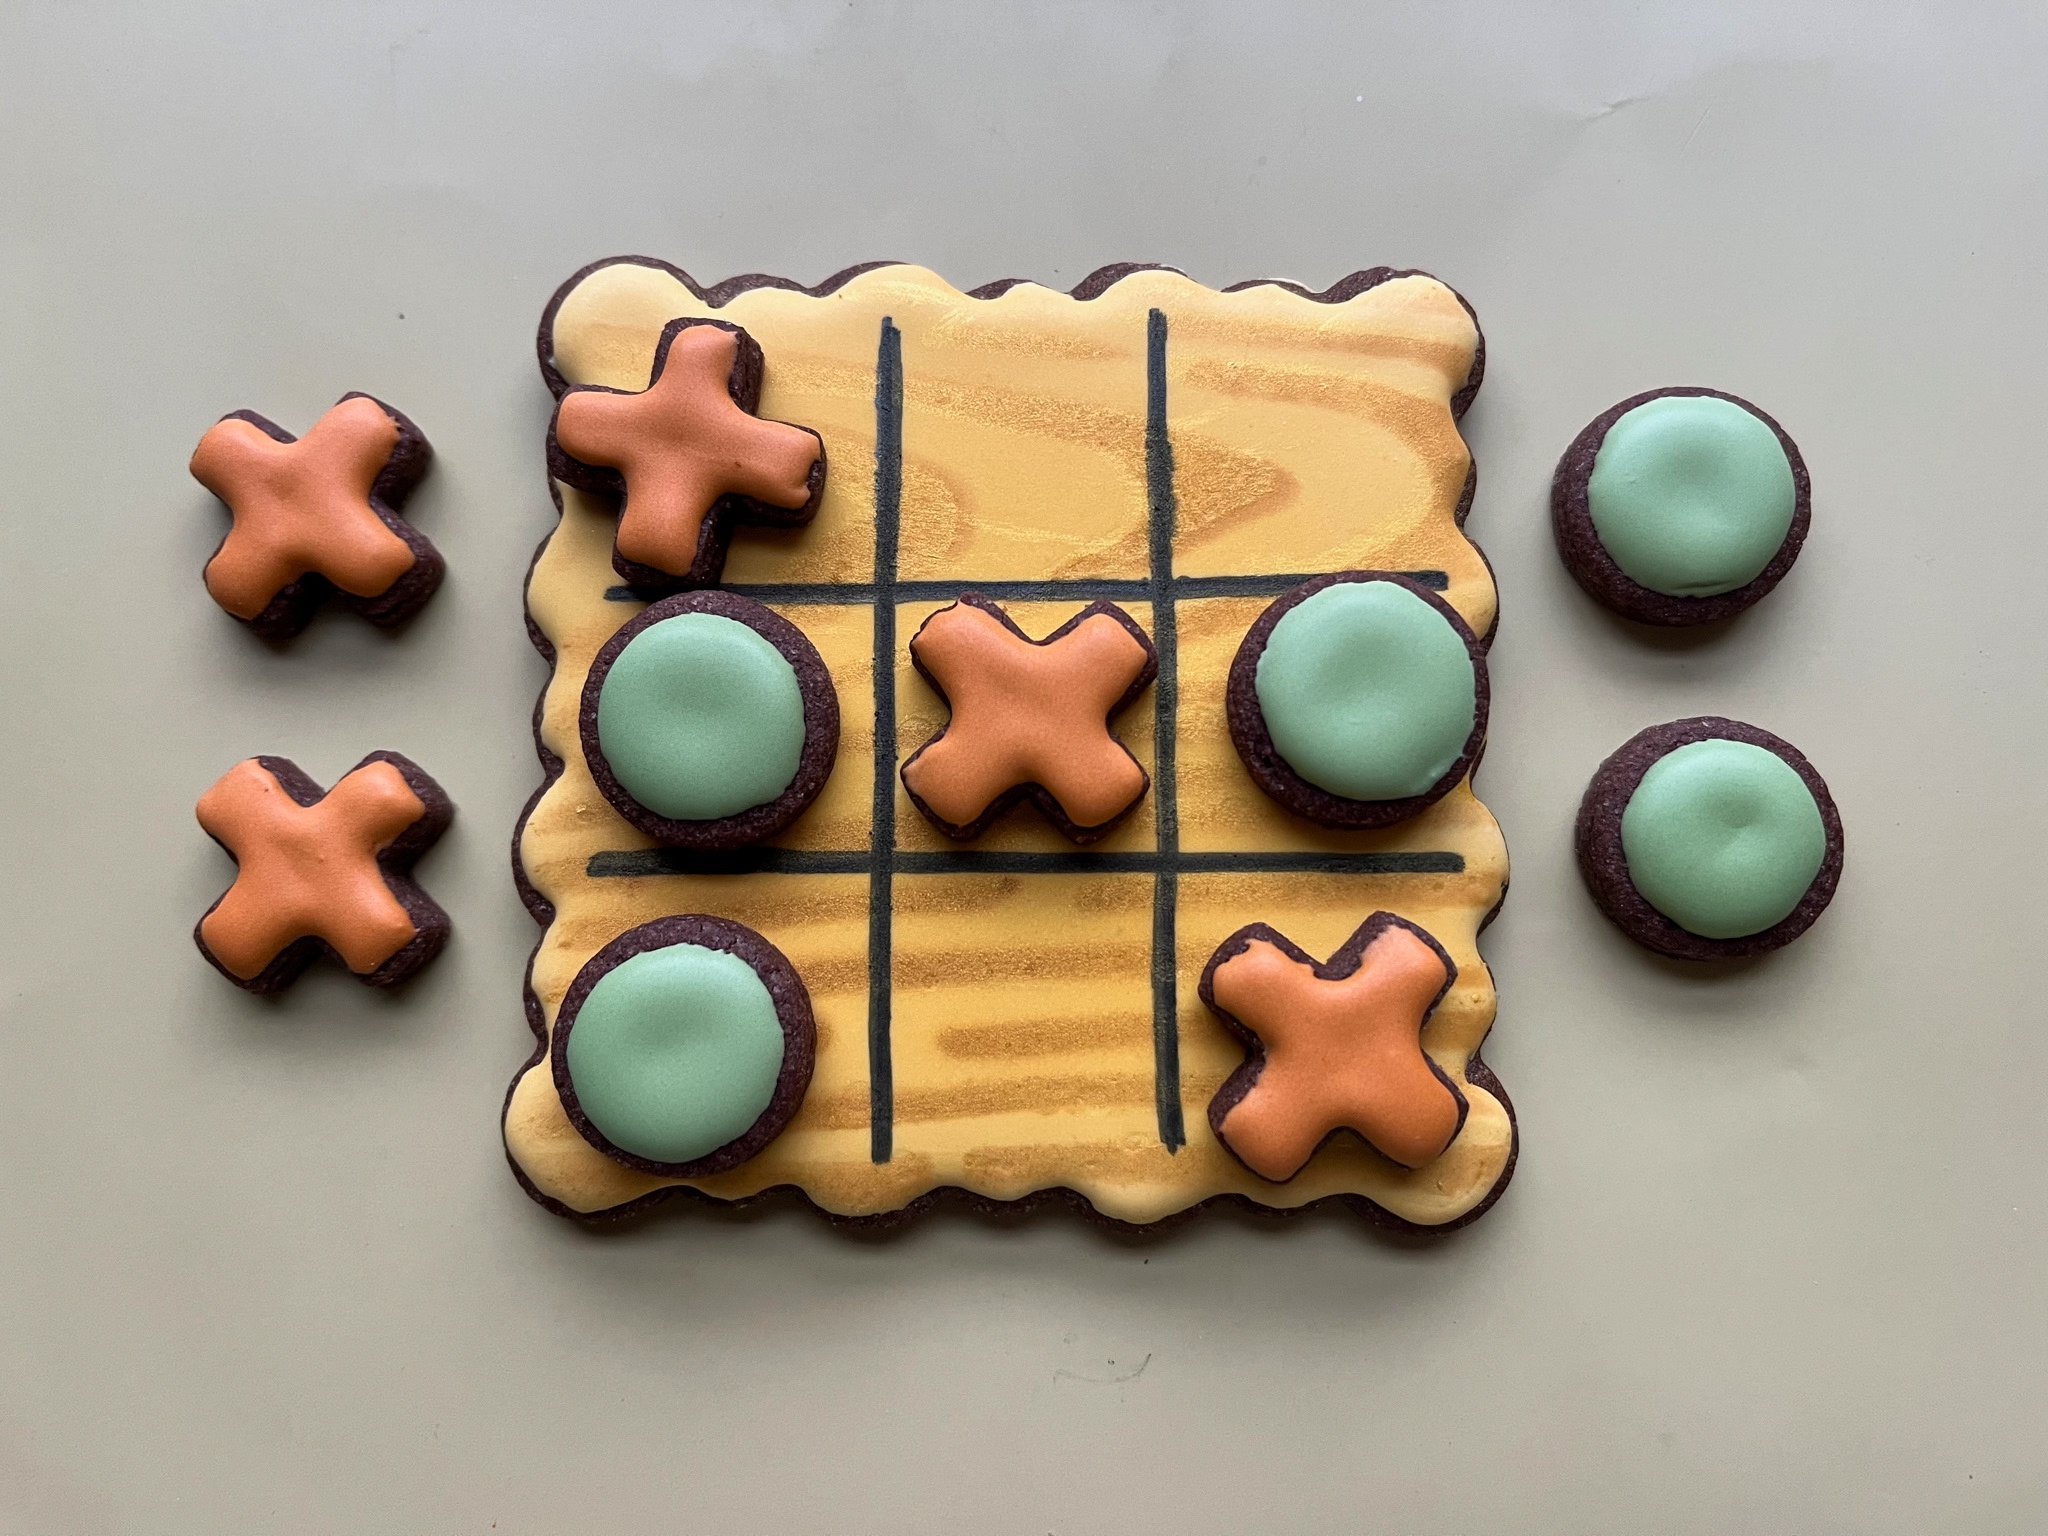
MOVING ON… COTTON CANDY CUTOUT COOKIES
COTTON CANDY SUGAR COOKIES (from The Bewitching Kitchen)
1 cup (227g) room temperature unsalted butter 1 cup (200g) granulated sugar 1/8 cup agave nectar 3/4 tsp Cotton Candy Flavoring (LorAnn) 1/4 tsp vanilla extract or paste 1 large egg 1/2 tsp baking powder 1/2 tsp salt 3 cups (360g) all-purpose flour
Royal icing in pastel pink, blue and white, flooding consistency. Royal icing in thick consistency for cotton candy (I used pink) Royal icing in piping consistency for writing and cone (I used gold) Sprinkles for edges.
Heat oven to 350 degrees F.
Combine baking powder, salt and flour in a bowl. Reserve.
Cream butter and sugar until smooth, at least 2 minutes. Add the agave nectar and mix until combined.
Beat in cotton candy flavoring, vanilla and egg. Add the dry ingredients and mix just until a dough forms.
You can roll it right away or place in the fridge for 30 minutes if you prefer.
Roll the dough, cut shapes and freeze for 10 minutes before baking until slightly golden at the edges. Depending on the size of the cookie, 10 to 14 minutes.
Comments: Decorating these cookies is quite straightforward, just pipe the border with white icing and coat with sprinkles. Then flood the whole cookie with three pastel colors and marble them with a spatula. Allow it to set and add the details. Once it all set, I painted the letters and the cones with Rose Gold luster powder from SugarArt. I am not sure one can really detect the flavor of Cotton Candy but they were delicious anyway…
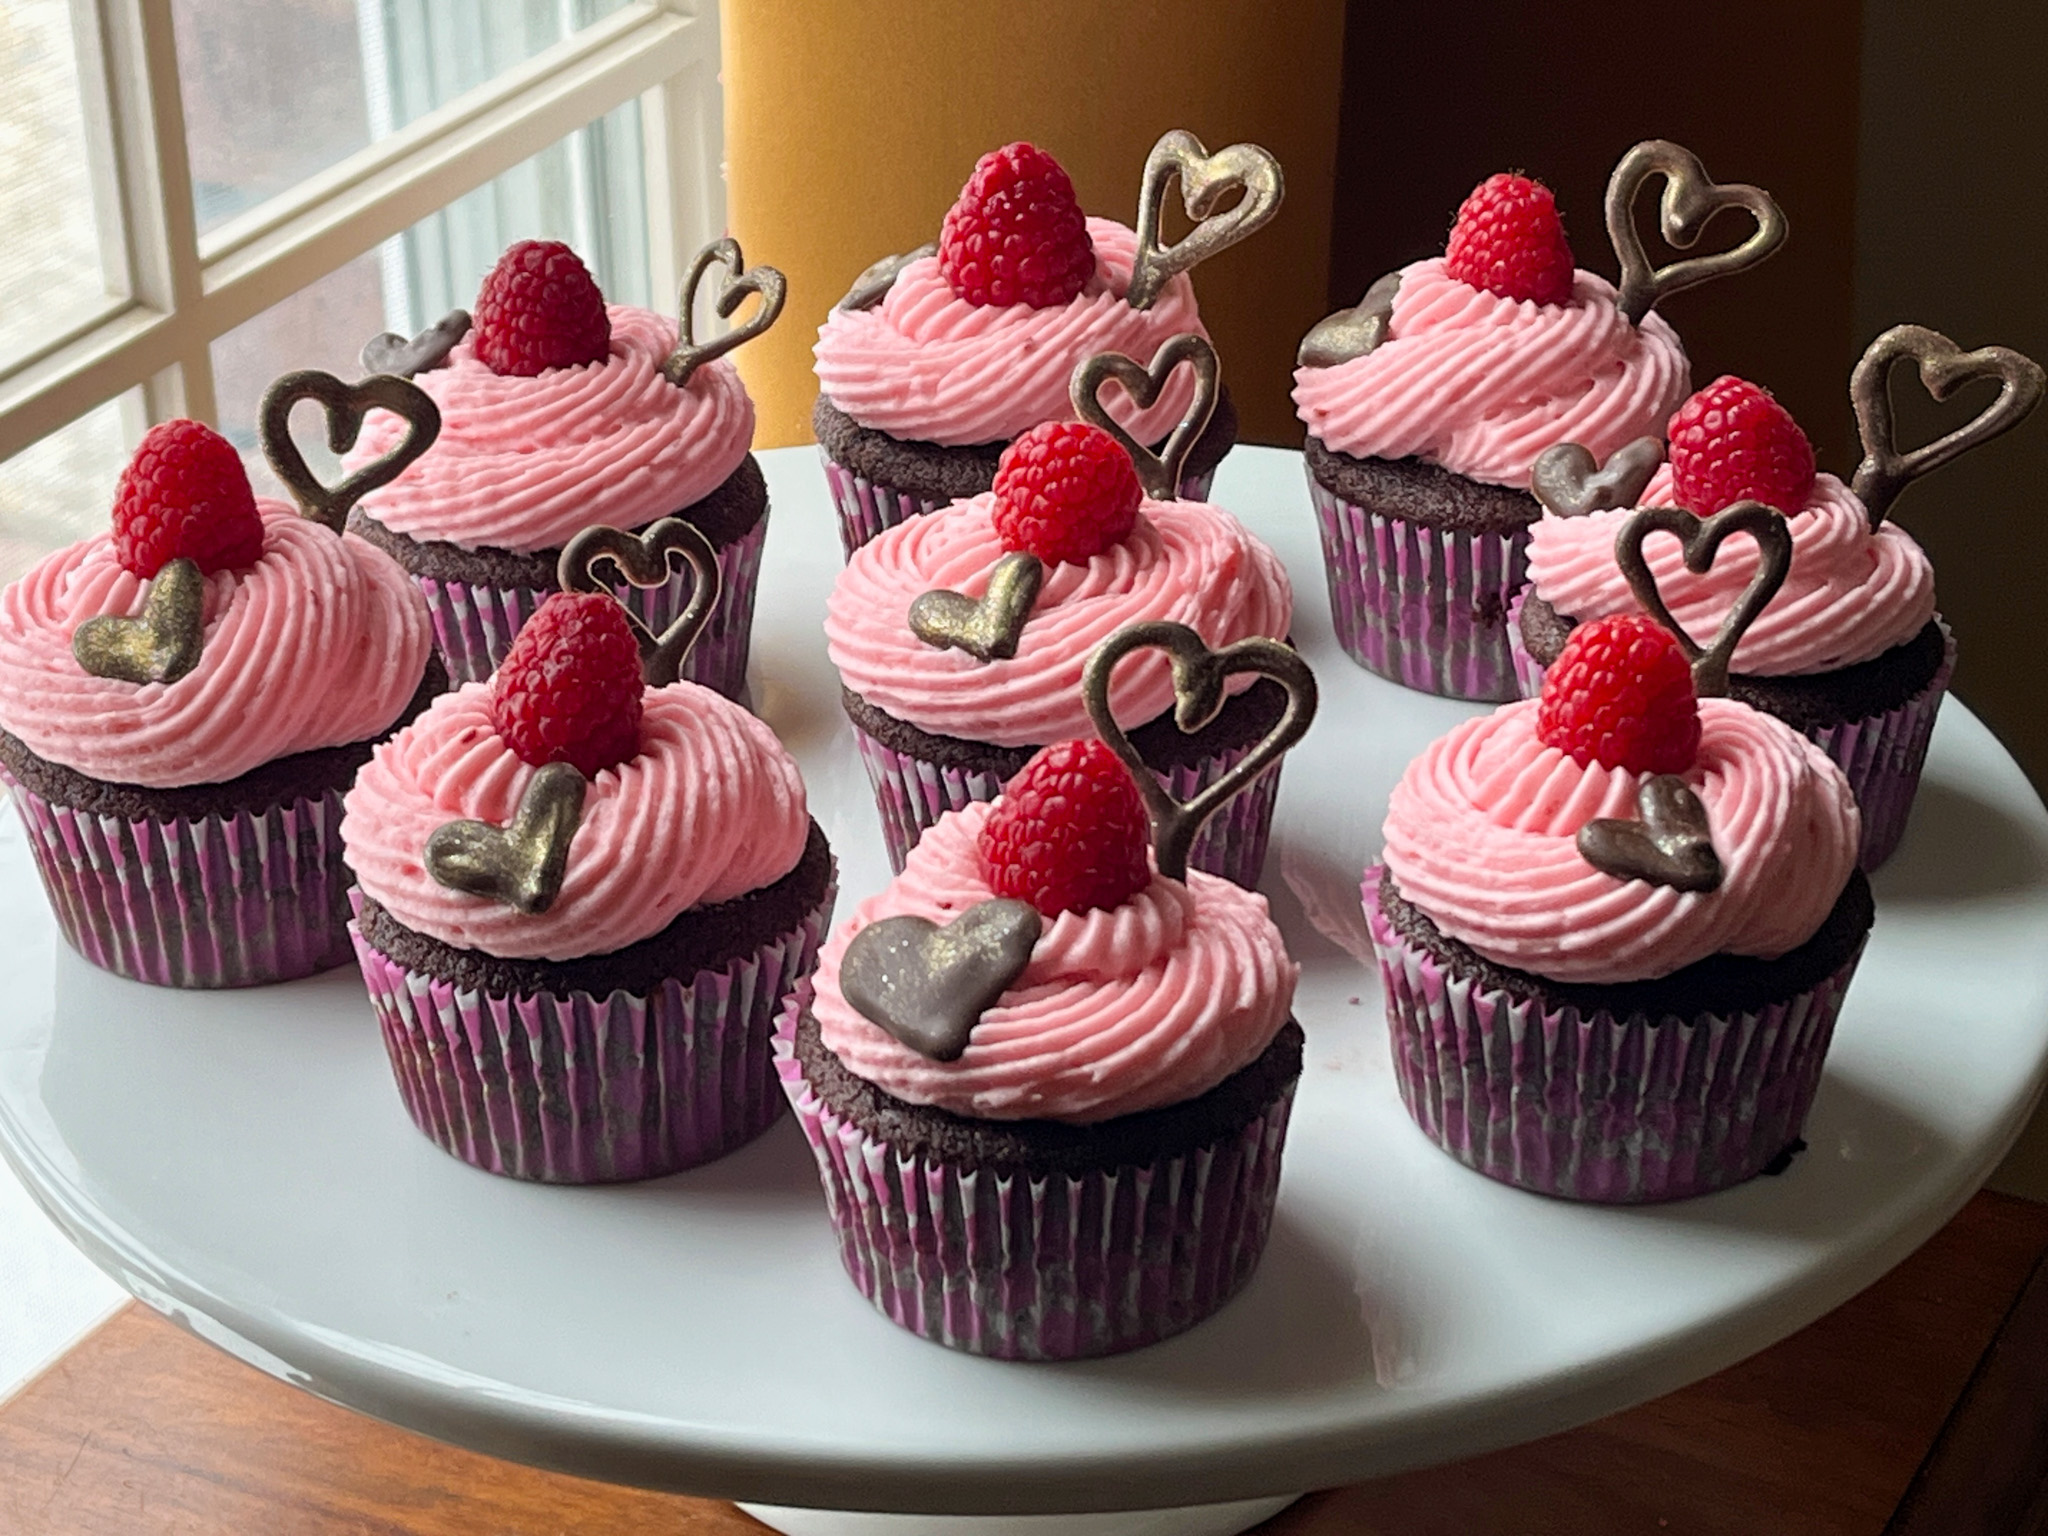
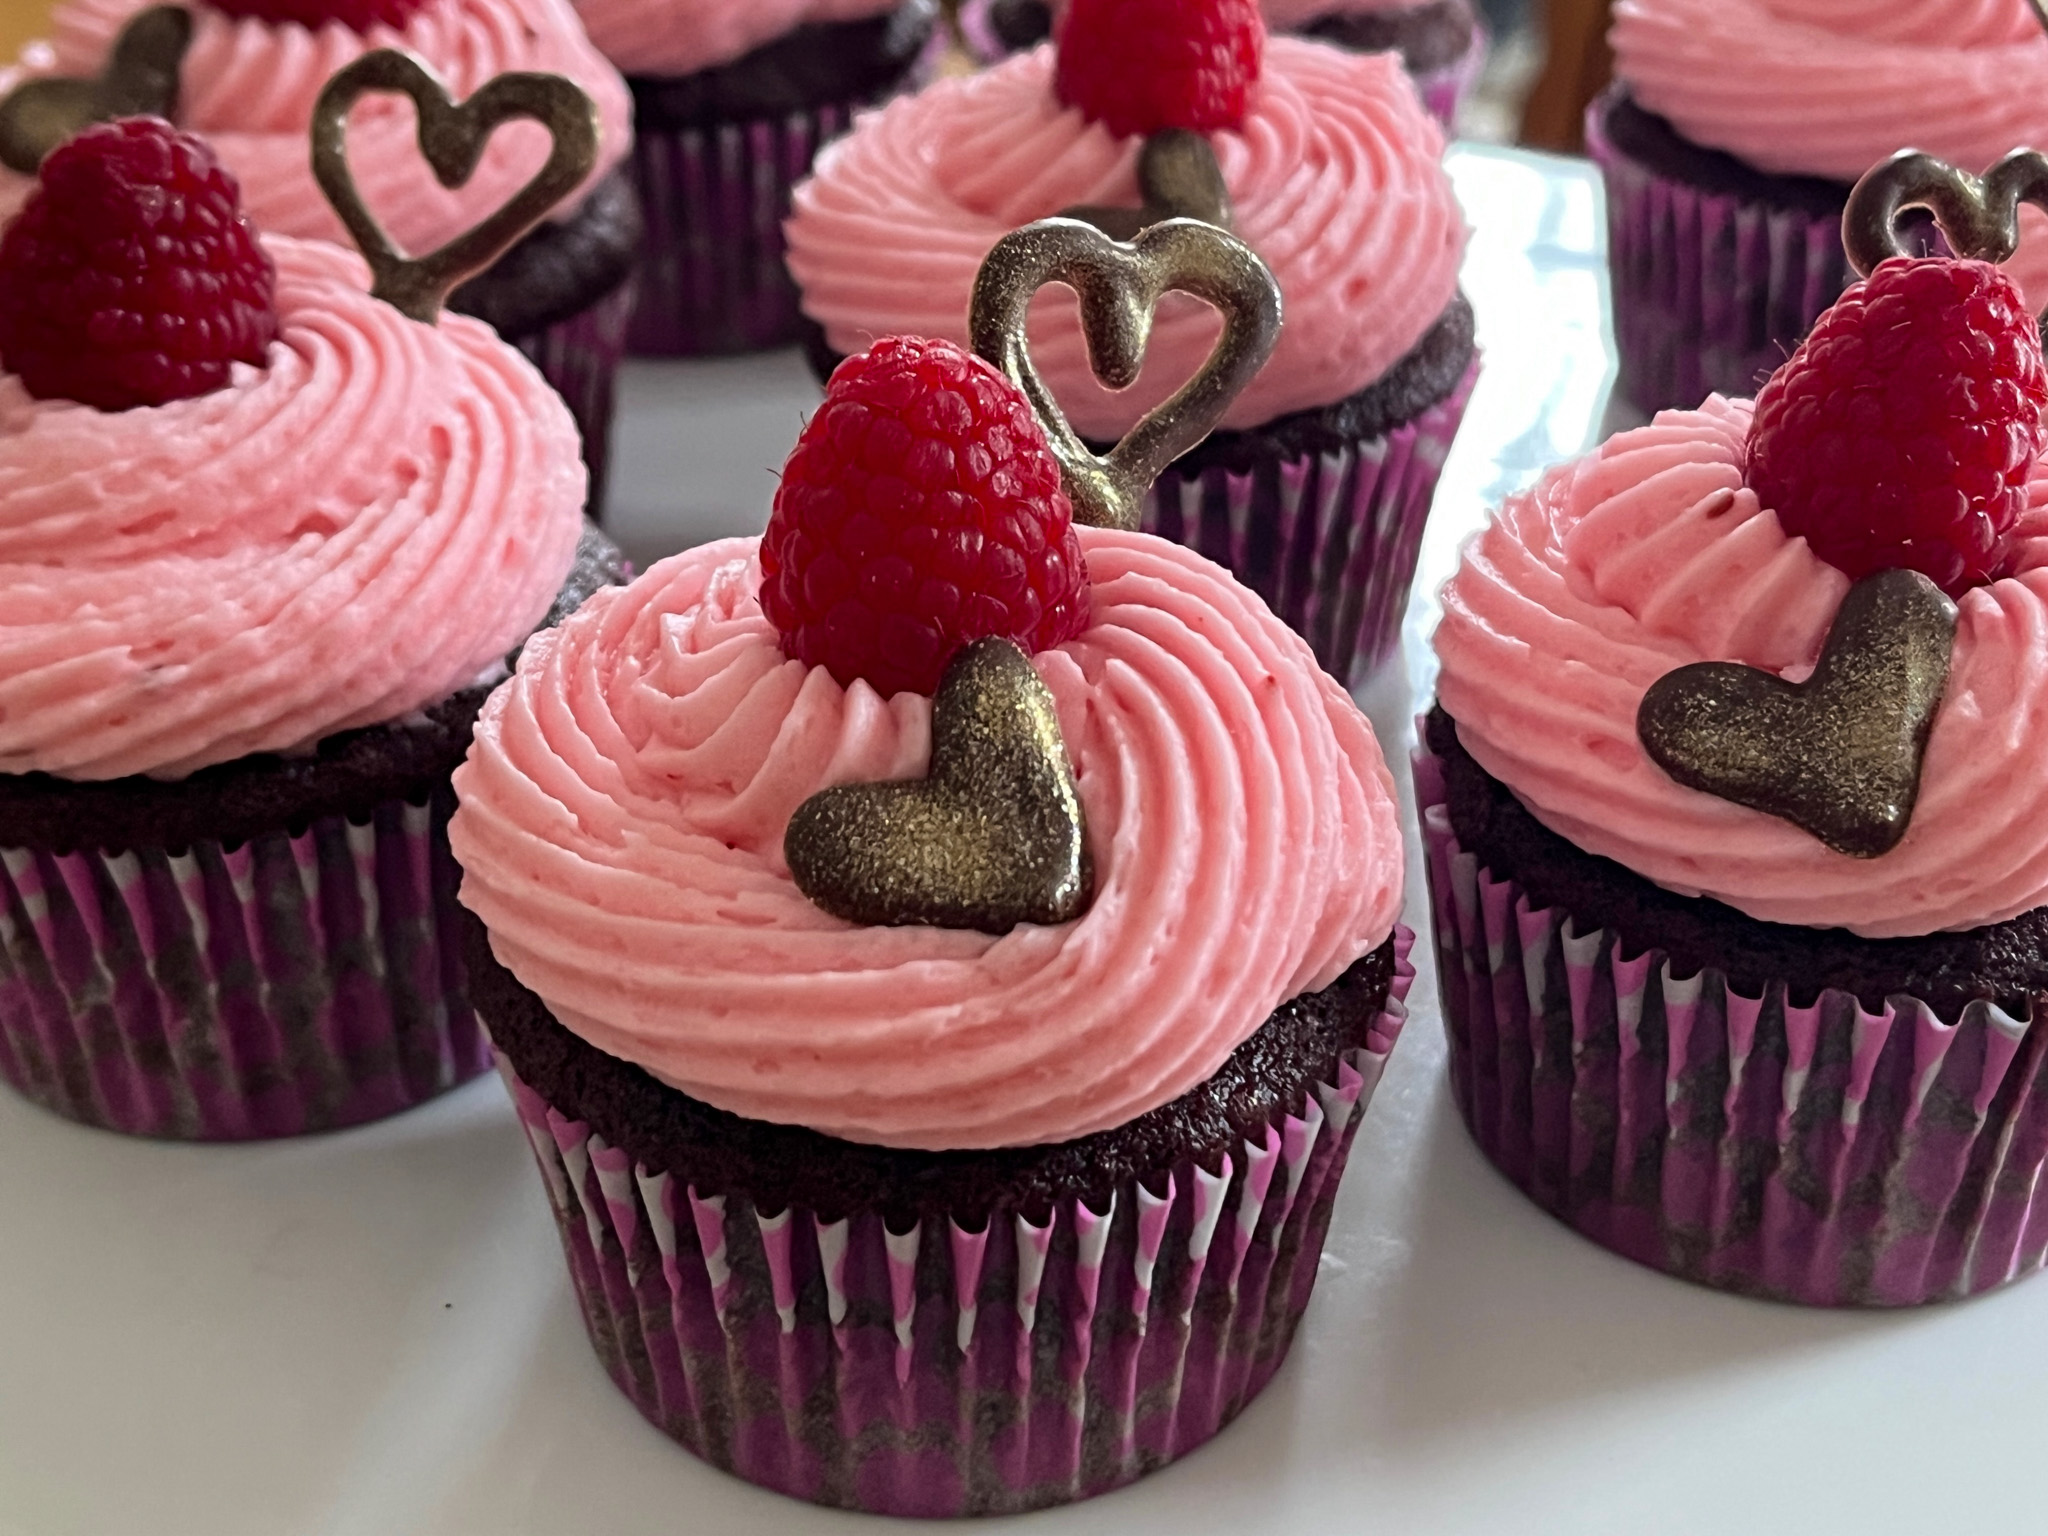
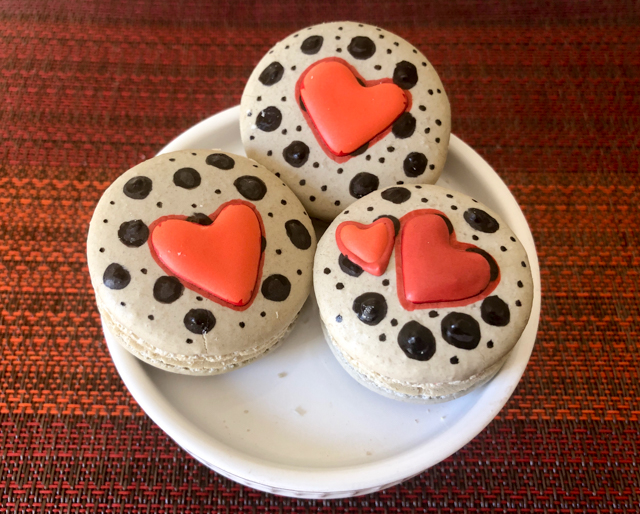
CHOCOLATE CUPCAKES with RASPBERRY BUTTERCREAM (decoration inspired by @cookingclassy)
CHOCOLATE CUPCAKES WITH RASPBERRY BUTTERCREAM (from The Bewitching Kitchen)
for the cupcakes (makes 10):
100g all-purpose flour 150g granulated sugar 20g cocoa powder (Dutch-processed) 45g unsalted butter 1/8 tsp salt 120ml milk at room temperature 1 large egg, room temperature 1 + 1/2 tsp baking powder
Heat oven to 350F.
Place flour, cocoa powder, salt, butter and sugar in the bowl of a KitchenAid type mixer fitted with the paddle attachment. Mix on medium-high speed until the mixture resembles coarse sand.
In a small bowl, whisk milk and egg. Pour half this mixture into the dry ingredients, and mix on medium speed. Scrape the bowl, continue mixing and pour the other half of the milk-egg. Mix on low speed until combined, then increase the speed to high for a few seconds.
Fill cupcake tins a little over half the volume, and bake until a toothpick comes out clean, about 15 minutes. Let the cupcakes cool completely before frosting.
RASPBERRY BUTTERCREAM
113g (1/2 cup) butter, softened 1/4 cup raspberry jam, seedless pinch of salt 3 cups powdered sugar super tiny amount of pink food gel color
Cut the butter into cubes and place in a mixing bowl of an electric mixer fitted with the paddle attachment. Mix butter until smooth, for about 4 minutes. Add jam, the pinch of salt and mix again until well mixed with butter, a couple of minutes. Add the pink gel color.
With the mixer on low speed, add powdered sugar one cup at a time, mixing until fully combined and free of lumps. Once it is all incorporated, turn the speed to high and mix for 2 minutes. That will give you a smooth buttercream that you can use immediately to frost the cooled cupcakes.
Decorate with a fresh raspberry and hearts made with tempered chocolate (or compound chocolate) melted and piped into parchment paper or acetate.
Comments: Normally I donate all the sweets I bake, but because it was Valentine’s Day, I saved one cupcake to enjoy with the hubby after our meal. OMG! Words of the husband: “Good thing we only had one to share because if we had more I could not stop eating them”. Moist, delicious, and the buttercream frosting absolutely perfect, bringing a little sharp flavor to the party. Make them. Just make them if you want a wonderful treat.
MOVING ON…
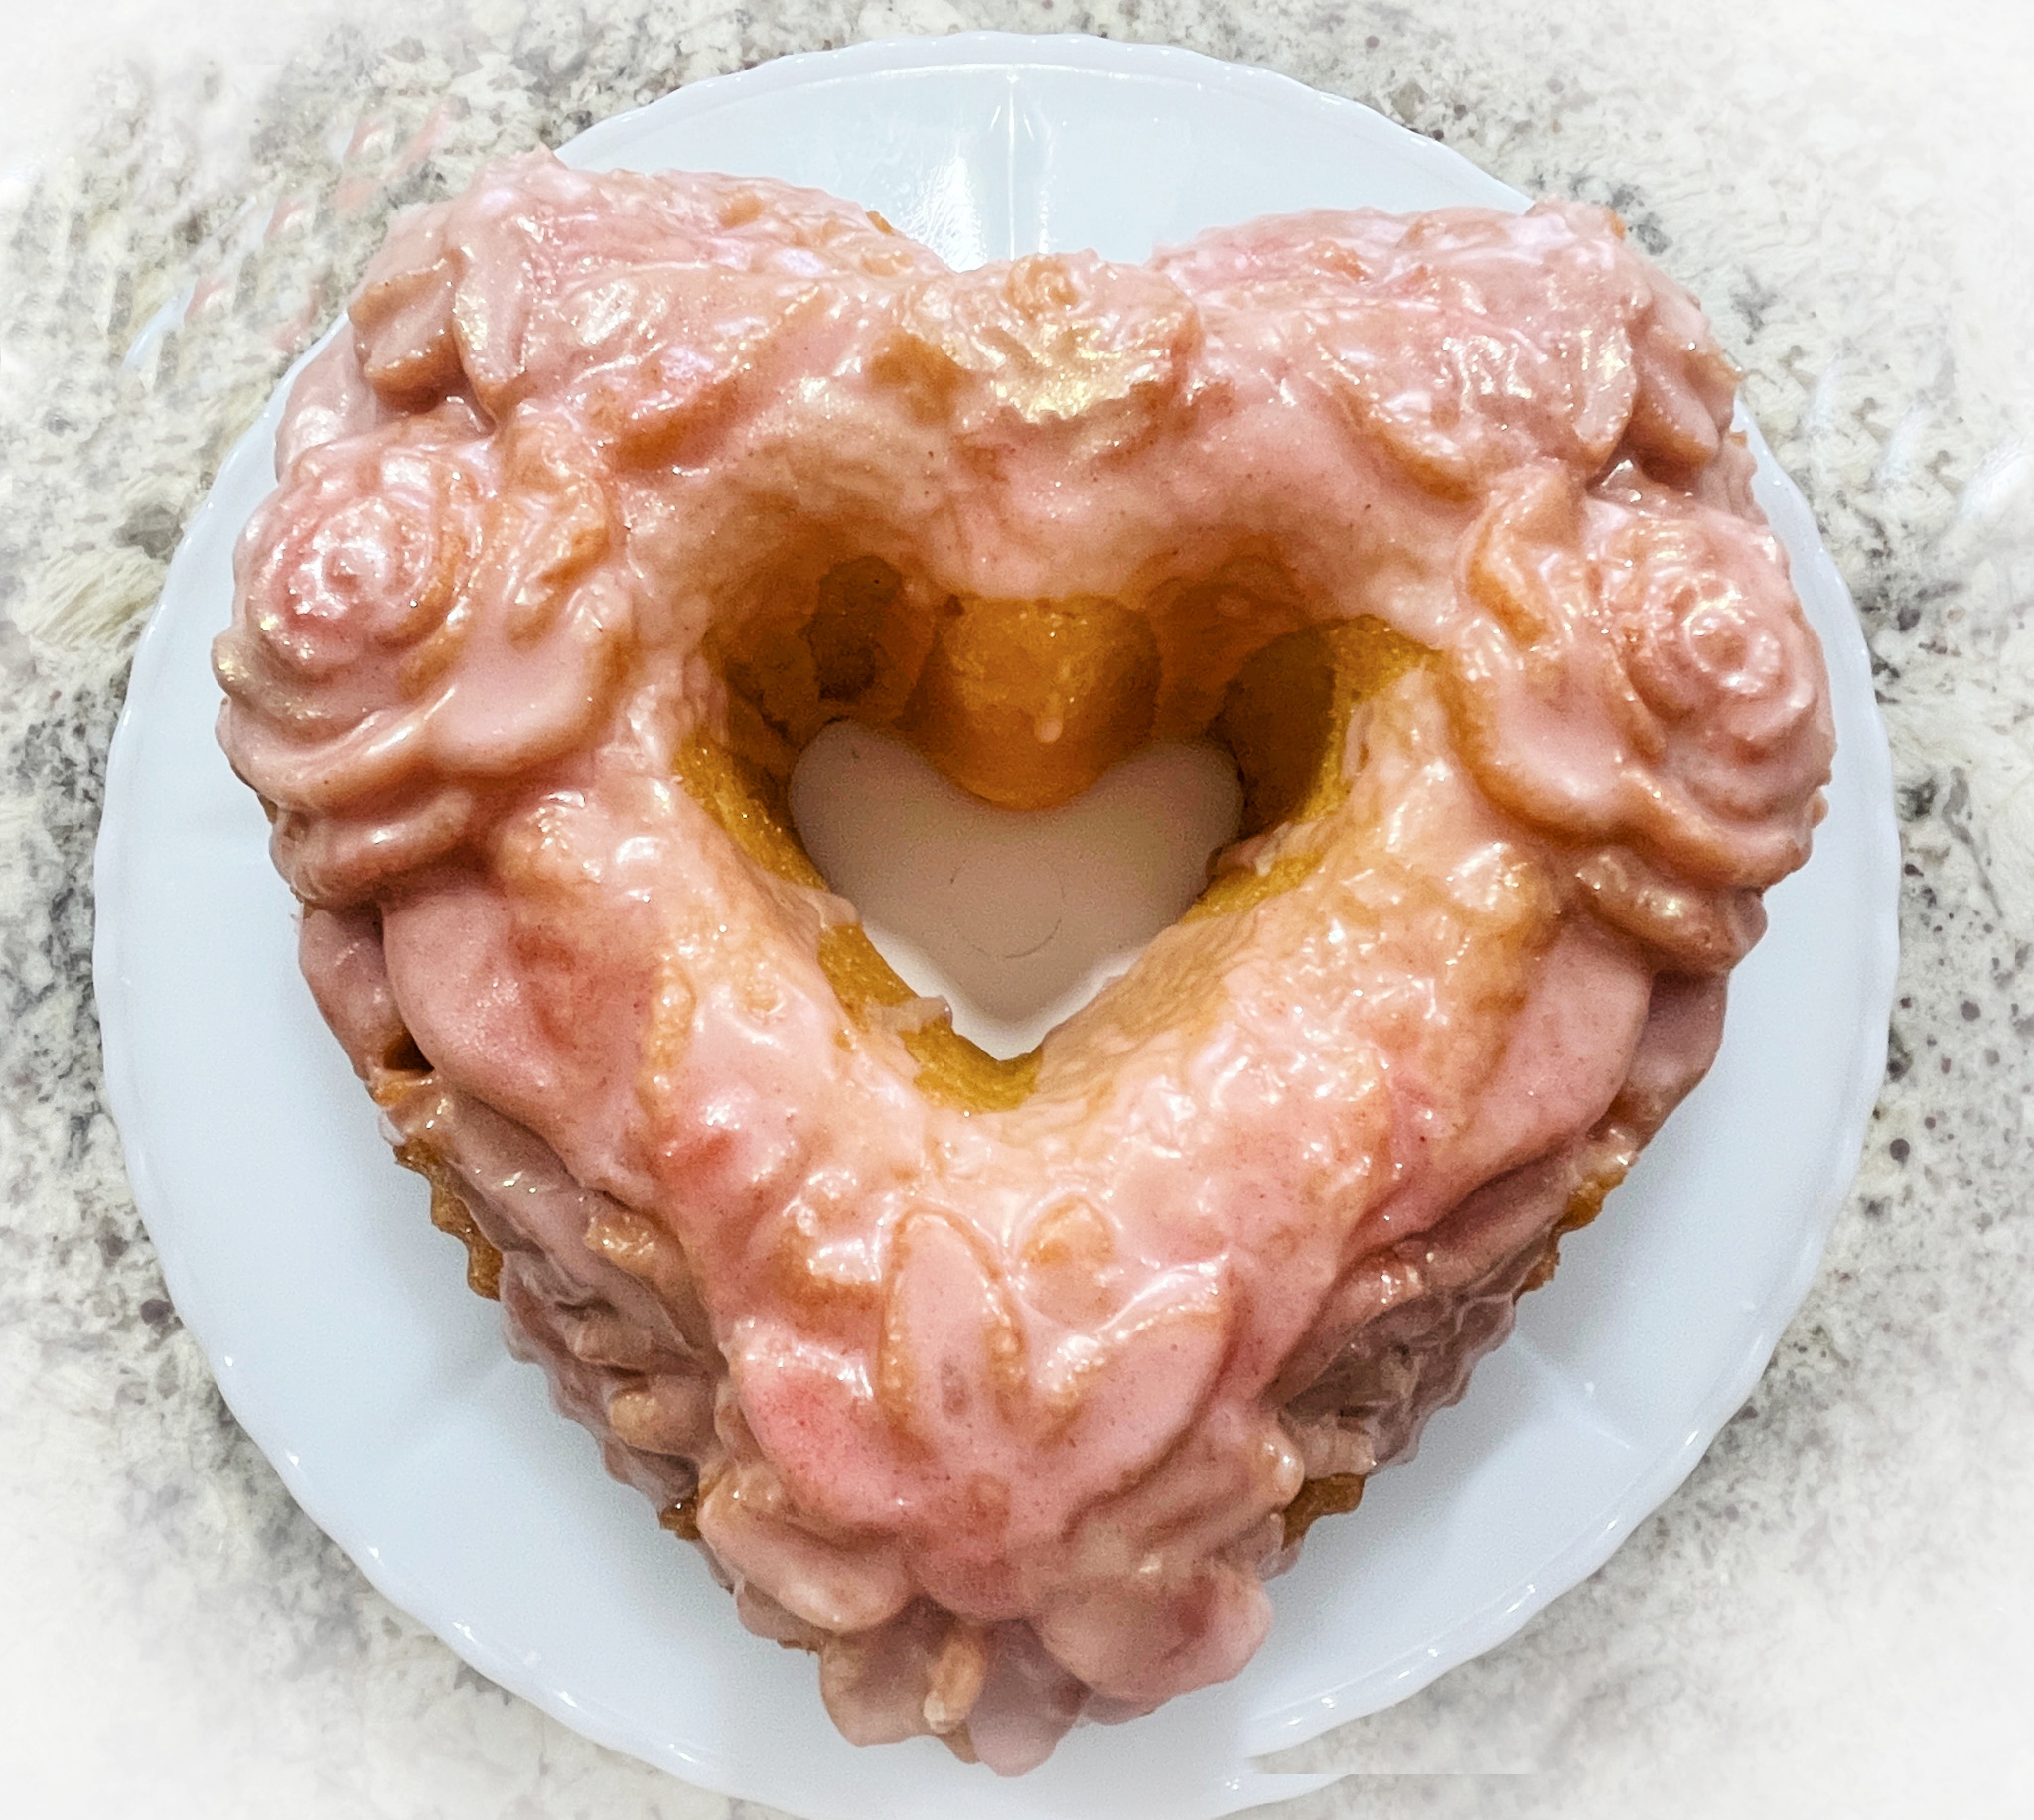
VANILLA CAKE WITH HIBISCUS GLAZE (recipe published in the past, click here)
.
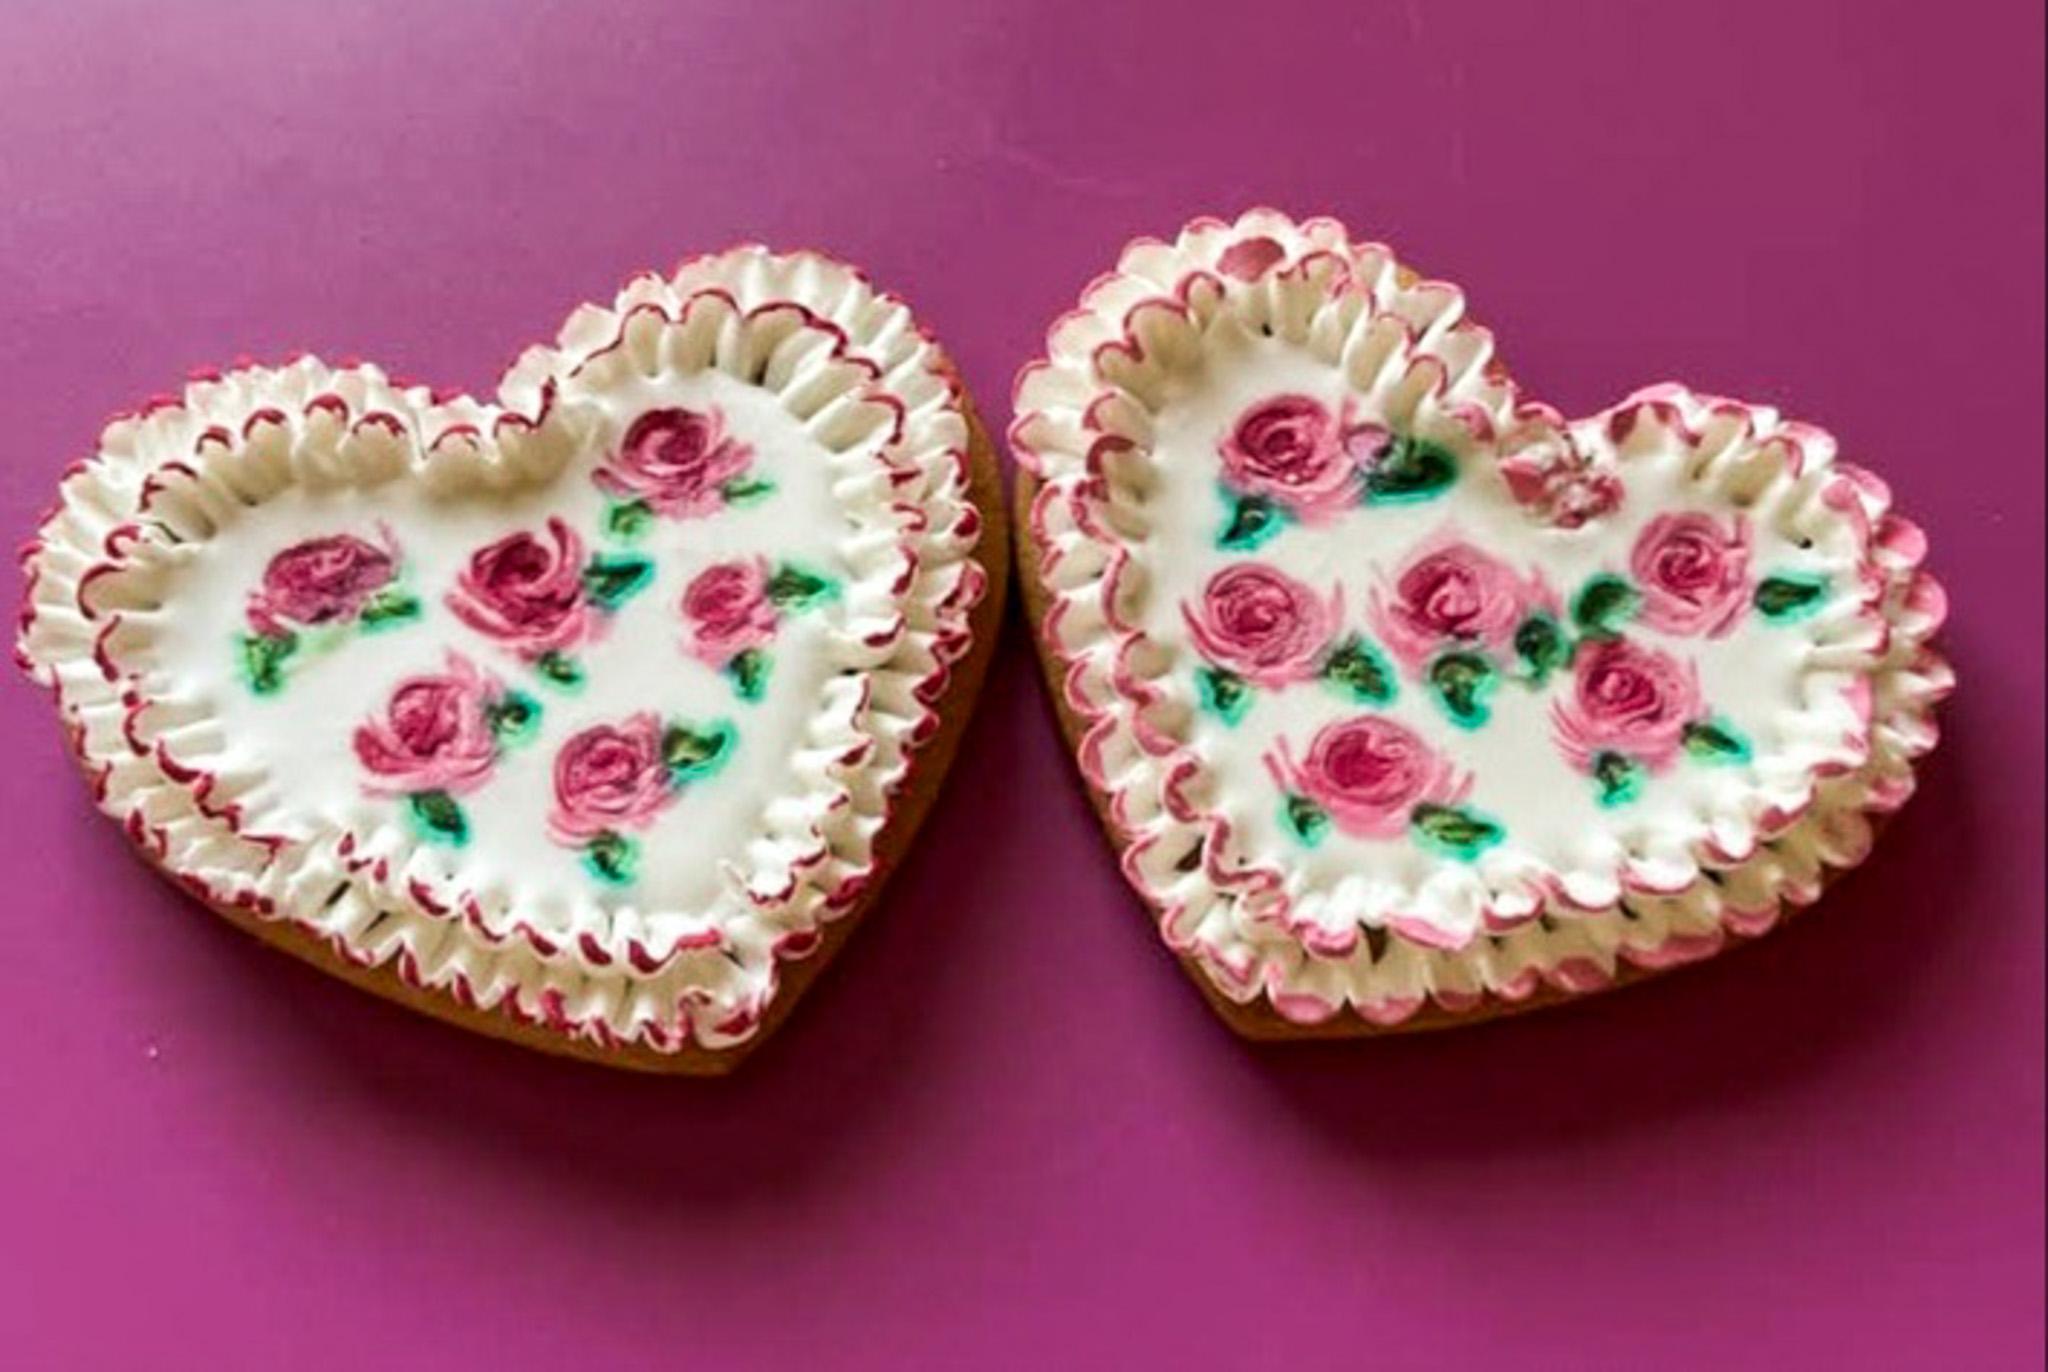
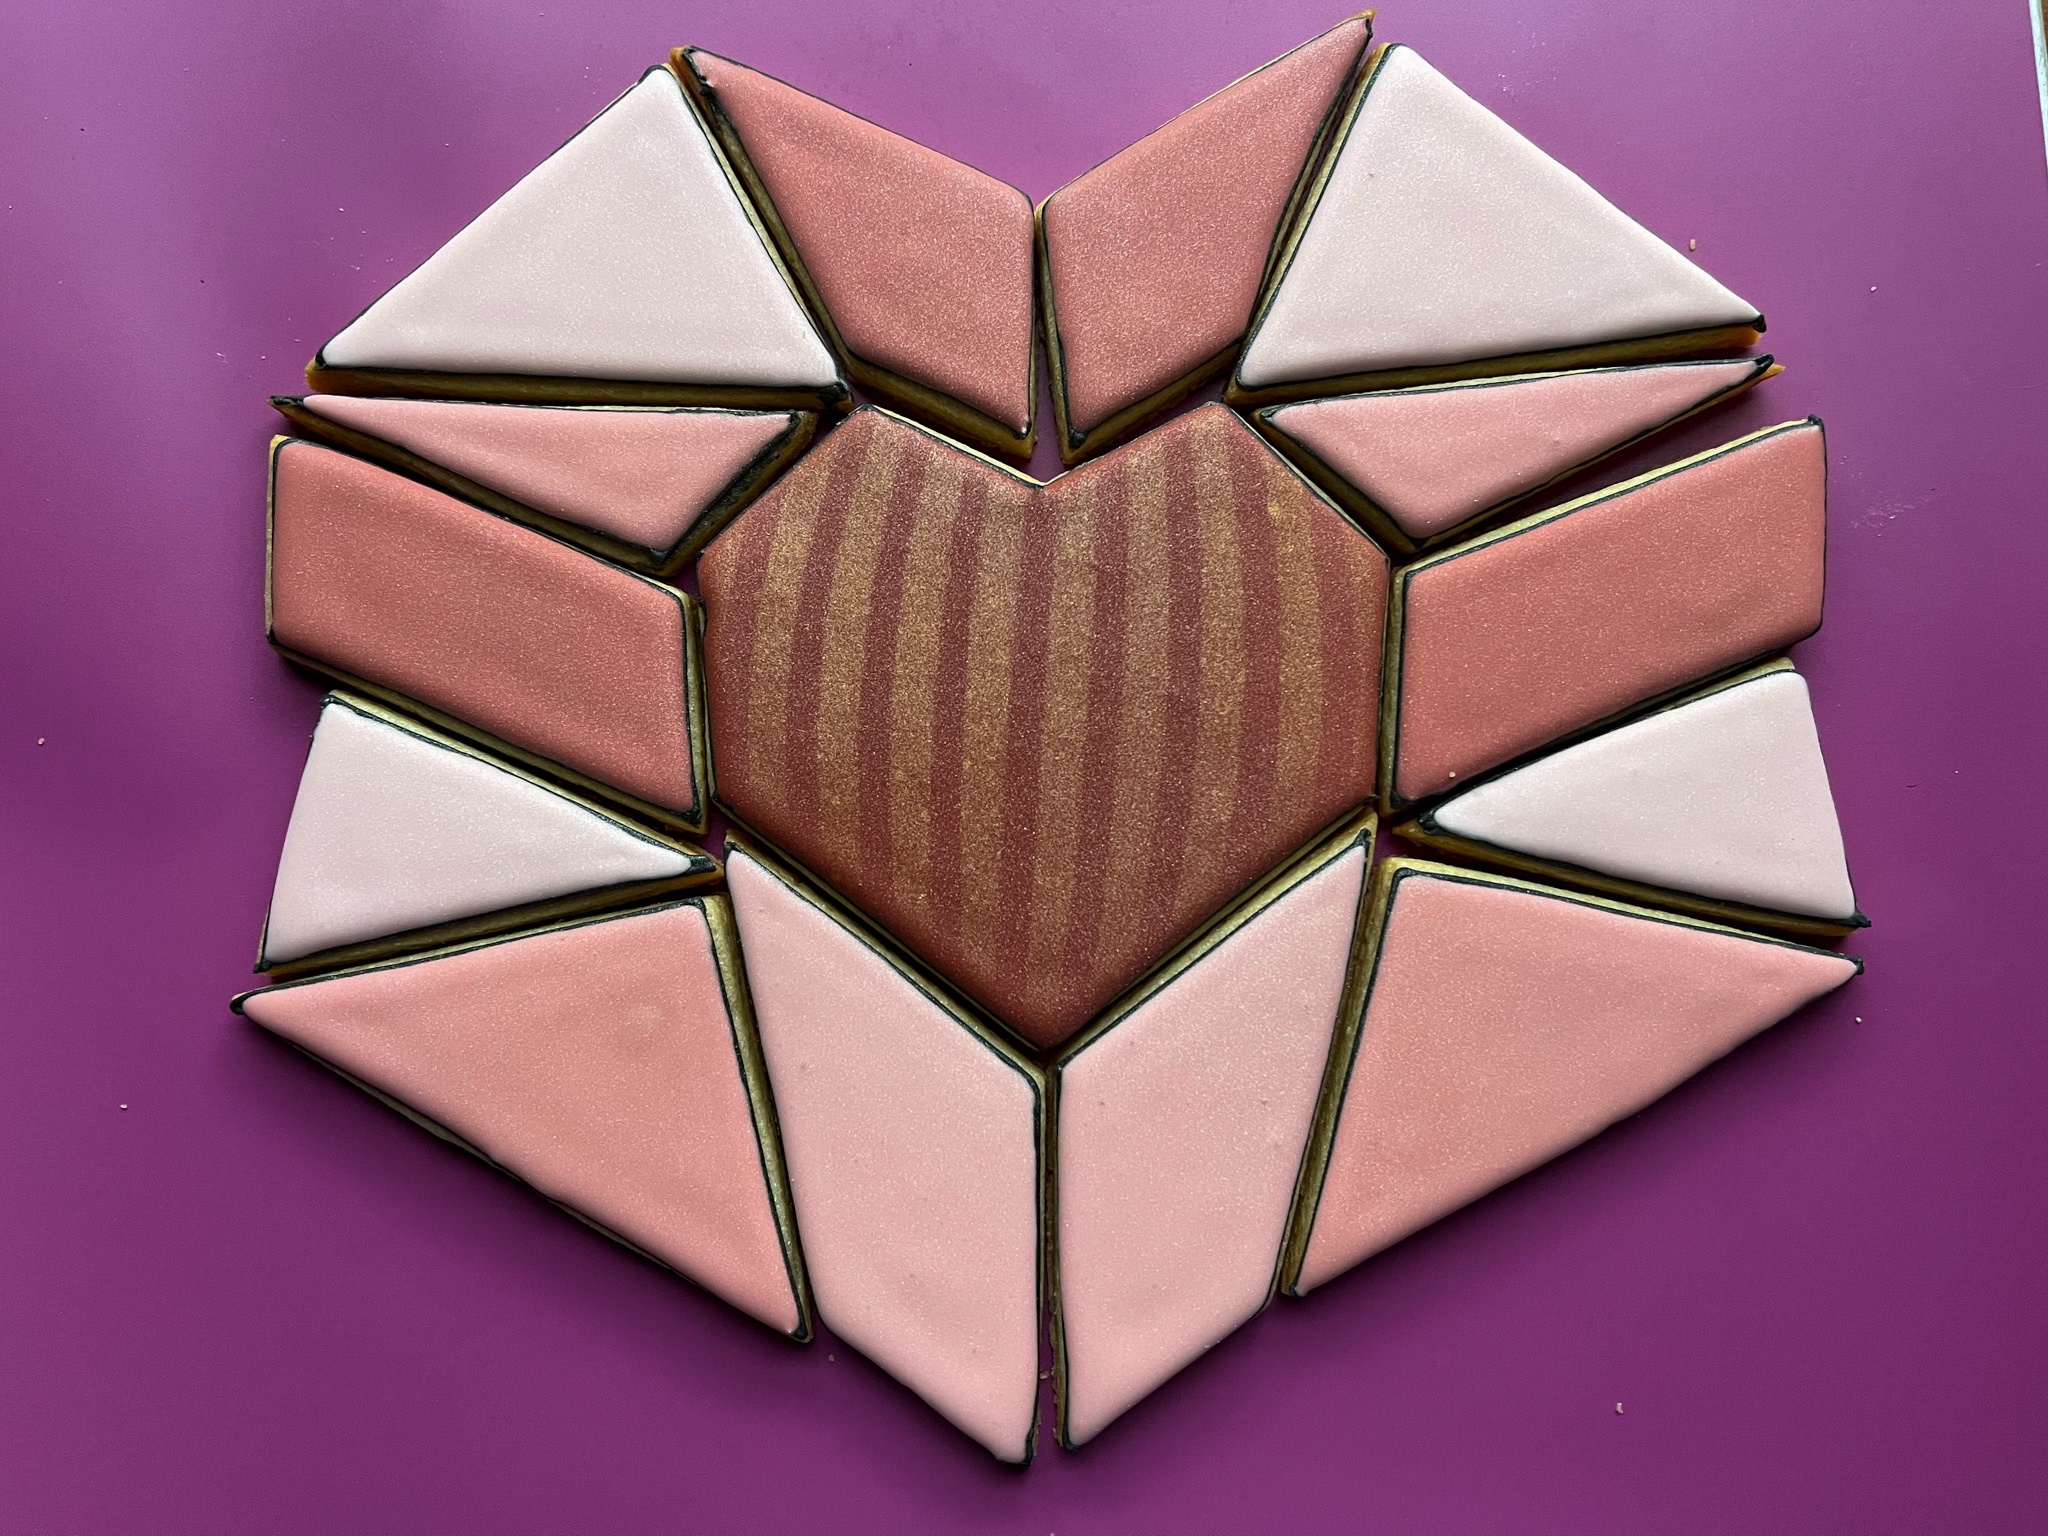
SUGAR COOKIES WITH RUFFLES AND ROSES (after @sweetambs)
I am a bit surprised that I never blogged on this particular recipe, adapted over the years from several sources, including a version from Phil’s family. It uses a small amount of baking soda, that makes the cookie puff a little bit but not spread too much. My current favorite version includes ground star anise, I am kind of smitten by its flavor.
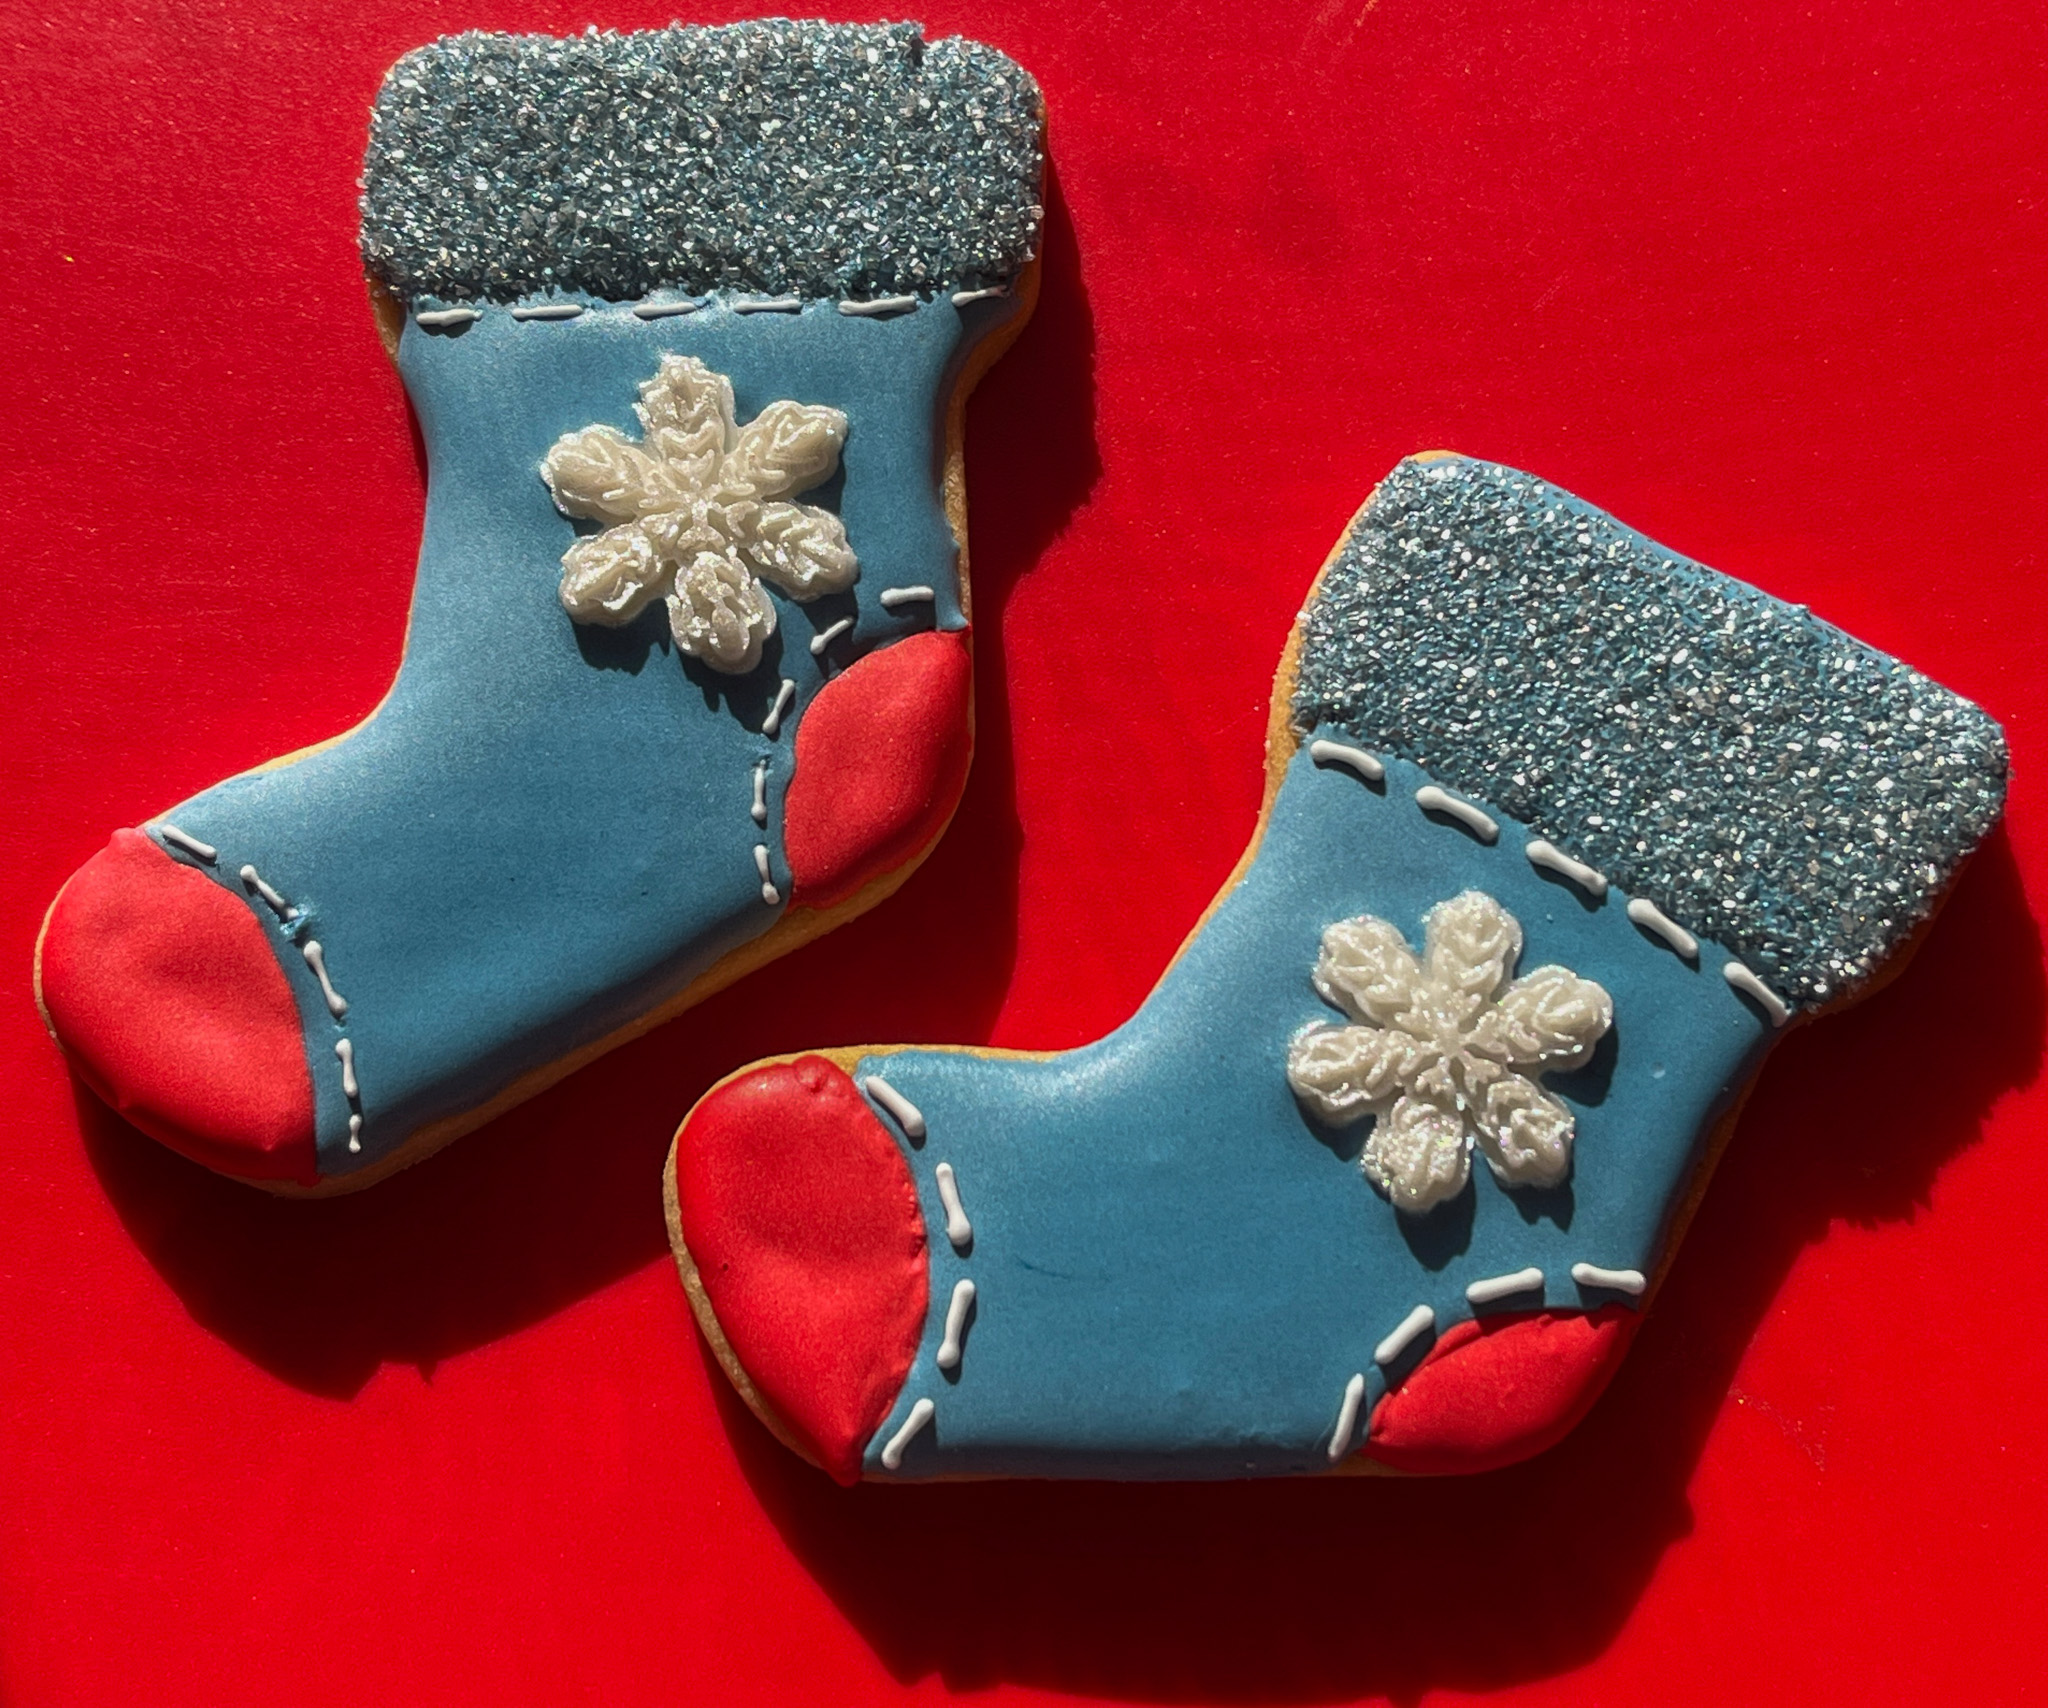
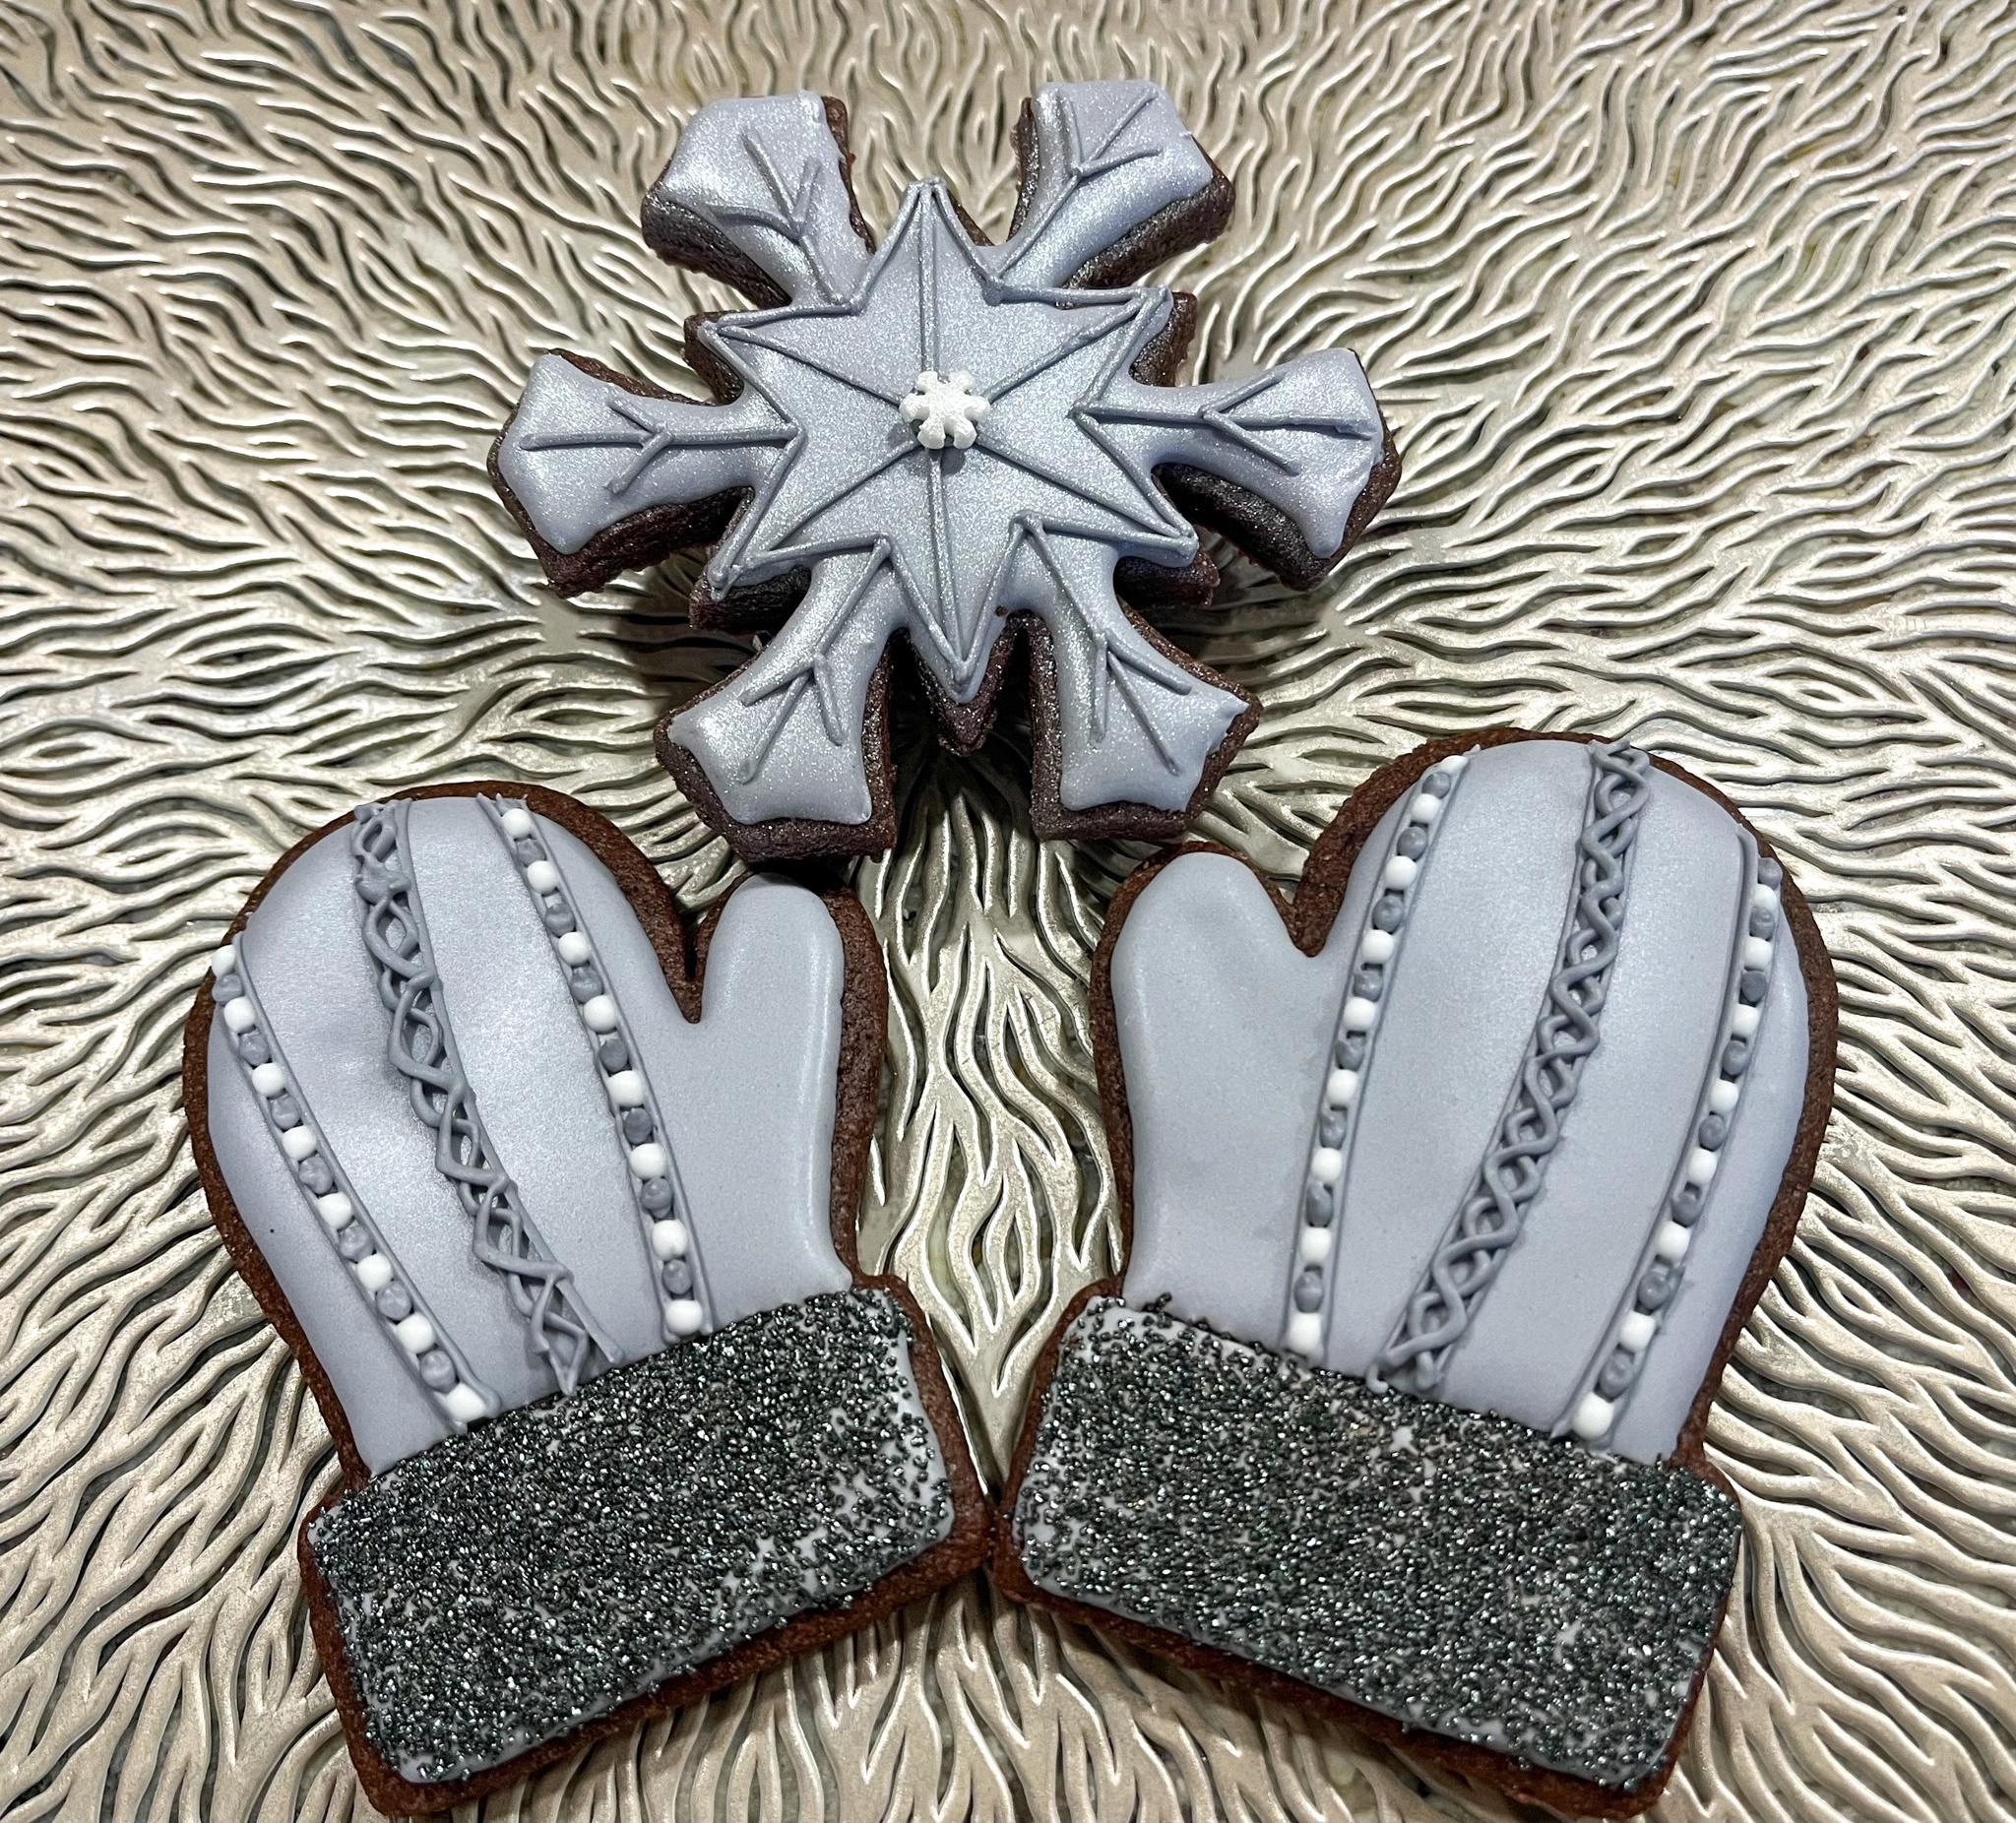
GINGERBREAD CUTOUT COOKIES (from The Bewitching Kitchen)
375g flour 1/2 tsp baking soda 1/4 tsp salt 2 tsp ground ginger 1 + 1/2 tsp cinnamon 1/2 tsp nutmeg 1/2 tsp cloves 1/2 tsp cardamoon 1/2 tsp ground star anise 3/4 cup brown sugar 3/4 cup butter (170g) 1/2 cup molasses 1 egg
Mix flour, baking soda and spices in a large bowl. Reserve.
To a mixer, add butter at room temperature and brown sugar. Beat until smooth, 2 to 3 minutes. Add molasses, mix until incorporated. Add egg and mix. Add the flour mixture in two steps, mixing at low speed.
Place dough in fridge for 1 hour to overnight. Roll out, cut shapes, bake preferably from frozen for 10 min, at 350F.
I love the smell of these cookies while baking and also as they sit later at room temperature. The star anise is a fantastic addition, a tip I got a few years ago from Haniela.
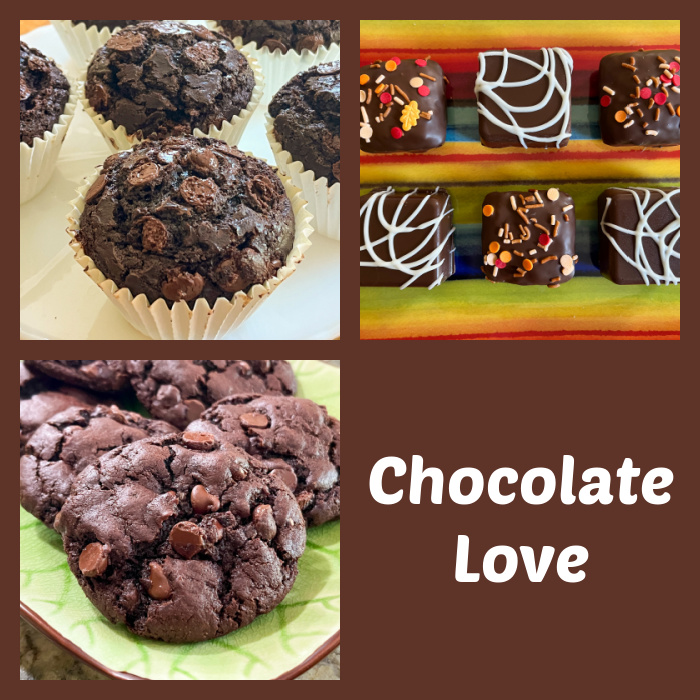
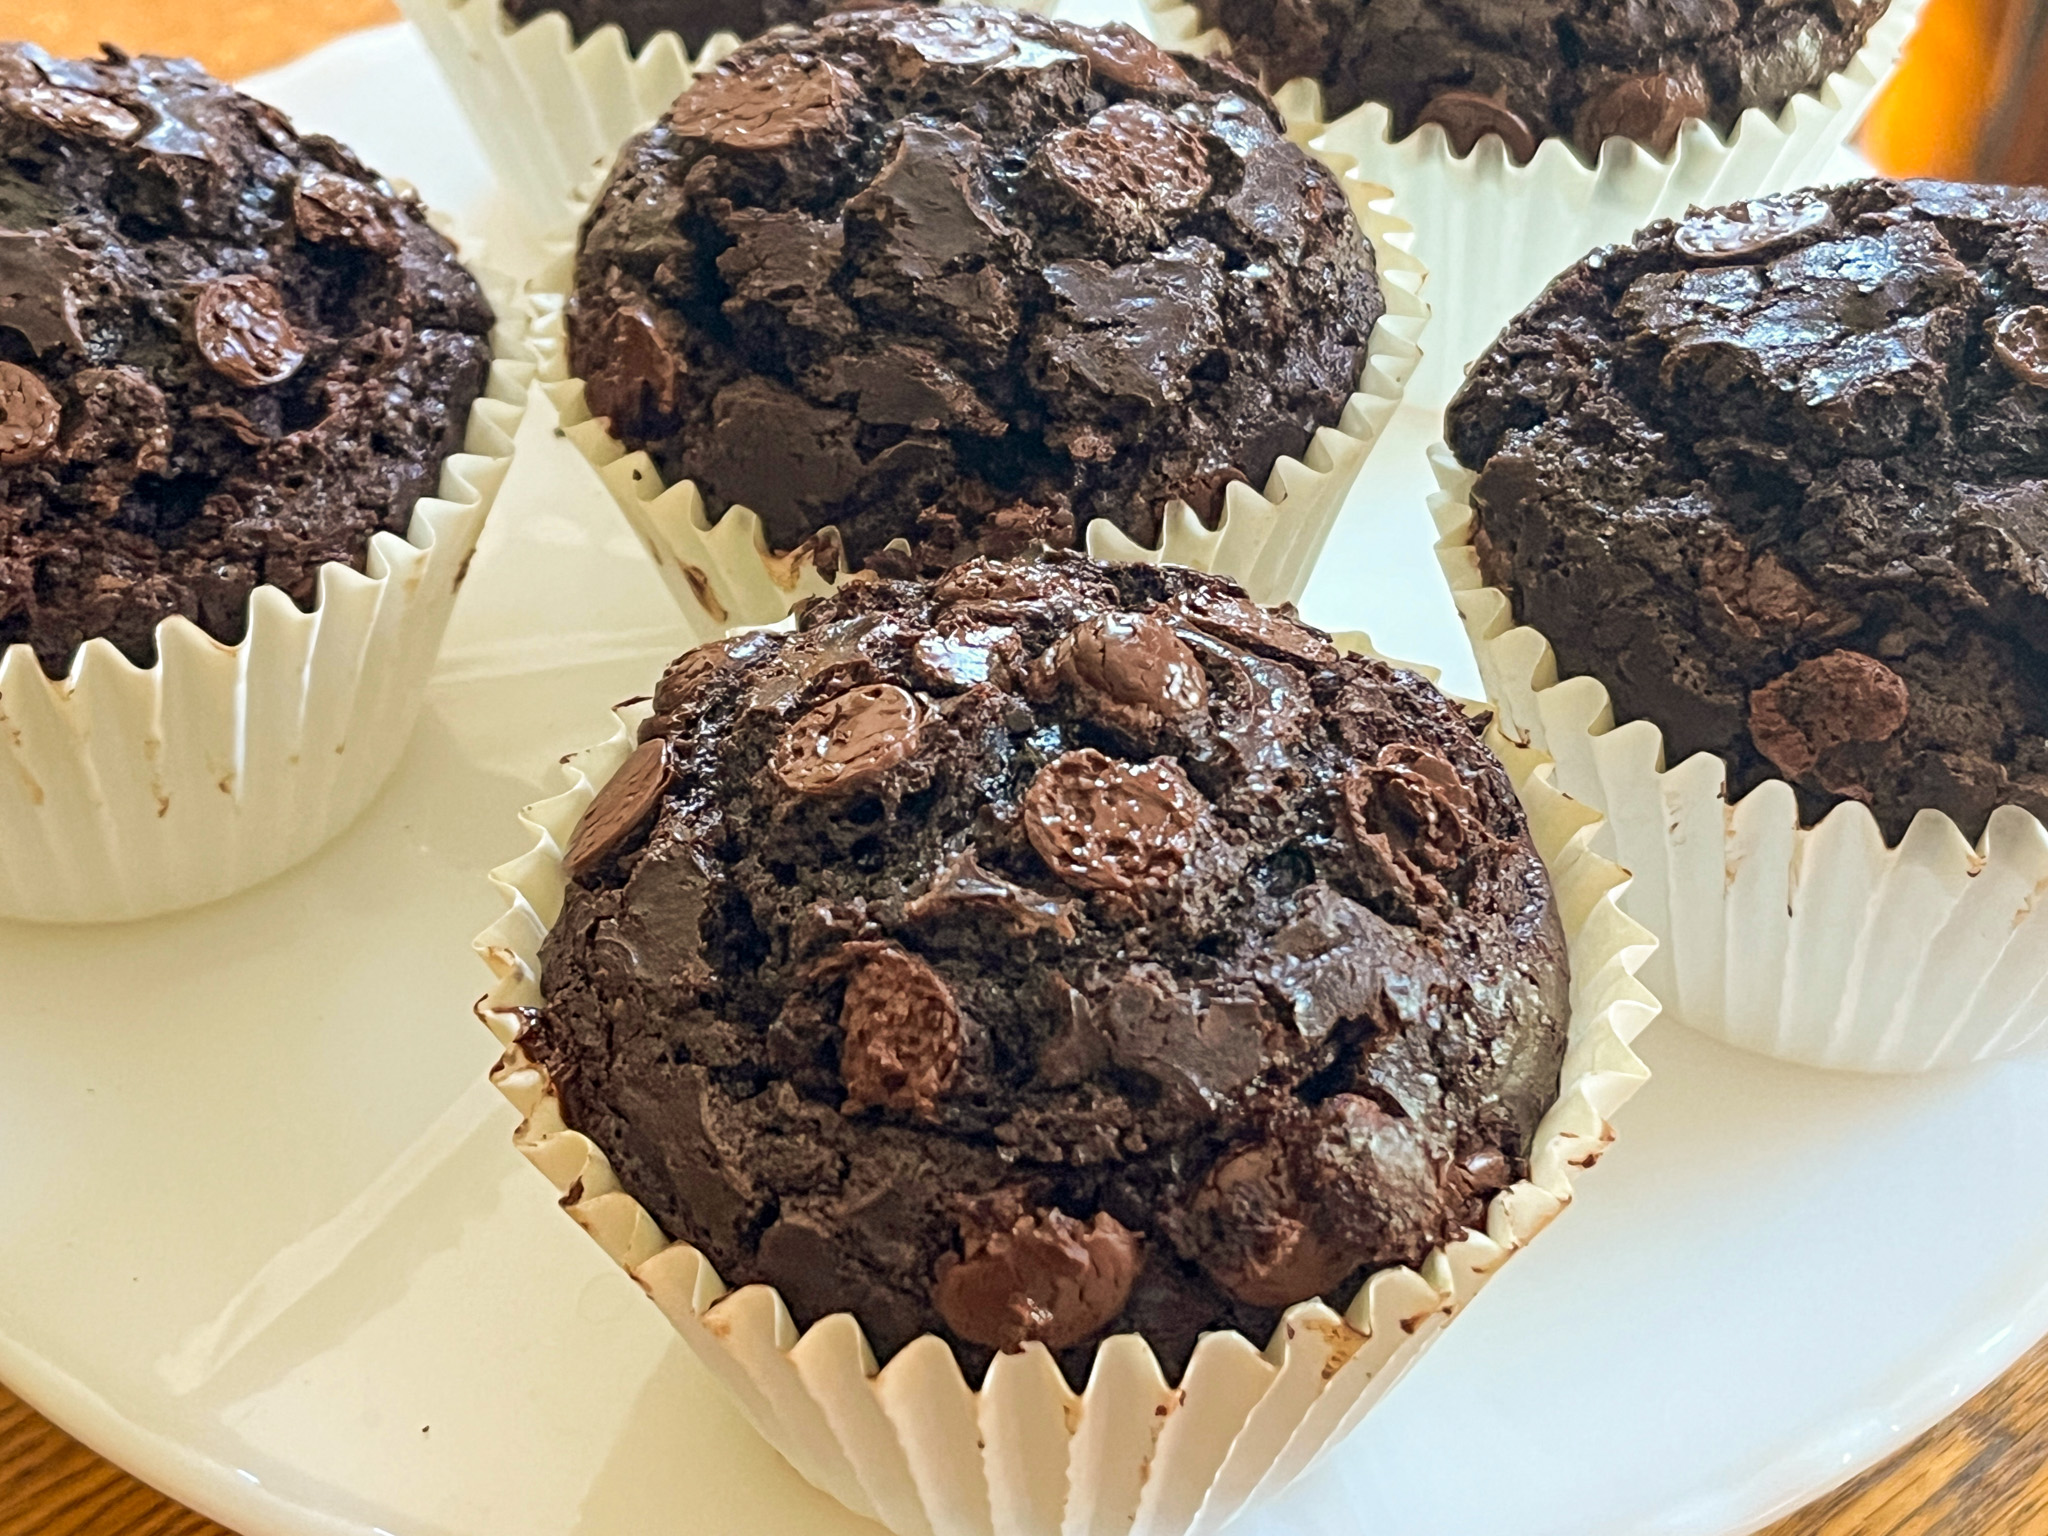
Today I share three delicious recipes that center on that dreamy ingredient that almost every human being loves: chocolate. I have known a few members of our species who claim to “hate” chocolate, and my hope is that they get their genomes sequenced to solve the mystery. Anyway, I digress. The first recipe comes from my favorite baker-instructor-guru, Helen Fletcher. These are beyond amazing and not for the faint of heart. Rich. Decadent. Luscious. Special. They are Double Chocolate Truffled Muffins!
For the truffle component: ½ cup heavy cream 2 tablespoons unsalted butter (30 grams) 2 tablespoons granulated sugar (25 grams) 5 ounces semisweet or bittersweet chocolate (140 grams) 1 teaspoon vanilla extract
for the muffin component: 1 ½ cups all-purpose flour (210 grams) 1 cup Dutch cocoa (85 grams) ¼ teaspoon baking powder ¾ teaspoon baking soda 1 teaspoon salt (I use table salt) 1 ⅓ cups brown sugar, either dark or light (265 grams) ½ cup whole milk ¾ cup canola or vegetable oil 2 large eggs 1 cup sour cream (225 grams) 1 tablespoon vanilla 1 teaspoon instant coffee or espresso powder 1 cup chocolate chunks (114 grams)
Start by making the truffle filling: Heat the cream, butter and sugar together in a small saucepan just until steamy. Do not let it come to a boil. Submerge the chocolate under the cream mixture and let it sit for 3 or 4 minutes. Whisk until smooth, making sure to get into the corners. Using a rubber spatula, go around the edges of the pan and bottom to make sure all of the chocolate is incorporated. Add the vanilla. Cover the surface with plastic wrap and set aside to cool.
Make the muffins: Line 9 jumbo muffin holes with paper liners. Set aside. Heat the oven to 425°F.
Sift the flour into a large bowl. Sift the cocoa, baking soda, baking powder and salt on top of the flour. Whisk together to mix well. In a very small bowl stir together the coffee or espresso and vanilla until the coffee or espresso is dissolved.
In a third smaller bowl, whisk together the milk, canola oil, eggs, sour cream, and coffee mixture. Pour the liquid ingredients over the dry ingredients and stir with a spoon or fold together with a rubber spatula just until everything is mixed well. Do not over mix.
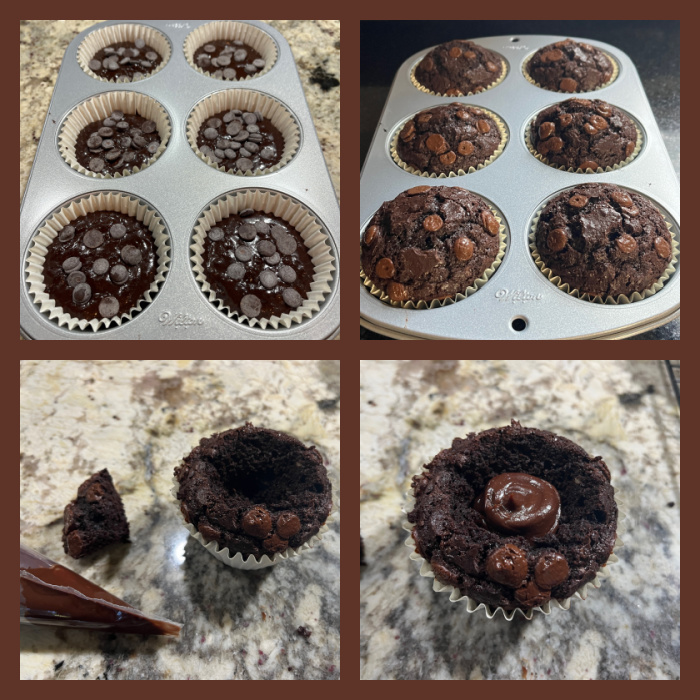
With a #8 disher/scooper or a ½ cup measure, drop the batter into the paper lined muffin cups for the jumbo muffins. Top generously with the chocolate chunks. Bake at 425°F for exactly 6 minutes for the jumbo and lower the temperature to 350°F. Continue to bake for about 20 minutes or until a tester comes out clean. Cool the muffins.
Starting about ½” from the edge of a muffin, insert a paring knife slanted towards the middle of the muffin and go all the way around the muffin. Remove the wedge shaped cake and set aside intact. To enlarge the hole for more filling, use a small spoon and scoop out additional cake.
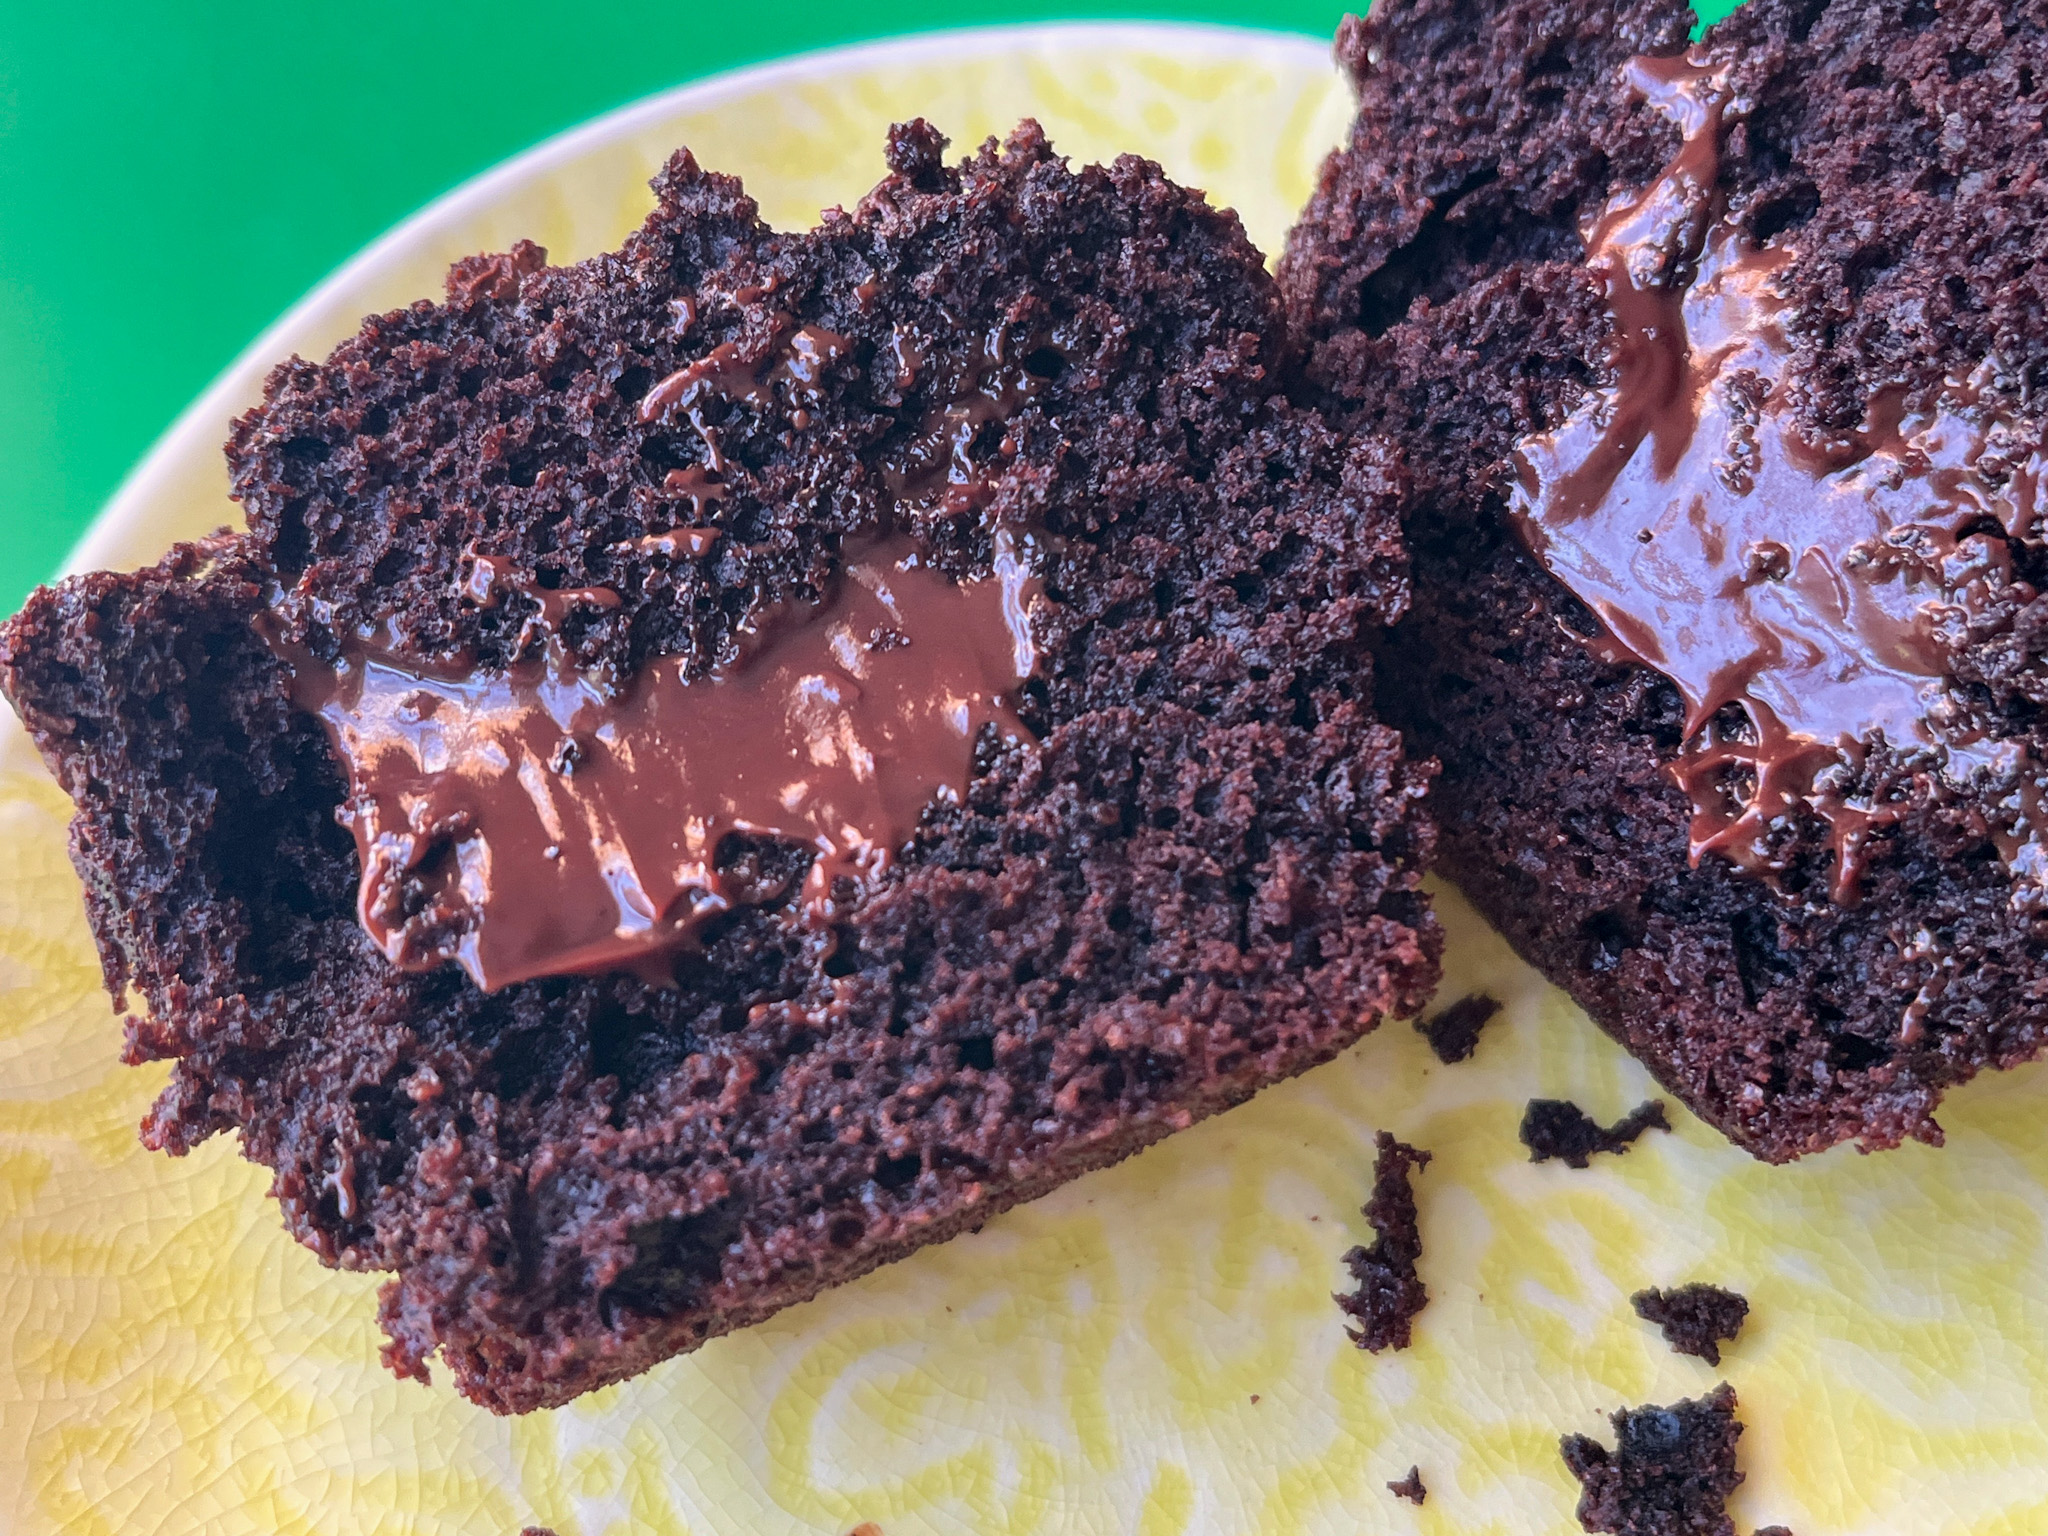
Fit a piping bag with a ½” tip, fill with the truffle filling and pipe into the hole almost up to the top. Alternately, spoon the filling in. Replace the wedge shape piece pushing it into the filling.
Comments: Please make sure to read Helen’s blog post about them, as she gives detailed explanation of their origin and how she adapted the recipe to make it more user-friendly without any loss of deliciousness (I can testify to that, they are spectacular). The pictures do not make it justice, as so often is the case with brown food. Their texture is superb, and that filling is unreal! Thank you thank you thank you, Helen!
.
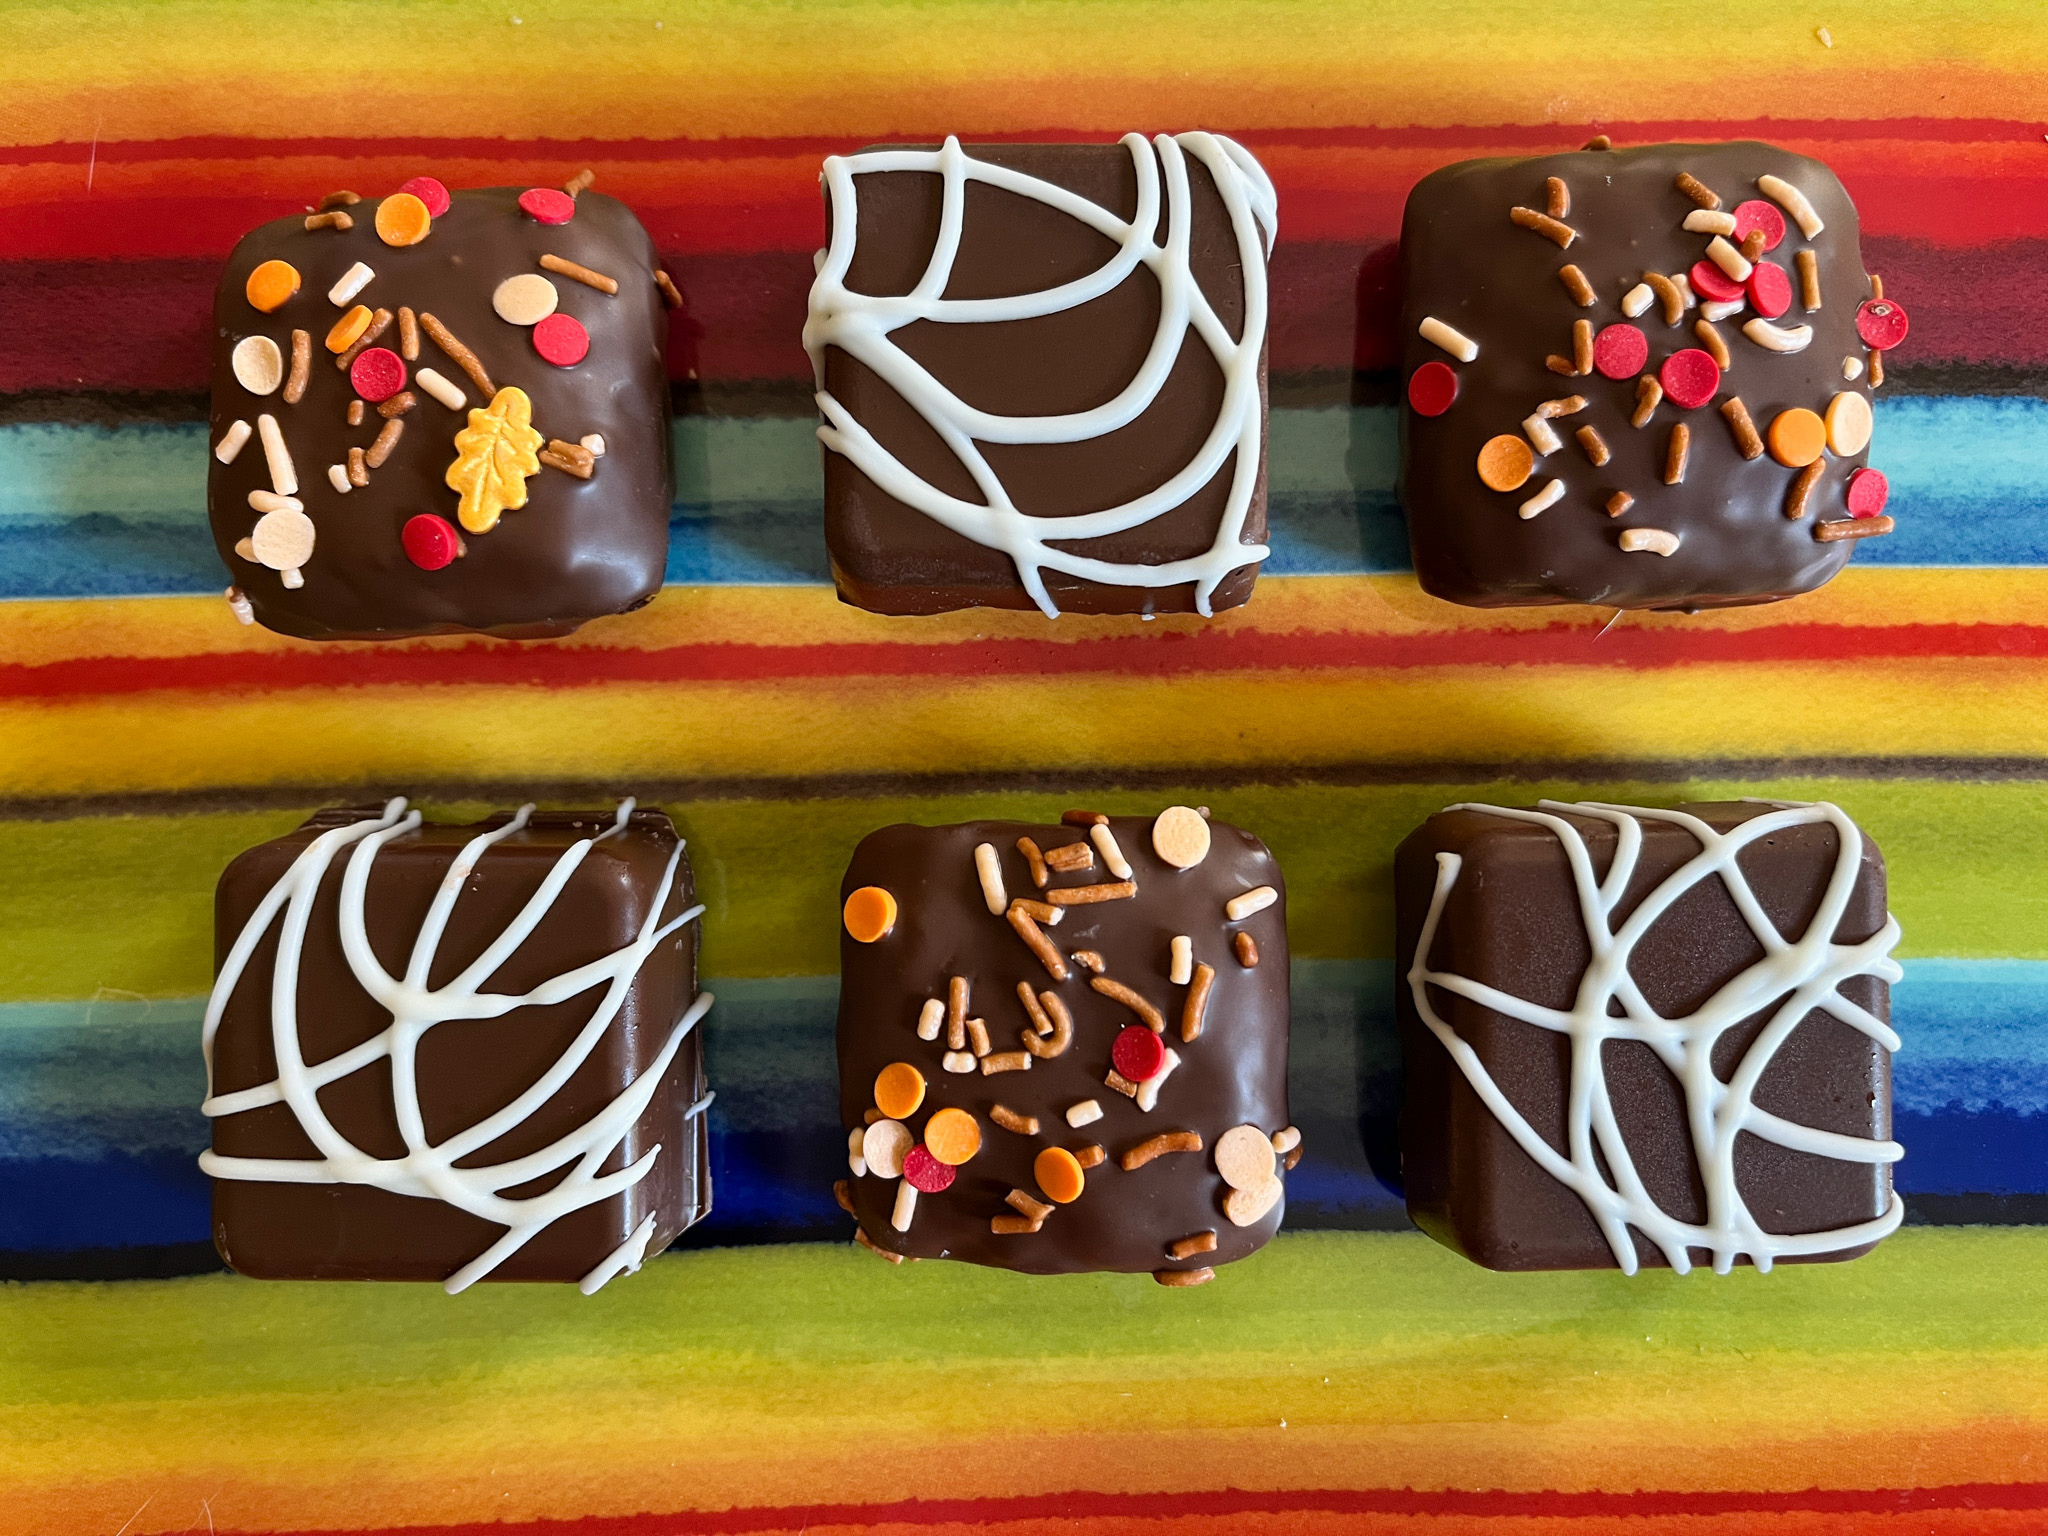
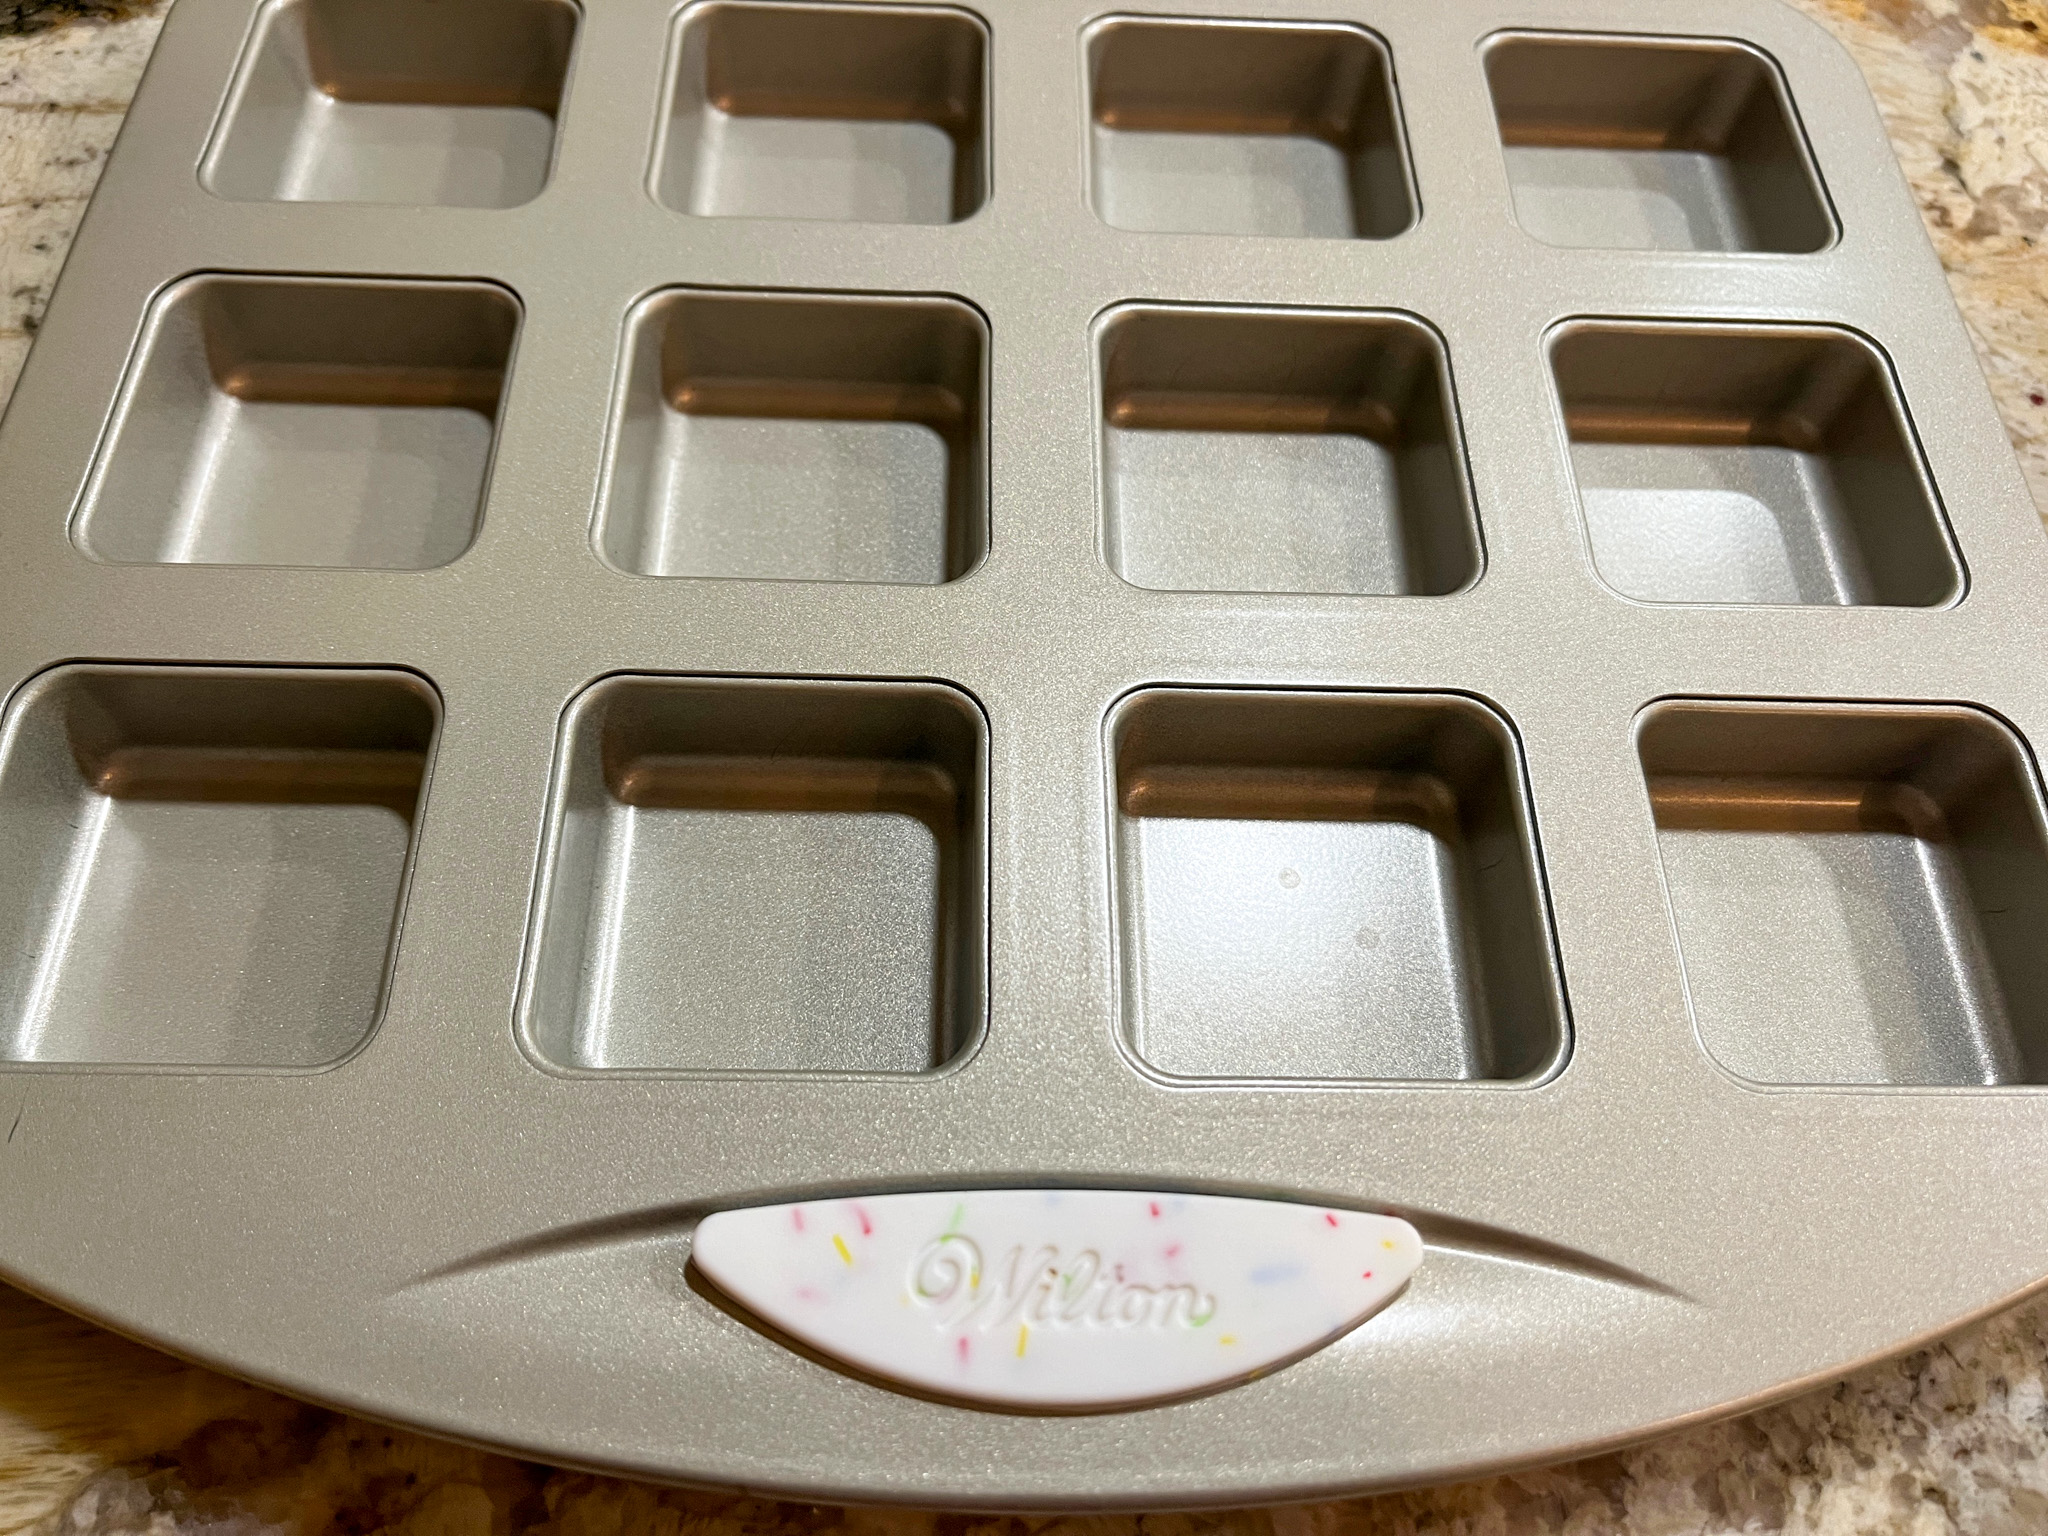
Moving on to the second recipe, credit goes to my beloved husband, who suggested that instead of coating Oreos with chocolate, I could do small pieces of brownies. I used a very small pan from Wilton to bake them. Without further ado…
1 cup all-purpose flour (130g) 1 cup granulated sugar (200g) 1/3 cup cocoa powder (35g) 1/2 teaspoon baking powder 1/4 teaspoon salt 1/2 cup vegetable oil 1 egg, lightly beaten 3 tablespoons milk 1/2 teaspoon vanilla extract
to coat: compound chocolate like Candy Melts or Almond Bark to decorate: sprinkles (optional)
Heat the oven to 350°F. Prepare the pan with baking spray.
In a medium bowl, whisk together flour, sugar, cocoa powder, baking powder and salt. Add vegetable oil, egg, milk and vanilla extract; stir well until smooth. Divide batter evenly between cavities, smoothing into an even layer (about 1 tablespoon per cavity). Bake for 13-16 minutes, or until edges are set and a toothpick inserted in the center comes out almost clean. Cool in pan on a cooling rack 5-10 minutes, loosen edges if necessary, and remove. Let cool completely on the rack.
Melt the compound chocolate until smooth using gentle power in the microwave. If too thick, add a small amount of coconut oil (refined). Coat the bites and decorate right away, or after setting, if going with drizzles of melted compound chocolate.
Comments: I got this pan at a sale in Jo-Ann store in town, and of course, could not resist it (info here). You can use silicone pans, or any other type of pan that makes mini-cakes. To coat, you can use two different methods. First, just melt the chocolate in a bowl and dip the cake to coat. That will give a rustic appearance, and you can add sprinkles right away. Second method will require you to clean the pan, then add melted chocolate in each cavity and quickly place the cake inside, pressing a bit so that the chocolate moves up along the sides. You can coat the bottom or not. Let it harden, remove from the pan, and if desired, make decorations with swirls of melted chocolate, I used white for that. Below you can see the different outcome.
And now for the last recipe, what might seem like your regular chocolate chip cookie, but it is truly special, due to the inclusion of an unexpected ingredient: buttermilk. You must give this recipe a try!
BUTTERMILK CHOCOLATE CHIP COOKIES
BUTTERMILK CHOCOLATE CHIP COOKIES (slightly modified from Yesterfood blog)
2 cups flour (260g) 1/2 teaspoon baking soda 1/2 teaspoon salt 1/2 cup butter, unsalted, melted 3/4 cup cocoa powder (75g) 1 + 1/2 cups sugar (300g) 1 teaspoon vanilla 2/3 cup buttermilk 1 (12 oz.) bag semi-sweet chocolate chips (about 2 cups)
Heat oven to 350 degrees. Line cookie sheets with parchment paper. Set aside. In a medium bowl, combine flour, baking soda, and salt. Whisk to combine. Set aside. In a large bowl, whisk the cocoa powder and melted butter until very smooth. Stir in the sugar, vanilla, and buttermilk until well combined.
Add the flour mixture to the chocolate mixture in thirds, stirring each time just until combined. Stir in the chocolate chips.
Scoop cookie dough onto prepared cookie sheets by heaping tablespoonfuls about 2″ apart. Bake for 10 to 12 minutes, until cookies are puffed, edges are set, and center is still moist. Place cookie sheets on wire racks for 5 minutes, then remove cookies onto wire racks to cool completely. Store tightly covered.
Comments: These cookies will definitely please any chocolate lover out there. It almost feels as if you are having a brownie. Excellent texture, I reduced the sugar from the published version and I think it was a good move. I do hope you give it a try…
So, that’s all for now, three real nice recipes celebrating chocolate!