PECAN SOURDOUGH DRESSED UP FOR PARTY

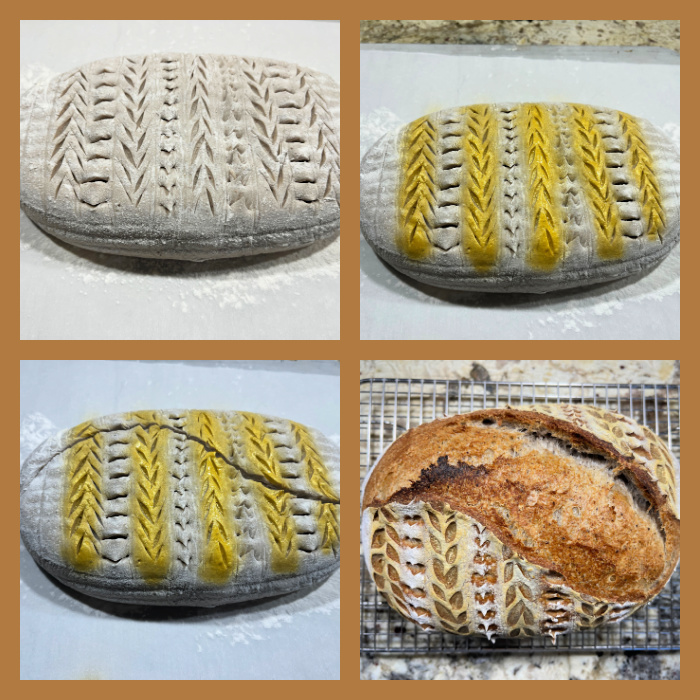
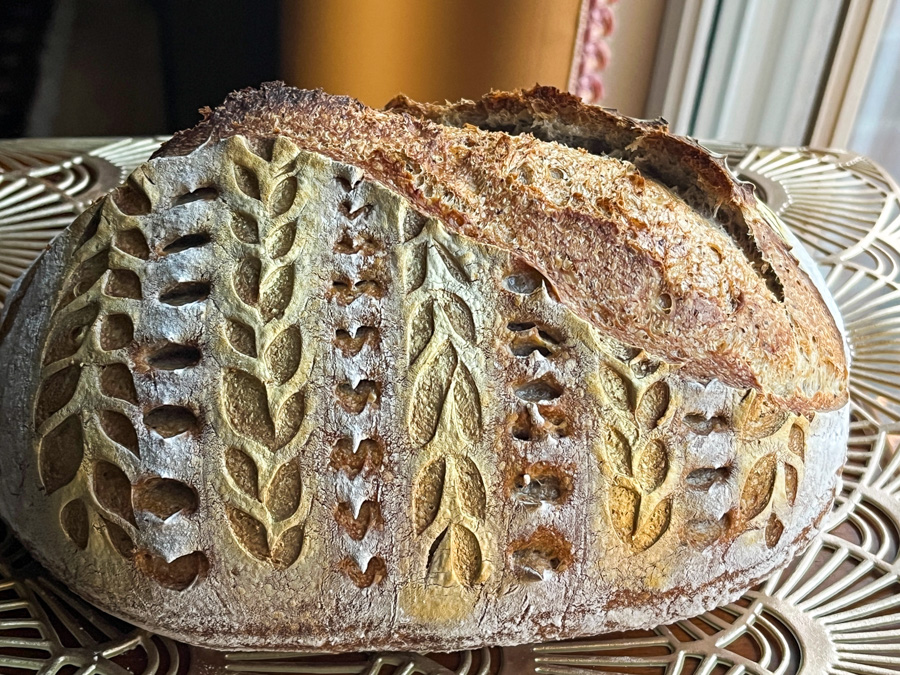
I’ve been having a lot of fun coupling the air-brush with sourdough baking. It is fast, simple and efficient to add a little bling to your bread. I used pecan flour in a small amount, because since it lacks gluten, I don’t want to risk compromising the structure of the bread.
PECAN SOURDOUGH
(from the Bewitching Kitchen)

385g white bread flour
20g pecan flour
20g whole-wheat flour
8g salt
280g water
65g sourdough starter at 100% hydration

optional: gold air-brush dye

Make the levain mixture about 6 hours before you plan to mix the dough. It should be very bubbly and active.

When you are ready to make the final dough, place the water in the bowl of a KitchenAid type mixer and dissolve the starter in it, mixing with a spatula briefly, then add the three types of flour, and the salt. Turn the mixer on with the hook attachment and knead the dough for 4 minutes at low-speed all the time. If the dough is too sticky, add 1/4 cup flour, you want the dough to start clearing the sides of the bowl, but still be sticky at the bottom.

Remove from the machine, and transfer to a container lightly coated with oil, cover lightly with plastic wrap and allow it to ferment for 4 hours, folding every 45 minutes or so. After four hours bulk fermentation, shape the dough as a ball, and place, seam side up, in a lightly floured banetton. Leave at room temperature one hour, and then place in the fridge overnight, from 8 to 12 hours.

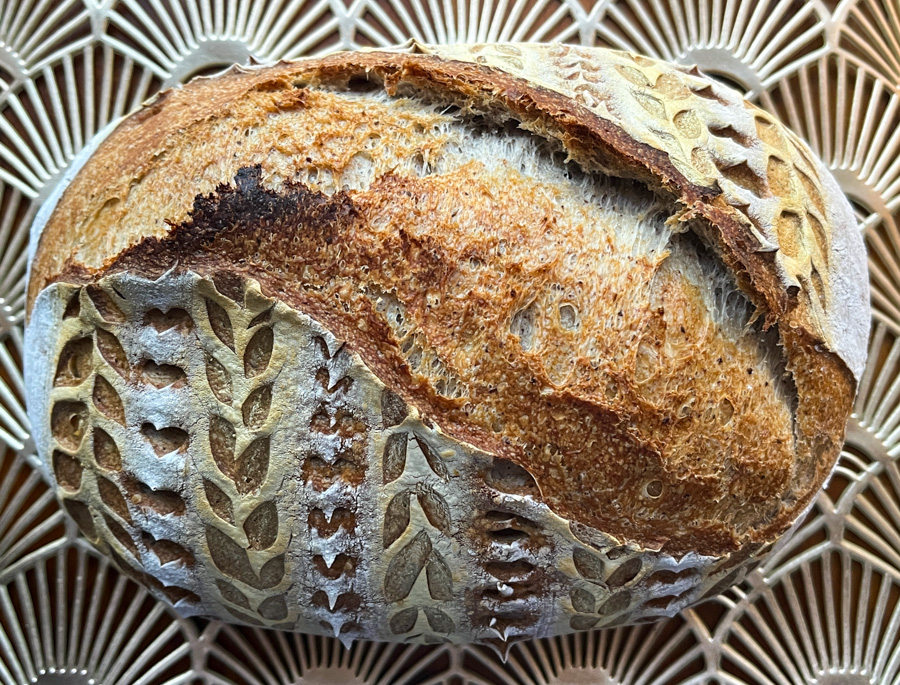
Next morning, heat the oven to 450F. Invert the dough over parchment paper, rub gently white flour on the surface. Score with the pattern of your choice and air-brush any region you want to highlight.

Bake at 450F for 45 minutes, preferably covered for the first 30 minutes to retain steam. Cool completely over a rack before slicing.

ENJOY!

to print the recipe, click here

Comments: The golden tone was a little lost during baking, so I air-brushed it again once it came out of the oven. In the composite picture above you see it exactly as it came out of the oven, and below after the second round of air-brushing. A red color would have stayed better, or perhaps I could have used luster powder in copper and mixed with alcohol to use in the air-brush. Something fun to try next time. We love the flavor of this bread, the pecan flour contributes a lot and gives a little more moisture.
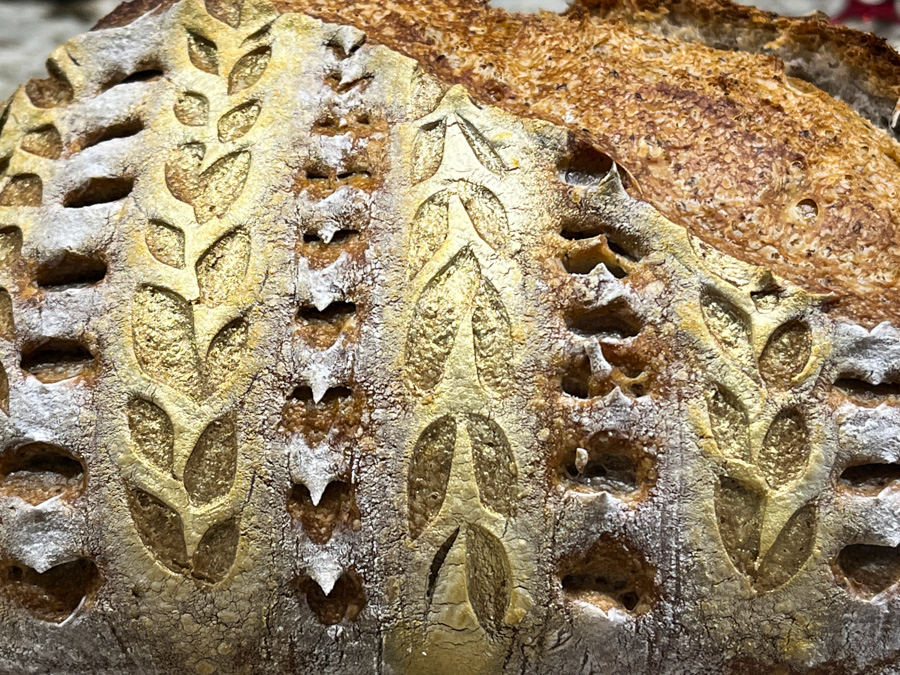
There is no flavor associated with the dye, at least not with the brand I use, which is this one. I buy it in the large bottle because it is a favorite that I tend to use all the time, especially in cookies.
ONE YEAR AGO: Tiramisu Tart

TWO YEARS AGO: Joy Cookie Club: Valentine’s Day

THREE YEARS AGO: Uttapam, White Lentil and Rice Flatbread

FOUR YEARS AGO: Valentine’s Day Sweetheart Cookies

FIVE YEARS AGO: Fesenjan, Fast-Food Style

SIX YEARS AGO: Lavender Macarons with White Chocolate Ganache

SEVEN YEARS AGO: Raspberry Chocolate Truffles

EIGHT YEARS AGO: Red Velvet Cupcakes

NINE YEARS AGO: Happy Valentine’s Day!

TEN YEARS AGO:  A Few Blogging Issues

ELEVEN YEARS AGO: Dan Dan Noodles

TWELVE YEARS AGO:  Sophie Grigson’s Parmesan Cake

THIRTEEN YEARS AGO: Antibiotics and Food

CHRISTMAS SOURDOUGH

I love it when a friend shares a baking idea with me, and in this case I am talking about Alex, my tent-baker partner of three years ago (time flies!). I gilded the lily by coupling some air-brushing with the basic scoring pattern, and I must say I’m pretty smitten by this little loaf of sourdough, perfumed with a touch of za’atar.

ZA’ATAR CHRISTMAS SOURDOUGH
(from the Bewitching Kitchen)

385g white bread flour
20g whole-wheat flour
65g sourdough starter at 100% hydration
280g water
8g salt
1 tsp za’atar

Make the levain mixture about 6 hours before you plan to mix the dough. It should be very bubbly and active.

When you are ready to make the final dough, place the water in the bowl of a KitchenAid type mixer and dissolve the starter in it, mixing with a spatula briefly, then add the two types of flour, the baharat and the salt. Turn the mixer on with the hook attachment and knead the dough for 4 minutes at low-speed all the time. If the dough is too sticky, add 1/4 cup flour, you want the dough to start clearing the sides of the bowl, but still be sticky at the bottom.

Remove from the machine, and transfer to a container lightly coated with oil, cover lightly with plastic wrap and allow it to ferment for 4 hours, folding every 45 minutes or so. After four hours bulk fermentation, shape the dough as a ball, and place, seam side up, in a lightly floured banetton. Leave at room temperature one hour, and then place in the fridge overnight, from 8 to 12 hours.

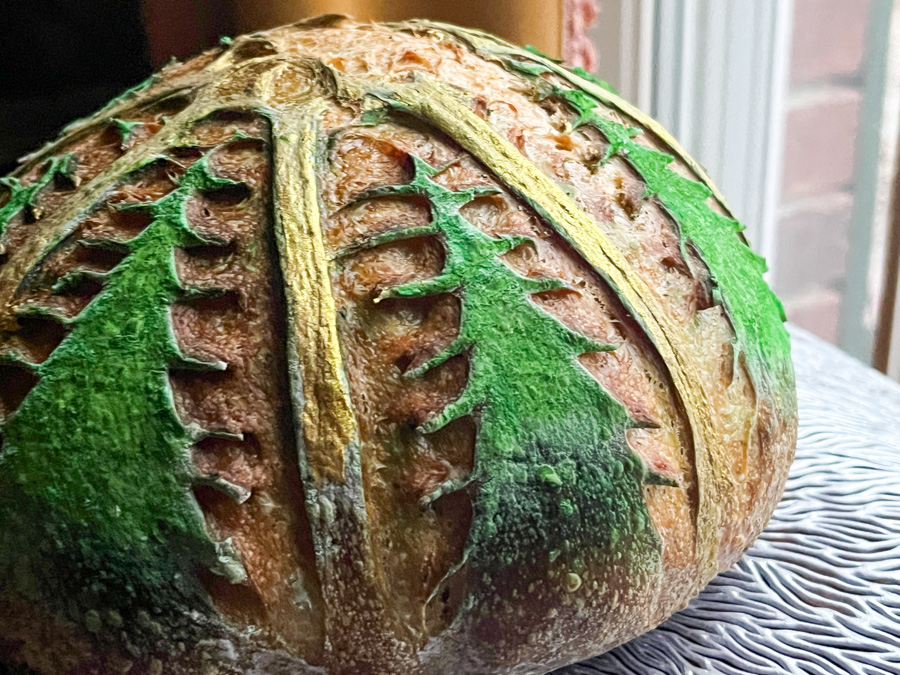
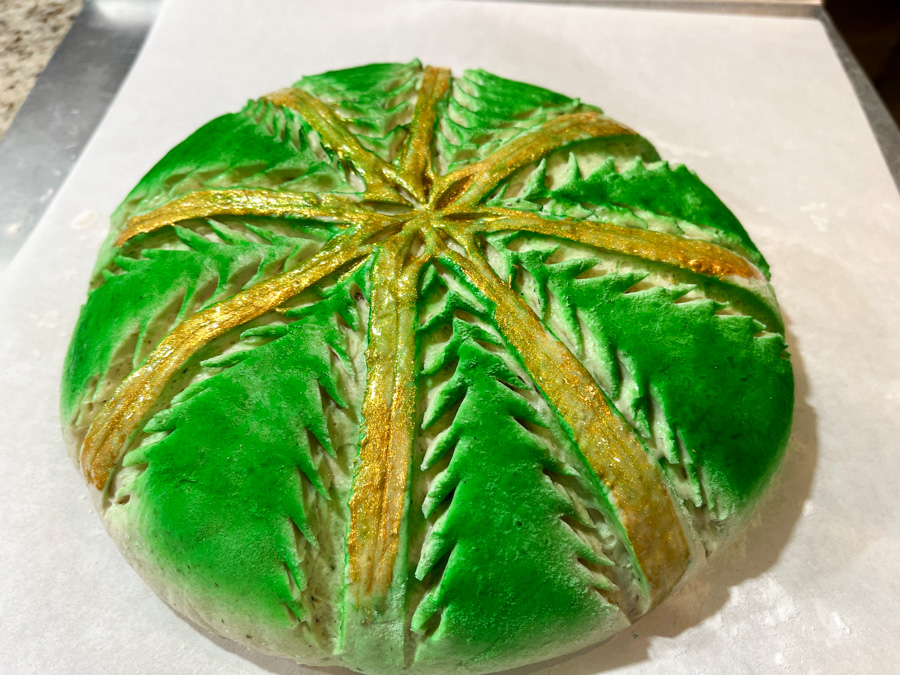
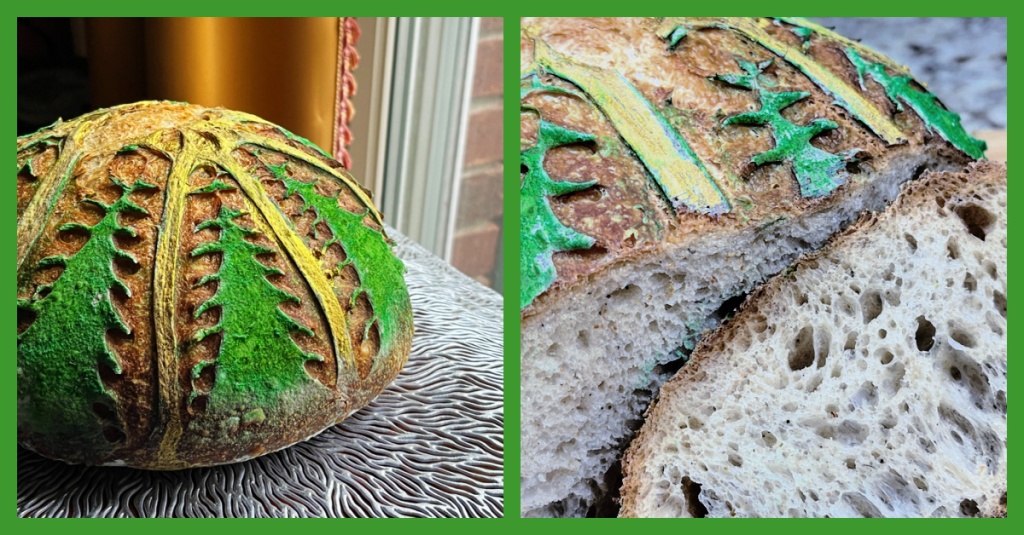
Next morning, heat the oven to 450F. Invert the dough over parchment paper, rub gently white flour on the surface. Score with a pine tree pattern (see picture below) and paint them with air-brush in green, then go over the center lines with gold luster powder.

Bake at 450F for 45 minutes, preferably covered for the first 30 minutes to retain steam. Cool completely over a rack before slicing.

ENJOY!

to print the recipe, click here

Comments: Alex brought to my attention this post from Instagram, so you can check how it is scored by watching the reel. I used the air-brush to add some green to the trees after scoring. It worked great because it goes fast, but of course there is little precision on the edges. I then used gold to hide the green that sprayed in between the tree pattern. Just like the Instagram post, my central star also bursted in the oven, but such is the price you pay for good oven spring. The green faded a little bit during baking so next time I will use a heavier hand with the air-brush. Now that I know the colors of air-brush dyes work well, I will be playing with other patterns and bringing stencils to play too. Stay tuned!

ONE YEAR AGO: Star-Shaped Sun-dried Tomato Bread

TWO YEARS AGO: Cranberry White Chocolate Tart

THREE YEARS AGO: I dream of Madeleines and a Tower of Cheesecakes

FOUR YEARS AGO: Dominique Ansel’s Chocolate Mousse Cake

FIVE YEARS AGO: Slow-Roasted Eye of the Round Beef

SIX YEARS AGO: Steam-Roasted Indian-Spiced Cauliflower

SEVEN YEARS AGO: Creamy Zucchini-Mushroom Soup

EIGHT YEARS AGO: Ken Forkish’s Pain au Bacon

NINE YEARS AGO: Carrot and Cumin Hamburger Buns

TEN YEARS AGO: Potato Galettes a l’Alsacienne & Book Review

ELEVEN YEARS AGO: Caramelized Carrot Soup

TWELVE YEARS AGO: Miso-Grilled Shrimp

THIRTEEN YEARS AGO: Pain Poilane

LESSONS FROM TANYA, THE FINAL CHAPTER

Third post of a series of three on Sugar Cookie Decorating

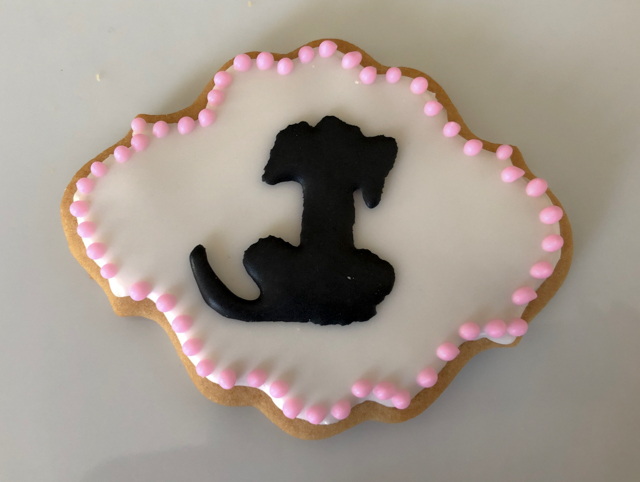
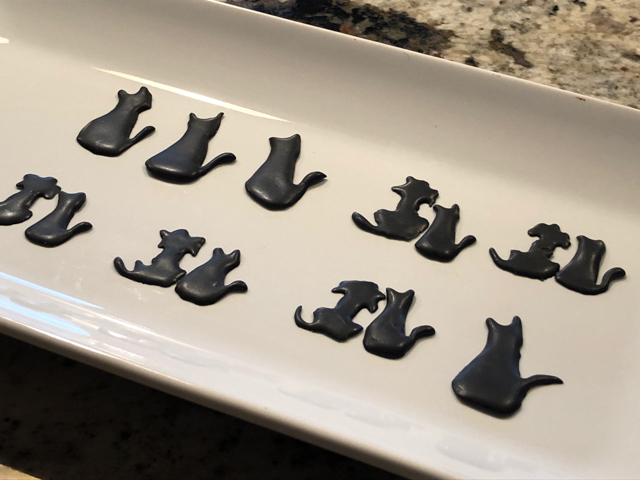
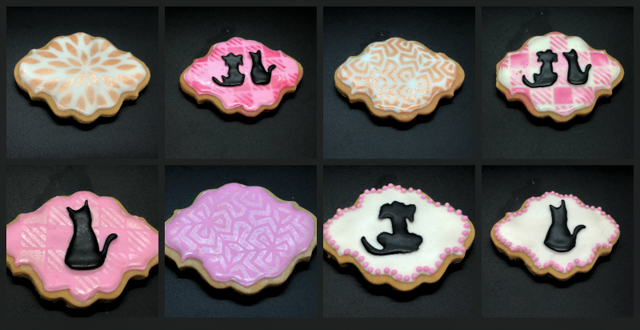
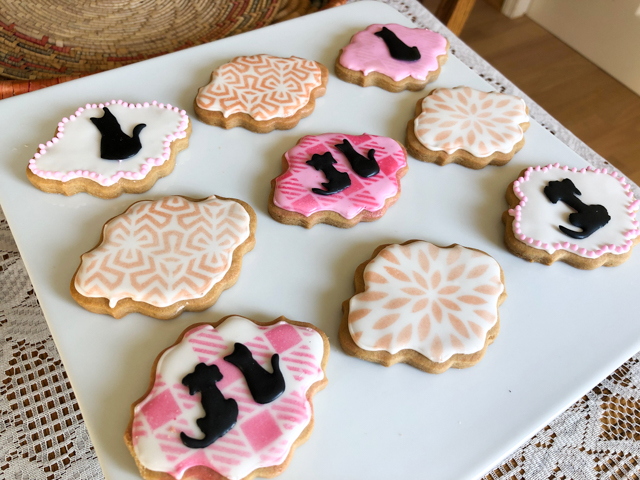
In this post, I won’t share a recipe, as I will be using the exact same one posted yesterday. I made another set of silhouettes because the pups were beyond upset by my use of felines as cookie decoration.

Please do not laugh of my pink dotted border. That is the one technique Tanya demonstrated and I simply could not succeed. She does the beaded border pulling the piping tip and dragging a bit alternating the direction, it looks soooo adorable. I’ve tried in two cookies, and they ended in my belly because I was forced to eat the evidence. So I just went with little dots and even that has plenty of room for improvement.

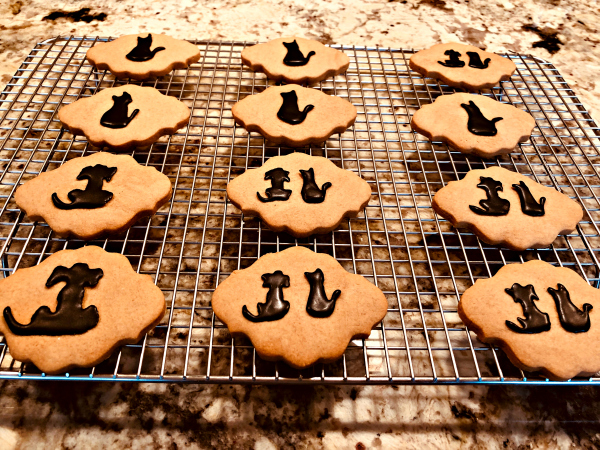
I made dogs and cats of two sizes, to either stand alone in a cookie or side by side as best friends. At least in the cookie world, such relationship is possible.

The planning stage…

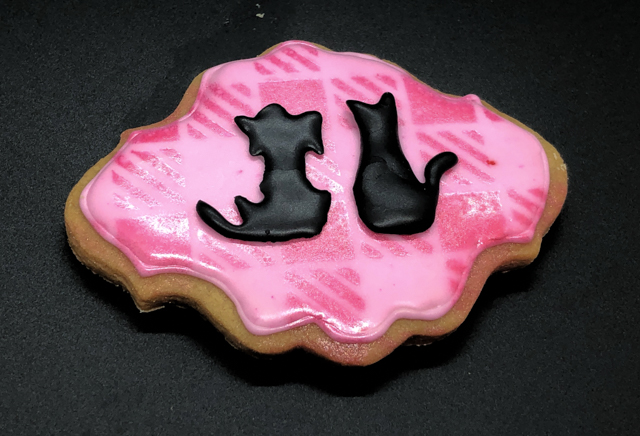
In this batch of cookies, I brought my air-brush into play. So I started from the flooding technique, and allowed that to fully dry for 24 hours. Once the surface is truly solid, you can lay a stencil on top and air-brush any color and/or pattern you fancy.

After that, simply glue the silhouette, if using, or any other piping with Royal icing you feel like adding.

If you are new to air-brushing, I highly recommend this one. It has a cup that is bigger than other brands, and can also be used for cocoa butter for spraying bonbon molds (I intend to try that in the near future).

You will also need air-brush dyes, and my favorite brand is Cookie Countess. The most useful colors are the pearl types, white, gold, silver or my favorite: Rose’ Gold (which I used in the cookies without silhouettes in the group picture above).

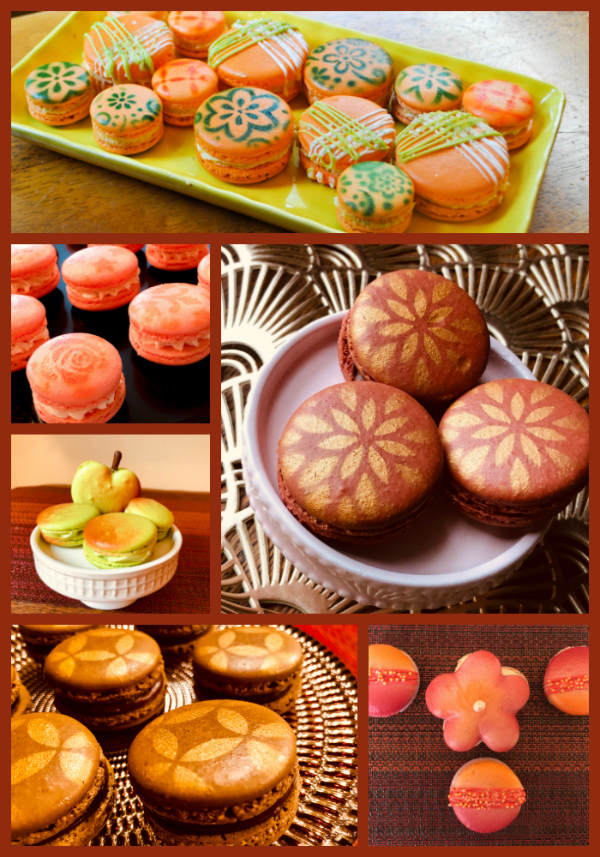
Below a little sampling of bakes from old posts and a few not yet blogged about, all decorated with air-brushing, some with stencils, some without. Speaking of stencils, etsy.com is a great source to get them.

It is really a very nice tool to play with, so if you are over the fence about getting one, consider this post a little encouragement…

I hope you enjoyed this little Trilogy of Sugar Cookies. Sugar Cookies and macarons are almost always part of my weekly bakes for Common Table meals, so I am constantly trying to find new ways to decorate them and new flavors to explore. Stay tuned for more in the near future…

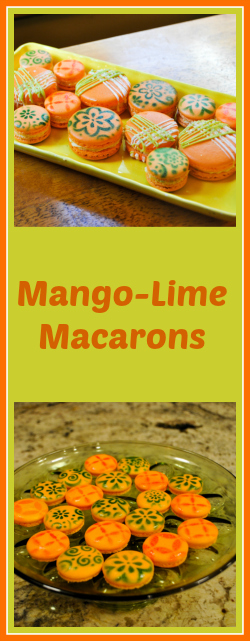
MANGO-LIME MACARONS

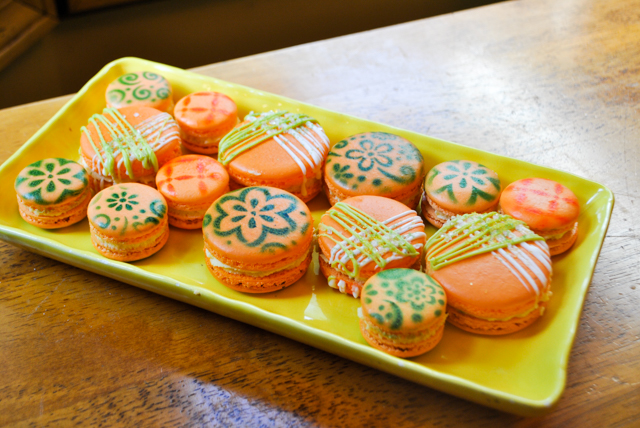
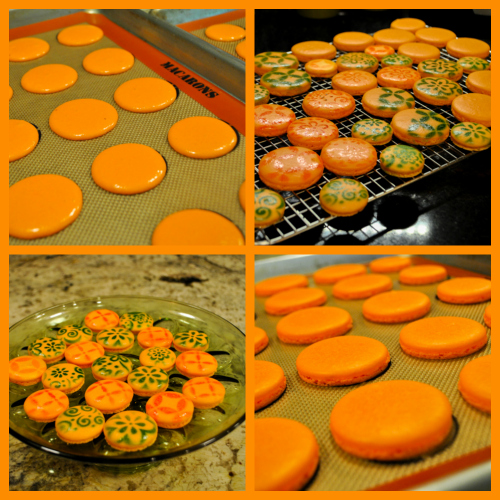
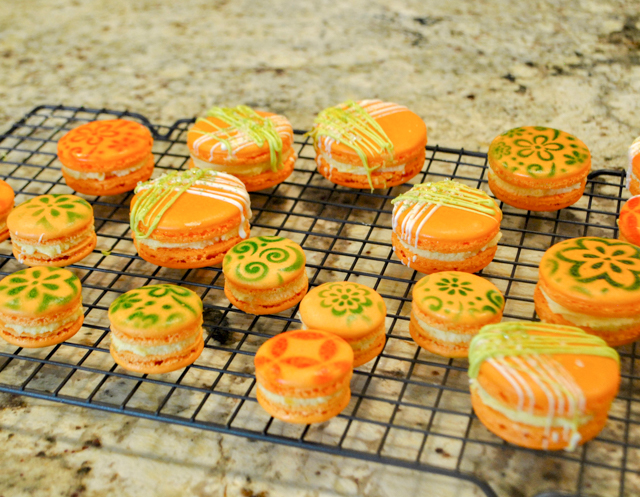
Brazil meets France, big time. If I was talking soccer, that would be pretty unsettling, but since I mean macarons, it’s all good! Macarons shells are considered overly sweet by many people, so a filling that balances that is my favorite option. Do not skimp on the lime zest, it is absolutely mandatory in this recipe.  I put my air-brush to work, but in case you do not have one, a simple drizzle of white chocolate will do just fine.

MANGO-LIME MACARONS
(shells from this post, filling inspired by Joanne’s blog)

for the shells:
198 g powdered sugar
113 g almond meal
113 g egg whites at room temperature
a pinch of cream of tartar
100 g granulated sugar
Orange Gel color from AmeriColor
2 drops vanilla extract

for the filling:
230 g white chocolate, coarsely chopped
¾ cup heavy whipping cream
2 tbsp unsalted butter
¼ cup mango puree
zest of one lime or a bit more (taste and decide)

to decorate: white chocolate, melted, white and tinted with lime green (optional)

Line 2 or 3 heavy baking sheets with parchment paper or Silpat mats. Layer the powdered sugar and almond meal   in a food processor. Pulse until the mixture looks like fine meal, about 15 seconds. Pass through a sieve and transfer to a small bowl. Set aside.

Place the egg whites and pinch of cream of tartar in the bowl of a stand mixer fitted with the whisk attachment. Make sure that the bowl and the whisk are impeccably clean. Starting on medium speed, whip the whites with the cream of tartar until they look like light foam. The whites should not appear liquid. The foam will be light and should not have any structure.

Slowly rain in the granulated sugar, trying to aim the stream between the whisk and the side of the bowl. Turn the speed up to medium-high. Continue to whip the meringue until it is soft and shiny. It should look like marshmallow creme. Add the gel color and the vanilla. Staying at medium-high speed, whip the egg whites until the mixture begins to dull and the lines of the whisk are visible on the surface of the meringue. Check the peak. It should be firm. Transfer the whites to a medium bowl.

Fold in the almond meal mixture in three increments. Paint the mixture halfway up the side of the bowl, using the flat side of a spatula. Scrape the mixture down to the center of the bowl. Repeat two or three times, then check to see if the mixture slides slowly down the side of the bowl. Put the mixture in a piping bag fitted with one of the tips listed above. Pipe on the prepared baking sheets.

Slam each sheet hard four to six times on the counter. Then fist bump each end of the sheet’s underside twice. Let the unbaked macarons dry until they look dull but not overly dry. Drying time depends on humidity. Ina dry climate, the macarons can dry in 15 to 20 minutes; in a humid climate, it can take 35 to 40 minutes.

While the macarons are drying, heat the oven to 300 F. Bake one sheet at a time on the middle rack. Check in 11 minutes. If the tops slide, then bake for 2 to 3 more minutes. The macarons should release without sticking. Check one or two. If they stick, put them back in the oven for 1 to 2 more minutes. Let the macaroons cool for 10 minutes before removing from the pan.

Decorate shells before filling using an air-brush and stencils, or if you prefer to decorate with a drizzle, do it after pairing and filling the macarons.

For the mango white chocolate ganache, place the chocolate in a heat-resistant bowl. Bring the heavy cream to a to a simmer in a heavy-bottomed pot over medium heat. When bubbles start to form along the sides, remove from the heat and pour over the white chocolate. Allow to sit for a minute before stirring to combine. Whisk in the butter until completely melted. Stir in the mango puree and the lime zest until combined. Refrigerate overnight, or until set.

Remove from the fridge and whip until slightly thickened, about 3-4 minutes. Pipe onto half of the macaron shells and then sandwich with a second shell. Allow to chill overnight so that macarons will mature and have a perfect consistency.

ENJOY!

to print the recipe, click here

Comments: I am quite smitten with my air-brush thingie… It takes just a little bit of getting used to, the main thing is to make sure you keep the spray 6 inches away or farther from the target. Otherwise the ink blotches and you don’t get the real nice effect of air-brushing.  Obviously, this means it can be a bit messy, but the dyes wash out very easily. I just place a parchment paper under the shell I’m painting.  There is one super cool gadget to help with stenciling cookies, though. I will be featuring it on my next installment of In My Kitchen, in a few days.  Don’t miss it.

The filling for these macs was very tasty. The lime zest brightens it up, and counteracts the sweetness of the white chocolate ganache.

I suppose I must add a new category to my blog. Macarons.
Since I cannot fight my obsession, I shall embrace it.

ONE YEAR AGO: Honey-Glazed Sriracha Meatballs

TWO YEARS AGO: Slow-cooker Braised Lamb Shanks

THREE YEARS AGO: How about some coffee with your steak?

FOUR YEARS AGO: Celebrate Wednesday with a Spiral Kick

FIVE YEARS AGO: Carrot Flan with Greens and Lemon Vinaigrette

SIX YEARS AGO: Granola Bars

SEVEN YEARS AGO:  Awesome Broccolini

EIGHT YEARS AGO:  A Twist on Pesto

NINE YEARS AGO: Ciabatta: Judging a bread by its holes

MACARONS WITH GANACHE NOISETTE

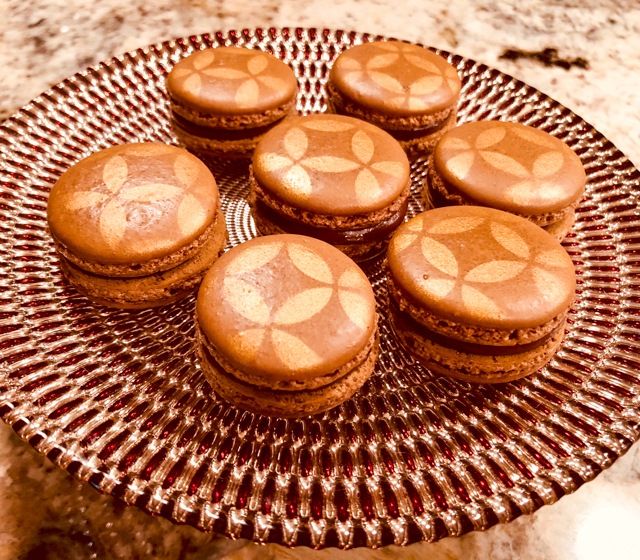
The filling for these French macs started with a pâte noisette concoction, which was suggested to me by my friend Jennifer, Pâtissière Extraordinaire. You can see a detailed description (in French) with a jump here.  I used part of this amazing paste in a cake (stay tuned) and what was left metamorphosed into macaron filling. The mixture of pâte noisette with ganache is the most gastronomically sensual thing in the known universe. Too superlative for you? Try it. If you disagree, we can discuss the matter further, sharing a few macarons while we are at it…

MACARONS WITH GANACHE NOISETTE
(from Bewitching Kitchen, inspired by this site)

for the pâte noisette (it makes more than you’ll need):
125 g hazelnuts, peeled
125 g almonds
160 g sugar
5 g water

for the ganache noisette:
100 g milk chocolate
160 g pâte noisette
140 g heavy cream

for the shells:
198 g powdered sugar
113 g almond meal
113 g egg whites at room temperature
a pinch of cream of tartar
100 g granulated sugar
3:1:1 brown, green and yellow food coloring
1/8 teaspoon vanilla paste

Make the pâte noisette. Start by placing water and sugar in a large saucepan. Heat up to 245 F.   Then add the hazelnuts and almonds. Gradually, they will be covered with a white film.  Cook until the sugar dissolves and caramelizes, stirring constantly. Be patient, it is going to take a little time. Pour the mixture on a sheet of parchment paper and let cool completely.  Coarsely chop and add to a blender, the more powerful the better.  In a Vitamix blender, in less than 5 minutes you should have a very smooth paste, which is what you want.

Make the ganache. Heat the heavy cream almost to boiling point. Add to the chocolate, cut in pieces. Wait a couple of minutes and stir to completely dissolve the chocolate. Let it cool for half an hour, add the pâte praline made as described. Keep in the fridge for at least a couple of hours to get into spreadable consistency.  Reserve to fill macarons.

Make the shells. Place the egg whites and pinch of cream of tartar in the bowl of a stand mixer fitted with the whisk attachment. Make sure that the bowl and the whisk are impeccably clean. Starting on medium speed, whip the whites with the cream of tartar until they look like light foam. The whites should not appear liquid. The foam will be light and should not have any structure.

Slowly rain in the granulated sugar, trying to aim the stream between the whisk and the side of the bowl. Turn the speed up to medium-high. Continue to whip the meringue until it is soft and shiny. It should look like marshmallow creme. Add the gel color and the vanilla. Staying at medium-high speed, whip the egg whites until the mixture begins to dull and the lines of the whisk are visible on the surface of the meringue. Check the peak. It should be firm. Transfer the whites to a medium bowl.

Fold in the almond meal mixture in three increments. Paint the mixture halfway up the side of the bowl, using the flat side of a spatula. Scrape the mixture down to the center of the bowl. Repeat two or three times, then check to see if the mixture slides slowly down the side of the bowl. Put the mixture in a piping bag fitted with your tip of choice. Pipe on the prepared baking sheets.

Slam each sheet hard four to six times on the counter. Then fist bump each end of the sheet’s underside twice. Let the unbaked macarons dry until they look dull but not overly dry. Drying time depends on humidity. Ina dry climate, the macarons can dry in 15 to 20 minutes; in a humid climate, it can take 35 to 40 minutes.

While the macarons are drying, heat the oven to 300 F. Bake one sheet at a time on the middle rack. Check in 12 minutes. If the tops slide, then bake for 2 to 3 more minutes. The macarons should release without sticking. Check one or two. If they stick, put them back in the oven for 1 to 2 more minutes. Let the macaroons cool for 10 minutes before removing from the pan.

Use the air-brush and a stencil to decorate each shell. Pair them according to size and fill.

Filled macarons should stay overnight in the fridge before consumed. The texture is much better on the following day.

ENJOY!

to print the recipe, click here

Comments: The air-brusher. I got it with a special discount from Groupon, after a tip from macaron-obsessed folks from a Facebook group. I am in love. First, it is pretty small and very easy to use. They advise you to practice on a piece of parchment paper, I did so, but realized it was pretty much a no-brainer. It has three speeds of spraying, I used the lowest, it gave good coverage without getting out of control. I mean, who wants to have a dalmatian with the ears sprayed gold? Second, it is super easy to clean. For me, that matters. Something that takes a lot of work to clean makes me think twice before using. This was a breeze. Warm water gets poured through the opening, sprayed inside a bowl with more warm water, done! You need special food color for the air-brusher, but I know it’s possible to improvise with normal dyes diluted in vodka or some other type of alcohol.  I used Chefmaster.

The filling. I suppose you can make a similar preparation using Nutella. But I tell you, making the pâte noisette from scratch and incorporating it in the ganache is a game-changer. It is nutty, almost smoky (it’s the caramel speaking), sweet but with a sharp twist to it. For my taste, it is close to perfection.  I had a little bit of ganache noisette left. It was enjoyed one tiny teaspoon at a time, standing up by the fridge, while telling myself: make this again, roll as truffles, coat in chocolate sprinkles, give to all the special human beings in your life.

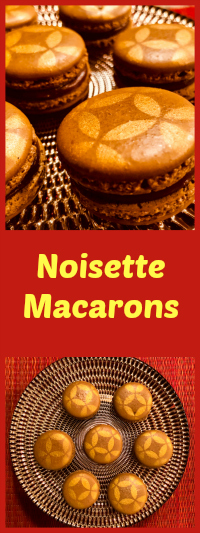
Make your life sweeter, grab a pin!


ONE YEAR AGO: Quiche with Asparagus and Fennel

TWO YEARS AGO: Fakebouleh

THREE YEARS AGO: Yellow Squash Soup

FOUR YEARS AGO: Grilled Chicken with Tamarind and Coconut Glaze

FIVE YEARS AGO: Chicken-Apricot Skewers

SIX YEARS AGO:  Asparagus Quiche

SEVEN YEARS AGO: Two-stage Pea and Prosciutto Risotto

EIGHT YEARS AGO: Mellow Bakers: Corn Bread


SaveSave

SaveSave

SaveSave

SaveSave