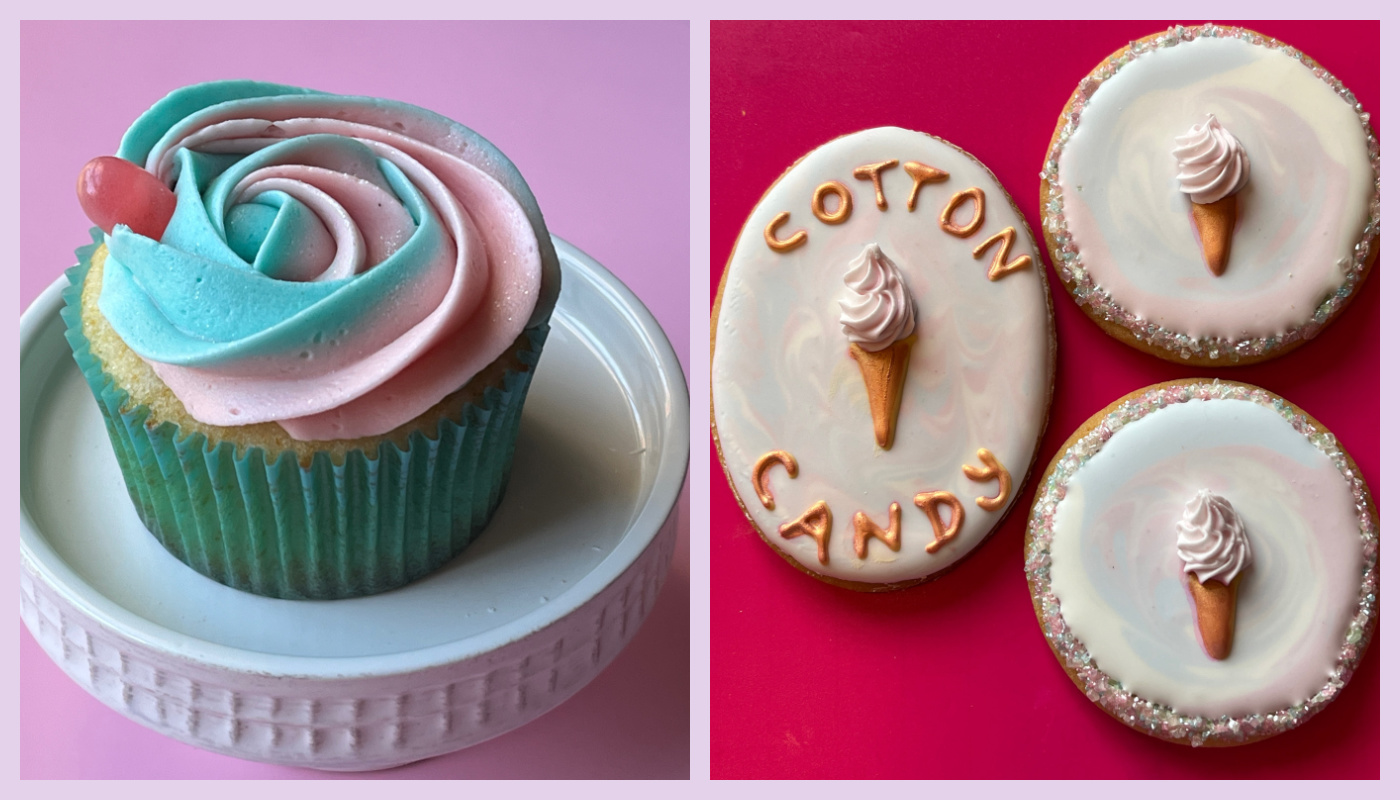
First of all, let me clarify that I cannot share this recipe. It is copyrighted and available exclusively for members of Savour, the online cooking community hosted by the amazing Kirsten Kibballs (click here for details). This can only be described as a baking marathon, one of the most involved projects I’ve ever attempted. However I am beyond thrilled with the way they turned out!

Although I cannot share the recipe, I will walk you through all the steps, so you will have some idea of all that is involved.
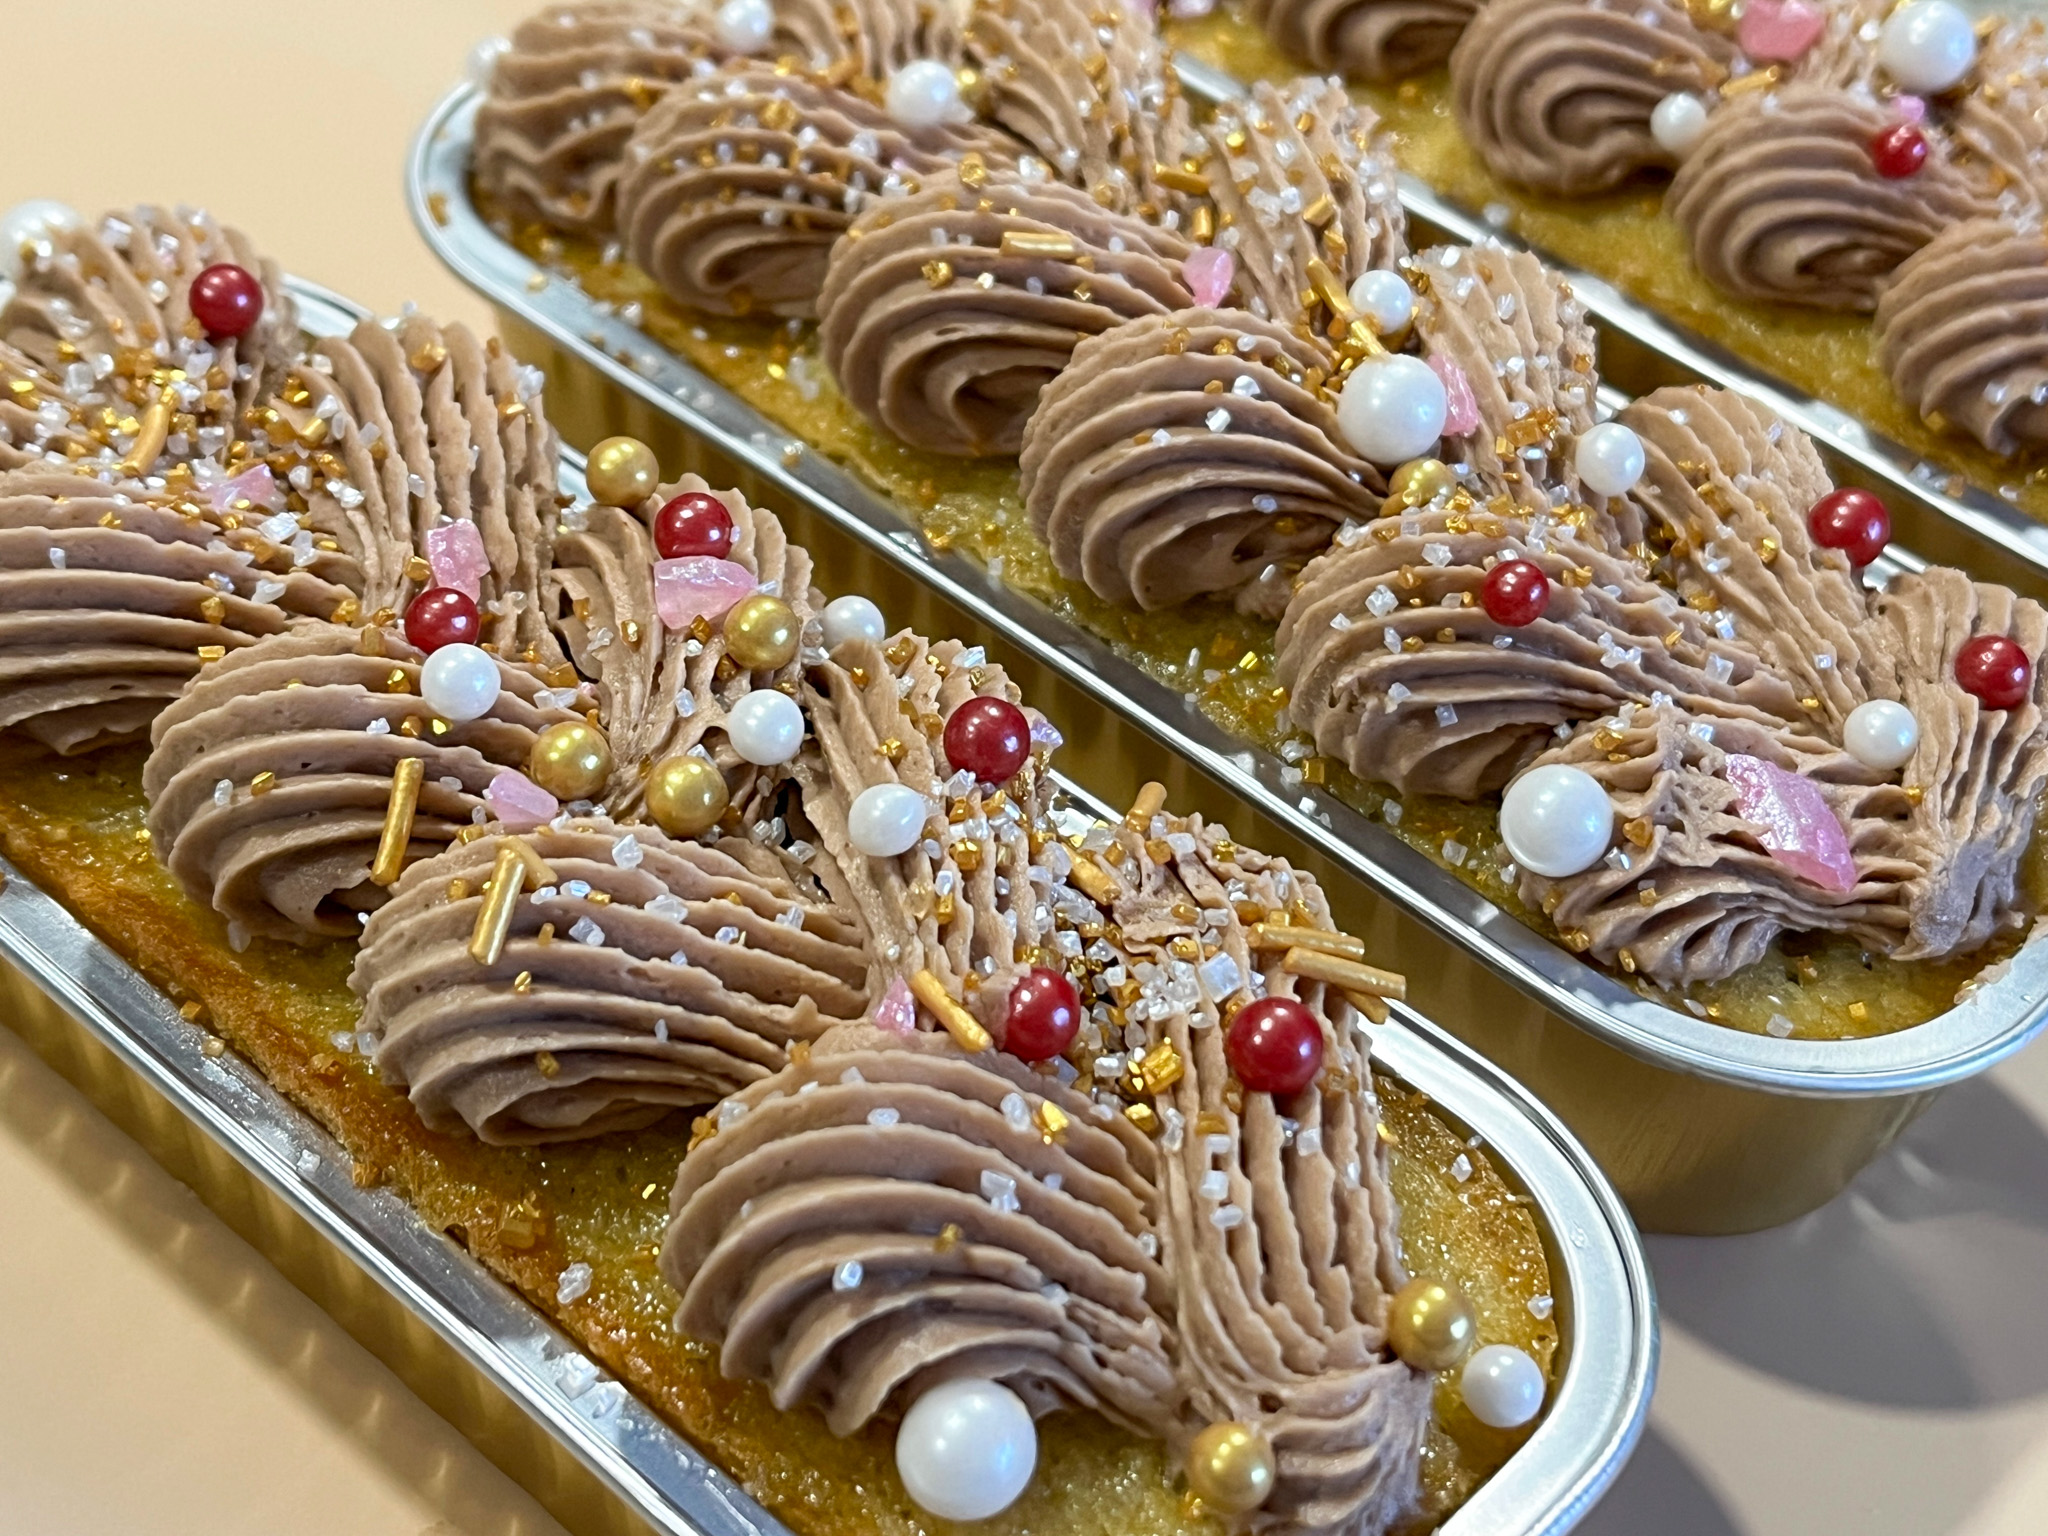
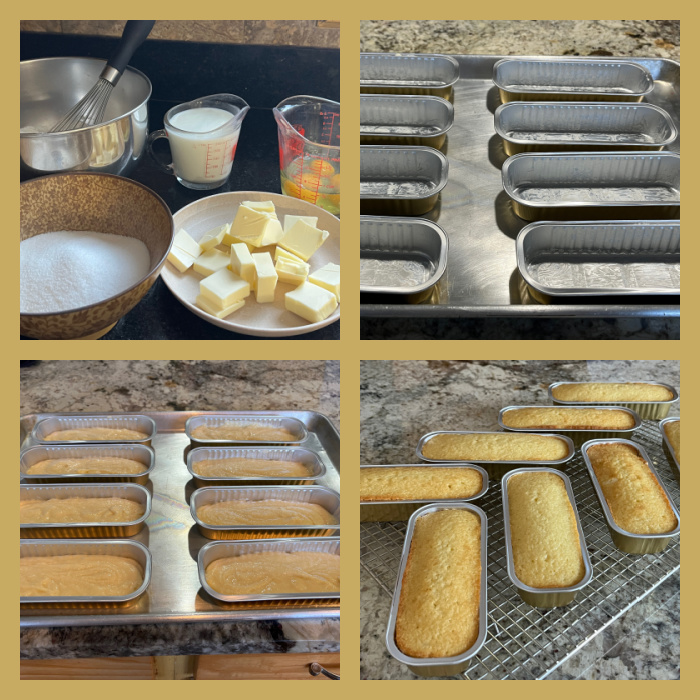
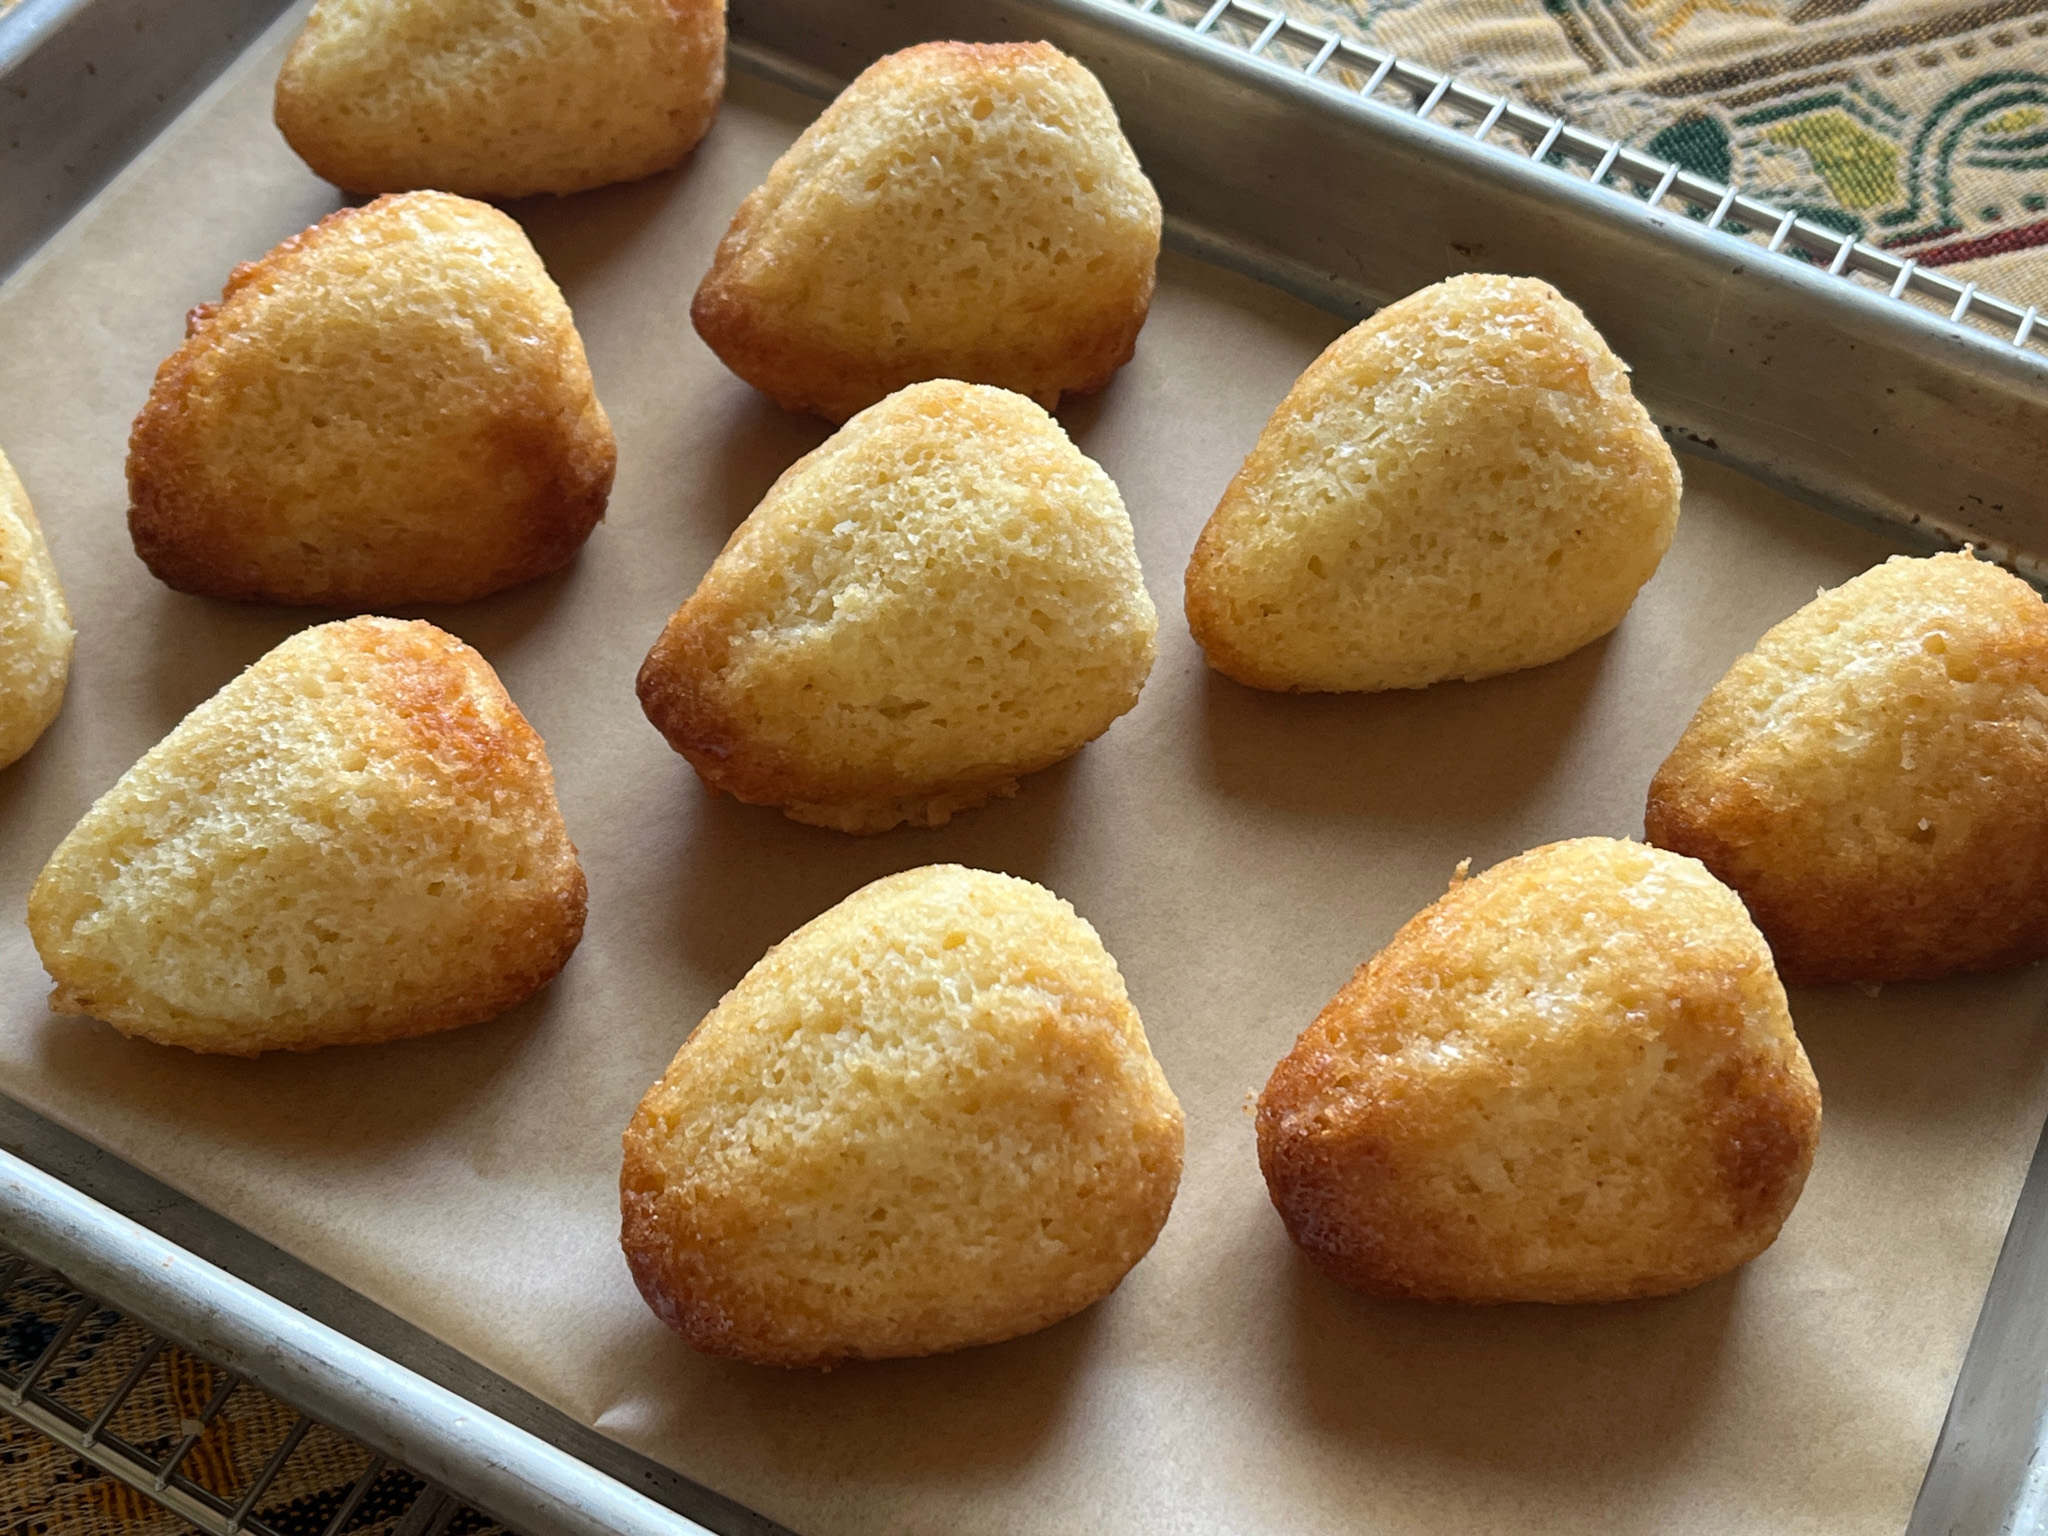
Starting with the Financier component, you can conceivably use a muffin tin to make them, but if at all possible, get this silicone pan that allows you to bake cute strawberry-shaped cakes.
.
Kirsten’s recipe includes coconut and it is really delicious on its own. Once the cakes are baked, they go straight into the freezer (still in the pan) to facilitate removal. From that point, the cakes are hollowed and filled with the other components.
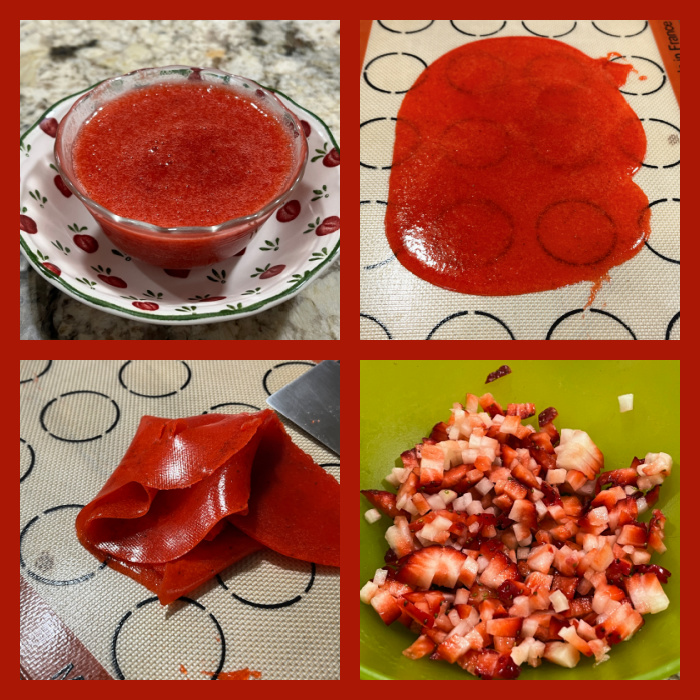
Starting with a Strawberry jelly made from fresh strawberry puree, agar-agar, allowed to set, and then emulsified in a blender to make a cream. That is finally mixed with fresh strawberries, diced very small, and used to fill the cakes.
The second component of the filling is a fantastic white chocolate chantilly cream, that must be made at least 6 hours before use. First the strawberry jelly/fruit is added, then the chantilly. The cakes go into the freezer to set for a while, and then white chocolate is used to seal the bottom.

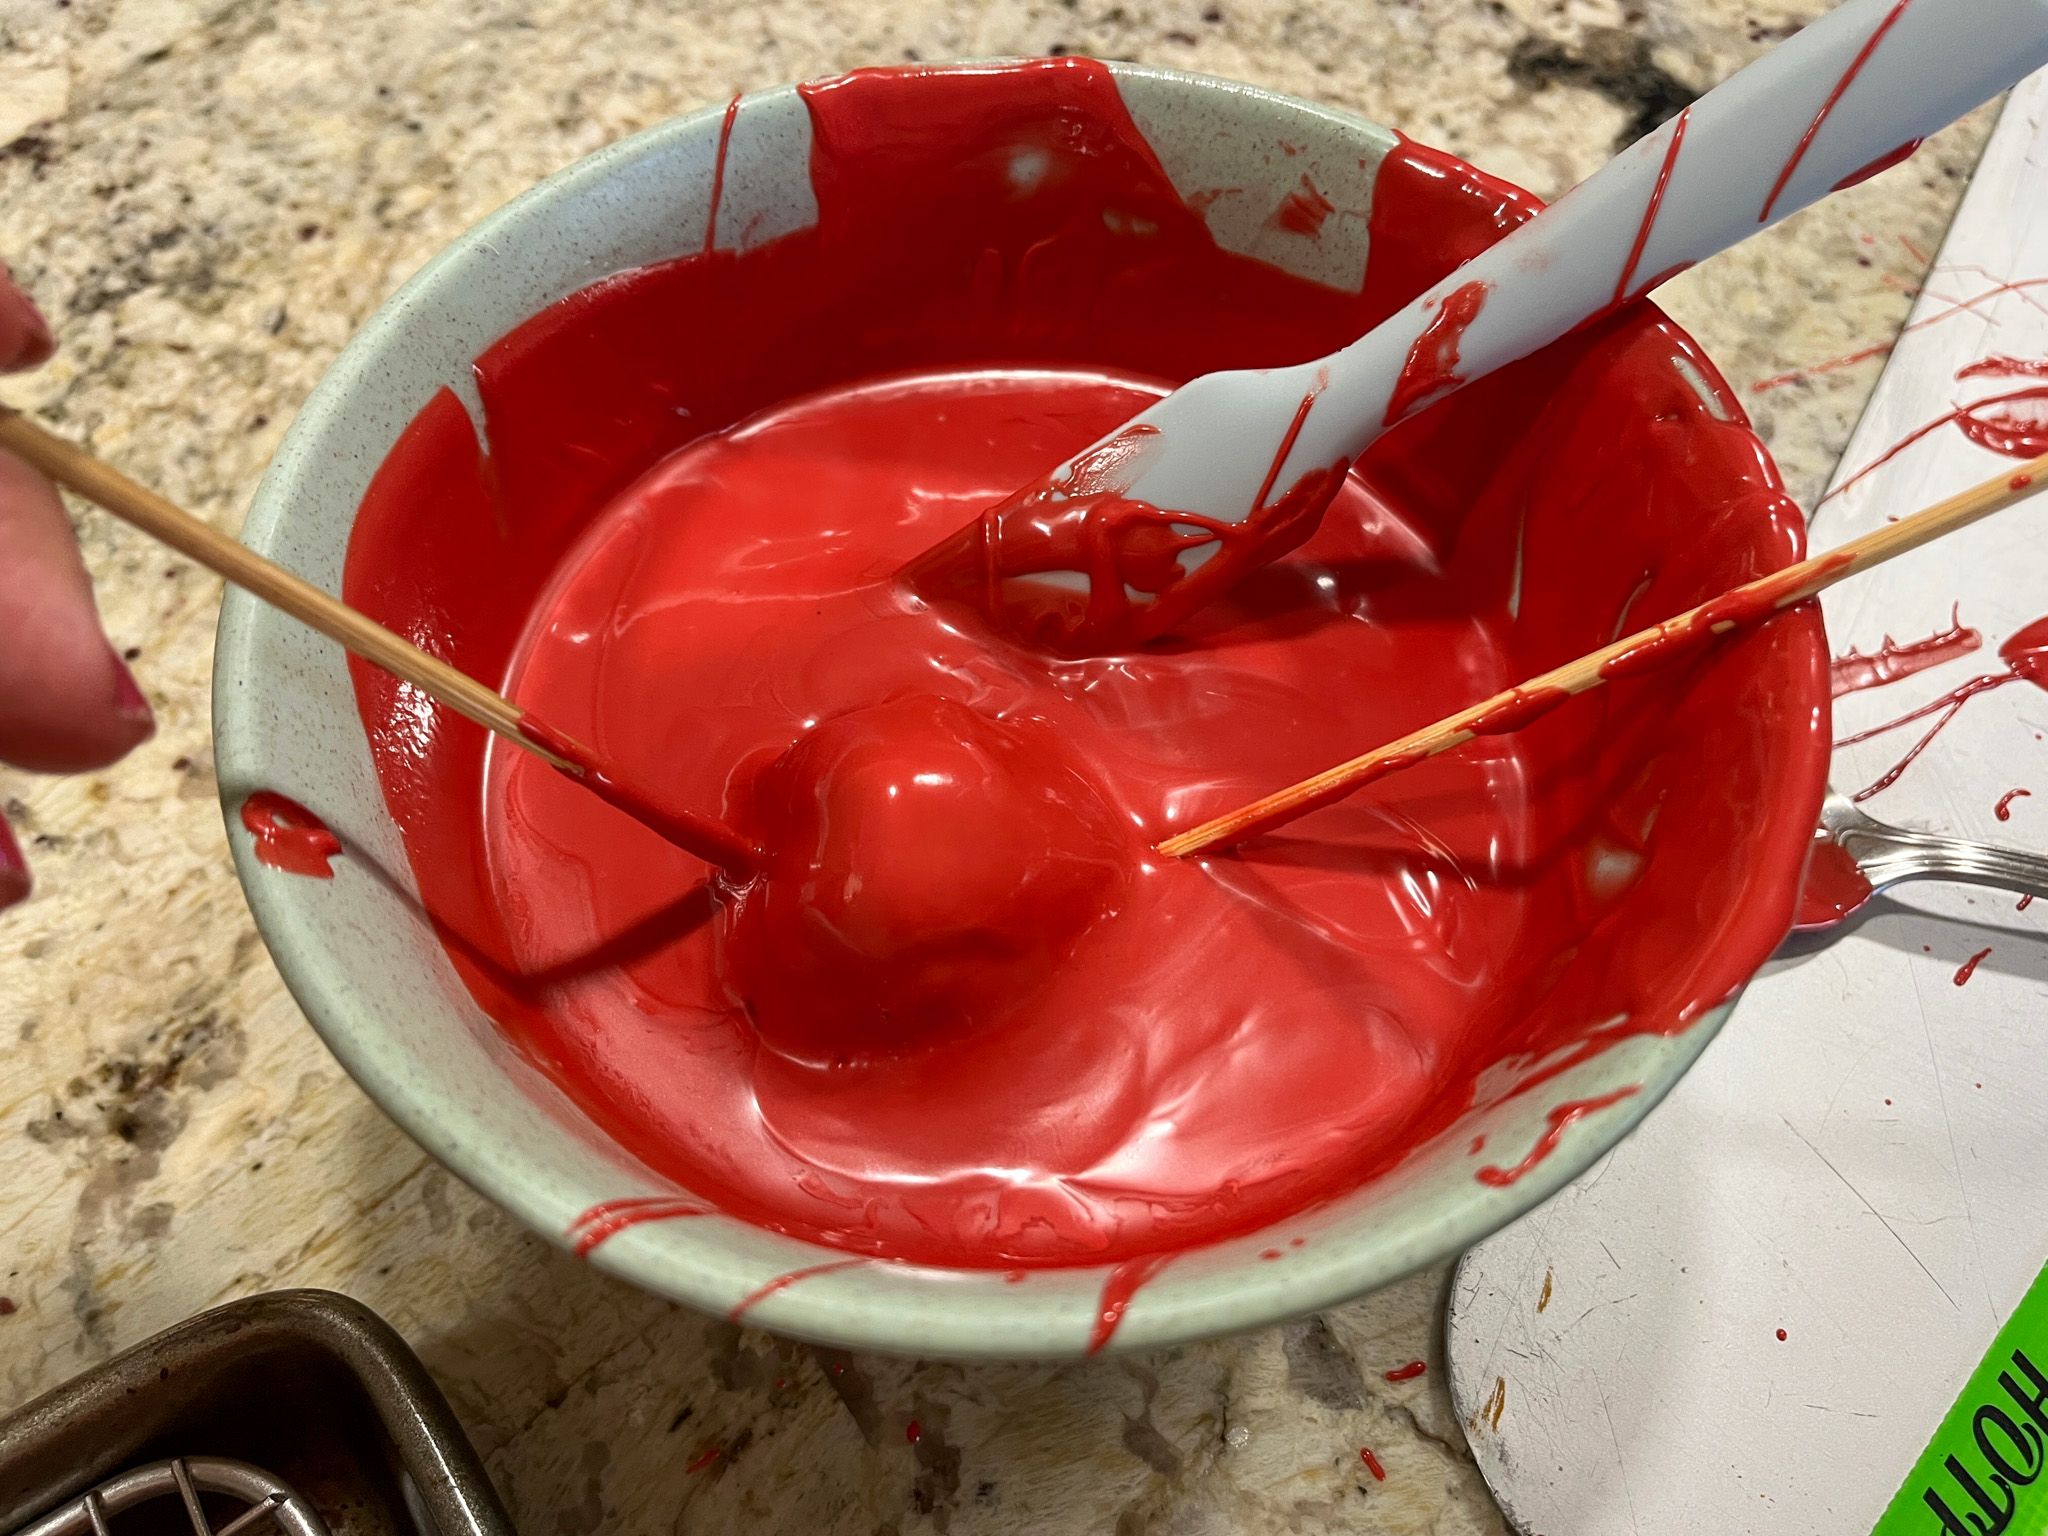
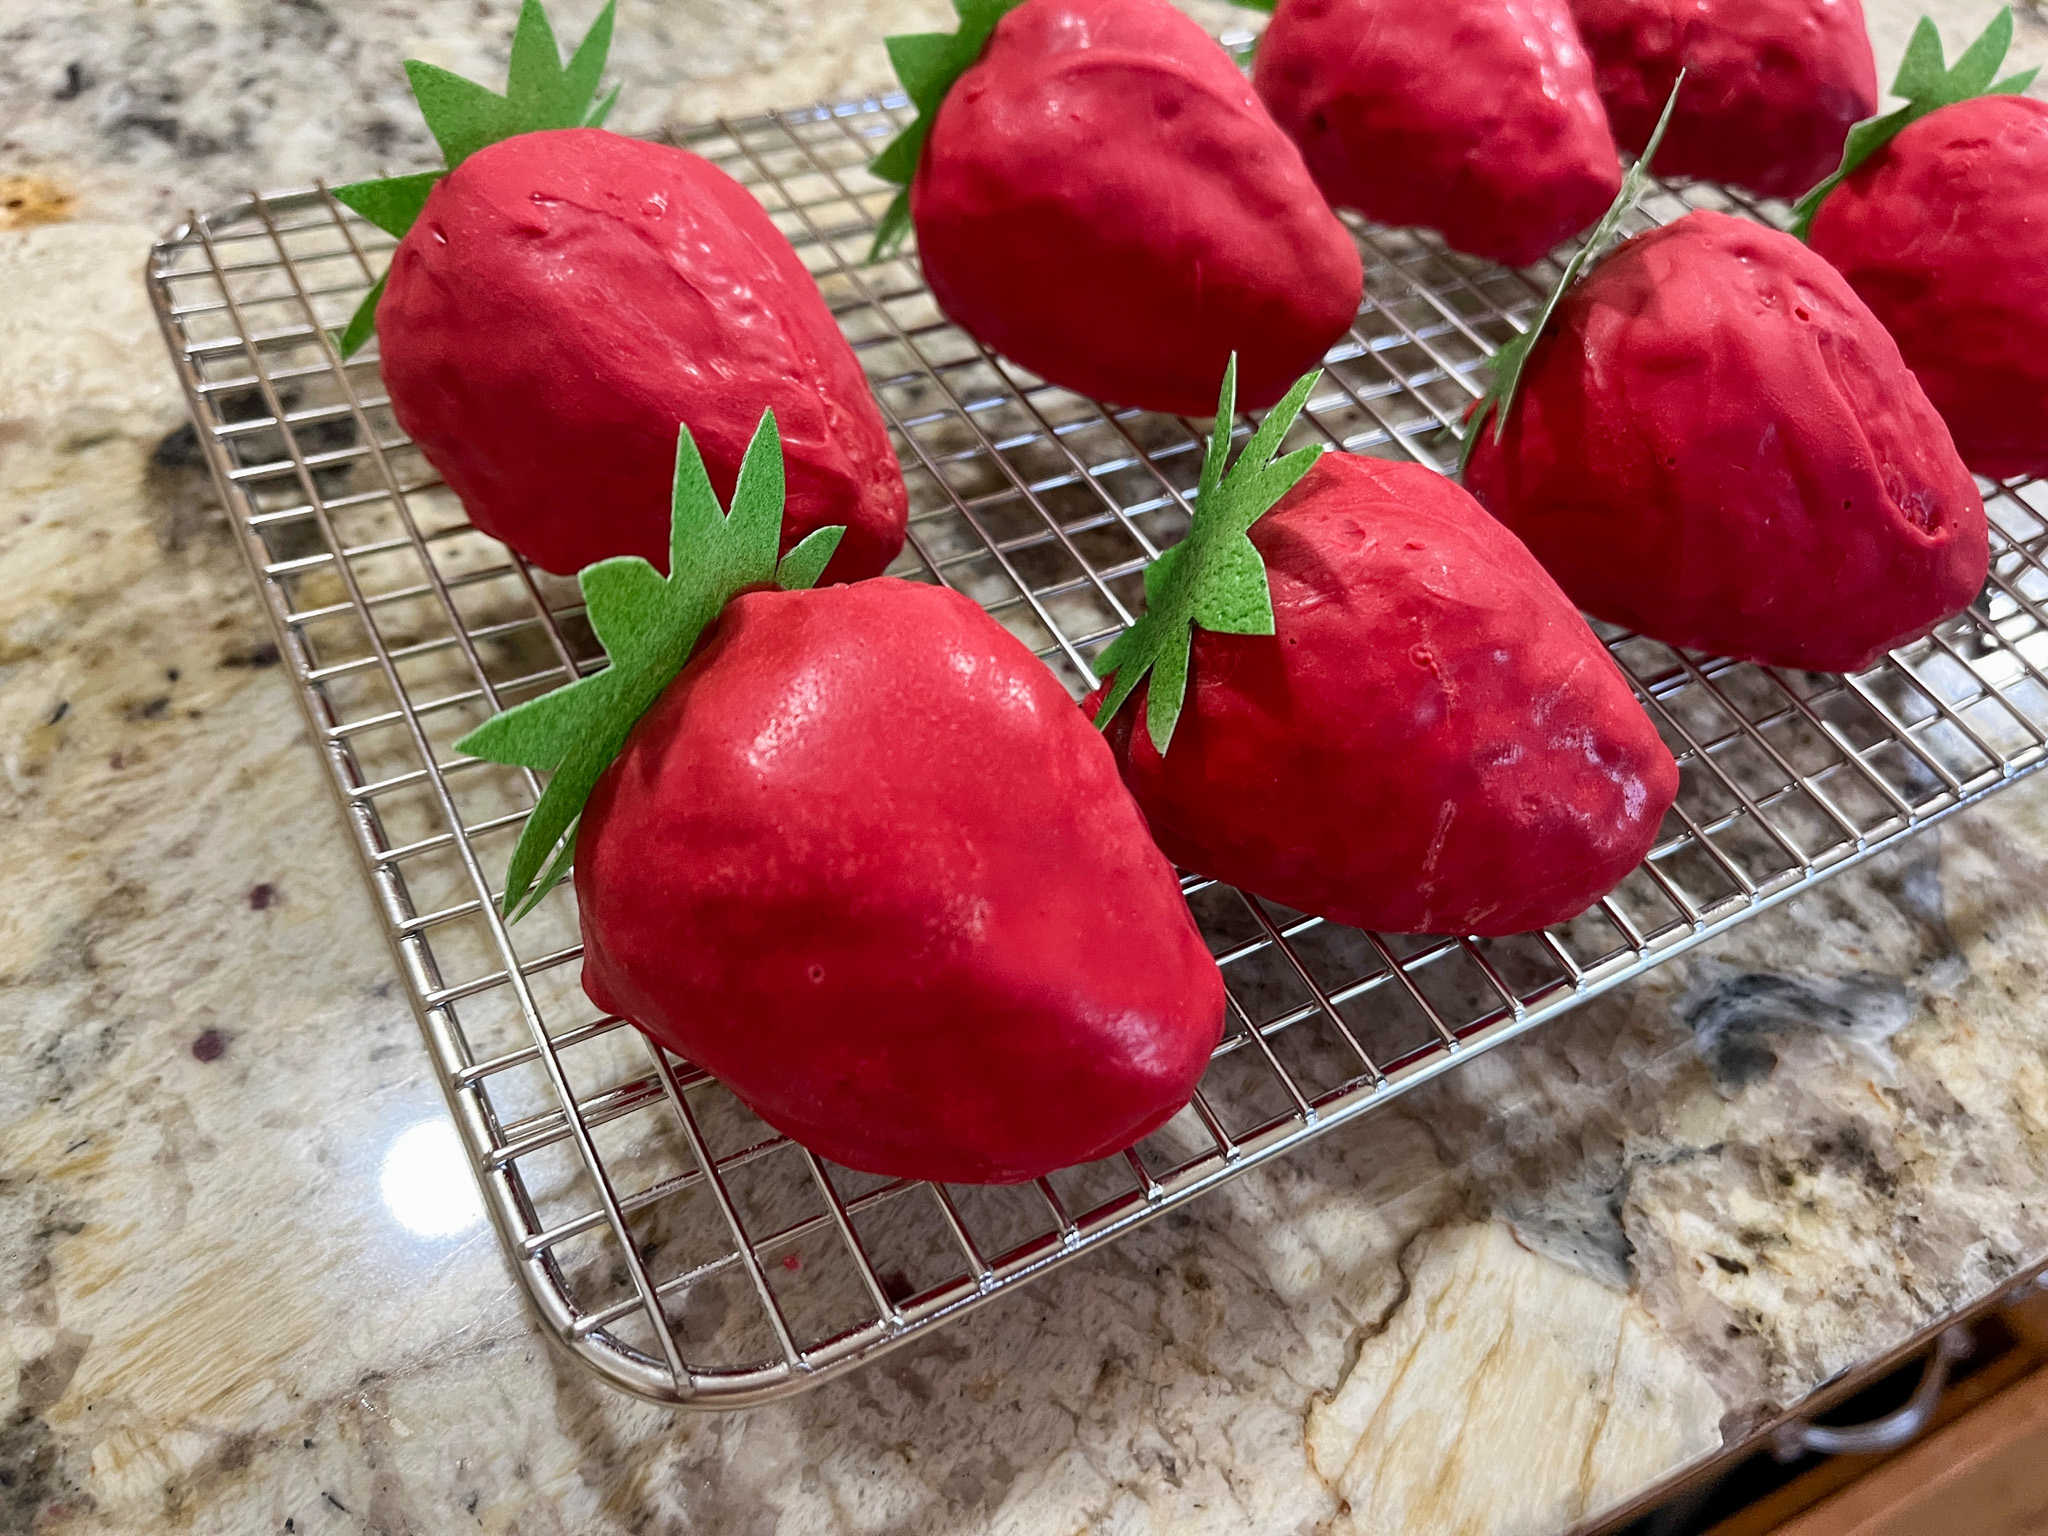
At this point, all goes back to the fridge, or for a short stay in the freezer. Tempered chocolate dyed red mixed with neutral oil is used to coat each mini-cake. It will be messy! Best way to deal with it is using two big wooden skewers to manipulate them.
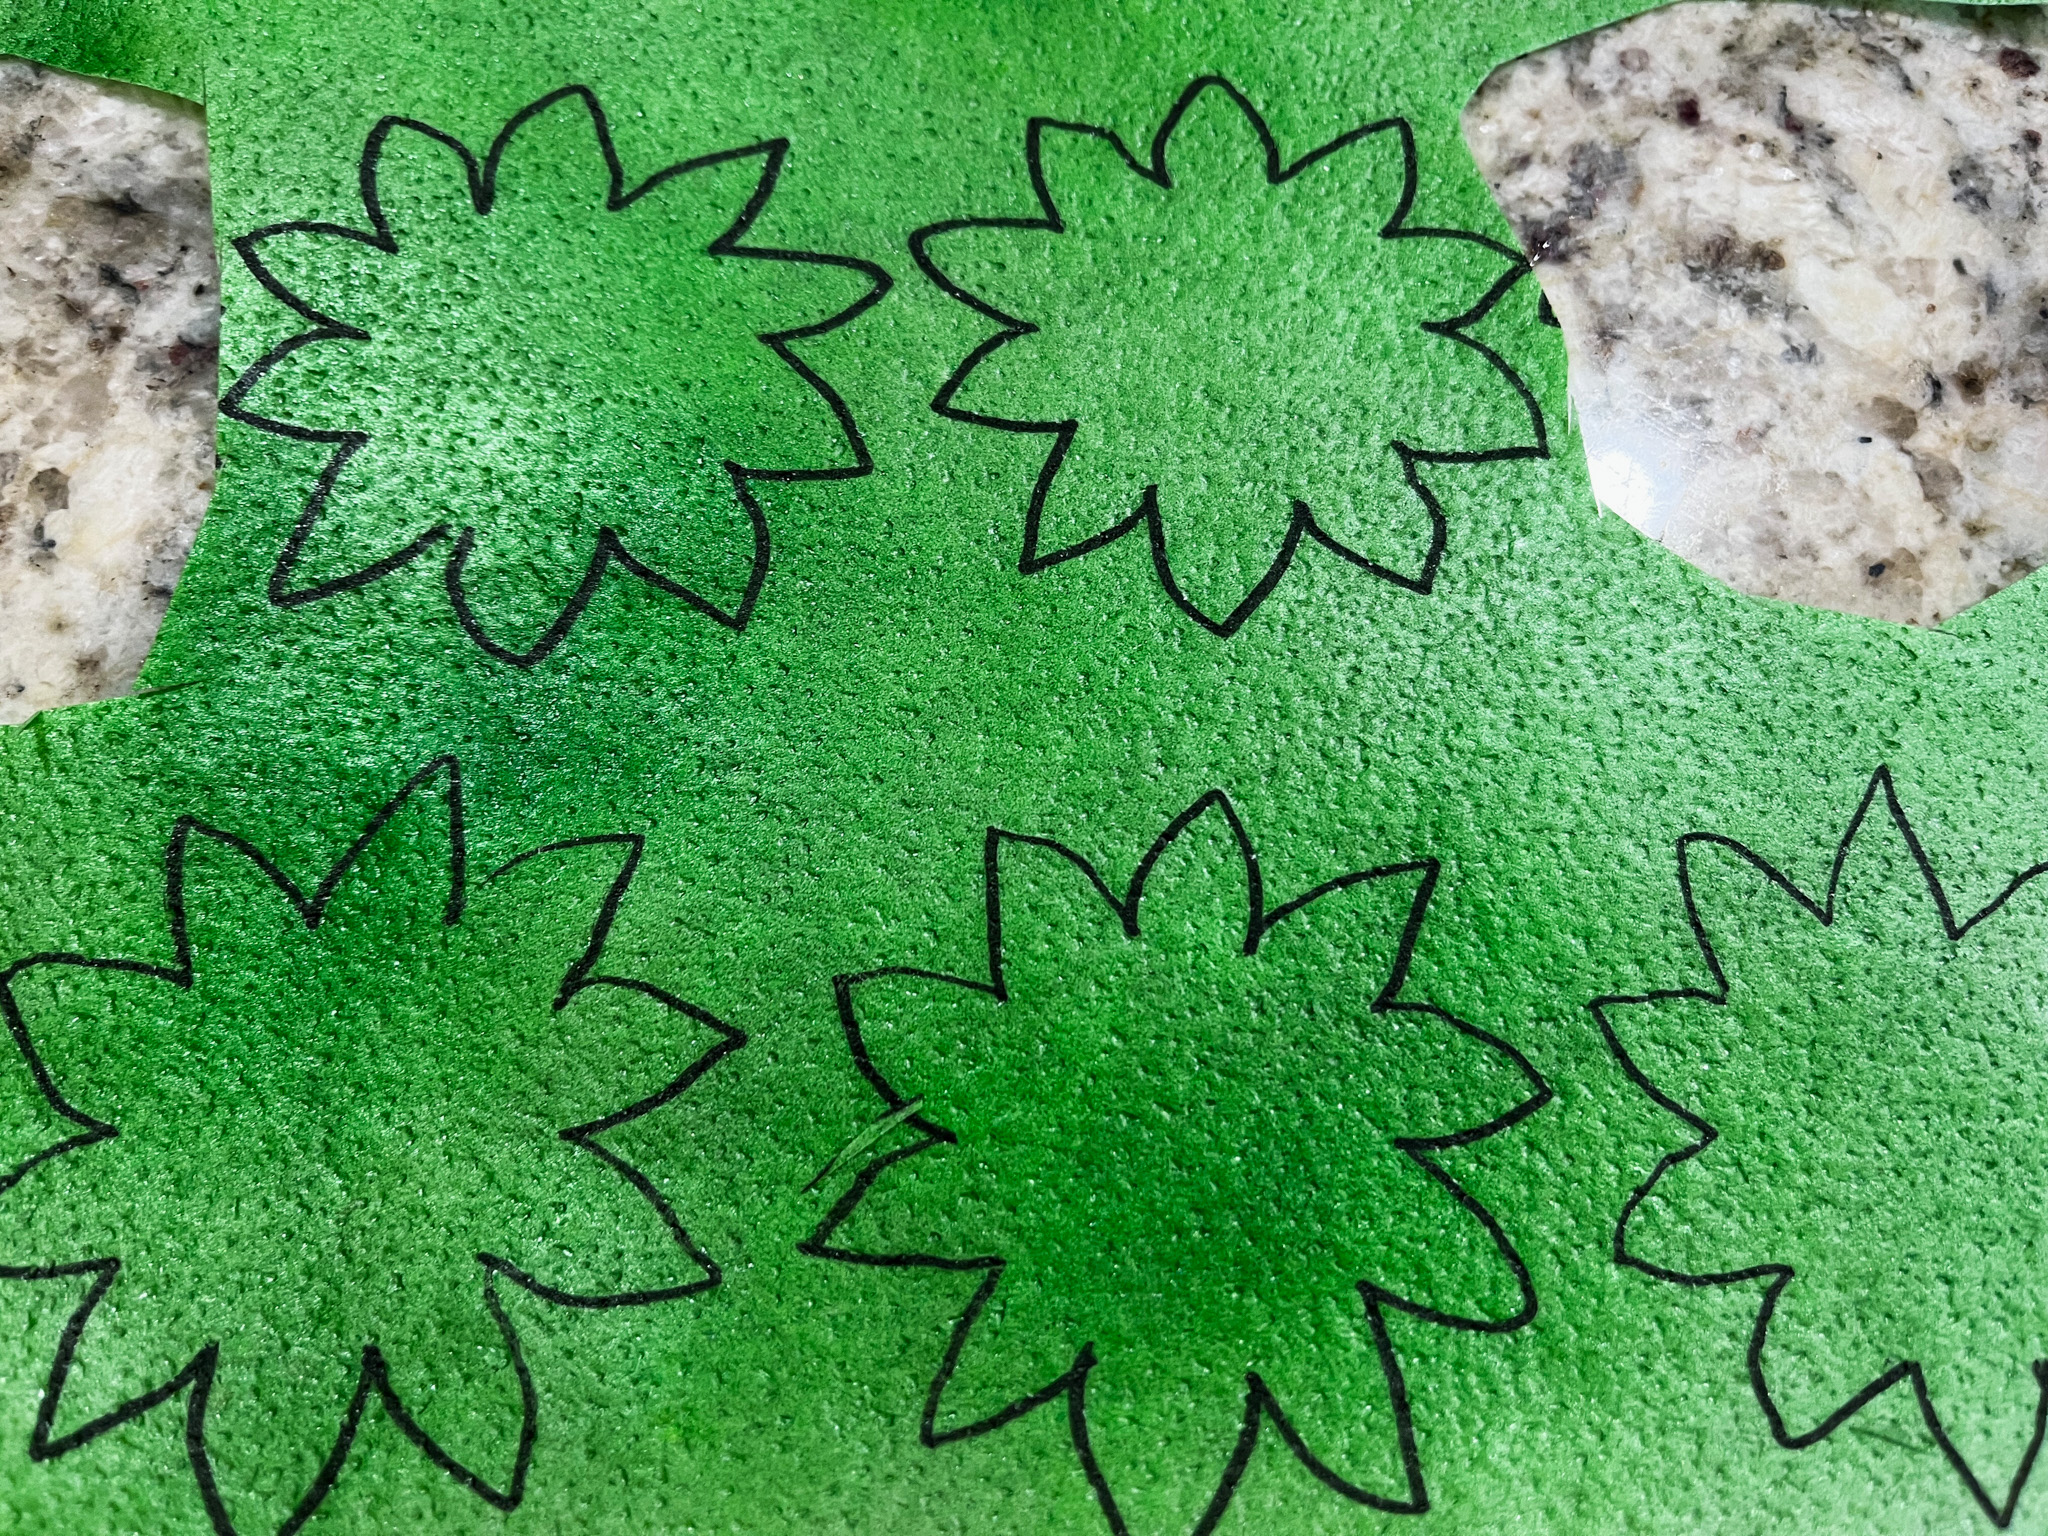
Marathon is in its final stages now… For the strawberry leaves, I spray-painted wafer paper and cut shapes using the template provided by Savour. Kirsten used tempered green chocolate and a very elaborate system to cut and shape them, but I had to simplify it.
The only way they stayed glued was using Edible glue from Wilton. Melted chocolate and Royal icing were no good.
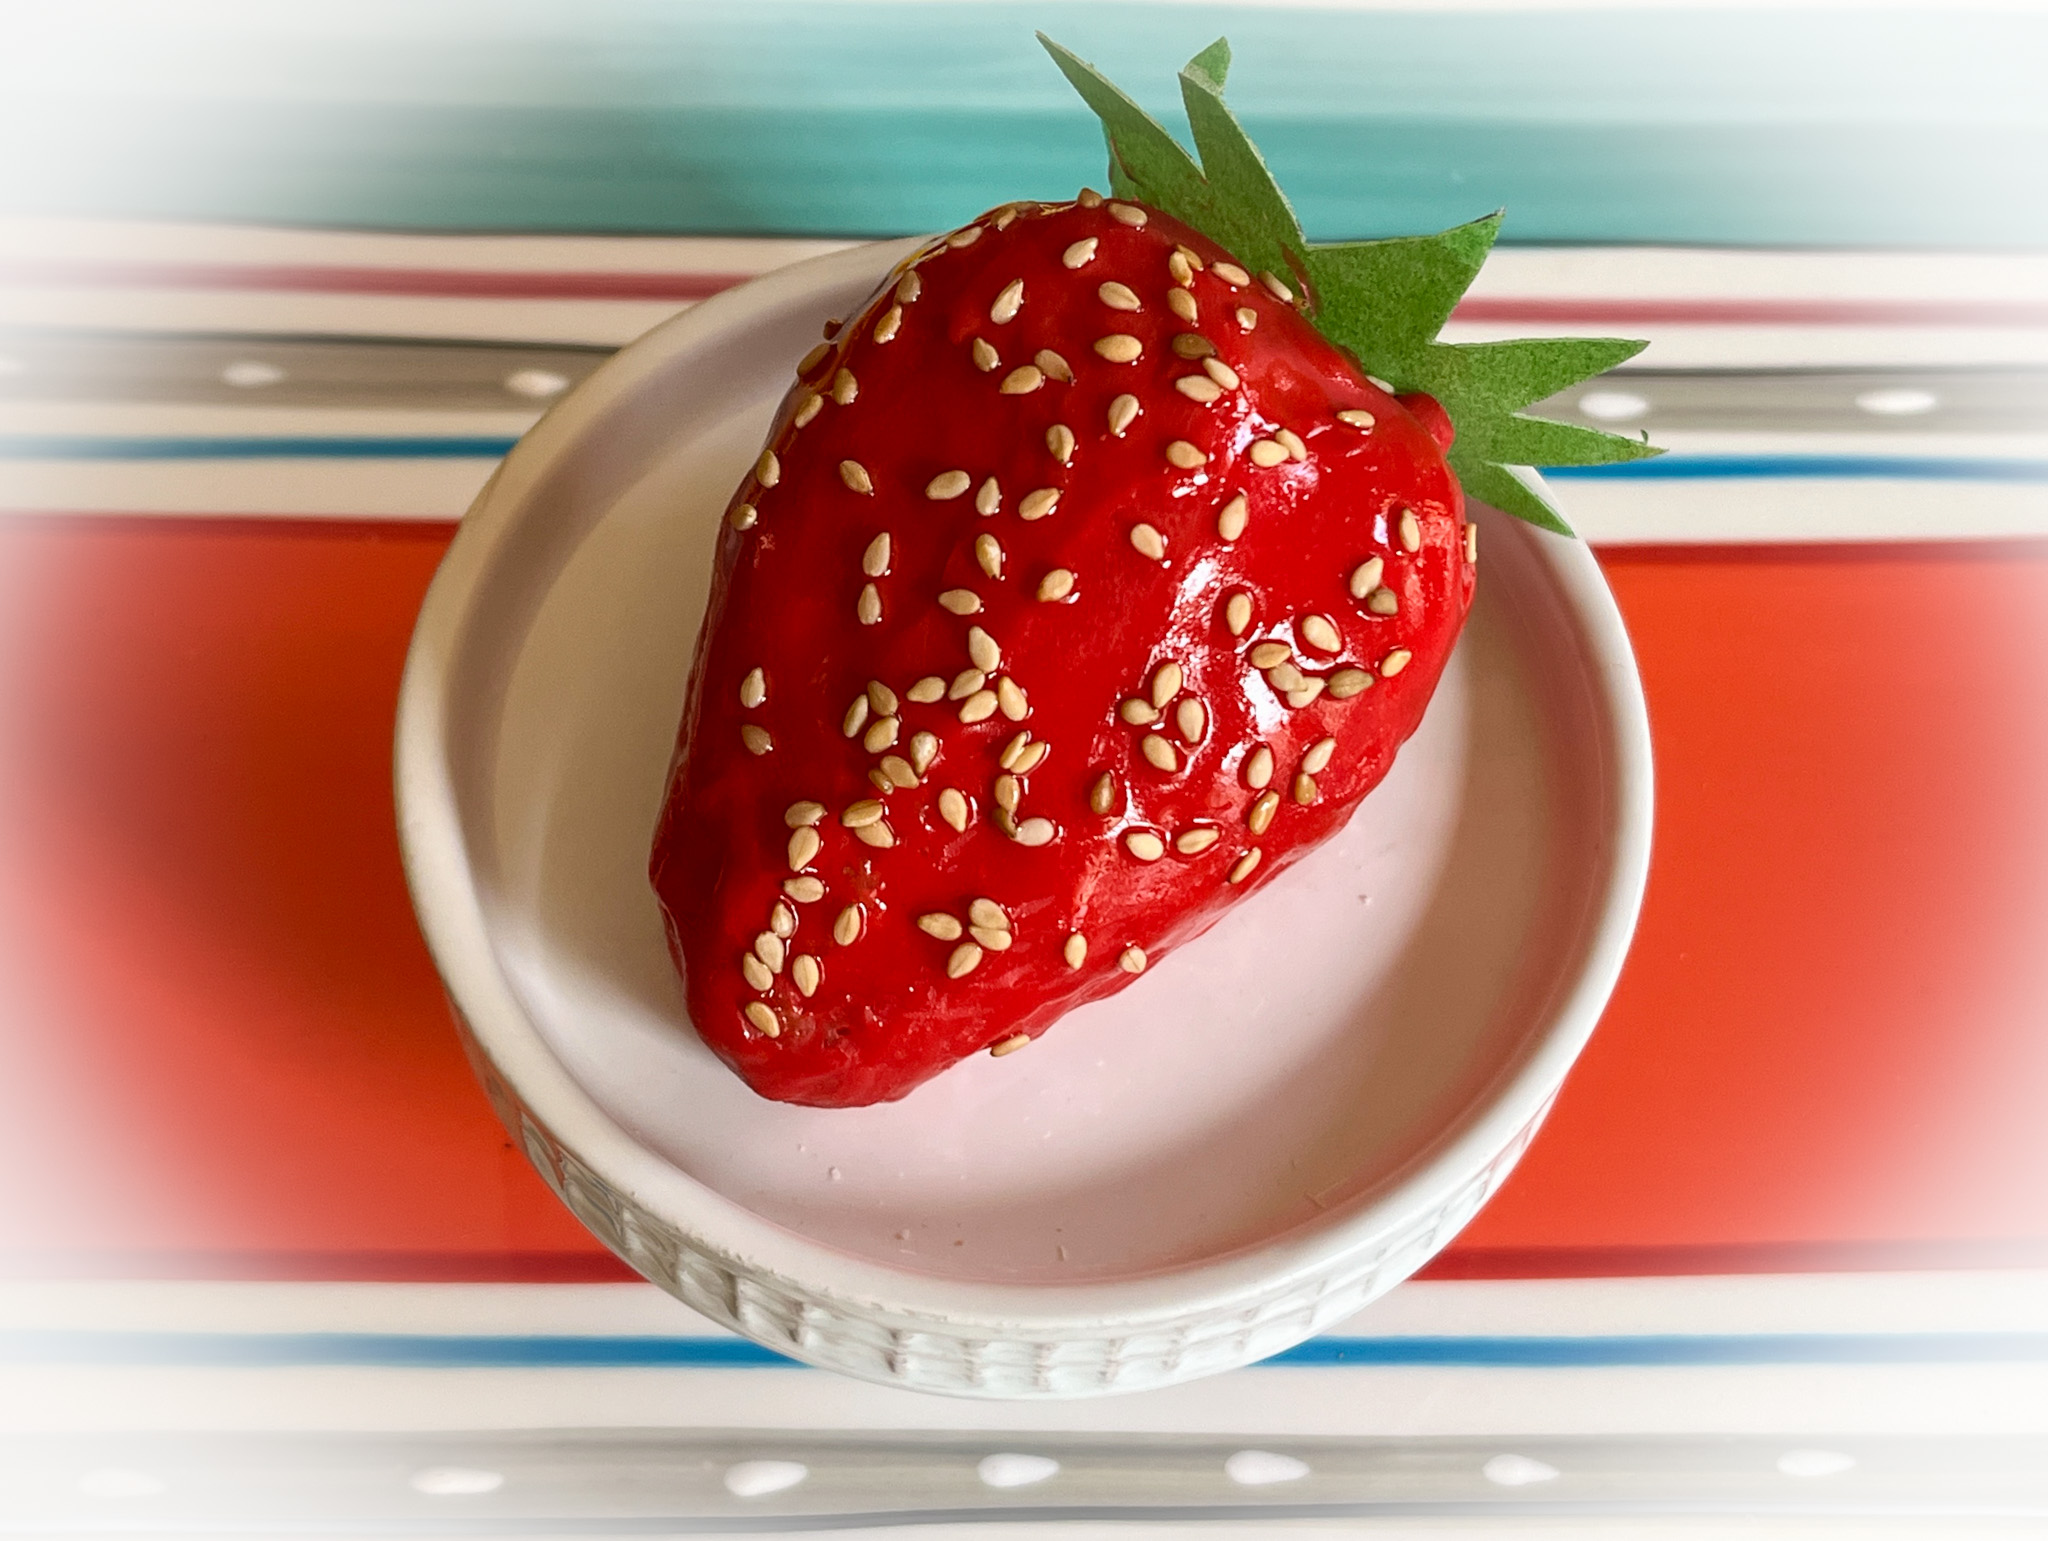
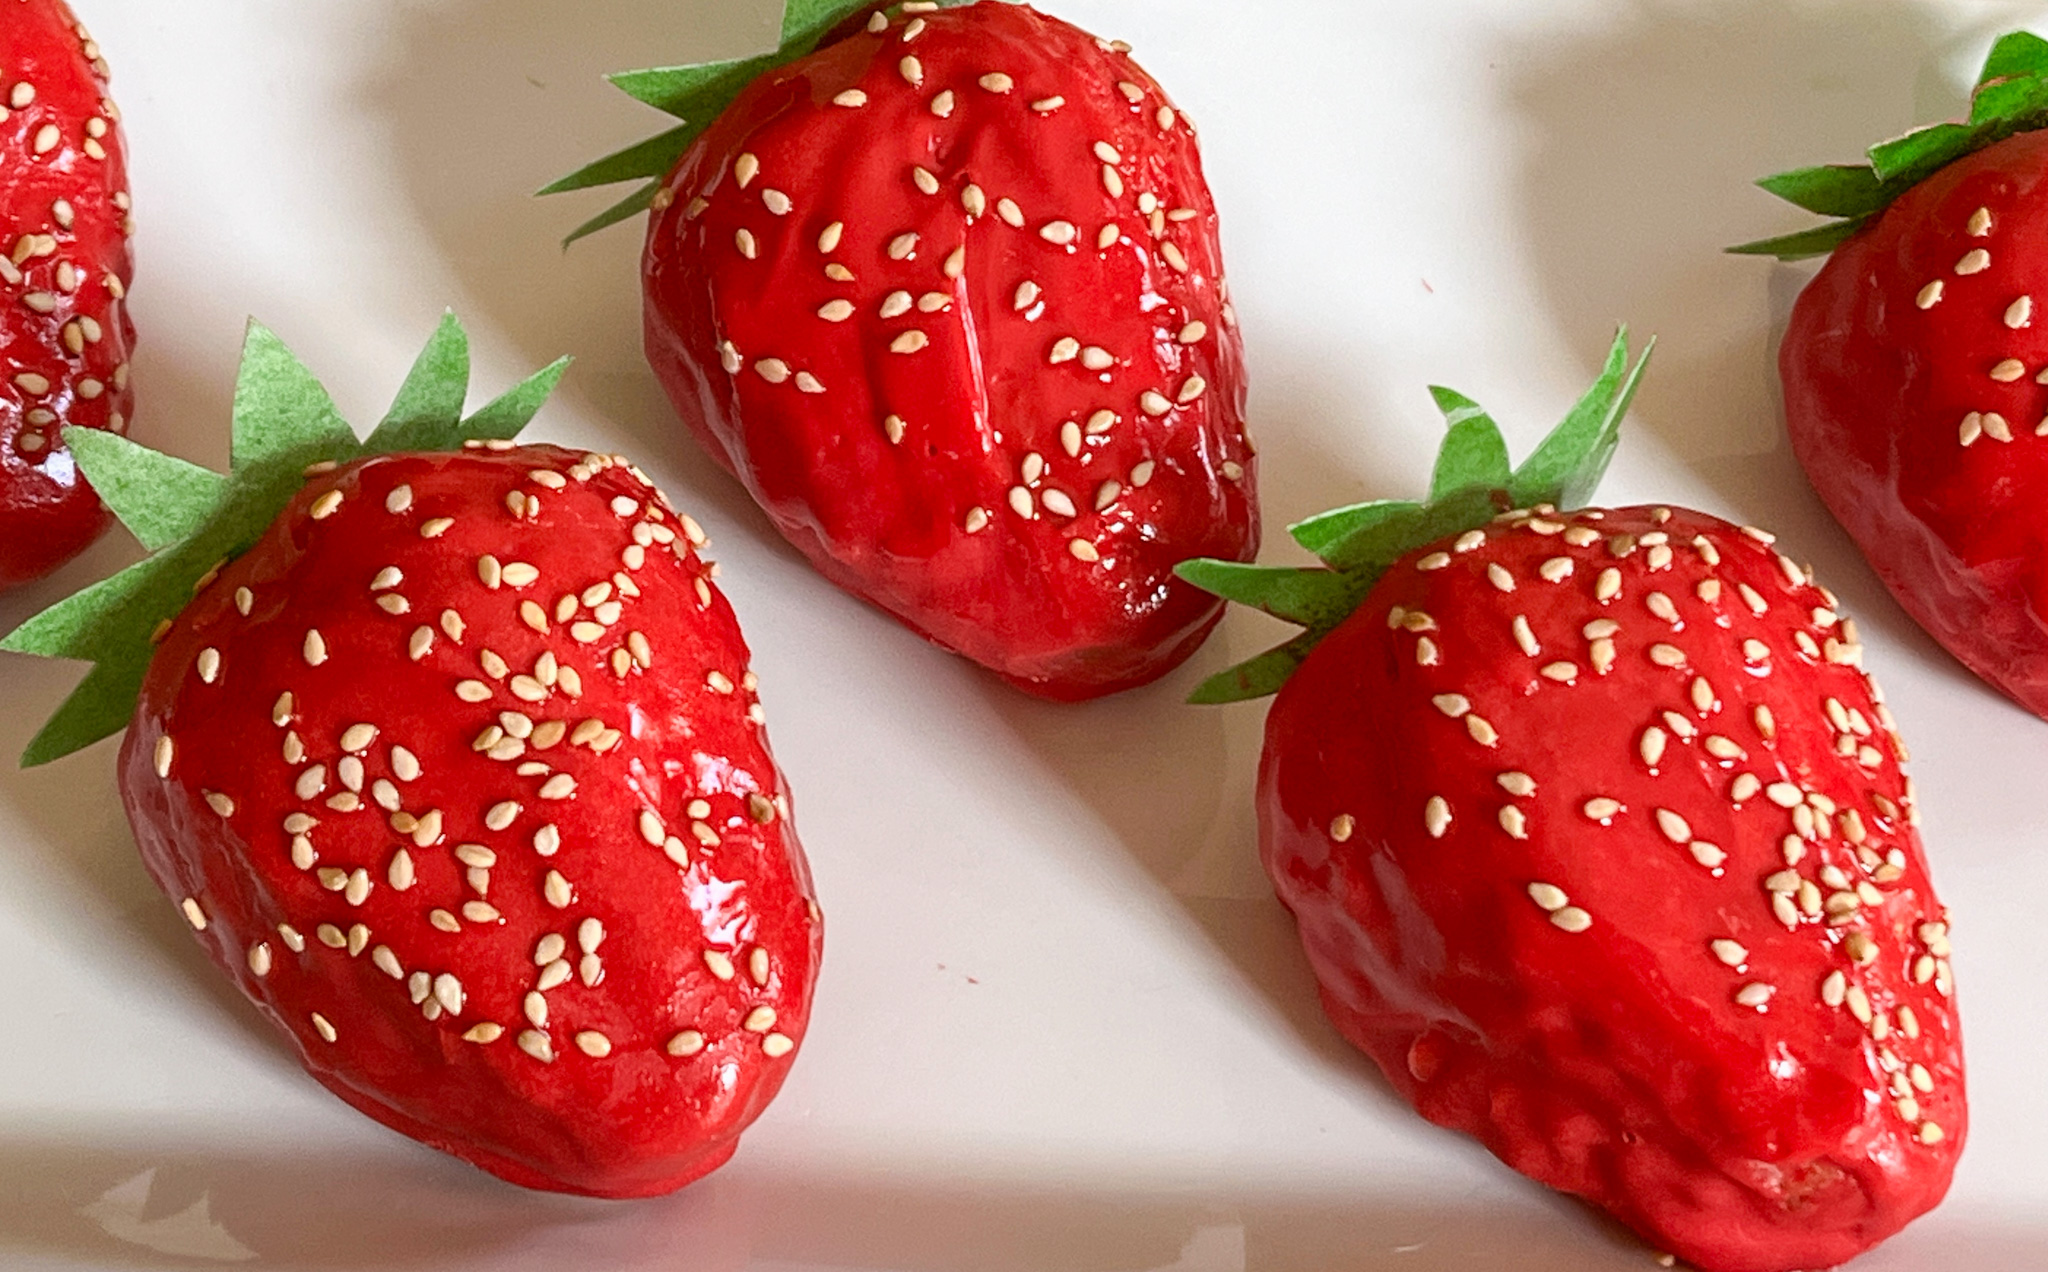
Finally, they get brushed with a little oil (I used grapeseed) and white sesame seeds are sprinkled all over!
And with that step, we just crossed the finish line!
I made 9 of these babies, and Phil and I shared one, as I really needed to know how they tasted.
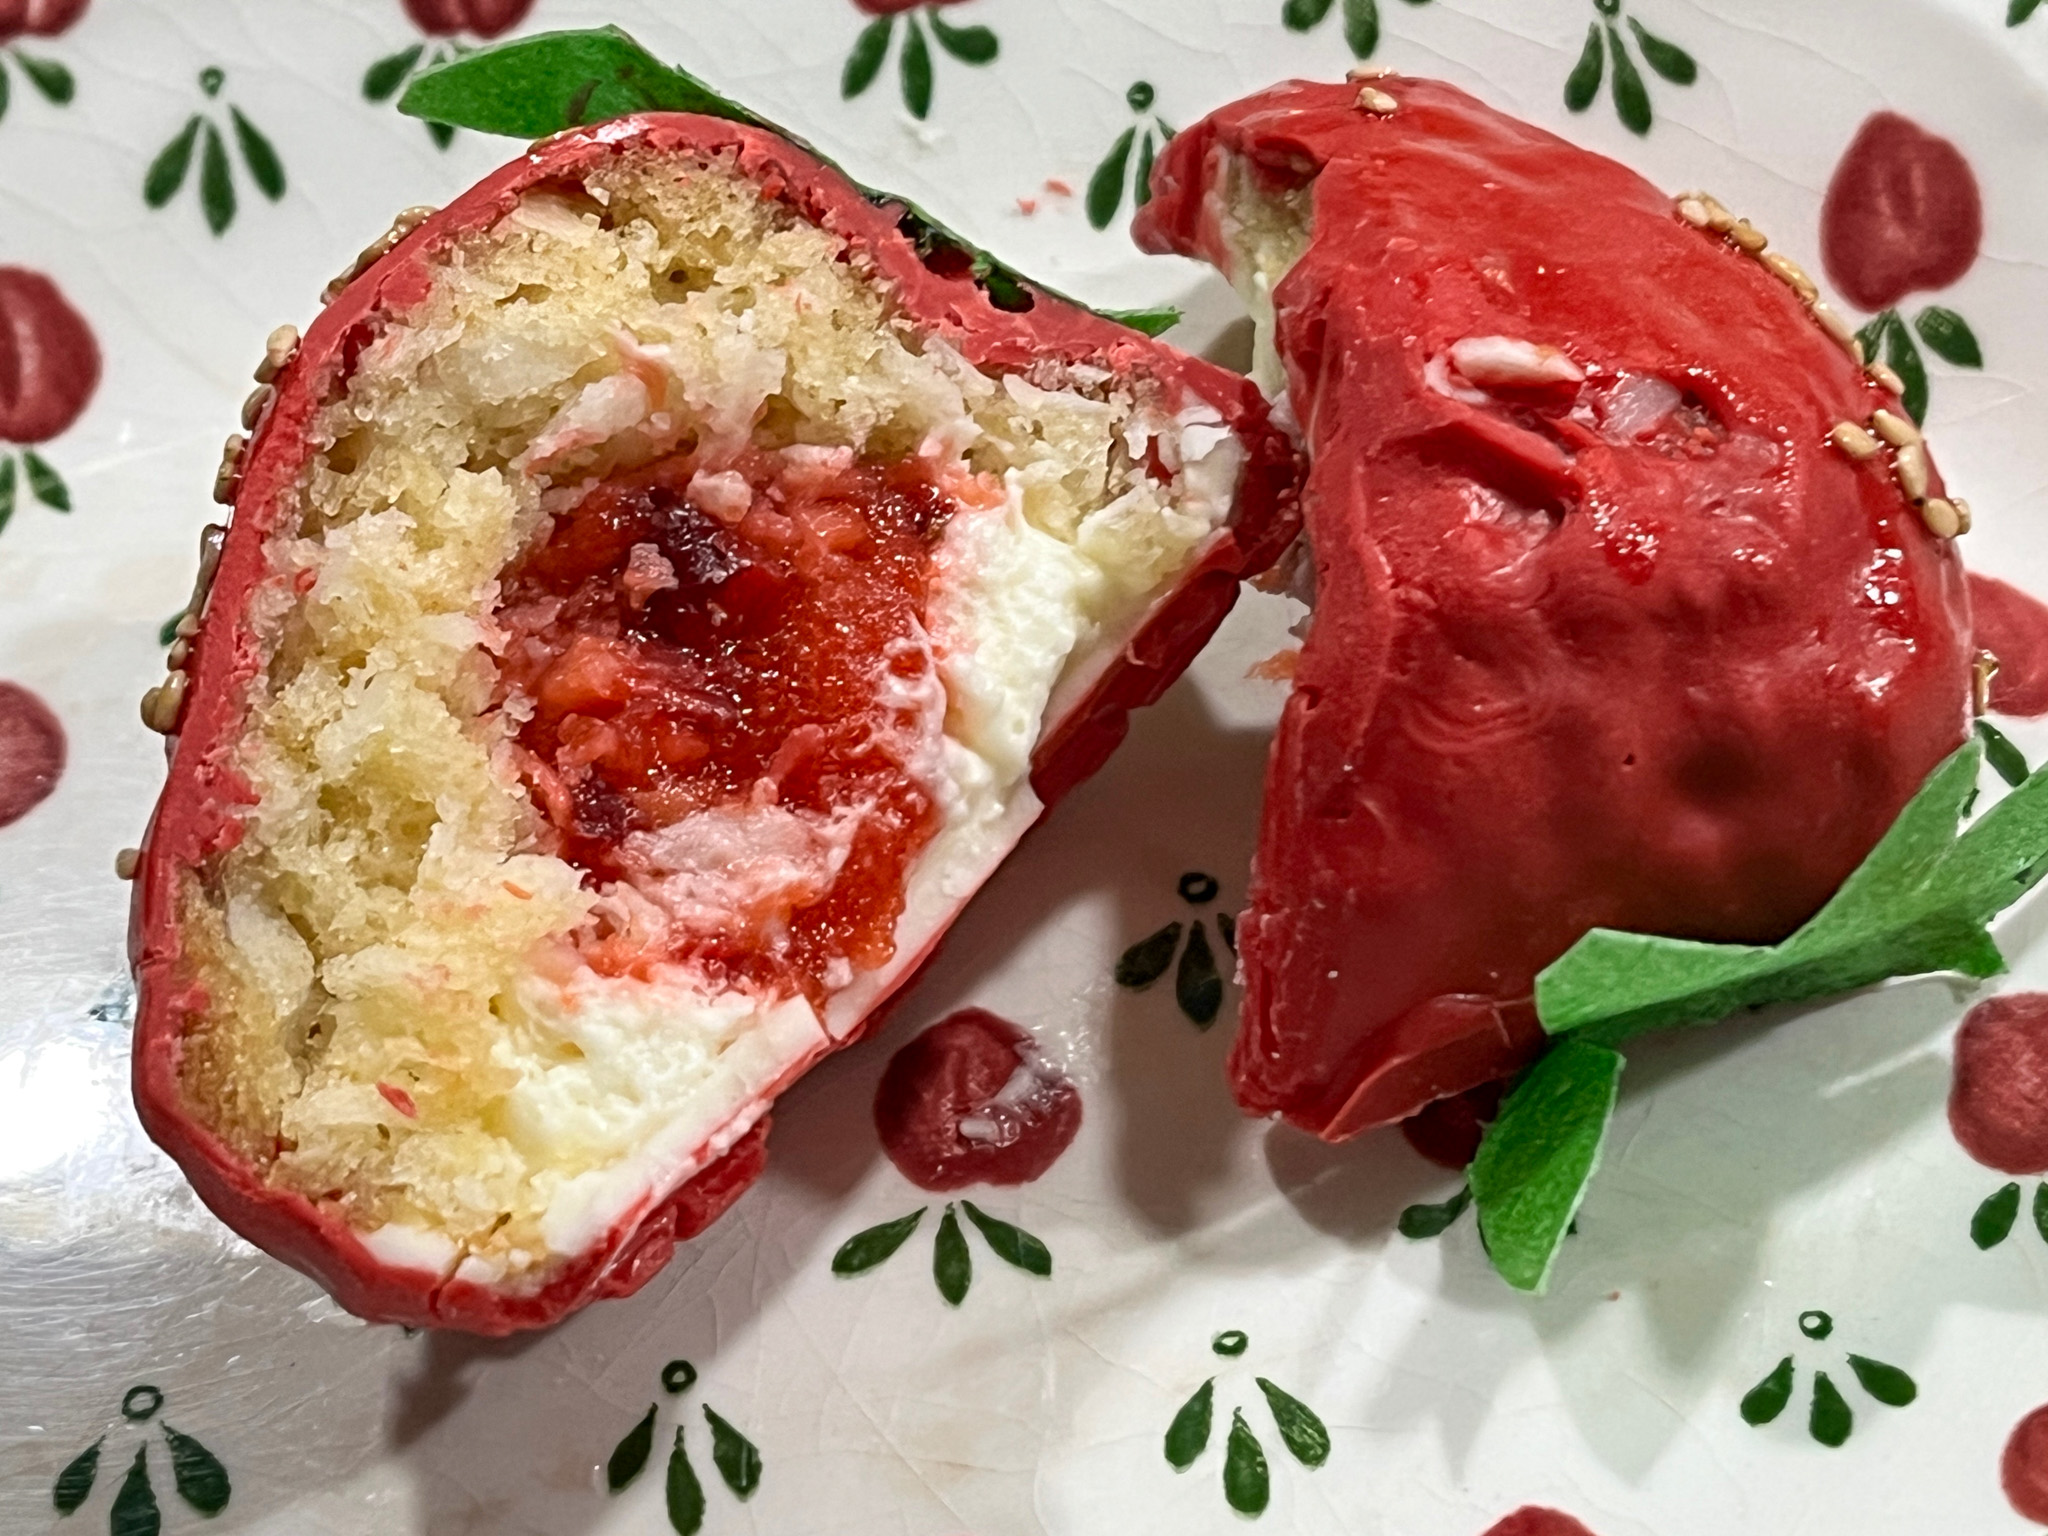
One of the best things I’ve ever baked, for sure! I messed up when I cut it, they were too cold from the fridge, but I can tell you everything worked great together. The cake is moist and tender, the strawberry cream intensely flavored, and the chocolate whipped cream completes the symphony…
I was quite exhausted at the end, but so glad I decided to face this challenge. If you are interested in expanding your horizons in baking, consider joining Savour online school. I’ve been a member from their very beginning, and although I don’t bake often from their recipes, I watch most of their videos when they are published and learn a lot with each and every one.
.
ONE YEAR AGO: In My Kitchen, April 2024
TWO YEARS AGO: In My Kitchen, Spring 2023
THREE YEARS AGO: In My Kitchen, April 2022
FOUR YEARS AGO: In My Kitchen, April 2021
FIVE YEARS AGO: In My Kitchen, April 2020
SIX YEARS AGO: In My Kitchen, April 2019
SEVEN YEARS AGO: In My Kitchen, April 2018
EIGHT YEARS AGO: First Monday Favorite
NINE YEARS AGO: In My Kitchen, April 2016
TEN YEARS AGO: Spring has Sprung with Suzanne Goin
ELEVEN YEARS AGO: Chai Brownies
TWELVE YEARS AGO: Pomegranate-Molasses Glazed Carrots
THIRTEEN YEARS AGO: Braised Brisket with Bourbon-Peach Glaze
FOURTEEN YEARS AGO: The Real Vodka Sauce
FIFTEEN YEARS AGO: Spring Rolls on a Spring Day