WHIMSICAL CUPCAKES

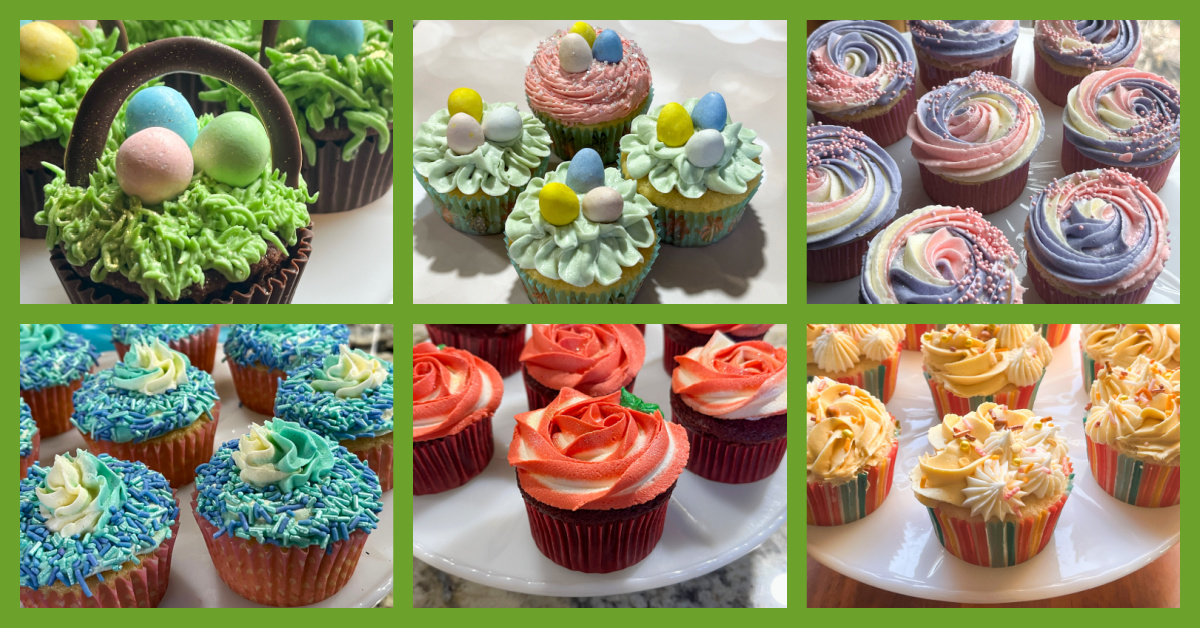
Today I share a small series of cupcakes that celebrate Easter and Spring…

For the cupcakes I have used either this recipe (for chocolate flavor), or this one for a basic vanilla. The buttercream used this basic recipe.

.

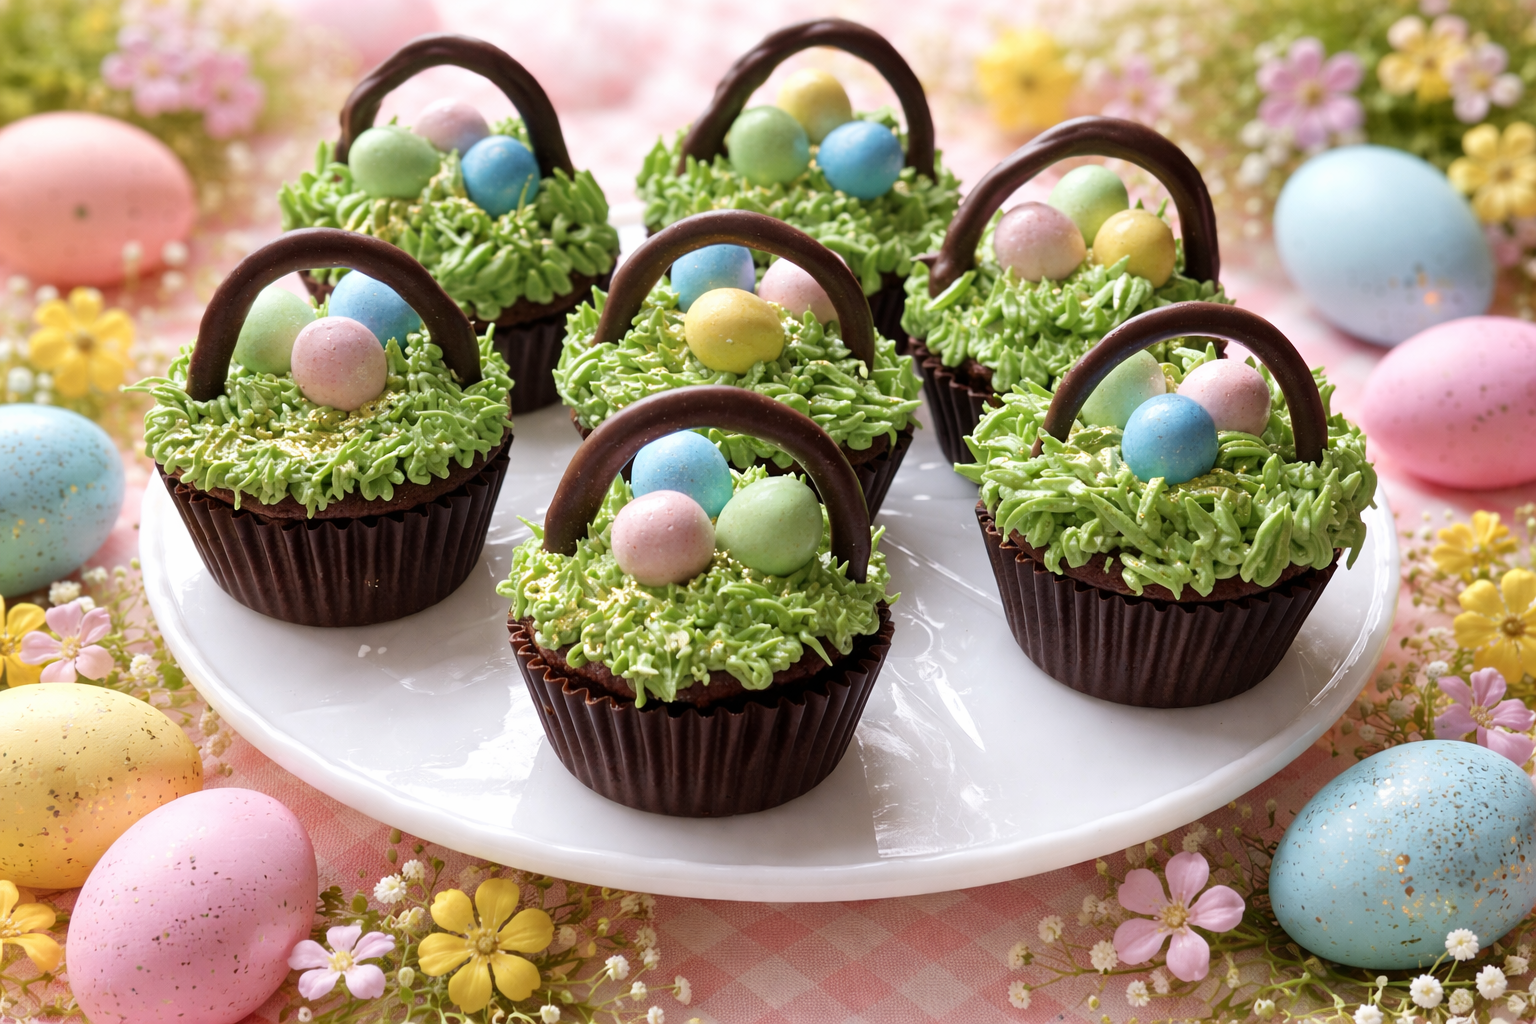
EASTER EGG BASKET CUPCAKES

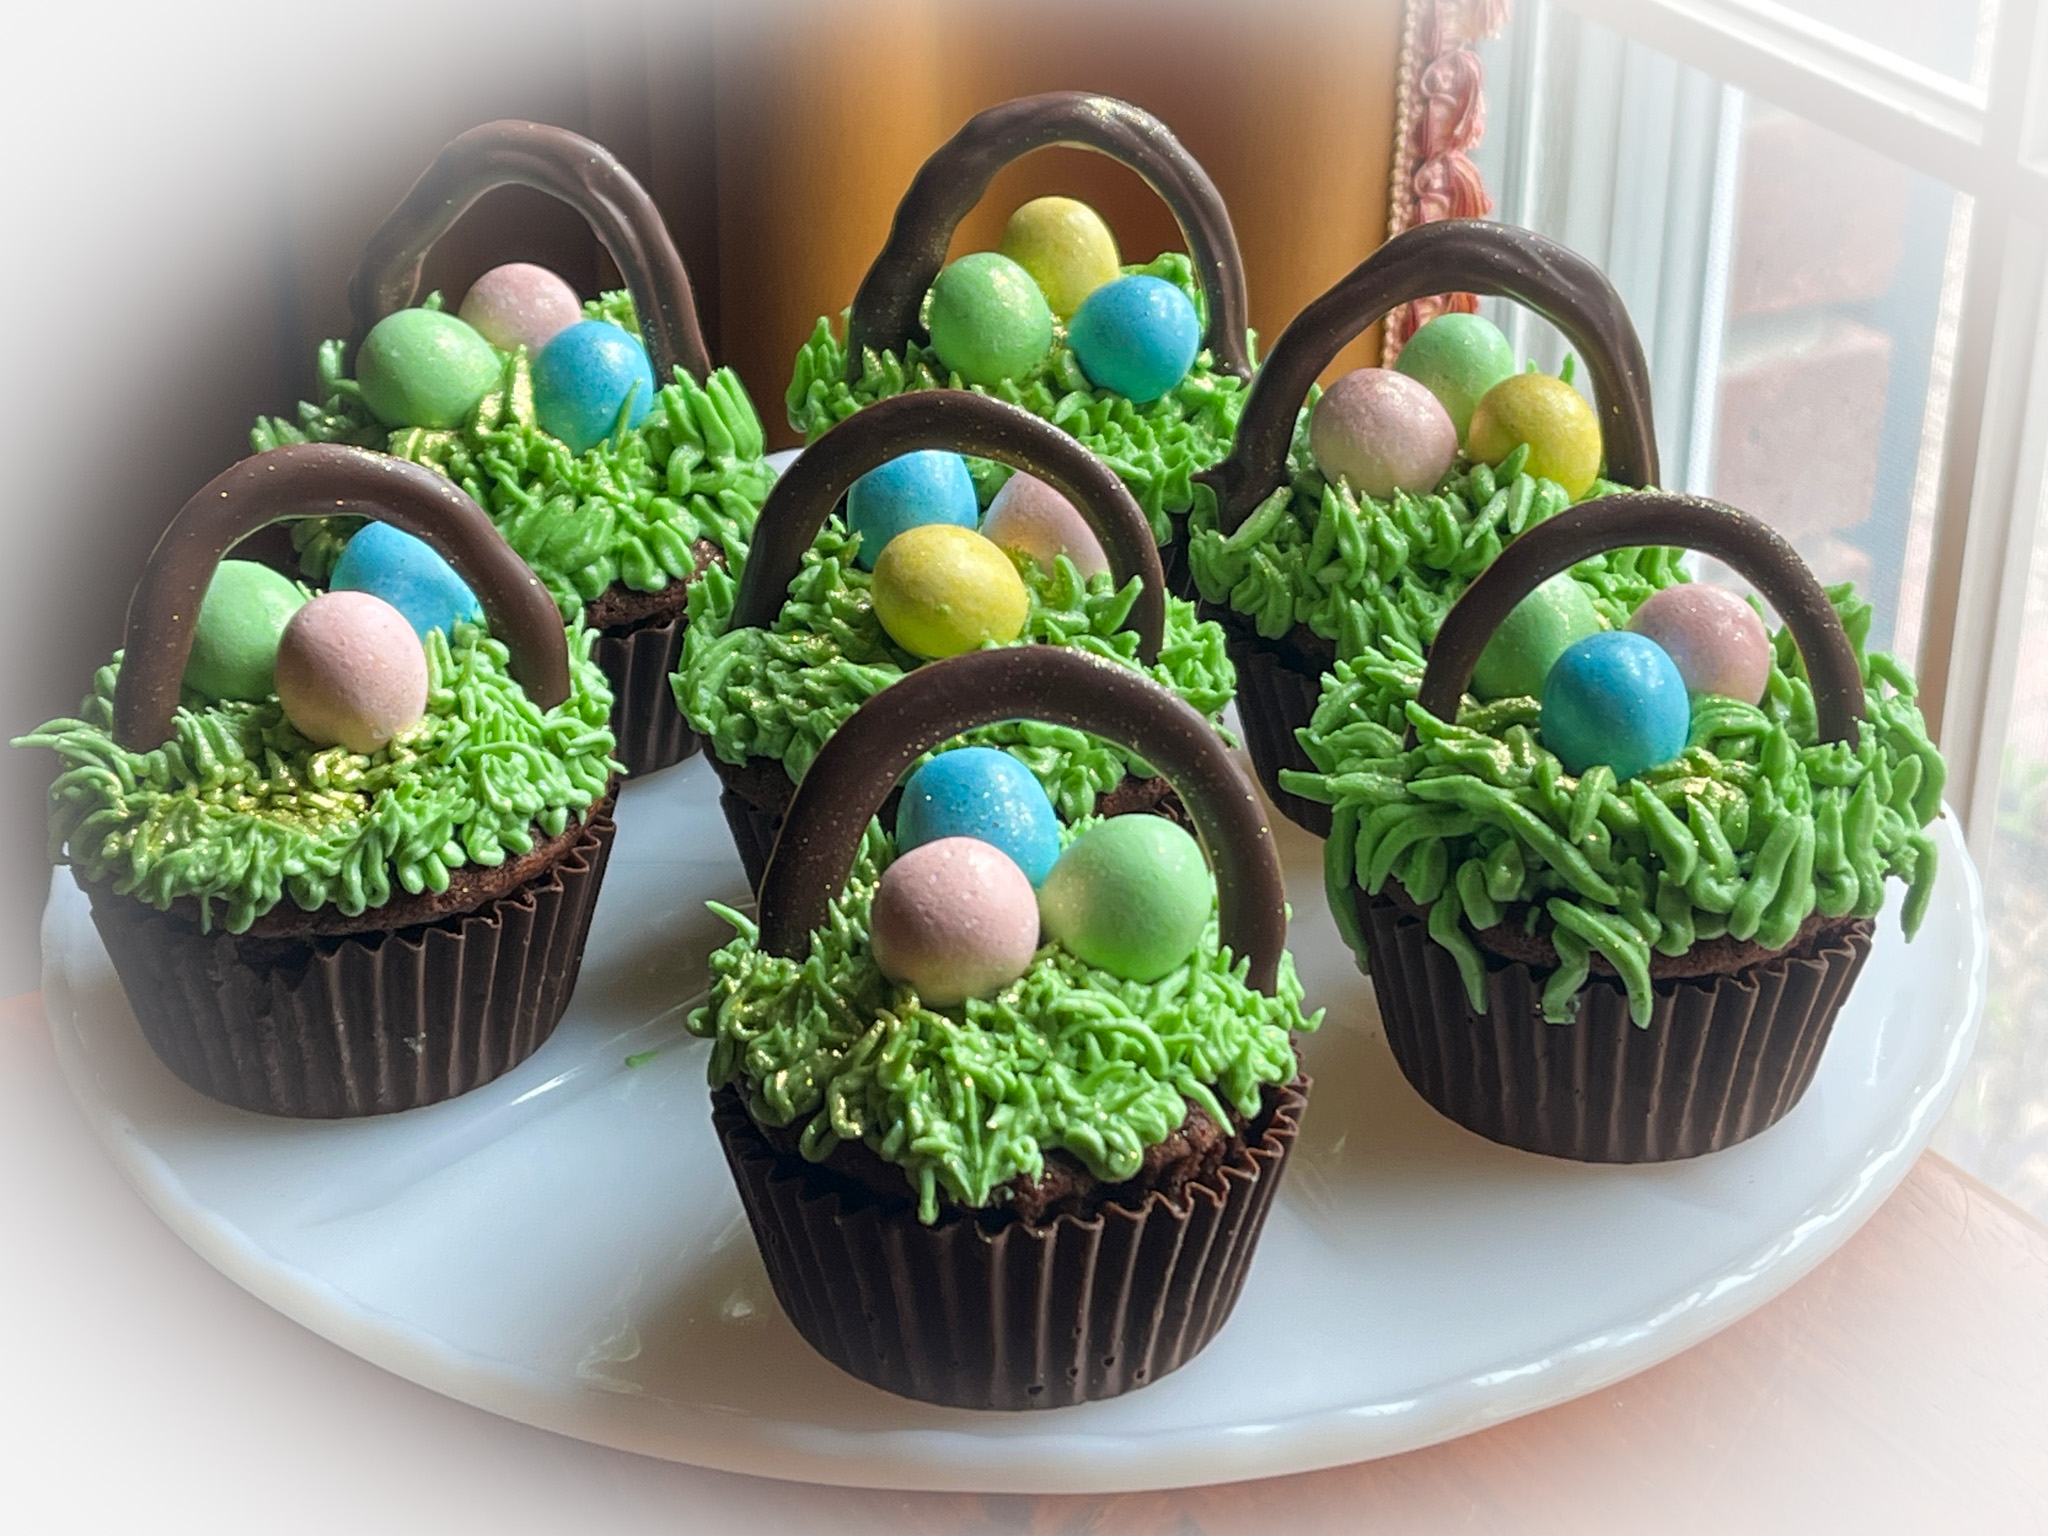
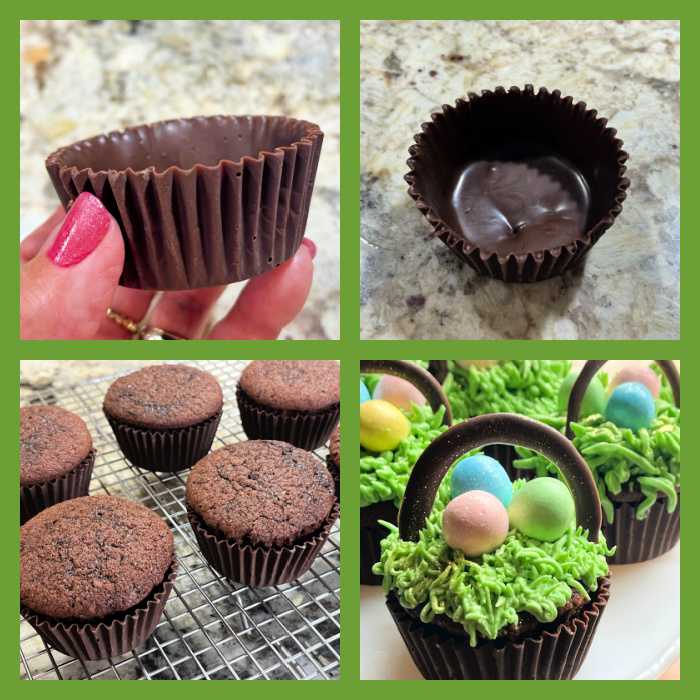
The cupcakes were chocolate, and to make these more special, I made the wrapper component as a compound chocolate concoction, so the whole thing was edible. I painted aluminum foil cupcake wrappers with melted compound chocolate, in two steps, to make them sturdy. First step I left them at room temperature for 15 minutes, painted once more and put in the fridge for 10 minutes. Then carefully peeled off the paper wrapper, and laid the baked cupcakes inside. The handles were also made with compound chocolate piped on parchment sheets and carefully placed over the buttercream while still soft. I used a grass piping tip to cover the cupcakes, and placed three eggs on top.

.

I love the way these turned out!
.

.

x

EASTER EGG NESTS CUPCAKES

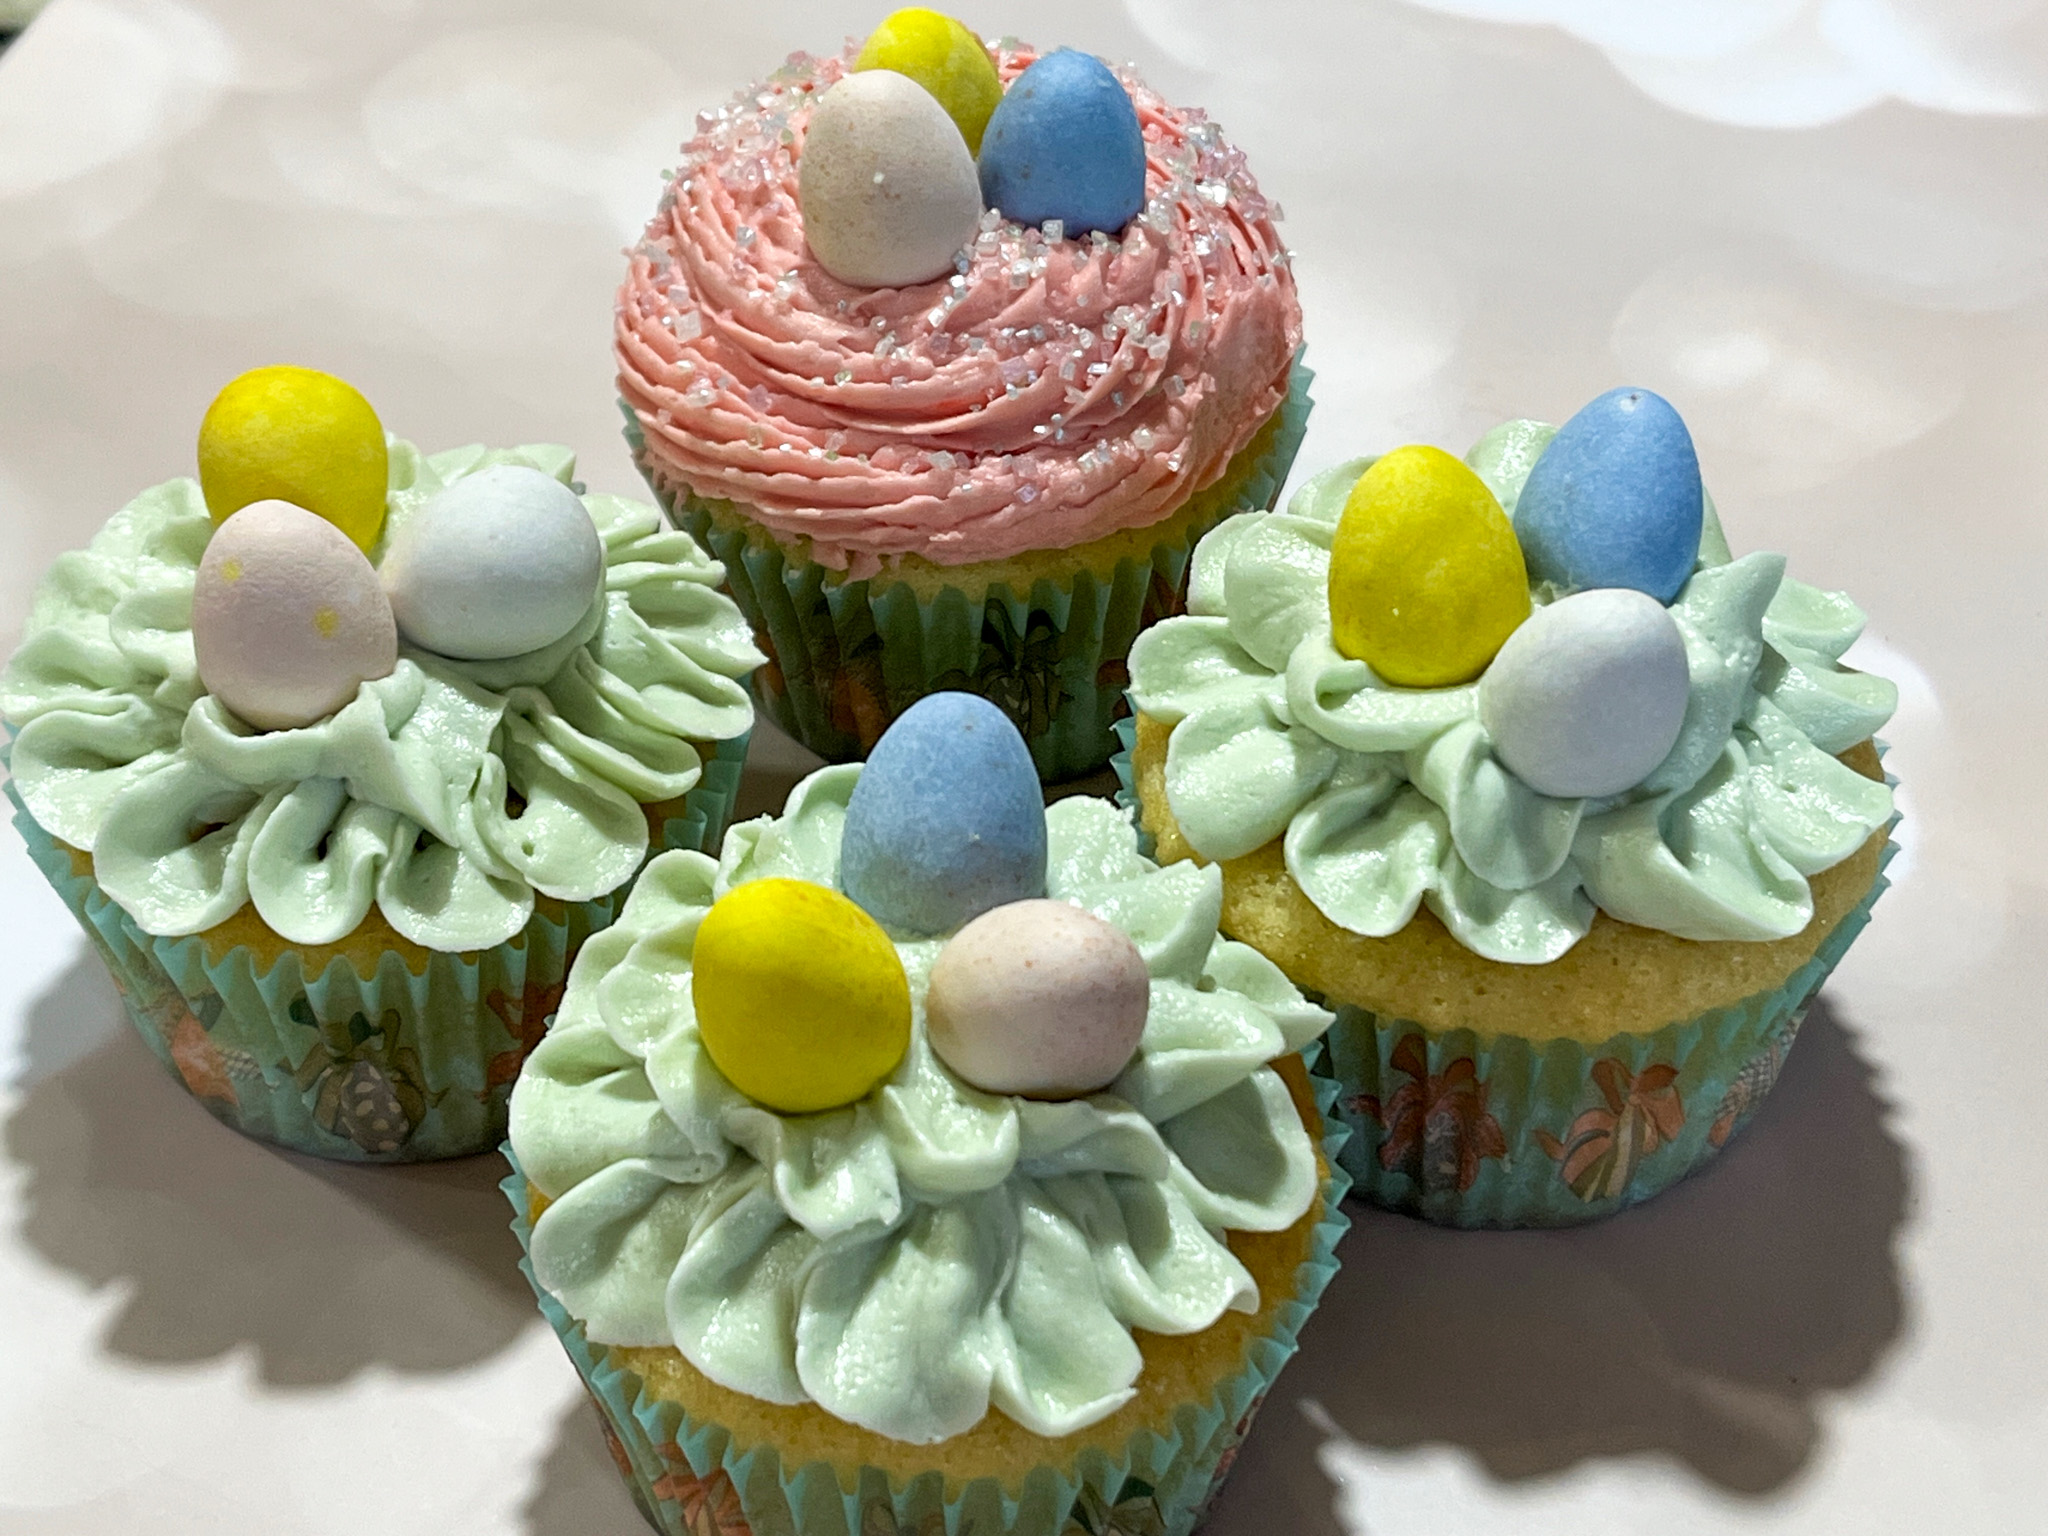
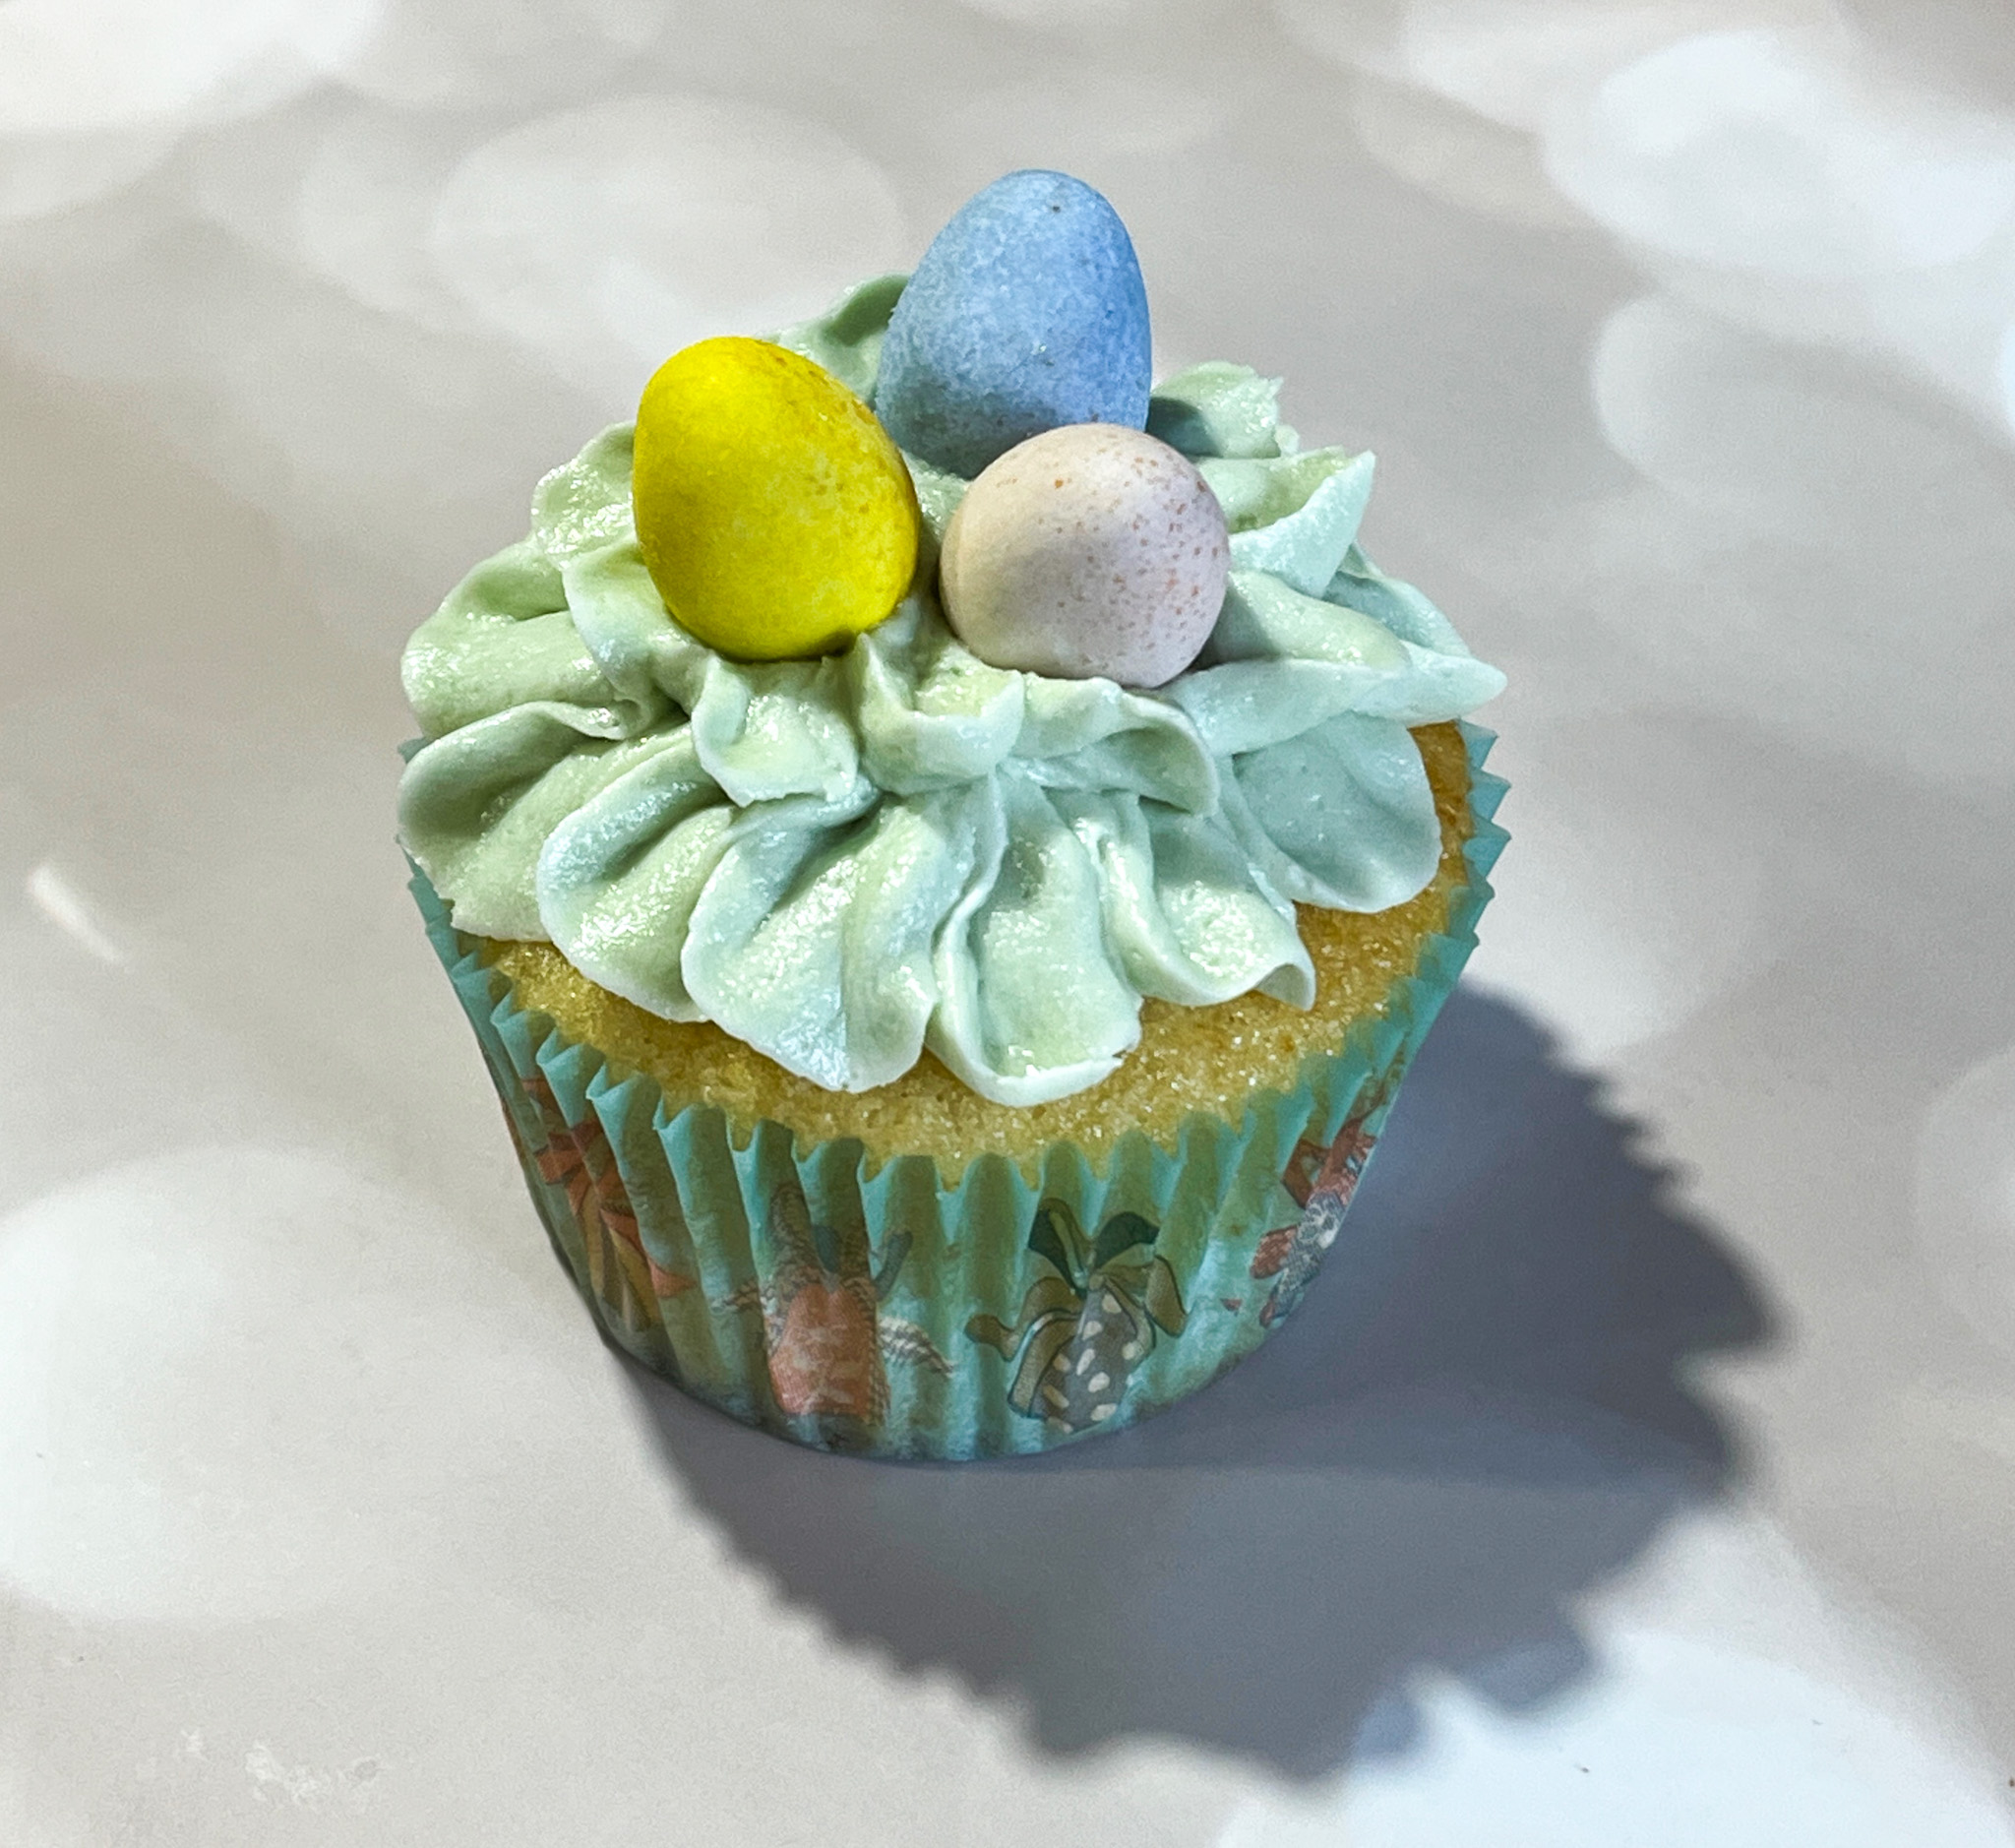
These were vanilla cupcakes, the buttercream was dyed pastel green or pink, and piped with a petal tip (#104) or a closed star tip. Little eggs added on top…

.

x

TRICOLOR SWIRL CUPCAKES

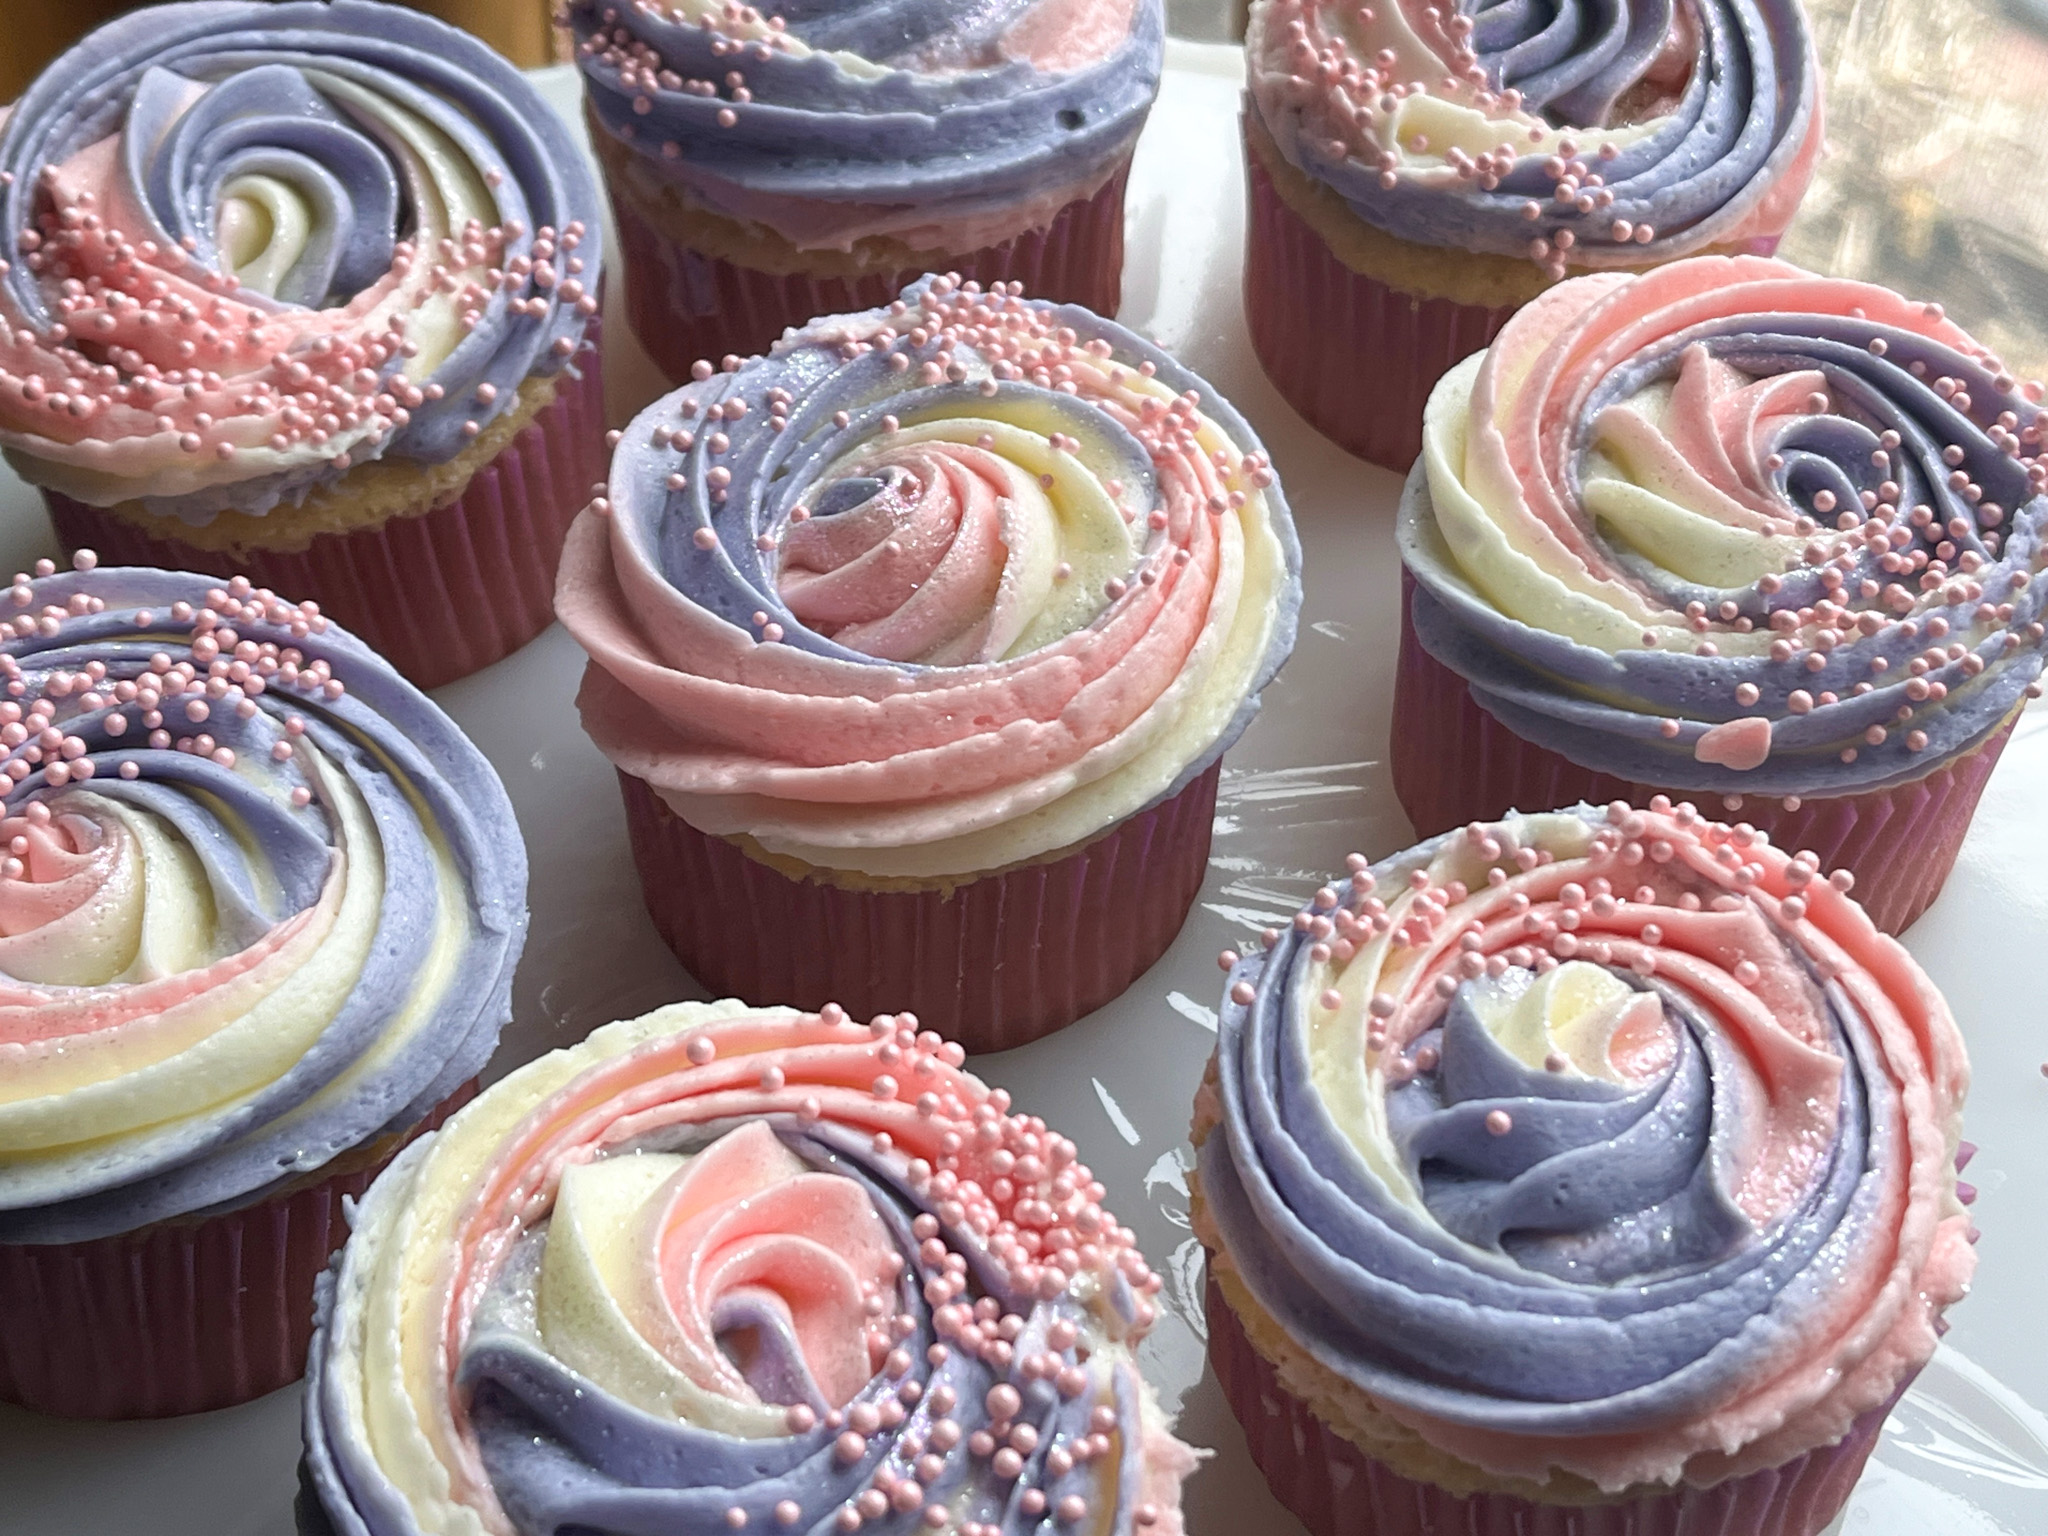
Chocolate Cupcakes were frosted with buttercream divided in three portions and dyed pink, blue and the third portion left without any color. The buttercream was laid over plastic wrap in three straight lines, closed as a sausage and piped using a 1M icing tip. Sprinkles added right after piping.

.

x

SPRINKLE BORDER CUPCAKES


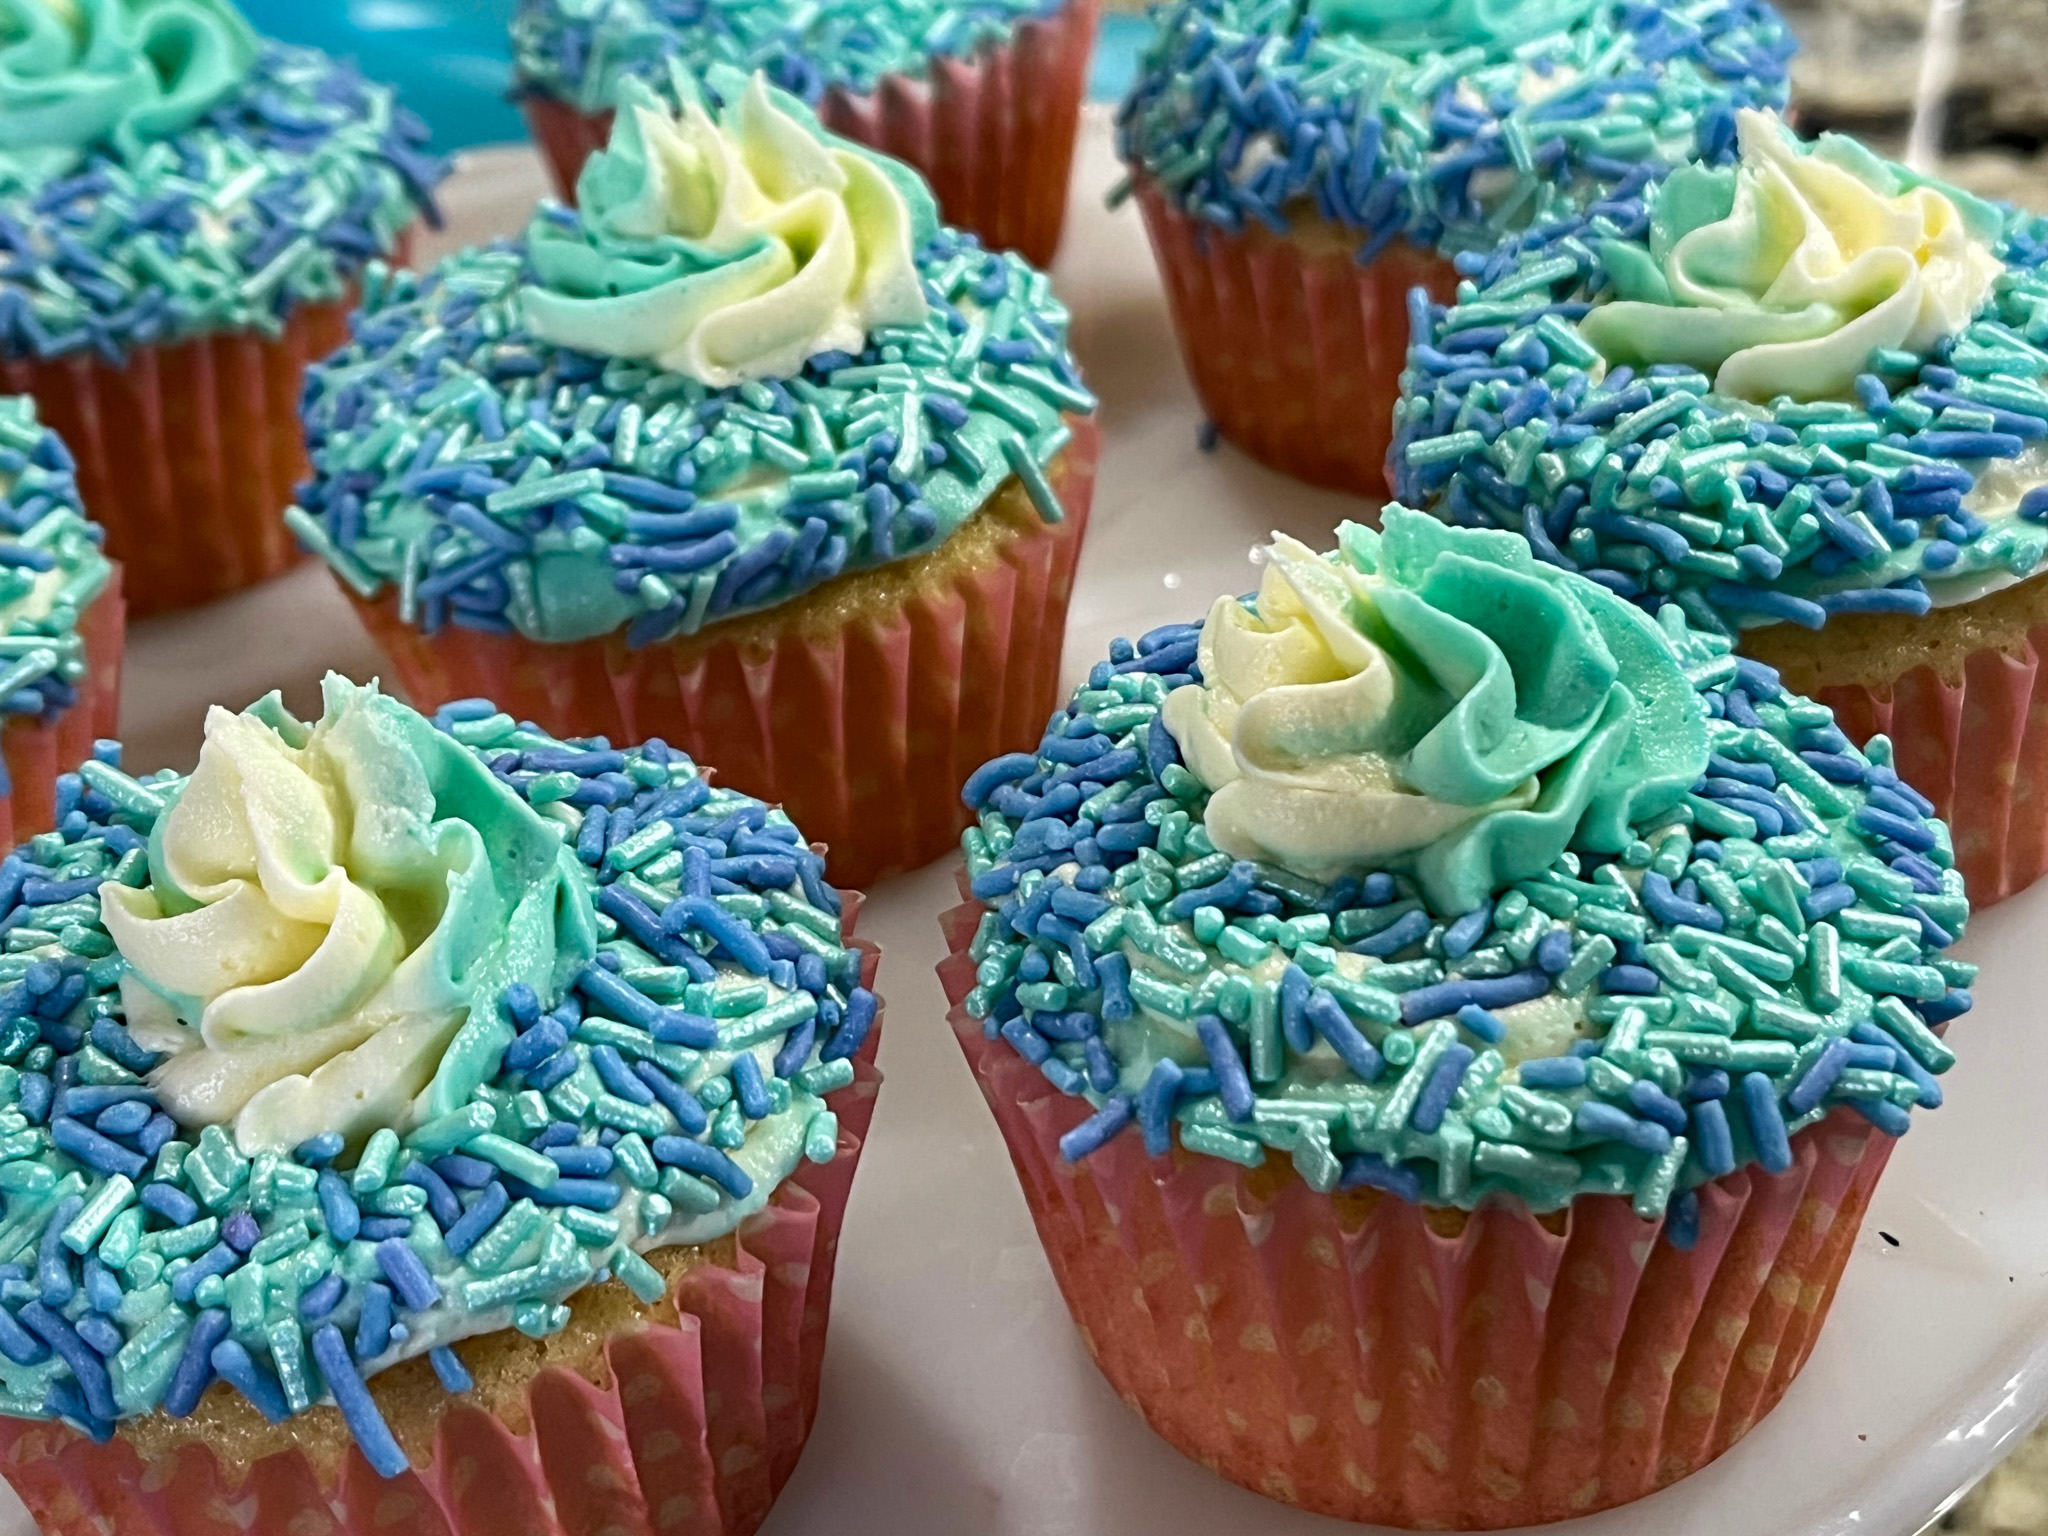
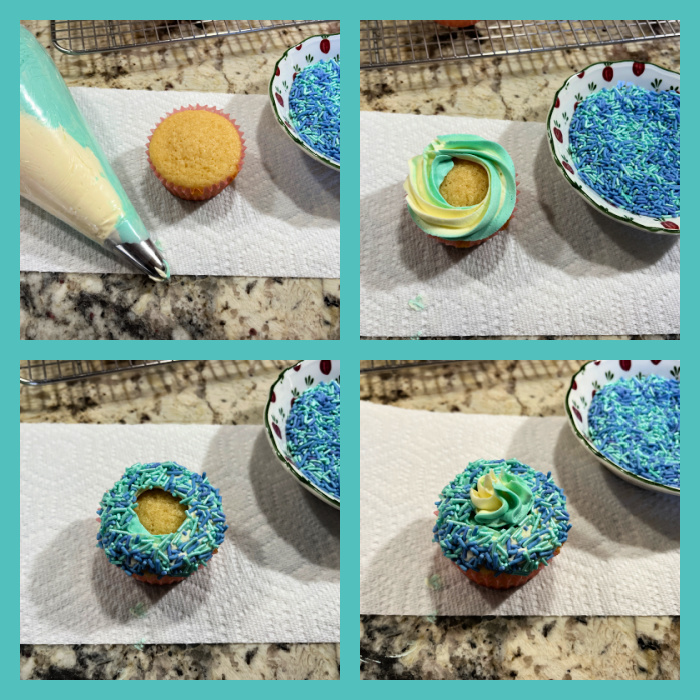
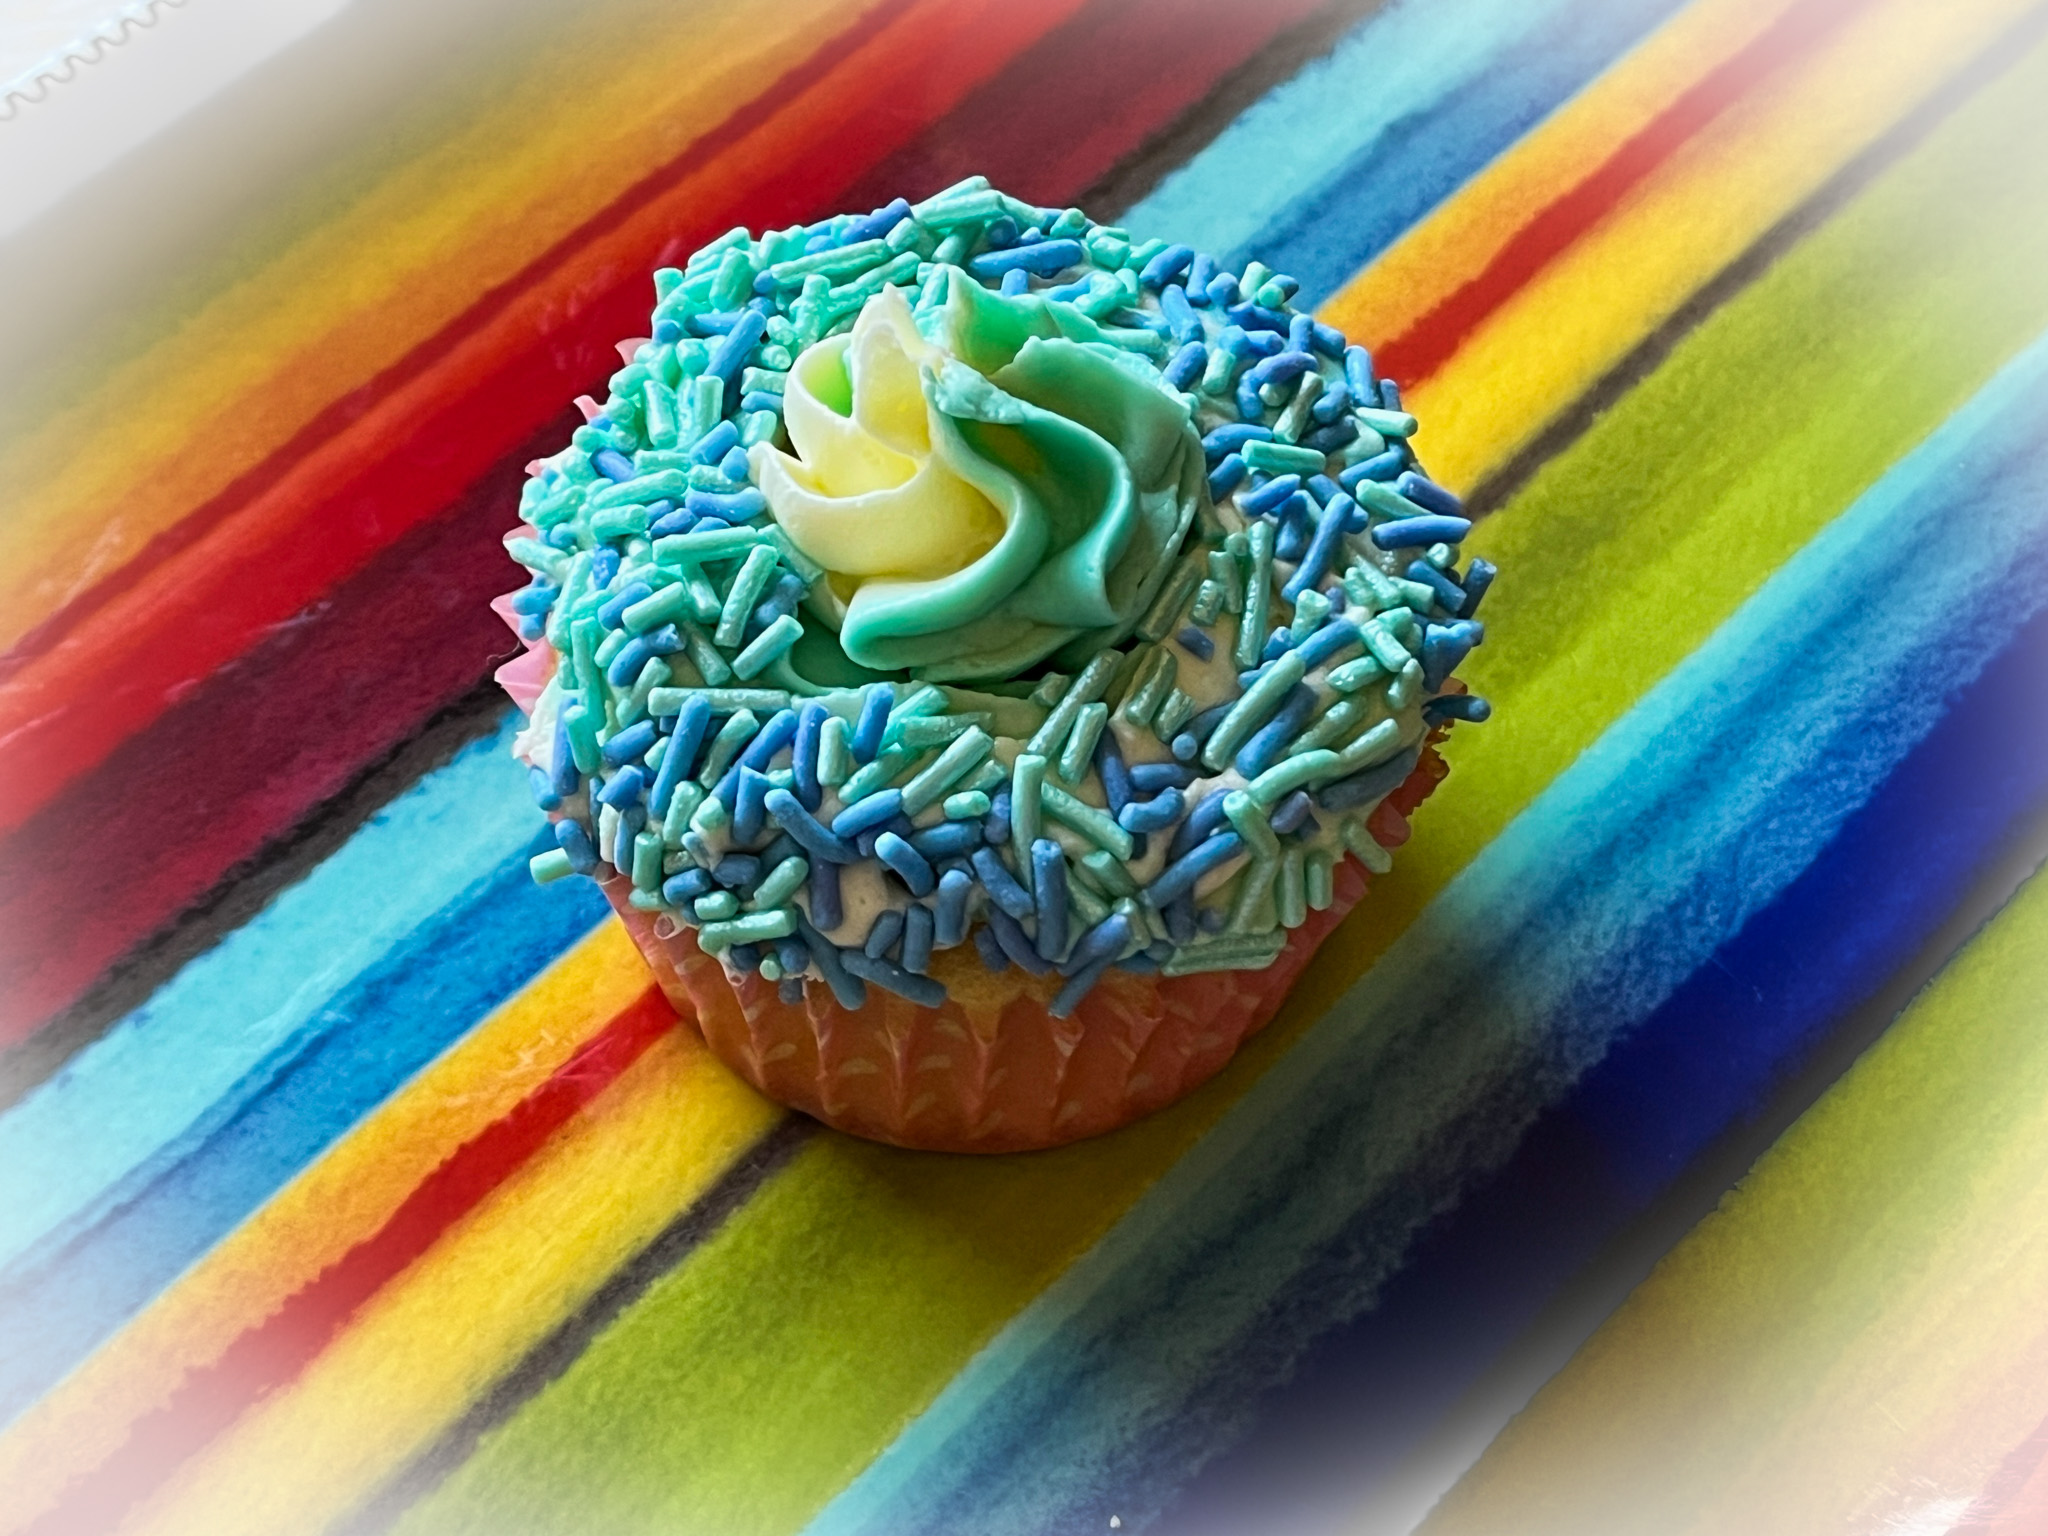
Cupcakes were vanilla. Buttercream was divided in two portions, half dyed teal and half left white. Buttercream was placed in a large piping bag, piped as a border and immediately covered with sprinkles. The center was piped right after.

These technique will work with many color combinations, of course…

.

x

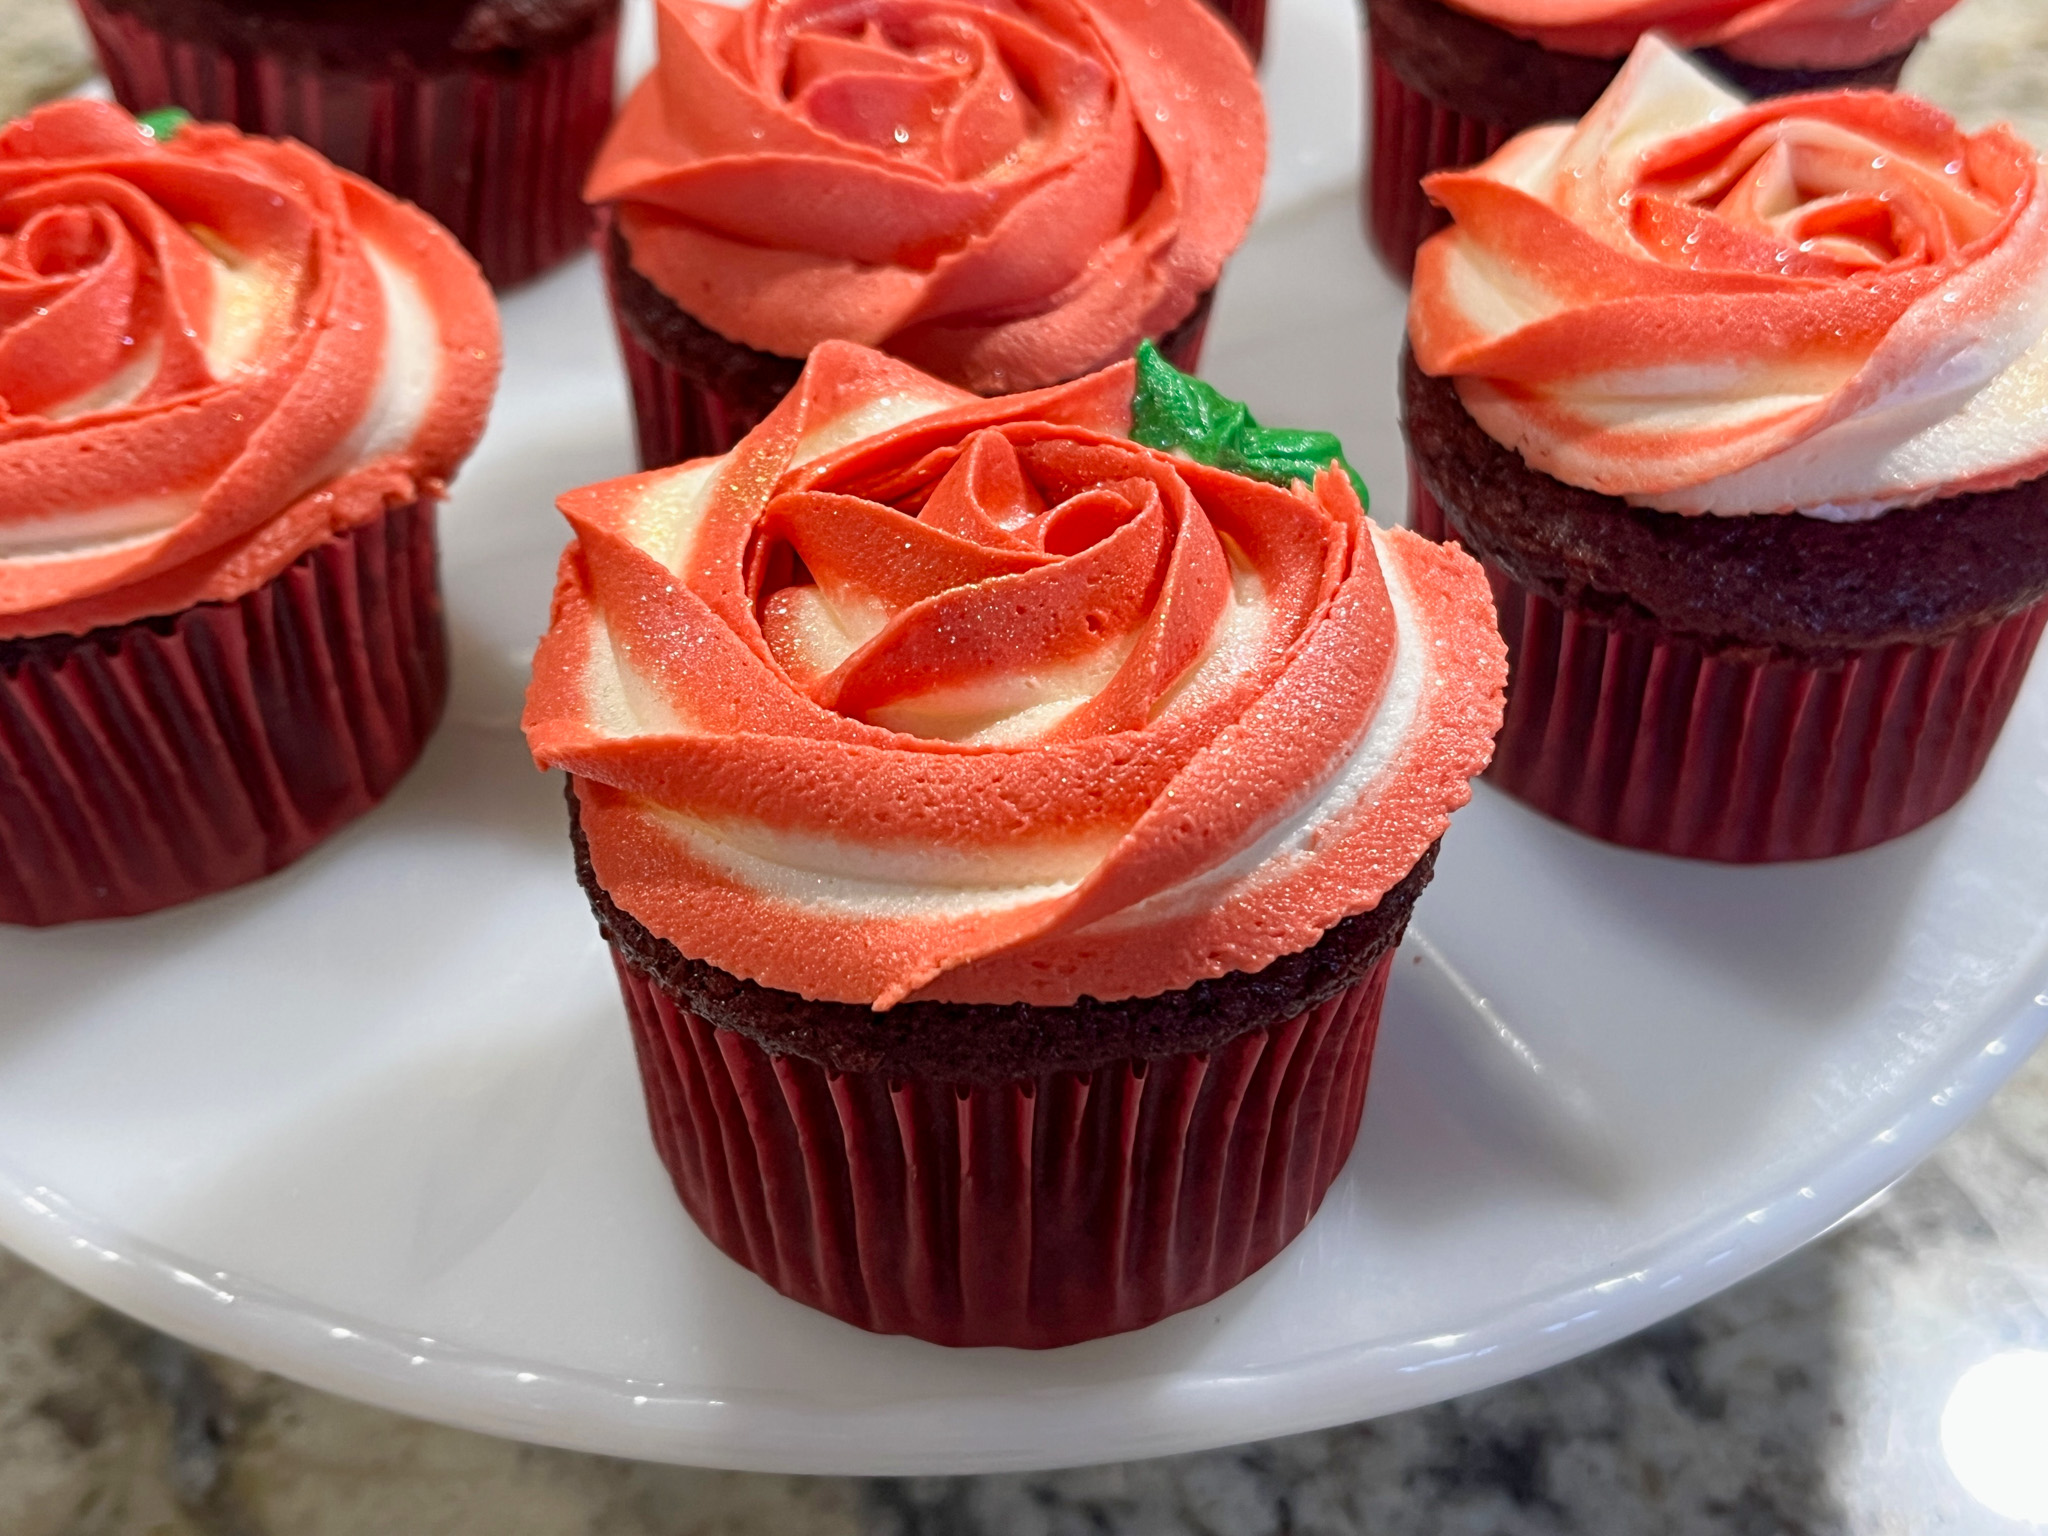
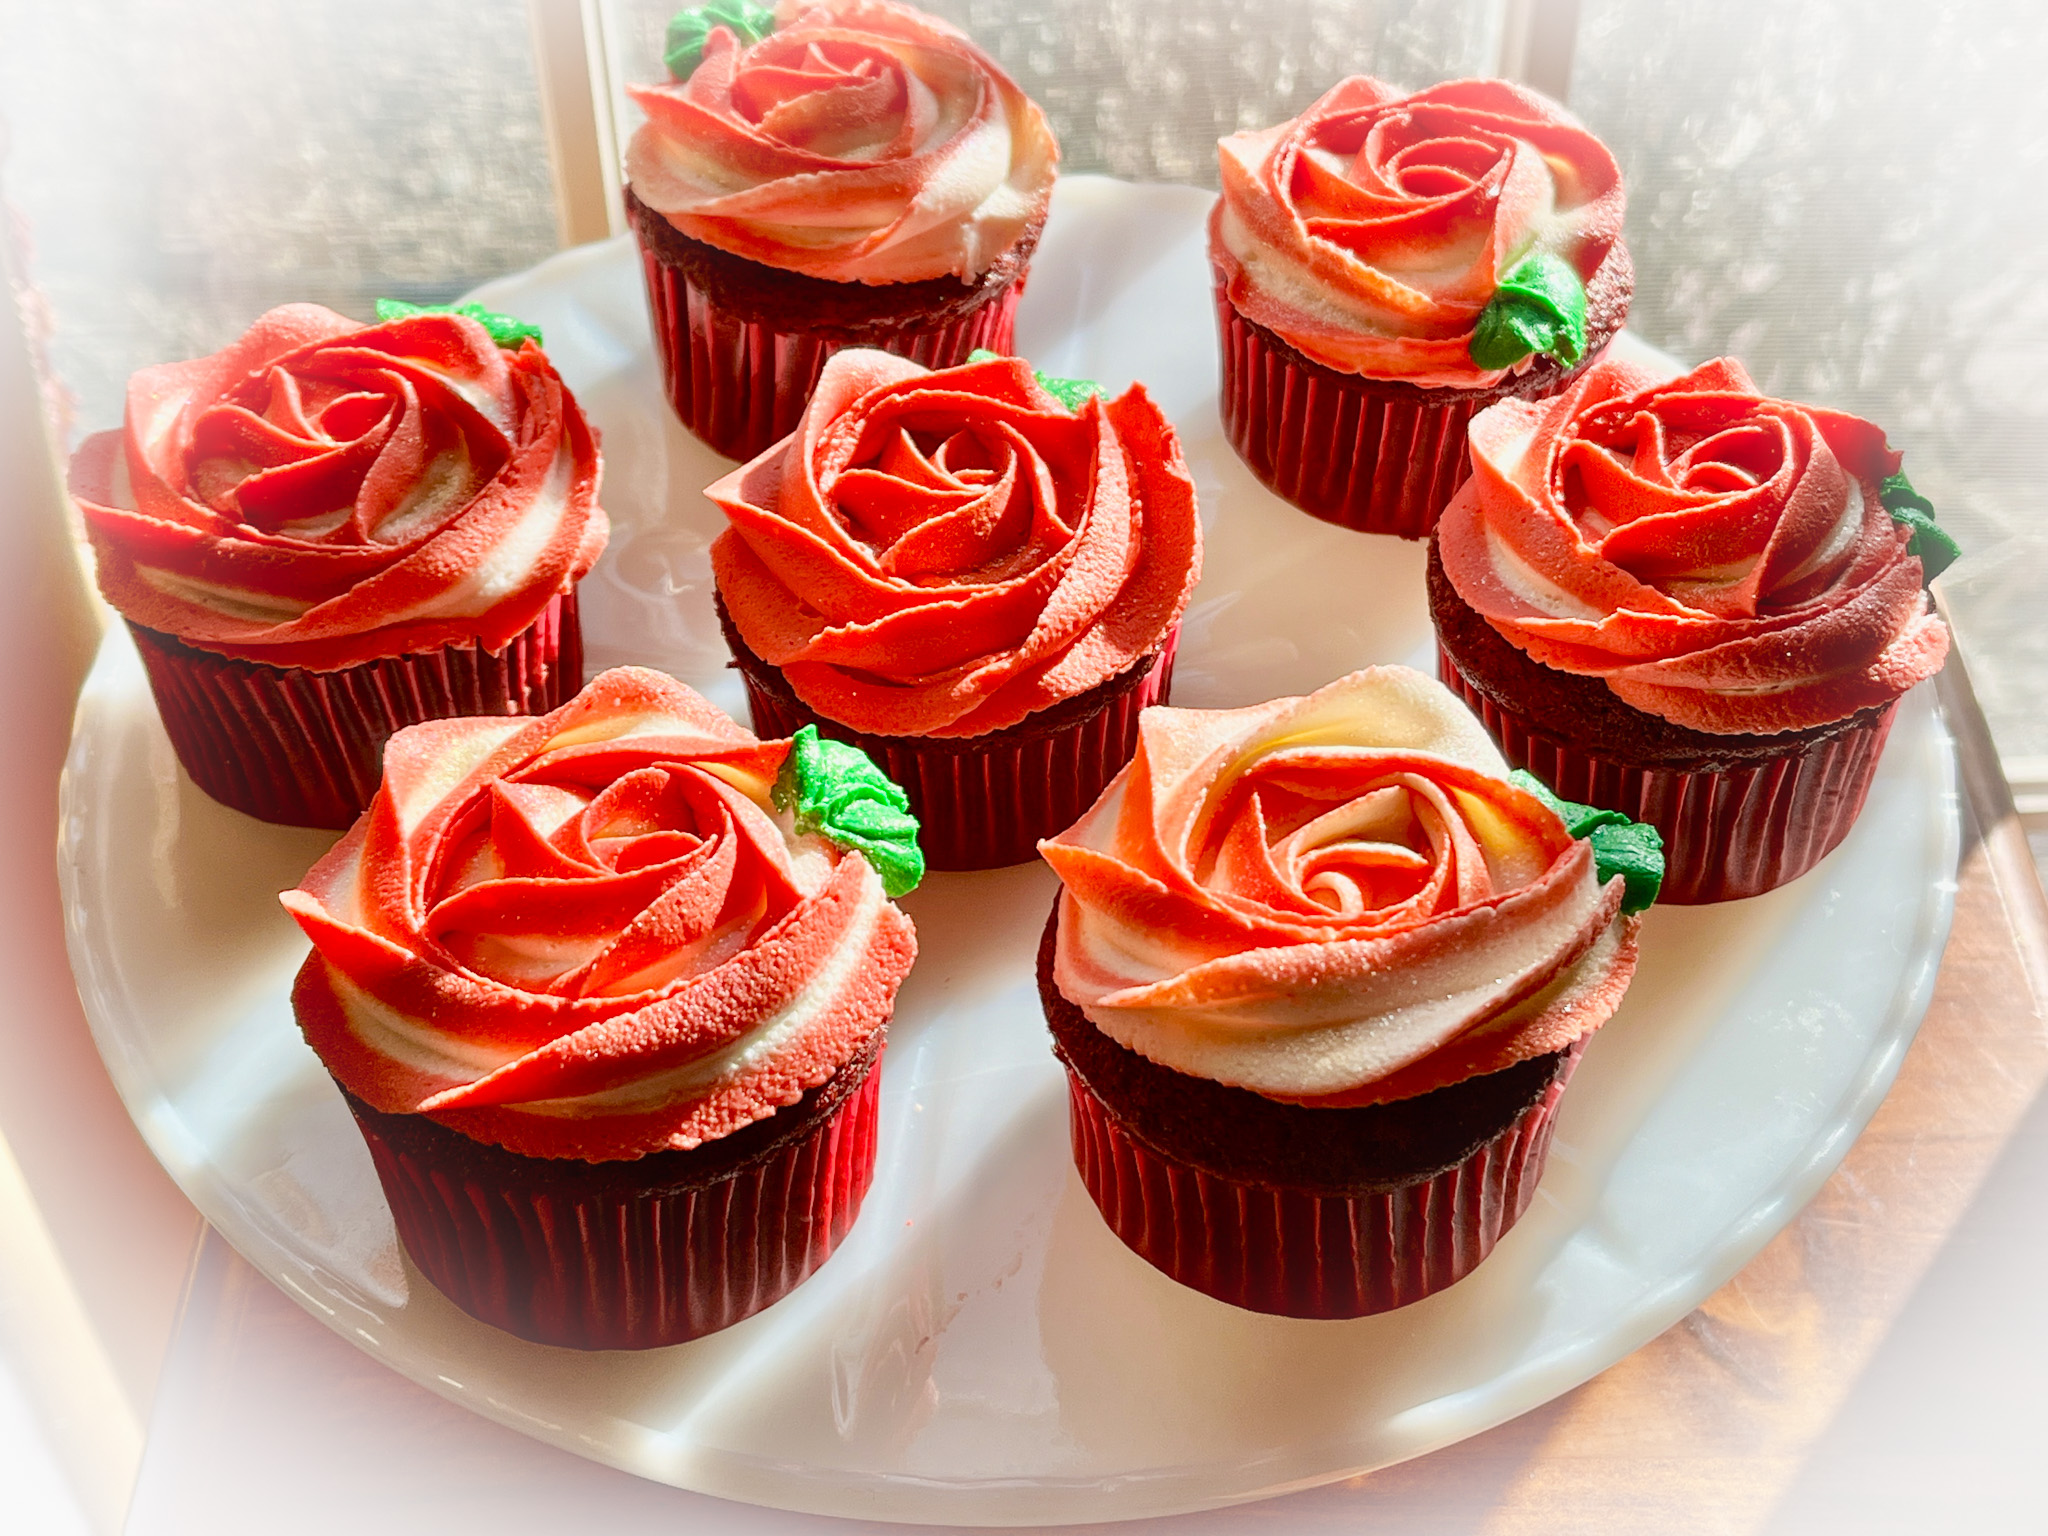
RED AND WHITE ROSE CUPCAKES

Cupcakes were chocolate. To get this precise two-tone effect, the buttercream was dyed in two portions, red and white. A very small amount was dyed green for the leaves. The red buttercream was carefully laid inside the piping bag covering the edges, and the white placed at the center. Piping tip 1M was used to pipe the flower. The leaf was added right after piping the rose. You can see exactly how to prepare the piping bag watching this youtube video.

.

x

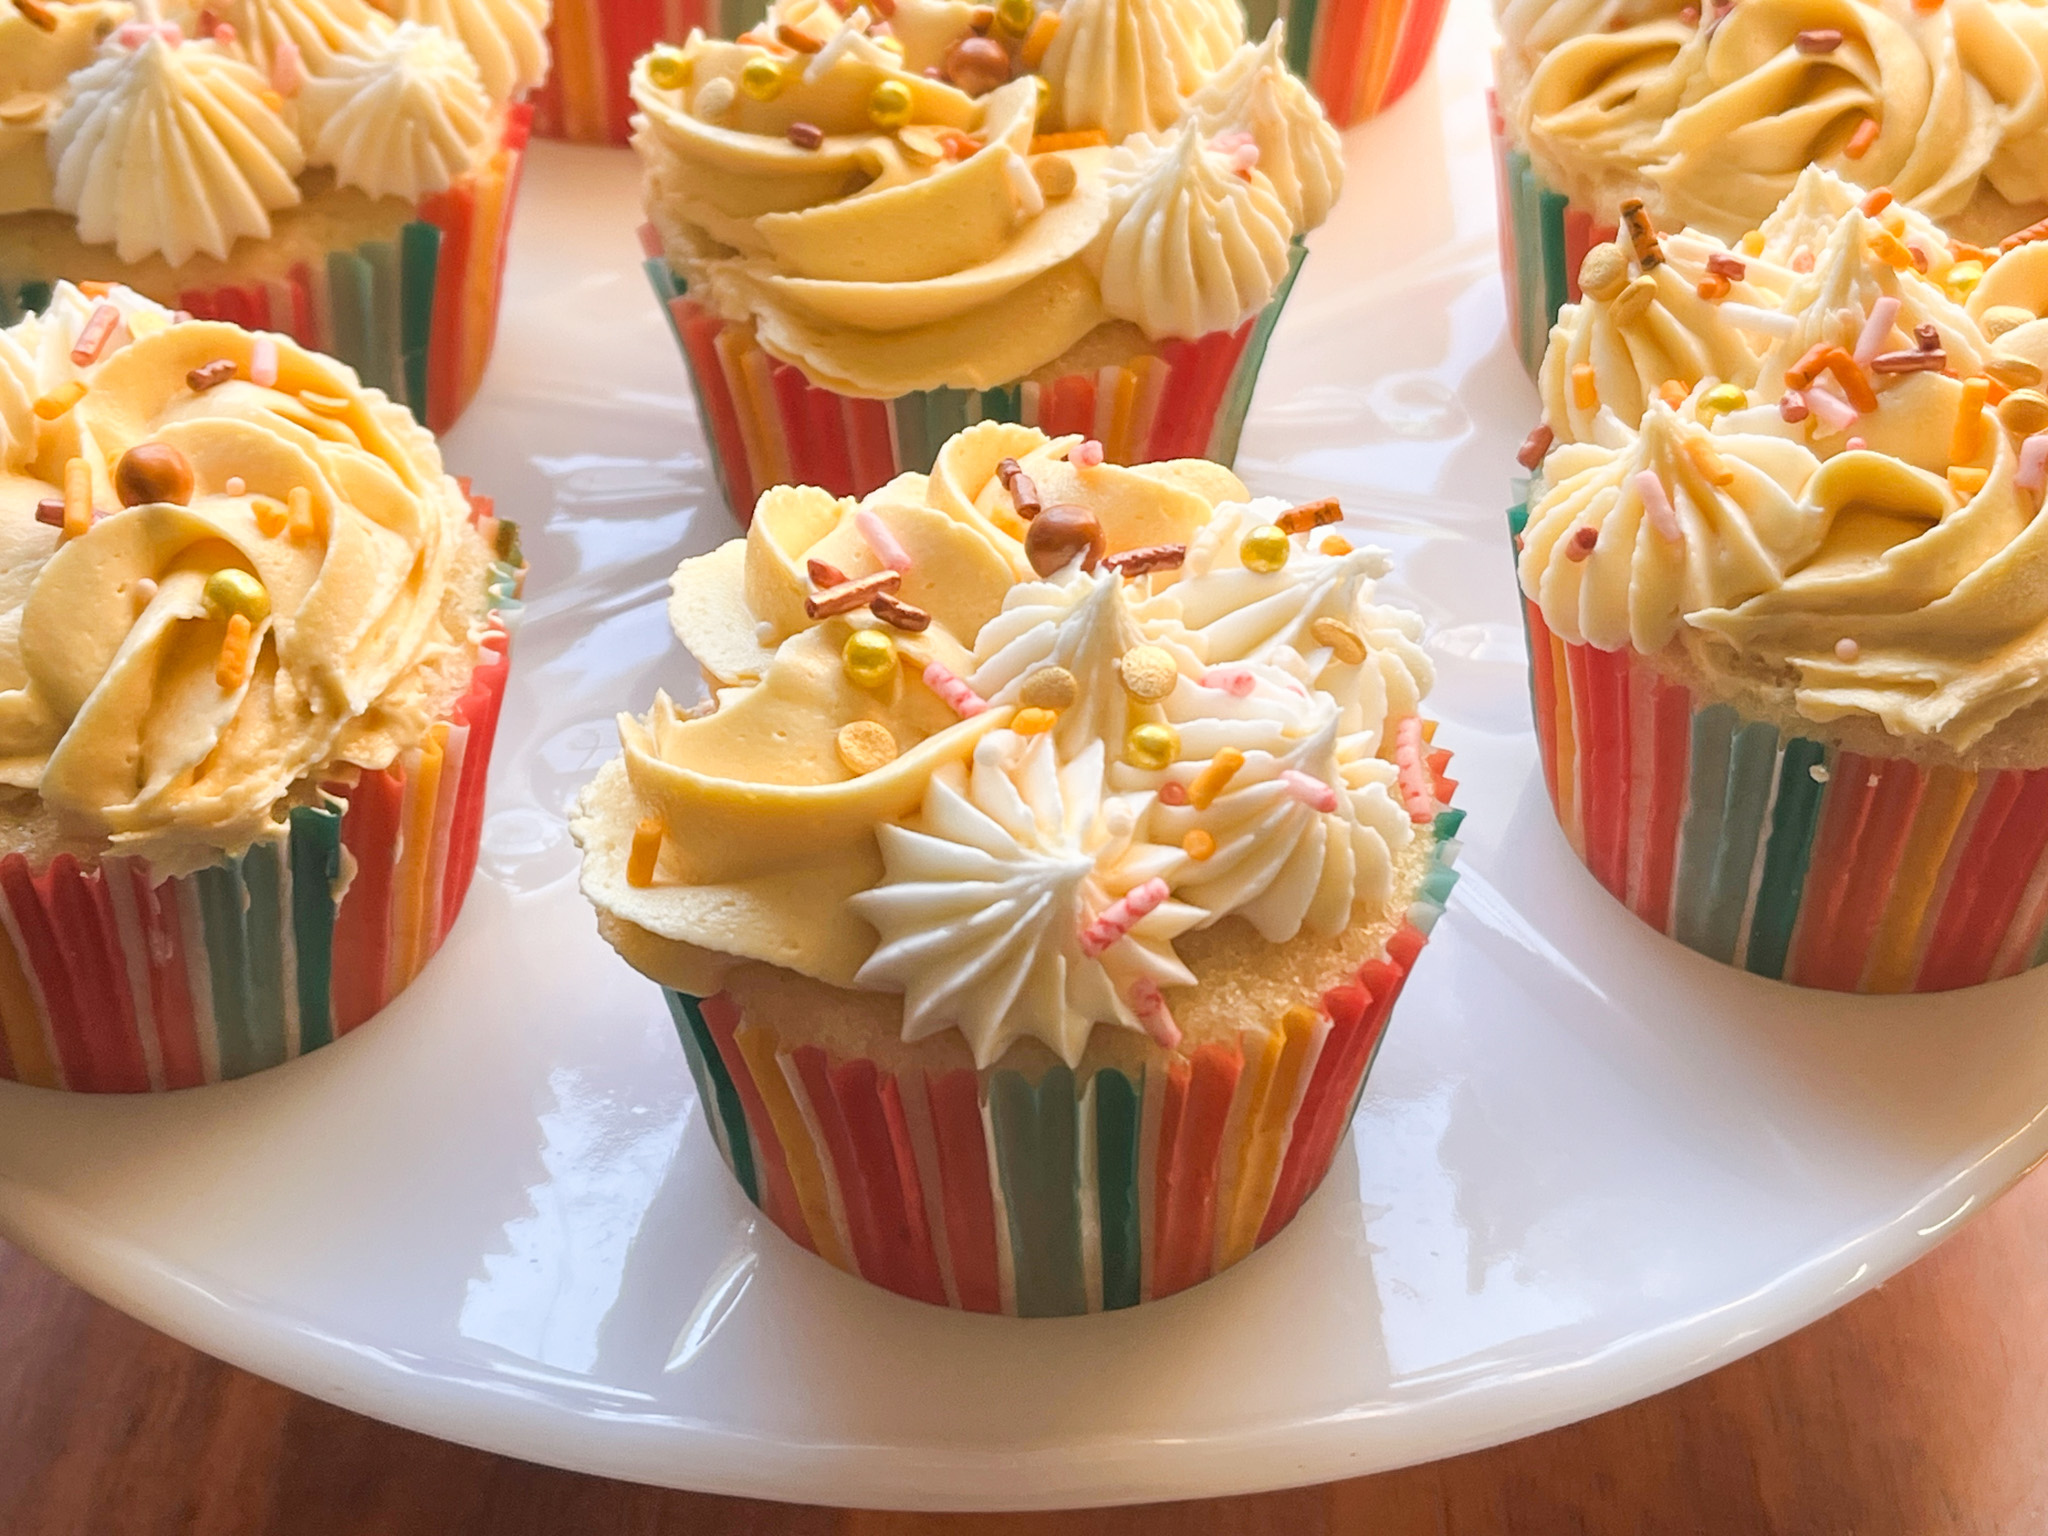
SPRING CELEBRATION CUPCAKES

For these vanilla cupcakes, I made buttercream dyed pastel yellow and white, and used a variety of piping tips to pipe swirls (1M tip) and little blobs (French star tip). Golden sprinkles added a final festive look.

.

1 YEAR AGO: Pasta Frolla for Linzer Type Cookies

2 YEARS AGO: Ravioli Cookies, the Shortest Path to Insanity

3 YEARS AGO: Peanut Butter and Jelly Babka and a Cookbook Review

4 YEARS AGO: Painted Sourdough

5 YEARS AGO: Over-the-Moon Blueberry Lemon Macarons

6 YEARS AGO: Springtime Macarons Bake-Along

7 AGO: Macarons for a Little Princess

8 YEARS AGO: Gilding the Sourdough Loaf

9 YEARS AGO: Lolita Joins the Bewitching Kitchen

10 YEARS AGO: Cashew Cream Sauce

11 YEARS AGO: Blood Orange Margaritas

12 YEARS AGO: Smoked Salmon Appetizer

13 YEARS AGO: Clementine Cake

14 YEARS AGO: Springtime Spinach Risotto

15 YEARS AGO: The end of green bean cruelty

FIFTEEN YEARS AGO: Torta di Limone e Mandorle

A DUET OF ST PATRICK’S BAKES

If you follow my baby blog, perhaps you’ve noticed I ran out of time to blog about St. Patrick’s cookies? It turns out I also got in trouble right here in the Bewitching Kitchen. Today I share a bread and a batch of cupcakes made in honor of that special holiday. Included in this post, a little cupcake decorating video, that you can find right after the recipe.

x

Better late than never, let’s start with the bread…


SHAMROCK SOURDOUGH
(from The Bewitching Kitchen)

450g bread flour
25g spelt flour
25g dark rye flour
75g sourdough starter (stiff or 100% hydration)
10g salt
360g water
Thai rice flour (or tapioca flour)
shamrock shape cut from edible paper

Mix all ingredients in the bowl of a KitchenAid type mixer fitted with the dough hook. Knead gently for about 4 minutes (first or second speed maximum).

Transfer dough to a lightly oil bowl and do a bulk fermentation with 4 folds made 45 minutes apart. Before you start the fermentation , remove a very small amount of dough to a small glass container (like those that hold spices), and mark where the level of the dough is with a permanent marker. Keep that at room temperature to monitor fermentation.

After the last folding cycle, keep an eye on the fermentation using the small vial. Ideally you want to let the dough ferment until it is double in size. Depending on the day, temperature of your kitchen, it might take 8 hours or more.

Once bulk fermentation is over, shape the dough as a round ball. Place in the fridge overnight.

Next day, freeze the dough for 30 minutes in the banetton, to make it easier to score later. Invert the dough on a paper liner, add the shamrock shape in the center, and flour the region around it (I used Thai rice flour). To make the paper stick, you can spray the surface VERY LIGHTLY with water. Score the perimeter of the shamrock and the outer area of the dough, and place in a Dutch oven.

Close the pan and bake at 450F for 30 minutes, open and allow the bread to brown for a further 15 minutes.

Cool completely over a rack before slicing.

ENJOY!

to print the recipe, click here

Comments: I used my Supersonic blade to score the dough, but a sharp razor blade will do, of course. This composition of sourdough, with mostly white flour, but a touch of spelt and rye might very well be my favorite these days.

x


ST PATRICK CHOCOLATE CUPCAKES
(from The Bewitching Kitchen)

makes 10 cupcakes

100g all-purpose flour
20g cocoa powder
140g granulated sugar
1/8 tsp salt
40g unsalted butter
1 large egg
120ml milk
1 + ½ tsp baking powder
buttercream for topping
Mini-golden Oreos painted with gold luster powder + vodka

Heat your oven to 350F and line a muffin tray with cupcake liners.

In a small, bowl, whisk the milk and egg with a fork. Reserve.

Put the flour, baking powder, cocoa powder, butter, sugar and salt into the stand mixer
bowl with the paddle attachment. Mix on a medium speed until the butter turns into the consistency of sand.

Pour in half of the milk and egg mixture into the stand mixer bowl with your other
ingredients and mix on a slow speed until it all fully combines and becomes a thick
paste. Pour the remaining milk mixture and mix on low-speed until the batter is smooth.

Fill the lined pan with batter, a little more than halfway full. Bake for 16 minutes, testing with a toothpick. Leave to cool in the pan for 5 minutes, then remove the cupcakes to a rack to cool completely.

BASIC BUTTERCREAM FOR CUPCAKES

226g butter, unsalted, softened
452g powdered sugar
pinch of salt
Vanilla extract, about 1 tsp or more to taste
a couple or more tablespoons of milk (to adjust consistency)

Place the softened butter in the bowl of a KitchenAid type mixer with the paddle attachment, add the pinch of salt, and whip at high speed for about 7 minutes. It needs to be really soft and lighter. Stop the mixer. Eyeball the amount of powdered sugar, add 1/3 and mix at low speed at first, once the sugar is starting to get incorporated, increase the speed to medium-high. 

Add the second portion of the sugar, and incorporate the same way. Add the final portion, start at low speed, clean the sides of the bowl well with a spatula, add the vanilla and increase the speed slowly all the way to high. Whip it until very smooth. Add milk to desired consistency. Divide the buttercream in two portions, dye one with light green, one with darker green. Place both portions over a plastic wrap, enclose them as a sausage, drop inside a large piping bag fitted with an open star tip. Decorate the tops of the cupcakes as shown in the video. Add the gold Oreos.

EENJOY!

to print the recipe, click here

Comments: I was pretty happy with the way these cupcakes turned out. It was fun to decorate, and to show the process in more detail, here is a little video for you.

x

That’s all for now, friends! If you like a little St. Patrick’s trivia, here is a very interesting article for you…

x

ONE YEAR AGO: Happy Birthday to me!

TWO YEARS AGO:  Incredibly Simple: Air-Fried Salmon Bites

THREE YEARS AGO: Chocolate-Covered Oreos

FOUR YEARS AGO: Pan-Steamed Broccoli with Miso Vinaigrette

FIVE YEARS AGO: Cookies and Rubber Stamps

SIX YEARS AGO: Macarons for all Seasons and Reasons

SEVEN YEARS AGO: Lentils and Radicchio? Yes, please!

EIGHT YEAR AGO: Tres Leches Cake

NINE YEARS AGO: The Joys of Grating Squash

TEN YEARS AGO: Auberge-Pecan Walnut Bread

ELEVEN YEARS AGO: Gluten-free and Vegan Raspberry Bars

TWELVE YEARS AGO: Lasserre, a French Classic

THIRTEEN YEARS AGO: Sourdough Bread with Walnuts and Dates

FOURTEEN YEARS AGO: Braised Brisket with Bourbon-Apricot Glaze

FIFTEEN YEARS AGO: The Real Vodka Sauce

SIXTEEN YEARS AGO: Pork Tenderloin and Blue Cheese

CHOCOLATE MOUSSE ENTREMET CAKE

Ready for a true labor of love? Full disclosure, it was a case of self-love, because I made it to celebrate my own Birthday! I spread the preparation over three days, you can definitely make it in two, but sometimes it is best not to rush. Since it’s been many years since I made this type of cake, I decided to take my time and enjoy the ride.

CHOCOLATE MOUSSE ENTREMET CAKE
(from Sugar Geek Show)

for the cake component:
3 large eggs
1 cup white sugar (220 g)
1 tsp vanilla extract
3/4 cup mayonnaise (180 g)
1 + 1/2 cup all purpose flour (180 g)
1/2 cup cocoa powder (45 g)
1 tsp baking powder
1/2 tsp baking soda
1/2 tsp salt
3/4 cup water (185 g)

for the ganache center:
1 Tbsp (15 g) white sugar
1 tsp glucose or Corn Syrup
1/2 cup (120 g) whipping cream
50 g dark chocolate
40 g milk chocolate
2 tsps of unsalted butter

for the chocolate mousse:
3/4 cup + 1 Tbsp whipping cream (200 g)
200 g dark chocolate
3/4 cup + 1 Tbsp heavy cream (200 g)
3 egg yolks
60 g white sugar
1/4 cup (60 g) water

for the chocolate mirror glaze:
1 cup granulated sugar (200 g)
1/3 cup + 1 Tbsp water (100 g)
2 drops red food coloring (optional)
1 cup heavy whipping cream (220 g)
1/3 cup + 1 Tbsp corn syrup or glucose (120 g)
1 + 1/2 cups cocoa powder (130 g)
6 gelatin sheets (16 g) – I used Platinum


Make the cake: Line a 1/4 inch sheet pan with parchment paper and heat oven to 350 F.

In a large bowl, combine the sugar, flour, cocoa powder, baking powder, baking soda, and salt. In a separate bowl, whisk together the eggs, vanilla extract, mayonnaise, and water. With an electric mixer, set on low speed, gradually add the wet ingredients into the bowl with the dry ingredients until combined. Then increase the speed to medium and continue to mix for one more minute until the batter is fully combined and smooth. Spread the batter onto the pan and bake for about 15 minutes or until the center of the cake is set.

Let the cake cool for 15 minutes, then remove from pan and cover in plastic wrap and freeze until you are ready to start assembling the cake.

Make the ganache: Break up the dark chocolate and milk chocolate into small pieces and place into a heat-proof bowl; set aside. In a medium-sized sauce pan, bring the cream, glucose or corn syrup, and sugar to a boil. Pour 1/3 of the hot cream mixture over the chocolate pieces, whisking vigorously until the chocolate starts to melt. Pour another 1/3 of the hot cream over the chocolate while whisking, continuing until the cream is all used up. Place the butter in a tall container or pitcher and pour the ganache over it. Using an immersion blender, mix the ganache and butter together until smooth and shiny. Pour the mixture into a bowl, cover with plastic touching the surface and let set for 5-6 hours at room temperature. You can also do that the day before.

After the ganache has set, remove the chocolate cake from the freezer and use a 3-inch cake cutter to cut six small cake rounds (each cake round should be about 1/4 the height of your cake ring). Place the chocolate ganache into a piping bag and pipe about 2 teaspoons of ganache in the center of each cake round). Place in the freezer for at least one hour.


Make the chocolate mousse: the mousse is made up of three components: the whipped cream, the chocolate ganache, and the egg yolks whipped with hot syrup (pâte à bombe). First, whip the 200 g cream until soft peaks form and set aside. For the chocolate ganache, break up the dark chocolate into smaller pieces and place in a heat-proof bowl. Bring the 200g heavy cream to a boil and then pour 1/3 of the hot cream onto the chocolate, whisking vigorously. Working in thirds, continue to pour the hot cream onto the chocolate until all of the cream has been used, whisking in-between each addition. Set aside.

For the pâte à bombe, place your egg yolks into a heat-proof bowl. In a large saucepan, heat the sugar and water together until the temperature reaches 244 F. Slowly pour the hot mixture onto the bowl holding the egg yolks, whisking continuously until the mixture thickens and turns a pale yellow.

Combine all three components: first fold the whip cream into the ganache, then pour the egg yolk mixture into the bowl of the mixed chocolate ganache, then fold all ingredients until smooth. Transfer mousse to a piping bag and coat inside of each metal cake ring with cooking spray. Line inside of each cake mold with acetate. Pipe the mousse into each cake ring, filling 3/4 of the way to the top. Gently press each frozen cake ring (topped with the ganache) into the ring with the ganache facing downward. The mousse should gradually move up toward the top of the ring. Flatten out the mousse and scrape off any excess mousse. Freeze each cake overnight.


Make the chocolate mirror glaze: first, place your gelatin sheets in a bowl of cold water for about 5 minutes to soften. Heat the water, sugar, and a few drops of red food gel on the stovetop until the mixture reaches 222 F. In a separate bowl, mix the glucose (or corn syrup) and cream together then microwave for one minute until warm. Now pour this into the pan holding the sugar/water mixture, whisking continuously, then bring to a boil. Add the cocoa powder, remove from the heat and continue to mix.

Squeeze out the excess moisture from the gelatin leaves, then place in a pitcher or large measuring cup. Pour the sugar/cocoa mixture on top of the gelatin and mix with an immersion blender until all bubbles are gone. Let temperature reduce to 104 F (40 C) while preparing your cake molds.

To unmold the frozen entremet cakes, use a hair dryer to heat up the sides of the cake ring for a few seconds, then gently push the cake out of the mold onto a cooling rack placed on top of a baking sheet. Remove the acetate sheet from the cake. Before applying the glaze to the cake, make sure the glaze temperature is 104 F (40 C). Gradually pour the glaze onto the cake starting from the center outwards, fully covering the top and sides. (The excess glaze that has accumulated in the pan can be scraped up and re-used).

After the glaze settle a few minutes, transfer the cake to a serving dish; decorate with some gold leaf and serve.

ENJOY!

to print the recipe, click here

Comments: The link associated with the recipe will take you straight to a video showing every single step of the preparation, so even if you have no previous experience with entremet cakes, you’ll be able to tackle it. Here is my way to approach this adventure:

Day one: baked the chocolate cake, wrapped it and froze it

Day two: made the ganache early in the morning, cut cake slices and topped with ganache around noon. Made the mousse and assembled the cake rings around 5pm. Froze everything overnight.

Day three: Made the chocolate mirror glaze, while it cooled to the pouring temperature (I used 110F instead of 104F), I removed the frozen cakes from the rings, took the acetate out, and placed them back in the freezer until the glaze was ready to pour.

The only problem I had – and that was a big problem that led into severe hyperventilation – was right after glazing the cakes. The video gave a super cool tip to hold the cake with a stick to roll the base over sprinkles, but it is VERY important that you do not stick that too deep, or you won’t be able to remove it without destroying the little cake. I almost lost my Zen. So, if you make them, insert the skewer just a little bit, it will be a bit wobbly but then you will remove it without issues, and the gold leaf or another decoration of your choice will hide the small hole left on the glaze.

I was totally thrilled with the outcome! Especially because I had not worked with mirror glaze in such a long time. Consider investing in a Bamix handheld mixer, it is the best tool to remove bubbles from this type of glaze, although for extra safety I always pass it through a fine sieve (they did not use it in the video, but I advise you to incorporate this extra step). I’ve had the Bamix for many years, found a great deal on eBay at the time, probably around 2018.

This is a real rich dessert, we shared one and then Phil had a couple of bites from the second one, leftover was his breakfast next day. If you don’t have gold leaf to decorate the top, a small fondant decoration or even sprinkles will do.

I truly enjoyed making these cakes, and now I wonder if I really need a super special occasion to justify bringing it to our table… Life is short, not a bad idea to indulge every once in a while, right?

ONE YEAR AGO: Cake Pucks

TWO YEARS AGO: Haniela’s Cheese Crackers

THREE YEARS AGO: Shrimp Tacos with Jicama-Mango Salsa

FOUR YEARS AGO: Mini-Egg Brownies

FIVE YEARS AGO: The Luck of the Irish

SIX YEARS AGO: When life gives you Eye-of-the-Round

SEVEN YEARS AGO: Carrot Cake Macarons

EIGHT YEARS AGO: Soup Saturday: Say Goodbye to Winter

NINE YEARS AGO: Manchego and Poblano Soup

TEN YEARS AGO: A Smashing Pair

ELEVEN YEARS AGO: Spinach and Mushroom Stuffed Pork Tenderloin

TWELVE YEARS AGO: Crispy Chickpea and Caper Spaghetti

THIRTEEN YEARS AGO: Spring has Sprung!

FOURTEEN YEARS AGO: Chickpea and Fire Roasted Tomato Soup

FIFTEEN YEARS AGO: Double Asparagus Delight

SIXTEEN YEARS AGO:  Sun-dried Tomato and Feta Cheese Torte

BAKING WITH LOVE

Valentine’s Day is just about here! Today I share a few ideas to sweeten up this special weekend… Make sure to visit my cookie blog tomorrow for a series of cookies that celebrate love. And now, let’s get started, shall we?

.

x


VANILLA POUND CAKE WITH HIBISCUS GLAZE
(from The Bewitching Kitchen)

for the cake:
3 sticks (339g) unsalted butter, softened (room temperature)
8 oz Cream Cheese, at room temperature (one regular package)
2 + 1/2 cups (500g) sugar
1 tsp salt
2 tsp vanilla paste or extract
6 Eggs, at room temperature
3 cups (375g) flour

for the glaze:
3 tablespoons hibiscus tea
200g powdered sugar
squeeze of lemon juice

Heat oven to 325F.

Cream butter, cream cheese and sugar with hand mixer until light and fluffy. Pound cakes do not contain leavening agent, so make sure to work the butter until fluffy. Add salt and vanilla, beat well.
Add eggs one at a time, mixing after each addition. Gradually mix in the three cups of flour.

Pour into well greased bundt pan. Bake for about 90 minutes, covering with foil if the top gets too brown before a toothpick inserted in the center comes out clean.

Wait for 15 minutes before un-molding over a rack. Let the cake cool completely, then make a glaze whisking all the ingredients. Pour the glaze over the cake, decorate with sprinkles, if desired.

ENJOY!

to print the recipe click here


Comments: The Bundt pan I used is this one. Any cake will look good with a simple dusting of powdered sugar, but I decided to go with a light glaze and sprinkles.

x


If your heart is set on chocolate, but you don’t feel like a simple tray of brownies, here is a very cute idea… Bake the brownies in a heart-shape silicone mold, then use the same mold to coat each piece in chocolate (I went with compound chocolate dyed red). I used these molds to bake and coat the brownies. And my favorite recipe for the little cakes (check here).

When you bake the brownies, the bottom side, that touches the mold, will be super flat. You can flip them when you coat and place the non-flat side touching the chocolate. That will end up smooth, so both sides of your little cakes will be nice and flat.

So the process goes like this: bake the brownies, cool them completely in the mold. Freeze for 10 minutes to make sure the brownie will be nice and firm. Remove cakes. Wash the mold, dry well. Melt compound chocolate in the color of your choice, add a layer to the bottom of the mold and immediately insert the cake back. Push gently all the way down. Make sure you see the chocolate coming up a bit around the edges, no need to come all the way to the top. Freeze for 15 minutes. Un-mold, and decorate.

Once they are coated, you can pipe a drizzle of melted chocolate and add sprinkles.

.

.

x

No need for recipe, just a little festive decoration, made with Royal icing and sanding sugar. Leftover melted chocolate was used to form little hearts using this mold.

x

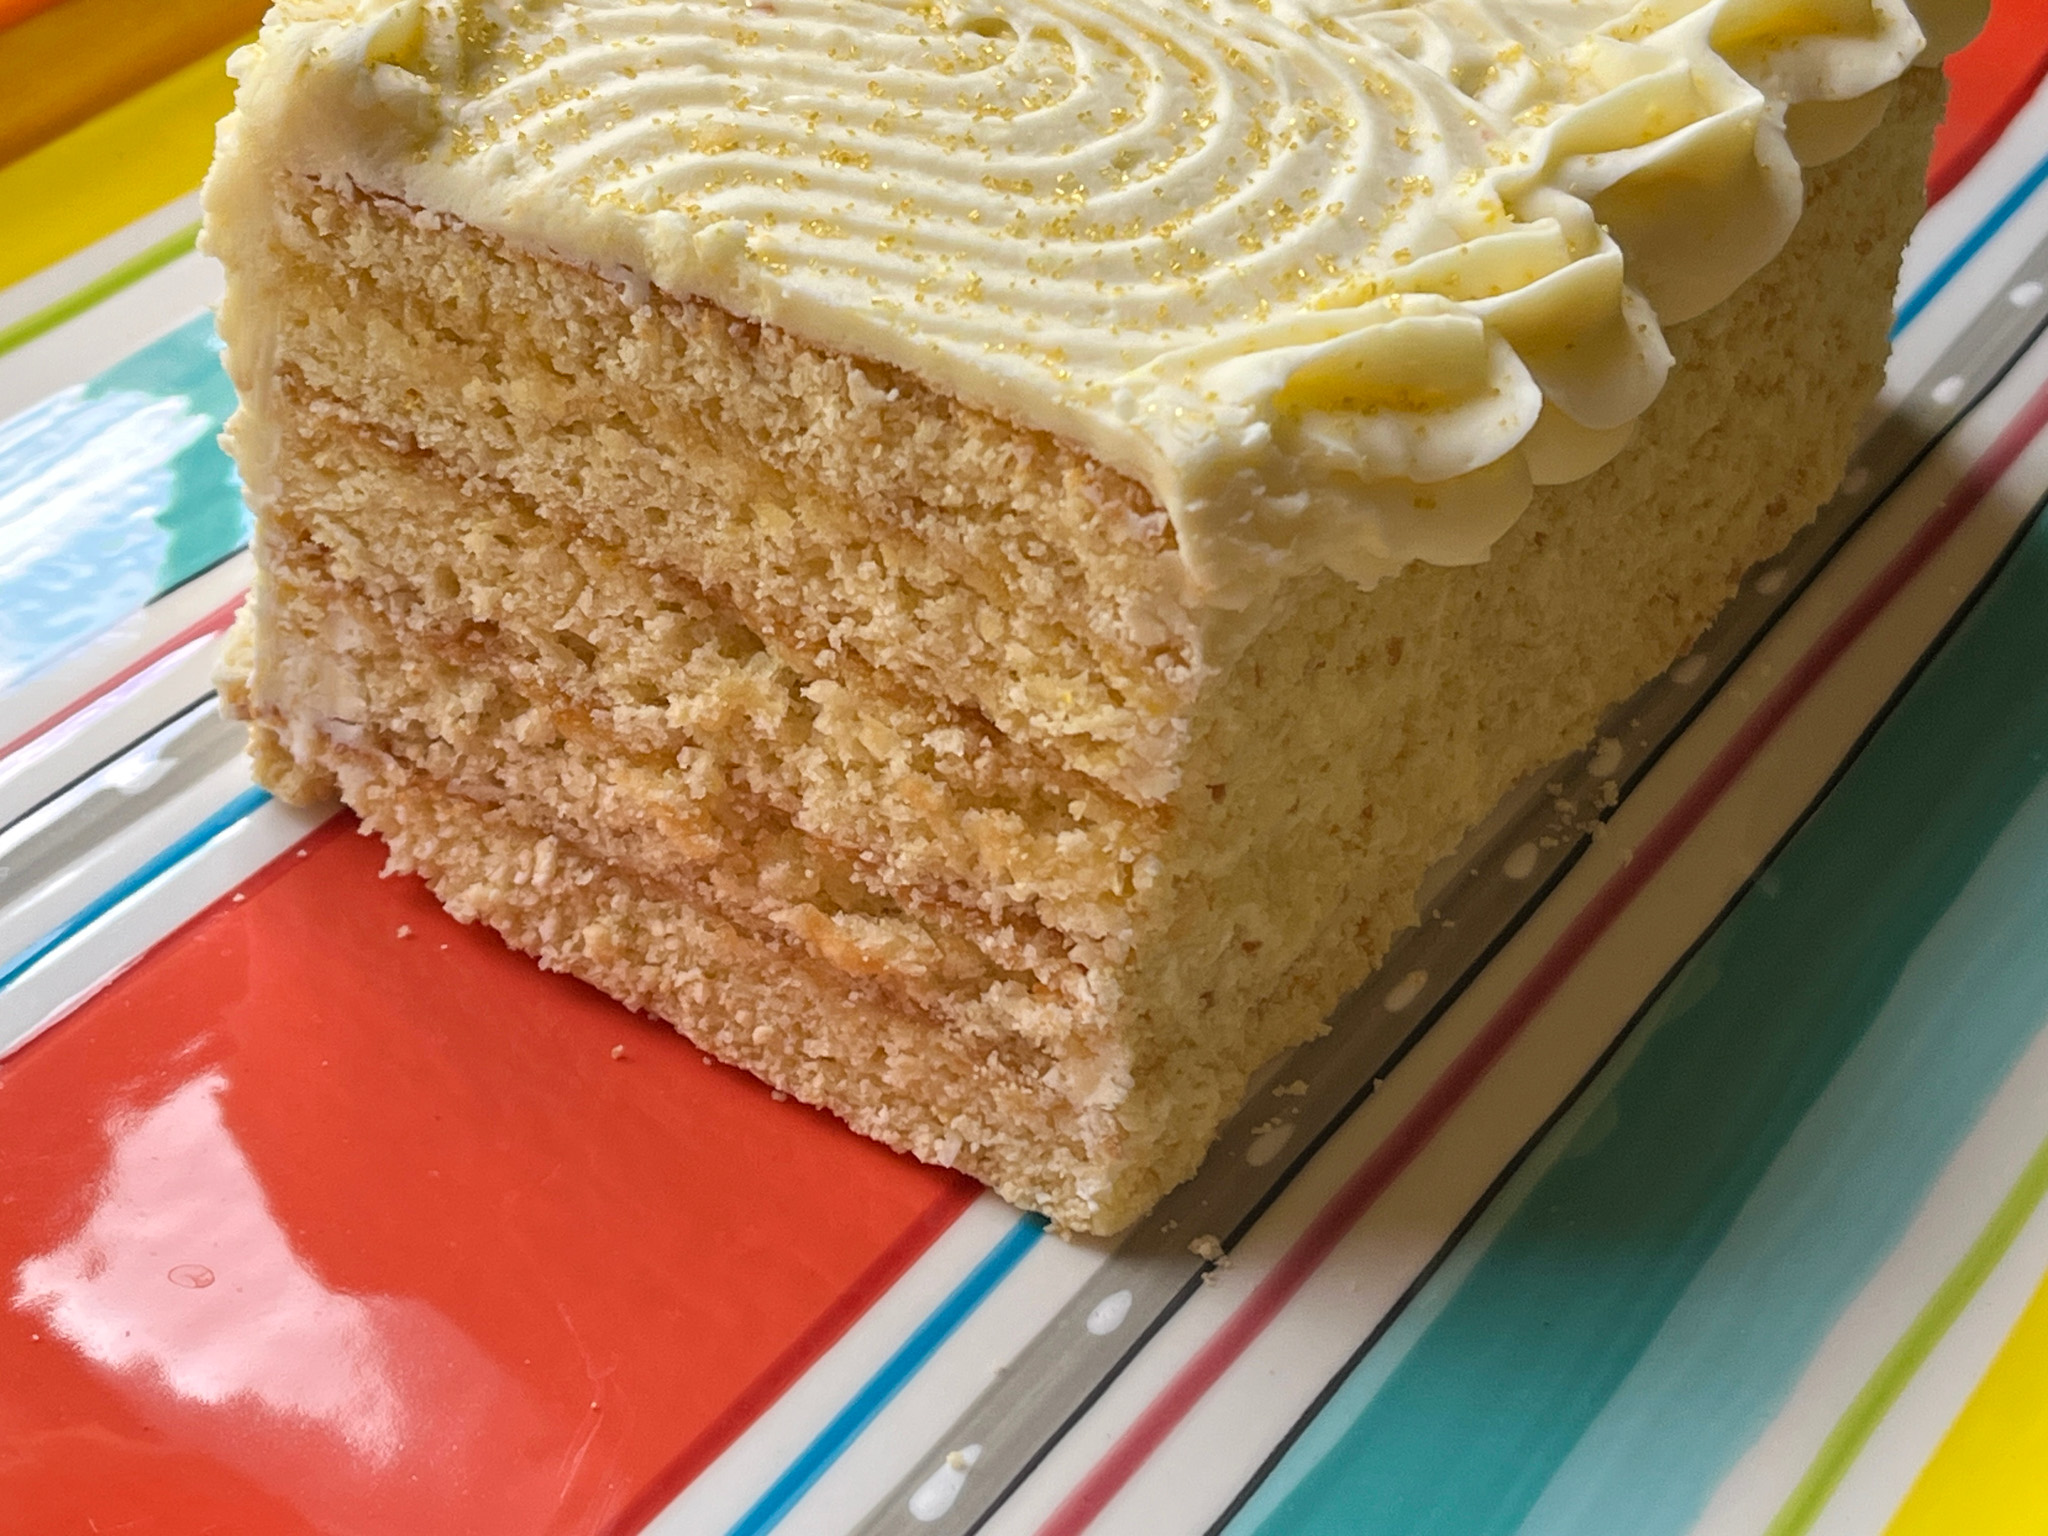
I cannot share the recipe, as it is copyrighted. Published as Sunny Sprinkle Layer Cake, it is in a great book by Molly Gilbert called Sheet Pan Sweets. I baked it in a half-sheet pan, then cut 4 squares to make the layers, used a simple American Buttercream to frost it. It was not easy to frost smoothly a square cake, but oh, well. What does not kill you, makes you stronger.

.

ONE YEAR AGO: Baking with the Heart

TWO YEARS AGO: Baking with the Heart

THREE YEARS AGO: Roasted Cauliflower with Chickpeas and Quinoa

FOUR YEARS AGO: A Savory Phyllo Pie

FIVE YEARS AGO: Nut-Free Lady Grey Macarons

SIX YEARS AGO: Mini-Heart Cakes for your Valentine

SEVEN YEARS AGO: Blue Moon Milk

EIGHT YEARS AGO: Slow-Cooked Chicken Meatballs

NINE YEARS AGO: Zesty Flourless Chocolate Cake

TEN YEARS AGO: Maple Pumpkin Pecan Snacking Cake

ELEVEN YEARS AGOSilky Gingered Zucchini Soup

TWELVE YEARS AGO: Sweet Fifteen!

THIRTEEN YEARS AGO: Sesame and Flaxseed Sourdough

FOURTEEN YEARS AGO: Green Beans with Miso and Almonds

FIFTEEN YEARS AGO: Saturday Morning Scones

SIXTEEN YEARS AGO: White Bread

MINI-MACARON CAKE, A LITTLE SHOWSTOPPER

New Year’s Eve, we cooked our meal together, and decided not to have dessert, since a mighty Mont Blanc had been at our table just a few days earlier (read about it here). But I developed this intense desire to surprise my beloved husband, so one day in which he had to work in a very long experiment I went to work and made all I needed to assemble a mini-cake. Small in size, great in impact. Coffee and chocolate. And a ton of love.

COFEE AND CHOCOLATE MINI-MACARON CAKE
(slightly modified from Pies and Tacos website)

for the shells:
100 grams egg whites
100 grams granulated sugar
4 grams egg white powder
105 grams almond flour
105 grams powdered sugar
1 teaspoon espresso powder

for the espresso and mocha filling:
1/4 cup cream cheese, softened (56 grams)
2 tbsp butter, softened (28 grams)
1 + 1/2 cup powdered sugar (187 grams)
1/2 tsp vanilla extract
1/2 tsp espresso powder
2 tbsp cocoa powder
1 tsp milk to adjust consistency (if needed)


Prepare a large piping bag, fitted with a large round tip, I use a 1/2” diameter tip. Set aside. Line two baking sheets with parchment paper or silicone mat. Place a template with large circles – 4 inches in diameter – underneath it. You will need 4 circles.

Process the powdered sugar and almond flour for 20 seconds, pass through a sieve. Set it aside. Whisk the sugar and the egg white powder (if using) in a bowl, and place it over a pan with barely simmering water. Add the egg whites to the sugar and whisk the mixture until frothy and the sugar is completely melted. Transfer the syrup to the bowl of a stand mixer.

With the whisk attachment, start whisking mixture on low for about 30 seconds, then gradually start increasing speed to medium. Whisk on medium for one to two minutes, until the mixture is white and starting to become fluffy. Raise the speed to high, or medium-high and whisk for a few minutes until stiff peaks are formed. Pour the powdered sugar and almond flour into the stiff meringue. Perform the macaronage until it is glossy and has a thick flowing consistency. Add the espresso powder when the batter is almost ready to pipe.

Transfer the batter to the prepared piping bag. Place the piping bag directly 90 degrees over the center of a circle template. Apply gentle pressure and carefully pipe while keeping the bag in that vertical position. I piped each macaron about 3.5”, because they spread out considerably after piping, and then they reached a 4.” diameter after I banged the tray against the counter.
Once you’ve piped the circles, bang the tray against the counter a few times. This will release air bubbles that are in the batter and prevent your macaron shells from cracking.

Let the trays sit for a while so the shells will dry out. Bake at 315F for about 20 minutes, until they don’t move around as you try to rotate the shells.

Make the filling:
Cream the softened cream cheese and butter together in the bowl of an electric mixer, for about 2 minutes, until light and fluffy. With the mixer off, add the powdered sugar to the bowl. Turn mixer on low to incorporate the powdered sugar with the cream cheese and butter. Cream the mixture on medium high for one minute. Add vanilla extract and the espresso powder and mix to combine.

If the frosting is too runny, add more powdered sugar. And if the frosting is too stiff, add a teaspoon of water or milk to thin it out. Divide the frosting between two different bowls. Cover one bowl so that the frosting doesn’t dry out, that will be the Espresso Frosting.

To make the Mocha Frosting, add cocoa powder to the other half of the frosting you divided between the bowls. Cream until combined.

Lay out a piece of plastic wrap. Spread a stripe of the Mocha Frosting in the middle of the plastic wrap, across the narrow side. On top of the Mocha (brown) Frosting, spread some Espresso (white) Frosting. Roll the plastic wrap over itself to form a log. Line a piping bag with the piping tip of your preference. Insert the frosting log in the piping bag (watch the video on this page). Press evenly on all sides so both color frostings come out with the same intensity.

Place one macaron shell on top of a cake stand or plate. Pipe some frosting on top. Top with another shell. Pipe more frosting on top. Repeat until you reach the last shell. If desired, pipe some frosting on top of the macaron cake, and then decorate with chocolate covered espresso beans.


Let the macarons mature for 24 hour in the fridge before serving.

ENJOY!

to print the recipe, click here

Comments: Did you know that Camila, the baker behind Pies and Tacos is originally from Brazil? She is an expert macaron baker, I’ve been following her site for years, and also have her cookbooks. I normally use the French meringue method, but this was my first time piping large shells and I decided to follow her exact method. Worked like a dream!

This was so incredibly delicious, but the best part was Phil’s face when I brought the dessert from the basement (we have a fridge in the basement which is perfect for hiding sweet surprises).

If you have a special celebration coming up, consider making a mini-macaron cake, you will thank me later. It is messy to eat, but totally worth it. Very important to let that rest for one or two days in the fridge, the layers meld together nicely. A dreamy dessert, no doubt!

ONE YEAR AGO: Chocolate Cupcakes with Peanut Butter Frosting

TWO YEARS AGO: Incredibly Simple, Times Four

THREE YEARS AGO: Zucchini-Prosciuto Parcels

FOUR YEARS AGO: Double Peanut Sourdough Loaf

FIVE YEARS AGO: Fennel-Rubbed Shrimp in Light Coconut Sauce

SIX YEARS AGO: Puff Bread Balls, Two Salads and a Cookbook Review

SEVEN YEARS AGO: Pistachio-Caramel and Apple Mousse Cakes

EIGHT YEARS AGO: La Couronne Bordelaise

NINE YEARS AGO: A Special Birthday Dinner

TEN YEARS AGO: Duck Confit for a Special Occasion

ELEVEN YEARS AGO: Tuscan Grilled Chicken and Sausage Skewers

TWELVE YEARS AGO: Celebrate Wednesday with Pork Tenderloin & Apples

THIRTEEN YEARS AGO: Salmon Wellington

FOURTEEN YEARS AGO: The Green Chip Alternative

FIFTEEN YEARS AGO: Weekend Pita Project

SIXTEEN YEARS AGO: Let it snow, let it snow, eggs in snow