LEMON DOT CAKES

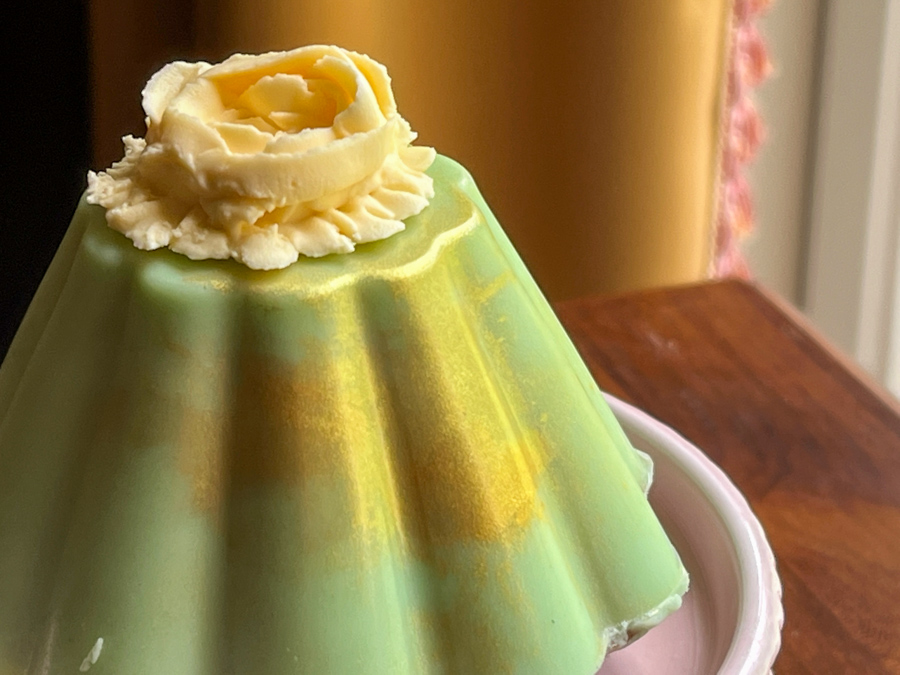
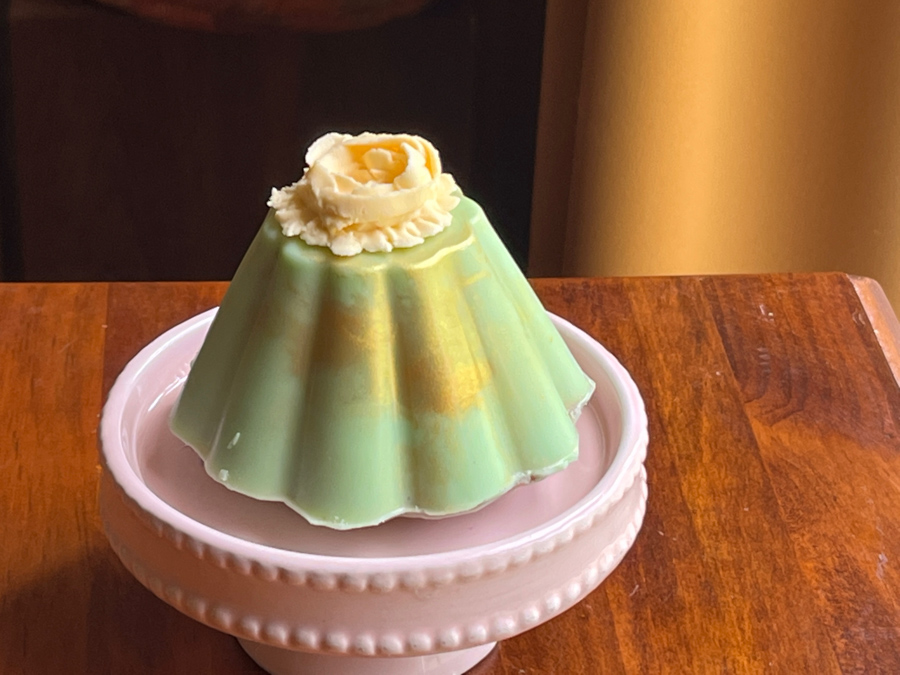
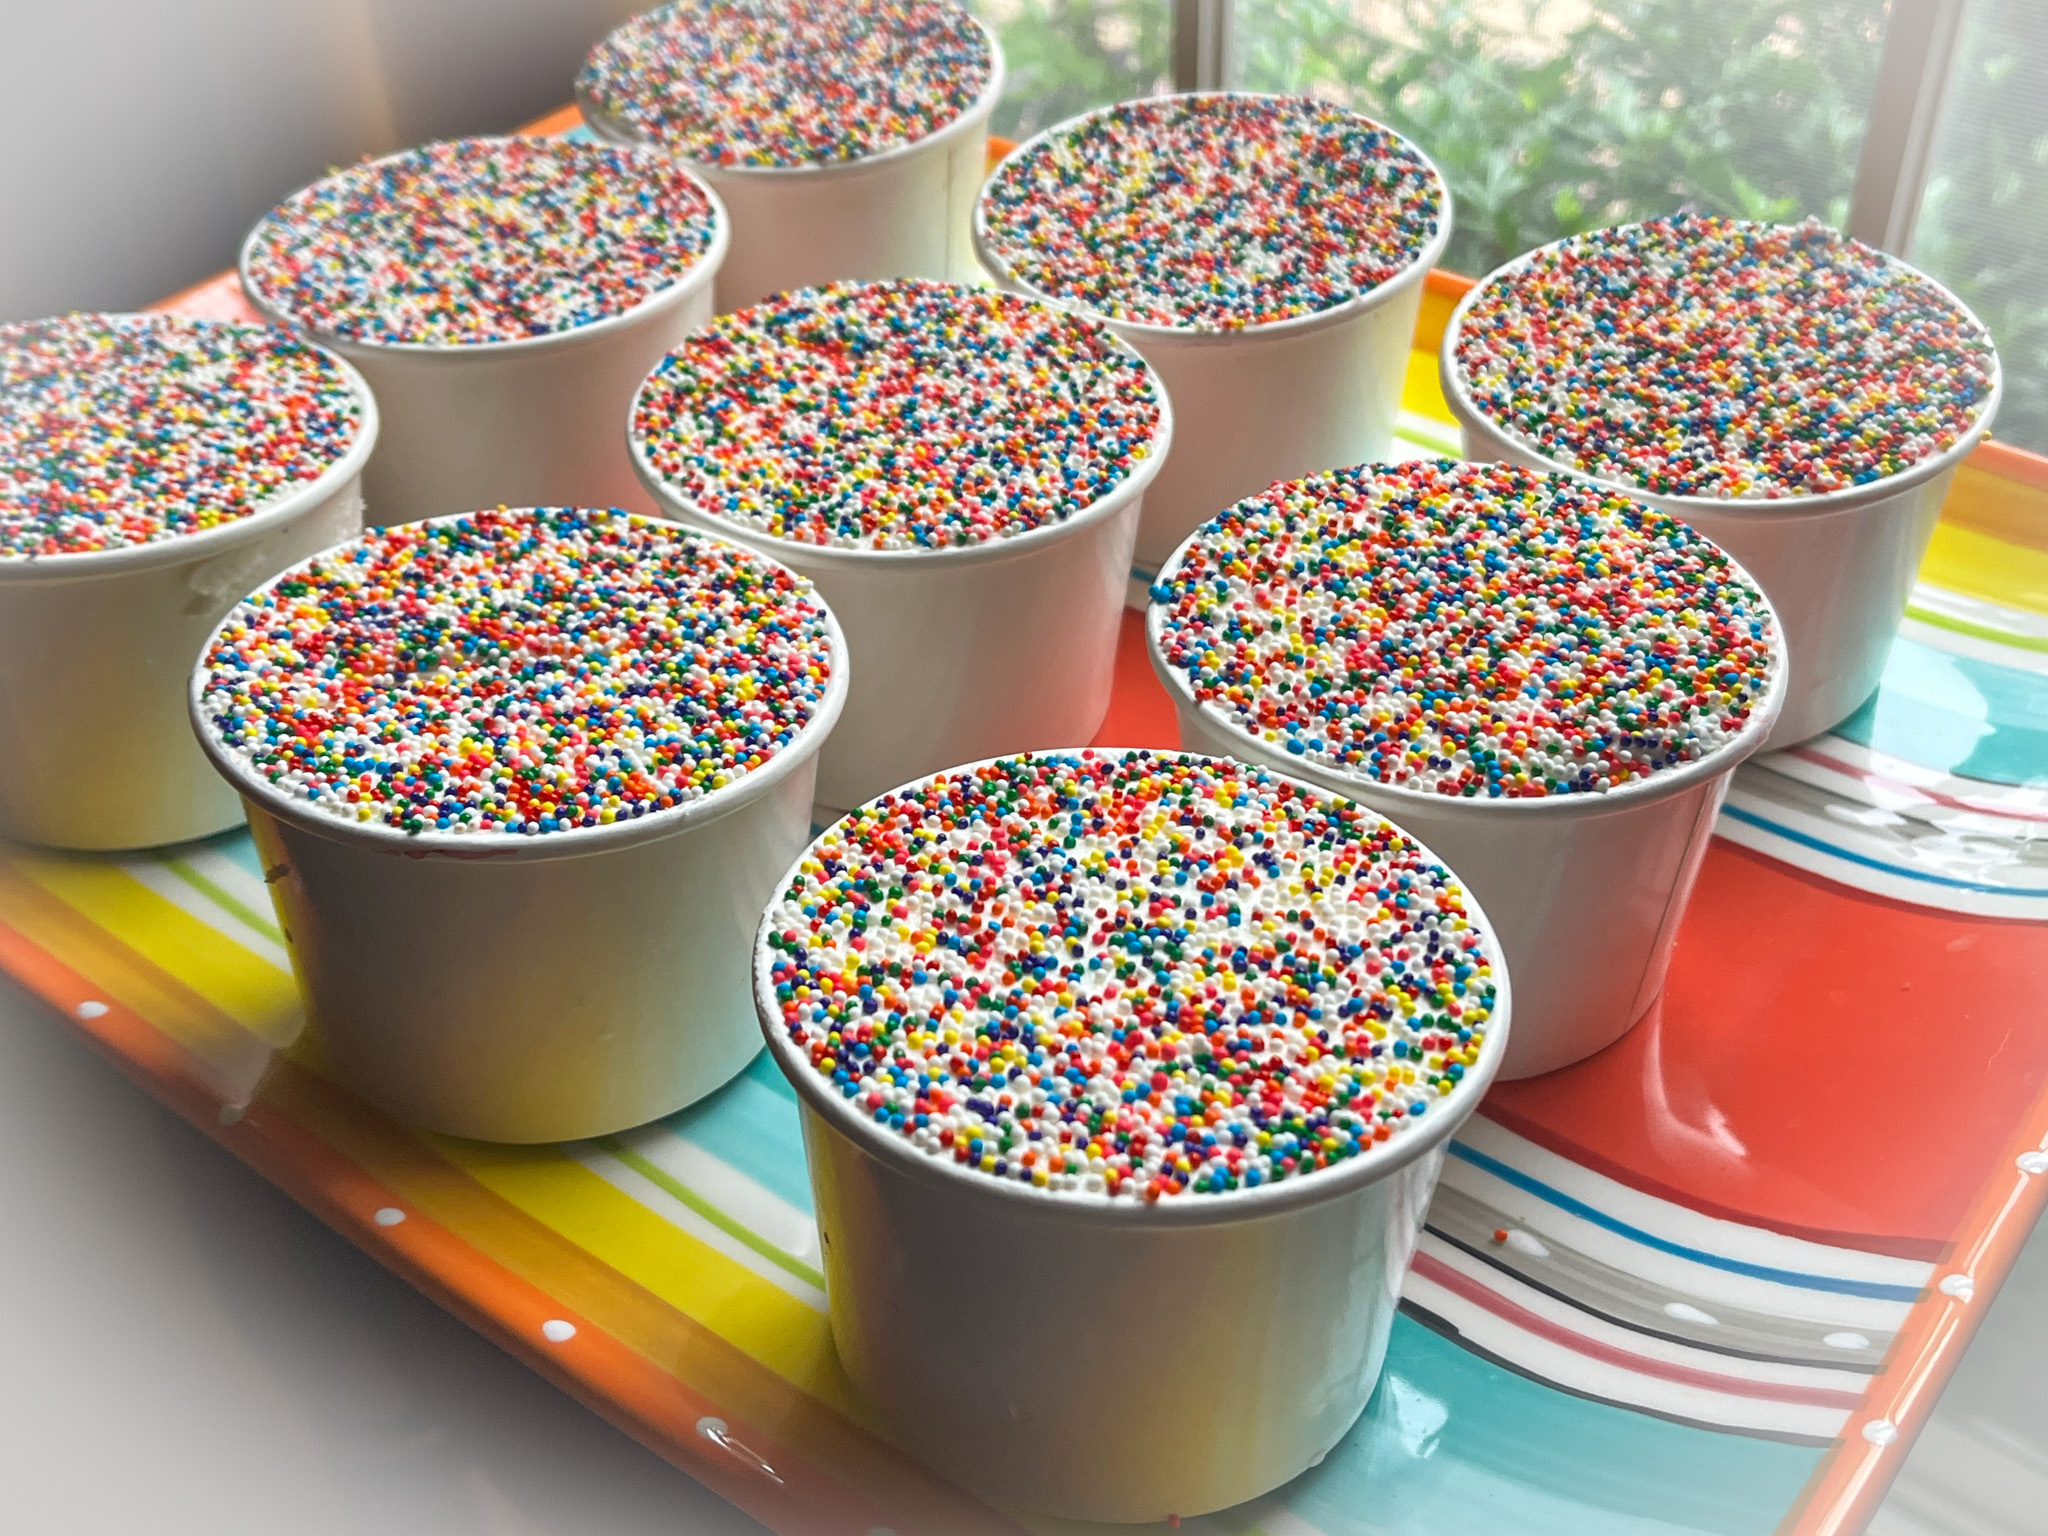
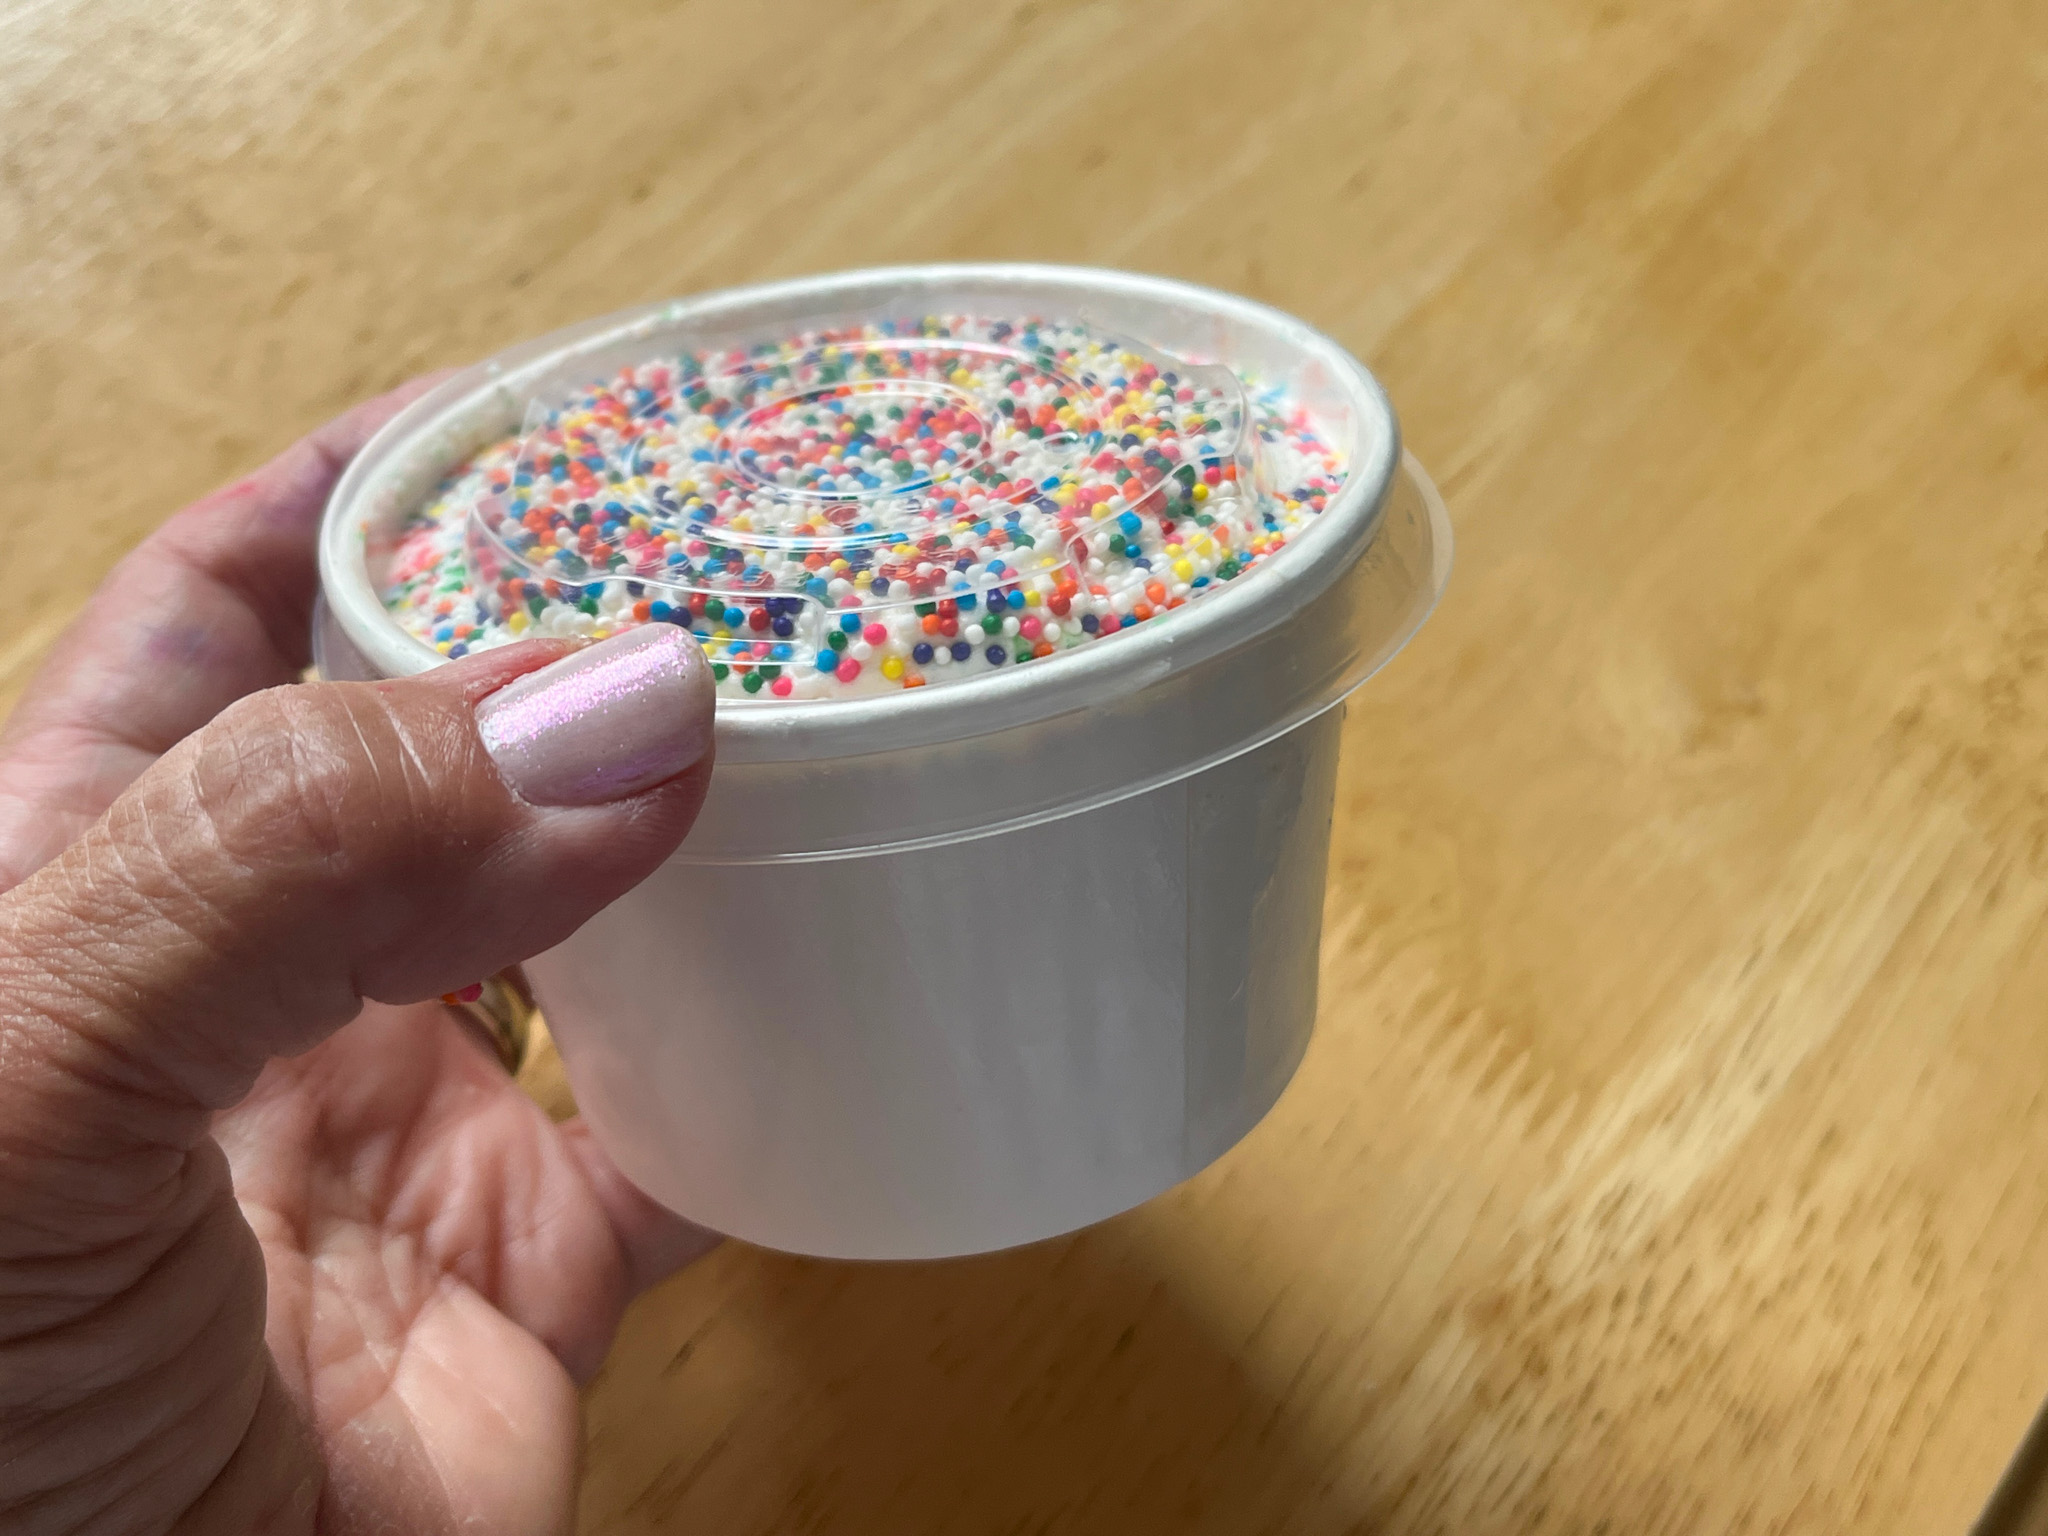
Have you heard of these? It all started at a bakery in Roslyn, New York, called -quite appropriately – The Dotcakes. They sell them in many different formats, including the popular cupcake, The whole idea behind them is a soft cake inserted in a paper or glass cup, filled to the brim with buttercream, and topped with nonpareils. Simple and effective. Apparently dot cakes are going viral on TikTok, I would not know because I never had the patience for the platform. But Susan, from The View from Great Island, recently made those and I jumped on that project shortly after reading her post. Well, first I had to visit The Super Evil Empire to get me some paper cups. THEN I jumped on it.


LEMON DOT CAKES
(from The View from Great Island)

15 ounce lemon cake mix, prepared according to box directions.
1 cup salted butter, at room temperature
6 cups powdered sugar
8 Tbsp lemon juice
1/2 tsp vanilla extract
nonpareil sprinkles

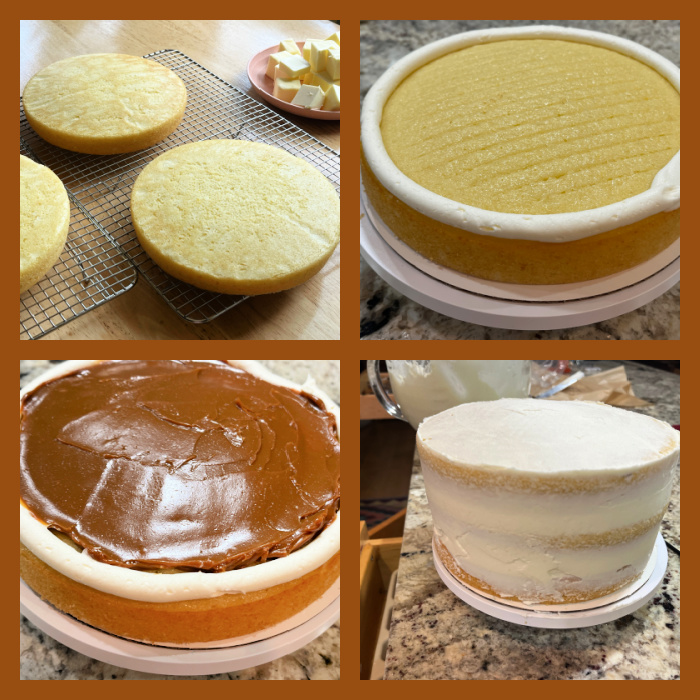
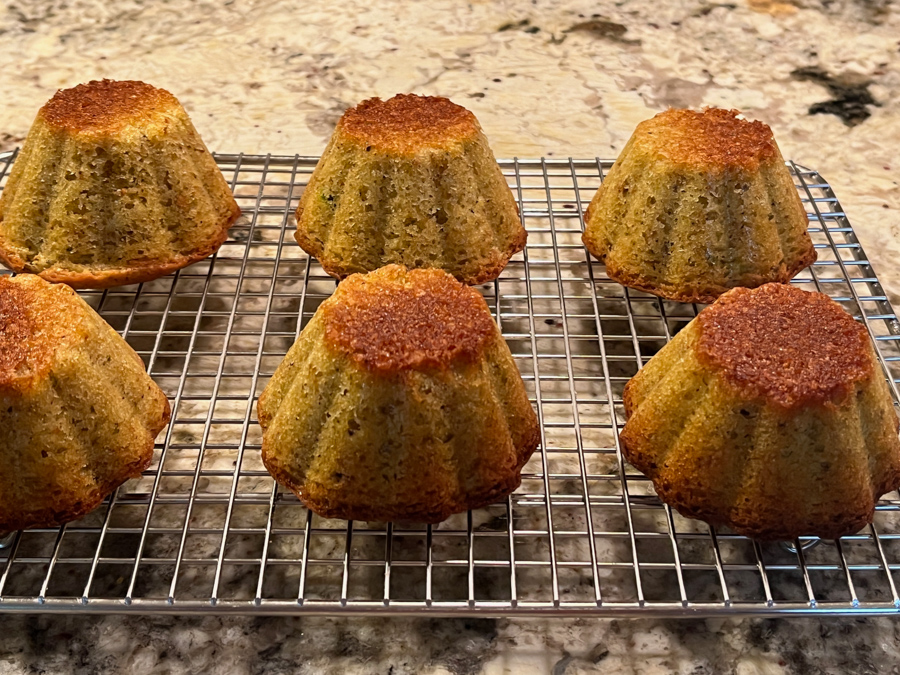
Preheat the oven to 350F and grease a 10×15 jelly roll pan.

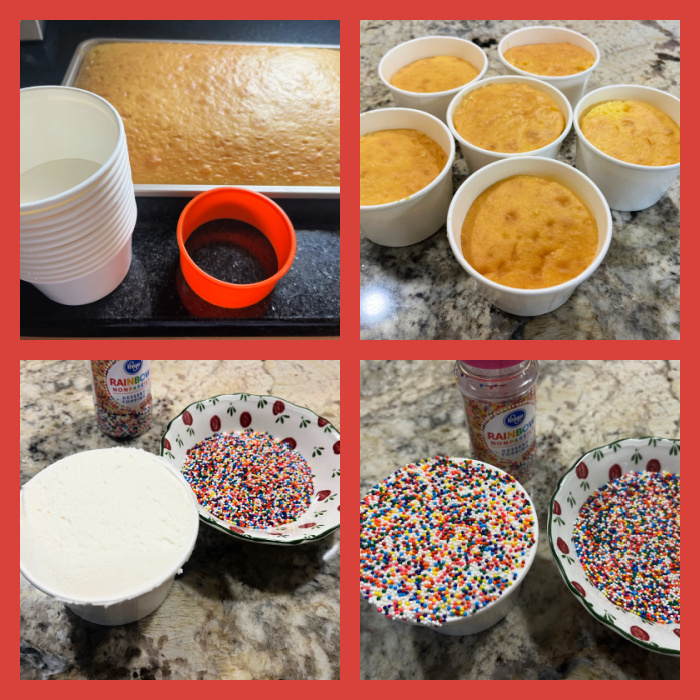
Prepare the cake mix according to its directions and spread into your prepared pan. Bake for about 18 minutes, or until it springs back when lightly touched in the center. A toothpick will come out without wet batter on it. Set aside to cool.

To make the frosting beat the softened butter until fluffy in a large bowl. Slowly add the sugar, a cup at a time, along with the lemon juice and vanilla. Beat until smooth and silky.

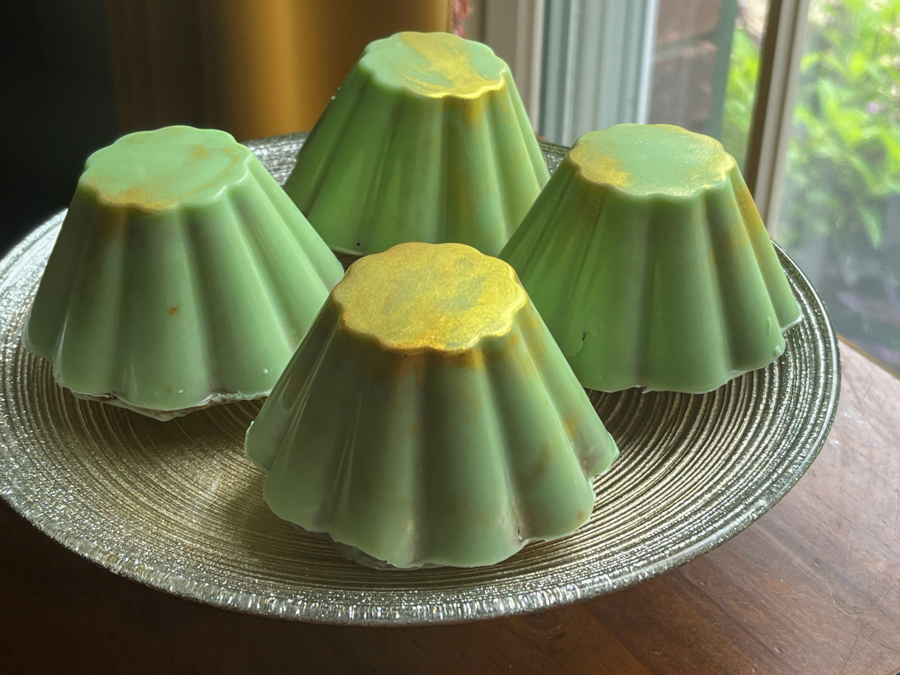
When the cake has cooled use your cookie cutter (in the same size as your cake cups) to cut out rounds of cake. Place a round of cake into each cup. Top with the frosting, and bring it right to the top. Smooth it out so that it is completely flat.

Place your sprinkles in a bowl and dip each cup headfirst down into the sprinkles so that they cover the whole surface.

ENJOY!

to print the recipe, click here

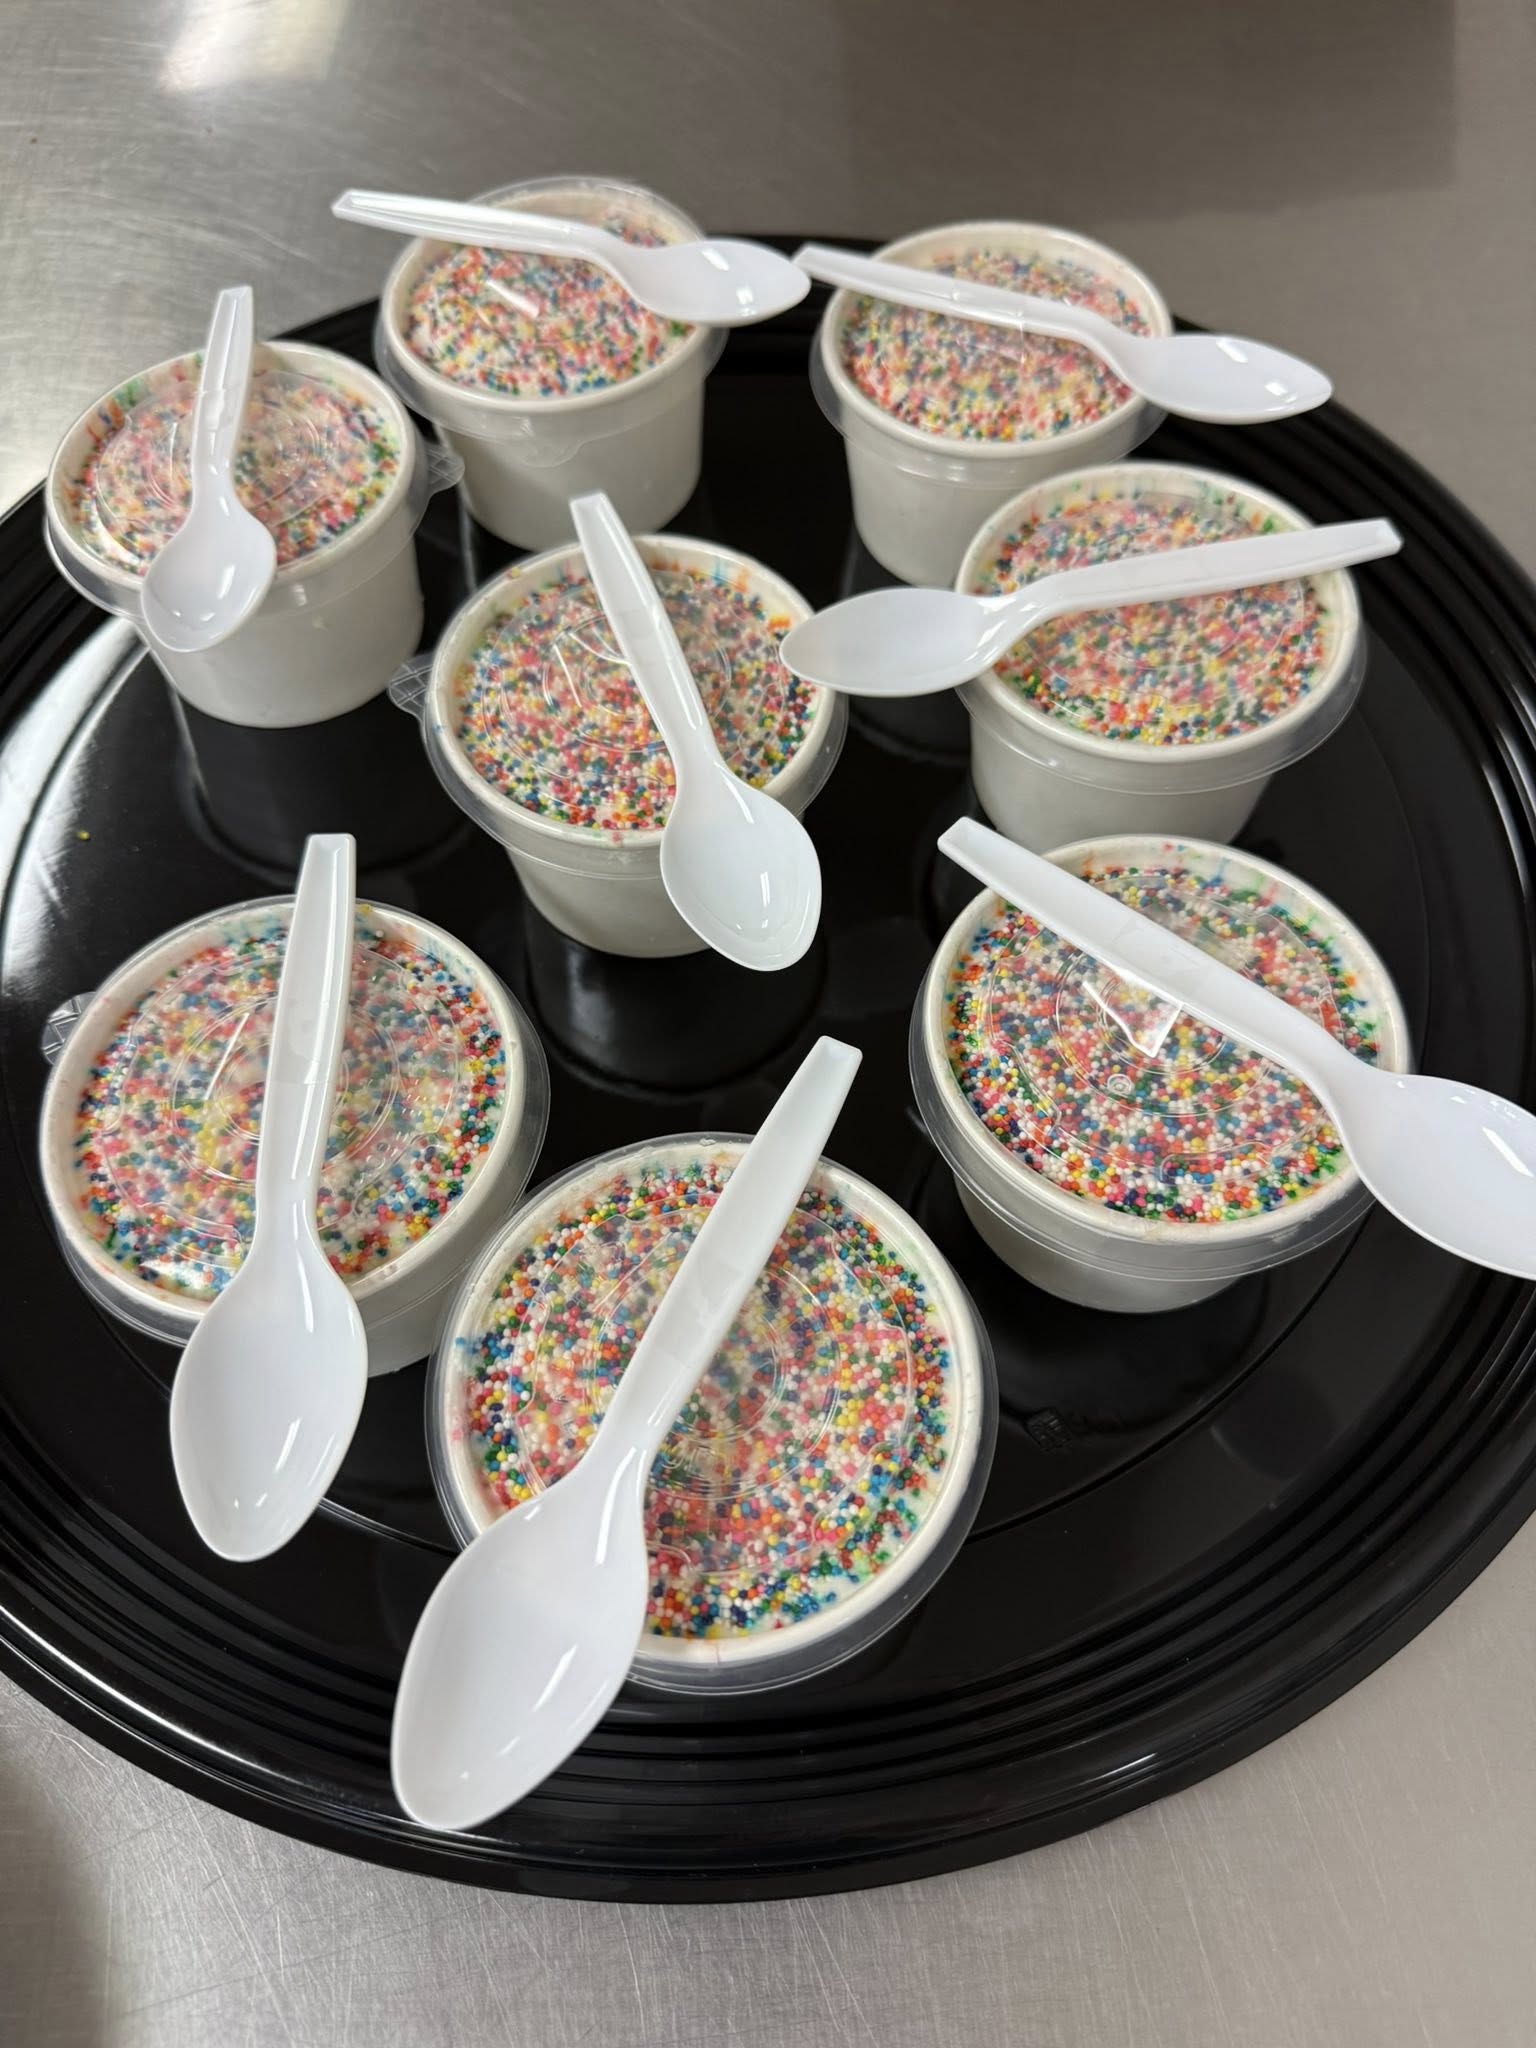
Comments: Please do not be upset about the use of a box cake. This is a simple, humble cake that just needs to be moist and flavorful. A box cake delivers that without issues. You can of course make the cake component from scratch. But sometimes simplicity wins in my kitchen. The little cups come with a lid that is perfect to donate these babies, otherwise the nonpareils could make it a bit messy, some always seem to fall off.

I donated the whole batch but I heard they turned out delicious. Each one was donated with a little spoon attached to the lid, to make it easier for the volunteers working that meal.
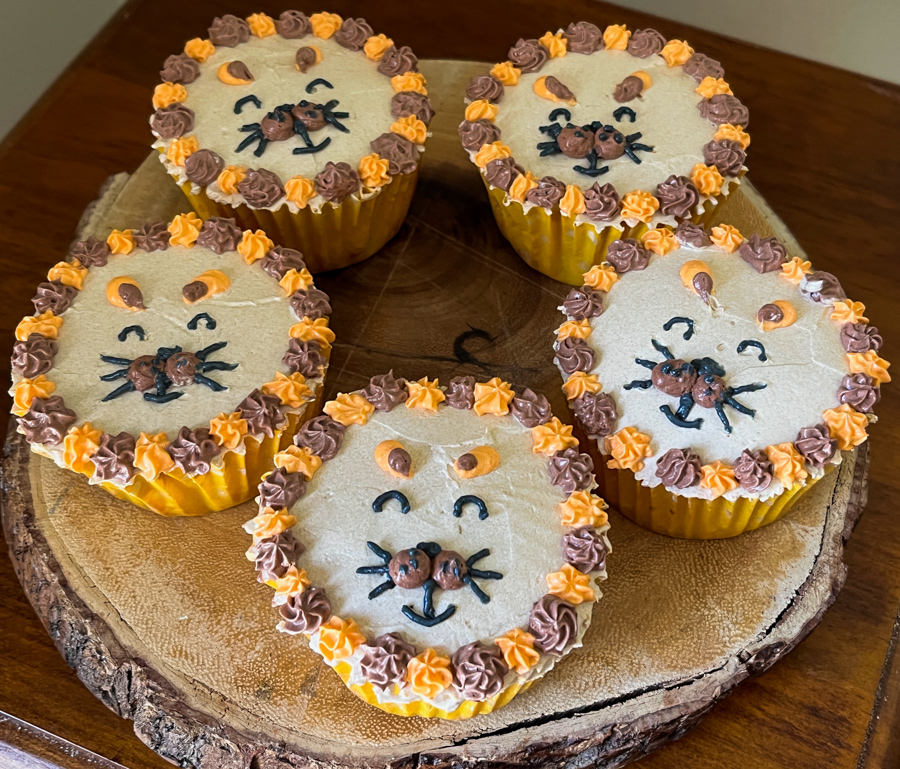
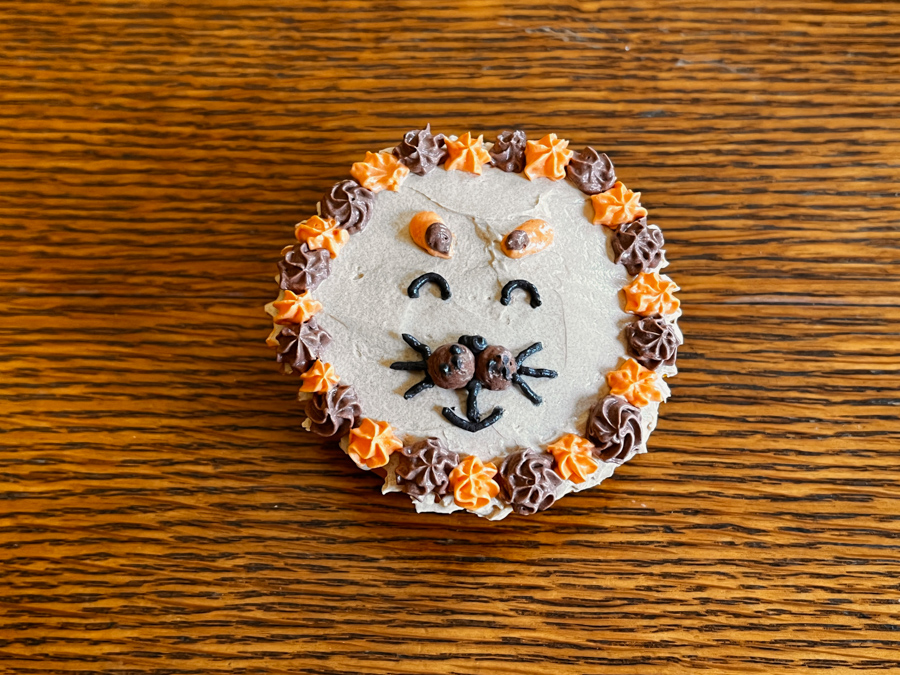
1 YEAR AGO: Cornbread Aebleskiver

2 YEARS AGO: Lemon Ganache Macarons 

3 YEARS AGO: Fresh Dill and Feta Sourdough

4 YEARS AGO: Marinated Chickpeas with Slow-Roasted Red Peppers

5 YEARS AGO: Passionfruit Millionaire’s Shortbread

6 YEARS AGO: Chai-Mango Rosette Macarons

7 YEARS AGO: Common Table, Something New in My Life

8 YEARS AGO: The Daisy, a Bread with Brioche Alter-Ego

9 YEARS AGO: Pork Tenderloin, Braciole Style

10 YEARS AGO: Raspberry Buckle

11 YEARS AGO: Seafood Gratin for a Special Dinner

12 YEARS AGO: Cooking Sous-Vide: Sweet and Spicy Asian Pork Loin

13 YEARS AGO:  Farewell to a Bewitching Kitchen

14 YEARS AGO: In My Kitchen. June 2012

15 YEARS AGO: Goodbye L.A.

16 YEARS AGO: 7-6-5 Pork Tenderloin

THE BEWITCHING KITCHEN TURNS 16!


Cake is pretty much mandatory, right? This blog anniversary caught me by surprise, as we are currently away. I got a bit confused and thought that the big day was later in the month. My plan was to bake for the occasion once we arrived back home. Good thing I double-checked… Full disclosure: this cake was produced in a bit of a hurry as we prepared to leave for a 2-week trip to the East Coast. Without further ado, I share with you today a lemon cake with raspberry filling and Swiss meringue buttercream. Maybe made in a hurry, but with a huge amount of love!


LEMON LAYER CAKE WITH RASPBERRY FILLING
(adapted from The New York Times)

¾ cup/170 grams unsalted butter, softened
3 cups/385 grams all-purpose flour 
2 cups/400 grams granulated sugar, divided
3 medium lemons
1½ cups/360 milliliters whole milk
2 teaspoons baking powder
½ teaspoon baking soda
1½ teaspoons kosher salt 
¼ cup/60 milliliters neutral oil (I used grapeseed)
4 large eggs, at room temperature

1 cup raspberry jam (store-bought or home-made)

1 recipe for Swiss meringue buttercream, starting with 400g butter (details here)

Heat oven to 325 degrees. Spray three (8-inch) cake pans with baking spray and line each with parchment paper. 

Make the cake: Add 350 grams of the granulated sugar to the bowl of a stand mixer fitted with the paddle, then zest the lemons directly into the sugar. Use your fingers to rub the zest into the sugar until it looks moist and sandy.

Juice the zested lemons into a small bowl. Transfer ¼ cup of juice to a large measuring cup and stir in the milk. Let it sit while you prepare the rest of the cake, reserving the remaining juice for the lemon syrup. 

To the bowl with the lemon sugar, add the flour, baking powder, baking soda and salt, and mix on low to combine. Add the softened butter to the bowl all at once. Mix on low until the butter is evenly distributed and the mixture looks sandy. Add the oil and eggs to the measuring cup with the milk mixture and mix with a fork to combine. With the mixer on low, slowly stream in the milk mixture. When the batter is moistened, stop the mixer and scrape the bottom and sides of the bowl to ensure there aren’t any dry pockets. Adjust mixer speed to medium and mix for 1 minute more. Divide the batter among the prepared pans, spread evenly and tap the pans on a countertop to release any large air bubbles.


Bake the cakes until slightly risen and a toothpick inserted in the center comes out clean, 20 to 25 minutes. Set the pans on a wire rack and let the cakes cool for about 15 minutes. Then, run a thin knife along the edges of the pan and carefully turn the cakes out onto the rack to cool completely. 

While the cakes cool, make the syrup: Measure ¼ cup lemon juice from the remaining reserved juice. Combine the juice and the remaining 50 grams sugar in a small saucepan and bring to a boil over medium-high, stirring occasionally. Cook until the sugar has dissolved, then pour into a heat-safe container to cool.

Make the Swiss meringue buttercream. Reserve 1/3 of the amount and dye red (I used Tulip Red). Dye a very small amount with green for the stems. I used Laurel color. Dye the rest of the buttercream with Fuchsia or any other color you like.

Assemble the cake: Place one layer of cake onto a serving plate, top side up. Brush the cake with lemon syrup. Spread raspberry jam over the top of the cake. Repeat with the second layer on top of the filling, top side down, and press gently. Add the final layer. Brush the cake with syrup, then cover the top and sides of the cake with a thin layer of fuchsia frosting. Refrigerate until firm, about 30 minutes. Frost the cake with fuchsia, smoothing the surface. Let that set for 30 minutes, then pipe stems with green buttercream and a tip 3. Using the tulip red buttercream, pipe the flowers with a petal 101 tip, a border at the bottom with an open star tip (like #20) and a border on top with 1M tip.

ENJOY!

to print the recipe, click here

Comments: Hard to believe it’s been 16 years. Hard to find what to say about it without getting cheesy or highly predictable. So I won’t say much. I’m still having fun blogging, I’m still excited every time I hit “publish” on a new post. I am not stopping quite yet. Let’s step into the 17th year of my blogging journey, and if you’ve been following me for a while, THANK YOU! If you are new here, I hope you’ll find things that inspire you to cook, bake, and be passionate about. Life is too short not to enjoy what each day brings.

Apologies for not showing pictures of the cake cut to reveal the layers and filling. It was donated whole, so I also never got to see it. And that ends up as being part of its charm… Or so I hope…

.
ONE YEAR AGO: The Bewitching Kitchen turns 15 years old!

TWO YEARS AGO: The Bewitching Kitchen turns 14!

THREE YEARS AGO: The Bewitching Kitchen turns 13!

FOUR YEARS AGO: The Bewitching Kitchen Turns 12!

FIVE YEARS AGO: The Bewitching Kitchen turns 11!

SIX YEARS AGO: The Bewitching Kitchen Turns 10, and a Giveaway…

SEVEN YEARS AGO: The Bewitching Kitchen turns 9!

EIGHT YEAR AGO: The Bewitching Kitchen turns eight!

NINE YEARS AGO: The Bewitching Kitchen Turns Seven!

TEN YEARS AGO: Bewitching Kitchen Turns Six!

ELEVEN YEARS AGO: The Bewitching Kitchen turns Five!

TWELVE YEARS AGO: The Bewitching Kitchen turns Four!

THIRTEEN YEARS AGO: The Bewitching Kitchen Turns Three! 

FOURTEEN YEARS AGO:  The Bewitching Kitchen turns Two!

FIFTEEN YEARS AGO:  Bewitching Birthday!

SIXTEEN YEARS AGO: Welcome to my blog!

LEMON LAYER CAKE WITH DULCE DE LECHE FILLING

This post is dedicated to my friend Margie
(she will understand why).

I’ve been making layer cakes every other week to donate on Fridays. A couple of weeks ago I was trying to decide which cake flavor to make and my beloved husband told me “I’ve got one for you!” He then showed me a recipe published in the New York times. It sounded really good and I decided to go for it except that I changed the filling and the frosting. Layers had store-bought dulce de leche and I used Swiss meringue buttercream as the frosting because I’ve been having so much fun making it. The cake turned out with the springtime feel I was hoping for and I heard that everybody loved it. A win-win situation for sure!


LEMON LAYER CAKE WITH DULCE DE LECHE FILLING
(adapted from The New York Times)

¾ cup/170 grams unsalted butter, softened
3 cups/385 grams all-purpose flour
2 cups/400 grams granulated sugar, divided
3 medium lemons
1½ cups/360 milliliters whole milk
2 teaspoons baking powder
½ teaspoon baking soda
1½ teaspoons kosher salt
¼ cup/60 milliliters neutral oil (I used grapeseed)
4 large eggs, at room temperature

1 can of La Lechera dulce de leche (you won’t use the full amount)

1 recipe for Swiss meringue buttercream, starting with 400g butter (details here)

Heat oven to 325 degrees. Spray three (8-inch) cake pans with baking spray and line each with parchment paper.

Make the cake: Add 350 grams of the granulated sugar to the bowl of a stand mixer fitted with the paddle, then zest the lemons directly into the sugar. Use your fingers to rub the zest into the sugar until it looks moist and sandy.

Juice the zested lemons into a small bowl. Transfer ¼ cup of juice to a large measuring cup and stir in the milk. Let it sit while you prepare the rest of the cake, reserving the remaining juice for the lemon syrup.

To the bowl with the lemon sugar, add the flour, baking powder, baking soda and salt, and mix on low to combine. Add the softened butter to the bowl all at once. Mix on low until the butter is evenly distributed and the mixture looks sandy. Add the oil and eggs to the measuring cup with the milk mixture and mix with a fork to combine. With the mixer on low, slowly stream in the milk mixture. When the batter is moistened, stop the mixer and scrape the bottom and sides of the bowl to ensure there aren’t any dry pockets. Adjust mixer speed to medium and mix for 1 minute more. Divide the batter among the prepared pans, spread evenly and tap the pans on a countertop to release any large air bubbles.


Bake the cakes until slightly risen and a toothpick inserted in the center comes out clean, 20 to 25 minutes. Set the pans on a wire rack and let the cakes cool for about 15 minutes. Then, run a thin knife along the edges of the pan and carefully turn the cakes out onto the rack to cool completely.

While the cakes cool, make the syrup: Measure ¼ cup lemon juice from the remaining reserved juice. Combine the juice and the remaining 50 grams sugar in a small saucepan and bring to a boil over medium-high, stirring occasionally. Cook until the sugar has dissolved, then pour into a heat-safe container to cool.

Make the Swiss meringue buttercream. Reserve 1/3 of the amount without any dye. That will be used as a crumb layer and for the white flowers. Dye a small amount green for the leaves. Dye the rest of the batter yellow.

Assemble the cake: Place one layer of cake onto a serving plate, top side up. Brush the cake with lemon syrup. Spread dulce de leche over the top of the cake. Repeat with the second layer on top of the filling, top side down, and press gently. Add the final layer. Brush the cake with syrup, then cover the top and sides of the cake with a thin layer of frosting. Refrigerate until firm, about 30 minutes. Frost the cake with yellow buttercream, add details on the sides wiht a comb if so desired. Pipe roses and leaves. A little pumping of gold luster powder is optional but nice…

ENJOY!

to print the recipe, click here

Comments: The layers baked like a dream, flat and beautiful. Cake smelled amazing, I really wish we could have sampled a small slice. Oh, well… I used my little electric turntable to frost it and again loved the process. Makes life very easy. Thank you, Phil! Your gifts are always perfect! The only thing I would change if I was to make this cake again, is use a lighter green for the leaves. Well, there is one more thing I would change. I would actually brush the layers with the lemon syrup instead of forgetting all about it and staring at the syrup sitting at the countertop next to the fully frosted cake.

.

If you have a special occasion to celebrate now that Spring is in full swing, think about this cake…

ONE YEAR AGO: A Duet of Springtime Macarons

TWO YEARS AGO: Fiesta Bakes for Cinco de Mayo

THREE YEARS AGO: Thai-Meatballs Over Wilted Bok-Choy

FOUR YEARS AGO: Asparagus with Gunpowder Masala

FIVE YEARS AGO: The Home Bakers Collective, April Project

SIX YEARS AGO: Asian-Style Eggplant Meatballs

SEVEN YEAR AGO: Uzbek Flatbread

EIGHT YEARS AGO: First Monday Favorite – Black Sesame FOUR

NINE YEARS AGO: Chocolate Orange Mini-Cakes

TEN YEARS AGO: In My Kitchen, May 2015

ELEVEN YEARS AGO: P90X3, a Review of Tony Horton’s Latest Fitness Program 

TWELVE YEARS AGO: Pasta and Mussels in Saffron Broth

THIRTEEN YEARS AGO: Triple Chocolate Brownies

FOURTEEN YEARS AGO: Shanghai Soup Dumplings

FIFTEEN YEARS AGO: Bite-sized Chocolate Pleasure

LEMON BUNDT CAKE, A REAL WINNER

Lemon Cakes can be a bit tricky as far as flavor goes. I have made a cake from a super reputable source that promised to deliver the most intense, most lemony flavor coupled with a moist and tender cake. It was tremendously convoluted, a ton of work and to be absolutely honest with you, the America’s Test Kitchen version delivered it all for 1/10 of the trouble. Which is saying a lot, as they are known for never cutting corners.


They are super strict about copyright issues, and rarely reply to requests asking permission to publish their recipes, however I was able to find this one online. If you’d like to make this deliciously lemony cake, pay a visit to this site. No difference from the recipe found in The Perfect Cake (2018), a cookbook I highly recommend. To bake this particular version, I used the Bavaria Bundt pan from Nordicware, but any pan with 10 to 12-cup capacity will do the job. I just love the way they un-mold like a dream!

When I make a Bundt cake, I donate it whole, so I cannot share a picture of the crumb, but I’ve had excellent feedback about this baby. In fact, I’ve made it three times already, using different Bundt pan shapes. Always a winner!

ONE YEAR AGO: Aji-Amarillo Roasted Chicken Thighs

TWO YEARS AGO: Karen’s Quick Shrimp Fried Rice

THREE YEARS AGO: OMG Peanut Butter Bars

FOUR YEARS AGO: Kansas Sunflower Seed and Black Walnut Macarons

FIVE YEARS AGO: Curry Turmeric Sourdough

SIX YEARS AGO: Black Olive Tapenade and Deviled Eggs

SEVEN YEARS AGO: Blueberry Crumble Coffee Cake

EIGHT YEARS AGO: Fresh Strawberry Yogurt Bundt Cake

NINE YEAR AGO: Quinoa Salad with Red Grapes and Avocado

TEN YEARS AGO: Strawberry Coffee Cake

ELEVEN YEARS AGO: Lemon-Poppy Seed Muffins

TWELVE YEARS AGO: Mascarpone Brownies

THIRTEEN YEARS AGO: Salmon Tacos

FOURTEEN YEARS AGOCinnamon Turban Bread

FIFTEEN YEARS AGO: Summertime Gratin

A TRIO OF LITTLE CAKES

Mini-cakes are cute from the get-go, in fact most desserts made in single serving are pretty adorable by default. But some details can raise their level of cuteness even higher. Today I share three ideas to make mini-cakes a little more special.

The first method to make cute cupcakes is using a different shape of pan. Like this pan from Nordic Ware. I think the quality of their pans is hard to beat, and totally worth the price tag. They are heavy, well-made and bake like a dream. I usually still spray the inside with PAM baking spray, a light coating ensures nothing will stick in the little crevices.

LEMON MINI-BUNDT CAKES

LEMON MINI-BUNDT CAKES
(adapted from several sources)

125g butter (I used Kerrygold)
150g sugar
zest of 1 lemon
2 large eggs (100g)
180 g all-purpose flour
1 + 1/4 teaspoon baking powder
Pinch of salt
½ cup milk
1 tablespoon freshly squeezed lemon juice
1 tsp lemon extract
for the glaze:
200g powdered sugar (1 cup)
Juice of 1 fresh lemon (amount adjusted for consistency)
sprinkles to decorate (optional)

Heat oven to 350 F. Rub the sugar with the lemon zest for a couple a minutes until very fragrant. Cream butter and lemon-infused sugar together. Add eggs one at a time, beating in slow speed until incorporated. Add the dry ingredients and milk. Mix well to combine, then add the lemon juice and extract, whisking gently.

Pour batter into the pan a little over 1/2 full in each cavity, but not quite reaching 3/4 of the capacity. Bake until a toothpick inserted in the cake comes out clean, about 22 minutes. Leave the cakes in the pan for 5 minutes than invert and cool them completely over a rack.

Make the glaze by mixing the ingredients. You want a pourable consistency, but not too thick so that the ridges of the cake still show. Pour over the cooled cakes. Decorate with sprinkles.

ENJOY!

to print the recipe, click here

These lemon cakes are very moist, with intense citric flavor. I used a very thin glaze because I wanted the ridges to be evident. If making a regular cupcake, consider a much thicker icing that will stay on the surface a little better.

PISTACHIO-ROSE MINI-CAKES

In this method, used by Sonali from sugaretal, you will need a silicone mold to bake the cakes. Then, after washing it well, the pan is used to apply the compound chocolate coating. The result is quite stunning, but the process pretty simple. I used this pan.

PISTACHIO ROSE MINI-CAKES
(recipe from Sonali)

To get the recipe, follow the link to her Instagram page.

After baking the cakes….

The silicone pan is washed and dried very well. I used a little gold luster powder to brush the bottom of the pan, then poured Candy melts dyed light green. Carefully brushed that all the way to the sides of each cavity and placed the cake back, snuggly, so that it would get a smooth coating on the surface. Make sure to do one little cake at a time, so that the melted compound chocolate does not harden.

The pan is placed in the freezer for about 30 minutes, so that the shell is properly formed and the cakes will release fully coated.

I am totally in love with this combination of pistachio and rose. In fact, I urge you to visit Sonali’s blog, full of elegant ideas for all sorts of desserts.

Finaly, the third way to dress up a cupcake, is making a few colors of Swiss meringue buttercream and creating a cute pattern on the surface. I followed the design of Liz Shim, available at Domestika.com

CUPCAKES DECORATED WITH SWISS MERINGUE BUTTERCREAM

LION HEAD CUPCAKES
(design from Liz Shim)

I made a simple vanilla cupcake (recipe from America’s Test Kitchen), and a batch of Swiss meringue buttercream following the recipe provided by Liz Shim in her class. I coated the top of the cupcakes with buttercream, and separated small amounts to dye orange, brown, and black. Those were used to make all the details using star-shaped or round piping tips.

I hope you enjoyed this trio of cakes. There are many options for mini-cake pans at Nordic Ware, one more beautiful than the other: hearts, little houses, tiered little cakes, stars… just choose your favorite and play with cake flavors. I think the pan I used would be very nice with a red velvet cake too.

Coating a cake with compound chocolate is another great option to include in your repertoire, and Sonali is a pro at that. You might remember I’ve used her method in the past (click here).

As to piping designs with buttercream, it involves a bit of a learning curve. I am much more comfortable piping Royal icing, which stays put better and is less prone to melting with the heat of your hands in the piping bag. But I intend to keep practicing, so stay tuned!

ONE YEAR AGO: From our Garden to You

TWO YEARS AGO: Lady Bug Macarons

THREE YEARS AGO: Five-Stranded Braided Bread

FOUR YEARS AGO: Green Olive Salad

FIVE YEARS AGO: Coffee Macarons Dressed up to Party

SIX YEARS AGO: Blogging Hiatus

SEVEN YEARS AGO: Tomato Tatin

EIGHT YEARS AGO: Headed to Colorado!  

NINE YEARS AGO: Farofa Brasileira

TEN  YEARS AGO: Thai-Inspired Pork Tenderloin

ELEVEN YEARS AGO: A yummy Brazilian cake: Bolo de Fuba’

TWELVE YEARS AGO:  Summer’s Tomatoes

THIRTEEN YEARS AGO: Leaving on a jet plane…