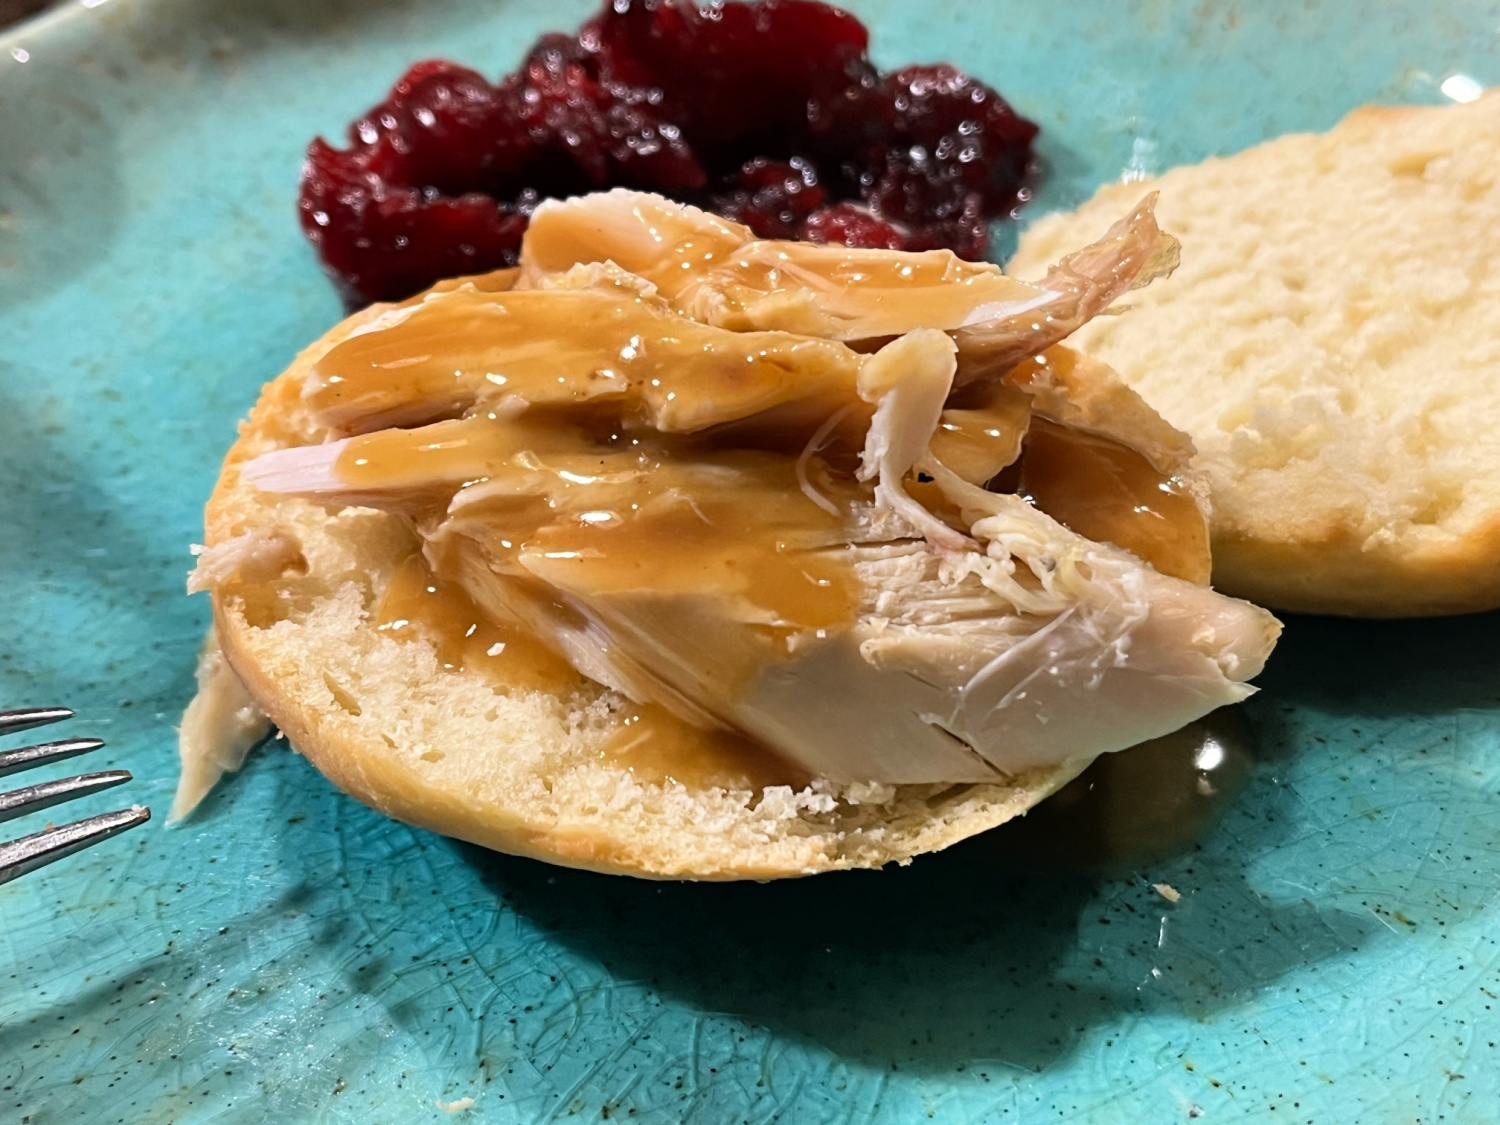
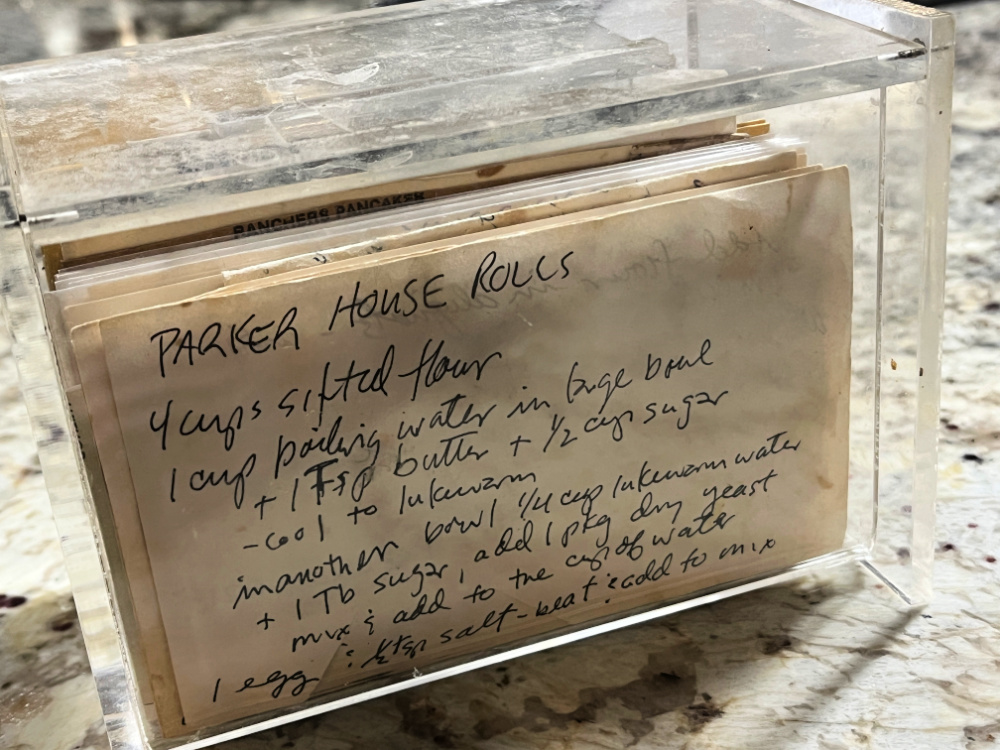
Inspired by the traditional Parker House Rolls, this is the recipe Phil’s Mom used to make every Thanksgiving. Phil keeps a bunch of recipes handwritten in small cards, held inside an acrylic box that is very likely older than his grownup kids. I learned to love and cherish that little box of recipes because they were all part of his childhood, teenage, and hippie years. His past.
KLEBBA HOUSE ROLLS (from Louise Wilhelmina Klebba)
One 1/4-ounce package active dry yeast 1 + 1/4 cup warm water 1/2 cup sugar 4 tbs unsalted butter, melted and cooled 1 large egg, lightly beaten 1/2 tsp salt 4 cups all-purpose flour, or more if needed
Make the dough. In a stand mixer mix the yeast with the water, sugar, butter, egg and salt.
Fit it with the dough hook, and add the flour in two increments, kneading it at low-speed. Knead the dough for about 4 minutes, until smooth. Remove from the mixer, transfer to a buttered bowl, cover and let it rise until doubled, about 2 hours.
Roll the dough with a rolling pin, cut in circles with a 3-inch biscuit cutter. Place over a baking sheet lined with parchment paper and let it rise again for 1 to 1.5 hours. Brush with melted butter before baking at 375F for 15 minutes or until golden. Brush again with butter as soon as they are out of the oven.
Comments: The traditional Parker House Rolls are shaped differently, they are shaped as rounds, then flattened and folded. I used the method that Phil’s Mom used, which is different, so if you want to check how it was originally made, read this article. I am so glad I made them with very minor modifications from Phil’s family recipe. In those days there was no instant yeast, so the whole method was slightly more convoluted. Most important thing, our Thanksgiving meal this year had a touch of loving memories from a distant past. And that made me very very happy.
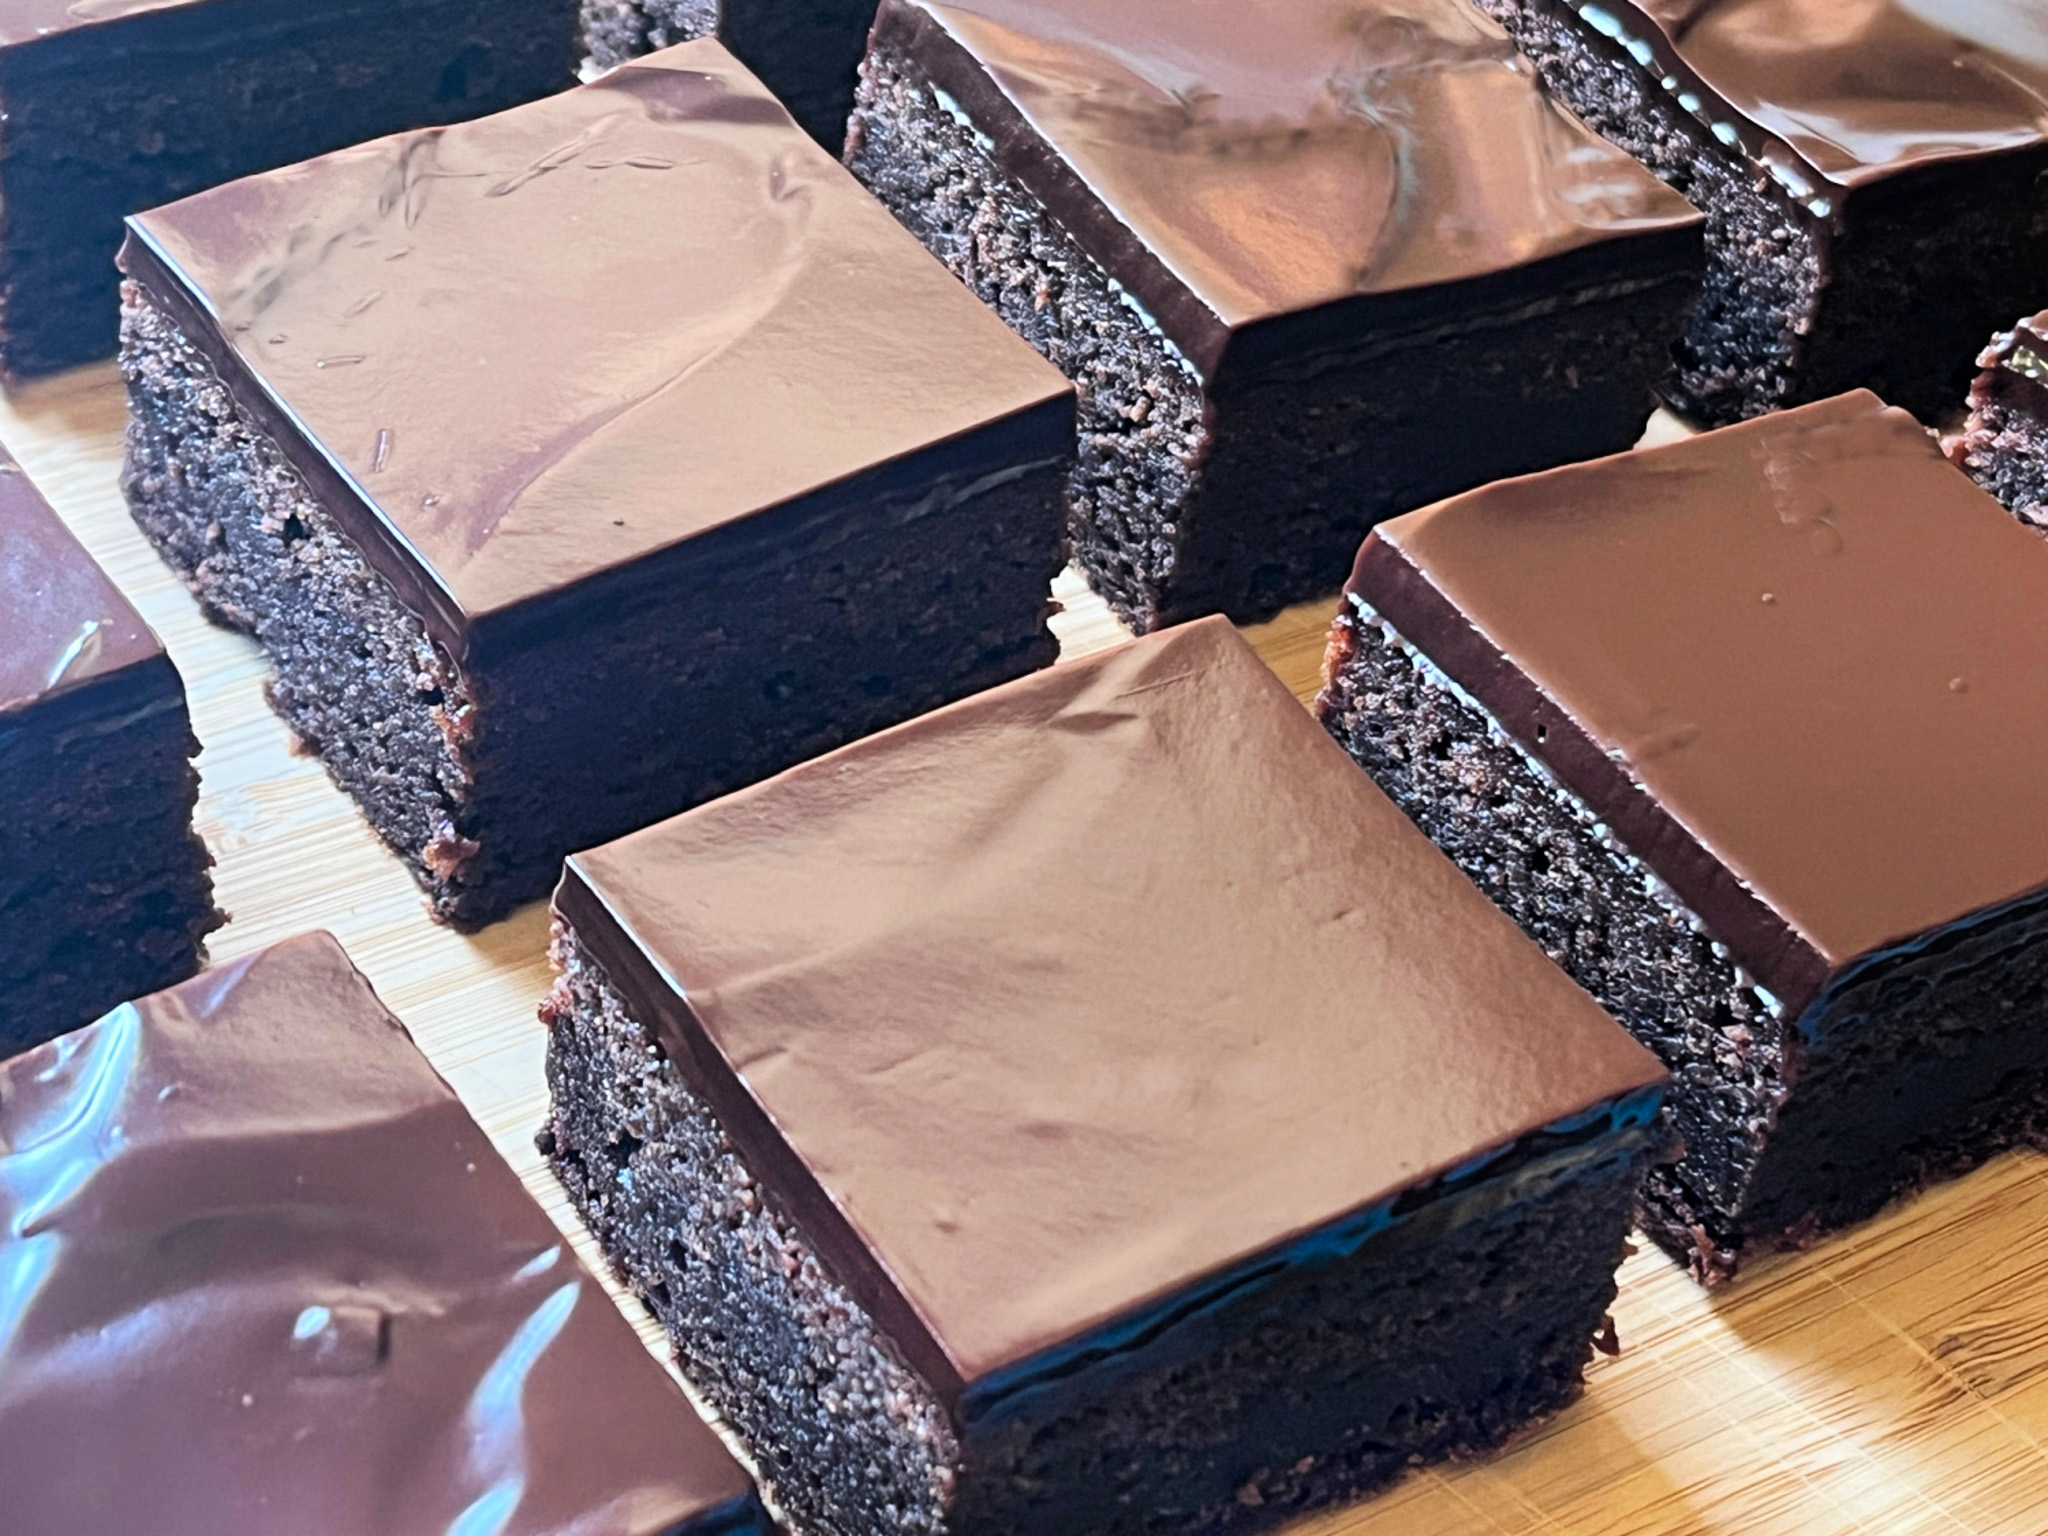
Today it is all a celebration of chocolate, so appropriate for the season, don’t you think? Let’s start with another winner of a recipe by Helen Fletcher.
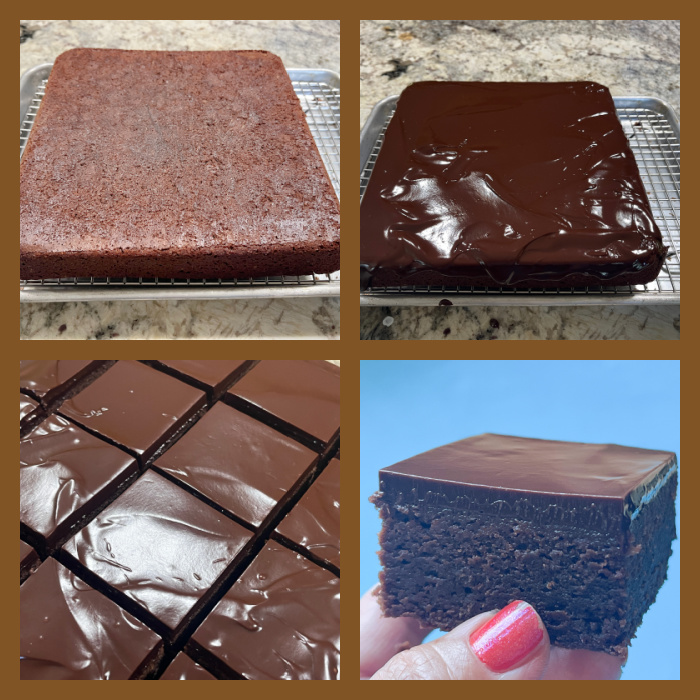
MEXICAN BROWNIES
To get the recipe, pay a visit to her site, where you can get step by step pictures to guide you through the process. One of the tips she gives is pouring the smooth icing on the brownie after flipping it so that the bottom side is up. That ensures a super flat surface for glazing. It is all in the details, my friends!
.
Moving on, a Celebration Cake I made for the chef who is behind the homeless meals, a person I admire so much! Works tirelessly to offer free meals 7 days/week.
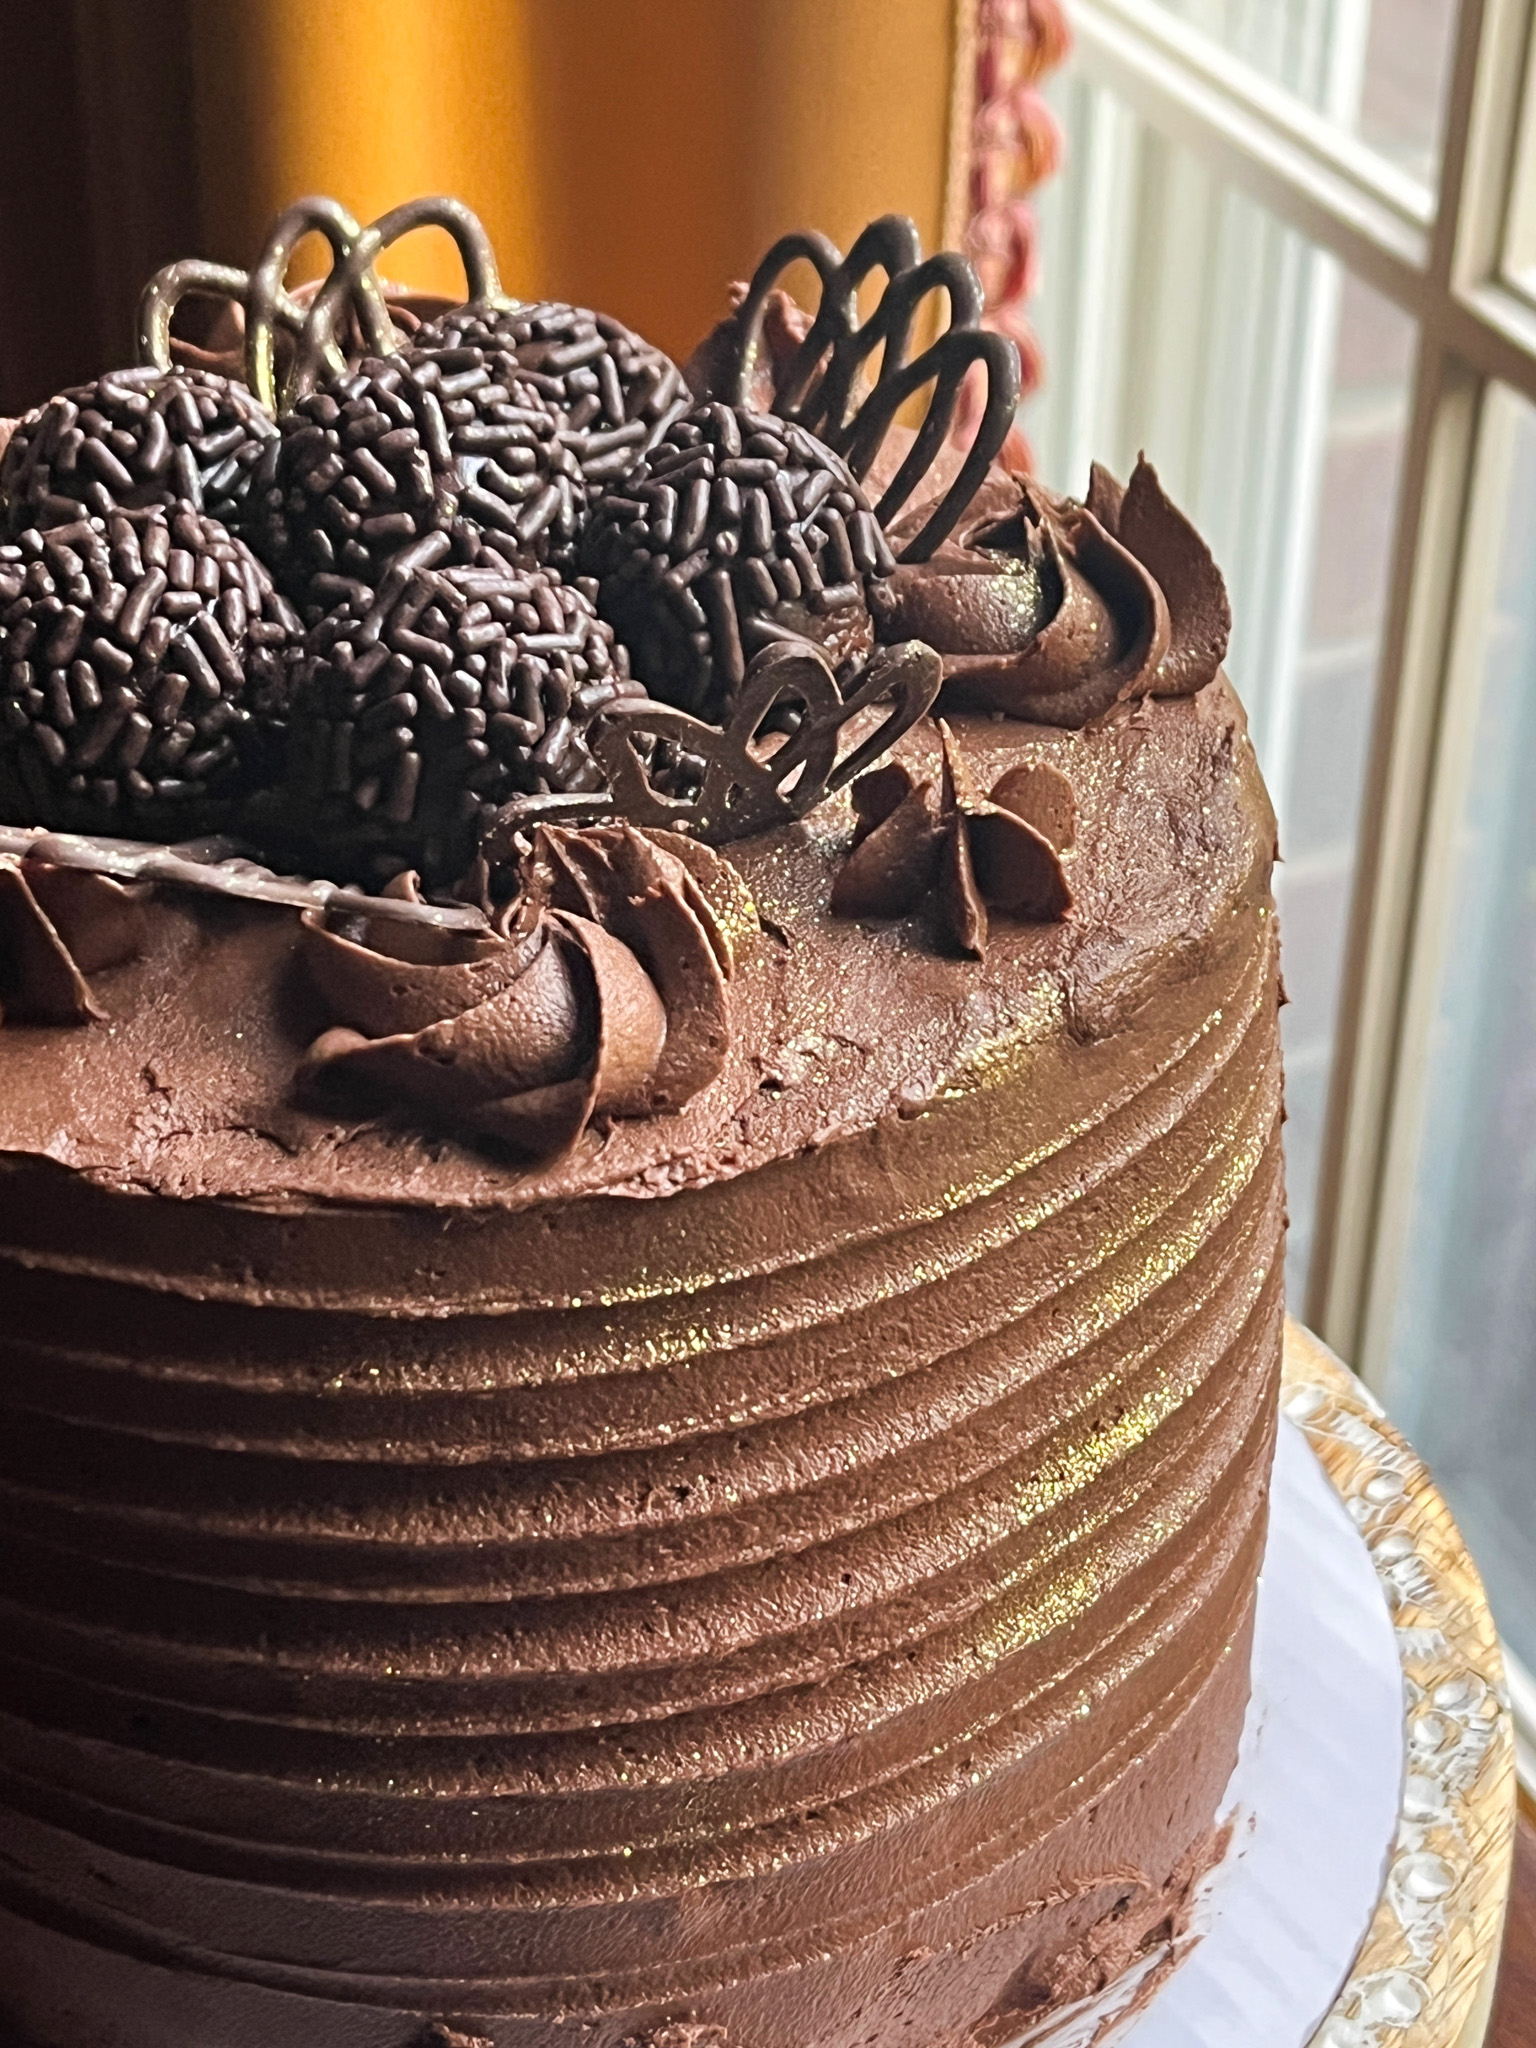
CHOCOLATE CELEBRATION CAKE WITH RASPBERRY FILLING (inspired by many sources)
for the cake: 1 + 3/4 cups (210g) all-purpose flour 1 + 1/2 cups (300g) sugar 3/4 cup (70g) cocoa powder 2 teaspoons baking soda 1 teaspoon baking powder 1 teaspoon kosher salt 1 cup buttermilk, shaken 1/2 cup vegetable oil 2 large eggs, at room temperature 1 teaspoon pure vanilla extract 1 cup freshly brewed hot coffee
for the buttercream: 1 cup (226g) unsalted butter, softened to room temperature 3 + 1/2 cups ( 420g) confectioners’ sugar 1/2 cup ( 45g) unsweetened cocoa powder 2 to 3 Tablespoons heavy cream pinch of salt 1 teaspoon vanilla extract
for the filling: Raspberry jam (store-bought or homemade)
for optional decoration: Brazilian brigadeiros (click here for recipe)
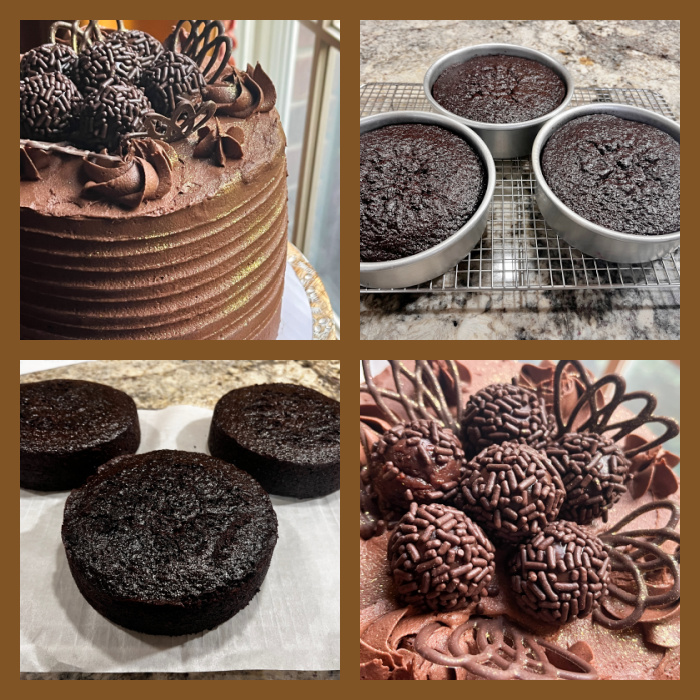
Heat the oven to 350 degrees F. Butter three 7-inch round cake pans. Line with parchment paper, then butter and flour the pans, or use baking spray.
Sift the flour, sugar, cocoa, baking soda, baking powder, and salt into the bowl of an electric mixer fitted with a paddle attachment and mix on low speed until combined. In another bowl, combine the buttermilk, oil, eggs, and vanilla. With the mixer on low speed, slowly add the wet ingredients to the dry. With mixer still on low, add the coffee and stir just to combine.
Pour the batter into the prepared pans and bake for 35 to 40 minutes, until a cake tester comes out clean. Cool in the pans for 20 minutes, then turn them out onto a cooling rack and cool completely before filling and frosting.
Make the frosting: On a stand mixer fitted with a paddle attachment, beat the butter on medium speed until creamy, about 4 minutes. Add confectioners’ sugar, cocoa powder, heavy cream, salt, and vanilla extract. Beat on low speed for 30 seconds, then increase to high speed and beat for 1 full minute. Adjust consistency with more powdered sugar or with heavy cream. Place in a piping bag fitted with appropriate icing tips for the decorations you desire.
Place the first cake on a circular cardboard, add a circle of buttercream as a dam around the perimeter, fill the center with jam. Place second cake on top, repeat the process. Place the last cake on top, cover with a thin crumb cake layer of buttercream and refrigerate for 30 minutes. Finish the buttercream icing, add brigadeiros if so desired, or any other decorations.
Comments: I donated this cake whole, so we have not tried it, but I have used this recipe before and it is really a delicious, very moist, intensely chocolate-y cake. The raspberry jam goes very well with it, although it is also outstanding with some salted caramel as the filling.
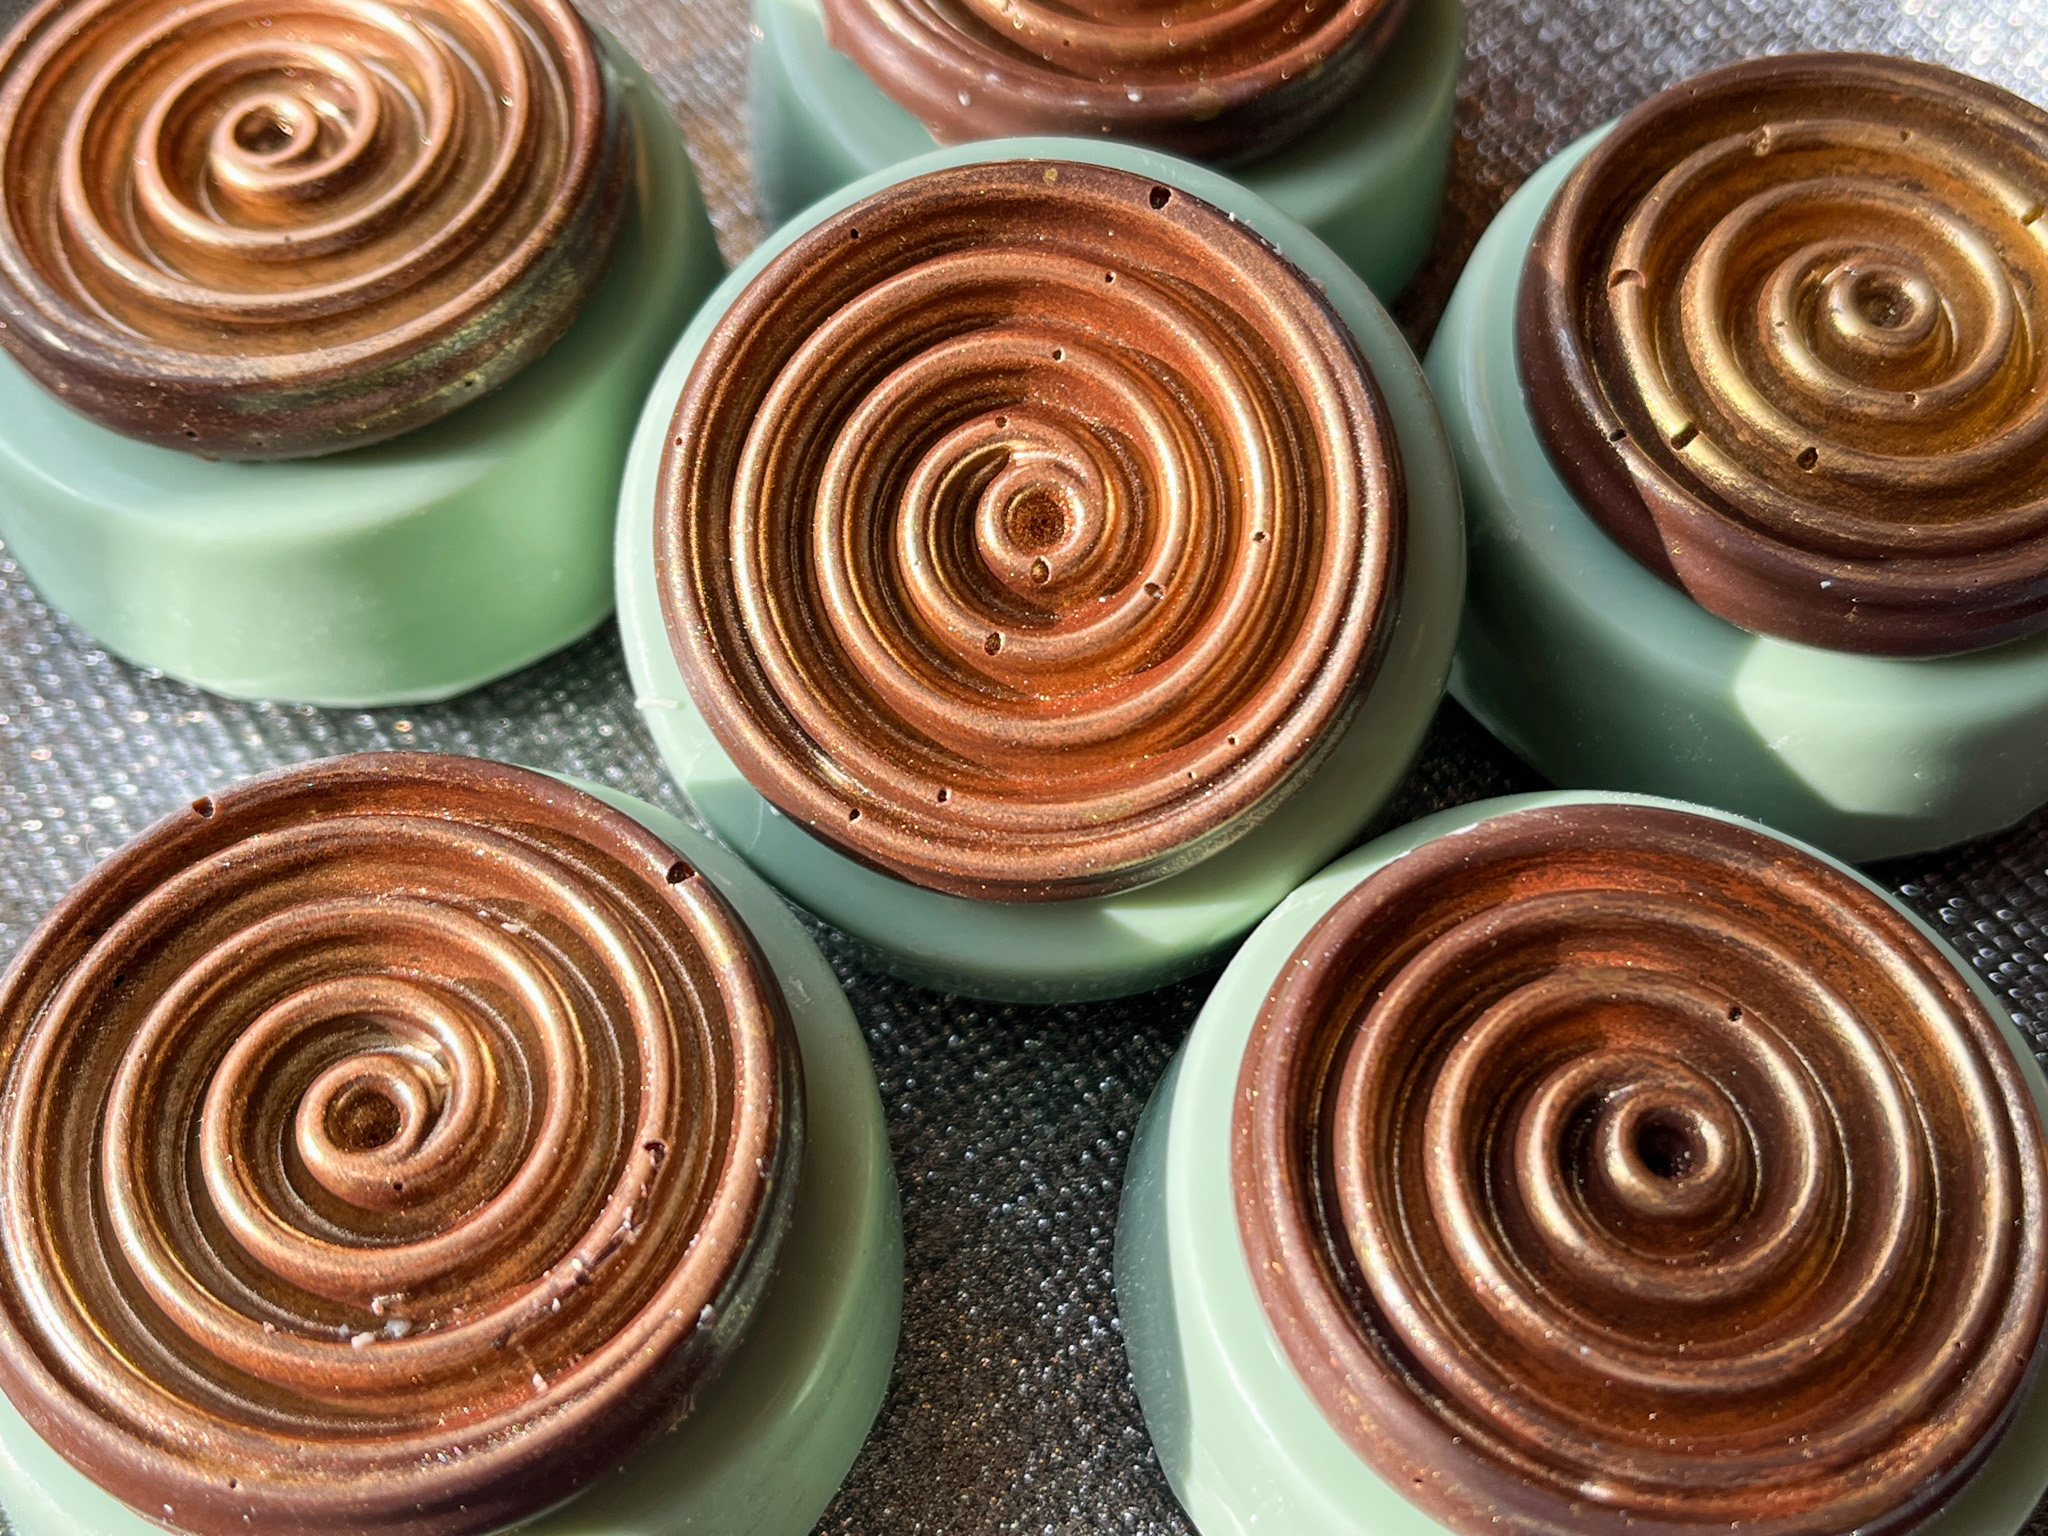
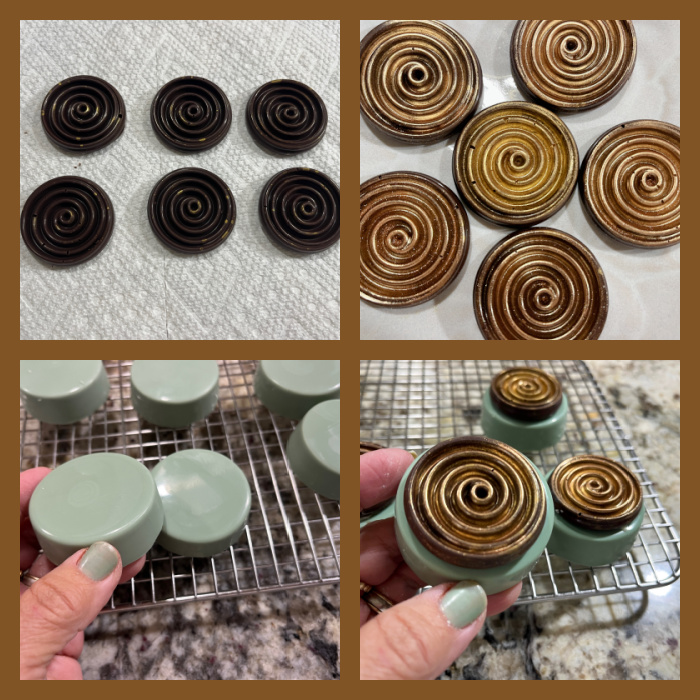
CHOCOLATE COVERED OREOS, DA VINCI STYLE
These turned out so cool, I was super happy with them. My sister Norma pointed out they reminded her of Leonardo da Vinci’s inventions, so that’s the reason for the name. I used a silicone mold I’ve had for many years to make the decorations with dark compound chocolate, later brushed with luster powder copper. I used a very light green to tint the chocolate for the molds.
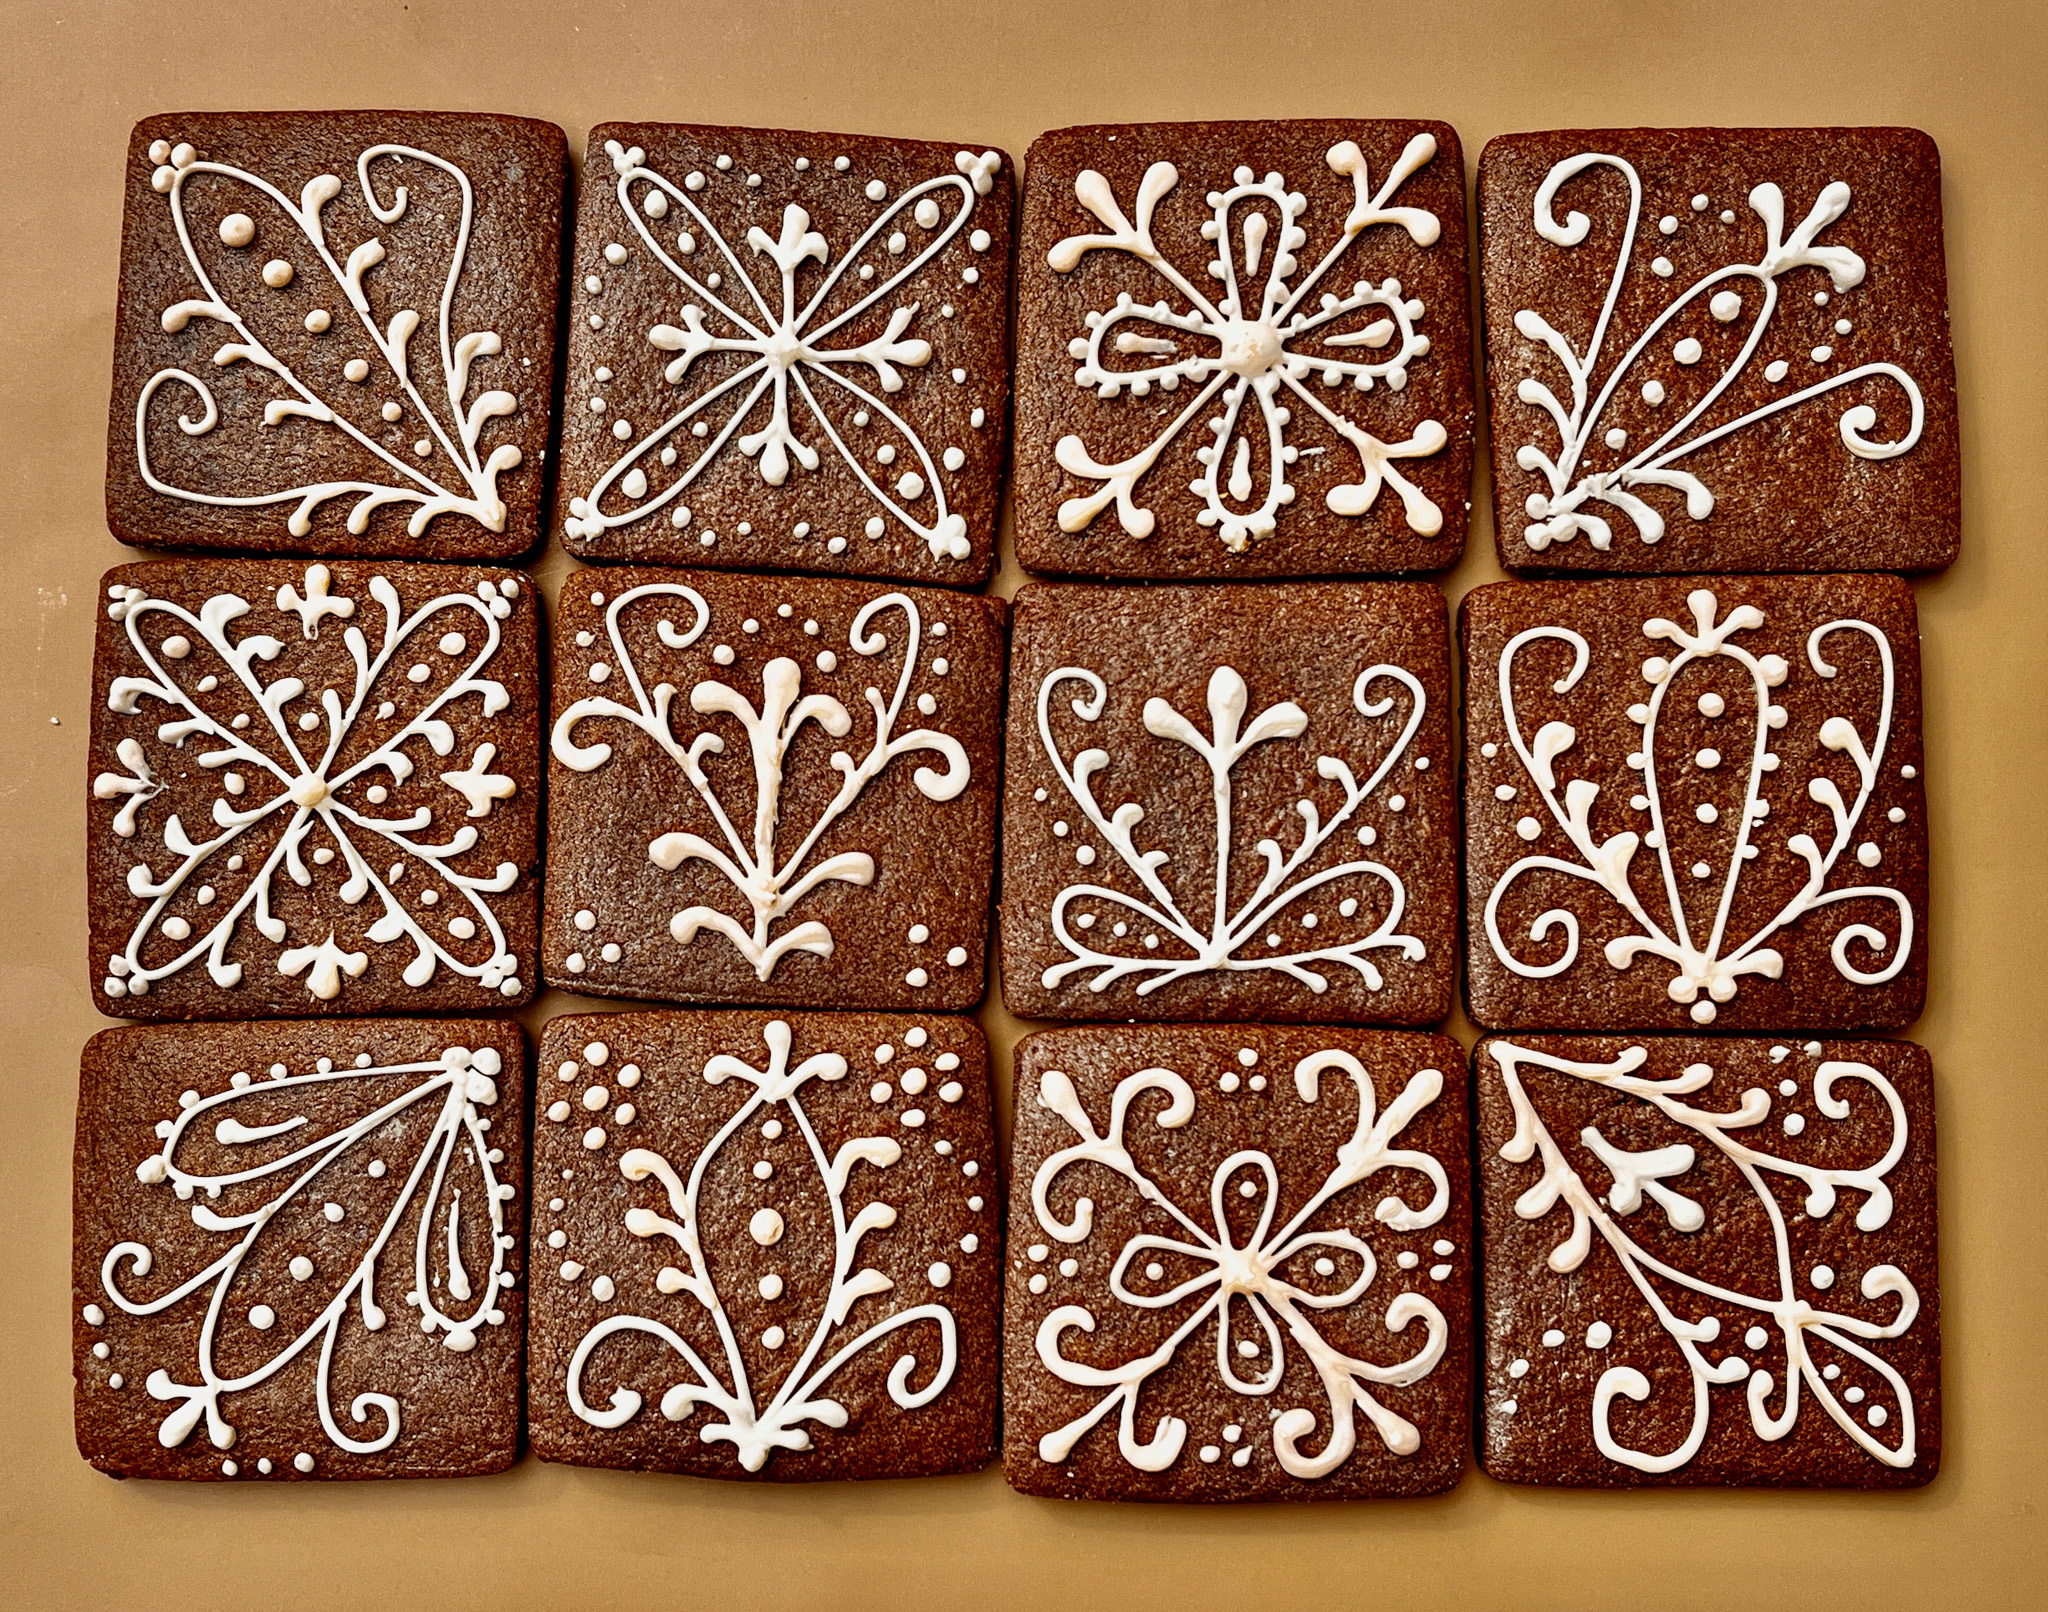
Finally, I close this post with a series of chocolate cookies decorated according to a tutorial from Tunde Dugantsi. Simple white Royal icing, good practice for fine line piping. It would also work well on gingerbread cookies, keep that in mind. I used my default chocolate cookie recipe for those (find it here).
I am totally in love with this cookbook! I have a soft spot for baking that is not overly sweet, which might sound strange, as I bake so many sugar cookies, macarons, and cupcakes. But a recipe that calls for adding miso to a cookie gets me dreaming. Salted caramel? Same thing. This is actually my second cookbook from Kat Lieu, and I think both would be a great Christmas gift for bakers (wink, wink).
Without further ado, here is a wonderfully delicious recipe for Masala Macaroons…
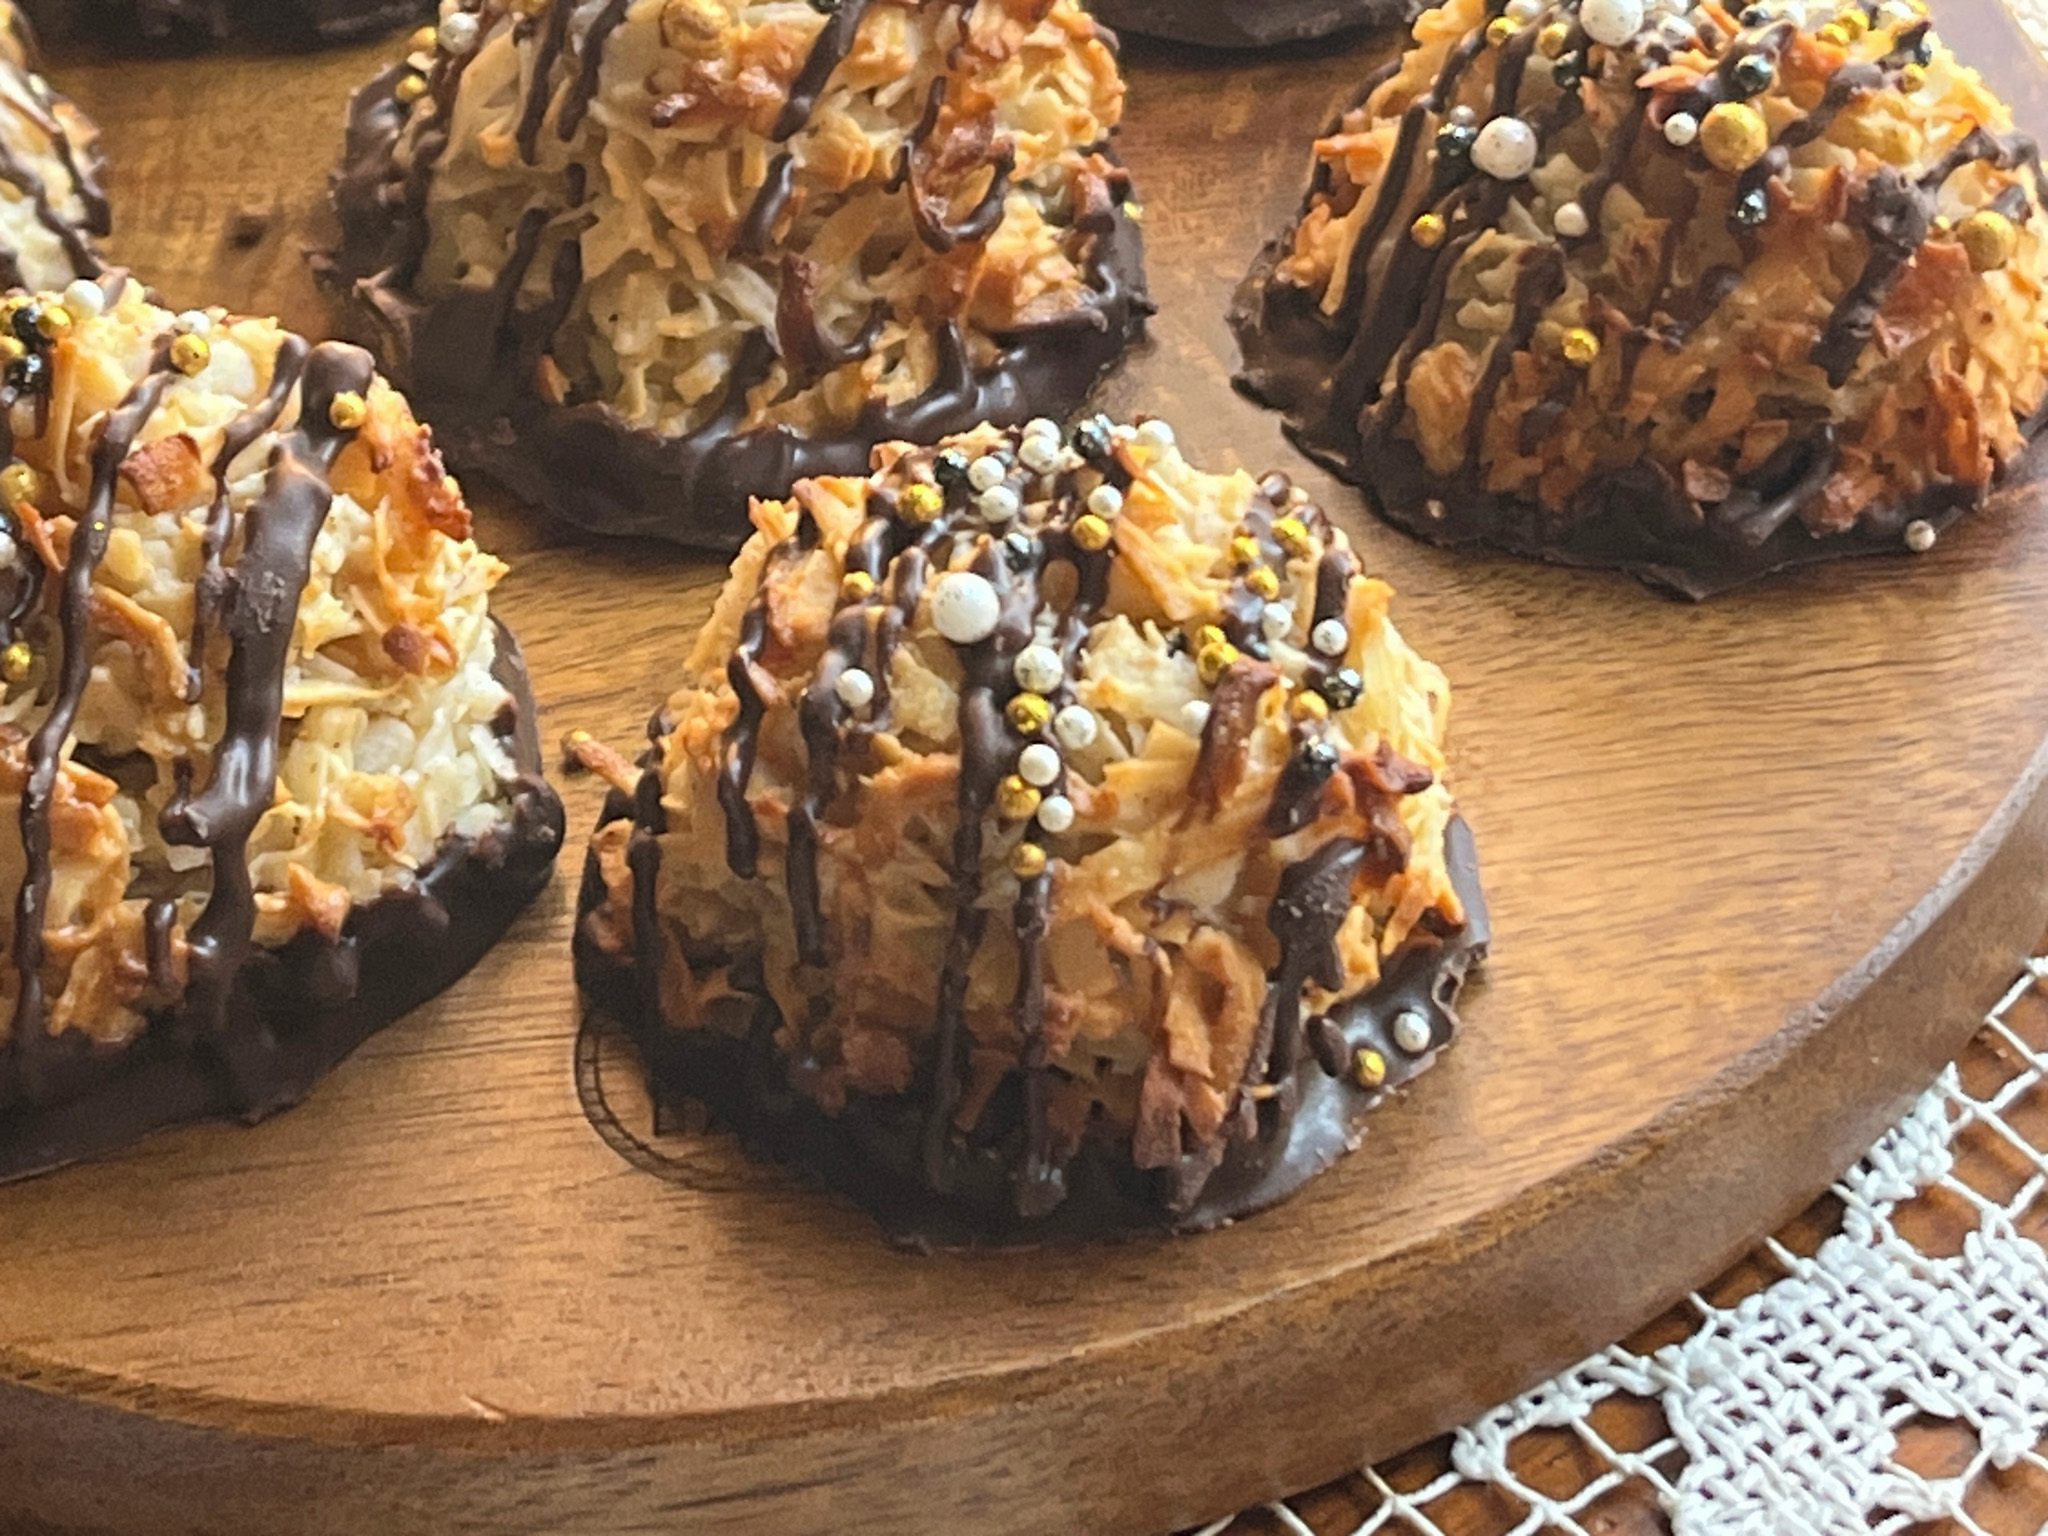
MASALA MACAROONS (published with permission from 108 Asian Cookies)
One 14-ounce (396 g) can sweetened condensed milk 1 ripe small banana, mashed 1 teaspoon red miso One 14-ounce (396 g) bag unsweetened shredded coconut 2 teaspoons garam masala ½ teaspoon ground cardamom ½ teaspoon ground ginger About ⅓ cup (60 g) semisweet chocolate chips, plus more as needed 1 teaspoon neutral oil Sea salt flakes, for garnish Sprinkles, for garnish (optional)
Heat the oven to 350°F. Line two baking sheets with parchment paper. In a large mixing bowl, mix the condensed milk, mashed banana, and miso until combined. Add the shredded coconut, garam masala, cardamom, and ginger and mix until well combined and the dough can hold itself together.
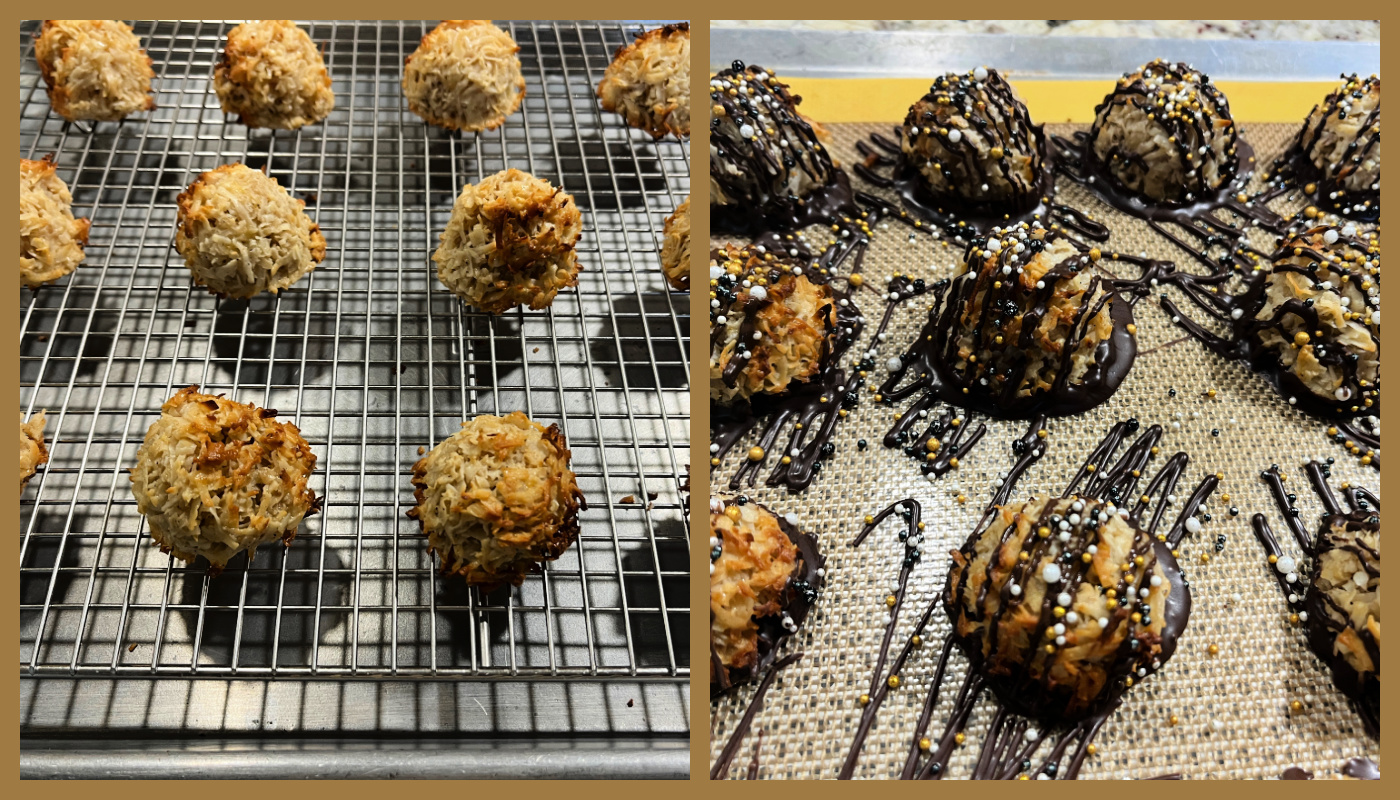
Scoop heaping tablespoons of batter for each macaroon and place on the prepared baking sheet. Keep their rounded mound shapes and give each about 1 inch of space. Bake all the macaroons until the edges are crispy and golden brown and the tops are lightly toasted, 16 to 18 minutes.
Let the macaroons set on the baking sheets for 5 minutes before transferring to a wire rack to cool completely. While the macaroons are cooling, combine the chocolate chips and oil in a medium heatproof bowl and microwave in 30-second bursts, stirring after each interval, until the chocolate is melted and smooth. Dip the bottoms of the cooled macaroons into the melted chocolate. Place them back on the parchment-lined baking sheets to set. Drizzle additional melted chocolate on top of each macaroon. Before the chocolate sets completely, sprinkle a few flakes of sea salt and sprinkles on top of each macaroon.
Comments: These were superb, I confess to stealing one from the donation box and being happy that I did… If you don’t like coconut, of course these are not for you, but if you love them, be ready for a treat! Easy to make, rich and luscious, one will satisfy your sweet tooth, but the spices and miso tone it down substantially. Truly special… You need them in your life.
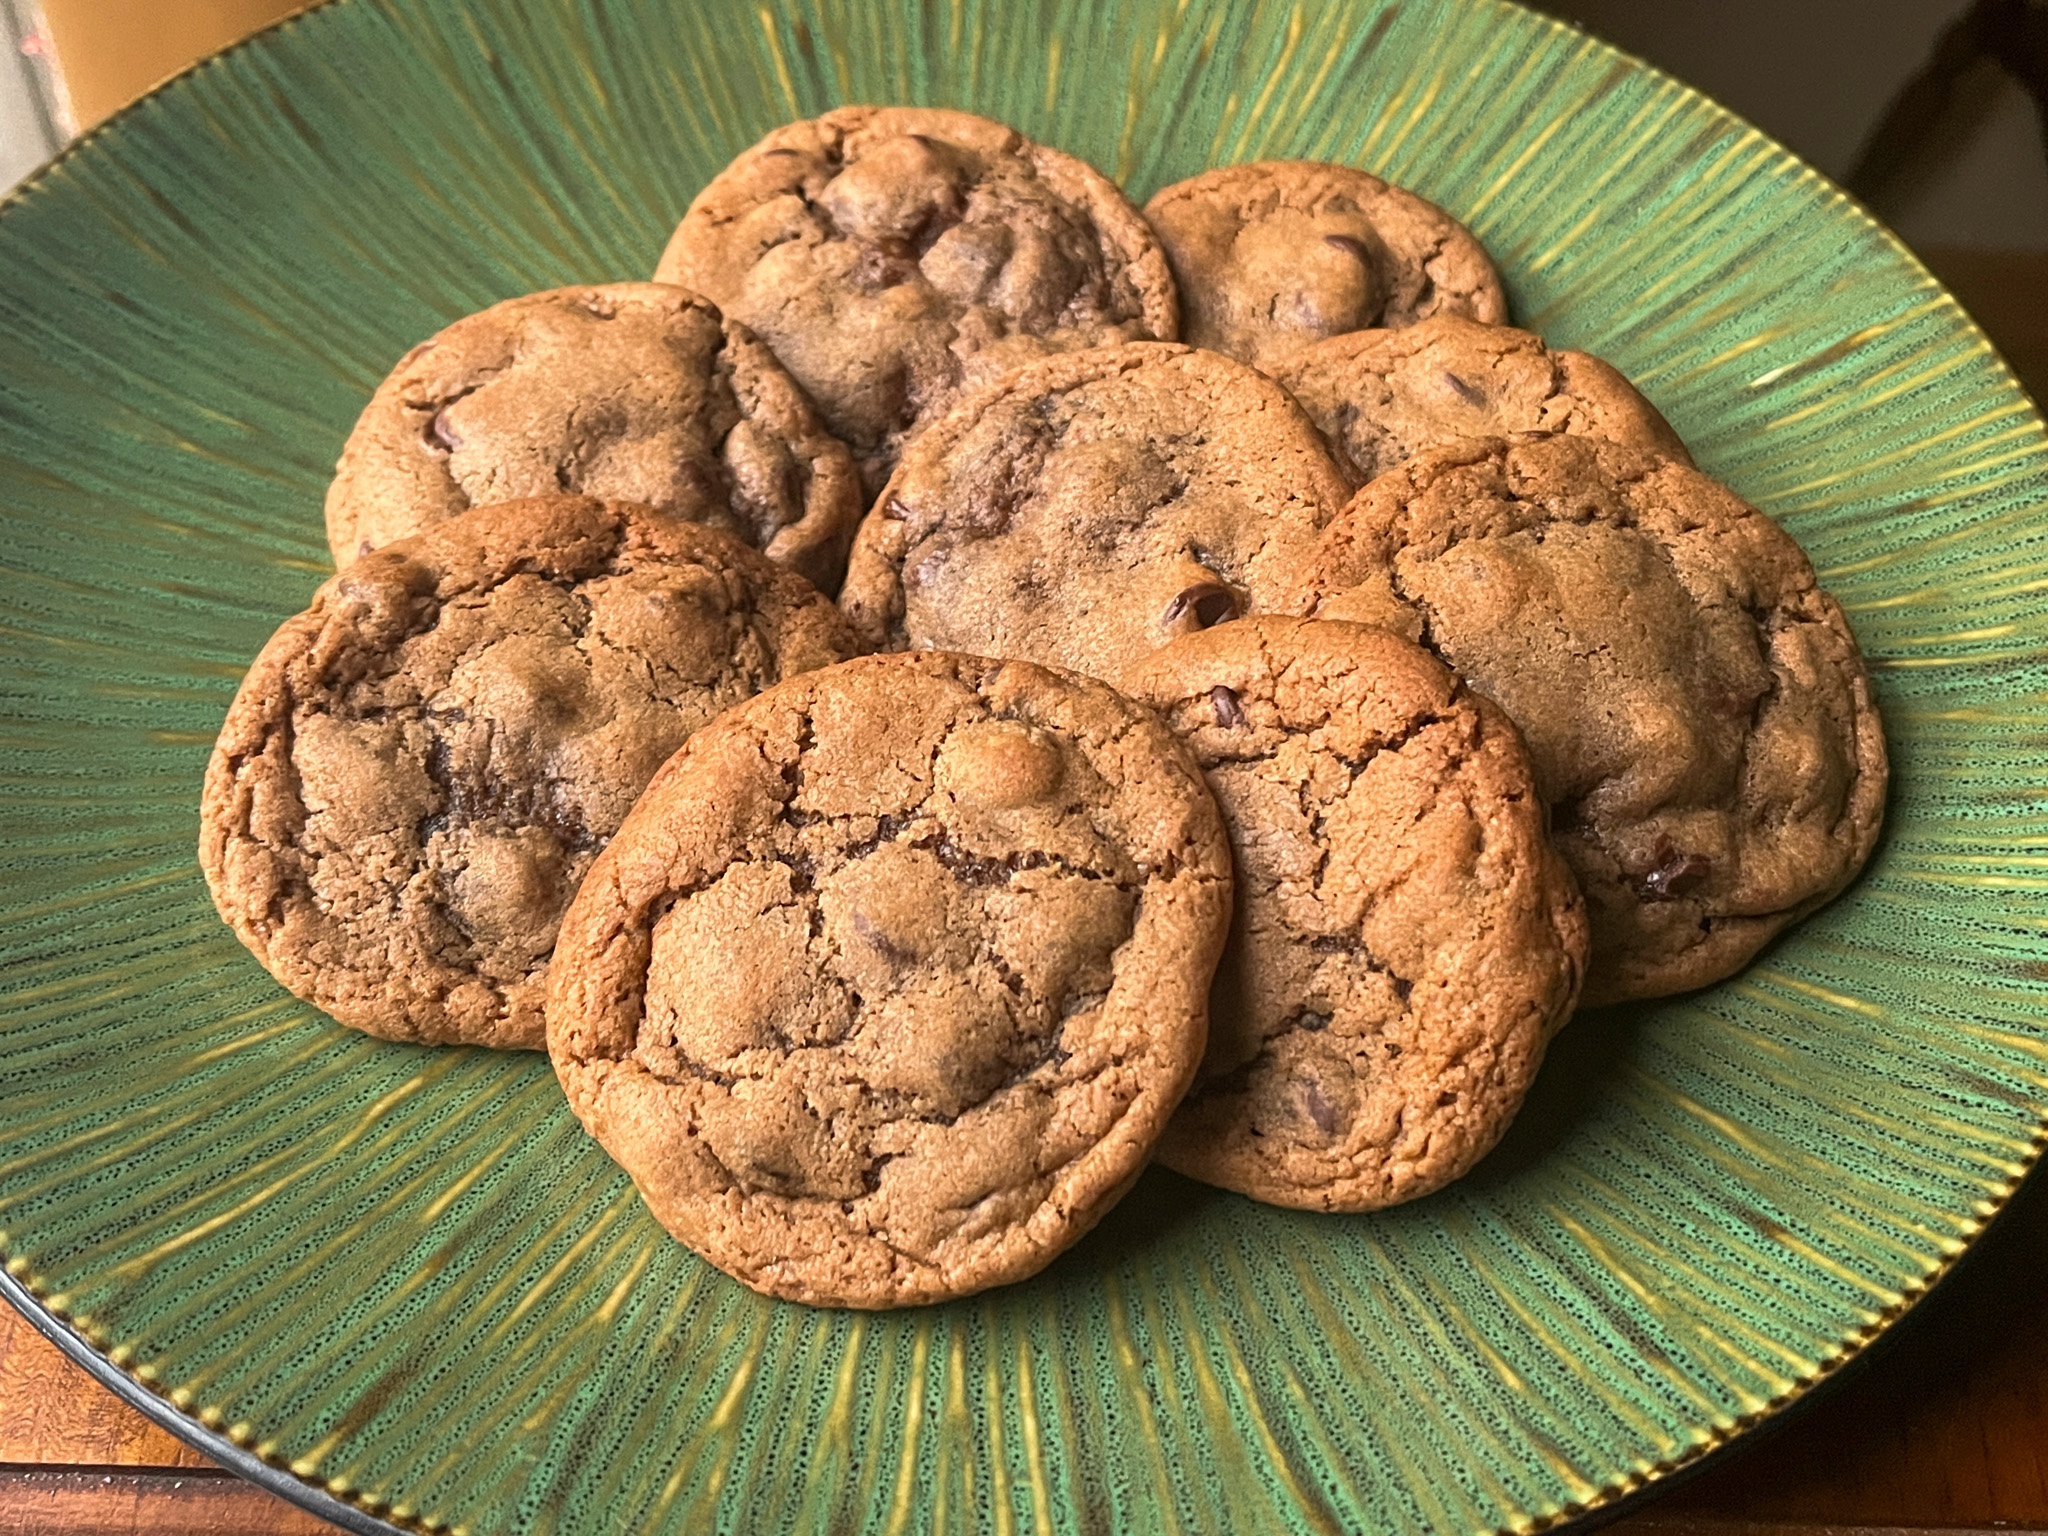
As a teaser, these are chocolate chip cookies described by Kat as Best Chocolate Chip Cookies Ever. They take Ovaltine, molasses and miso. To die for, honestly. You need these cookies and this cookbook in your life.
Big thank you to Kat for allowing me to share this recipe today!
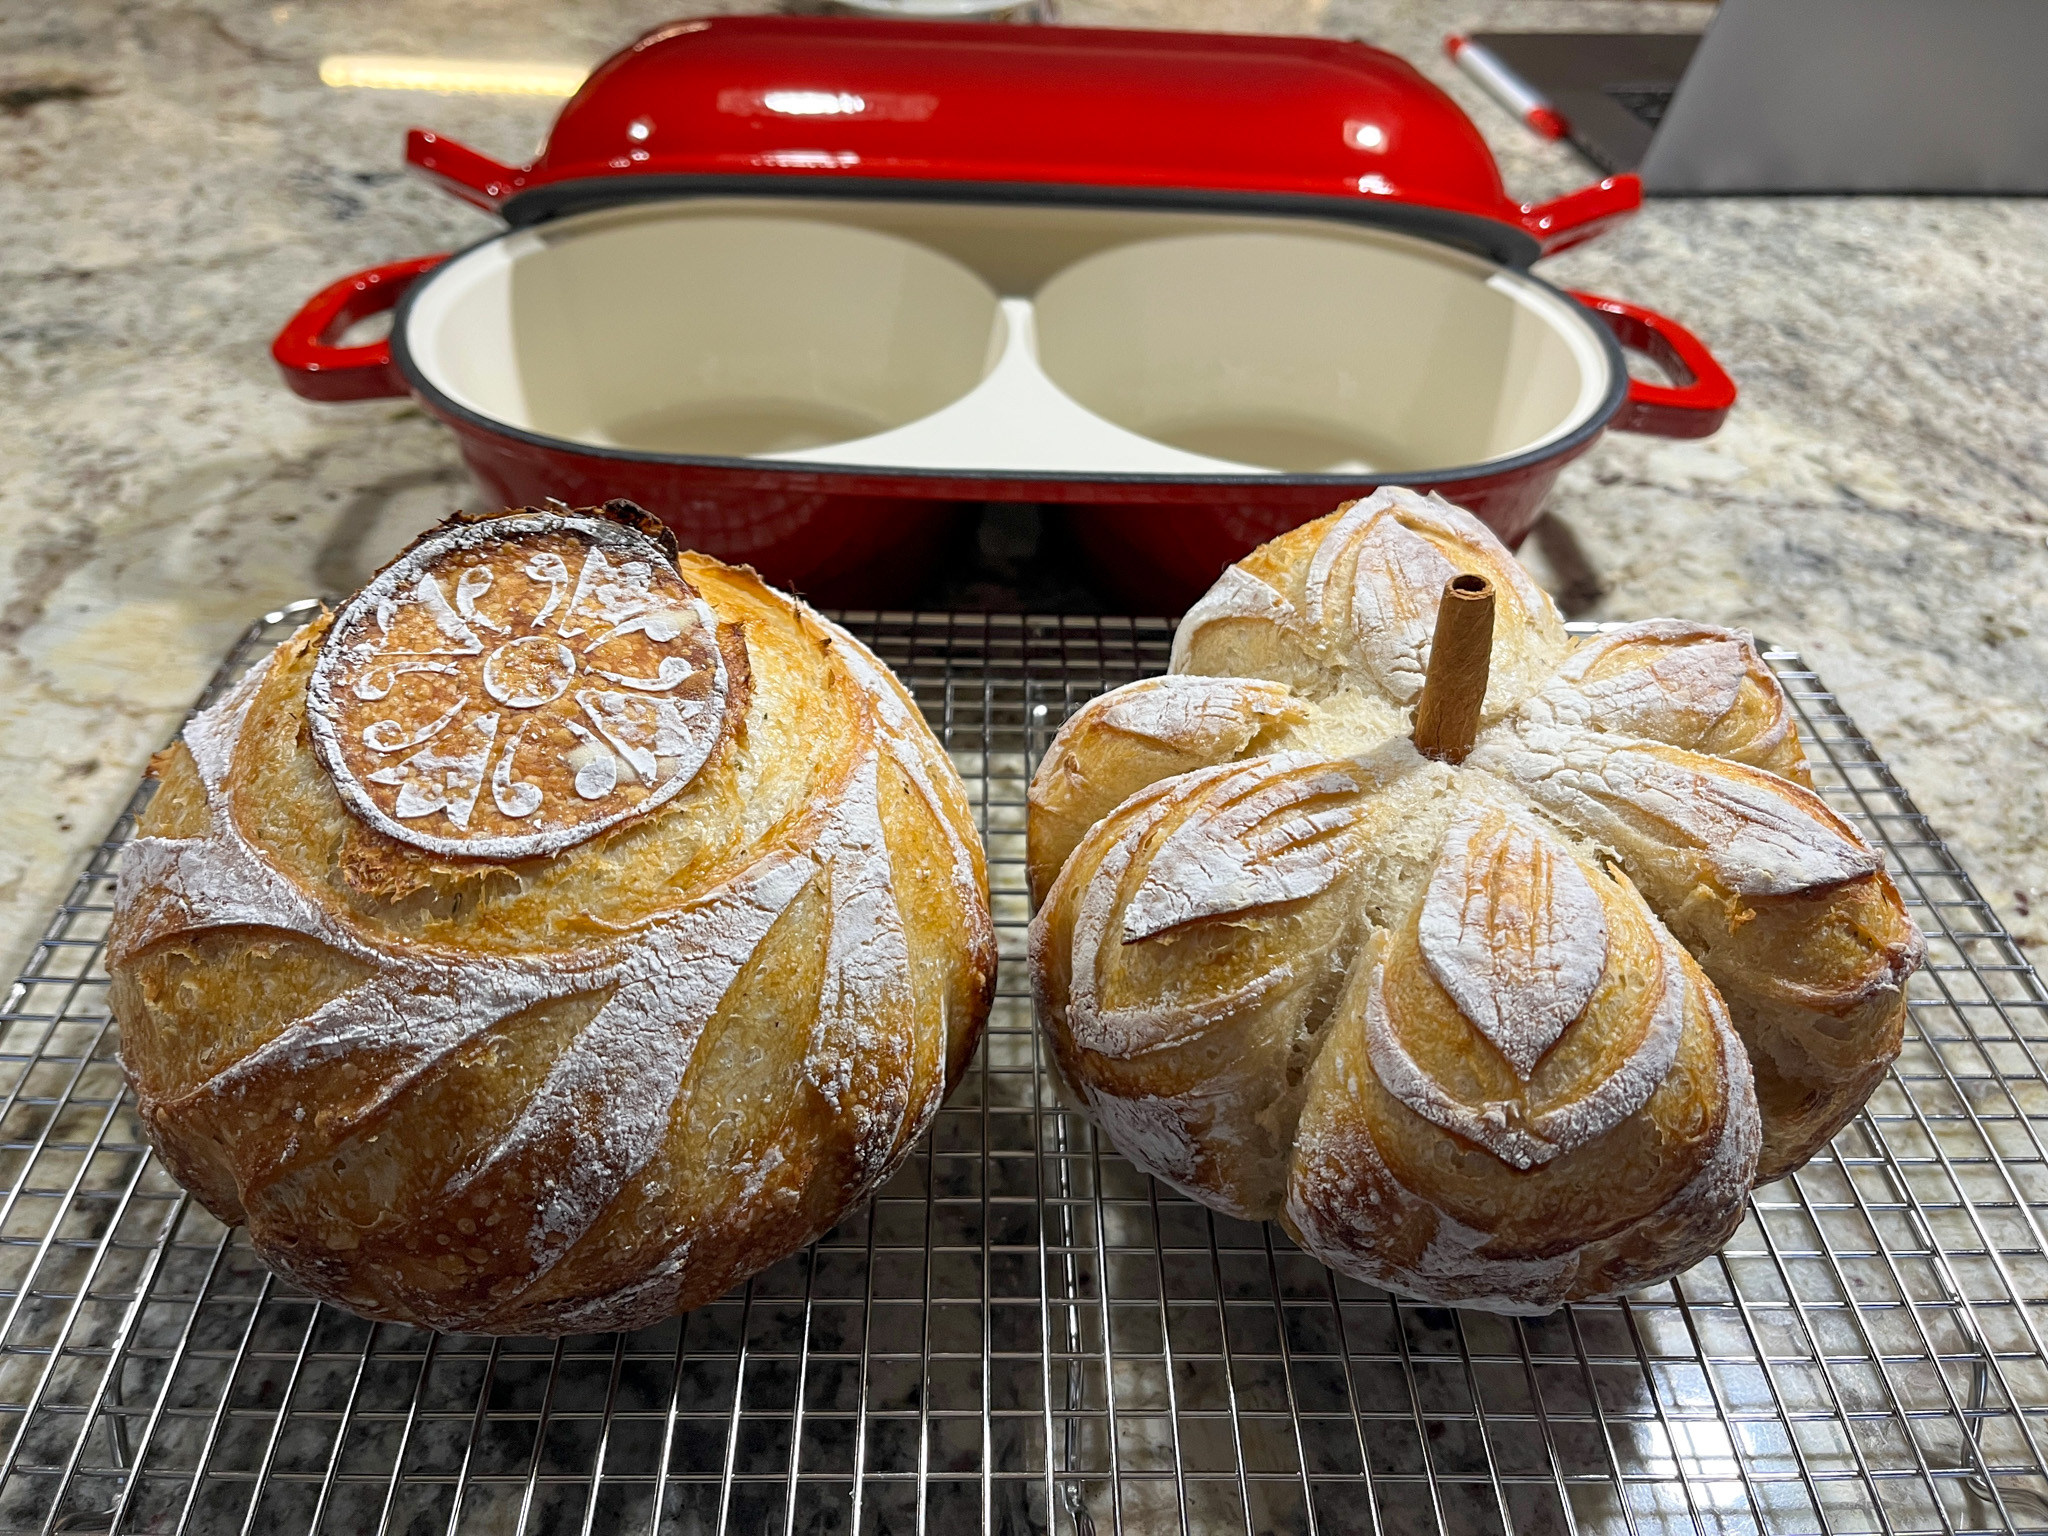
I admit it. I didn’t try to resist the temptation to buy this pan. It was too adorable and I needed it in my life. Today I share my very first adventure with the Nuovva double Dutch oven (click here for ordering info).
The pan is available in several colors, but my heart was set on this gorgeous red version. It is almost exactly 16 inches, so unless your oven is really small, you should have no issues using it.
DUET OF SOURDOUGH BOULES (from The Bewitching Kitchen)
580g bread flour 20g whole-wheat flour 420g water 11g salt 85g starter (I used stiff, at about 75% hydration)
Mix all ingredients in the bowl of a KitchenAid type mixer fitted with the dough hook. Knead gently for about 4 minutes (first or second speed maximum).
Transfer dough to a lightly oil bowl and do a bulk fermentation with 4 folds made 45 minutes apart. Before you start the fermentation , remove a very small amount of dough to a small glass container (like those that hold spices), and mark where the level of the dough is with a permanent marker. Keep that at room temperature to monitor fermentation.
After the last folding cycle, keep an eye on the fermentation using the small vial. Ideally you want to let the dough ferment until it is double in size. Depending on the day, temperature of your kitchen, it might take 8 hours or more. Be patient, it will pay off.
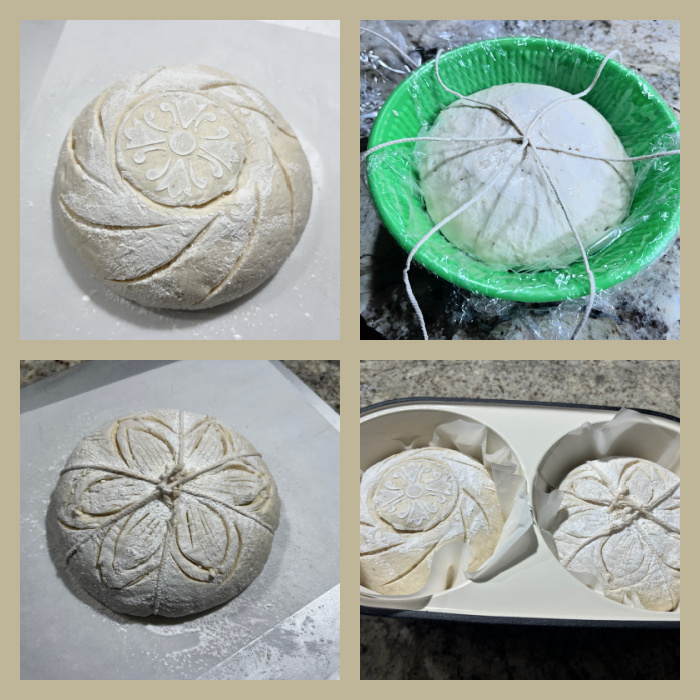
Once bulk fermentation is over, divide the dough in two equal parts, shape them as two small balls and place in a floured banetton. Place in the fridge overnight.
Next day, freeze the dough for 30 minutes in the banetton, to make it easier to score later. Invert the dough on the paper liner, place in the loaf pan, you can invert it over 3 strings if you like to make a pumpkin/flower shape. Score in any way you want, or use a stencil.
Close the pan and bake at 450F for 30 minutes. Remove the lid, and allow the bread to bake further for another 15 minutes or so. I found that the surface of the bread was not browning enough so after 40 minutes I removed them from the pan and let them bake for additional 10 minutes over the rack, outside of the pan.
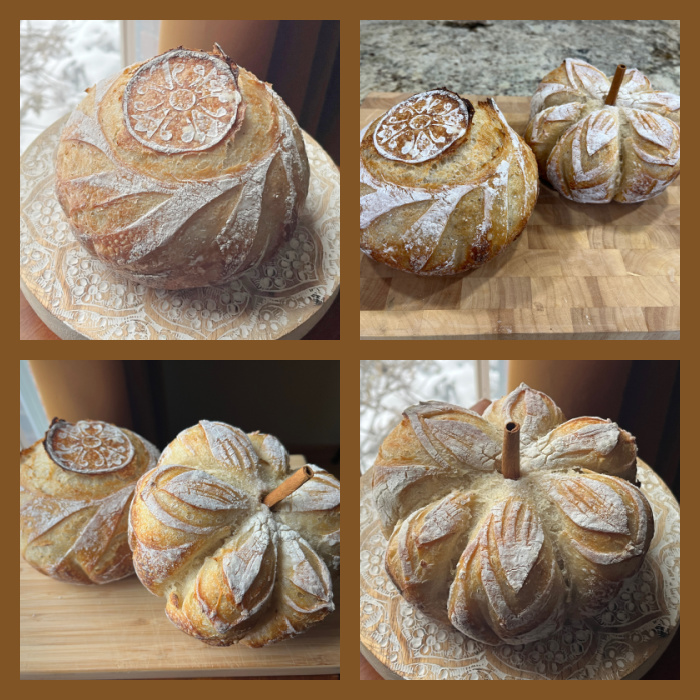
Comments: Cannot tell you how much we loved these loaves! They look adorable and baked perfectly side-by-side in the pan. I will be using it often. The loaves would be perfect for a dinner party, a sure way to impress your guests.
Did I need another sourdough toy? Probably not. Am I happy I got it? OH, YEAH!
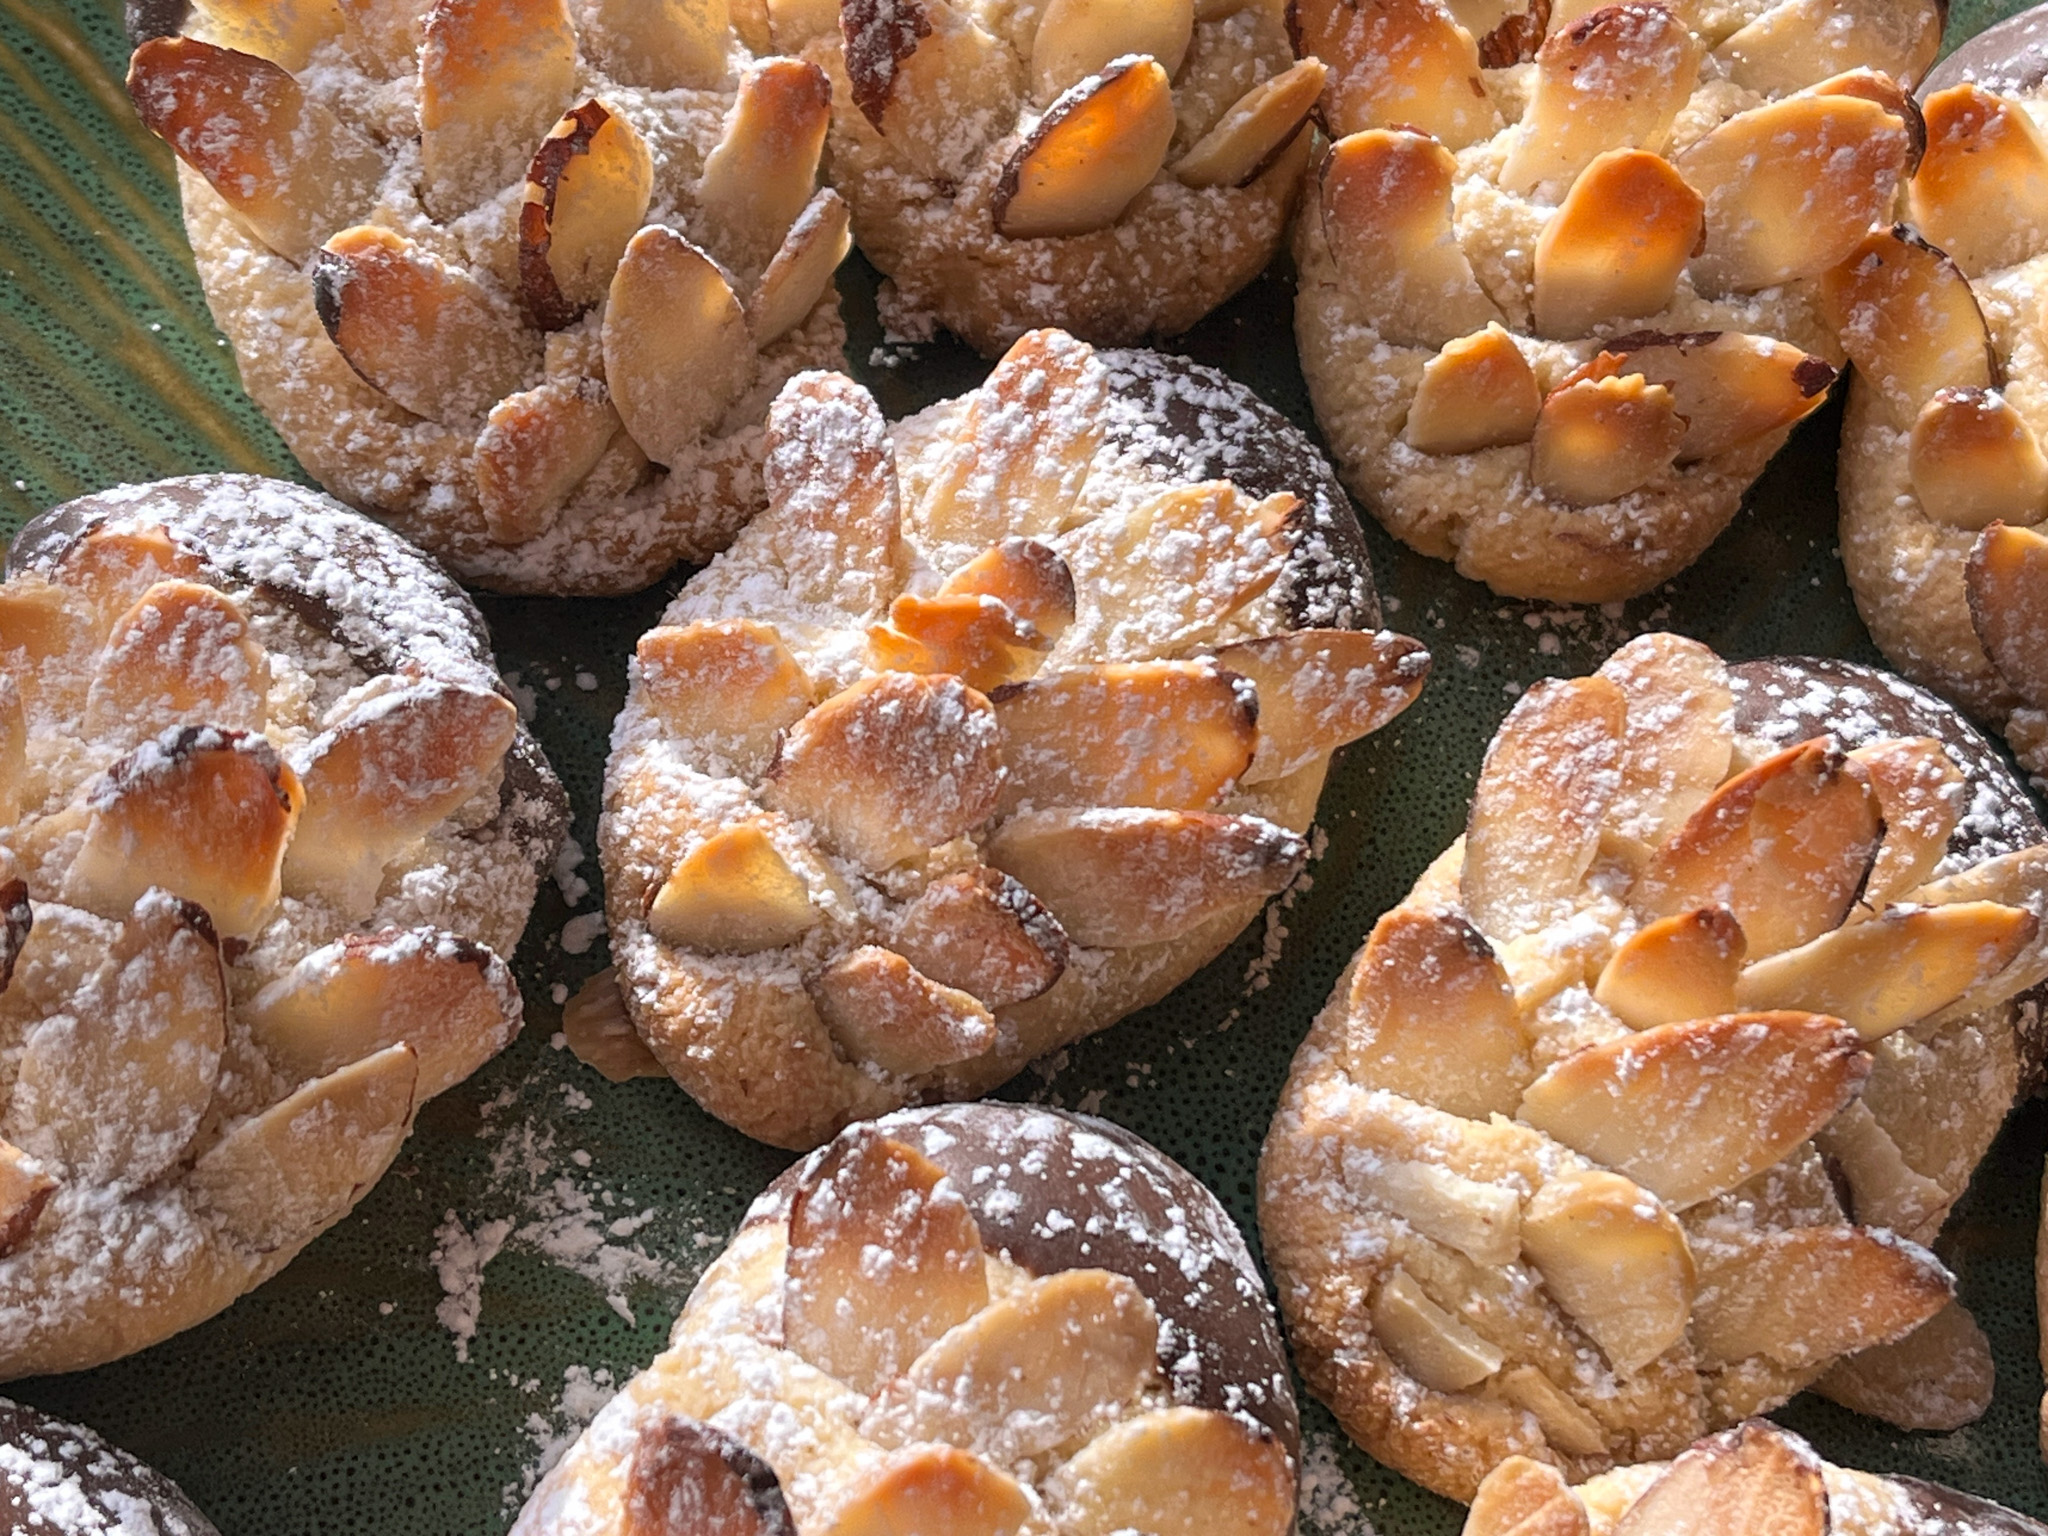
I follow wonderful bakers on Instagram, they are a great source of inspiration, from cookies to cakes, from tarts to bread baking, and patisserie in general. A few months ago I learned that Winnie Lee (IG ohcakeswinnie) was going to publish her first cookbook. I placed an order and anxiously waited. If you like to order Bake with Winnie for you or to gift to someone, click here. Her style of baking is whimsical, clever, creative. Reminds me of one of my favorite bakers from The Great British Bake-Off, Kim-Joy. Bake with Winnie is a book full of gorgeous bakes, colorful, playful, impossible to look at them and not smile. And dream. Today I share with you the second recipe I tried: Pinecone Almond Cookies Tartlets, absolutely adorable!
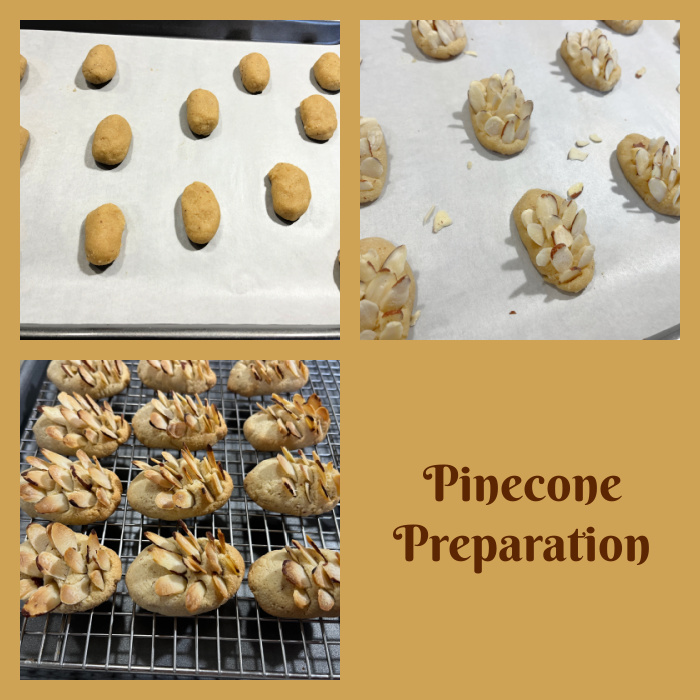
PINECONE ALMOND COOKIES (published with permission from Bake with Winnie)
Preheat your oven to 175°C and line a flat baking tray with baking paper.
In a large mixing bowl, combine the ground almonds and sifted icing sugar. Whisk the eggs, vanilla and almond extract in a separate bowl and add them to the dry ingredients. Mix with a whisk or spatula until you get a thick, slightly sticky paste. You can add a bit more ground almonds (25g / ¼cup) so it’s easier to work with.
Using a small ice cream scoop or your hands slightly damp, portion out the dough. Roll into long oval shapes and slightly flatten them. Arrange on the baking tray. Press sliced almonds into the top of each cookie in overlapping rows to mimic the look of pinecones, leaving about 1/3 of the cookie bare for dipping in chocolate later.
Bake for about 12–15 minutes or until lightly golden. Allow the cookies to cool completely on a wire rack.
Dust with icing sugar the almond section of the cookie. Melt the dark chocolate and dip the bare end of each cookie into the chocolate. Let the dipped cookies set on parchment paper before serving.
Comments: Just loved making this batch of cookies, which could easily also be flipped into hedgehogs, don’t you think? Add the chocolate to the other side, a couple of white drops of chocolate or Royal icing, or even sprinkles for the eyes, and there you go! New shape….. They have a nice texture and that delicious taste of almonds made more intense by the roasted pieces all over. The only time-consuming step is finding nicely shaped almond slices in the bag, they are often a bit too broken or damaged. But it is totally worth it.
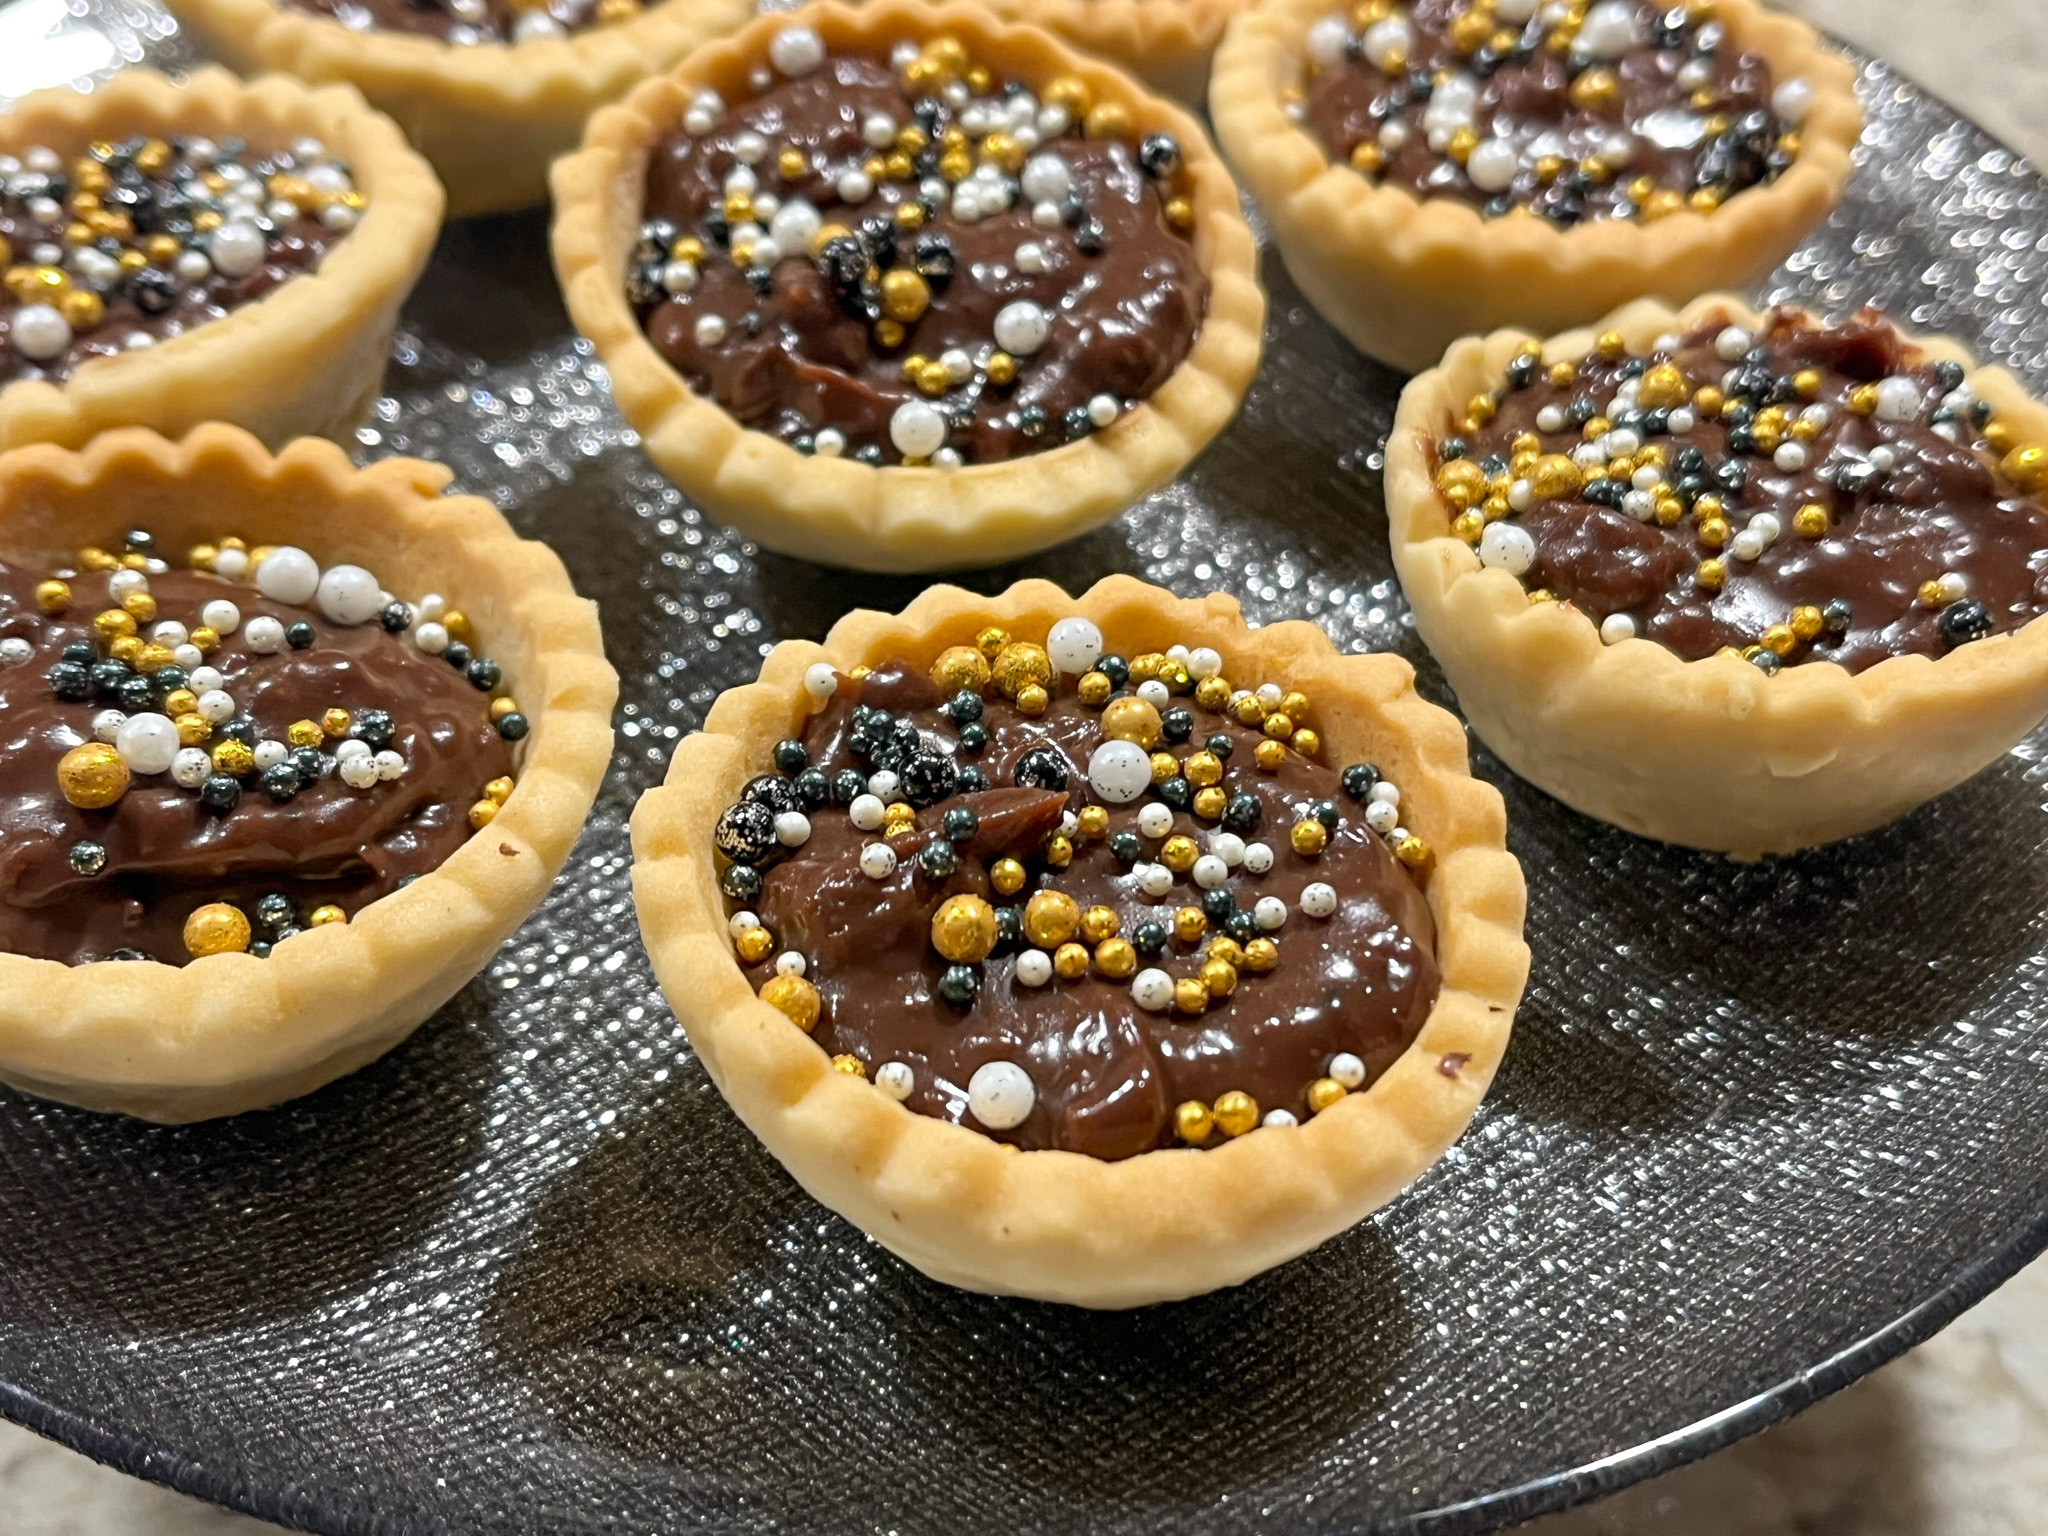
Moving on, a teaser recipe from the book, Chocolate Tartlets, in which she makes the dough in a pretty efficient way, shaping them in the bottom side of muffin tins.
.
That should give you an idea of Winnie’s style of baking. I am totally smitten by her cookbook. So let me take you through a little stroll through her publication… The book is divided in five sections.
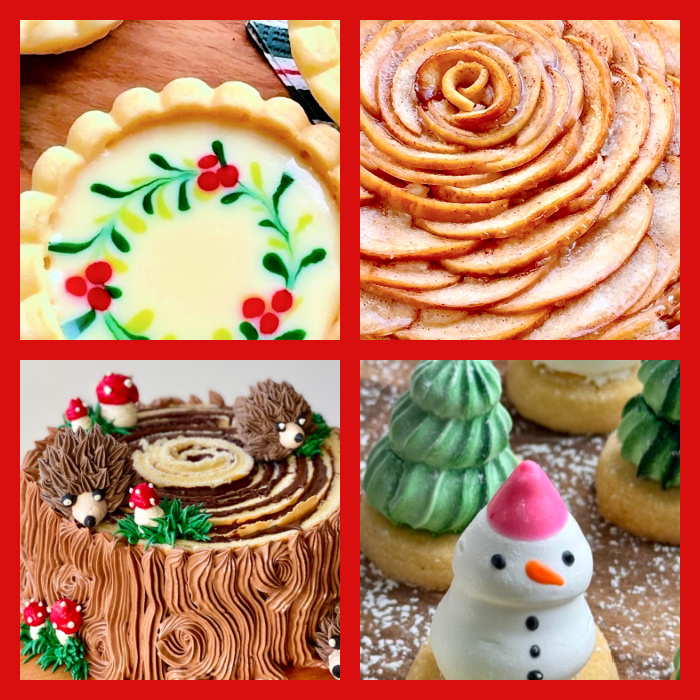
PRETTY FOR SPRING. In this section she shares so many bakes with a floral and overall cute component. She opens the chapter with one incredibly beautiful crostata, perfect lattice and colorful flowers all around the edge, all made with pastry. Truly a masterpiece! Imagine Madeleines decorated with pressed flowers, a Roll cake perfect for Valentine’s with hearts imprinted all over. A complete dream of a chapter.
SUMMER LOVIN’.Again the chapter opens with a showstopper, her Happiness Cake Roll, at some point I simply must make it and take for my donations on Fridays. It is one of the happiest bakes I’ve seen, just gives you a smile. A patterned roll cake topped with all kinds of colorful concoctions made of meringue. Another favorite of mine is her Strawberry Cake, decorated with a white buttercream lattice. Must bake! Adorable Linzer-style cookies are part of this chapter too.
SWEET AND SPOOKY. If you are a Halloween-lover like myself, you will flip for this part of her book, but there is a lot more. It starts with cupcakes decorated as little foxes. It is in this chapter that you will find chocolate tartlets I used as a teaser recipe, although hers are different, the filling is ganache and they are all topped with a fresh raspberry. A Spider Web Cake Roll must be part of my Halloween next year. It is a promise! But my very very favorite? A Woodland Cake Roll which is rolled vertically. I’ve been fascinated with this type of cake for a long time.
MAGICAL CHRISTMAS. I almost made her opening recipe, Gingerbread Man Cake Roll. Yes, she is huge on cake rolls, a kind of bake I love and do not make often enough. That must change… Snowflake Pastries made with puff pastry are on my list also. They look absolutely amazing. Perhaps my favorite of this chapter: Holly Mini Tarts. Incredibly cute!
FROSTINGS AND FILLINGS. In this final chapter she shares some of the basic recipe used throughout the book, so it is very useful, plus you can use those for your own versions of cakes and bakes.
I thank Winnie for allowing me to publish a recipe from her cookbook, she is a very sweet person, quite helpful and interactive in her IG page (click here), so pay her a visit and order a copy of her book for yourself or someone you love…