FOUR LITTLE CUPCAKES

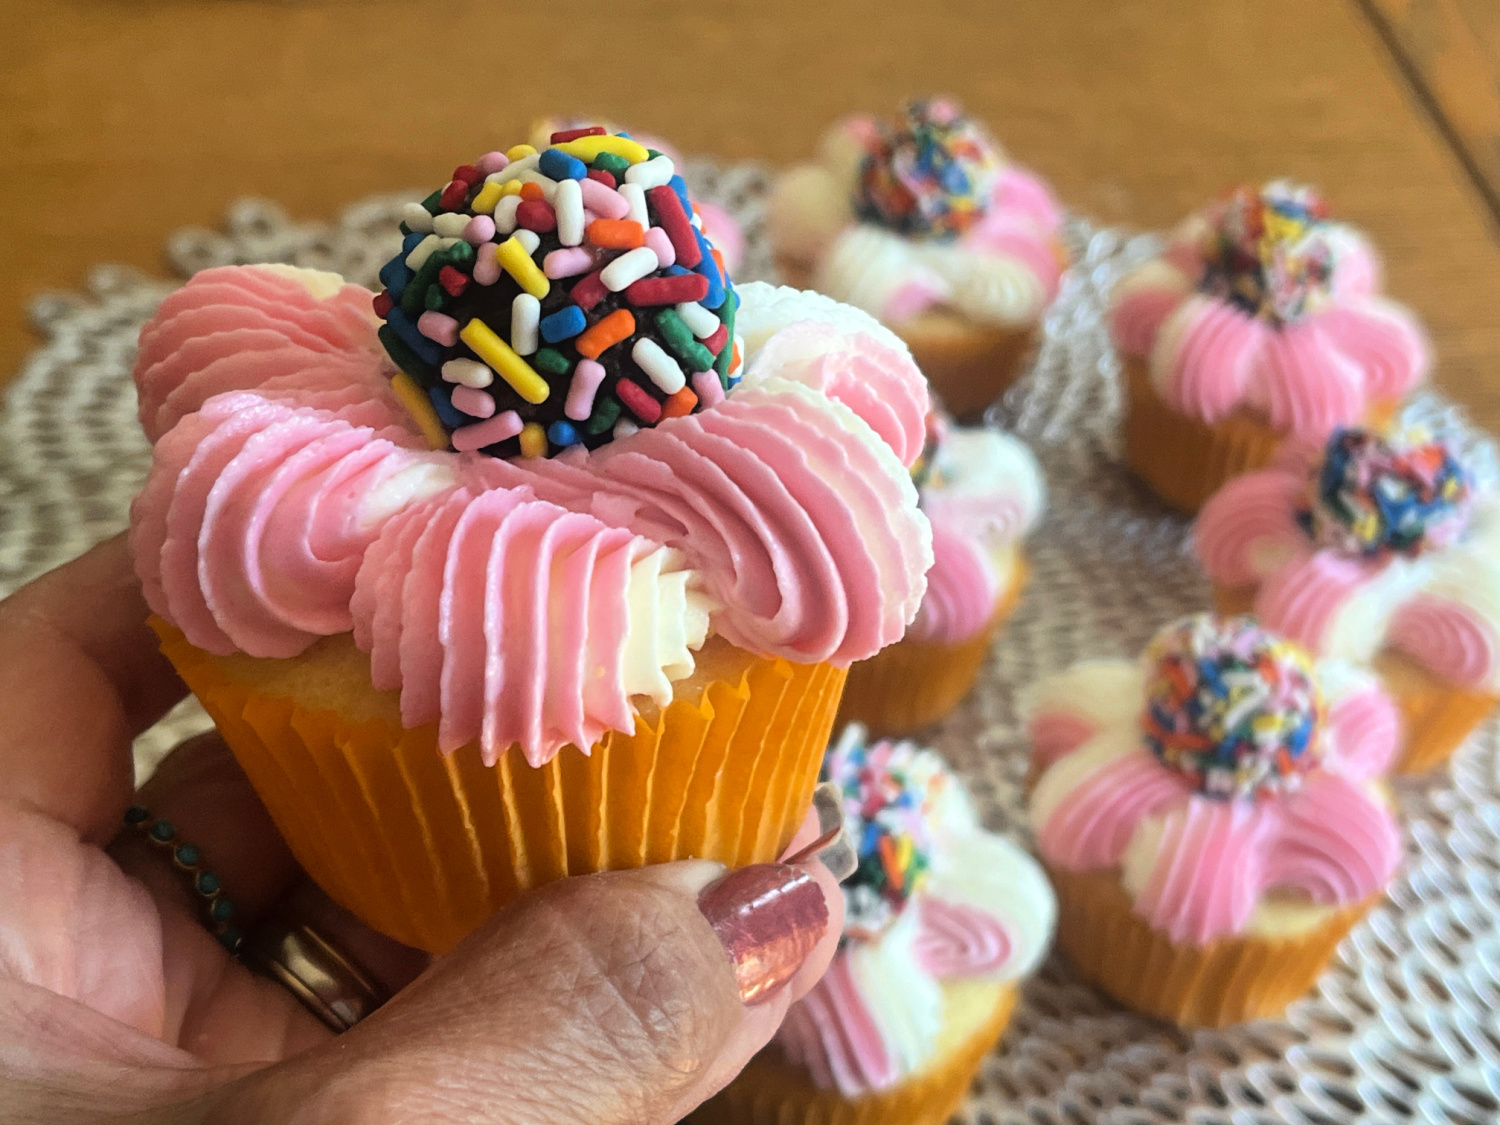
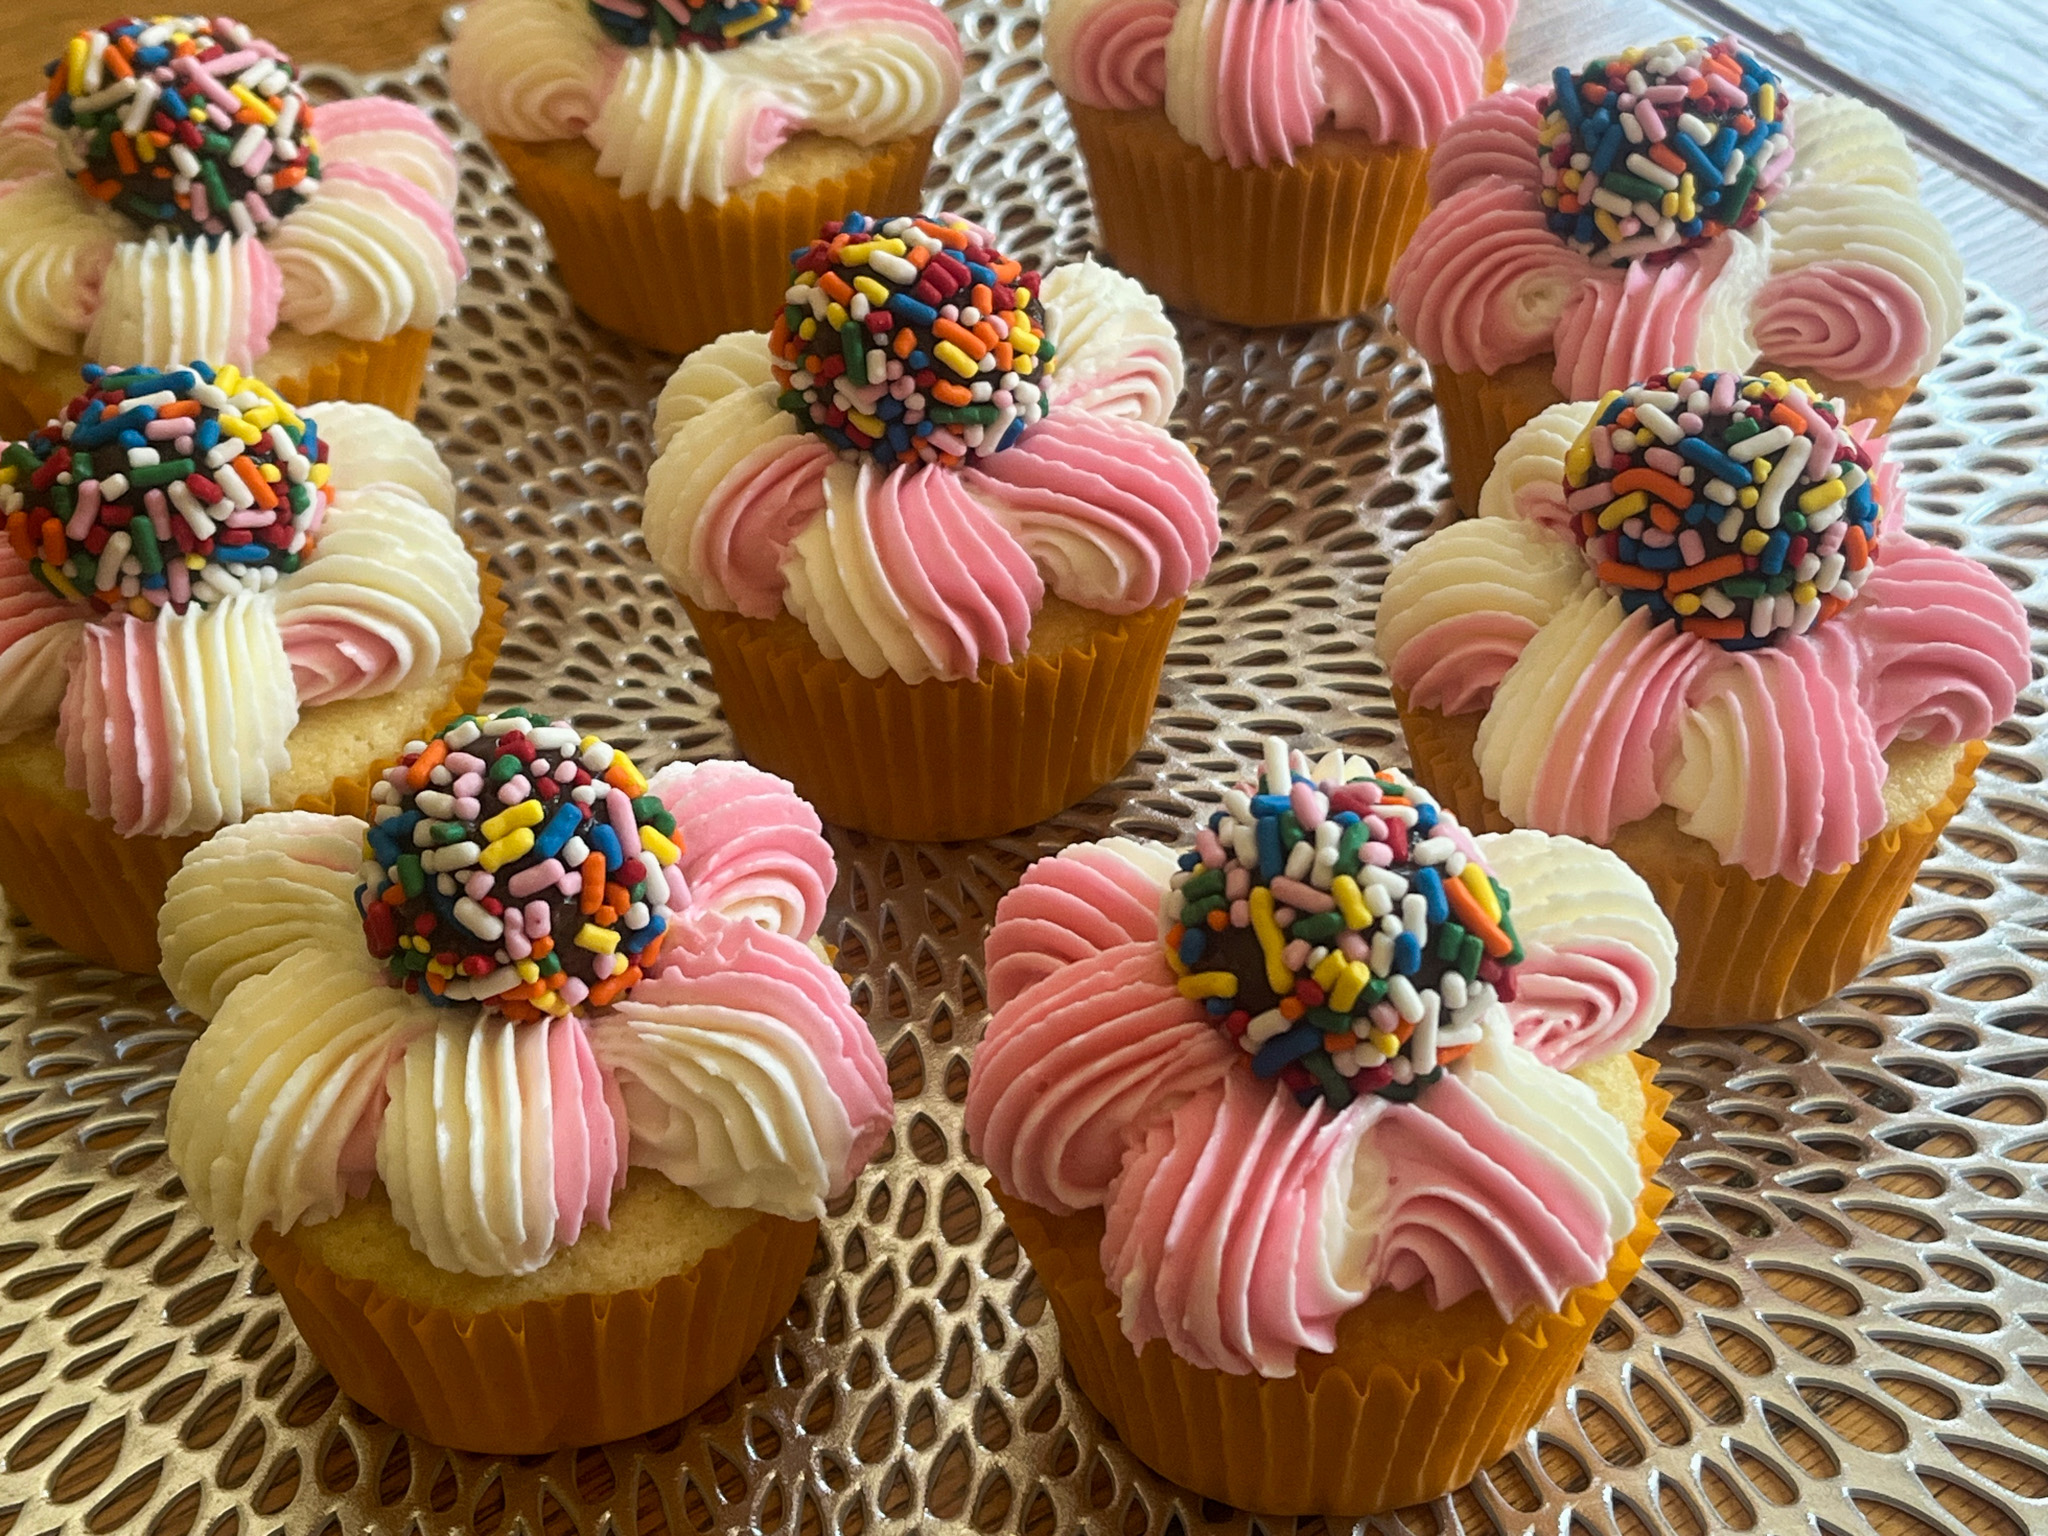
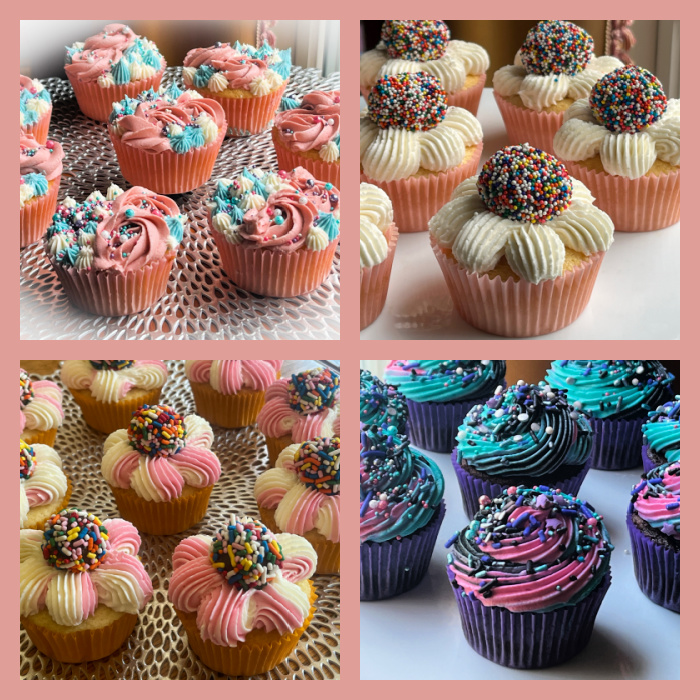
Vanilla or Chocolate Cupcakes, all with American Buttercream in different decorating styles. Two designs went tropical, showcasing a plump Brazilian “brigadeiro” on the top.

VANILLA CUPCAKES
(adapted from several sources)

120g all-purpose flour
150g granulated sugar
40g butter, unsalted, removed from the fridge for 30 minutes
1 large egg
120mL milk
1 + 1/2 tsp baking powder
1/2 tsp vanilla paste or extract
1/4 tsp salt

Heat the oven to 350F and line a cupcake pan with paper baking cups. Recipe makes 9 to 10 cupcakes.

Put the flour, baking powder, sugar, salt and butter cut in small pieces in the bowl of a KitchenAid type mixer fitted with the paddle attachment. Mix on medium-low until the butter is in very small pieces, almost like sand. 

Whisk the egg with the milk and vanilla, add slowly to the mixer running in low-speed. Once it is almost smooth, increase the speed to high for a couple of minutes, scraping the bottom of the bowl once. 

Stop the mixer and make sure the batter is fully smooth, mixing by hand with a spatula. Add batter to the 9 cupcakes, filling half-way full only. Bake for 15 to 18 minutes, until a toothpick comes out clean when inserted in the center.

Leave cool completely before decorating.

ENJOY!

to print the recipe, click here
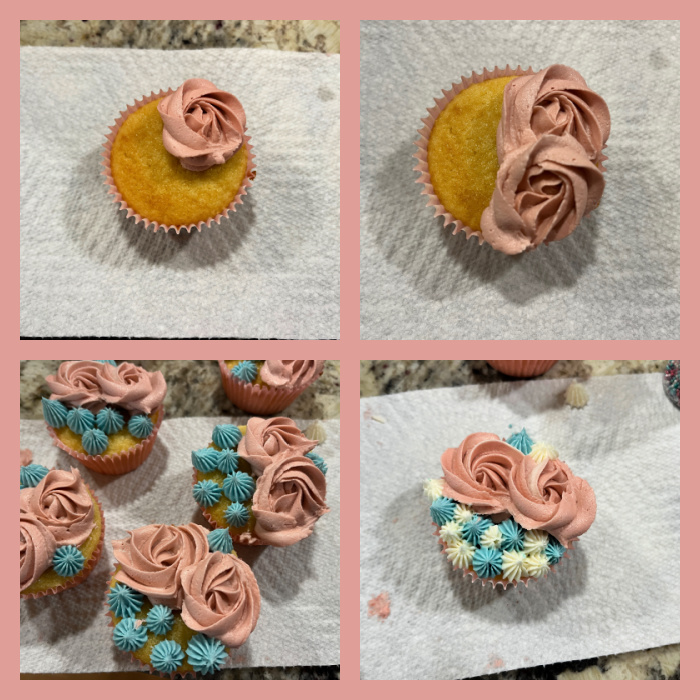
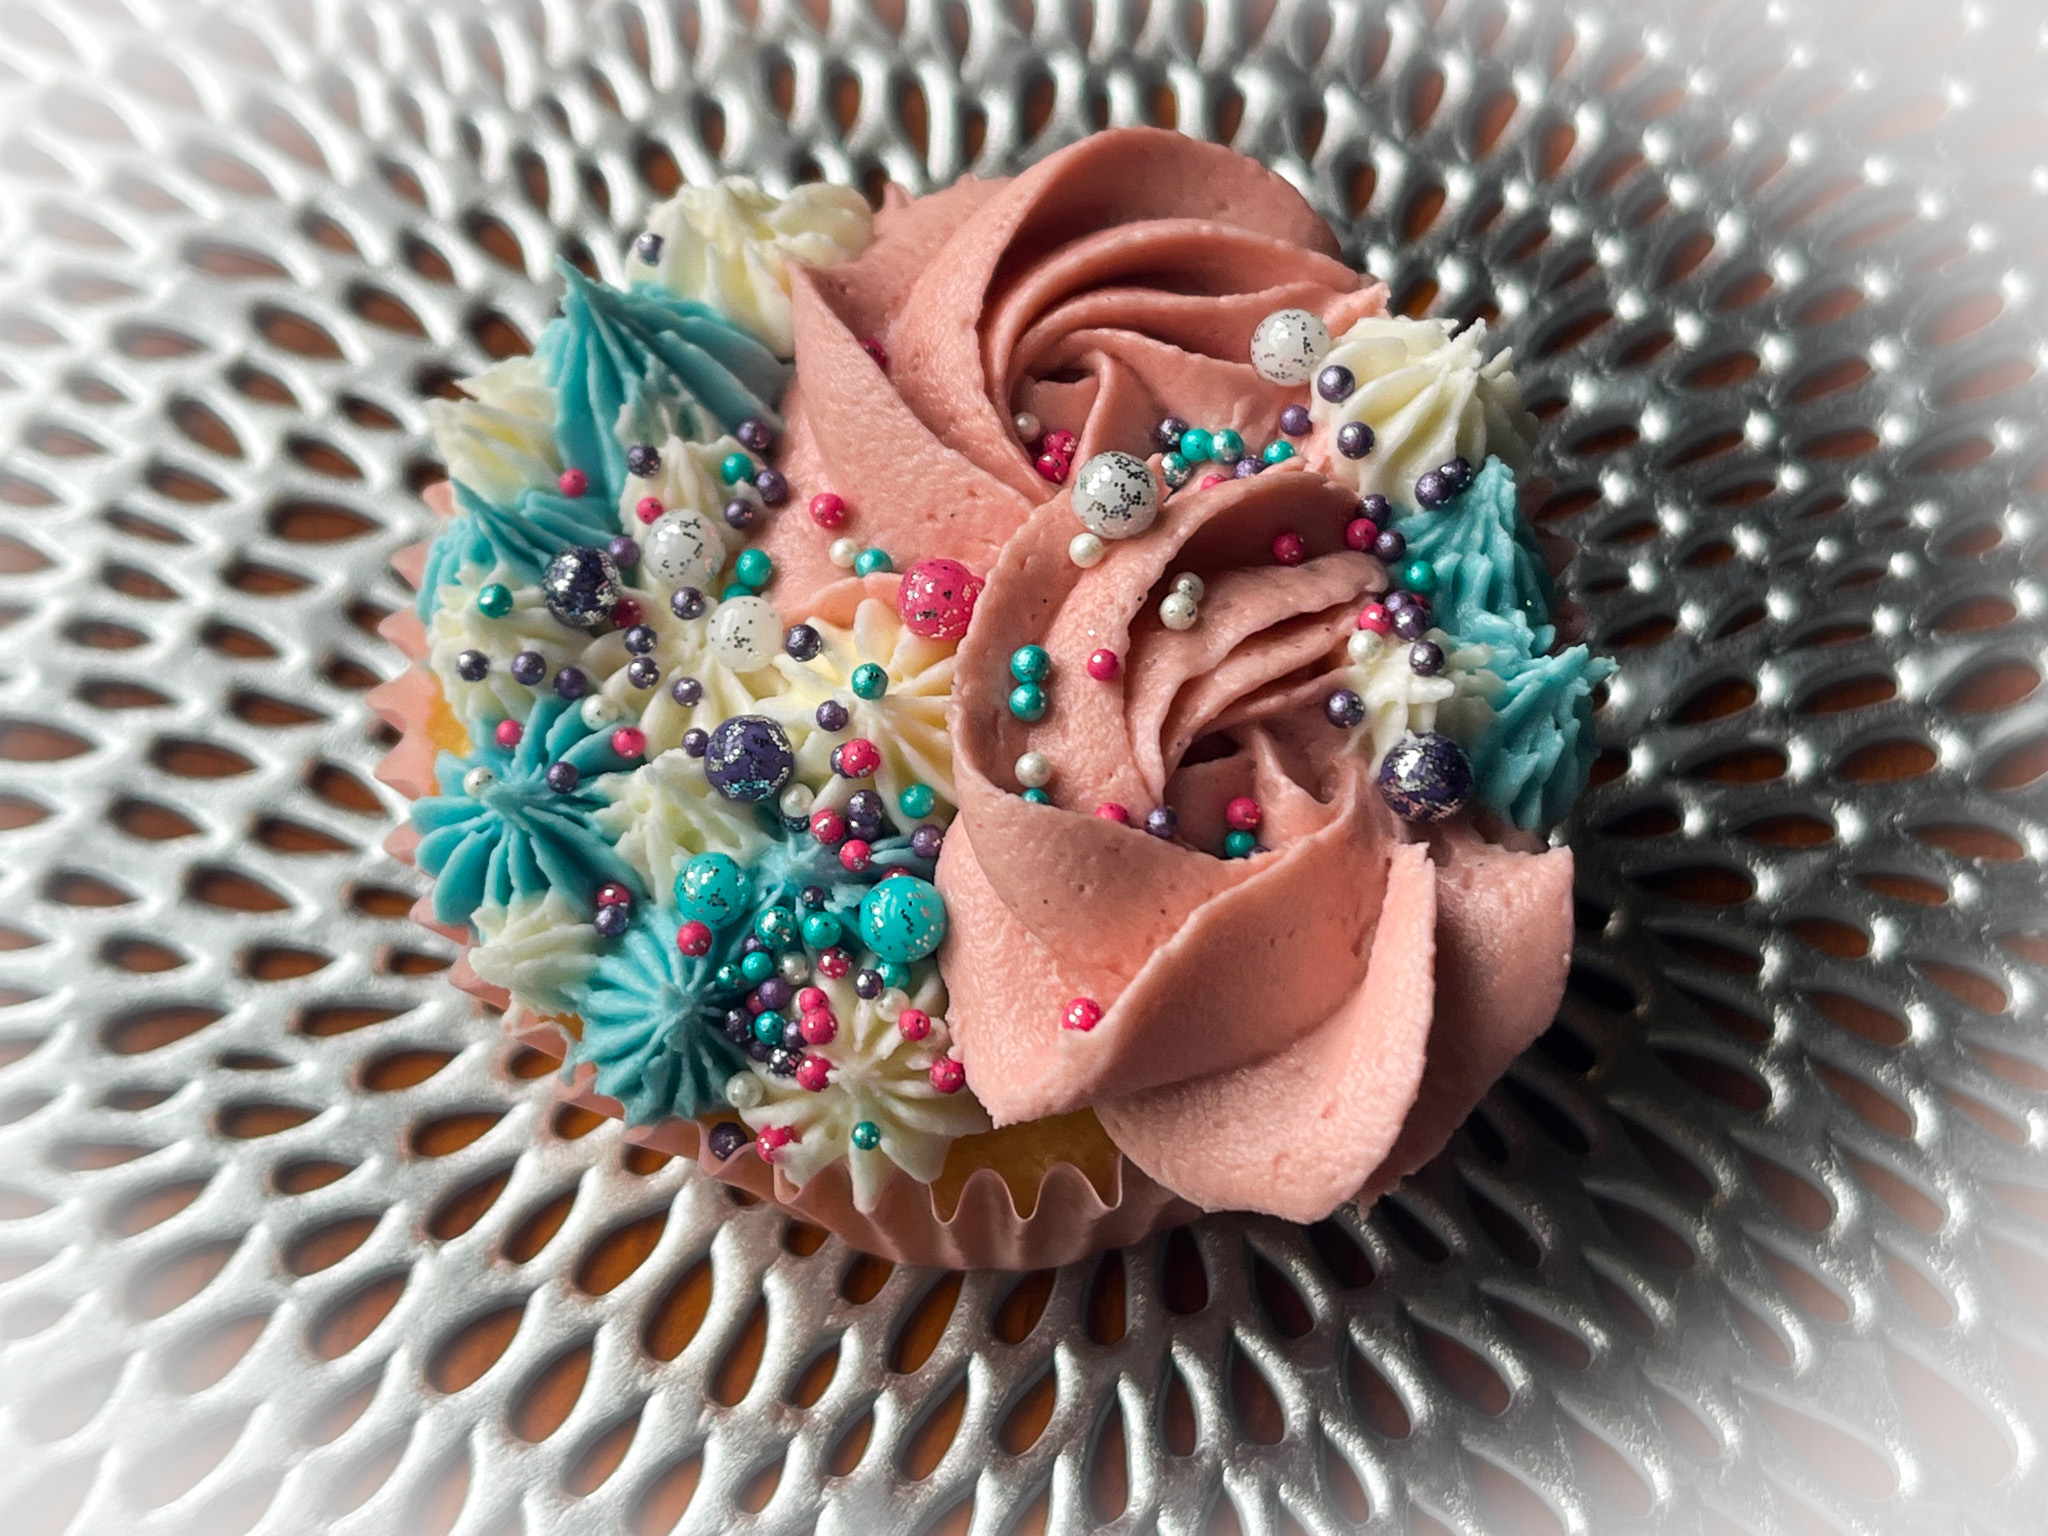
Vanilla cupcakes were baked then frosted with American buttercream, using this recipe. The batch was divided in three portions, dyed pastel pink, teal, and the last portion left white. Then, it was a matter of having fun with different piping tips and finish them with sprinkles in matching color.

I used a 3D Wilton tip for the large rose swirl, and a tip 20 for the other details. Just have fun with it, no precision needed. I love the end result…

.

I used the same vanilla cupcake recipe, the same American buttercream. Rolled brigadeiros in sprinkles, and used them to decorate the cupcakes right after frosting. I used a large open star tip to make petal-style piping. You can use white frosting, or make a marble type like I did in one of my batches, using pink and white.

These turned out fun and from what I heard, were a big hit when I donated them…

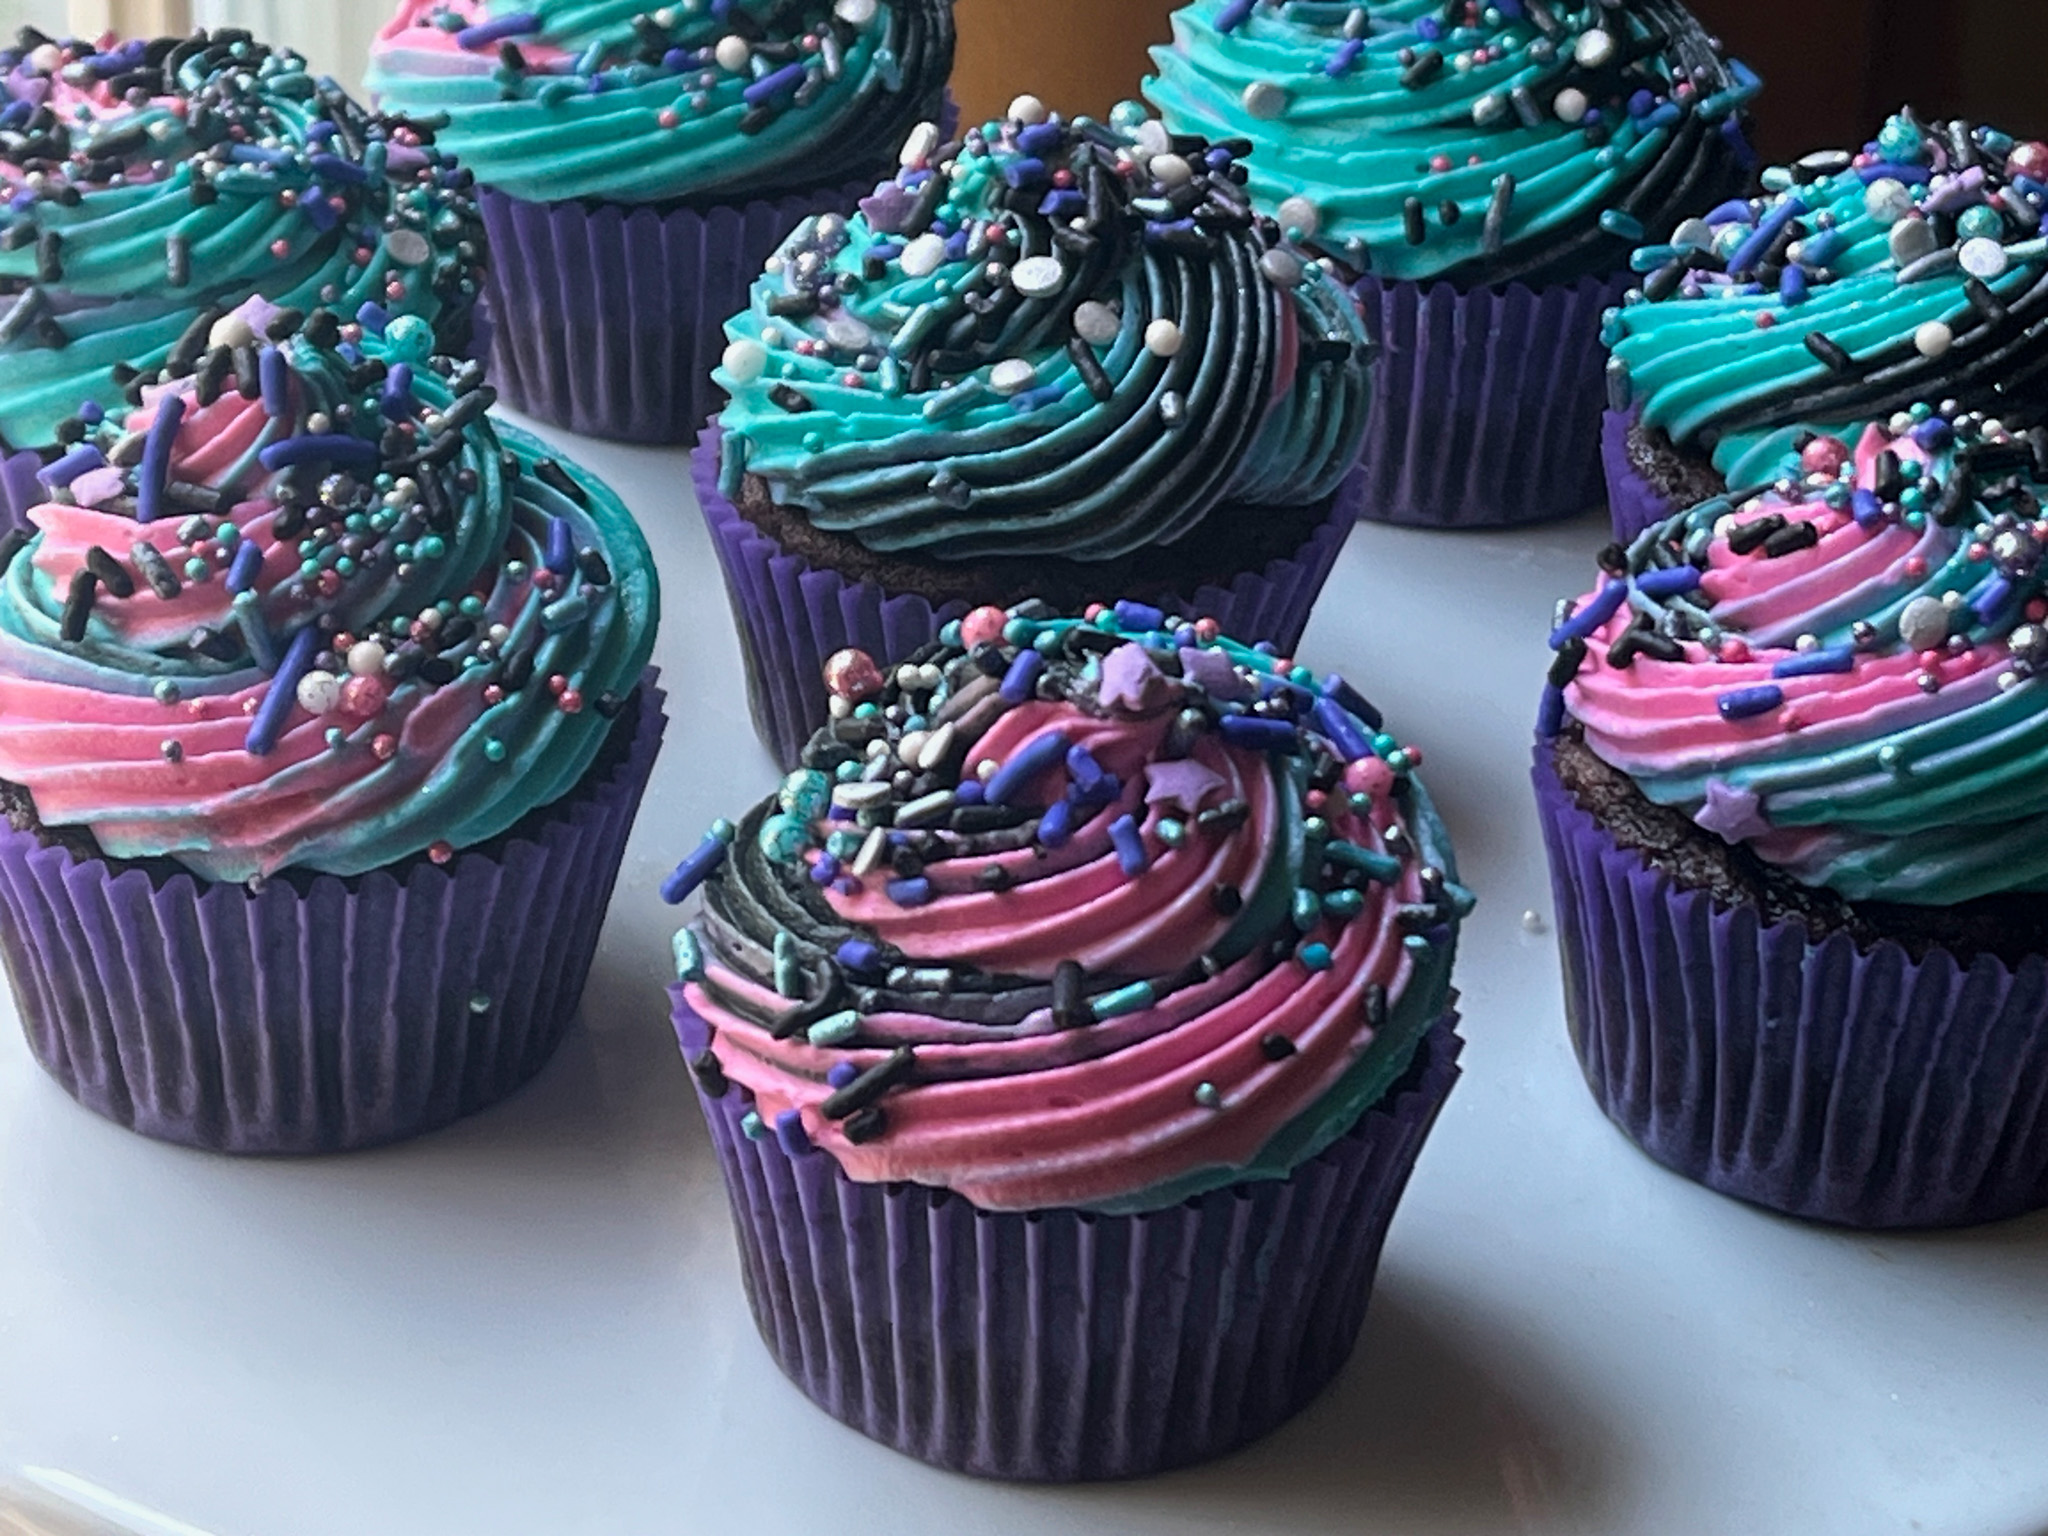
CHOCOLATE GALAXY CUPCAKES
(inspired by several sources)

for the cupcakes (makes 10):
100g all-purpose flour
20g cocoa powder
140g granulated sugar
40g butter, softened
1/8 tsp salt
1 large egg
120mL milk, full-fat
1 + 1/2 tsp baking powder

Heat oven to 350F and line a tray with cupcake liners. 

Mix the milk with egg in a small bowl, whisk, reserve. 

Put the flour, cocoa powder, butter, sugar and salt in the bowl of a standing mixer fitted with the paddle attachment. Mix until the butter forms a sand consistency. Pour half the milk mixture into the bowl and mix on low-speed for a minute. Increase the speed to medium-high for a couple of minutes. Add the remaining milk mixture, and mix on low-speed until fully incorporated. 

Increase the speed for a few seconds, then add the batter to the lined cupcakes. Bake for about 15 minutes, until a toothpick comes clean when inserted in the center. 

Cool the cupcakes completely before frosting. 

ENJOY!

to print the recipe, click here

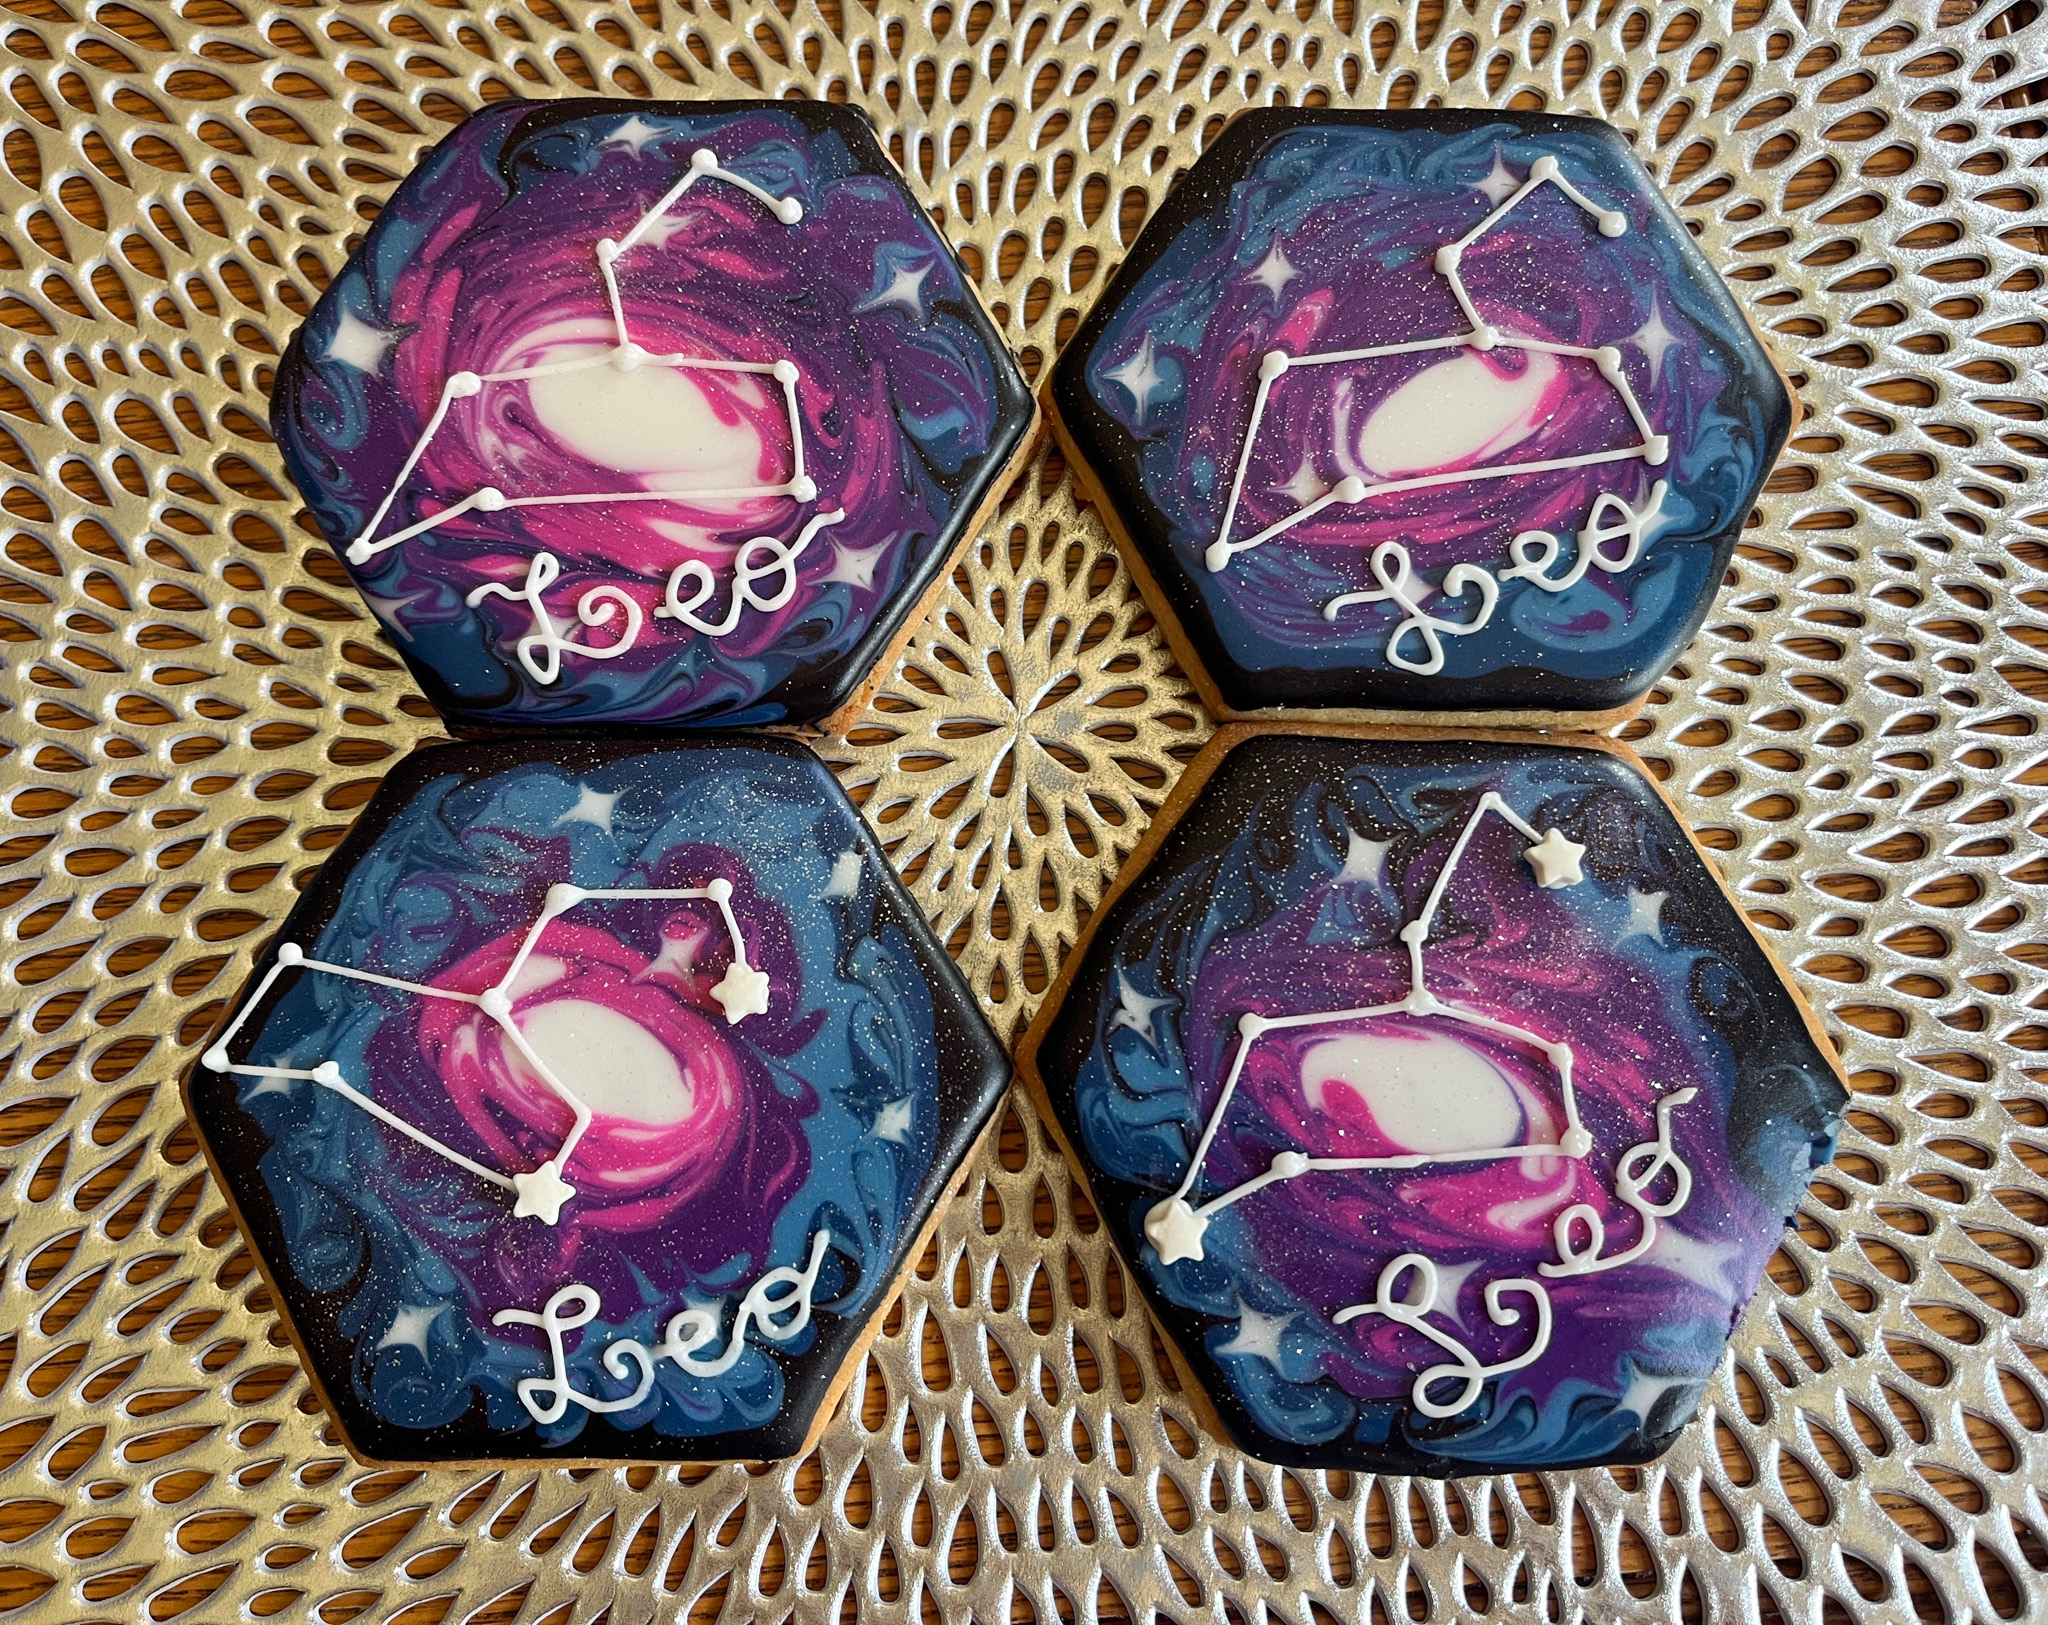
For the galaxy effect, divide the buttercream in three portions, one of them smaller than the other two (no need for exact measurements, you can eye-ball). The idea is to minimize the amount of the very dark component, otherwise it will overpower the design. Dye the smallest portion black, the other two teal and pink. Add them in straight lines over plastic wrap, roll the wrap like a sausage and insert into a large piping bag fitted with an open star tip. Pipe swirls, and add sprinkles. These would be amazing next to the cookies I blogged about recently, don’t you think?

1 YEAR AGO: Summer in Cupcakes

2 YEARS AGO: Puff Pastry Twists with Cinnamon and Cardamon

3 YEARS AGO: Three Delicious Bakes

4 YEARS AGO: Banana Bread from the Experts

5 YEARS AGO: Shrimp Stir-Fry with Snow Peas and Cashews

6 YEARS AGO: Pickled-Roasted Chickpeas with Cashew Cream

7 YEARS AGO: Twice-Baked Goat Cheese Souffle

8 YEARS AGO: A Star from England in the Bewitching Kitchen

9 YEARS AGO: Hommage to the Sun

10 YEARS AGO:The Fabulous Three
.
11 YEARS AGO: Turkey-Chorizo Burger with Green Chile Dressing
.
12 YEARS AGO:Taco Salad
.
13 YEARS AGO: Semolina Sourdough Boule
.
14 YEARS AGO:Forgive me, for I have sinned
.

15 YEARS AGOCracked Wheat Sandwich Bread
.
16 YEARS AGO:  Au Revoir, my Bewitching Kitchen
.
17 YEARS AGO:French Bread
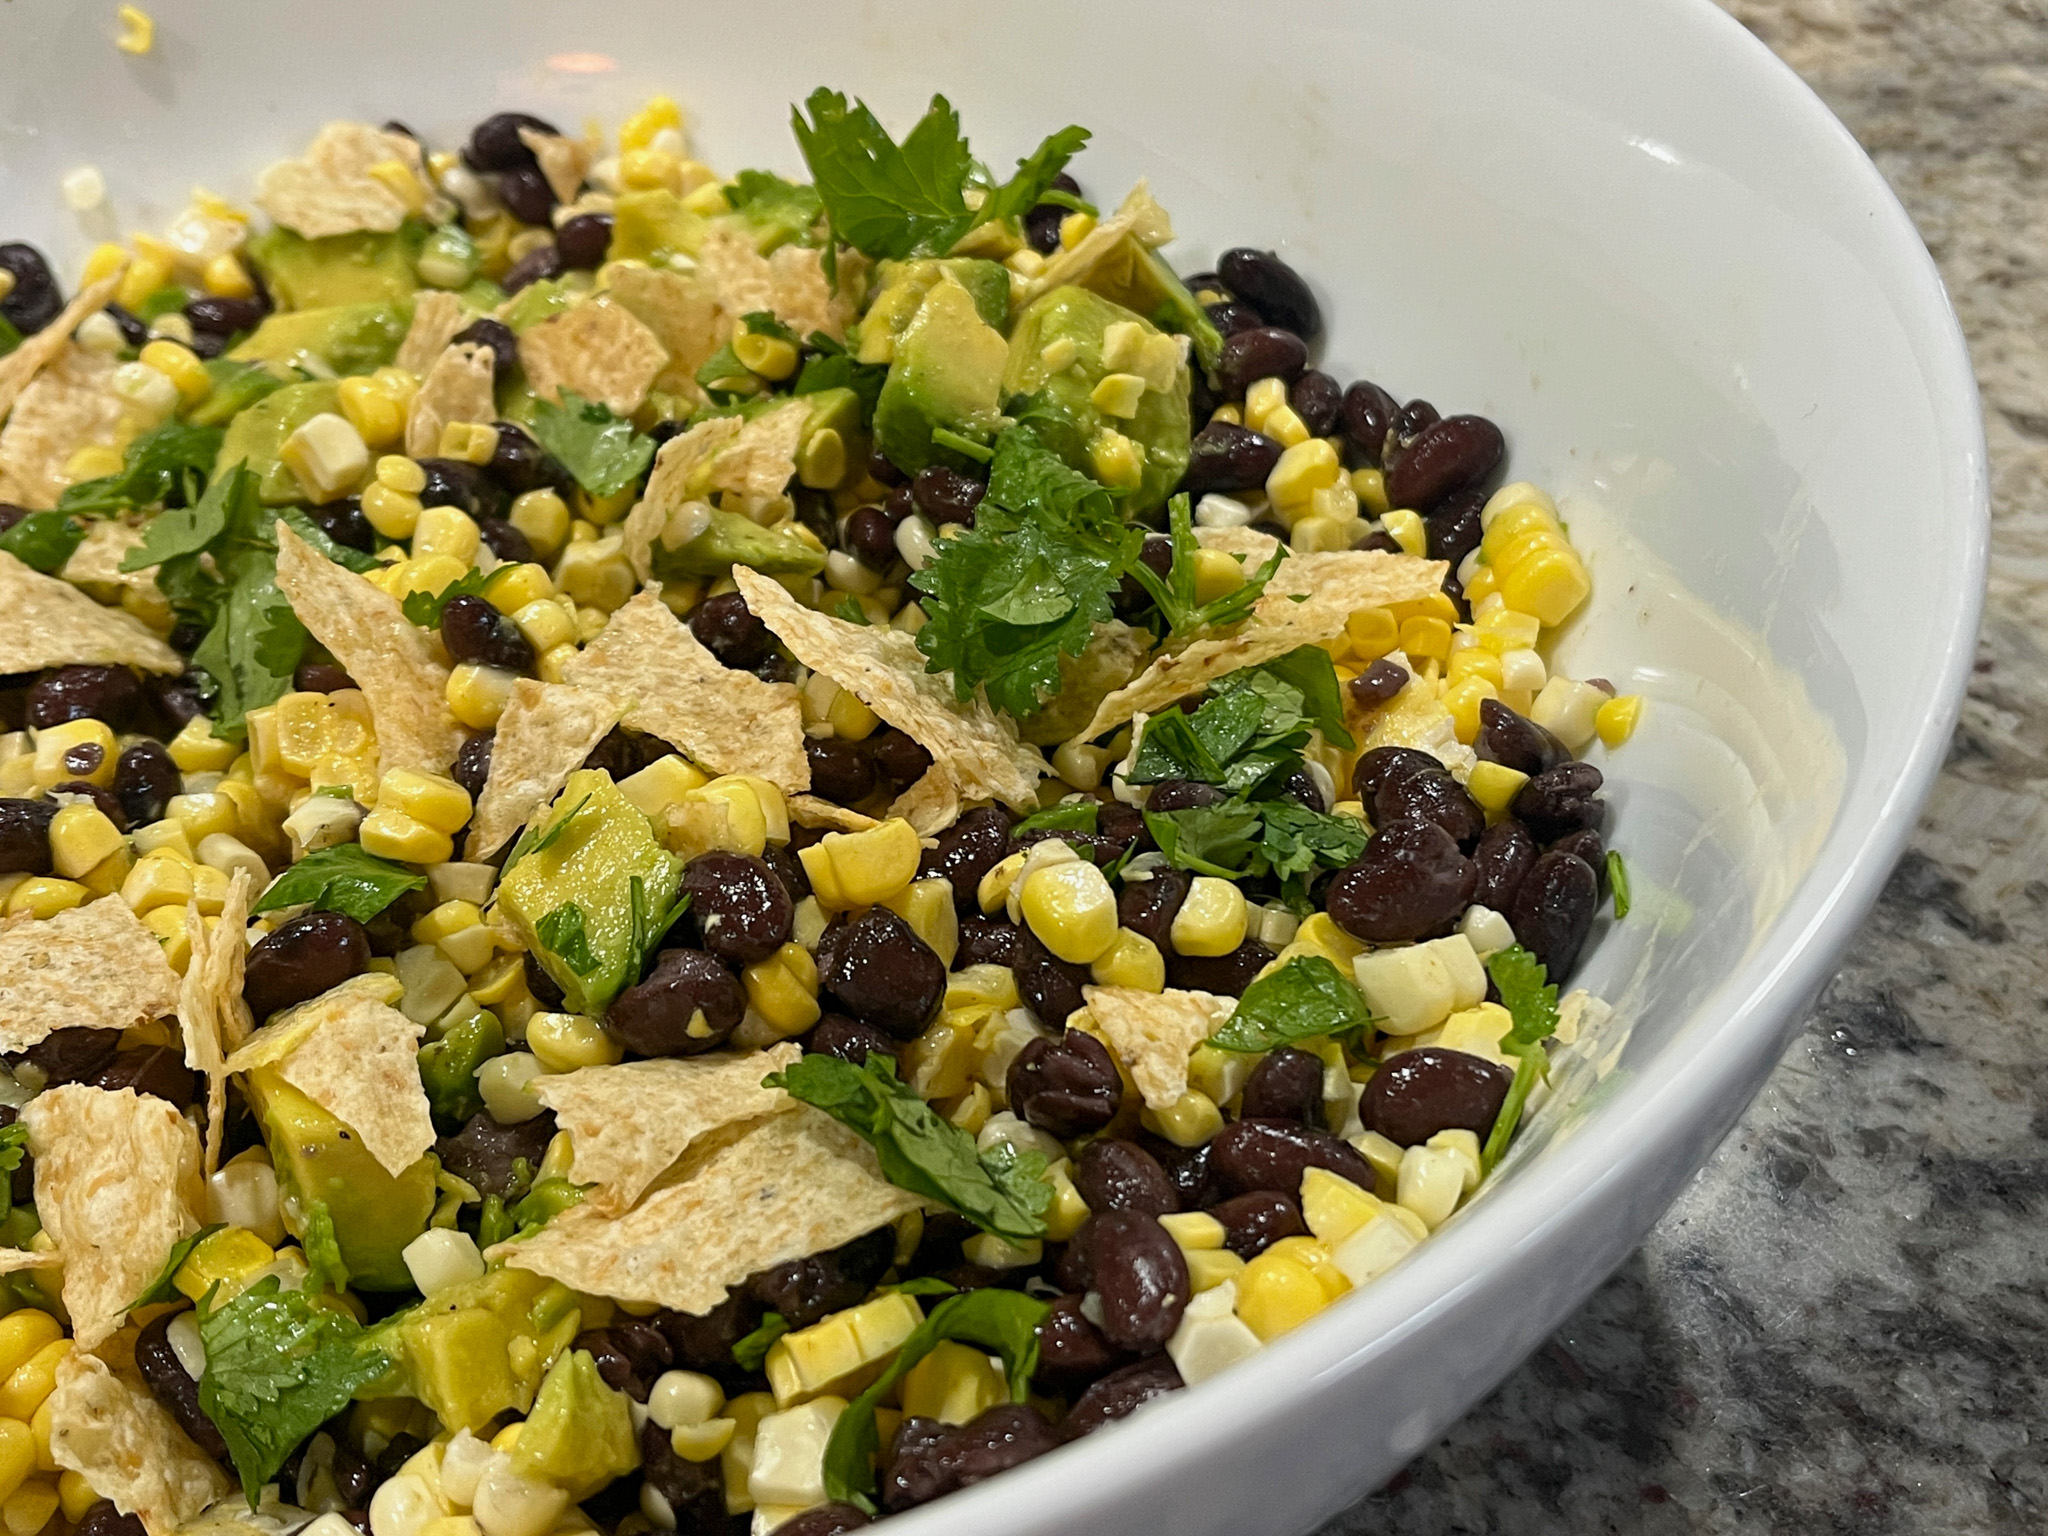
FRESH CORN AND BLACK BEAN SALAD WITH CORN CHIPS

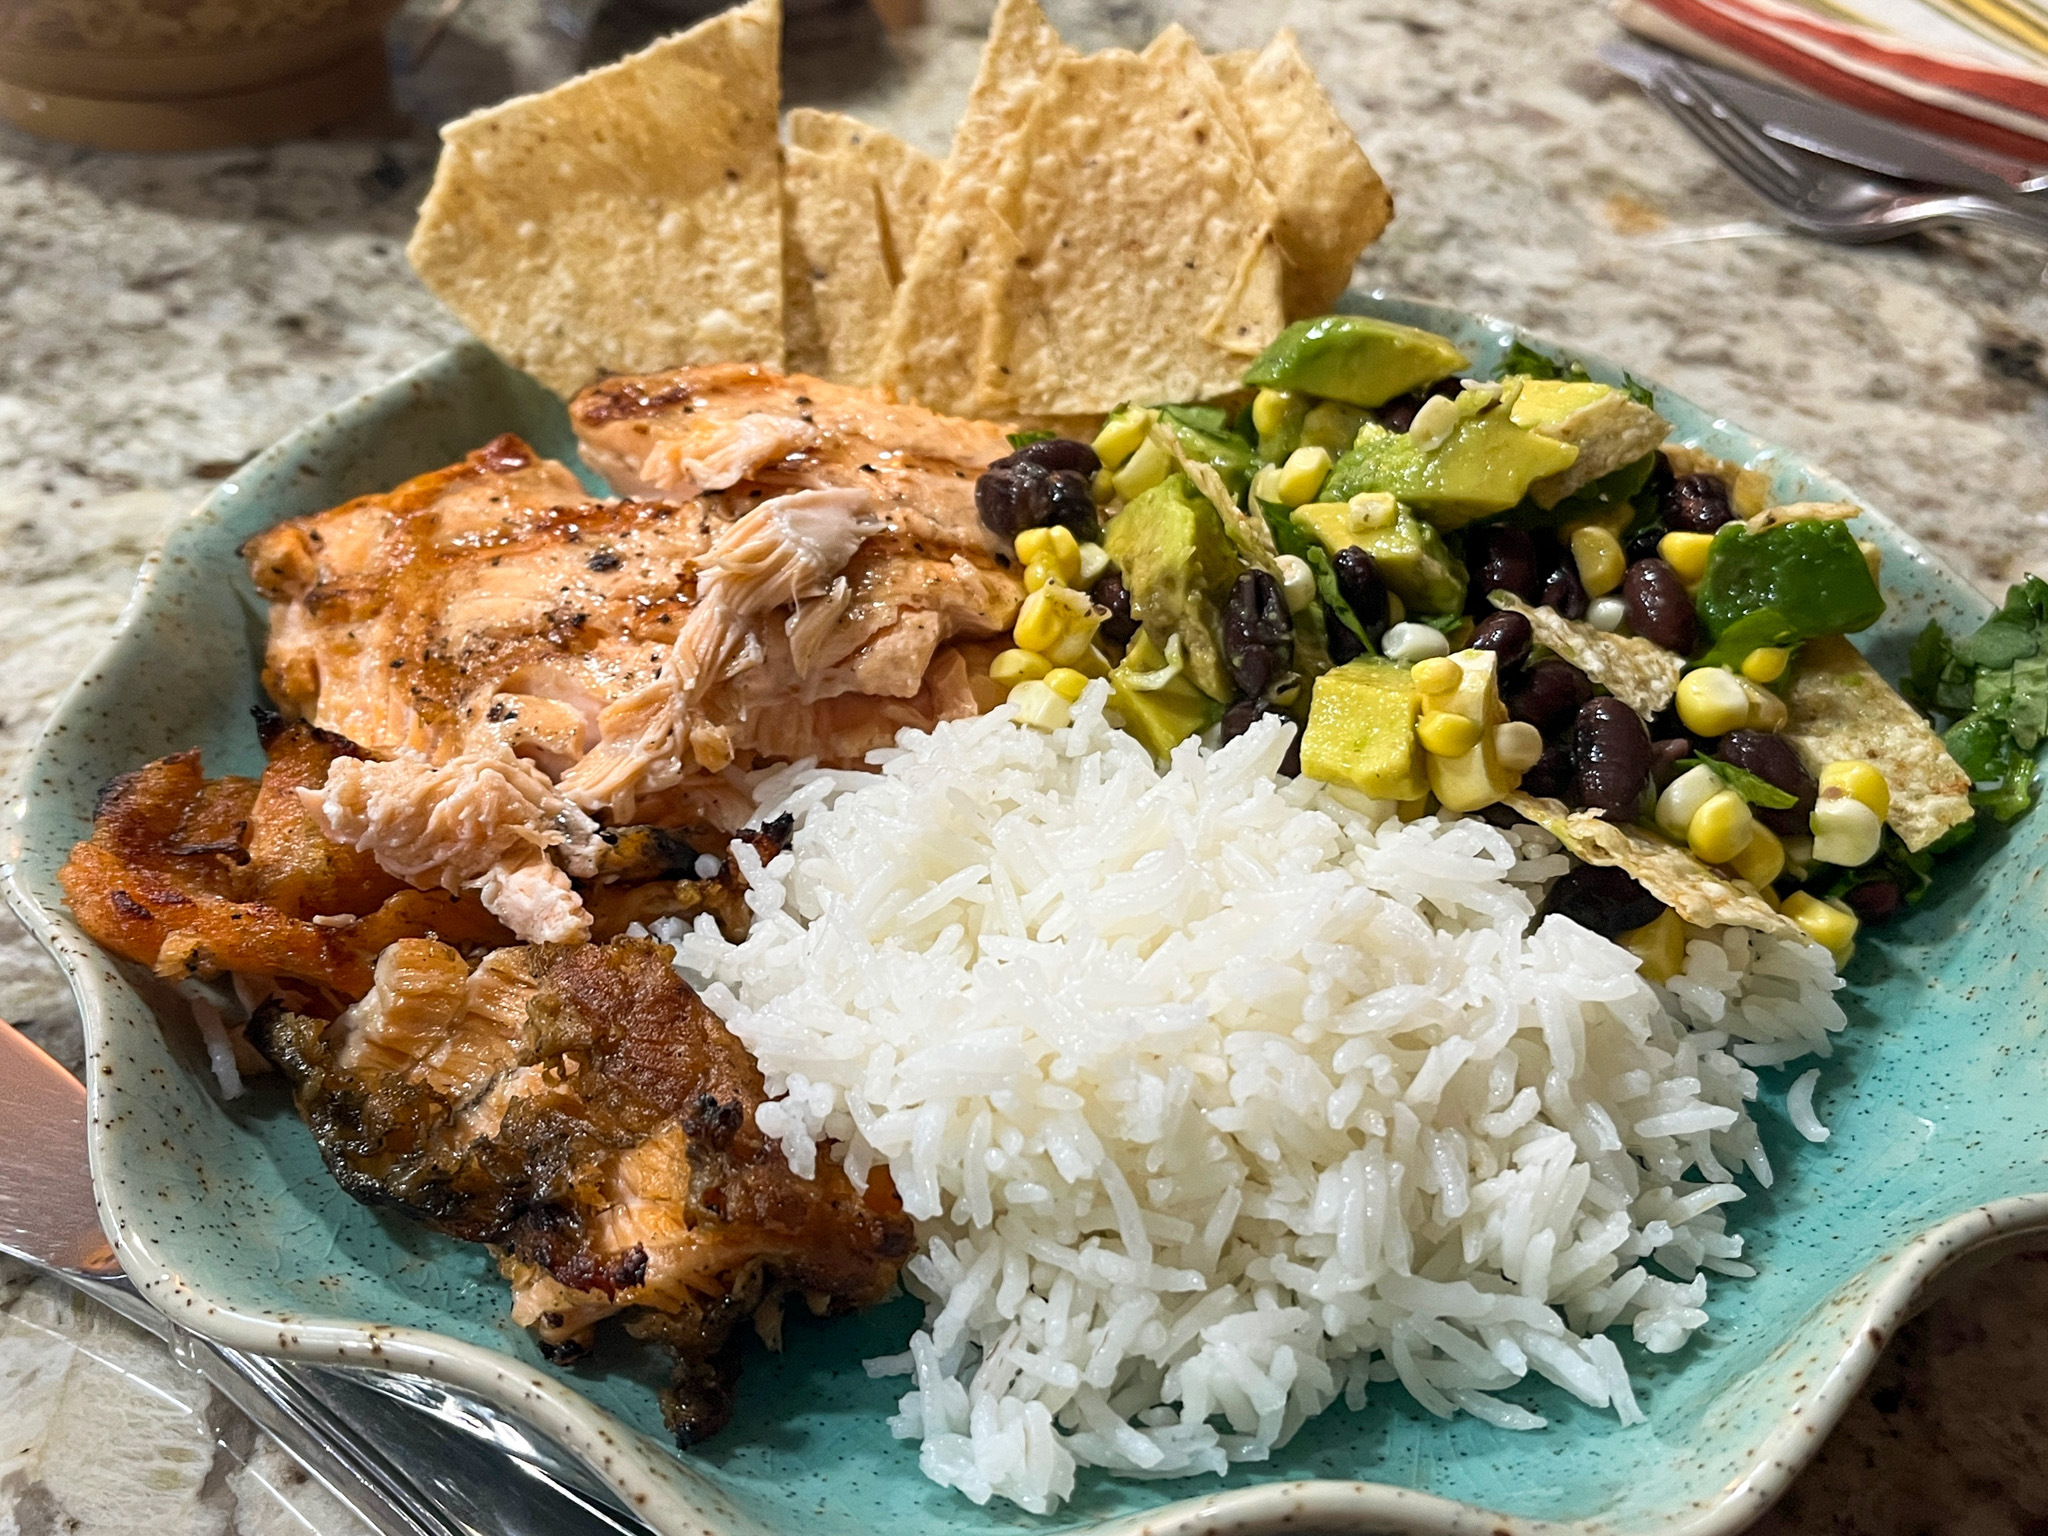
We have new neighbors who moved here from a town in Kansas 5 hours away, where they own a big farm. One of their main crops is corn, and they have been gifting us spectacular examples of their labor of love. We often indulge with nothing more than a little salt and pepper, but we’ve also been working hard trying new recipes. Here is one that is a total winner!

FRESH CORN AND BLACK BEAN SALAD WITH CORN CHIPS
(adapted from The New York Times)

for the dressing:
2 tablespoons fresh lime juice
1 teaspoon ground cumin
1 teaspoon sugar (if your corn is super sweet, omit it)
½ teaspoon crushed red pepper
3 tablespoons extra-virgin olive oil
Salt and pepper to taste

for the salad:
4 cups fresh corn kernels (from 4 large cobs)
1 (15-ounce) can black beans, rinsed
A big handful of cilantro leaves, chopped
corn tortilla chips, lightly crushed, amount to taste
2 ripe avocados, halved, pitted and roughly diced
Hot sauce (optional), for serving

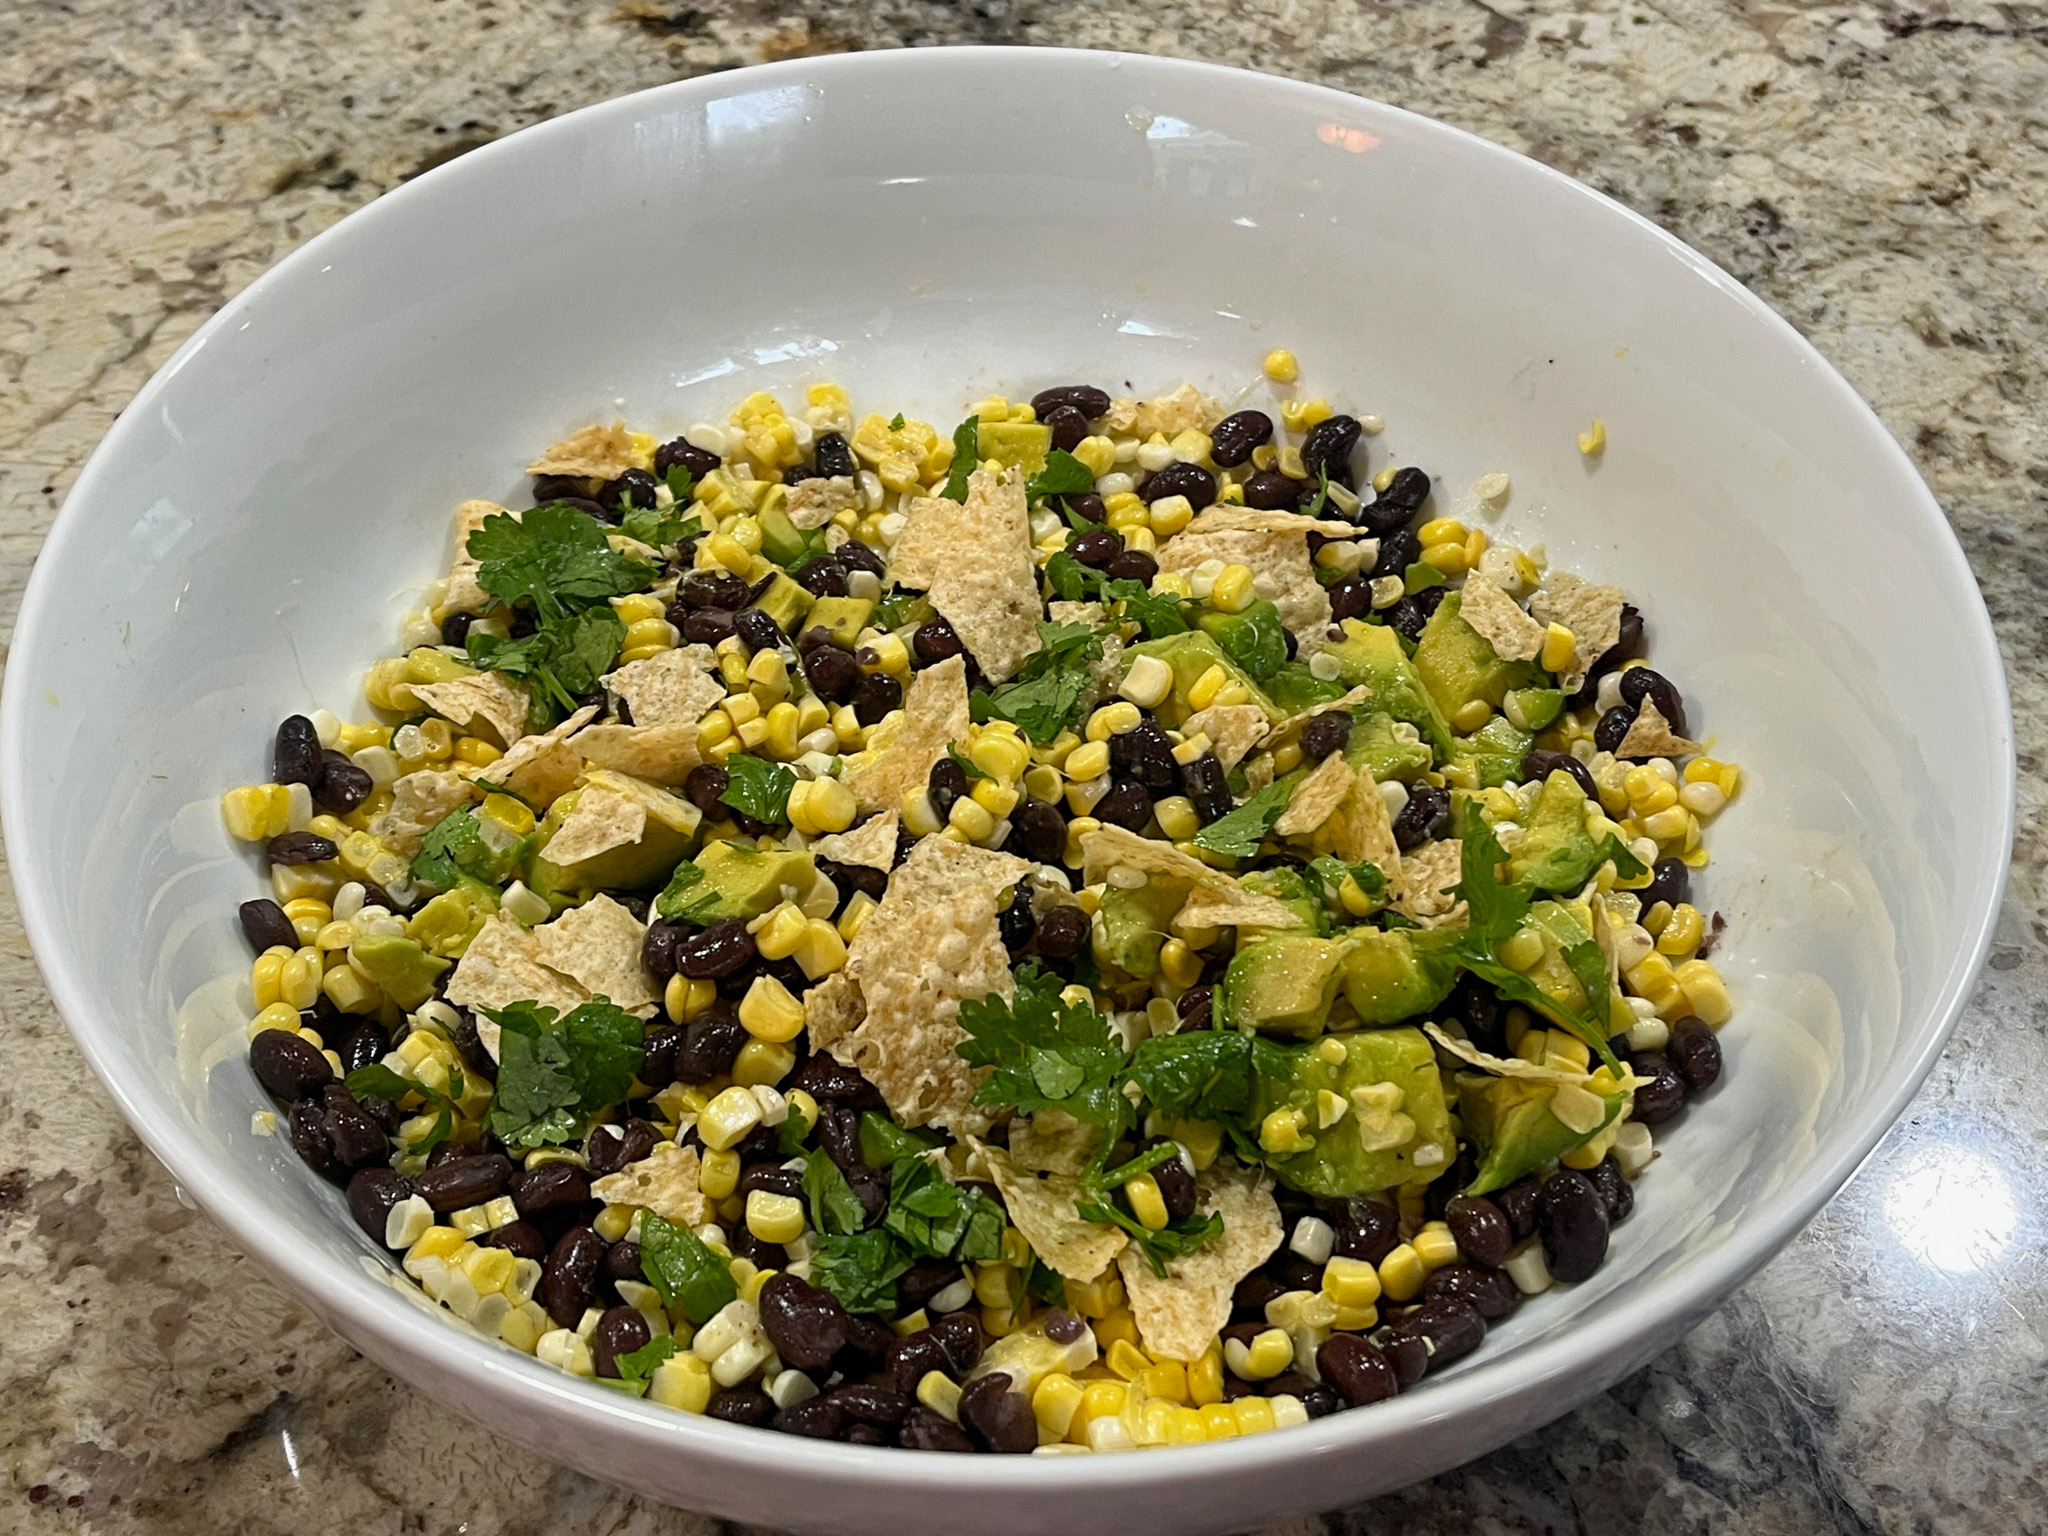
Prepare the dressing: To a large bowl, add the lime juice, cumin, sugar, crushed red pepper and olive oil. Season with about 1 teaspoon of salt and a pinch of pepper and whisk to combine. Taste and check seasonings, adding more salt and pepper if needed.
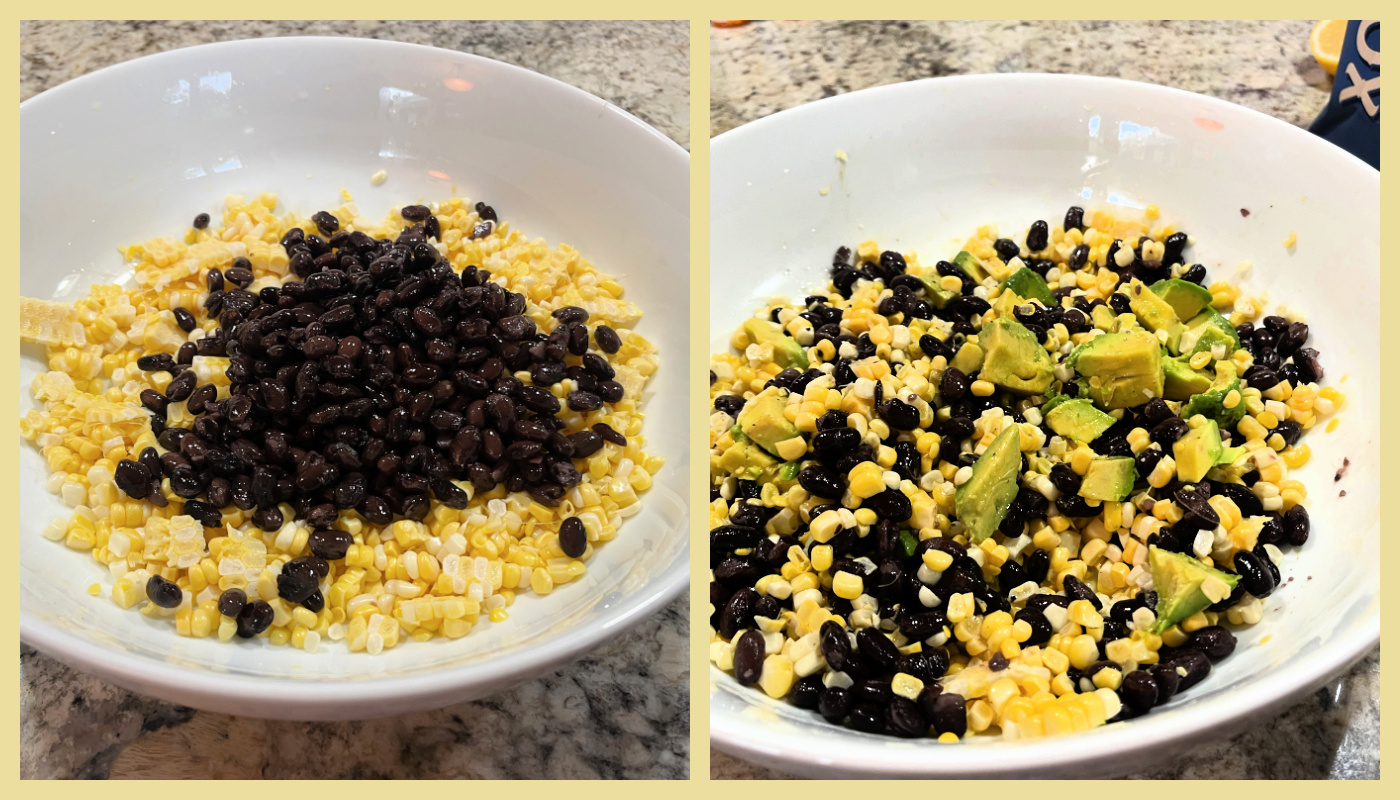
To the dressing, add the corn, black beans and cilantro. Toss to combine, taste and season with salt and pepper.
When ready to eat, add the corn chips and avocados, and toss to combine. Dot with hot sauce, if so desired.

ENJOY!

to print the recipe, click here

Comments: Such a colorful salad, and quite substantial, as it is quite high in carbs. You can serve it only next to a main dish like grilled salmon, which we chose in our first time enjoying it, or go for the kill and also add rice and more chips like my beloved did.

Some dishes make you smile just looking at the plate, so colorful and fun. And having the best corn makes it super special. Leftovers were still ok, although I recommend adding fresh corn chips. The avocado might suffer a bit but the overall acidity helps.

1 YEAR AGO: Gluten-Free Red Lentil Bagels

2 YEARS AGO: Sourdough Bubble Bread

3 YEARS AGO: Watermelon Salad

4 YEARS AGO: Kashmiri Chicken Thighs

5 YEARS AGO:  A Vegan Trilogy

6 YEARS AGO: The Mystifying Hurricane Roll

7 YEARS AGO: Pop-Tarts with Strawberry Balsamic Jam

8 YEARS AGO: Ptichye Moloko, a Russian Dessert

9 YEARS AGO: Cheesy Low-Carb Zucchini Tarts

10 YEARS AGO: Blogging Hiatus

11 YEARS AGO: Apricots, Three Ways

12 YEARS AGO: Up Close and Personal with Kale

13 YEARS AGOBlack Berry Cherry Sorbet

14 YEARS AGO: Asparagus Pesto

15 YEARS AGO: Chocolate and Chestnut Terrine

16 YEARS AGO: Under the spell of lemongrass

17 YEARS AGO: Greens + Grapefruit + Shrimp = Great Salad!

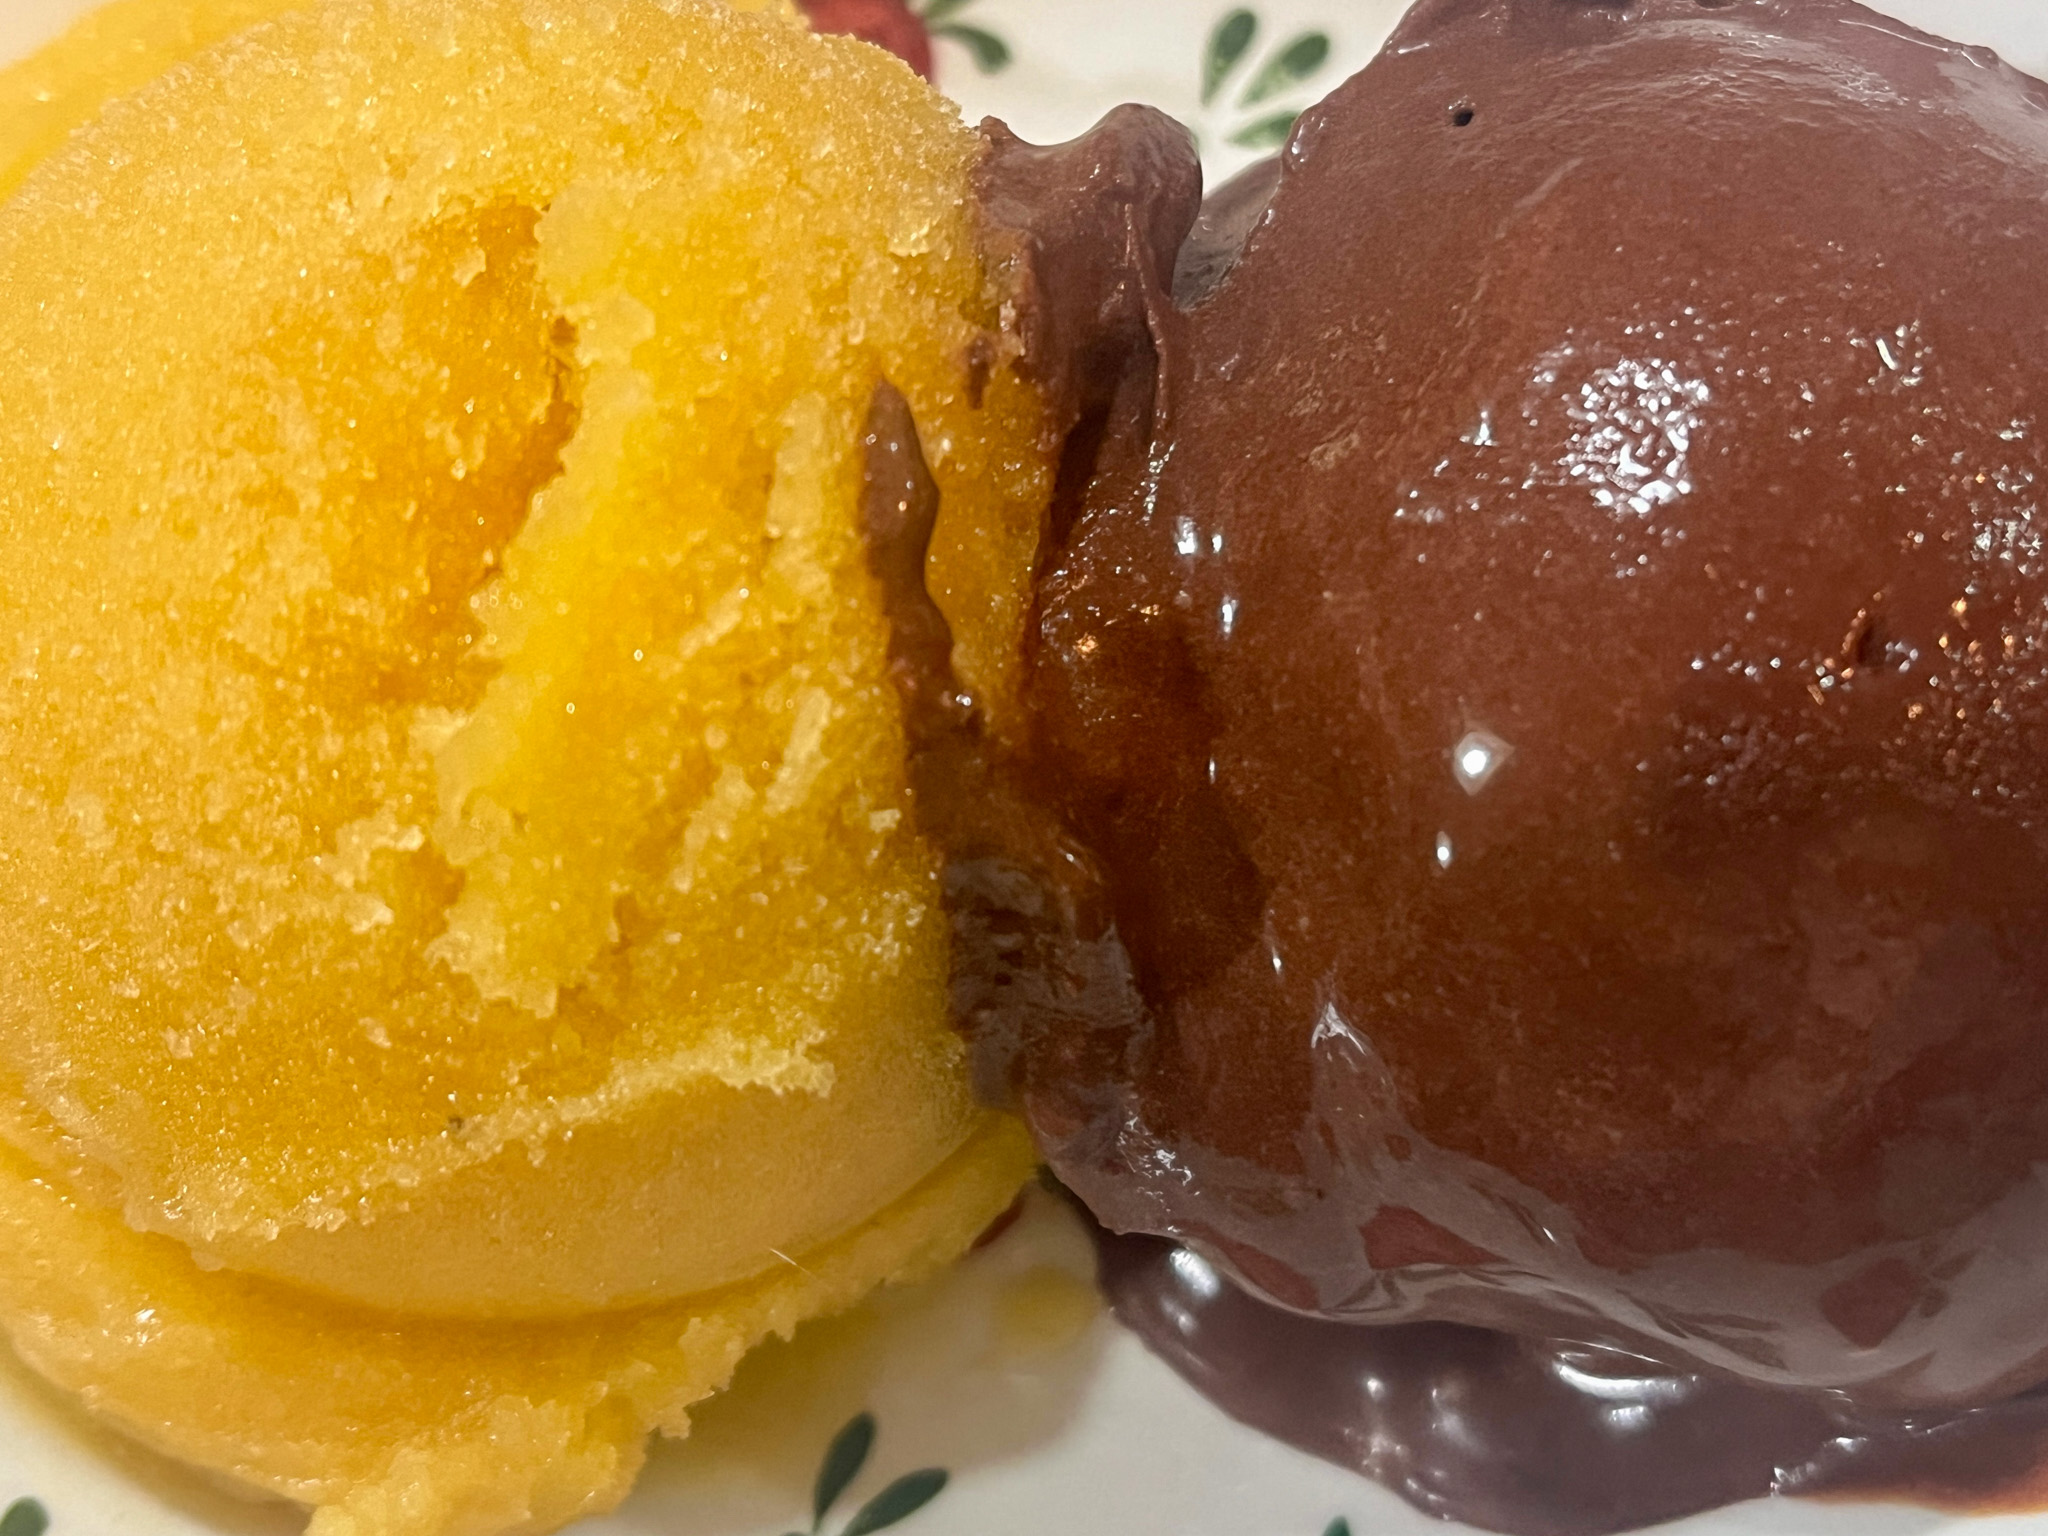
THE YIN AND YANG OF SORBETS

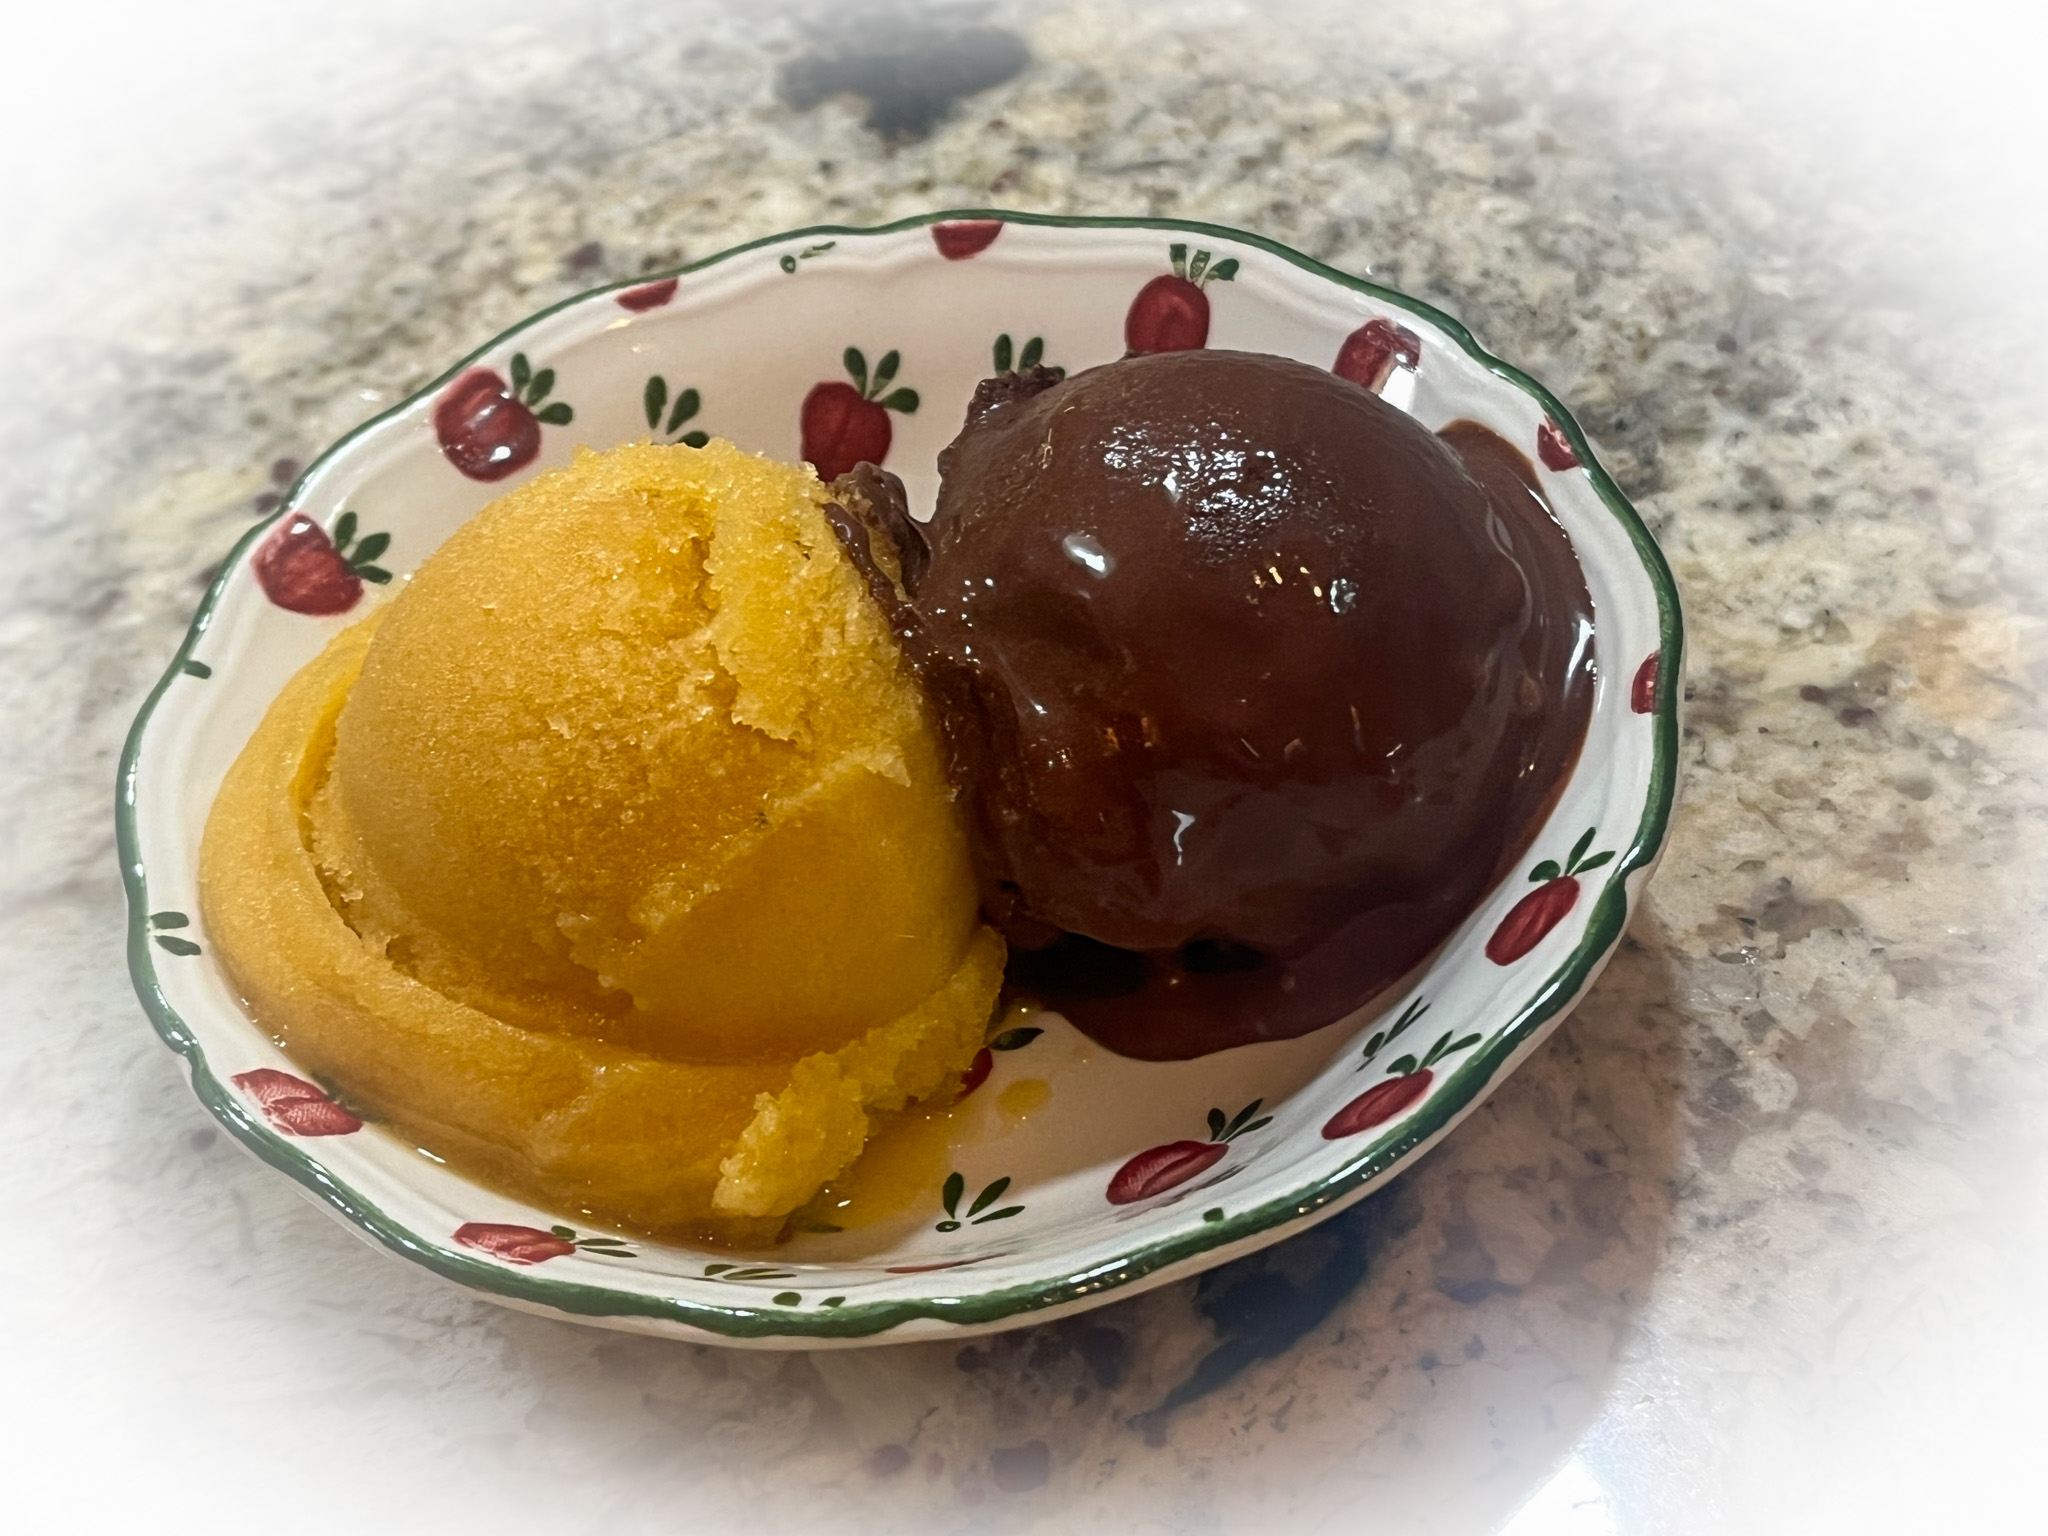
Two delicious takes on sorbets, one made by the husband, one made by yours truly. Together they make a match made in heaven. Am I talking sorbet or people? You decide!

PEACHES AND HONEYDEW SORBET
(from The Bewitching Kitchen)

2 + 1/2 cups peaches (with skin)
2 + 1/2 cups honeydew melon (or cantaloupe)
1/2 cup sugar
1 banana
juice of lime
2 tablespoons vodka
2 tablespoons Cointreau (can be omitted)

Mix all ingredients in a Vitamix type blender. Process until fully smooth, let it sit in the fridge overnight or at least 6 hours, covered.

Mix it briefly with a spoon, them churn in your ice cream maker, until done.

ENJOY!

to print the recipe, click here


CHOCOLATE SORBET
(from David Leibovitz)

RECIPE AVAILABLE HERE

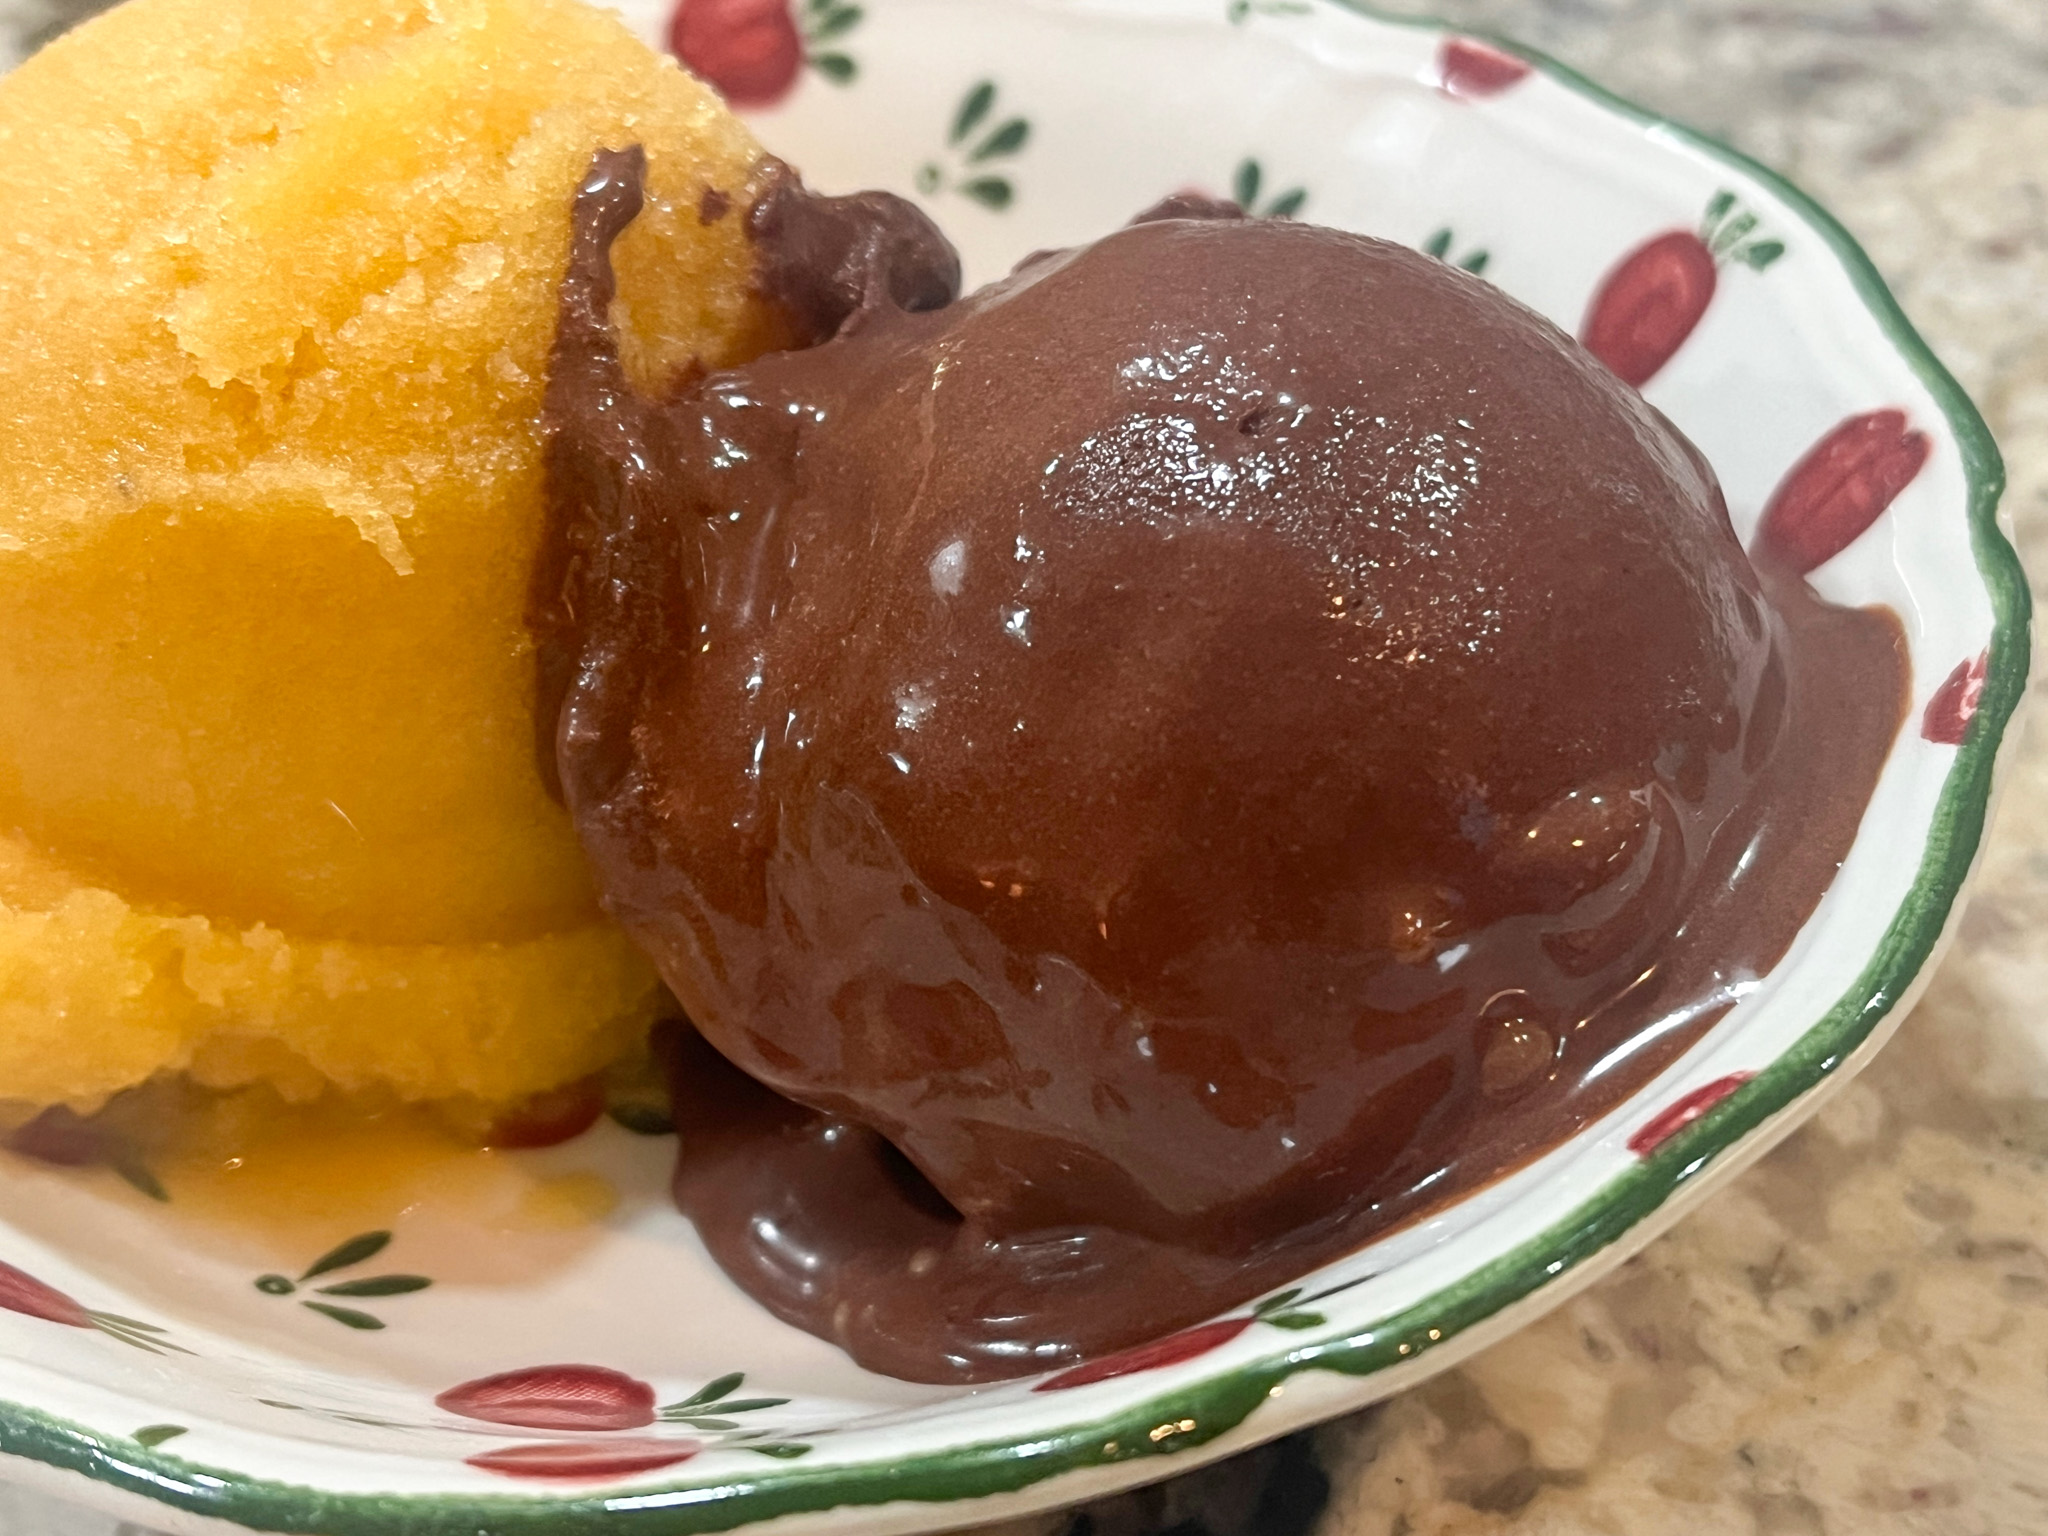
Comments: Phil is the sorbet maker in our home, and he always comes with amazing combinations using all sorts of fruits, as you can see if you do a search in this site. This peach/melon concoction is refreshing, with the right amount of sweetness. But we both feel that the chocolate sorbet from David Leibovitz steals the show. I’ve had his book – The Perfect Scoop – for many years, and wanted to try this version for the longest time. So glad I finally dd! It is a huge hit of chocolate, intense, feels very rich, but not a drop of heavy cream in the horizon. Pretty amazing, we highly recommend you try it. I am glad the recipe is available online.

1 YEAR AGO: Pistachio Shortbread Cookies

2 YEARS AGO: Shiroi Koibito Biscuits


3 YEARS AGO: Mini-Cakes, Two Ways


4 YEARS AGO: Earl Grey Shortbread Cookies


5 YEARS AGO: Summertime Macaron Duet


6 YEARS AGO: Pain de Mie Dressed up for Party


7 YEARS AGO: Five-Stranded Bread


8 YEARS AGO: Green Olive Salad


9 YEARS AGO: Coffee Macarons Dressed up to Party


10 YEARS AGO: Blogging Hiatus


11 YEARS AGO: Tomato Tatin


12 YEARS AGO: Headed to Colorado!  


13 YEARS AGO: Farofa Brasileira


14  YEARS AGO: Thai-Inspired Pork Tenderloin


15 YEARS AGO: A yummy Brazilian cake: Bolo de Fuba’


16 YEARS AGO:  Summer’s Tomatoes


17 YEARS AGO: Leaving on a jet plane… 

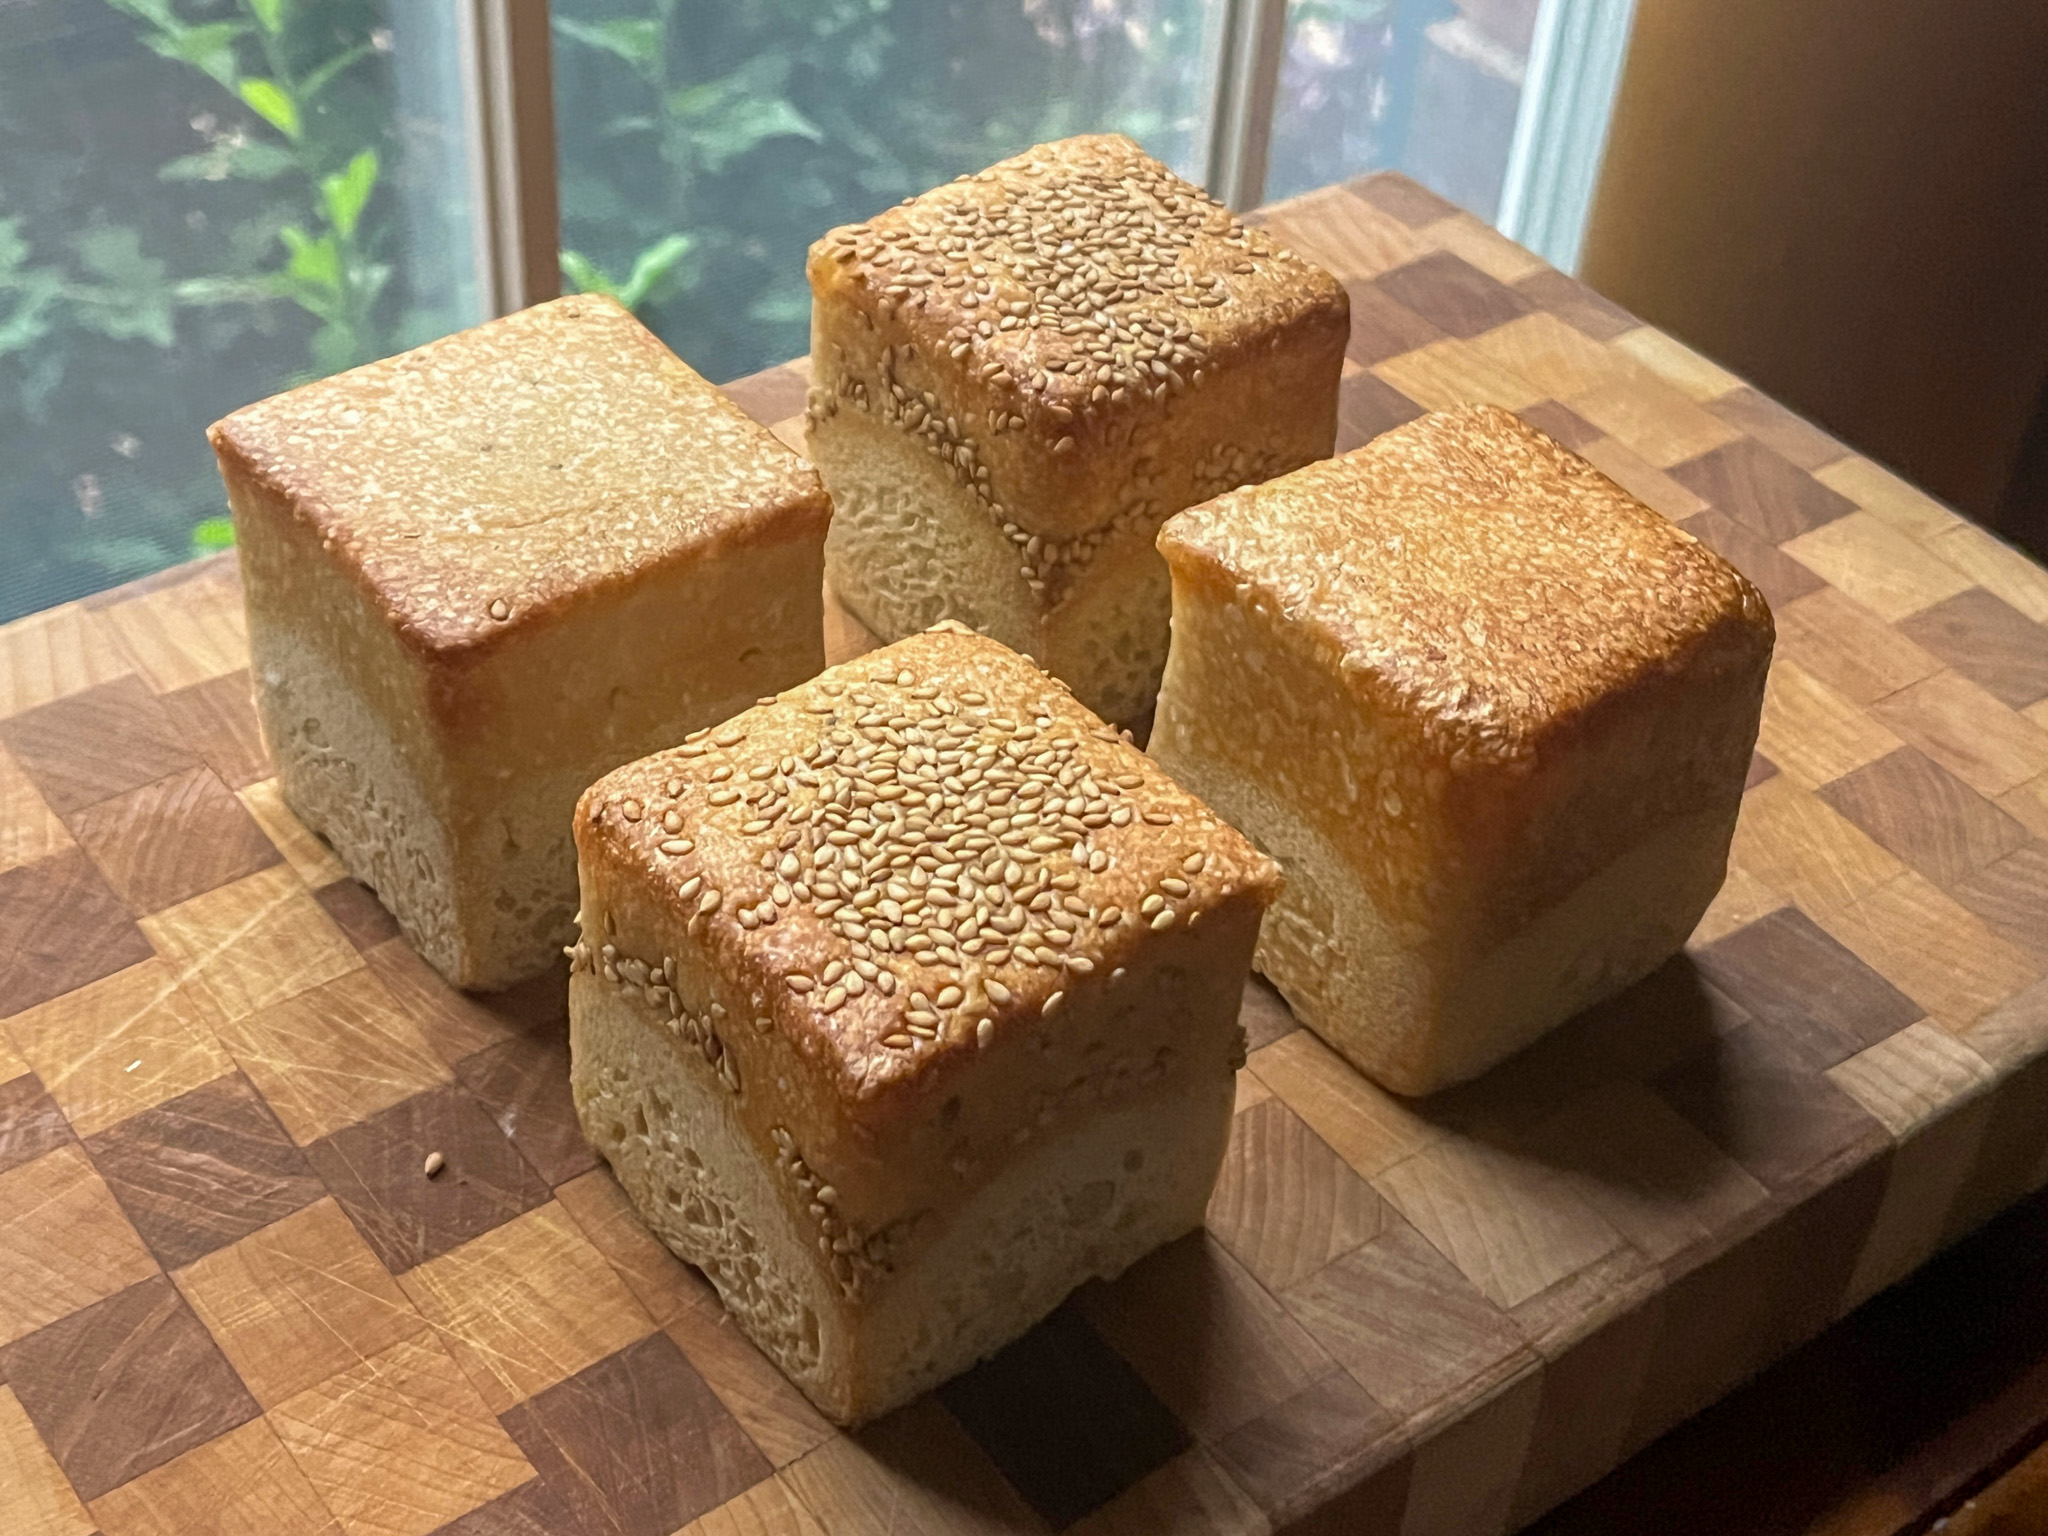
LITTLE CUBES OF SOURDOUGH JOY

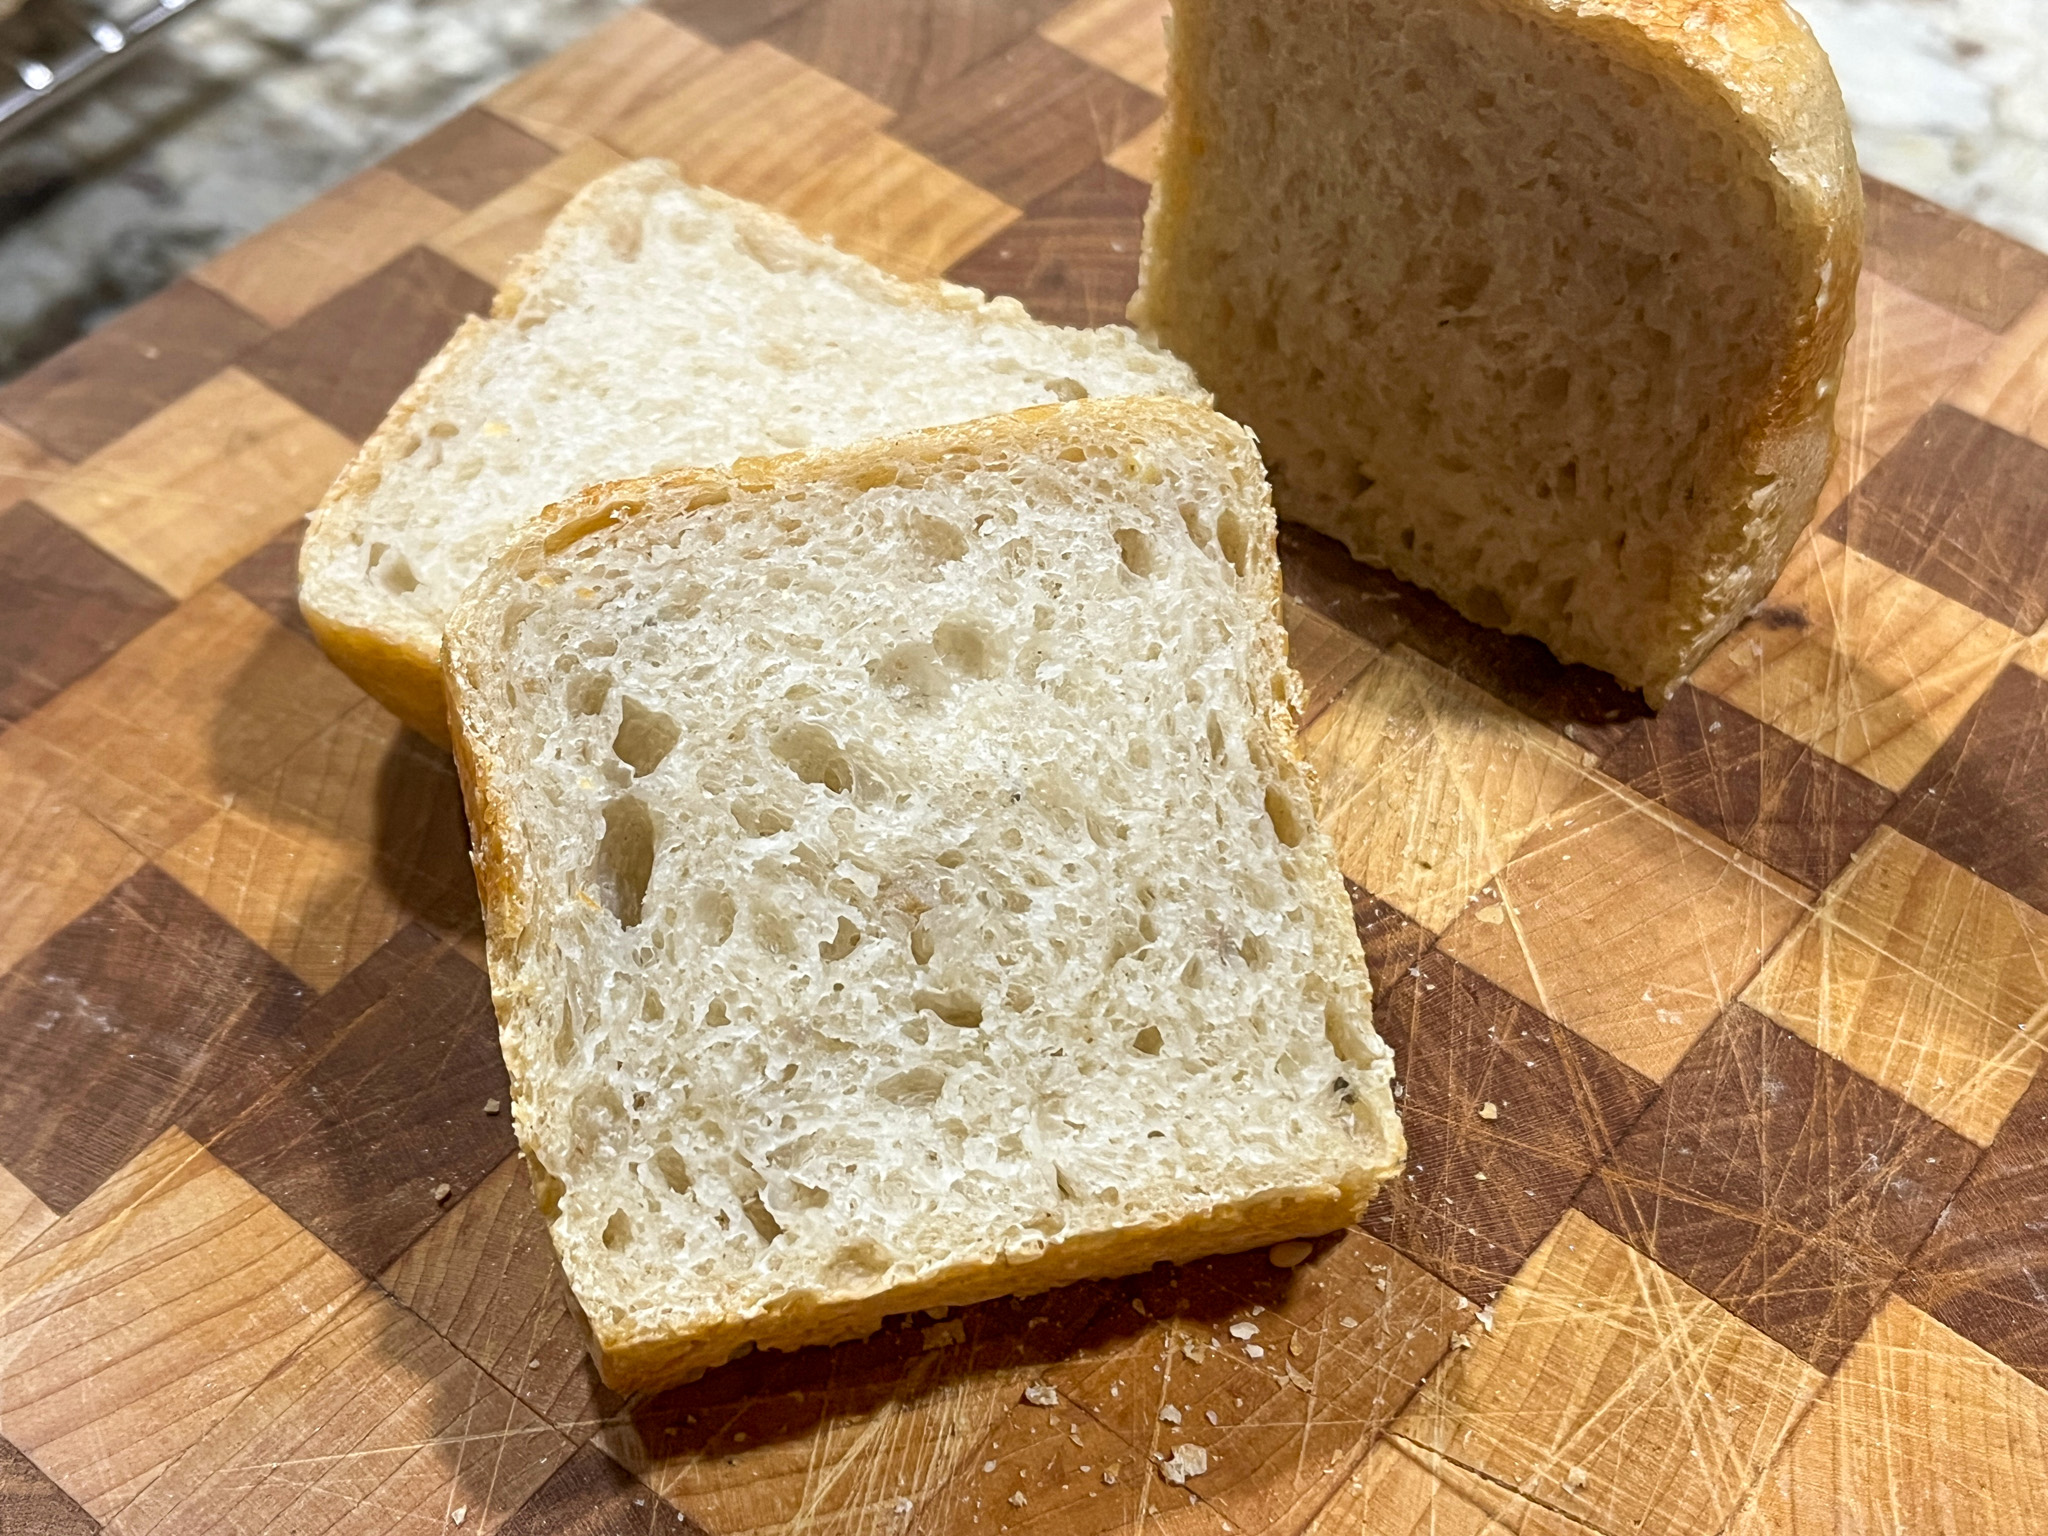
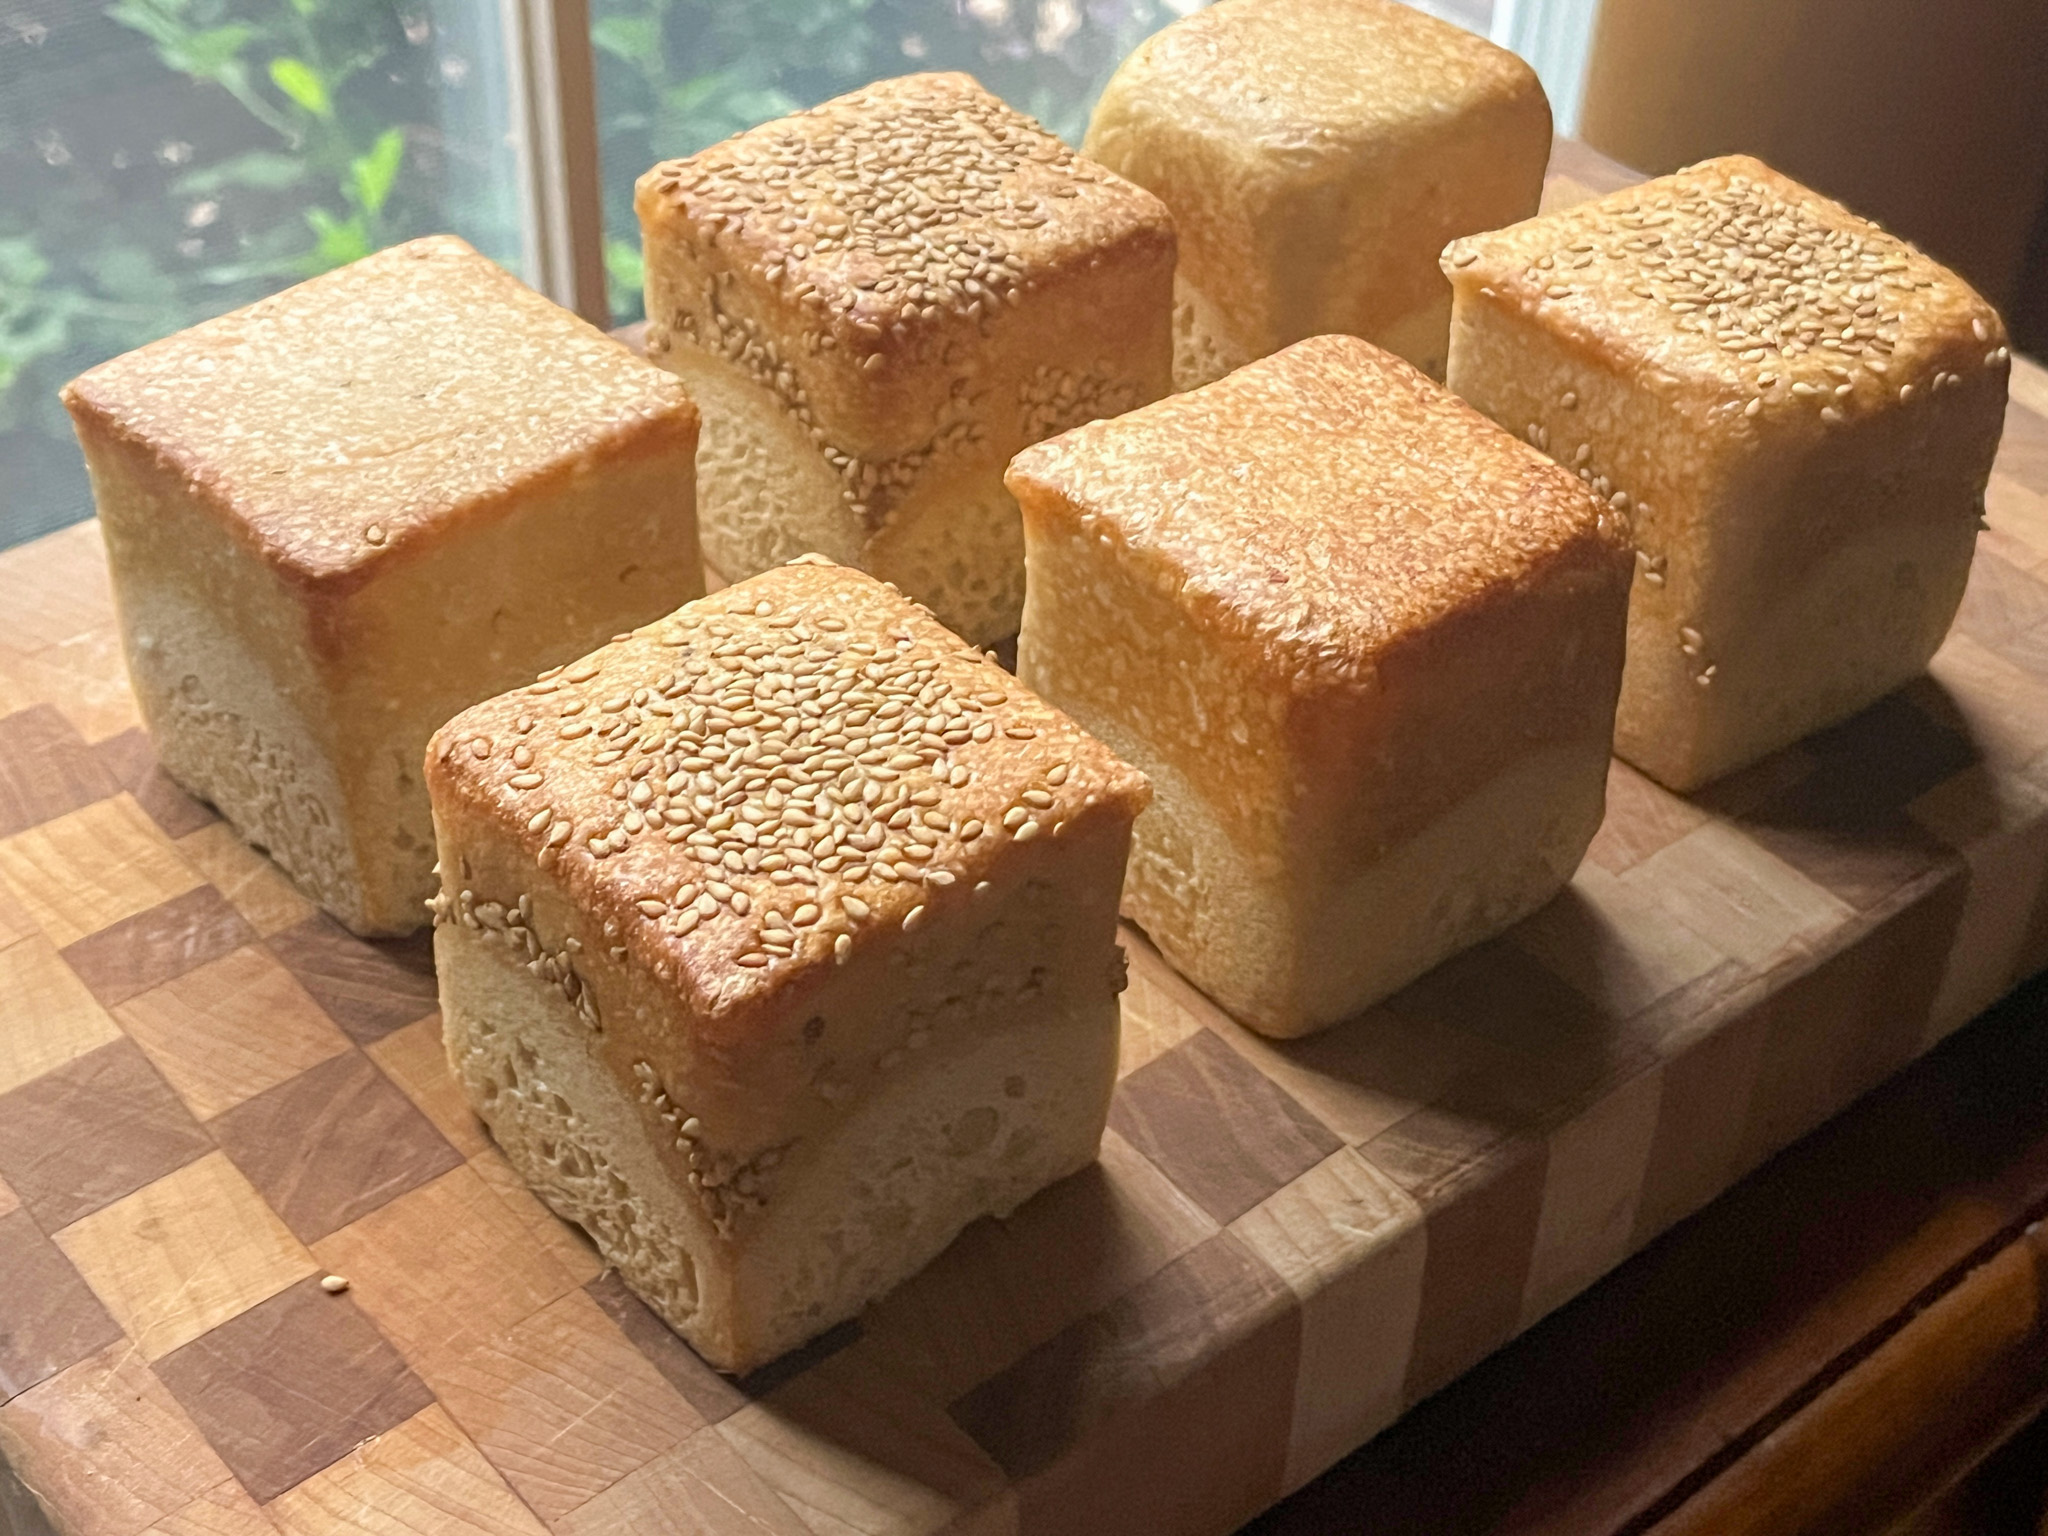
The idea of baking sourdough in closed containers so that they retain that exact shape is not new and not mine either, you can check Elaine using a larger cube pan (click here), or in her book The Sourdough Bible. In fact, back in 2020, I shared a recipe for a bread made in a loaf tin that takes that concept into a pretty exotic path (click here to learn all about it). In today’s post, I went a little smaller using a pan that in theory is more appropriate for cakes, but I am thrilled with the way these baby cubes turned out. Needless to say, the husband requested these to go “on regular repeat”. I have no objection to that!

LITTLE SOURDOUGH CUBES
(from The Bewitching Kitchen)

300g bread flour (I used Bob Mill’s Artisan Bread Flour)
215g water (for 72% hydration)
30g Super 10 Blend from King Arthur (click here)
8g salt
50g starter (at 80 to 100% hydration, your choice)
sesame seeds to sprinkle on the dough (optional)

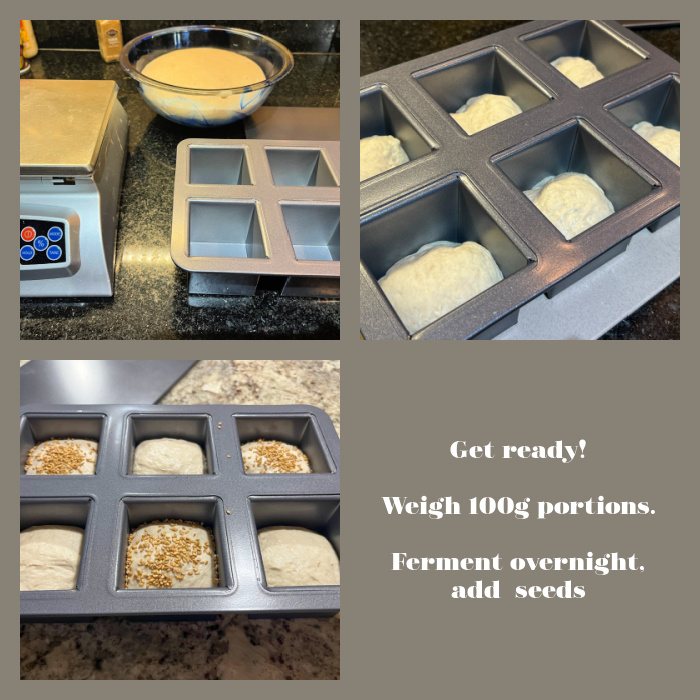
Mix all the ingredients in a KitchenAid type mixer. On second-to-lowest speed, mix the dough for about 4 minutes, then remove to a slightly oiled bowl. Proceed with bulk fermentation with folds at roughly ever 45 minutes. Do 4 to 5 total folds, then allow it to ferment at room temperature until almost doubled in size. Portion small balls of dough weighing 90 to 100g each. Place inside the cavities of your mini cube pan. I used this one. Cover the pan with plastic wrap and refrigerate overnight.

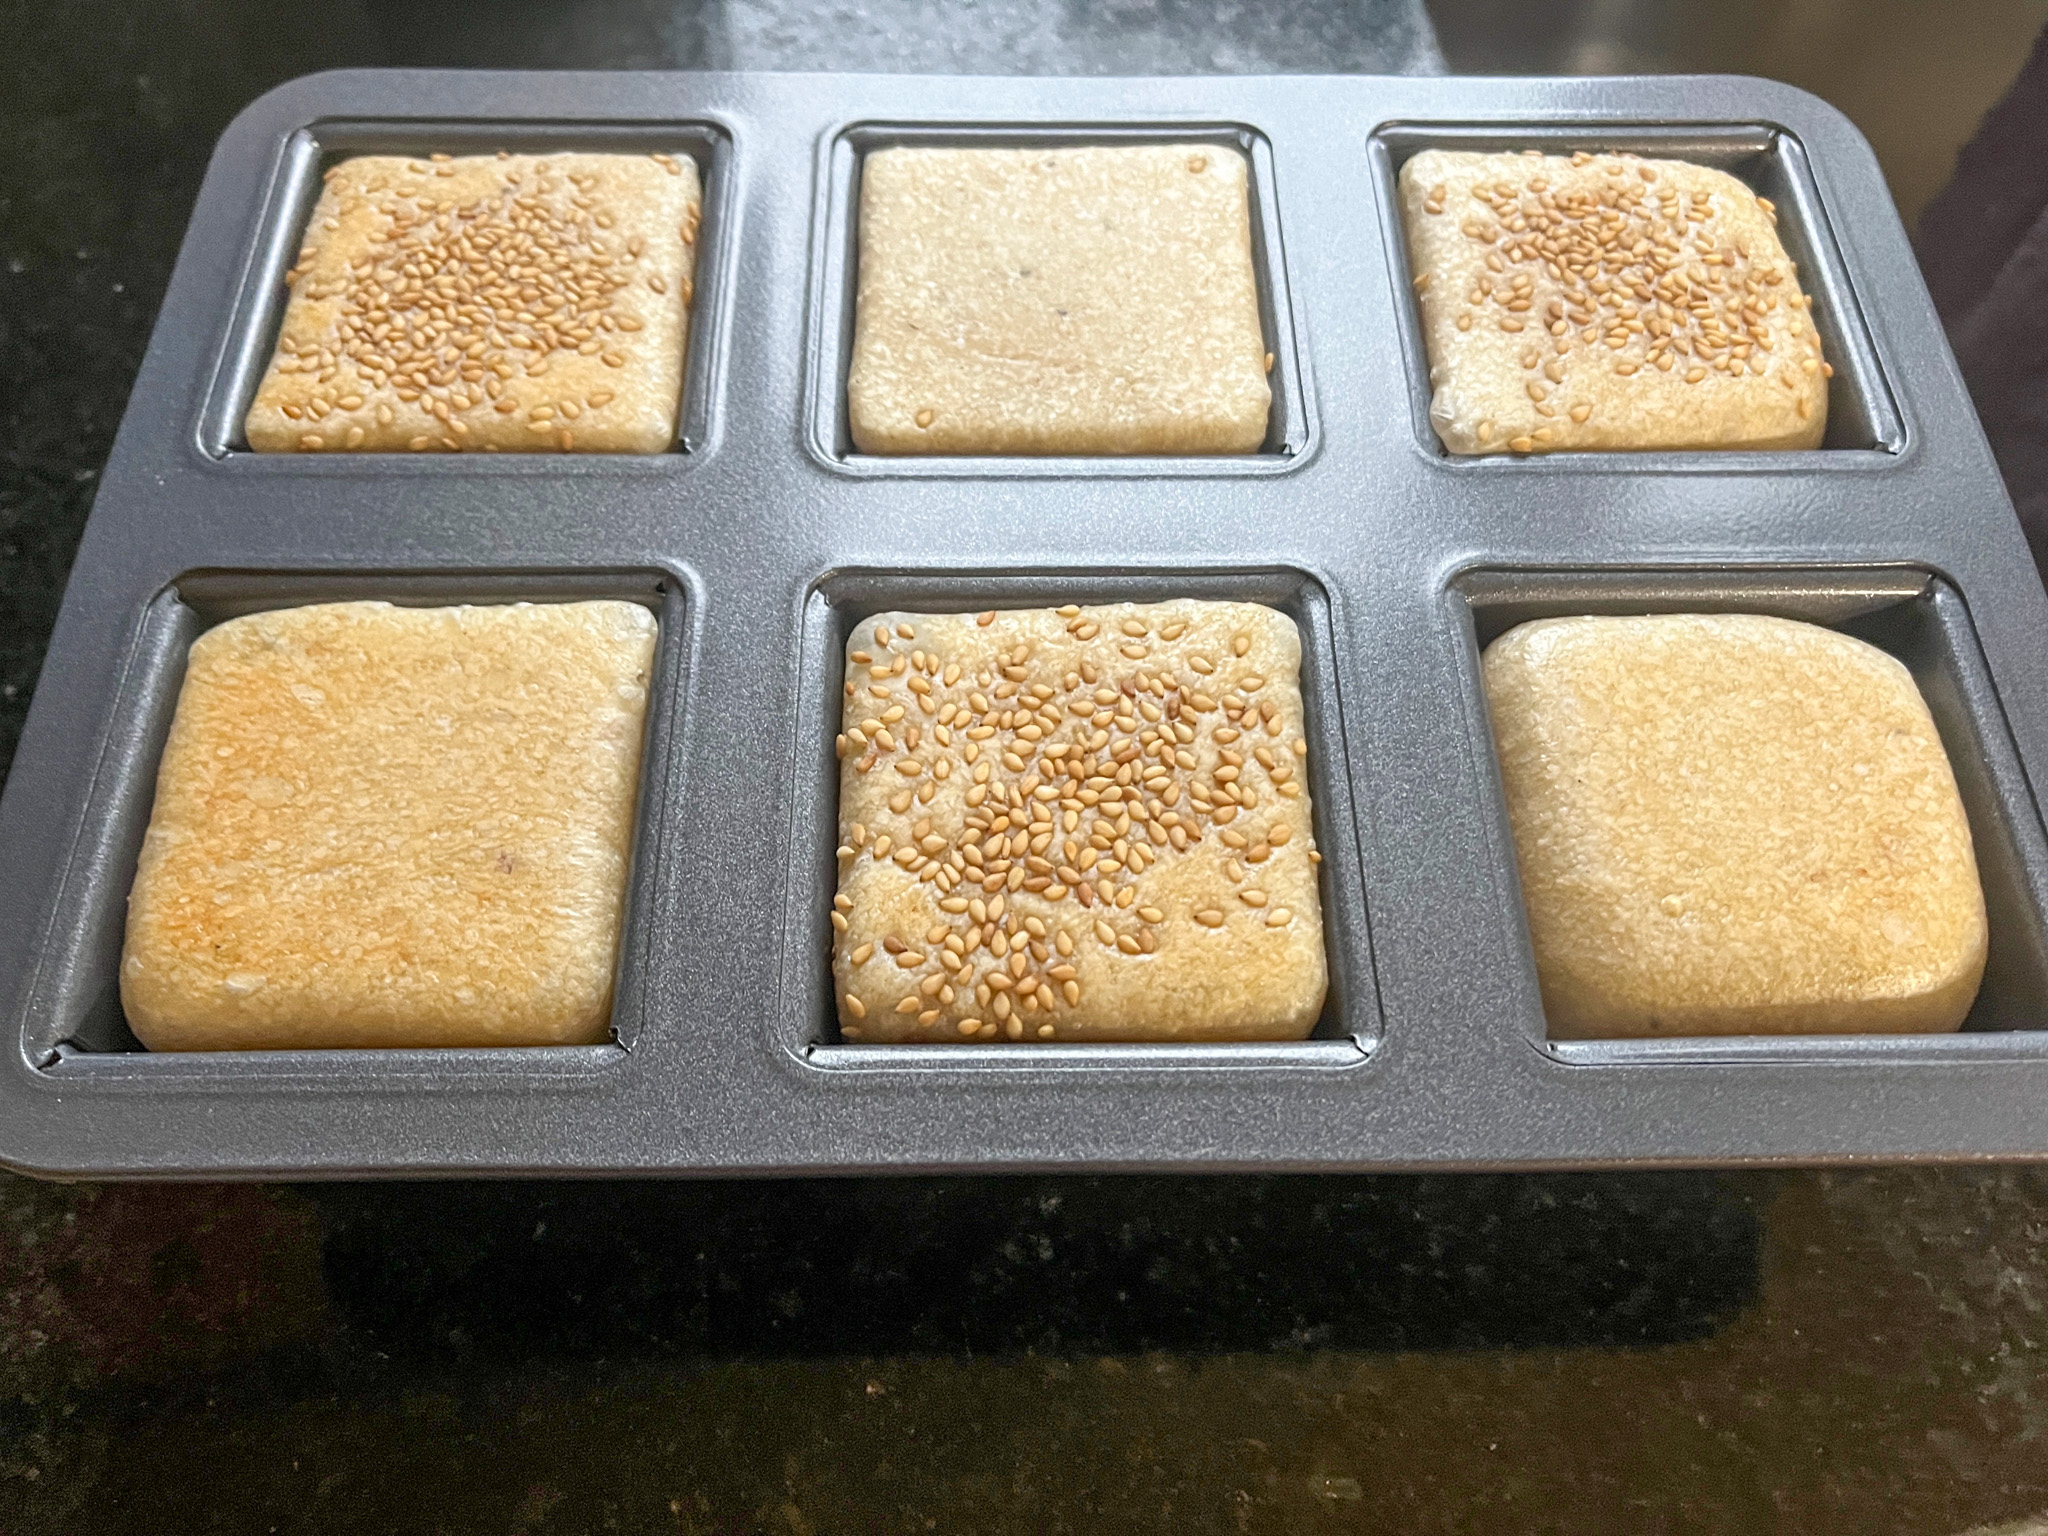
Next morning, turn the oven to 400F. Sprinkle toasted sesame seeds on top of the dough, close the pan and bake for 20 minutes. Remove the lid, bake for 5 more minutes, then carefully take the pan out of the oven, flip the little breads and place them on a rack back in the oven to give uniform color on the sides. This step is optional but I think it gives a better final product, with a more pleasant crust all over.

Allow to cool completely before slicing.

ENJOY!

to print the recipe, click here

Comments: I wanted to have a dough that would be almost exactly 600g total in weight, so that I could make six cubes. I wasn’t sure it 100g would be too much or not enough, but decided it was a nice round number to start experimenting. You can definitely play with the hydration level, as the bread is contained, you won’t have issues adding more water, so next time I might go to 75% or even higher.

Some of my cubes were slightly lighter than 100g, maybe 92g. You can see that in some the shape was not totally straight, as if the dough failed to fully expand the whole volume of the cavity. It’s not a serious problem, but if you use the exact same pan, aim for 100 to 105g per space.

They are adorable and delicious! As the husband said, the only problem is that once you start eating, you lose a bit the perspective of how much bread am I really consuming? It is easy to keep going because the slices are so small… I wanted to make croutons, but the cubes were gone next day. I will have to make more soon and save one or two cubes to cut croutons and freeze. It think that will be a perfect use for this bread.

1 YEAR AGO: Pappardelle with Scallops and Roasted Artichokes

2 YEARS AGO: Butterfly Pea Flower Accordion Bread

3 YEARS AGO: Slow-Cooker Pineapple Carnitas

4 YEARS AGO: Three Little Cakes

5 YEARS AGO: From our Garden to You

6 YEARS AGO: Lady Bug Macarons

7 YEARS AGO: Five-Stranded Braided Bread

8 YEARS AGO: Green Olive Salad

9 YEARS AGO: Coffee Macarons Dressed up to Party

10 YEARS AGO: Blogging Hiatus

11 YEARS AGO: Tomato Tatin

12 YEARS AGO: Headed to Colorado!  

13 YEARS AGO: Farofa Brasileira

14  YEARS AGO: Thai-Inspired Pork Tenderloin

15 YEARS AGO: A yummy Brazilian cake: Bolo de Fuba’

16 YEARS AGO:  Summer’s Tomatoes

17 YEARS AGO: Leaving on a jet plane… 

TOASTED MARSHMALLOW MACARONS

Pretty smitten with this bake, a very unusual twist on macarons, adding toasted marshmallows (made quickly in the air-fryer) to the buttercream, which is a simple American version with a small amount of cream cheese to lighten things up.


TOASTED MARSHMALLOW MACARONS
(from The Bewitching Kitchen)

For the shells:
200g powdered sugar
115 g almond flour
115 g egg whites at room temperature (approx. 4 eggs)
1/8 tsp of cream of tartar (optional)
100 g granulated sugar
¼ tsp vanilla paste or extract
drops of yellow gel food color

for the filling:
160g powdered sugar
2 tbsp unsalted butter softened
2 tbsp cream cheese, softened
1/4 tsp marshmallow extract (I used this one) – substitute vanilla, if you prefer
1/2 -1 tbsp room temperature whipping cream as necessary
pinch of salt
3 toasted large marshmallows

Line 3 heavy baking sheets with parchment/baking paper or Silpat mats. Layer the powdered sugar and almond flour in a food processor. Pulse until the mixture looks like fine meal, about 12 pulses. Pass through a sieve and transfer to a small bowl or to a sheet of parchment/baking paper. Set aside.

Place the egg whites and cream of tartar in the bowl of a stand mixer fitted with the whisk attachment. Make sure that the bowl and the whisk are impeccably clean. Starting on medium speed, whip the whites with the cream of tartar until they look like light foam. The whites should not appear liquid. The foam will be light and should not have any structure.

Slowly rain in the granulated sugar in five additions, trying to aim the stream between the whisk and the side of the bowl. Turn the speed up to high. Continue to whip the meringue until it is soft and shiny. It should look like marshmallow creme (marshmallow fluff). Add the vanilla. Whip the egg whites until the mixture begins to dull and the lines of the whisk are visible on the surface of the meringue. Check the peak. It should be firm. Transfer the whites to a medium bowl.

Fold in the almond flour mixture in two increments. Add yellow gel color. Paint the mixture halfway up the side of the bowl, using the flat side of a spatula. Scrape the mixture down to the center of the bowl. Fill a piping bag and pipe shells over Silpat or parchment paper.

Slam each sheet hard four to six times on the counter/worktop. Let the unbaked macarons dry until they look dull but not overly dry. Drying time depends on humidity. In a dry climate, the macarons can dry in 15 to 20 minutes; in a humid climate, it can take 35 to 40 minutes.

While the macarons are drying, heat the oven to 300 F. Bake one sheet at a time on the middle rack. Check in 11 minutes. If the tops slide or move (independently of the ‘feet’ when you gently twist the top), then bake for 2 to 3 more minutes. Check one or two. If they move when gently touched, put them back in the oven for 1 to 2 more minutes until they don’t move when touched. Let the macaroons cool for 10 minutes before removing from the pan. The macarons should release without sticking.

Make the filling: whisk the butter and cream cheese for a couple of minutes, add all other ingredients except the toasted marshmallow and whipping cream. Whisk at low speed first, then increase the speed until smooth. Toast the marshmallows in the air-fryer at 400F for 3 minutes. Let it cool briefly, cut in pieces and add to the buttercream. Whisk well with a hand held blender so that the pieces of marshmallow get incorporated. Adjust consistency with cream if needed.

If you like to decorate the shells, use a stencil and air-brush orange color to make a grid pattern.

Assemble the macarons: find two macarons similar in size and add a good amount of filling to the bottom of one of them. Place the other on top and squeeze gently to take the filling all the way to the edge. Store in the fridge for 24 hours for perfect texture.

ENJOY!

to print the recipe, click here

Comments: I first saw the use of toasted marshmallows on a reel on Facebook, without too many details, so I improvised my way through it. Definitely add some cream cheese, it gives this sweet filling a nice sharper edge. The little bits of marshmallow offer unexpected texture, I love what it did to the filling. Decorating the shells is of course optional, but you know me, cannot leave a shell alone. Or a sourdough. Or a cookie. I hope you try this recipe in a future macaron adventure.

.

1 YEAR AGO:  Banana Cupcakes with Honey Buttercream Frosting

2 YEARS AGO: Air-Fryer Chicken Skewers

3 YEARS AGO: Almond-Cranberry Sandwich Cookies

4 YEARS AGO: Brazilian Candy, Surpresa de Uva

5 YEARS AGO: Red Quinoa “Tabbouleh”

6 YEARS AGO: Cucumber Salad with Yogurt-Harissa Dressing

7 YEARS AGO: Sundried Tomato and Feta Cheese Torte 

8 YEARS AGO: Hickory-Smoked Beef Tenderloin

9 YEAR AGO: Spaghetti Squash, Revisited

10 YEARS AGO: Stir-fried Chicken and Cabbage in Spicy Almond Sauce

11 YEARS AGO: Fifteen Years!

12 YEARS AGO: Light Brioche Burger Buns

13 YEARS AGO: Sourdough Blues

14  YEARS AGO: Headed to Hawaii

15 YEARS AGO: A yummy Brazilian cake: Bolo de Fuba’

16 YEARS AGO:  Hidden Treasure

17 YEARS AGO: Avocado Three Ways