FOUR LITTLE CUPCAKES

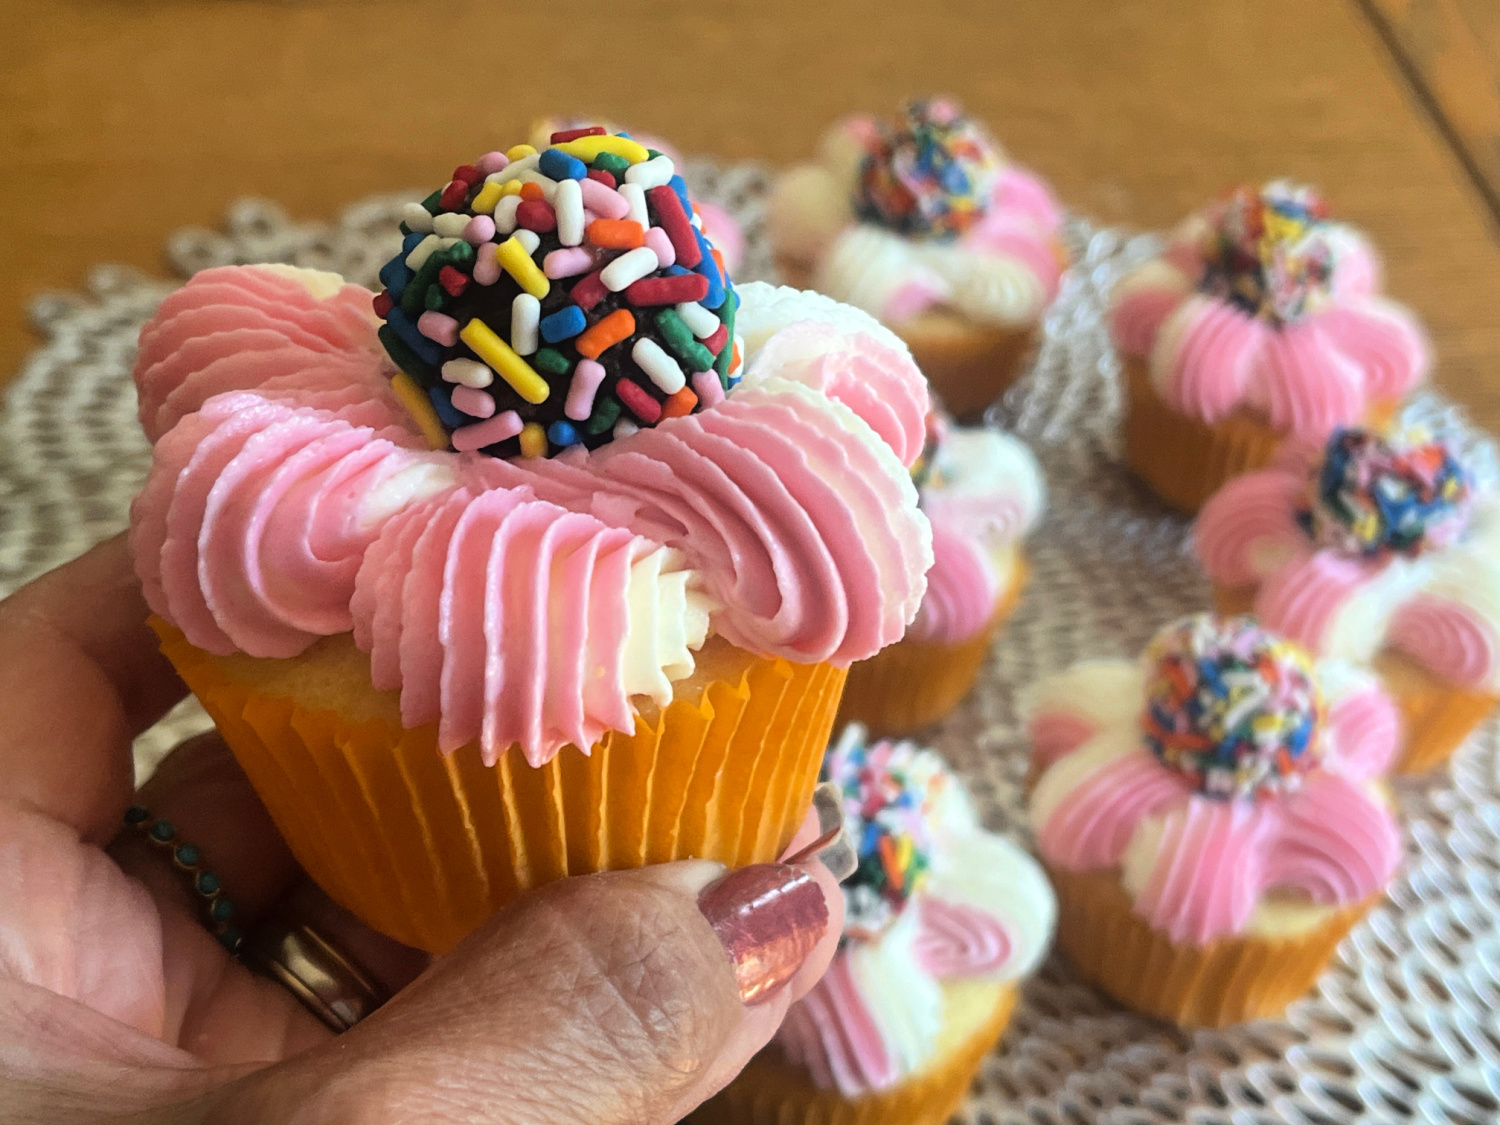
Vanilla or Chocolate Cupcakes, all with American Buttercream in different decorating styles. Two designs went tropical, showcasing a plump Brazilian “brigadeiro” on the top.

VANILLA CUPCAKES
(adapted from several sources)

120g all-purpose flour
150g granulated sugar
40g butter, unsalted, removed from the fridge for 30 minutes
1 large egg
120mL milk
1 + 1/2 tsp baking powder
1/2 tsp vanilla paste or extract
1/4 tsp salt

Heat the oven to 350F and line a cupcake pan with paper baking cups. Recipe makes 9 to 10 cupcakes.

Put the flour, baking powder, sugar, salt and butter cut in small pieces in the bowl of a KitchenAid type mixer fitted with the paddle attachment. Mix on medium-low until the butter is in very small pieces, almost like sand. 

Whisk the egg with the milk and vanilla, add slowly to the mixer running in low-speed. Once it is almost smooth, increase the speed to high for a couple of minutes, scraping the bottom of the bowl once. 

Stop the mixer and make sure the batter is fully smooth, mixing by hand with a spatula. Add batter to the 9 cupcakes, filling half-way full only. Bake for 15 to 18 minutes, until a toothpick comes out clean when inserted in the center.

Leave cool completely before decorating.

ENJOY!

to print the recipe, click here

Vanilla cupcakes were baked then frosted with American buttercream, using this recipe. The batch was divided in three portions, dyed pastel pink, teal, and the last portion left white. Then, it was a matter of having fun with different piping tips and finish them with sprinkles in matching color.
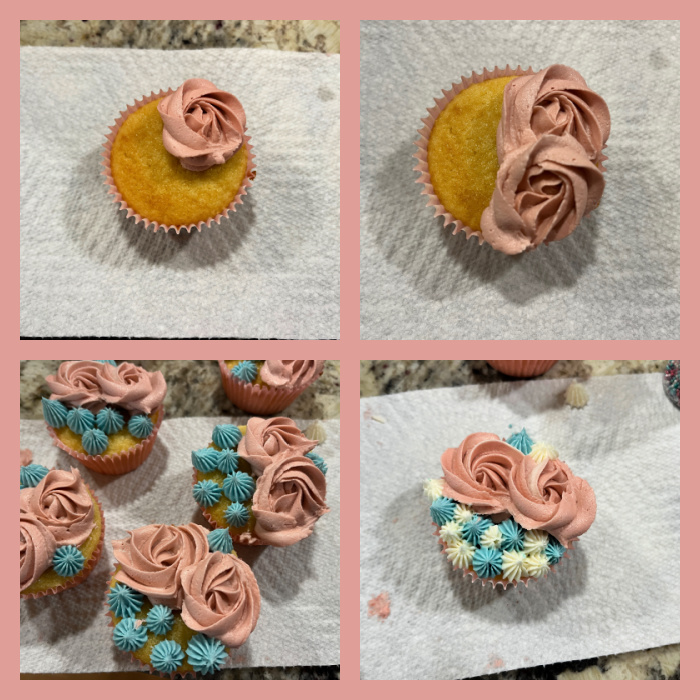
I used a 3D Wilton tip for the large rose swirl, and a tip 20 for the other details. Just have fun with it, no precision needed. I love the end result…

.

I used the same vanilla cupcake recipe, the same American buttercream. Rolled brigadeiros in sprinkles, and used them to decorate the cupcakes right after frosting. I used a large open star tip to make petal-style piping. You can use white frosting, or make a marble type like I did in one of my batches, using pink and white.

These turned out fun and from what I heard, were a big hit when I donated them…

CHOCOLATE GALAXY CUPCAKES
(inspired by several sources)

for the cupcakes (makes 10):
100g all-purpose flour
20g cocoa powder
140g granulated sugar
40g butter, softened
1/8 tsp salt
1 large egg
120mL milk, full-fat
1 + 1/2 tsp baking powder

Heat oven to 350F and line a tray with cupcake liners. 

Mix the milk with egg in a small bowl, whisk, reserve. 

Put the flour, cocoa powder, butter, sugar and salt in the bowl of a standing mixer fitted with the paddle attachment. Mix until the butter forms a sand consistency. Pour half the milk mixture into the bowl and mix on low-speed for a minute. Increase the speed to medium-high for a couple of minutes. Add the remaining milk mixture, and mix on low-speed until fully incorporated. 

Increase the speed for a few seconds, then add the batter to the lined cupcakes. Bake for about 15 minutes, until a toothpick comes clean when inserted in the center. 

Cool the cupcakes completely before frosting. 

ENJOY!

to print the recipe, click here

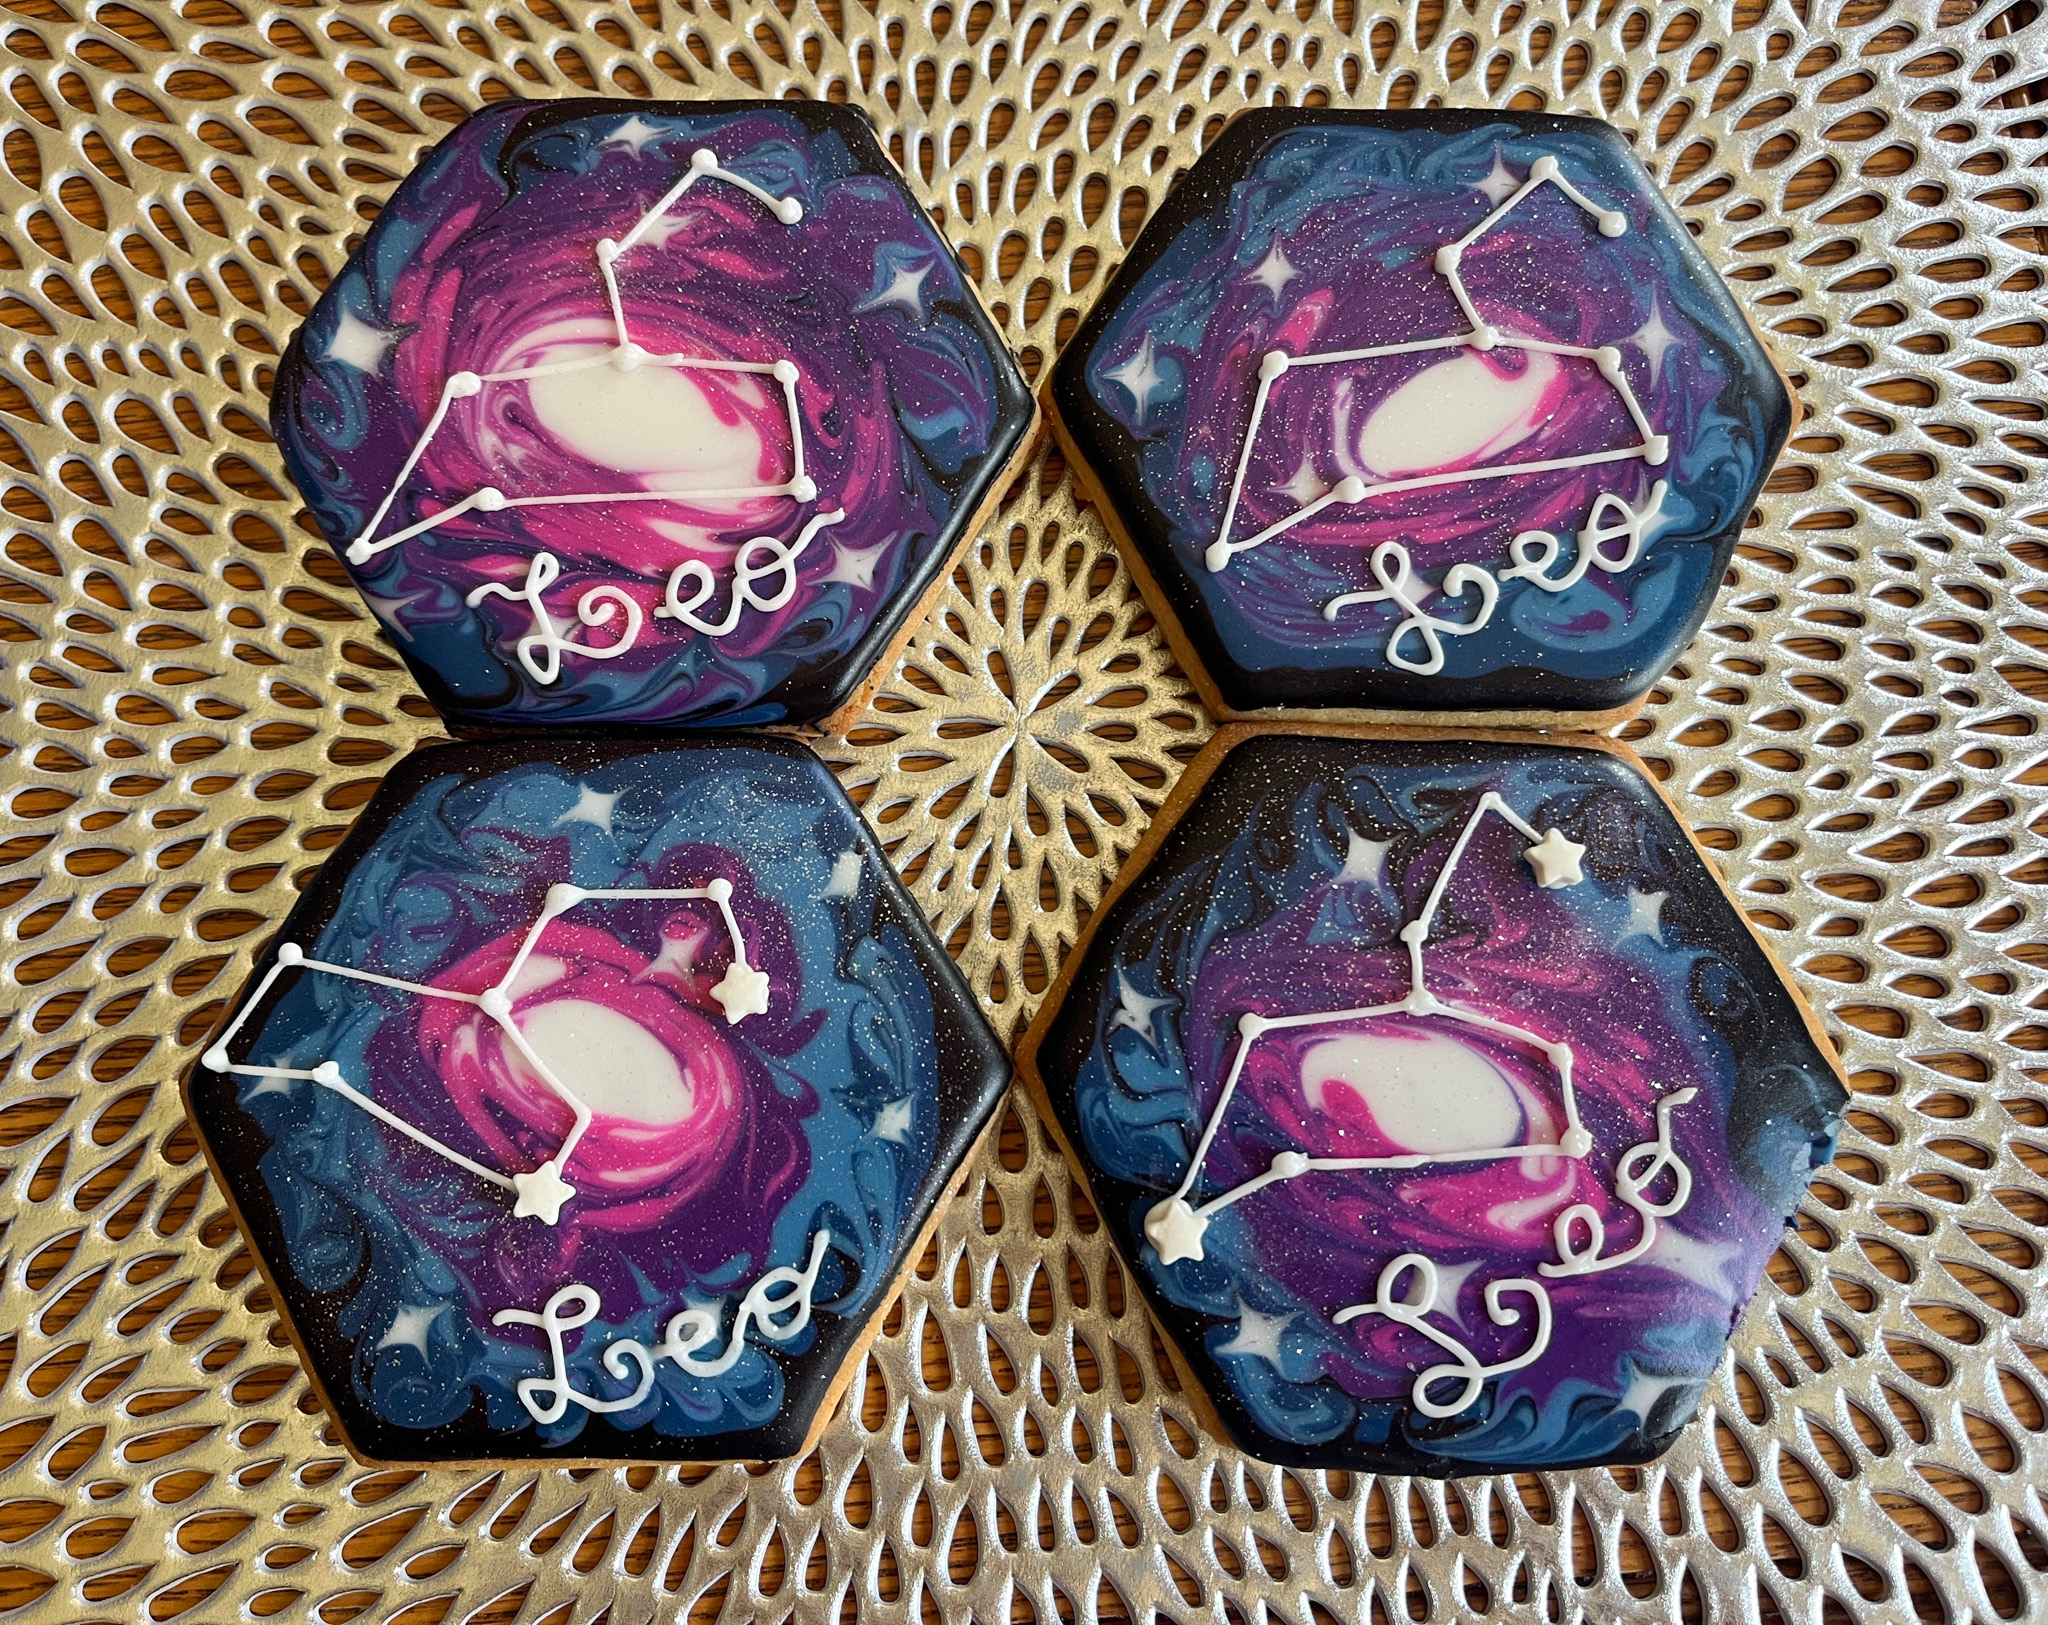
For the galaxy effect, divide the buttercream in three portions, one of them smaller than the other two (no need for exact measurements, you can eye-ball). The idea is to minimize the amount of the very dark component, otherwise it will overpower the design. Dye the smallest portion black, the other two teal and pink. Add them in straight lines over plastic wrap, roll the wrap like a sausage and insert into a large piping bag fitted with an open star tip. Pipe swirls, and add sprinkles. These would be amazing next to the cookies I blogged about recently, don’t you think?
1 YEAR AGO: Summer in Cupcakes

2 YEARS AGO: Puff Pastry Twists with Cinnamon and Cardamon

3 YEARS AGO: Three Delicious Bakes

4 YEARS AGO: Banana Bread from the Experts

5 YEARS AGO: Shrimp Stir-Fry with Snow Peas and Cashews

6 YEARS AGO: Pickled-Roasted Chickpeas with Cashew Cream

7 YEARS AGO: Twice-Baked Goat Cheese Souffle

8 YEARS AGO: A Star from England in the Bewitching Kitchen

9 YEARS AGO: Hommage to the Sun

10 YEARS AGO:The Fabulous Three
.
11 YEARS AGO: Turkey-Chorizo Burger with Green Chile Dressing
.
12 YEARS AGO:Taco Salad
.
13 YEARS AGO: Semolina Sourdough Boule
.
14 YEARS AGO:Forgive me, for I have sinned
.

15 YEARS AGOCracked Wheat Sandwich Bread
.
16 YEARS AGO:  Au Revoir, my Bewitching Kitchen
.
17 YEARS AGO:French Bread

MEMORIES of PASTEIS

When traveling to a country for the first time, it’s a good idea to pay special attention to their “street food.”   In Paris, for example, the tiny shops selling crepes (sometimes slathered with Nutella!) are a delight as one strolls along the avenues.   Many big cities are filled with  such delicacies, and in fact, one of my favorite cookbooks revolves around this topic.

On the streets of Brazil, you might stop to buy a “pastel,” and after sampling it, immediately return to the vendor for a couple more (plural = pasteis).    These fried savory pastries are sold at the entrance of street markets: every week on the same day a few blocks of a neighborhood street close to traffic, while farmers sell their produce from early morning until slightly past noon, with prices dropping as the hours pass.  You’ll smell the pasteis from a distance, and it’s  impossible to resist eating more than just one… The vendors are usually hard working Chinese-Brazilians, with red faces from the intense heat in their huge woks.

Growing up in our house, my memories of pasteis go well beyond the street markets.   Luisa, a cook who worked for my Mom every Saturday, often made them, and always from scratch. She used no machines or special gadgets, but only her strong arms, a rolling pin, and a fantastic disposition.

Luisa routinely prepared two batches, one for the whole family, and another for my Dad, which no one else would touch.  What was so special about his pasteis?  They were filled with minced peppers, and I am not talking jalapenos, poblanos, or serranos.  Those were incendiary Brazilian peppers that can make a grown man cry.  Dad was absolutely addicted to them.

Besides his love for hot peppers, he loved a good laugh.  You might see where this is headed: he’d  sneak into the kitchen to steal a couple of pasteis as Luisa was busy frying them, and then hide one of his “special ones” in the middle of the normal batch.   He later patiently waited for a very unlucky camper to bite into it.  Although everyone was on high alert at the beginning of the meal, we always seemed to forget until someone started howling in pain!   Dad, laughing to the point of tears,  insisted that he didn’t do it,  that Luisa had certainly made a mistake.  😉   The best times were when Mom got the fiery one…  Normally soft-spoken and even-tempered, a mouthful of hot pepper really made her fume, literally.   It’s been almost six years since my Dad left us, but the memories will never fade.

PASTEIS
(recipe adapted from my friend and fantastic cook, Anita)

for the dough
250g all purpose flour
1/2 cup warm water
1 egg
2 Tbs vegetable oil
1 tsp salt
1/2 Tbs pinga (or vodka)
1 tsp baking powder
vegetable oil, for frying (around 2 cups, depending on pan size)

Mix all ingredients together until very smooth. Allow the dough to rest for 30 minutes to 12 hours in the fridge, covered by plastic film.

Using a pasta machine, open small portions of the dough – on a Kitchen Aid, I roll up to number 5, not thinner. Place the dough on a floured surface and cut into squares. Add the filling of your choice to the center of the square and close the dough around it, pressing the edges with the tines of a fork to prevent it from opening as you fry it.  Make absolutely sure there are no holes for the oil to sip in, or they will be soggy.

Fry in extremely hot oil until golden, turning them only once. Remove to a tray with paper towels to absorb excess oil.  Pasteis can be kept in a 200F oven while you fry the full batch.

Ground beef filling
1 pound ground beef
1 Tbs olive oil
1/4 diced onion
1 Tbs tomato paste
1 Tbs pitted, diced green olives
1 Tbs minced parsley
salt and pepper to taste
1/4 cup cold water
1/2 Tbs cornstarch
1 boiled egg, finely diced

Saute the onions in the oil until translucent. Add the ground beef, and saute until cooked through. Add the tomato paste, green olives, salt and pepper and cook in slow-heat for 10 minutes. Add the boiled egg, mix well. Make a slurry with water and cornstarch, add to the ground beef mixture, cooking for a few minutes, until it thickens slightly. Let it cool completely before using. Leftover filling can be frozen.

(makes about 20 pasteis)

ENJOY!

PDF file under preparation……  (it had a mistake when originally published)


Comments:
If you don’t want the trouble of making the dough, won ton skins will work reasonably well, and they are quite easy to find in grocery stores.  But, this recipe will produce an authentic version, with a crust full of blisters and slightly more “substance” than you’ll get from won ton skins.

Pasteis can be filled with many different things.   Pastel de queijo (cheese pastel)  is very popular in Brazil:   just enclose  a piece of mozzarella with a sprinkle of oregano, and remember that it will be very hot once it’s done frying.    Hearts of palm is another popular filling (pastel de palmito) that I’ll definitely post about in the future, because I’m very fond of it.  Your own imagination is the limit: roasted chicken with a little cream cheese, cooked shrimp with tomatoes and herbs, all veggie…..  Have fun with it!

Pasteis can be made in a small size that’s  perfect as an appetizer with a cold caipirinha on the side.  But my favorite pasteis are as part of a full meal, with rice and a fresh salad.  Tropical paradise on a plate!
For more photos, follow the slide show…. And for a quick lesson on Brazilian Portuguese, click on the sound files down below.

This slideshow requires JavaScript.

If you want to pronounce it like a native, listen carefully:
pastel
pasteis

receita em portugues na proxima pagina….

pagina seguinte