QUILTED FOCACCIA BUNS

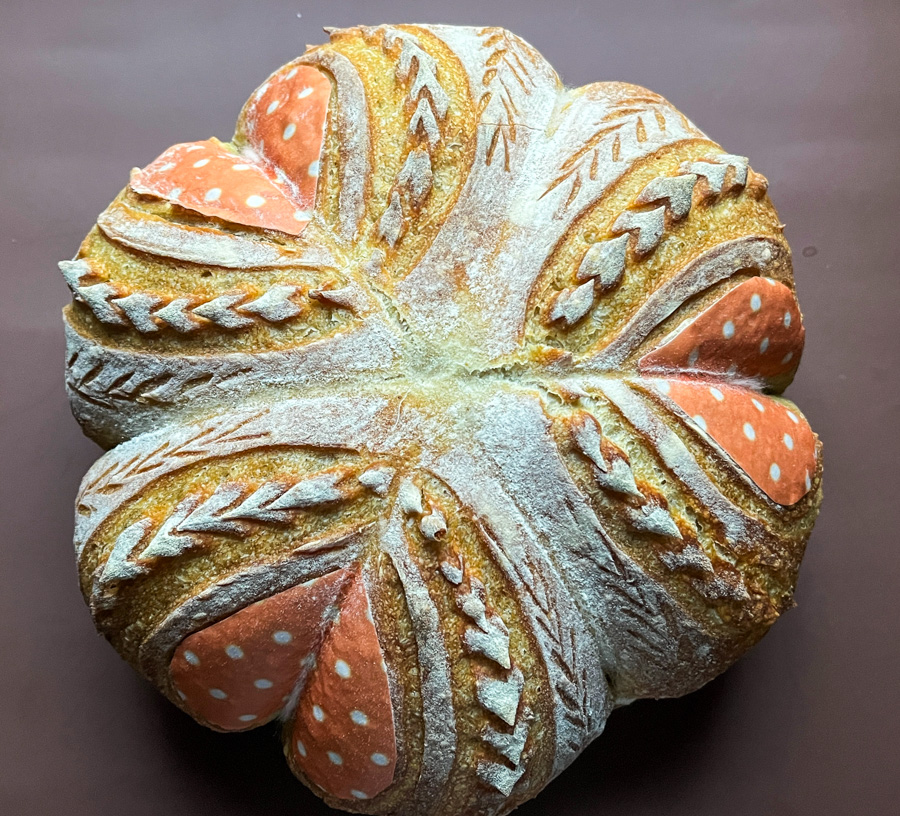
I stumbled on this recipe by accident, and could not wait to try it! It led me to buy a wonderful cookbook, called Beautiful Bread, by Theresa Culletto. This particular recipe is not in the book, but is available in her site, and you can check it out here. The book is amazing, all sorts of ideas to turn bread into art pieces… I love this kind of stuff so much! But without further ado, here are my quilted babies…

QUILTED FOCACCIA BUNS
(from Theresa Culletto)

pre-ferment:
146g bread flour (about 1 cup)
125g cool water (about 3/4 cup)
1/4 teaspoon instant yeast

for the dough:
all the pre-ferment
450g bread flour (about 3 cups)
285g warm water (about 1 + 1/4 cup) 285 grams
1 + ½ teaspoons instant yeast
12g salt (2 teaspoons)
1 tablespoon extra virgin olive oil

toppings of your choice, cut in small pieces. Avoid veggies that are too full of liquid, if using mushrooms it is best to sautee them before adding to the bread.

Make the pre-ferment the day before by mixing all ingredients and allowing to ferment covered at room temperature.

Next day, make the dough. Place the water and the yeast in a large bowl. Add all the pre-ferment and 1 tablespoon of oil. Mix with your hands to try to dissolve the pre-ferment in the water, then add the flour and the salt. Mix all ingredients together until the dough just comes together in a shaggy ball.
It will appear lumpy and sticky. Let it rest covered for 15 minutes.


Make a set of folds, let the dough rest for 15 minutes. Do three sessions of foldings with 15 minute rest between the sets, for a total of 45 minutes. Now ferment the dough for 2 hours.

Divide dough by cutting one third and two thirds. The larger piece will be spread out with your fingers onto a baking sheet you have prepared with parchment paper and flour . you should stretch the dough out to be approximately 12×6.

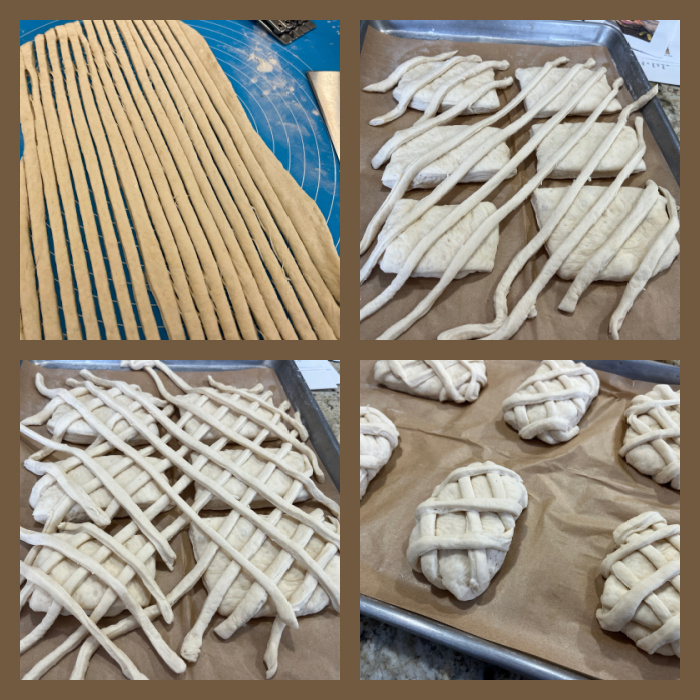
Make the strips for the lattice: take the smaller piece of dough ( 1 third) and roll out to a 12×6 rectangle on a well floured surface. This should be about ¼ inch thick when done. With a ruler and a pizza cuter make 1/4th inch thick strips 12 inch long , separate and place strips on well floured parchment. You will end up with about 16 strips. Set aside.

Cut the main dough into 8 equal pieces about 3×3 each . Separate each piece to place them about one inch apart. Brush each square with egg wash. Starting at the corner of the pan begin placing strips in one direction and then diagonally to cover the buns with a lattice. Trim back to 1 inch around buns using scissors. Tuck the loose ends under the buns.

Brush egg wash over each bun and begin decorating with various vegetables. Be sure to tuck them in so they do not cover the crisscross lines. After the buns have been decorated you can sprinkle with a little salt. Bake immediately in 425 degree oven for 20 minutes or until golden brown.

ENJOY!

to print the recipe, click here

Comments: I had a total blast making this recipe, and my main tip for you is to make sure the ends of the strips are well tucked underneath or they will flip and rise up during baking. I think I should have cut my veggies a little smaller but for a first time I am quite thrilled with the results. Huge thank you to Theresa for such a detailed explanation, I love how the strips almost looked like laminated dough on top. Very cool technique!

I did not tell the husband I was making these buns, just very casually informed him we would have bread ready later that Saturday. You should have seen his face when he saw them in the kitchen in all their quilted glory. He thought I was a genius, but I told him, nah, it is all Theresa’s fault!

ONE YEAR AGO: Chocolate-Covered Oreos

TWO YEARS AGO: Zucchini-Chickpea Baked Bites

THREE YEARS AGO: Slow-Cooker Hoisin Pulled Pork

FOUR YEARS AGO: I Will Cracker you Up

FIVE YEARS AGO: Pickling Ribbons

SIX  YEARS AGO: Green Beans and Carrots with Spicy Almonds

SEVEN YEARS AGO: Quiche 101

EIGHT YEARS AGO: Persian Butternut Squash Soup

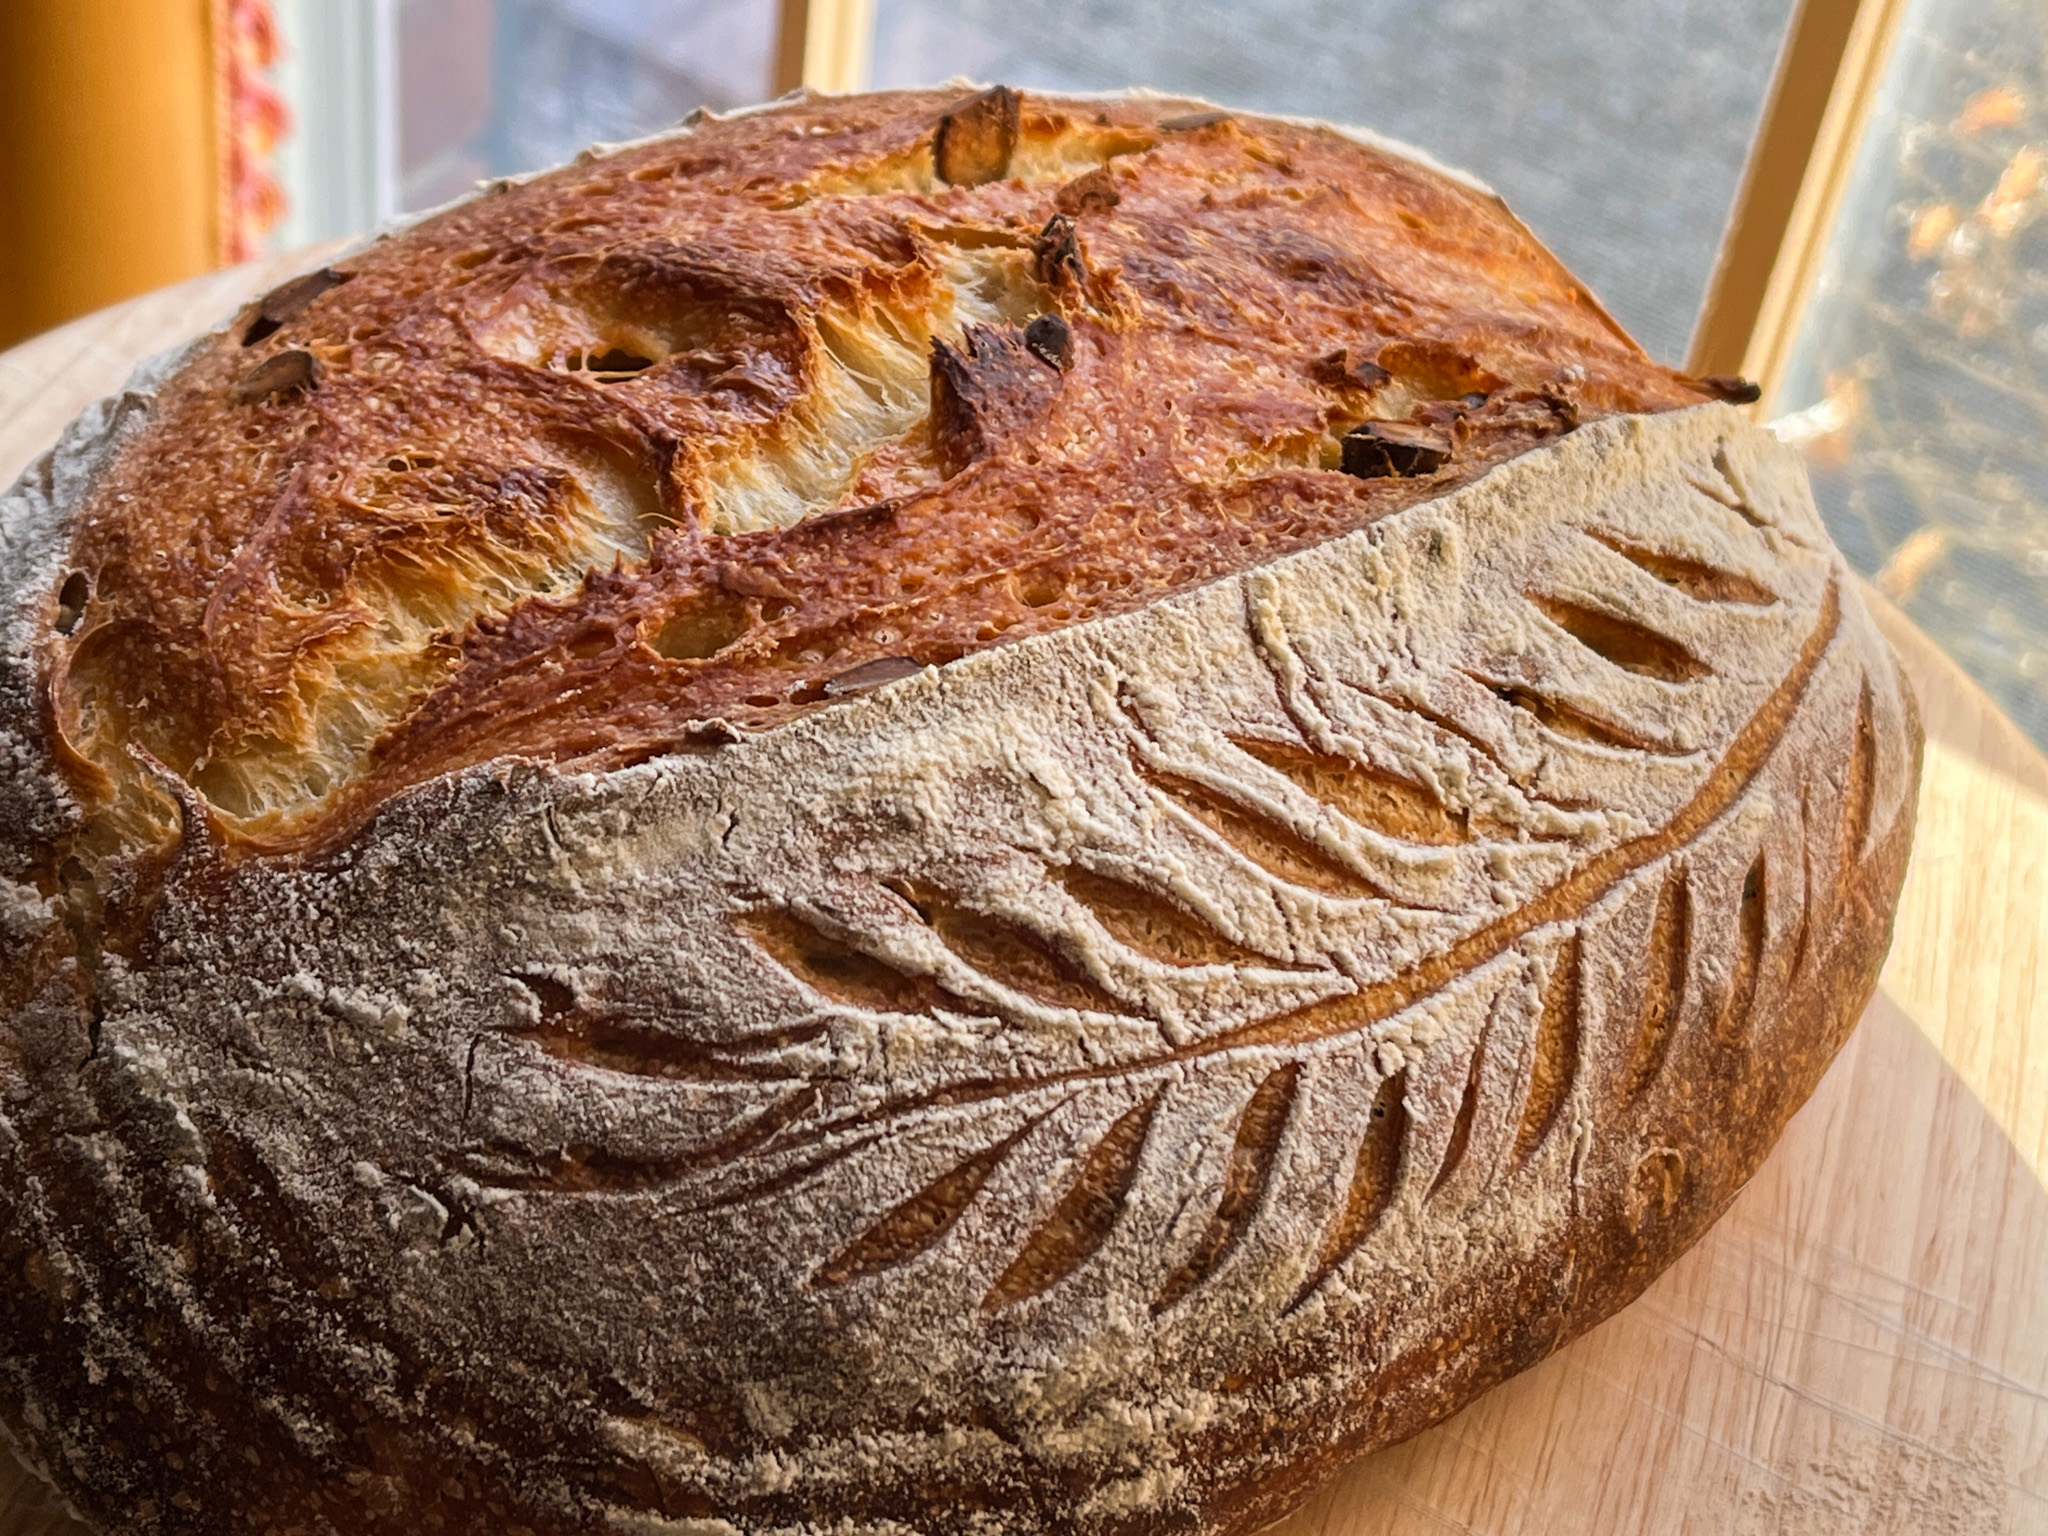
NINE YEARS AGO: Walnut Cranberry Sourdough Bread

TEN YEARS AGO: Ottolenghi in Brazil?

ELEVEN YEARS AGO: Roasted Winter Vegetables with Miso-Lime Dressing

TWELVE YEARS AGO: 2012 Fitness Report: P90X2

THIRTEEN YEARS AGO: Caramelized Bananas

FOUTEEN YEARS AGO: Roasted Lemon Vinaigrette

FIFTEEN YEARS AGO: Whole Wheat Bread

THREE ADORABLE COOKIES

.

COOKIE #1

VANILLA ELDERFLOWER PINWHEEL COOKIES
(from The Bewitching Kitchen)

2¼ cups (282 g) all-purpose flour
¼ teaspoon salt
7 tablespoons (98 g) unsalted butter, room temperature
3/4 cup (80 g) powdered sugar
1 large egg, room temperature
1 tablespoon (12.5 g) vanilla sugar
1 tablespoon elderberry powder (like this one)
tiny amount of purple food gel dye, if needed
white coarse sanding sugar

In a medium bowl, sift together the flour and salt; set aside.

In the bowl of a stand mixer fitted with the paddle attachment, beat the butter and powdered sugar together on medium-high until light and fluffy. With the mixer on low, add the egg and vanilla, mix to combine, and then scrape down the bowl using a rubber spatula. Add the flour mixture and use a rubber spatula to mix until well combined.

Divide the dough in half, add elderberry powder and food gel dye to one half, and mix until fully incorporated. Divide both halves of the dough in half again so you end up with two equal portions of vanilla dough and two equal portions of elderberry dough.

On a lightly floured work surface, roll each portion of dough out to a roughly 8-x-10-inch (20-x-25-cm) rectangle. Place a purple dough rectangle on top of a vanilla rectangle and use a rolling pin to gently press them together. Repeat with the other rectangles of vanilla and elderberry dough. Starting with the shorter side, roll the rectangles of dough into logs. Tightly wrap the two logs in plastic wrap and refrigerate for at least 1 hour and preferably overnight.

Heat the oven to 350°F. Line two baking trays with parchment paper or perforated silicone baking mats. Remove a cookie log from the refrigerator and let it warm up for a few minutes at room temperature. Roll on sanding sugar to coat the surface. Using a sharp knife, cut each log into ¼-inch slices. Place on the prepared baking trays and bake for 10 to 12 minutes, or until golden. Repeat with the remaining dough.

ENJOY!

to print the recipe, click here


Comments: Depending on the brand of your elderberry powder, you might not need the food gel dye. I used a very small amount, delivered with a toothpick. The sanding sugar coating is optional but I think it adds a lot to the overall look of the cookie.

.

TARTLET MOLDED COOKIES
(adapted from The Art of the Cookie)

200g all-purpose flour
1 teaspoon baking powder
½ teaspoon salt
1/2 cup (113g) unsalted butter, at room temperature
150g granulated sugar
1/2 large egg (whisk and add about half, no need to be too precise)
1 teaspoons vanilla extract
1 tablespoon heavy cream
softened butter to coat tins
pink, red and white sanding sugar

In a bowl, whisk together the flour, baking powder, and salt. In a large bowl, using an electric mixer on medium-high speed, beat the butter and sugar until light and fluffy, 2—3 minutes. Add the egg, cream and vanilla and beat on low speed until the egg is completely incorporated. Beating on low speed, slowly add the flour mixture and continue to beat until almost incorporated.

Press the dough into a disc, wrap tightly in plastic wrap, and refrigerate until firm, at least 1 hour or up to overnight.

Coat the tartlet tins of your choice with softened butter using a brush. Shower them with sanding sugar to form a layer at the bottom and edges. Place the tins on a baking sheet. Press a ball of dough in the tin, filling each 3/4 of the volume. Bake at 350F until set but not getting too much color, 15 to 18 minutes. Let the cookies sit in the tartlets for five minutes then remove gently using a small spatula if needed to help. Tapping the tins should work fine. Careful, they stay hot for a while.

ENJOY!

to print the recipe, click here

Comments: Those are just adorable indeed. Best consumed the same day, but if you keep them tightly closed in a container they will be ok next day. Probably any cookie recipe will work, make sure to make it a little softer than usual for cutout cookies, that’s why the heavy cream is a good addition. Chocolate dough could be great, I intend to give it a try soon.

.


CHOCOLATE AND ORANGE PINWHEELS

You’ll get a perfect swirl using Matt Adlard’s technique! I can’t share the recipe, you need to be part of his BAKE IT BETTER club, which is easy to do with a click here. Totally worth it!

ONE YEAR AGO: Ube Sourdough, Two Ways

TWO YEARS AGO: Brown Butter Dulce de Leche Cookie Cups

THREE YEARS AGO: Chicken Poblano Tortilla Soup

FOUR YEARS AGO: Kung Pao Chicken

FIVE YEARS AGO: Galette de Rois

SIX YEARS AGO: Sous-Vide Overnight Oatmeal

SEVEN YEARS AGO: A Valentine’s Day Opera

EIGHT YEARS AGO: Incredibly Simple Times Four

NINE YEARS AGO: Walnut-Cranberry Sourdough Bread

TEN YEARS AGO: Ottolenghi in Brazil?

ELEVEN YEARS AGO: Roasted Winter Vegetables with Miso-Lime Dressing

TWELVE YEARS AGO: 2012 Fitness Report: P90X2

THIRTEEN YEARS AGO: Caramelized Bananas

FOURTEEN YEARS AGO: Roasted Lemon Vinaigrette

FIFTEEN YEARS AGO: Whole Wheat Bread

BAKING WITH THE HEART – FEBRUARY 2025


CHOCOLATE CUPCAKES WITH RASPBERRY BUTTERCREAM
(from The Bewitching Kitchen)

for the cupcakes (makes 10):

100g all-purpose flour
150g granulated sugar
20g cocoa powder (Dutch-processed)
45g unsalted butter
1/8 tsp salt
120ml milk at room temperature
1 large egg, room temperature
1 + 1/2 tsp baking powder

Heat oven to 350F.

Place flour, cocoa powder, salt, butter and sugar in the bowl of a KitchenAid type mixer fitted with the paddle attachment. Mix on medium-high speed until the mixture resembles coarse sand.

In a small bowl, whisk milk and egg. Pour half this mixture into the dry ingredients, and mix on medium speed. Scrape the bowl, continue mixing and pour the other half of the milk-egg. Mix on low speed until combined, then increase the speed to high for a few seconds.

Fill cupcake tins a little over half the volume, and bake until a toothpick comes out clean, about 15 minutes. Let the cupcakes cool completely before frosting.

RASPBERRY BUTTERCREAM

113g (1/2 cup) butter, softened
1/4 cup raspberry jam, seedless
pinch of salt
3 cups powdered sugar
super tiny amount of pink food gel color

Cut the butter into cubes and place in a mixing bowl of an electric mixer fitted with the paddle attachment. Mix butter until smooth, for about 4 minutes. Add jam, the pinch of salt and mix again until well mixed with butter, a couple of minutes. Add the pink gel color.

With the mixer on low speed, add powdered sugar one cup at a time, mixing until fully combined and free of lumps. Once it is all incorporated, turn the speed to high and mix for 2 minutes. That will give you a smooth buttercream that you can use immediately to frost the cooled cupcakes.

Decorate with a fresh raspberry and hearts made with tempered chocolate (or compound chocolate) melted and piped into parchment paper or acetate.

ENJOY!

to print the recipe, click here

.

Comments: Normally I donate all the sweets I bake, but because it was Valentine’s Day, I saved one cupcake to enjoy with the hubby after our meal. OMG! Words of the husband: “Good thing we only had one to share because if we had more I could not stop eating them”. Moist, delicious, and the buttercream frosting absolutely perfect, bringing a little sharp flavor to the party. Make them. Just make them if you want a wonderful treat.

.

SUGAR COOKIES WITH RUFFLES AND ROSES
(after @sweetambs)

.

.

CHOCOLATE-CHIPOTLE COOKIES WITH CUTOUT HEARTS

.

.

OWLS IN LOVE
(after Haniela)

.

.

CHOCOLATE-COVERED OREOS

.

LADY-GREY MACARONS
(from the past, click here)

.

POLKA-DOT LOVE SOURDOUGH
(from the past, click here)

.

.

ONE YEAR AGO: Baking with the Heart

TWO YEARS AGO: Roasted Cauliflower with Chickpeas and Quinoa

THREE YEARS AGO: A Savory Phyllo Pie

FOUR YEARS AGO: Nut-Free Lady Grey Macarons

FIVE YEARS AGO: Mini-Heart Cakes for your Valentine

SIX YEARS AGO: Blue Moon Milk

SEVEN YEARS AGO: Slow-Cooked Chicken Meatballs

EIGHT YEARS AGO: Zesty Flourless Chocolate Cake

NINE YEARS AGO: Maple Pumpkin Pecan Snacking Cake

TEN YEARS AGOSilky Gingered Zucchini Soup

ELEVEN YEARS AGO: Sweet Fifteen!

TWELVE YEARS AGO: Sesame and Flaxseed Sourdough

THIRTEEN YEARS AGO: Green Beans with Miso and Almonds

FOURTEEN YEARS AGO: Saturday Morning Scones

FIFTEEN YEARS AGO: White Bread

WHITE CHICKEN, A CANTONESE CLASSIC

I’ve been intrigued by this recipe for a long time. It is supposed to produce a very tender, perfectly cooked chicken, although the skin component will suffer. You will not get a crispy brown skin. In fact, most people used to the regular roast chicken will prefer to discard the skin and focus exclusively on the meat. One very reputable source – Saveur magazine – gave instructions that shocked me. They claimed that simmering the whole chicken for 10 to 12 minutes would be enough. Not in my universe. I adapted that recipe using other sources and share with you my version. To be fully honest with you, I loved the breast meat, but for my personal taste, the legs could have been more tender. I removed the meat and used it later in a Mexican style concoction. With additional cooking and a few extra spices, it was much better.


CANTONESE-STYLE WHITE CHICKEN
(adapted from several sources)

3½- to 4-pound chicken, giblets discarded
6 quarts of water
1 Tablespoon kosher salt
1 tablespoon fennel seeds
5 whole cloves
2 star anise pods
1 piece of ginger (about 2 inches long), smashed lightly
1/2 cup sherry

for the sauce:
1/4 cup of the poaching liquid
3 tablespoons soy sauce
2 tablespoons grapeseed or other neutral oil
finely grated fresh ginger to taste
1 tablespoon rice vinegar
1 tablespoon toasted sesame oil
1 teaspoon granulated sugar

cilantro leaves to serve with (optional)

Remove the chicken from the refrigerator and let sit at room temperature for 30 minutes. Mix all the ingredients (water, spices and sherry) in a large pot that will be able to hold the whole chicken, covered in water. Bring to a boil. When the water boils, gently lower the whole chicken and make sure it is fully covered. If needed, add a plate on top to keep it submerged. Cook the chicken at gentle simmer, breast side up for 35 minutes. Turn off the heat, leave the chicken inside without touching it for another 30 minutes.

Transfer the chicken to a cutting board and let it sit while you prepare the sauce, whisking all ingredients together. Carve the chicken, discarding the skin. Serve over rice or cabbage, sprinkled with cilantro leaves, if so desired.

ENJOY!

to print the recipe, click here

Comments: The breast meat turned out perfect, exactly how I hoped it to be. Moist, tender, the sauce to drizzle over it is a must. Otherwise, I think it could be a bit too bland. The chicken skin was highly appreciated by our four-legged friends, so it was not wasted. In fact, they are lobbying to have this recipe in our regular rotation. Two paws enthusiastically up. When you add it all up, it is a six-paw-up recipe!

ONE YEAR AGO: Baking with the Heart

TWO YEARS AGO: Roasted Cauliflower with Chickpeas and Quinoa

THREE YEARS AGO: A Savory Phyllo Pie

FOUR YEARS AGO: Nut-Free Lady Grey Macarons

FIVE YEARS AGO: Mini-Heart Cakes for your Valentine

SIX YEARS AGO: Blue Moon Milk

SEVEN YEARS AGO: Slow-Cooked Chicken Meatballs

EIGHT YEARS AGO: Zesty Flourless Chocolate Cake

NINE YEARS AGO: Maple Pumpkin Pecan Snacking Cake

TEN YEARS AGOSilky Gingered Zucchini Soup

ELEVEN YEARS AGO: Sweet Fifteen!

TWELVE YEARS AGO: Sesame and Flaxseed Sourdough

THIRTEEN YEARS AGO: Green Beans with Miso and Almonds

FOURTEEN YEARS AGO: Saturday Morning Scones

FIFTEEN YEARS AGO: White Bread

YOGURT AND PISTACHIO SOURDOUGH

Inspiration for this delicious bread came from the one and only Elaine Boddy, through her book called EVERYDAY SOURDOUGH which you can find here. I made just a few modifications in the formula (she used walnuts, I wanted to incorporate pistachios), and the method, because I always leave the dough in the fridge overnight and bake first thing in the morning. Her book is absolutely full of great ideas, and I have reviewed it right after publication (check it out in this post).

YOGURT AND PISTACHIO SOURDOUGH
(slightly modified from Everyday Sourdough)

75 g sourdough starter at 100% hydration
240g water
125 g low-fat yogurt
500 g white bread flour
50 g pistachios, coarsely chopped
10 g salt

Mix all ingredients in the bowl of a KitchenAid type mixer fitted with the dough hook. Knead on low speed for about 4 minutes. Transfer to an oiled bowl and let proof at room temperature for 4 and a half hours, with folds every 45 minute or so, no need to be precise.

After the last fold, keep it at room temperature for a full hour, shape as a round boule or batard, and place in a banetton. Leave for another hour at room temperature, then retard it in the fridge.

Next morning, bake at 450F straight from the fridge, slashing right before baking. Bake covered for 30 minutes, remove lid and bake for 15 minutes more. Allow to cool completely before slicing.

ENJOY!

to print the recipe, click here

Comments: This is one tasty bread! The yogurt makes the crumb softer, with a nice taste that goes well with the pistachios. Husband adored it, and so did I… Huge thank you, Elaine, for allowing me to publish this little variation of your recipe!

ONE YEAR AGO: Chinese-Style Orange Chicken goes Light

TWO YEARS AGO: Roasted Cauliflower with Chickpeas and Quinoa

THREE YEARS AGO: A Savory Phyllo Pie

FOUR YEARS AGO: Nut-Free Lady Grey Macarons

FIVE YEARS AGO: Mini-Heart Cakes for your Valentine

SIX YEARS AGO: Blue Moon Milk

SEVEN YEARS AGO: Slow-Cooked Chicken Meatballs

EIGHT YEARS AGO: Zesty Flourless Chocolate Cake

NINE YEARS AGO: Maple Pumpkin Pecan Snacking Cake

TEN YEARS AGOSilky Gingered Zucchini Soup

ELEVEN YEARS AGO: Sweet Fifteen!

TWELVE YEARS AGO: Sesame and Flaxseed Sourdough

THIRTEEN YEARS AGO: Green Beans with Miso and Almonds

FOURTEEN YEARS AGO: Saturday Morning Scones

FIFTEEN YEARS AGO: White Bread