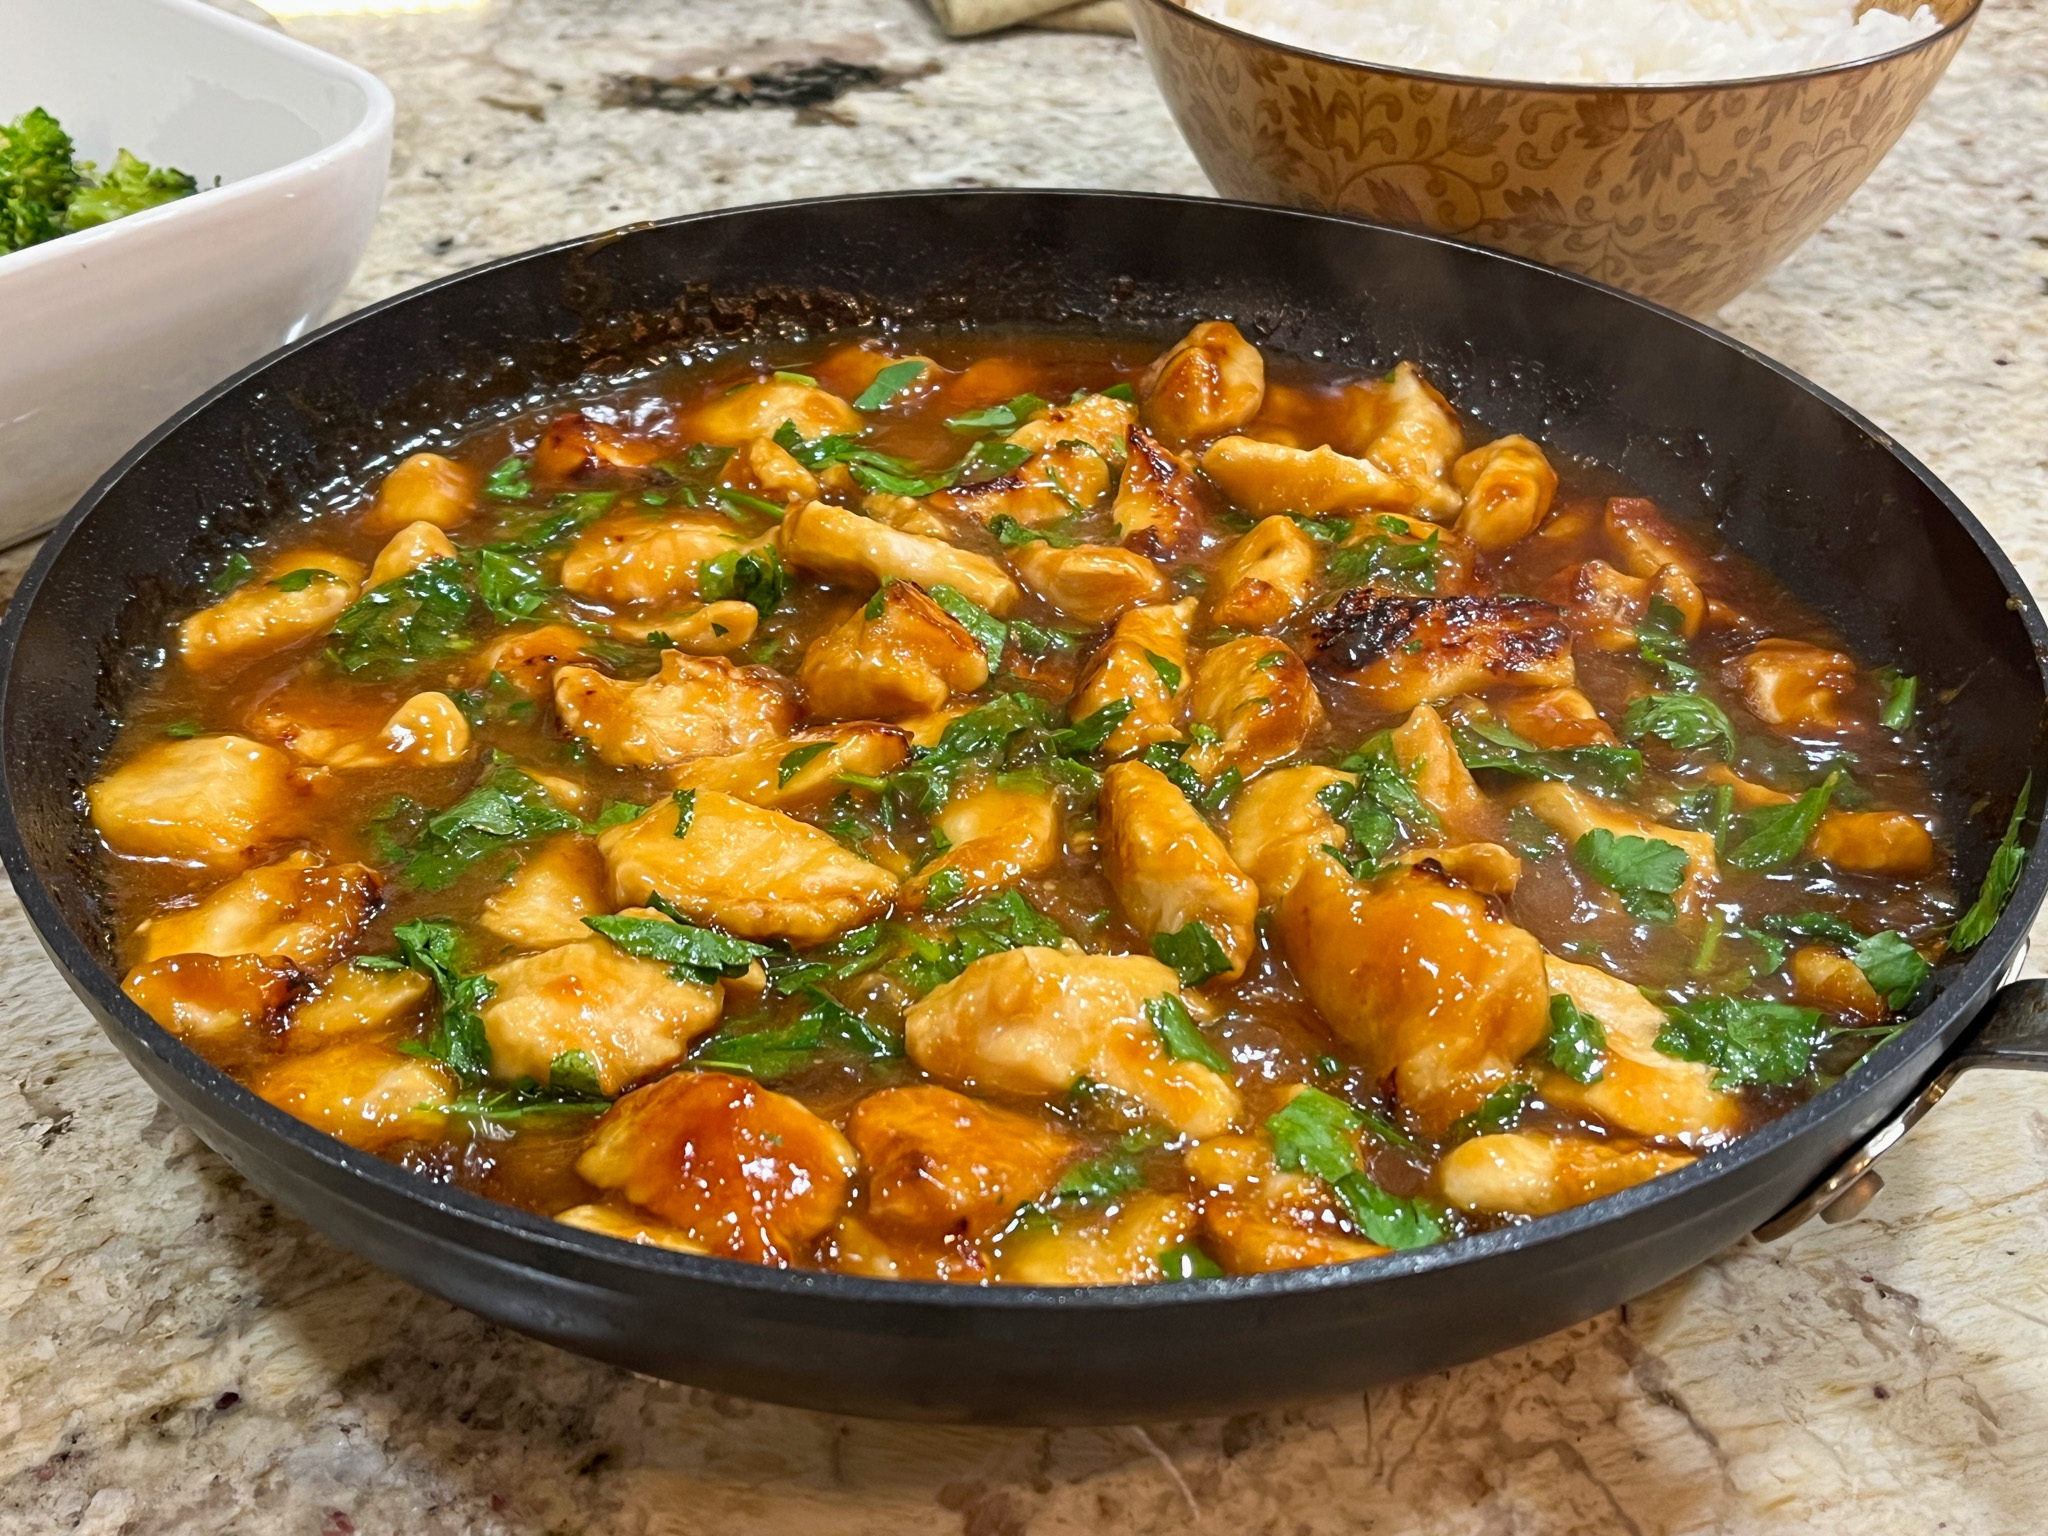
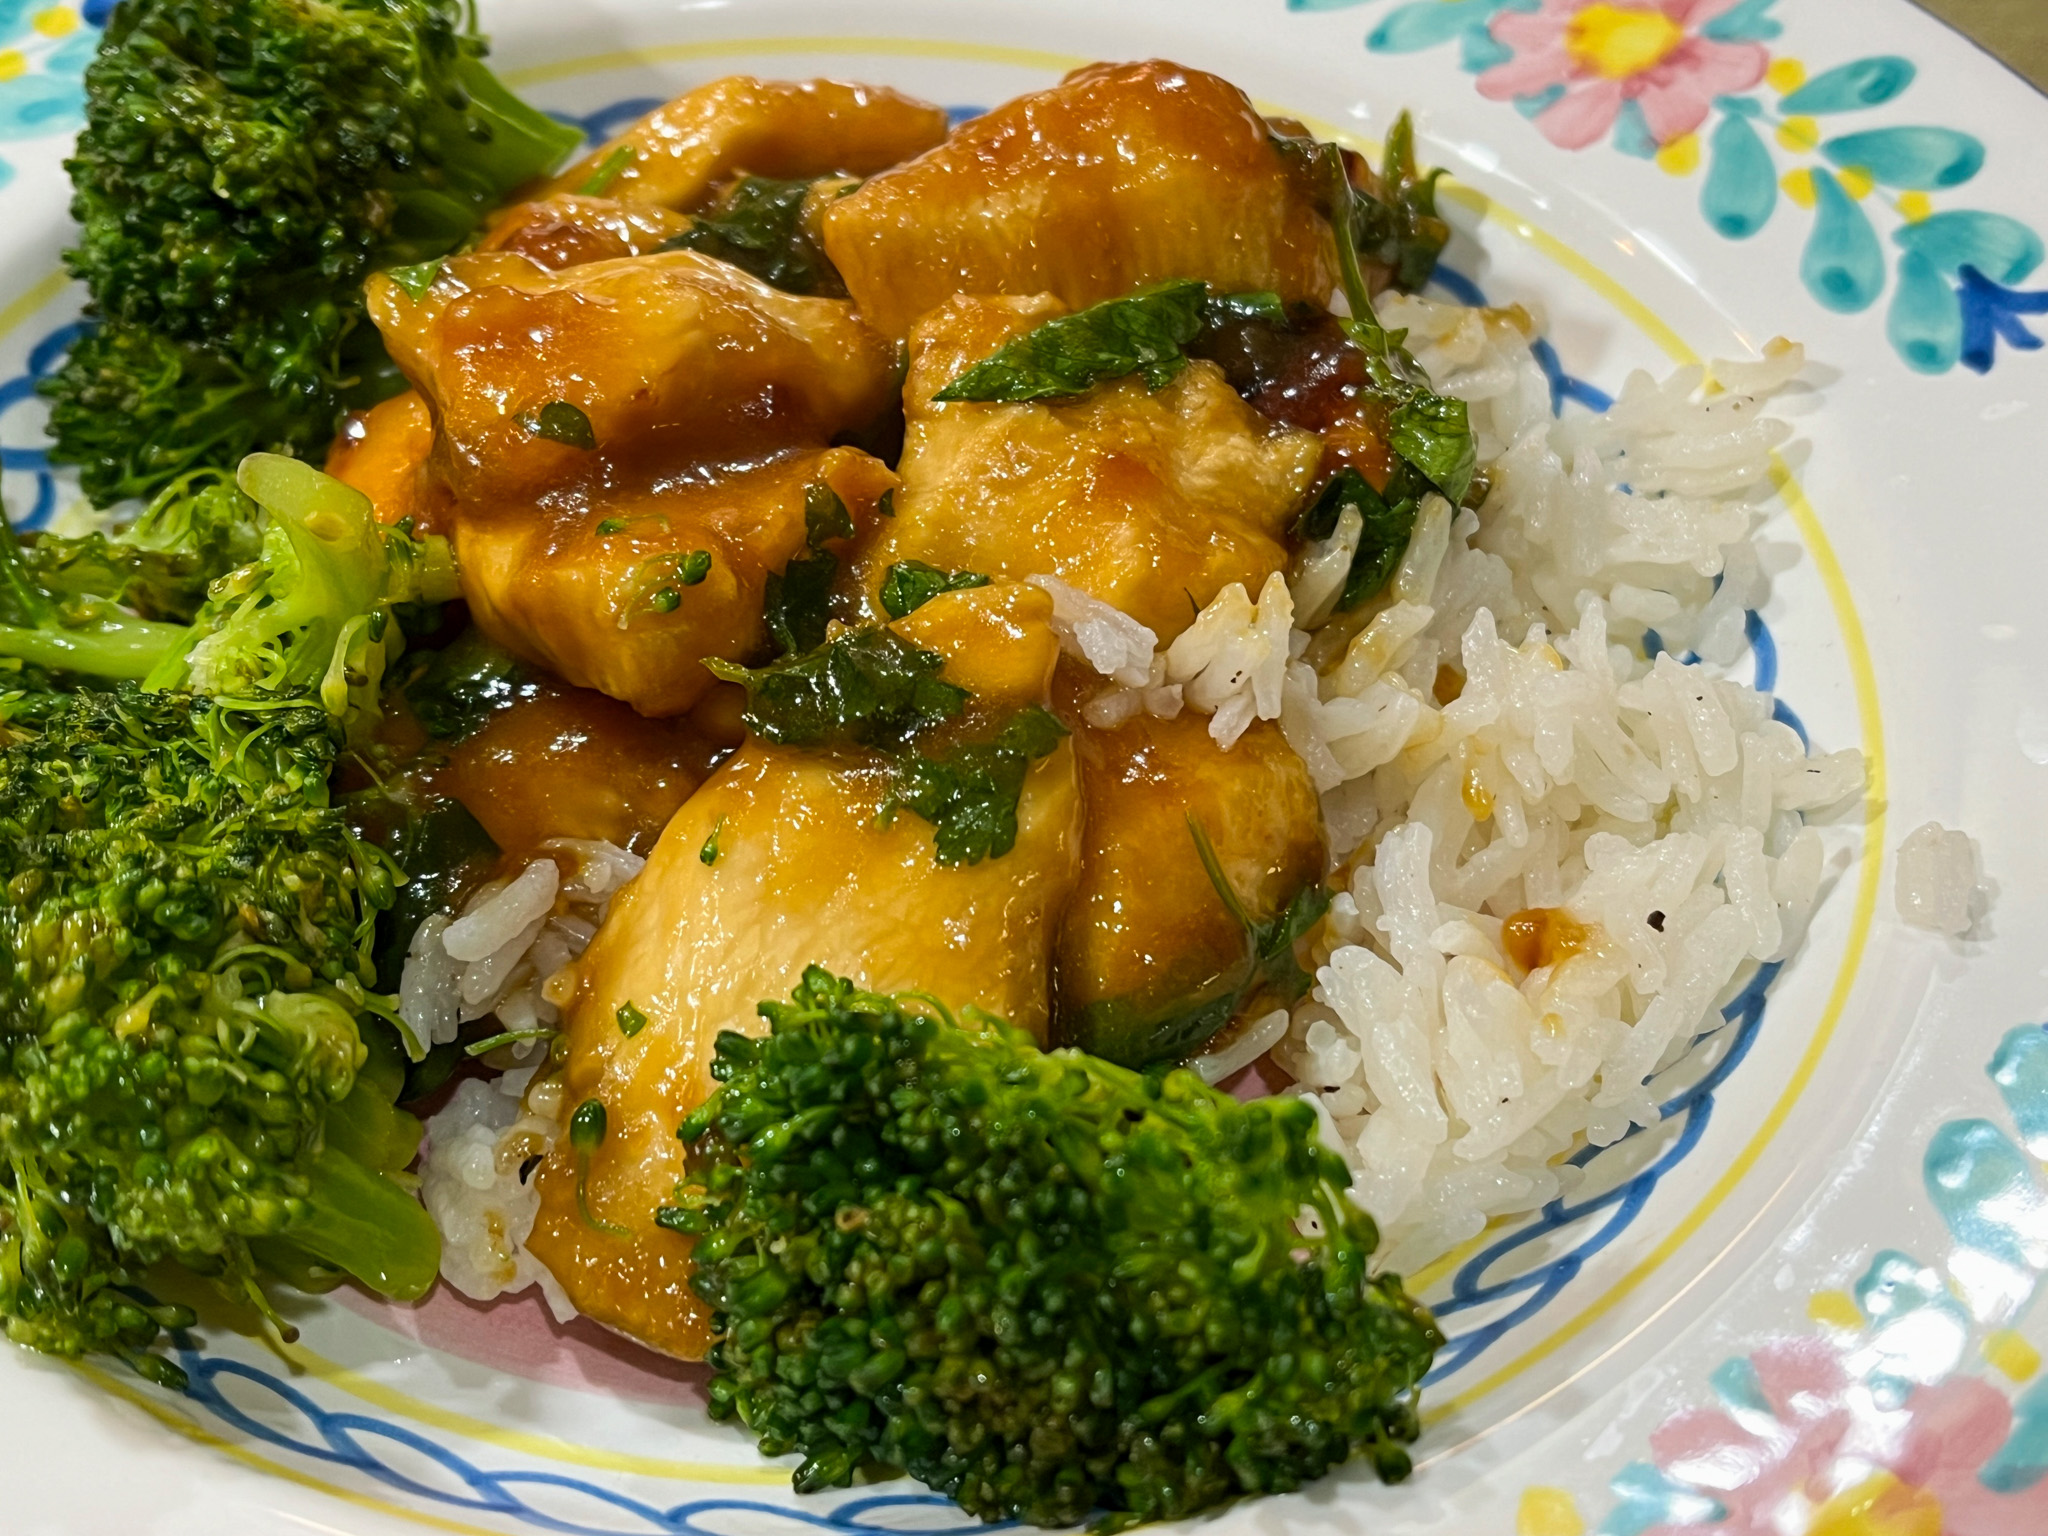
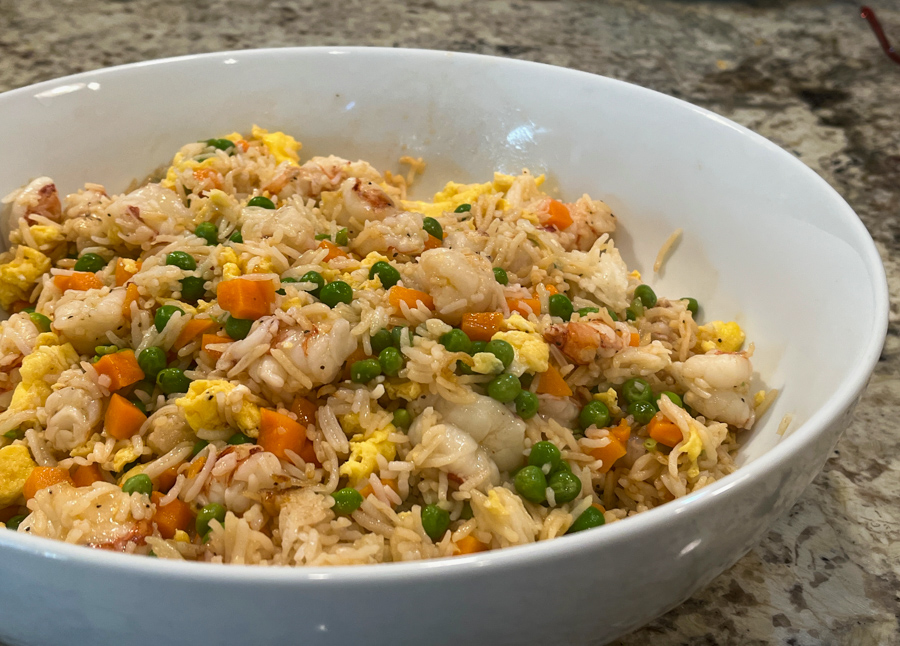
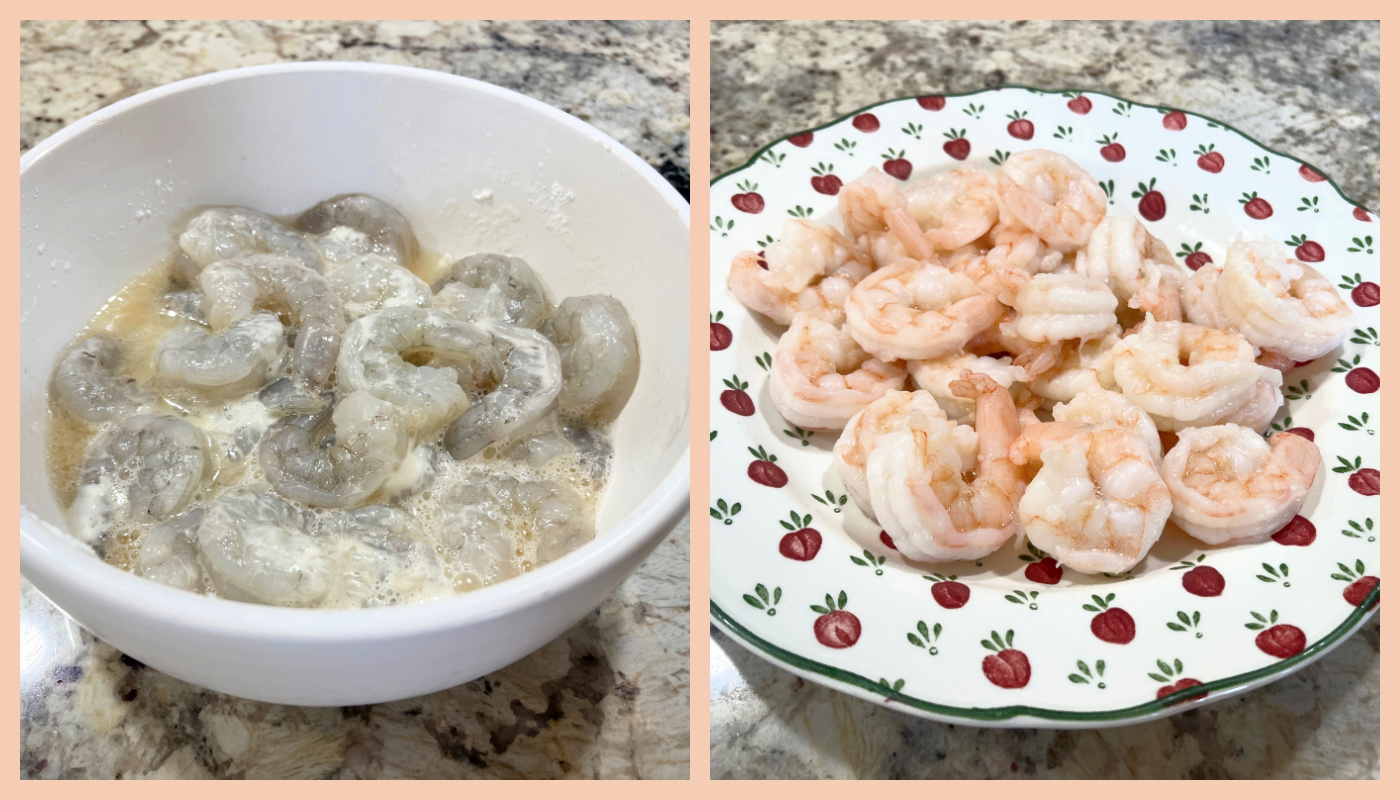
Oriental-style stir fries are often part of our rotation meals for dinner. Usually chicken or shrimp as the main protein. Shrimp cooks super fast, I usually brine it and incorporate it into the wok, and that does prevent it from getting tough and dry. But if you want the most perfect and succulent texture, look no further: go for the traditional Chinese method of velveting. It can be done in oil or water, I always opt for the latter. Once you have velveted shrimp, it can sit at room temperature for an hour without problems. Just use it in any recipe and be ready to fall in love…
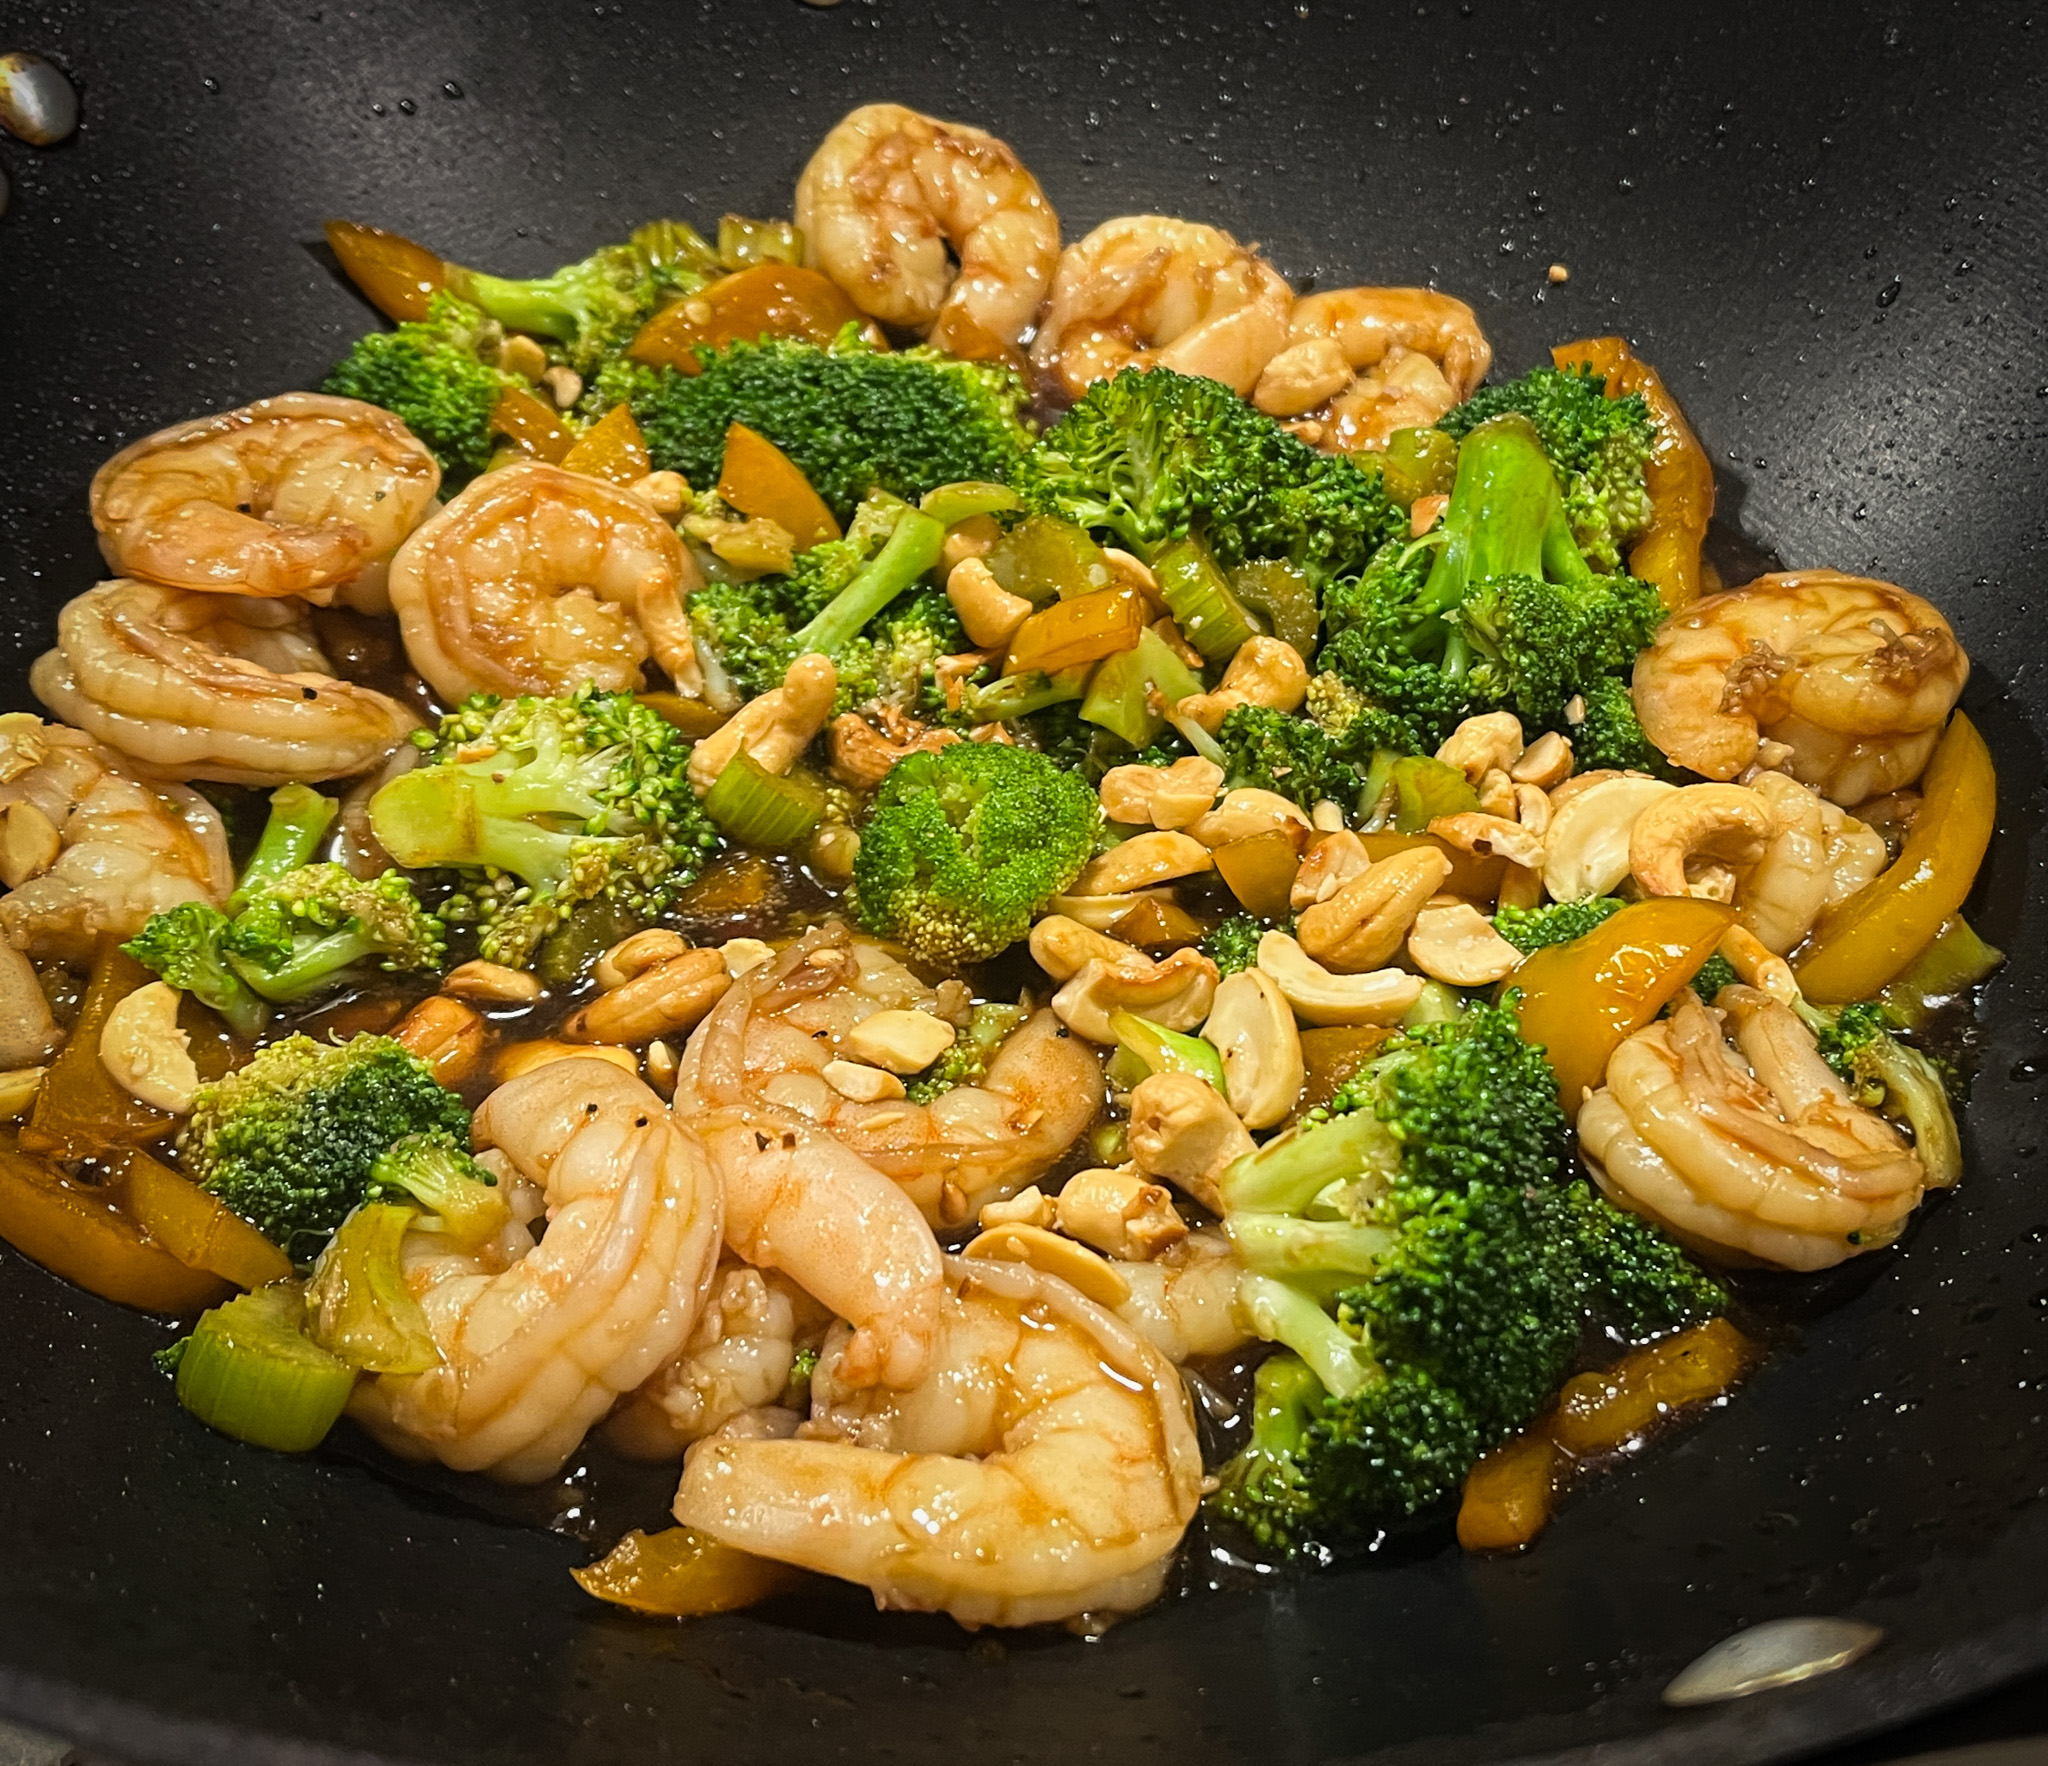
SHRIMP STIR-FRY WITH BROCCOLI AND CASHEWS
(from The Bewitching Kitchen)
for velveting the shrimp:
1/2 teaspoon salt
2 teaspoons sherry
1 large egg white, whisked briefly
1 + 1/2 Tablespoon cornstarch
1 Tablespoon olive oil
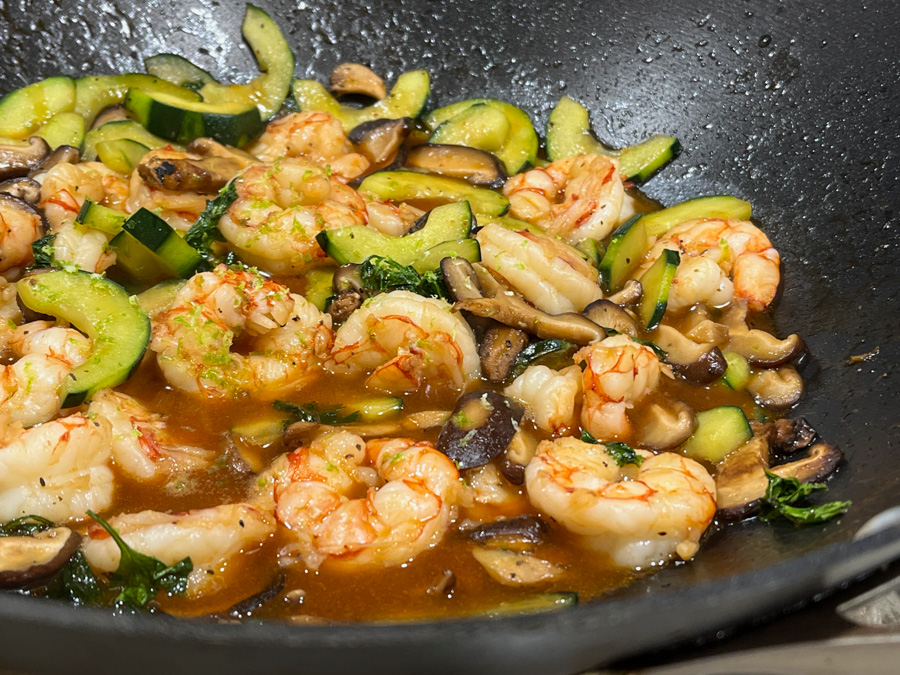
1 pound large shrimp, peeled and de-veined
1 medium head of broccoli florets
1/2 yellow bell pepper, sliced thin
2 stalks celery, cut in 1/4 inch slices
Cashews, lightly toasted
peanut oil, about 3 tablespoons
1 Tablespoon toasted sesame oil
salt and black pepper to taste
finishing sauce:
1/4 cup water
1/4 cup soy sauce or tamari
2 tablespoons rice vinegar
1 tablespoon honey
1 teaspoon Sriracha sauce (or more to taste)
1/2 teaspoon sesame oil
1/2 teaspoon minced ginger
2 teaspoons arrowroot powder
Place the shrimp in a bowl. Sprinkle the salt and sherry, gently mix. Add the egg white, cornstarch and olive oil, stir well but gently. Place in the fridge for 30 minutes.
Bring a pot with water to a gentle boil, add a smidgen of olive oil and then place the shrimp straight from the fridge in the water. Stir gently so they do not stick to each other. Simmer for a couple of minutes and immediately drain in a colander. Rinse very briefly with cold water to stop the cooking, and reserve until time to finish the recipe. You can do this step one hour in advance.
Mix all ingredients for the finishing sauce and reserve. Place the broccoli and a sprinkle of water in a microwave safe bowl, season gently with salt. Microwave for 2 minutes, drain, and reserve.
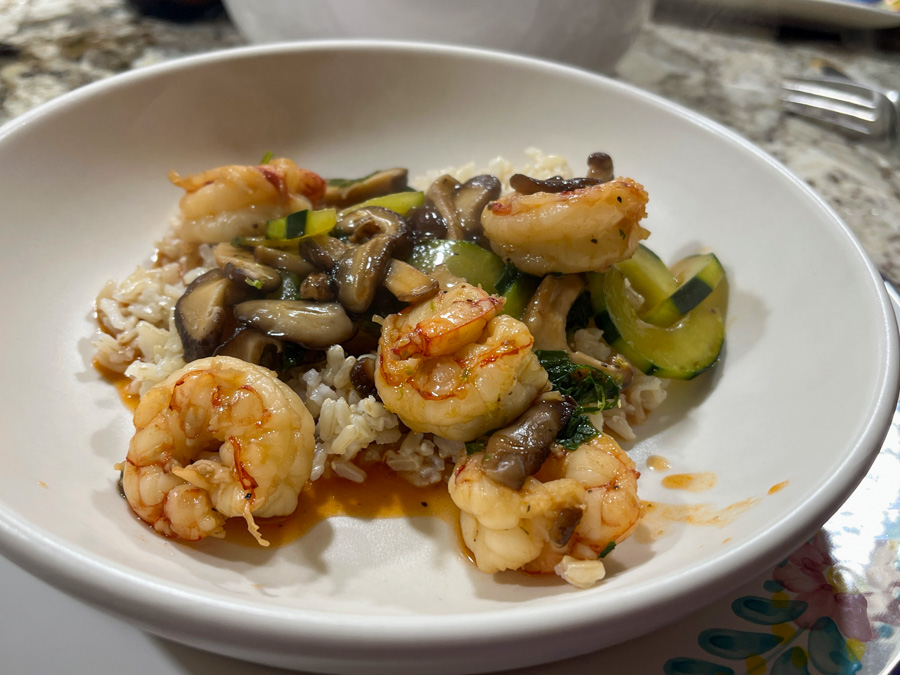
Heat the peanut oil in a wok, when smoking hot add the celery and yellow bell pepper. Season lightly with salt and pepper. When very fragrant and the veggies are soft, add the broccoli and stir-fry for 2 minutes. Add the velveted shrimp, cook gently for another minute or so. Whisk the prepared finishing sauce and pour into the wok, bring to a boil. Cook until thickened and well combined with the ingredients. Sprinkle toasted cashews on top and serve, adjusting seasoning if so desired.
ENJOY!
to print the recipe, click here
Comments: If you love stir-fries, I urge you to incorporate the velveting step to make your recipe even more special. Phil tasted it and immediately said “You nailed this one!” Indeed, you cannot beat the texture of these babies. You can use any recipe you like, and also do the exact same process (minus the cornstarch) to velvet chicken. I never use oil because I refuse to have to deal with a large amount of leftover oil, particularly if used for seafood. But your kitchen, your rules. I don’t think the oil method will produce a better outcome anyway. We enjoyed it with some brown rice and ate like Royals of The Ming Dynasty! Or so it seemed to us…
1 YEAR AGO: Chocolate-Covered Oreos and a Virtual Party!
ON2E YEARS AGO: Chicken Fajita Bites and a Cookbook Review
3 YEARS AGO: Oreo Balls, Fun and Easy
4 YEARS AGO: Pork with Prunes
5 YEARS AGO: Honeyed-Jalapenos on Spelt Pizza
6 YEARS AGO: Bulgur and Chickpea Salad with Pomegranate Seeds
7 YEARS AGO: Purple Star Macarons
8 YEARS AGO: Smoked Salmon, Fait Maison
9 YEARS AGO: Kouign-Amann, Fighting Fire with Fire
10 YEARS AGO: In My Kitchen, Yin and Yang
11 YEARS AGO: Chocolate Toffee Banana Bread
12 YEARS AGO: In My Kitchen, June 2014
13 YEARS AGO: Strawberry Frozen Yogurt
14 YEARS AGO: Baked Coconut and “The Brazilian Kitchen”
15 YEARS AGO: Honey-Glazed Chicken Legs
16 YEARS AGO: French-Style Rolls