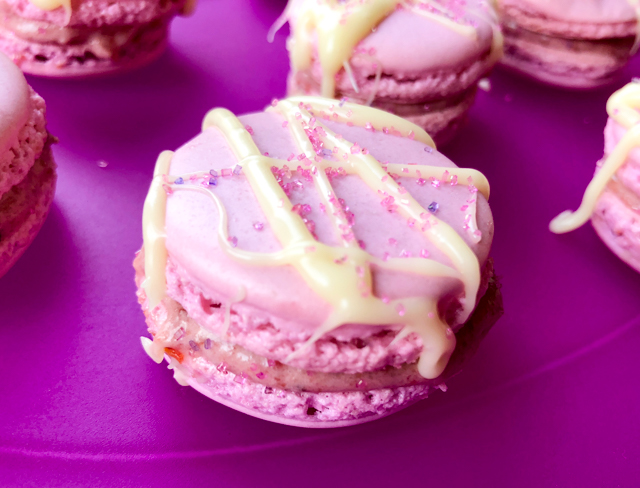
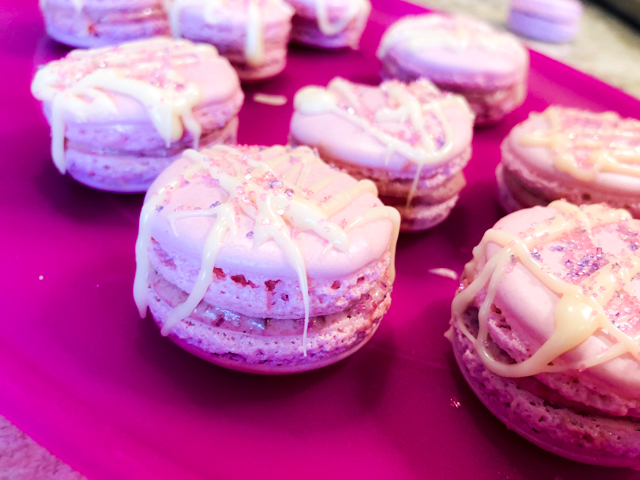
It was not intentional, but once I was done decorating my babies, I realized they would have been perfect for Mardi Gras, or as we call in Brazil, Carnaval. Made by the Italian meringue method, they were – full disclosure – the second batch baked in a single day, after a macaron fiasco I intend to completely forget. It involved cocoa powder and despair. Enough said. Undeterred, I cleaned up all the kitchen, sat down, took many breaths in, as many breaths out, looked in the mirror and said “You’ve got this.” Keep in mind the Winter Olympics were on, so I was contaminated by their unparalleled bravery. Did you watch those snowboarders in the half-pipe? I mean, give me a batch or two of macarons to bake ANYTIME.
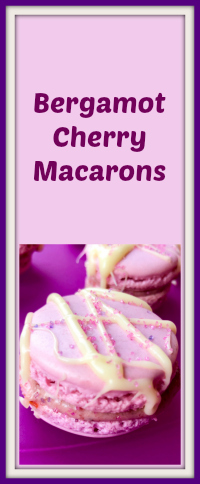
BERGAMOT-CHERRY MACARONS
(from the Bewitching Kitchen, inspired by several sources)
for the shells:
150g almond flour (I used fine ground from Bob Mill’s)
150g powdered sugar
110g egg whites, divided (55g + 55g)
red food gel color (I used Americolor)
pinch of salt
150g granulated sugar
40 mL water (a little over 2 +1/2 tablespoons)
for the filling:
200g white chocolate (I used Lindt)
60g heavy whipping cream
2 drops bergamot essential oil (see comments)
1/4 cup sour cherry preserves
for decoration:
white chocolate, melted
sugar crystal sprinkles, purple and pink
Prepare the filling. Place chocolate cut in small pieces in a large Pyrex measuring cup. Heat the cream to almost boiling and pour over the chocolate. Let it sit for a couple of minutes, then gently stir. When totally dissolved, add the bergamot oil, then the raspberry preserves. Place in a food processor and pulse a few times to homogenize. If necessary, add a little more cream, but do not allow the mixture to be too liquid. Place in the fridge until needed.
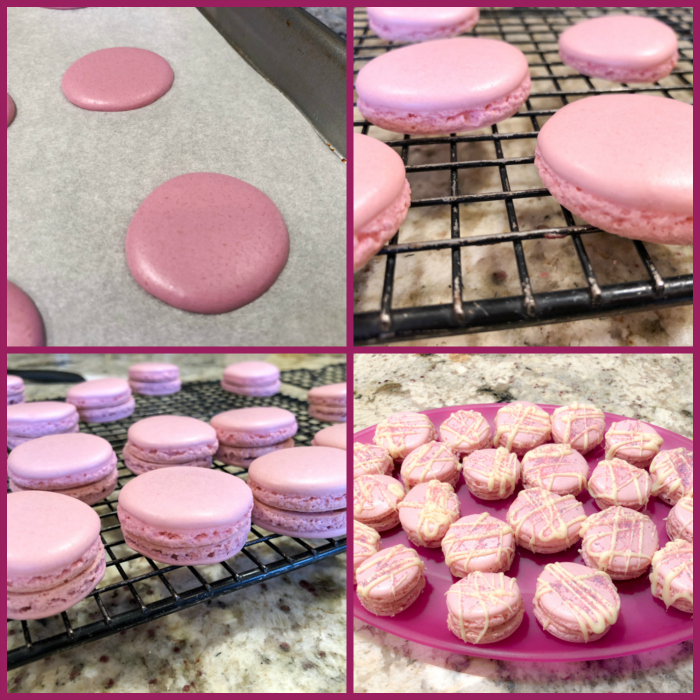
Make the shells. Heat the oven to 300 F. Line two baking sheets with Silpat or parchment paper, and prepare a pastry bag with a plain tip with 1/2 inch opening, or slightly smaller.
Grind together the powdered sugar and almond powder, using a food processor, to obtain a fine powder. Sift through a sieve into large bowl. Mix the first portion (55g) egg whites with red food color, then add it to the sieved mixture of almond and sugar. It will form a paste, a bit thick. Try to incorporate the color homogeneously, keep in mind it will be lighter when you add the meringue to it. You want a light pink in the end.
Make the Italian meringue. Place the other 55g egg whites and pinch of salt into the bowl of a Kitchen Aid type mixer. Set aside while you prepare the sugar syrup. In a small saucepan combine granulated sugar with water and place on medium heat. Using a candy thermometer measure syrup temperature. When it reaches 230 F start whipping the egg whites. When the syrup reaches 244 F pour it over the whipped egg whites while mixing continuously. Continue beating until the bowl has cooled slightly, and glossy peaks have formed.
Add the whipped whites over the almonds mixture and using a rubber or silicone spatula gently fold in until combined and smooth. Make sure to “paint” the mixture on the walls of the bowl so that you get a smooth, lava-like consistency. Transfer the mixture to the piping bag fitted with a 1/2 inch (1 cm) plain tip. Pipe the batter to make macarons the size you like. Rap the baking sheet a few times firmly on the counter top to flatten the macarons and to remove air bubbles. Let them sit at room temperature until a skin forms, about 30 minutes.
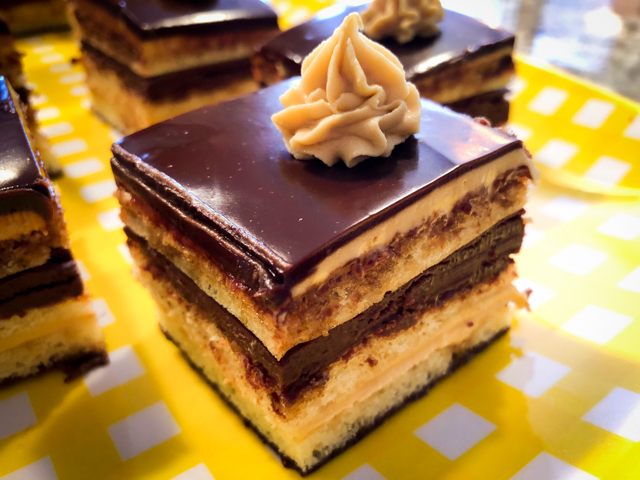
Bake for 18 to 20 minutes. They are ready when the top doesn’t move freely when you hold them and twist gently. Let cool slightly before removing from baking sheet. Marry two by two of similar size, add the filling. Melt white chocolate and add to a small bag. Cut a small opening with scissors and drizzle white chocolate on top of the filled macarons. White the chocolate is still warm, sprinkle the colored sugar on top. Place in the fridge overnight before serving them, at room temperature.
ENJOY!
to print the recipe, click here
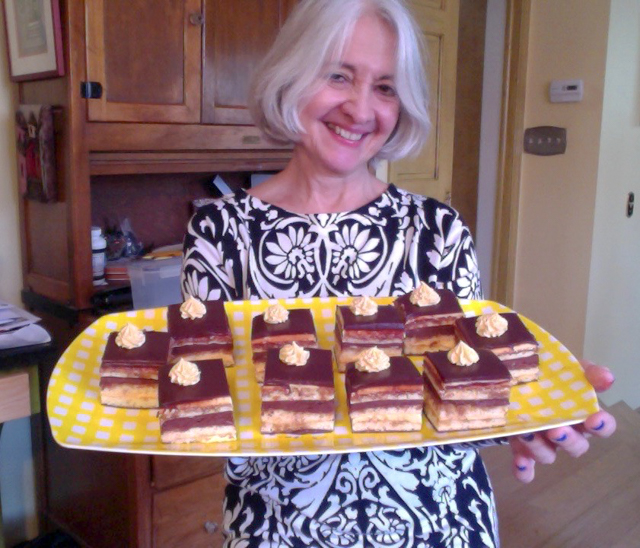
Comments: Hard to believe I baked two batches of macs in the same day… The thing with macarons is that when they go bad, they don’t fool around, they go royally bad. And of course, you can try to figure out the reasons, but more often than not, it is a collection of small things and they get together to create the perfect storm. At any rate, I am glad I regained my composure and made my colorful Mardi Gras creatures. I think the filling worked very well because the shells tend to be so sweet, having a sour note is a must. Our colleagues seemed to enjoy this batch quite a bit, I got compliments not only on the taste of the filling, but the texture of the shells. No hollows at all, very smooth surface, and reasonably sexy feet. I might be biased, though… they are my babies, after all…
If you do not have bergamot oil, use 1 teaspoon of freshly grated orange zest. I imagine a little bit of orange liquor could go well too, but you might have to play with amounts, as anything could get the delicate white chocolate ganache in trouble. And you definitely want to stay away from trouble whenever macarons are involved.
Make my day, grab a pin!
ONE YEAR AGO: Roasted Veggies with Queso Cotija Dressing
TWO YEARS AGO: Creamy Broccoli and Mushroom Casserole
THREE YEARS AGO: Maple Walnut Biscotti
FOUR YEARS AGO: Barley Risotto with Peas
FIVE YEARS AGO: Oatmeal Fudge Bars
SIX YEARS AGO: Cauliflower Steaks
SEVEN YEARS AGO: Soft Spot for Chevre
EIGHT YEARS AGO: Quick sun-dried Tomato Crostini