SESAME AND FLAXSEED SOURDOUGH

This  loaf of bread was made on a whim on a busy weekend mainly devoted to the lab. Tired of refreshing my starter and putting it back in the fridge, I decided that – no matter what – we would be having home-made bread on Super Bowl Sunday.  I had to cheat, though. The dough got spiked with some commercial yeast to speed up fermentation. Let’s hope the Wild Yeast Gods will have mercy on me…  😉
boule1

SESAME AND FLAXSEED SOURDOUGH
(inspired by Hamelman’s Bread)

Starter mix:
2.4 oz bread flour
3 oz water at room temperature
1 Tablespoon mature sourdough culture

Soaker:
1.5 oz flax seeds (about 1/4 cup)
1/2 cup water at room temperature

final dough:
12 oz bread flour
1.6 oz rye flour
2 oz sesame seeds, toasted
5.7 oz water
10 g salt
all the soaker
4.8 oz starter mix (you will have a small amount left)
1/2 teaspoon active dry yeast

Prepare the levain build 12-18 hours before making the final dough. Mix all ingredients and leave in a covered container at room temperature.  At the same time, make the soaker placing the flax seeds with water in a small bowl.  The seeds will expand quite a bit, so use a bowl that will allow that to happen without overflowing.

Next morning, make the final dough by mixing all the ingredients together in the bowl of a KitchenAid type mixer.  Mix on lowest speed for a couple of minutes.  Check the hydration level, adjust if necessary.  Increase speed to medium-low (level 3 of a KitchenAid), and mix for 3 to 4 minutes.

Let the dough ferment in a lightly oiled bowl for 2 and half hours, folding the dough twice at 50 minutes interval. After 2.5 hours, shape the dough as a ball and place in a suitable container for the final proofing.   My bread was ready to bake in 2 hours and 45 minutes.

Bake in a 450 F oven for 45 minutes. If baking covered to generate steam, remove the cover after 30 minutes.  Cool completely before slicing.

ENJOY!

to print the recipe, click here

composite

Whenever I bake a loaf of bread, I go into full scrutiny mode. I stare at the crust,  inspect the edge of the slashing,  and look for small blisters on the surface.  Then, after patiently waiting for the bread to cool,  I cut a slice and start the convoluted process of analyzing the crumb.  Phil knows better and allows me this important “bread-introspection” time before reaching to grab a piece. But, once he senses the green light, it never fails:  “This is good bread”.  Really, this bread is awesome!”   It gives me a thrill… I know he means it, and it puts all my bread scrutiny into perspective.   For instance, I had to stop beating myself up because the holes in the crumb did not organize into the pyramidal shape I love so much.  Oh, well… This is good bread.

IMG_1434
The flax seeds are visible, of course, but the sesame more or less disappears in the crumb. However, the flavor is there beyond any shadow of a doubt, and complements very well the small amount of rye and the hint of sourness.  Everyone watching the Super Bowl loved this loaf, some even preferred to turn the back to the TV and concentrate on it.  😉

Buck2

I am submitting this post to Susan’s Yeastspotting….

ONE YEAR AGO: Green Beans with Miso and Almonds

TWO YEARS AGO: Saturday Morning Scones

THREE YEARS AGO: White Bread

LET’S BRAID IT ON!

Joanna from Zeb Bakes is a constant source of inspiration. She always comes up with the most amazing breads, just because she got up one day in the mood to play with an idea, or try to mimic something from a fancy bakery.  Not too long ago she shared with her readers a gorgeous bread with a crown, looking like a Roman Emperor, perhaps Julius Caesar on his golden days.  According to Joanna, the Emperor had indulged a tad too much on vino the evening before, so his crown was tilted to one side.  Granted, we’ve all had our days of overindulging, so let’s not be too critical.  Here is my attempt at crowning a sourdough:
boule1
HAIL CAESAR SOURDOUGH
(adapted from Joanna, at Zeb Bakes)

Mix together:
25 g of active sourdough starter
100 g  bread flour
125 g water

Leave for 12-16 hours in a cold kitchen;  6-10 hours in a warm one.

The following day, make the dough:
225 g of the above mixture
200 g water
175 g bread flour
150 g regular bread flour
75 g dark rye flour
1/2 tablespoon of dark malt dissolved in water
3 g dry yeast
10 g sea salt

Mix all ingredients together, except the salt.  Leave the mass of dough to rest for 20 minutes, sprinkle salt on top and knead it in for a couple of minutes until smooth. You can use a KitchenAid in low-speed if you like.

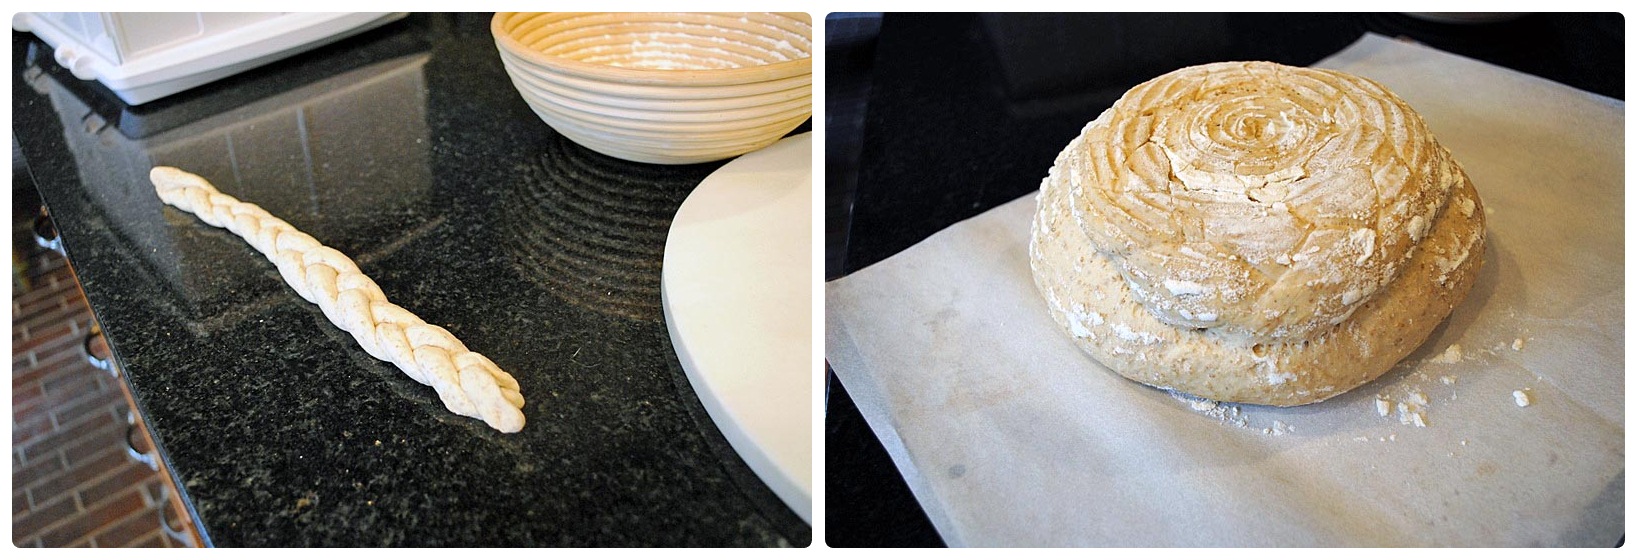
Ferment the dough for 3 hours, with two folds (at 60 and 120 minutes). Leave the dough rise undisturbed for the last hour.   Weigh the dough and separate a small amount roughly 10% of its weight for the braid.  Divide that portion in three, make long strands with it, and form a braid.   Place the braid at the bottom of a well floured banetton, form the remaining of the dough as a ball, and place it, seam side down over the braid.

Ferment the shaped dough for 2 hours, invert it on a piece of parchment paper, and bake in a 450 F oven with initial steam for 20 minutes, reduce the oven to 420 F and bake for 20 to 25 minutes more.  Cool completely on a rack.

ENJOY!

to print the recipe, click  here

composite

I loved making this bread!  When Joanna posted her article, she got a comment from the baker who originally designed this recipe, and he advised her to use less dough (5 to 8% from the total weight) to make the braids.  I used 10% because it already seemed like a very small amount, but I ran into some difficulties. I should have rolled my strands a little longer, and glued them better to the rest of the dough.  Still, it is a nice touch to embellish a sourdough boule. I will not lie to you, though.  My  Emperor was also vino-happy the previous night, as these (more revealing) shots will demonstrate. 😉

oops2oops

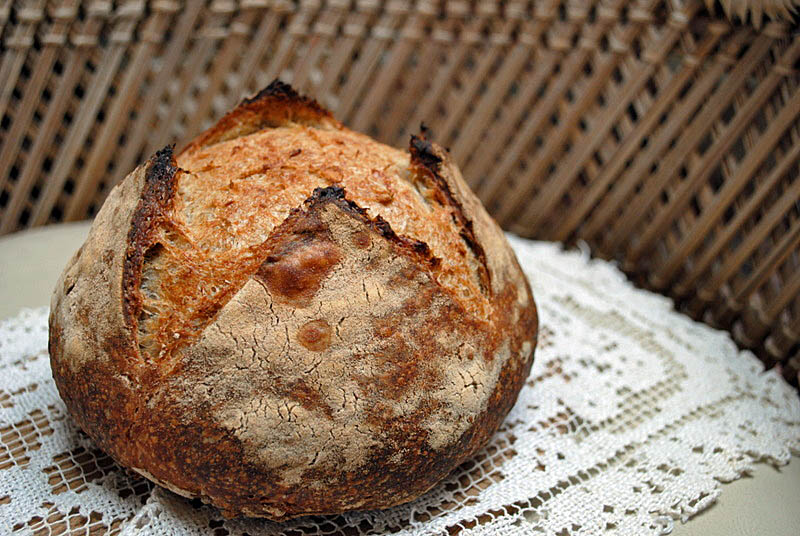
This was a nice loaf of bread, with the delicious flavor of rye, and a golden brown crust, boosted by the inclusion of malt. I baked it inside a large roasting pan with a lid, after a nice comment left by Donna on my sourdough mini-rolls post. It worked extremely well, thanks for the great tip, Donna!  I did not add any extra water inside the pan. I just poured some inside the lid, emptied it leaving a little water clinging to the surface, and inverted it quickly to close the roaster.  At the end of 20 minutes I opened the roasting pan and continued baking uncovered.

closeup

Joanna, thanks for another great recipe!  This one goes straight to Susan’s Yeastspotting…

ONE YEAR AGO: In My Kitchen, December 2011

TWO YEARS AGO: Festivus Dinner Rolls

THREE YEARS AGO: 100% Sourdough Rye

BEETROOT SOURDOUGH FOR THE HOLIDAYS

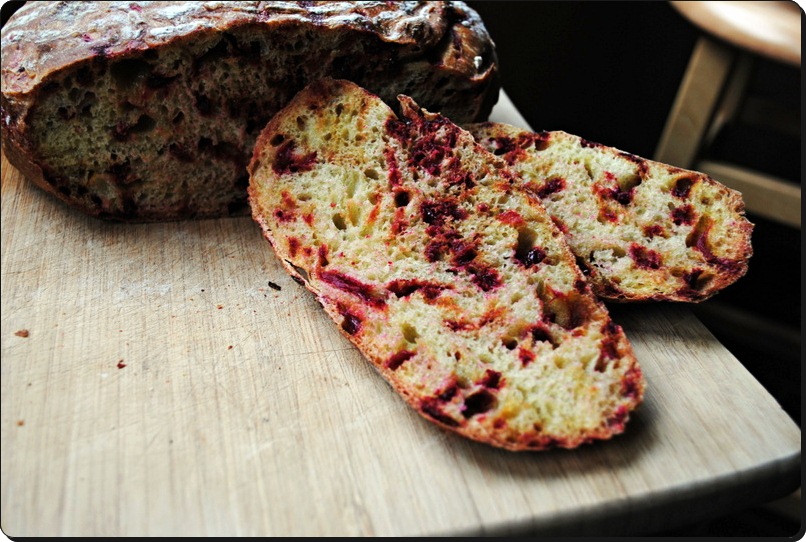
This gem of a recipe comes from one of my favorite bread books, which I reviewed in a not too distant past: How to Make Bread. Such a simple and straightforward title, but it says all that matters.  You will learn how to make great bread following the careful instructions of Emmanuel Hadjiandreou.    This bread is perfect for the holiday season, its crumb decorated with intensely red dots of beets, that are coarsely grated and incorporated raw in the dough.

You may wonder if the bread turns out too sweet or with a strong flavor of beets?  Not really. It is a sourdough still, but with a background of sweetness that is just enough to surprise your palate and act as the perfect supporting actor for a slice of Roquefort cheese.  Sharp cheeses,  eggplant relishes, anything with a nice bite and some saltiness will go extremely well with this bread.  I happen to like it all by itself, slightly toasted.

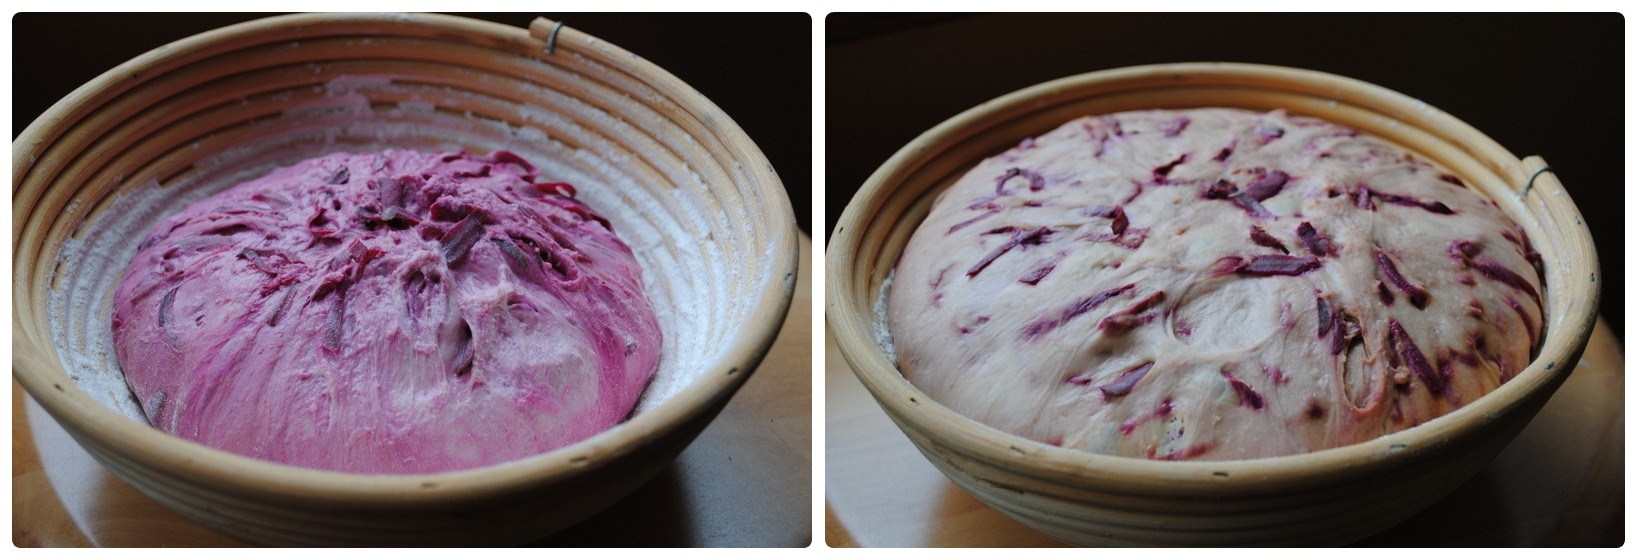
For this large boule I used two beets, one medium, one small.  One of the things I loved about this dough was the change in color as the dough proofed, starting with a gorgeous, intense purple, and getting more and more subtle as the fermentation went on.

The recipe for beetroot sourdough is very similar to the one I published with Emmanuel’s permission last May, except for the inclusion of grated, raw beets in the dough.  But a more detailed step by step photos of the full process of making this bread can be found with a quick jump to Garlic Buddha blog, a nice virtual spot!

I like a plain and simple sourdough, but every once in a while it is nice to explore different flavors and stretch the horizons a little.  Beets… who would imagine? 😉

I am submitting this post to Susan’s Yeastspotting…

ONE YEAR AGO: Cod Filet with Mustard Tarragon Crust

TWO YEARS AGO: Soba Noodles: Light and Healthy

THREE YEARS AGO: Potato-Rosemary Bread

CODRUTA’S ROLLED OAT SOURDOUGH BREAD

I can read Portuguese, English, and French.  Stretching my brains a little I can get by in blogs written in Italian or Spanish, as the grammar and many words are similar to those from my native language.  Reading Romanian is another story altogether, but Codruta’s blog is on my blogroll list and will not be leaving anytime soon! Through Google Translate and a few email exchanges with her, I can profit from the bread masterpieces she regularly posts on “Apa. Faina. Sare”.   Agua. Farinha. Sal.  Water. Flour. Salt.  The basic ingredients for great bread, once you add the magic of wild yeast.

When she posted her own formula for a sourdough bread with flaky oats in the dough, I wanted to make it right away, as it involved a technique new to me: cold fermentation of the starter and dough until final proofing of the shaped bread.  Plus, it combined two different starters, one made with rye flour.  Indeed, not a bread for beginners, but I decided to take a leap of faith and play with the grownups. 😉   What do you think?

CODRUTA’S ROLLED OAT SOURDOUGH
(reprinted with permission, from Apa. Faina. Sare)

Makes one very large loaf or two medium-sized loaves.

for pre-ferment:
50 g very active starter made with regular flour (100% hydration)
50 g very active starter made with rye flour (100% hydration)
100 g bread flour
50 g water

for final dough:
all pre-ferment (250g)
450 g white bread flour
150 g whole wheat flour
130 g rolled oats (rolled thick is better)
470 g cold water
17 g salt

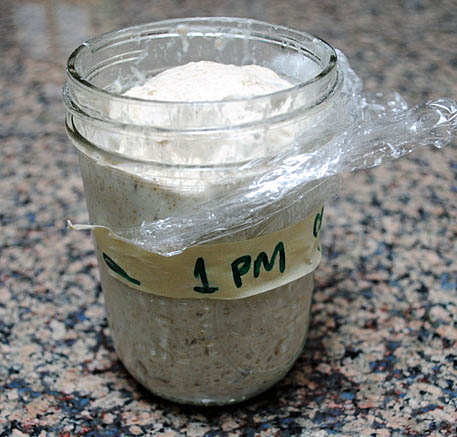
Prepare the pre-ferment by dissolving both types of starters in water, then add the flour. Stir and cover the container, placing it immediately in the refrigerator.  It is better to use a tall and narrow pot, transparent, so you can mark the level of your starter mixture as you place it in the fridge. Let it sit there 18-24 hours, until the yeast bubble grows up. You have a margin of a few hours to use for the yeast bubble will remain within, then begins to collapse.  Ideally, you should catch it when it’s almost doubled in bulk, as you can see in this photo.

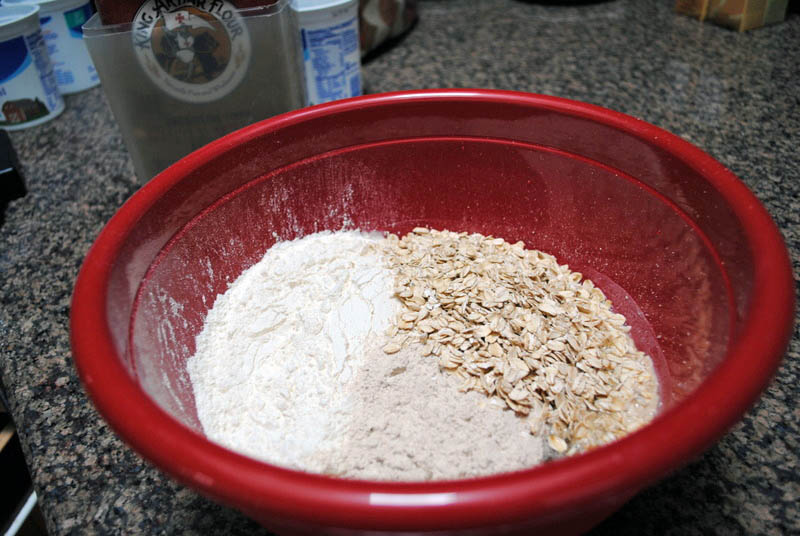
When the starter is ready to be used, mix in a bowl the flours, rolled oats and cold water, let it sit 40 to 60 min (the autolyse step). Sprinkle salt on top, add the fermented starter straight from the fridge. Blend all ingredients together. Knead by folding directly into the bowl, a few minutes, until the dough comes off the fingers and the vessel walls. The dough will be quite dense, but do not add more water. Cover the pot, wait 15 minutes, and repeat the kneading by folding (one complete rotation of the vessel is sufficient). Cover and wait 15 minutes.

Transfer the dough in a greased rectangular dish with oil, make a set of stretch and fold (SF), wait 45 minutes, repeat the set of SF and place dough in the refrigerator.  Let dough in refrigerator for 15 to 18 hours.

Remove dough from refrigerator and leave it at room temperature for 1 hour. Divide the dough in two, and shape each half as a round or oval loaf.  Place the shaped loaves in a banetton or another appropriate container, with the seam up. Cover the pot with a light fabric, and then with plastic wrap. Let the dough proof at room temperature for 2 hours and 30 minutes.

Heat your oven 45 minutes before baking time. Have a baking stone inside and your method to generate steam planned. Bake at 460 F  for 45 min, with steam for the initial 15 min. Reduce temp to 440 F  if the bread seems to be browning too much.

Cool it completely before slicing.

ENJOY!

to print the recipe, click here

With this bread, I tried to work on shaping a batard, but next time I will divide the dough in uneven portions, making a slightly smaller batard and bigger “boule”.  I need a bit more practice with this shape of bread, but I feel I’m slowly making progress…  I was hoping for a shorter bread, with more pointed ends.  It will happen.  I know it will…  😉

The bread was absolutely delicious! The oats, although not previously soaked, more or less disappear into the dough, contributing flavor and a very slight hint of texture. Perfect! More and more I lean towards bread with whole wheat flour and grains or seeds inside, I find that they are very satisfying and more flavorful than white bread.

Unfortunately, I had a small problem with my camera – pilot error – and lost all my photos of the crumb.   Mine was not as perfect as Codruta’s bread, but no one who tried the bread seemed to mind…  Make sure to stop by her blog and marvel at the structure of her bread,  with a beautiful pyramidal shape, which is a sign of perfect handling of the dough.

Codruta, thanks for a great recipe,  I now only have about 8 others from your blog waiting in line!   😉

I am submitting this post to Susan’s Yeastspotting event…

ONE YEAR AGO:  Roasted Corn and Tomato Risotto

TWO YEARS AGO: Light Rye Bread

Add to FacebookAdd to DiggAdd to Del.icio.usAdd to StumbleuponAdd to RedditAdd to BlinklistAdd to TwitterAdd to TechnoratiAdd to Yahoo BuzzAdd to Newsvine

AWARD-WINNING SOURDOUGH BAGUETTES

It was bound to happen.   Once I felt comfortable shaping baguettes, I went on the pursue of a recipe for a sourdough version. My number one source of inspiration for all things related to bread is Susan’s Wild Yeast, and this recipe charmed me right away.  Award-winning sourdough baguette version?  I am sold!   First thing I did was to drop an email to Samuel Fromartz, the writer-turned-baker behind the recipe,  asking for permission to publish his very detailed method.  To my delight, he replied within a few minutes, and we exchanged a few messages, in which I got great tips to improve steaming during baking  (I will test his method this weekend).   Sam Fromartz is currently working on a book about grains, bakers and bread for Viking/Penguin. So, if you are like me, and cannot have enough info on the subject, check his website for the development of his project.  I know I will…  😉

FROMARTZ BAGUETTE TRADITIONAL
(recipe published with permission from Samuel Fromartz)
(read original article at Chewswise blog)

Makes four baguettes

90 grams sourdough starter (at 100% hydration)
420 grams water
590 grams flour (I used King Arthur Organic All Purpose Flour)
10 grams whole wheat flour
13 grams sea salt
2 teaspoons instant dry yeast (I used  SAF Instant Yeast)
Olive oil to grease bowl
cornmeal to dust cutting board

FIRST DAY
Pour starter and yeast into bowl and add water, mixing until the starter breaks up a bit.  Add flours and salt and mix for a couple of minutes. The dough will be heavy and shaggy. Let it rest for 5 or 10 minutes, covered with plastic.

Rub the surface where you will knead the dough with a tiny amount of olive oil to prevent the dough from sticking (great tip originally from Dan Lepard).  Use a scraper to move dough onto the counter and begin to knead by stretching and folding dough, trying to use your finger tips.

After kneading for 5 minutes, scrape mass into a clean bowl or plastic bin. Cover and let rest for 20 minutes.

Oil the counter again if necessary and remove dough to counter. Stretch it until 1-inch thick then fold top and bottom in thirds like a letter. Do the same type of folding, coming from left to right. Put dough back in the bowl, cover, let it  rest for 20 minutes.

Remove from bin, fold again, and put back in a covered bowl for 20 minutes.

Remove from bin, fold again for the third and final time. Clean the bowl, oil lightly (with 2 tsp olive oil), and put dough back inside. Cover and place in refrigerator for 12 to 24 hours.

SECOND DAY
Place baking stone or quarry tiles in middle of oven. Place a thick rimmed cookie sheet or cast iron pan on oven floor or lower shelf. Heat oven to 470F (245 C).

Put a little olive oil in your palm and oil a 20-by-20 inch (50 x 50 cm) section of the counter. Remove dough from container. Cut dough in half. Put half back in container and into refrigerator. Cut dough into two rectangular pieces (about 250 grams each) and gently stretch into rectangles 5-by-7 inches (13-by-18 cm) with the long edge facing you.  Cover with light towel and let rest for 5 minutes.

While dough is resting, cut parchment paper large enough to fit your baking stone. Dust paper with flour. Dust  a couche (or kitchen towels) lightly with flour.

Shape dough into a log by folding top and bottom of rectangle toward middle and gently sealing the seam with thumb. Then fold top to meet the bottom and seal seam. You should have a log about 1.5 to 2 inches thick (4 to 5 cm). Gently roll and stretch into a 14-inch loaf (36 cm) or just under the size of your baking stone.

Place each loaf on parchment paper about six inches apart, seam side down. Place one rolled up towel underneath the paper between the loaves and one under each other edge, supporting their shape.  Cover with light kitchen towel and let rise for 45 minutes to 1 hour.

Put 2/3 cup water in measuring cup and bring to a boil in the microwave.

Carefully move the paper with the loaves onto a flour-dusted overturned cookie sheet or cutting board. Dust top of loaves very lightly with flour. Use a bench scraper to gently adjust the loaves and straighten them out.

Make four cuts on the top of the loaf with a razor blade, 1/4-inch deep, running lengthwise on the dough. A swift slash at a sharp 20-degree angle works best. Take cutting board and slide parchment paper with baguettes onto hot baking stone. Shut oven door. Open door, and carefully pour 2/3 cup water onto cookie sheet or cast iron pan. Be very careful if using boiling water. Shut door. Do not open the oven again while baking.

Check baguettes after 18 to 20 minutes. They should be dark brown and crusty. If pale, continue baking for 1 to 2 minutes. Let cool for 20 minutes on rack before eating. They are best eaten within 6 hours.

While baguettes are baking, form the remaining dough into loaves or leave for up to 24 hours and make fresh loaves the following day.

ENJOY!

to print the recipe, click here

for a streamlined version, click here

Comments:  To read the fascinating story behind perfecting  this recipe, check Sam’s write up about it here.

If you are a novice in baking bread, baguettes can be tricky, but you can find very detailed discussions about this particular recipe in his blog about it.  Don’t forget to read the comments, because they contain a lot of useful, additional information.  Sometimes little details we read  en passant  might mean the difference between failure and success.

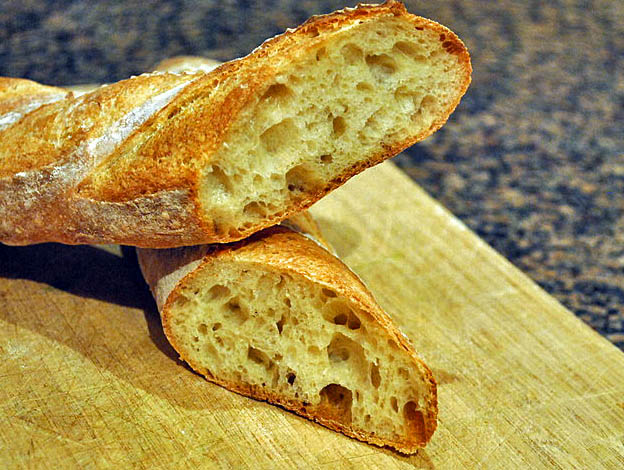
I absolutely loved this recipe!   Handling a dough from the fridge is quite a bit easier than at room temperature (about 78 F), I had no problems shaping the loaves and going for their final stretch.   I will be playing with this recipe for a while,  using it to practice my slashing technique (just got a new blade, per my friend Gary’s recommendation), and baking with steam.  The baguettes had a complex “feel”,  with very delicate sourdough flavor, open crumb, and a hearty crust.  I know that when I overcome the steaming problem they will be even better… stay tuned, friends… stay tuned…

This slideshow requires JavaScript.

I am submitting this post to Susan’s Yeastspotting event….

ONE YEAR AGO: Meet our Lab (Lab = laboratory, not Labrador Dog… ;-))

TWO YEARS AGO: My New Favorite Tomato Sauce

Add to FacebookAdd to DiggAdd to Del.icio.usAdd to StumbleuponAdd to RedditAdd to BlinklistAdd to TwitterAdd to TechnoratiAdd to Yahoo BuzzAdd to Newsvine