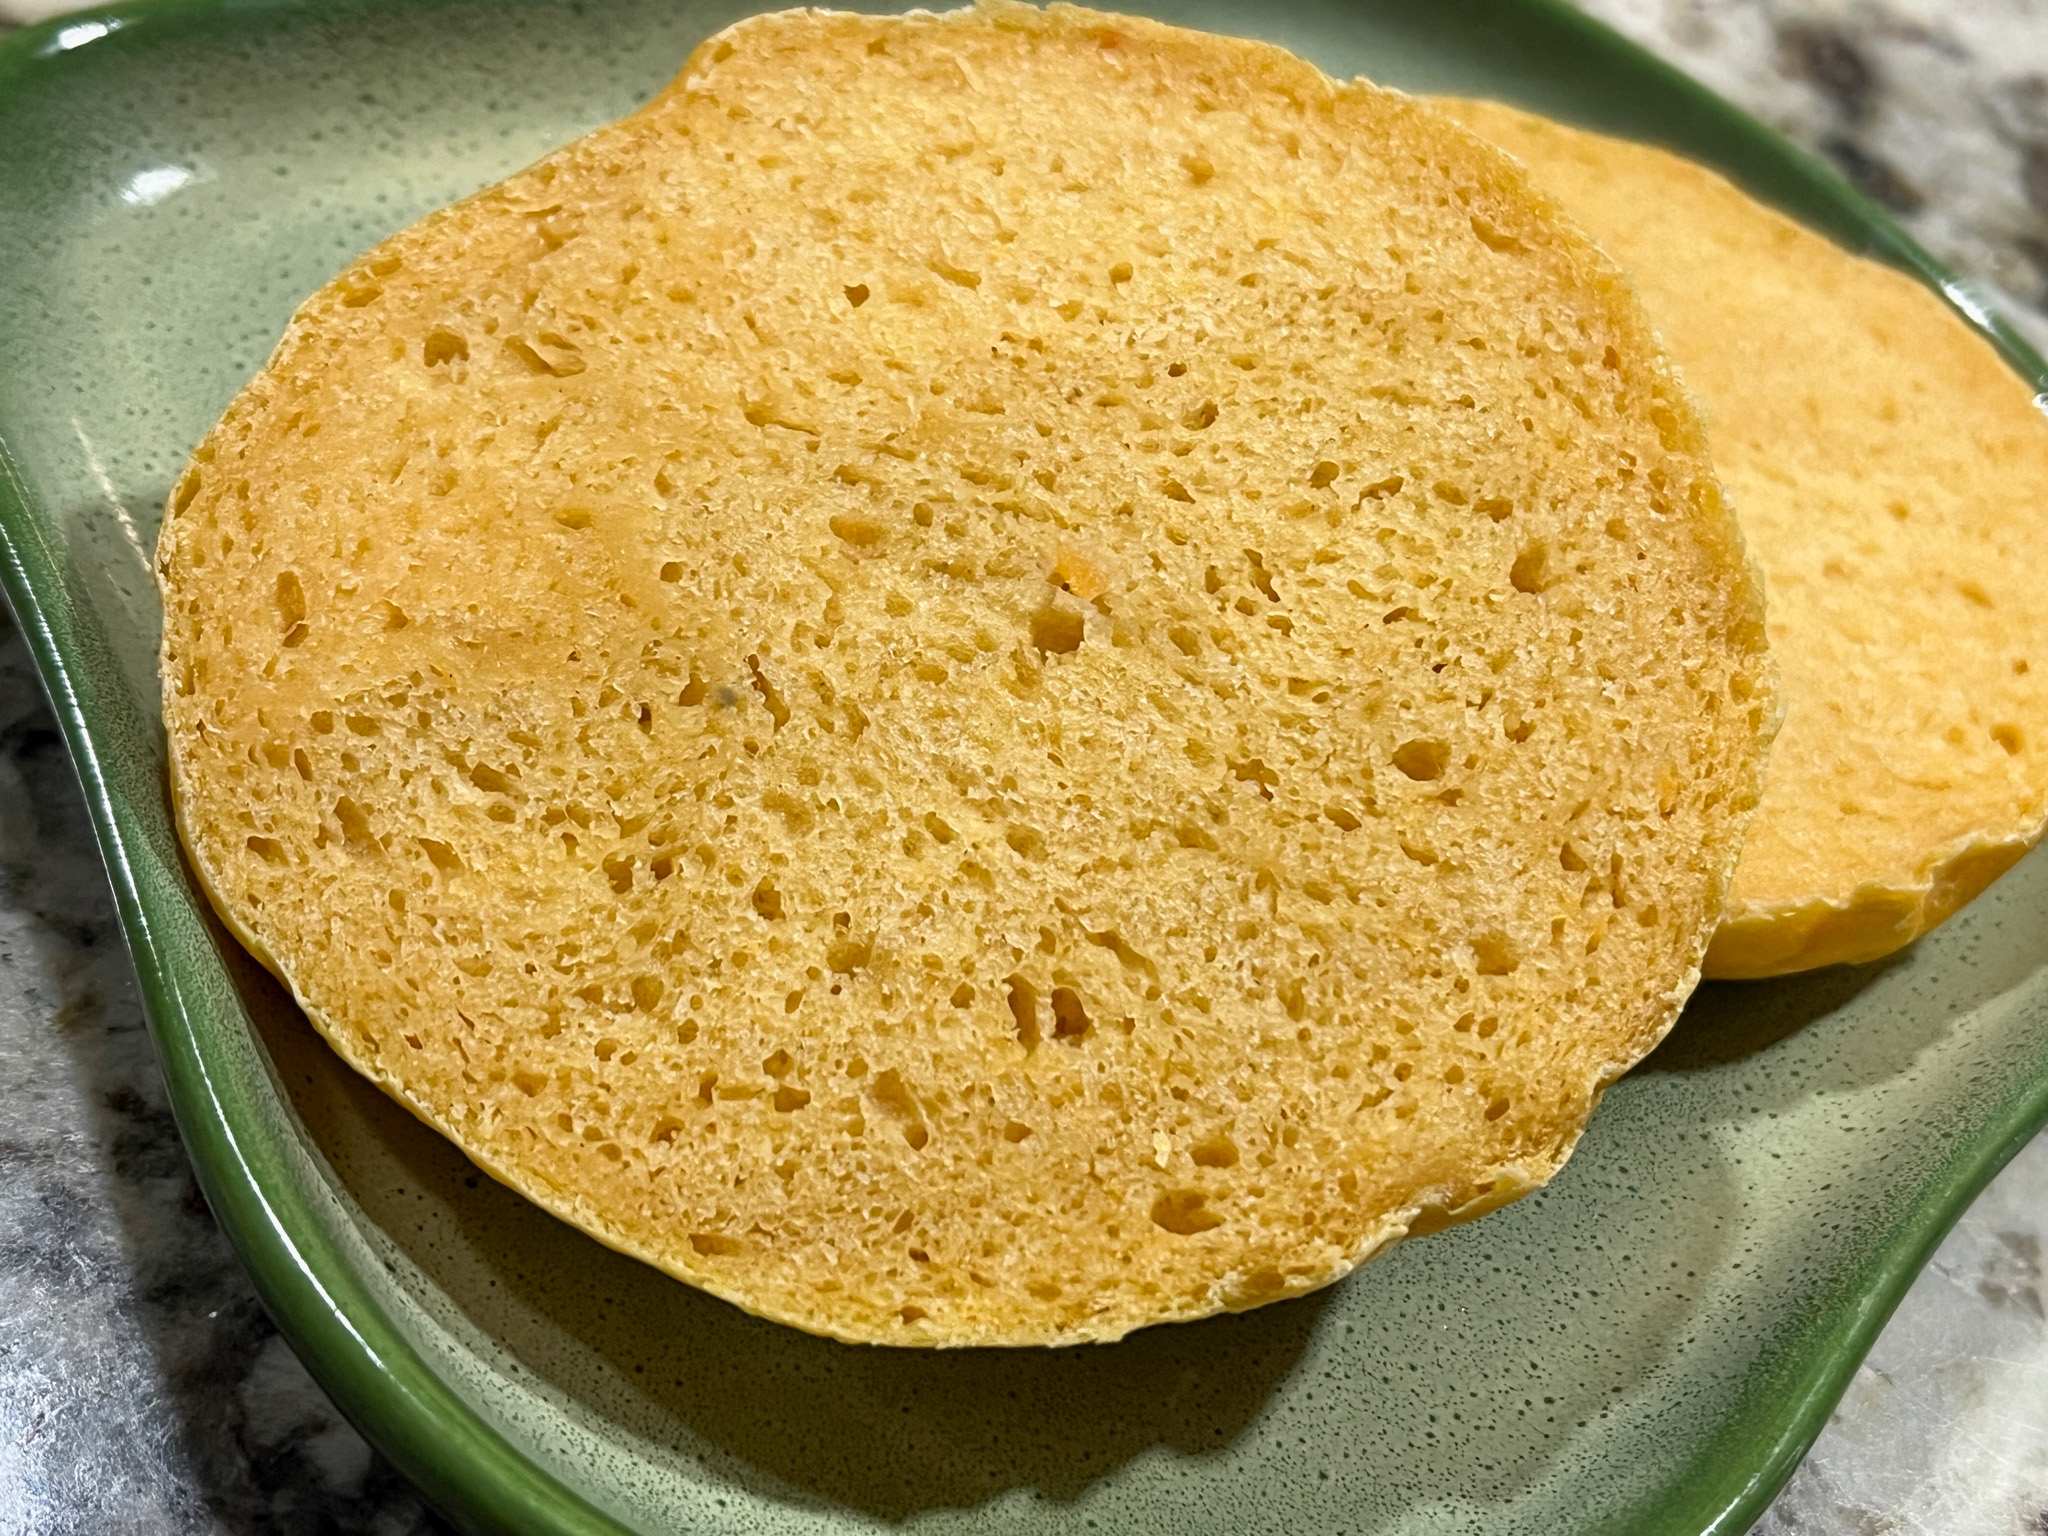
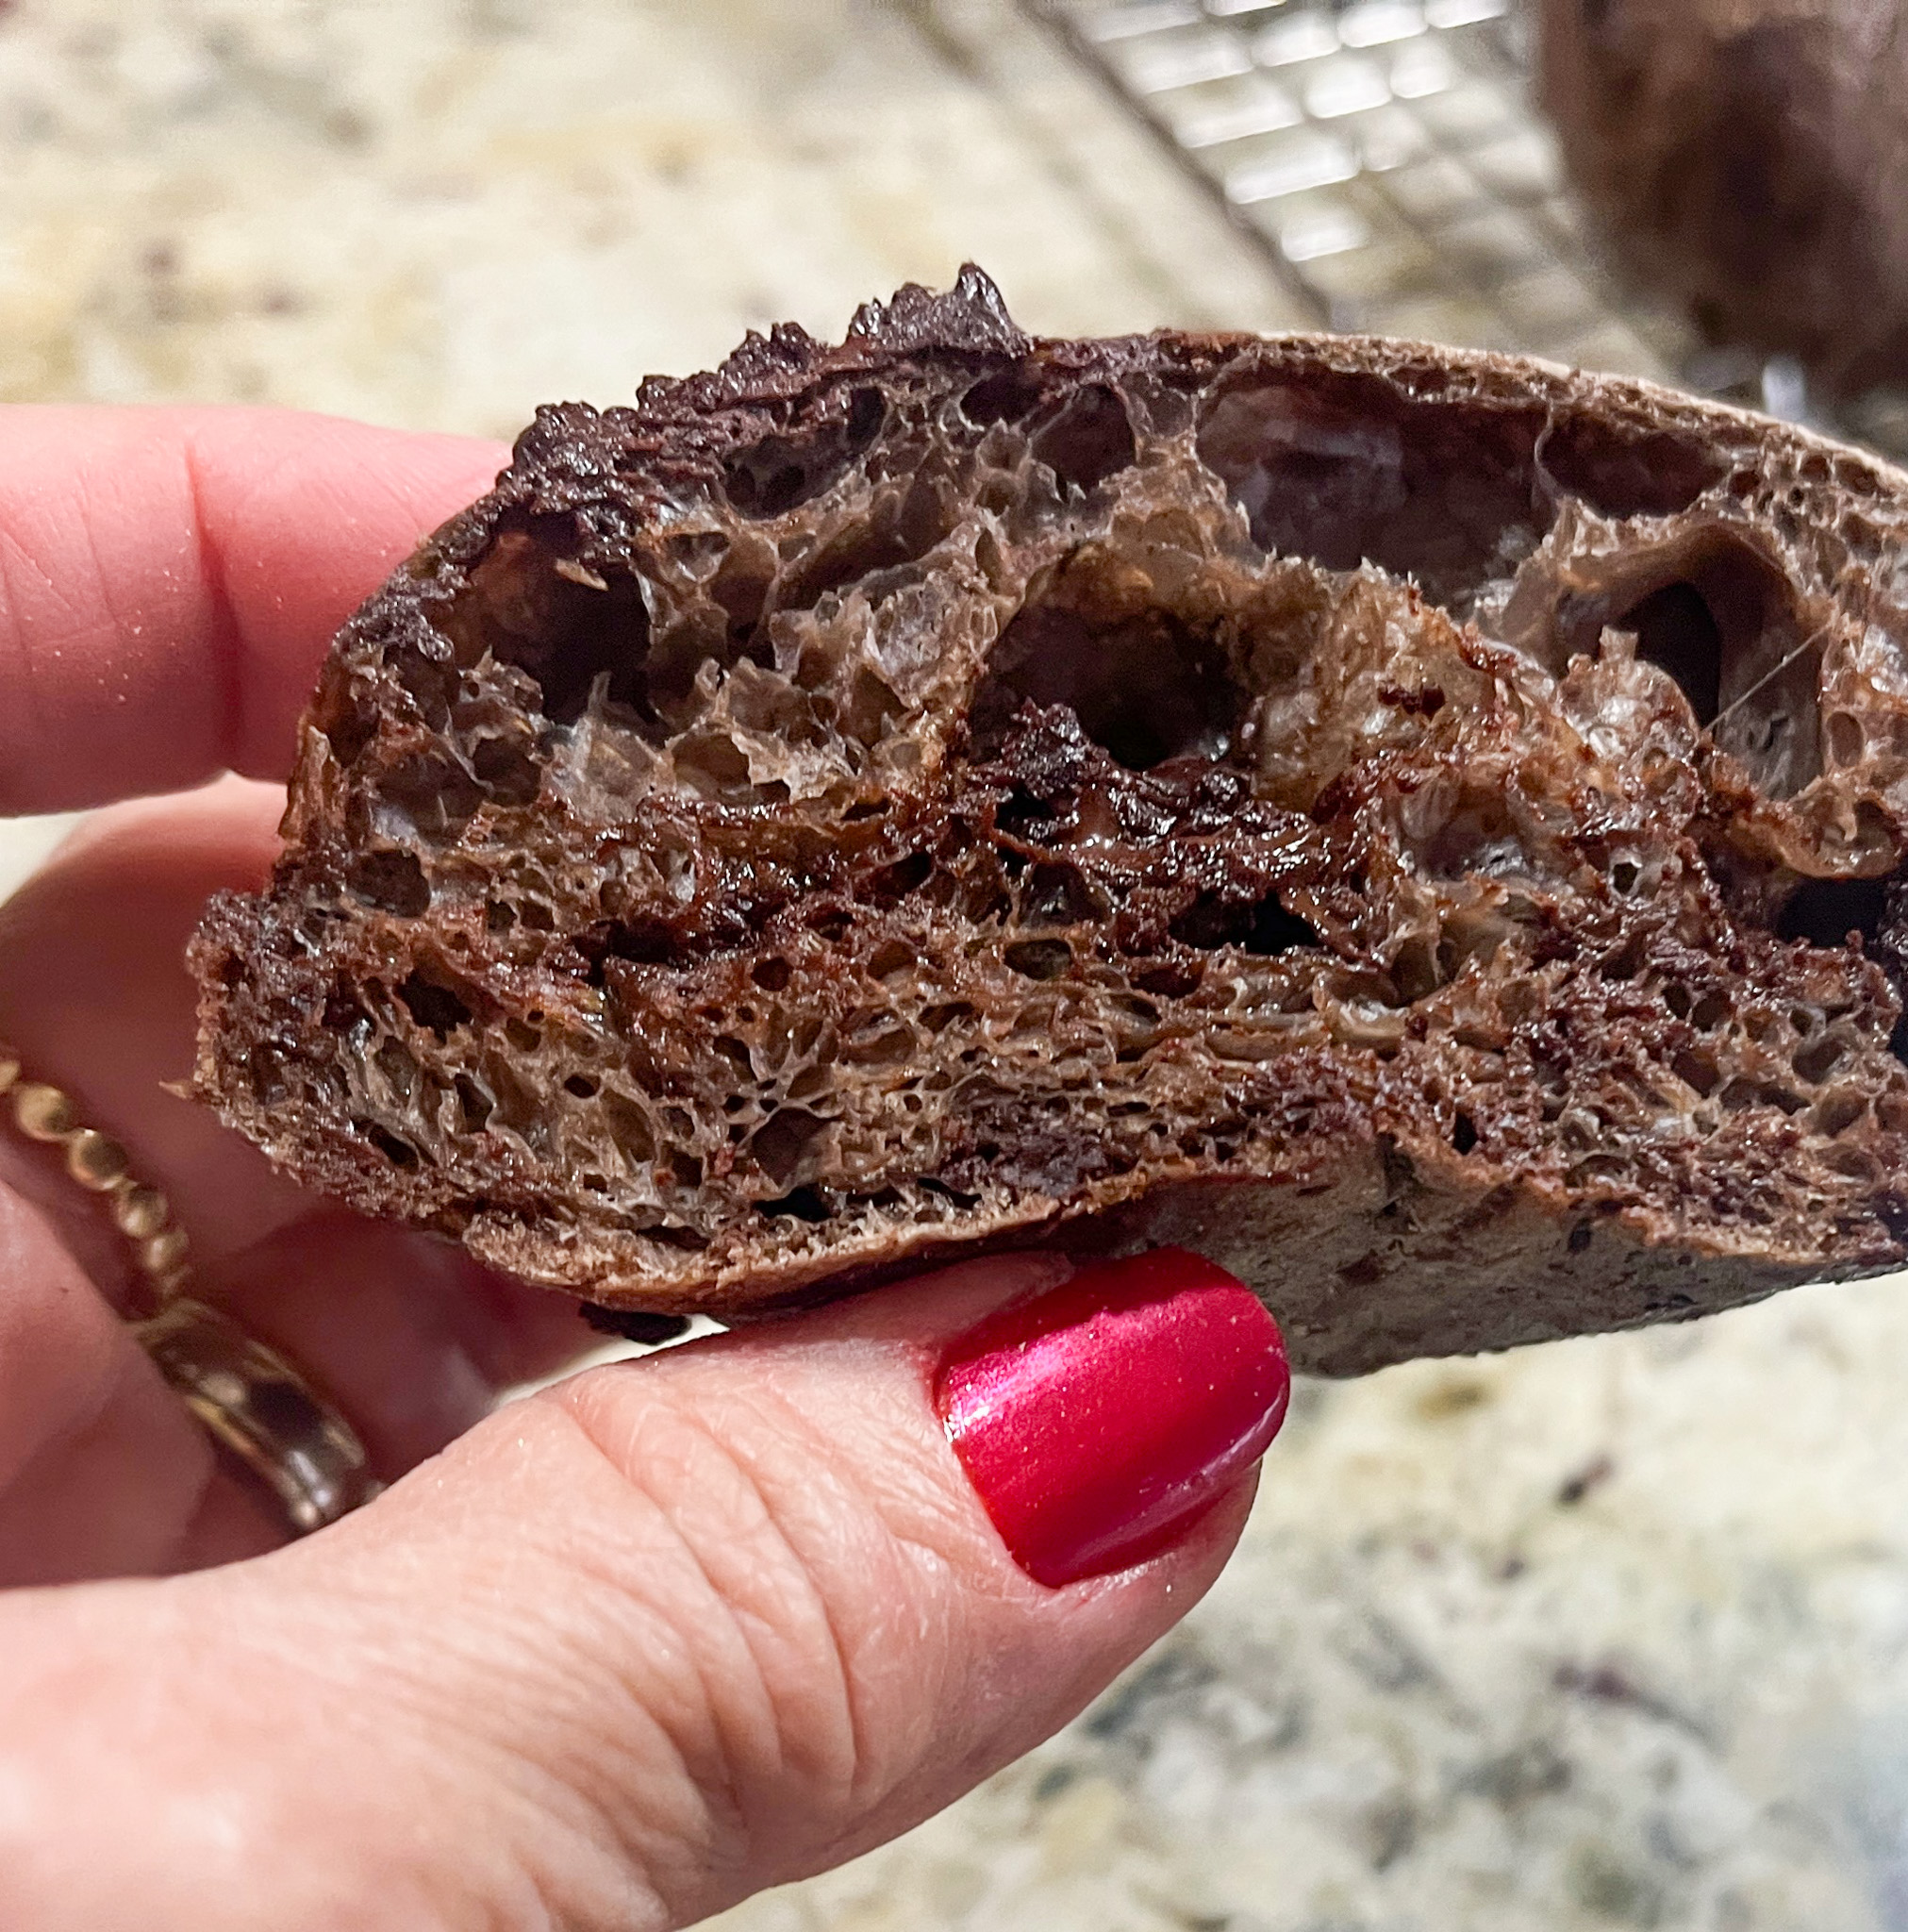
Decadent. First adjective that came to my mind after the first bite. It is not a sourdough, relies on commercial yeast, but I would not consider it a bread fit for beginner bakers. The high hydration level makes it very tricky to handle. However, if you don’t mind a little challenge, go for it. Absolutely wonderful!
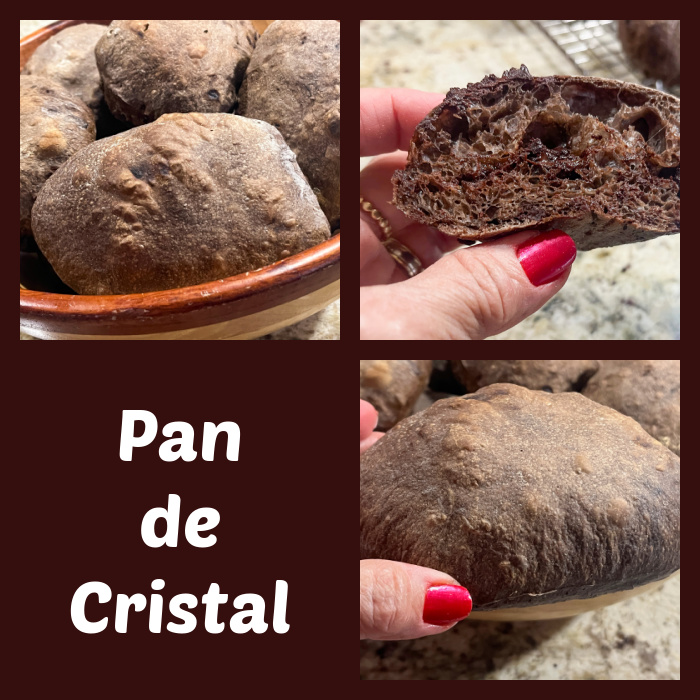
CHOCOLATE PAN DE CRISTAL
(slightly modified from King Arthur website)
500g bread flour
520g) water lukewarm
2 teaspoons (10g) table salt
3/4 teaspoon instant yeast
20g Dutch-processed cocoa powder
olive oil to coat the bowl
130g chopped chocolate
In a medium bowl, mix the dough ingredients until thoroughly combined and homogenous. The dough starts off very slack and wet. Oil a two-quart rectangular baking dish (10” x 7”) with 1 tablespoon of olive oil. Pour the dough into the dish. If you have a bread proofing box, set it to 72F and place the dish inside it. Cover the pan and allow the dough to rest for 20 minutes.
Perform a first set of bowl folds: use your wet hands to grab a section of dough from one side, lift it up, then press it down into the middle. Repeat this about 12 times going all around the perimeter of the dough. Cover the dish and allow the dough to rest for 20 minutes.
To do a coil fold: with wet hands, reach under the dough and stretch the middle upward until the dough releases from the dish. Roll it forward off your hands, allowing it to fold over (or “coil”) on itself. Rotate the dish 90°(a quarter turn) and repeat. Continue performing this folding action until the dough feels like it won’t stretch and elongate easily, usually four to five times. Cover the dish and allow the dough to rest for 20 minutes.
Repeat the coil fold. Cover the dish and allow the dough to rest for 20 minutes.
Repeat the coil fold one last time. Cover the dish and allow the dough to rest for 20 minutes.
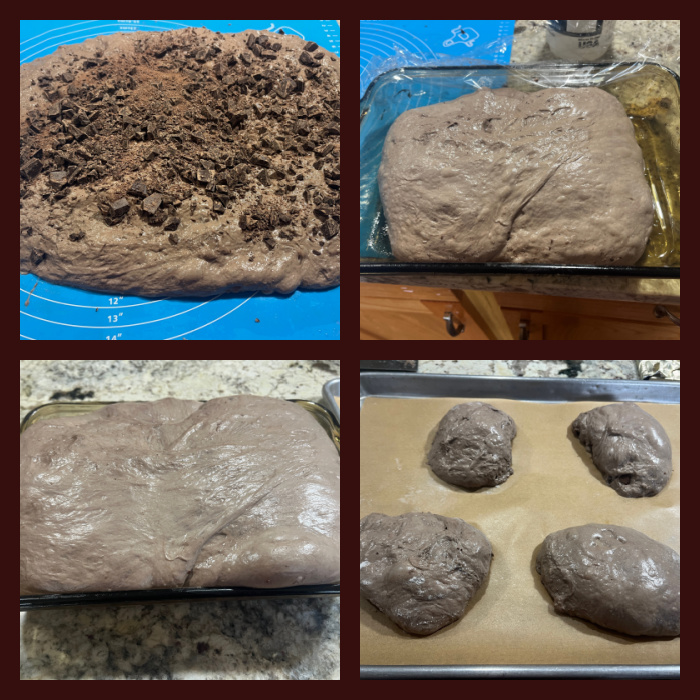
As gently as possible, turn the dough out onto a work surface spritzed with water. Gently coax the dough into a rectangle about 14” x 10” with the long side facing you. Sprinkle the dough evenly with the chocolate. Fold one of the short sides into the center, then fold the opposite third over the first, like you were folding a business letter.
Fold the dough a second time by bringing the top third of the dough down towards the center, then bringing the bottom third up to cover the top portion (another letter fold). Return the dough to the oiled dish to rise for about 80 minutes, until puffy.
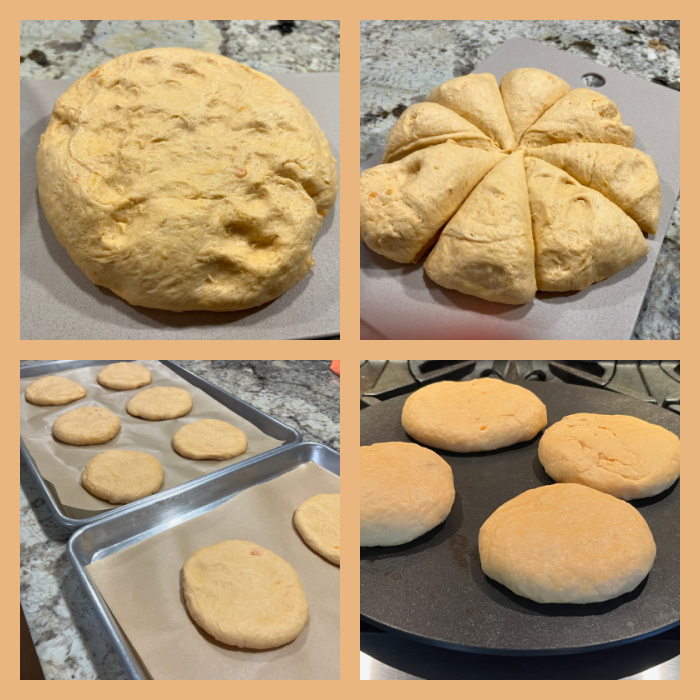
Gently turn the dough out onto a heavily floured surface. Sprinkle a generous amount of flour on top of the dough and roll the cut sides of the dough on the floured surface so no sticky spots are exposed. Tuck any visible pieces of chocolate into the dough to prevent them from burning.
Working as gently as possible, use a bench knife or other sharp knife to divide it into eight pieces. Place four pieces on a sheet of parchment, leaving space between them. Repeat with the remaining four pieces of dough, placing them on another sheet of parchment. Let the rolls rest at room temperature for 2 hours, uncovered.
Heat the oven to 475F with a baking stone (or steel sheet) inside. Carefully slide the four rolls (still resting on the parchment) into the oven onto the stone or steel. Allow the other rolls to continue to rest.
Bake the rolls for 20 to 25 minutes. Remove from the oven to a rack to cool. Bake the remaining 4 rolls. Allow the rolls to cool completely.
ENJOY!
to print the recipe, click here
Comments: I have made the original Pan de Cristal last year (check it out here). As soon as I saw the recipe at King Arthur’s site, I knew I had to try it. This bread is not sweet, the chocolate brings almost a smokey quality to the bread, but when you happen to bite into a morsel of chocolate that did not quite fully melt into the crumb, you know it is the key ingredient. Do not expect to be able to shape the rolls, divide them and let them be. The bread is great without anything but a little butter, flaky salt, a little Brie cheese, or if you are into jam, apparently cherry jam would be awesome with it. Like most breads, it freezes superbly well, so make it and enjoy it for days and weeks to come!
ONE YEAR AGO: Chicken Breasts in Creamy Turmeric-Mustard Sauce
TWO YEARS AGO: Shokupan Marbled Black Sesame Bread
THREE YEARS AGO: Chicken with Pasilla-Pecan Sauce
FOUR YEARS AGO: A Versatile Silicone Pan
FIVE YEARS AGO: Buffalo Chickpeas
SIX YEARS AGO: Bi-Color Croissant and Pain au Chocolat
SEVEN YEARS AGO: Lemon-Blueberry Entremet Cake
EIGHT YEARS AGO: Walk Strong3: Jessica Smith’s latest workout program
NINE YEARS AGO: Pork Medallions with Black Berry Compote
TEN YEARS AGO: Indian-Spiced Chicken with Chickpeas and Spinach
ELEVEN YEARS AGO: Curry Cardamon Cookies
TWELVE YEARS AGO: In My Kitchen, March 2014
THIRTEEN YEARS AGO: Boeuf Bourguignon for a Snowy Evening
FOURTEEN YEARS AGO: Chickpea Salad
FIFTEEN YEARS AGO: Soft Spot for Chevre
SIXTEEN YEARS AGO: Roasted Onion and Asiago Cheese Miche