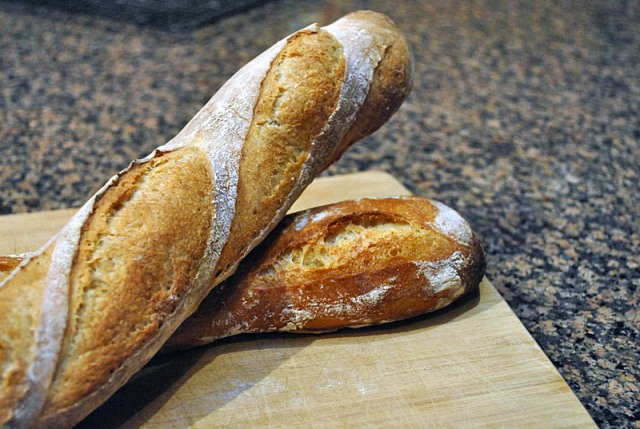
It was bound to happen. Once I felt comfortable shaping baguettes, I went on the pursue of a recipe for a sourdough version. My number one source of inspiration for all things related to bread is Susan’s Wild Yeast, and this recipe charmed me right away. Award-winning sourdough baguette version? I am sold! First thing I did was to drop an email to Samuel Fromartz, the writer-turned-baker behind the recipe, asking for permission to publish his very detailed method. To my delight, he replied within a few minutes, and we exchanged a few messages, in which I got great tips to improve steaming during baking (I will test his method this weekend). Sam Fromartz is currently working on a book about grains, bakers and bread for Viking/Penguin. So, if you are like me, and cannot have enough info on the subject, check his website for the development of his project. I know I will… 😉

FROMARTZ BAGUETTE TRADITIONAL
(recipe published with permission from Samuel Fromartz)
(read original article at Chewswise blog)
Makes four baguettes
90 grams sourdough starter (at 100% hydration)
420 grams water
590 grams flour (I used King Arthur Organic All Purpose Flour)
10 grams whole wheat flour
13 grams sea salt
2 teaspoons instant dry yeast (I used SAF Instant Yeast)
Olive oil to grease bowl
cornmeal to dust cutting board
FIRST DAY
Pour starter and yeast into bowl and add water, mixing until the starter breaks up a bit. Add flours and salt and mix for a couple of minutes. The dough will be heavy and shaggy. Let it rest for 5 or 10 minutes, covered with plastic.
Rub the surface where you will knead the dough with a tiny amount of olive oil to prevent the dough from sticking (great tip originally from Dan Lepard). Use a scraper to move dough onto the counter and begin to knead by stretching and folding dough, trying to use your finger tips.
After kneading for 5 minutes, scrape mass into a clean bowl or plastic bin. Cover and let rest for 20 minutes.
Oil the counter again if necessary and remove dough to counter. Stretch it until 1-inch thick then fold top and bottom in thirds like a letter. Do the same type of folding, coming from left to right. Put dough back in the bowl, cover, let it rest for 20 minutes.
Remove from bin, fold again, and put back in a covered bowl for 20 minutes.
Remove from bin, fold again for the third and final time. Clean the bowl, oil lightly (with 2 tsp olive oil), and put dough back inside. Cover and place in refrigerator for 12 to 24 hours.
SECOND DAY
Place baking stone or quarry tiles in middle of oven. Place a thick rimmed cookie sheet or cast iron pan on oven floor or lower shelf. Heat oven to 470F (245 C).
Put a little olive oil in your palm and oil a 20-by-20 inch (50 x 50 cm) section of the counter. Remove dough from container. Cut dough in half. Put half back in container and into refrigerator. Cut dough into two rectangular pieces (about 250 grams each) and gently stretch into rectangles 5-by-7 inches (13-by-18 cm) with the long edge facing you. Cover with light towel and let rest for 5 minutes.
While dough is resting, cut parchment paper large enough to fit your baking stone. Dust paper with flour. Dust a couche (or kitchen towels) lightly with flour.
Shape dough into a log by folding top and bottom of rectangle toward middle and gently sealing the seam with thumb. Then fold top to meet the bottom and seal seam. You should have a log about 1.5 to 2 inches thick (4 to 5 cm). Gently roll and stretch into a 14-inch loaf (36 cm) or just under the size of your baking stone.
Place each loaf on parchment paper about six inches apart, seam side down. Place one rolled up towel underneath the paper between the loaves and one under each other edge, supporting their shape. Cover with light kitchen towel and let rise for 45 minutes to 1 hour.
Put 2/3 cup water in measuring cup and bring to a boil in the microwave.
Carefully move the paper with the loaves onto a flour-dusted overturned cookie sheet or cutting board. Dust top of loaves very lightly with flour. Use a bench scraper to gently adjust the loaves and straighten them out.
Make four cuts on the top of the loaf with a razor blade, 1/4-inch deep, running lengthwise on the dough. A swift slash at a sharp 20-degree angle works best. Take cutting board and slide parchment paper with baguettes onto hot baking stone. Shut oven door. Open door, and carefully pour 2/3 cup water onto cookie sheet or cast iron pan. Be very careful if using boiling water. Shut door. Do not open the oven again while baking.
Check baguettes after 18 to 20 minutes. They should be dark brown and crusty. If pale, continue baking for 1 to 2 minutes. Let cool for 20 minutes on rack before eating. They are best eaten within 6 hours.
While baguettes are baking, form the remaining dough into loaves or leave for up to 24 hours and make fresh loaves the following day.
ENJOY!
to print the recipe, click here
for a streamlined version, click here
Comments: To read the fascinating story behind perfecting this recipe, check Sam’s write up about it here.
If you are a novice in baking bread, baguettes can be tricky, but you can find very detailed discussions about this particular recipe in his blog about it. Don’t forget to read the comments, because they contain a lot of useful, additional information. Sometimes little details we read en passant might mean the difference between failure and success.
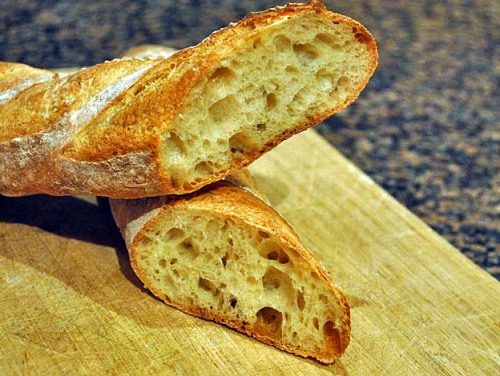
I absolutely loved this recipe! Handling a dough from the fridge is quite a bit easier than at room temperature (about 78 F), I had no problems shaping the loaves and going for their final stretch. I will be playing with this recipe for a while, using it to practice my slashing technique (just got a new blade, per my friend Gary’s recommendation), and baking with steam. The baguettes had a complex “feel”, with very delicate sourdough flavor, open crumb, and a hearty crust. I know that when I overcome the steaming problem they will be even better… stay tuned, friends… stay tuned…
I am submitting this post to Susan’s Yeastspotting event….
ONE YEAR AGO: Meet our Lab (Lab = laboratory, not Labrador Dog… ;-))
TWO YEARS AGO: My New Favorite Tomato Sauce


