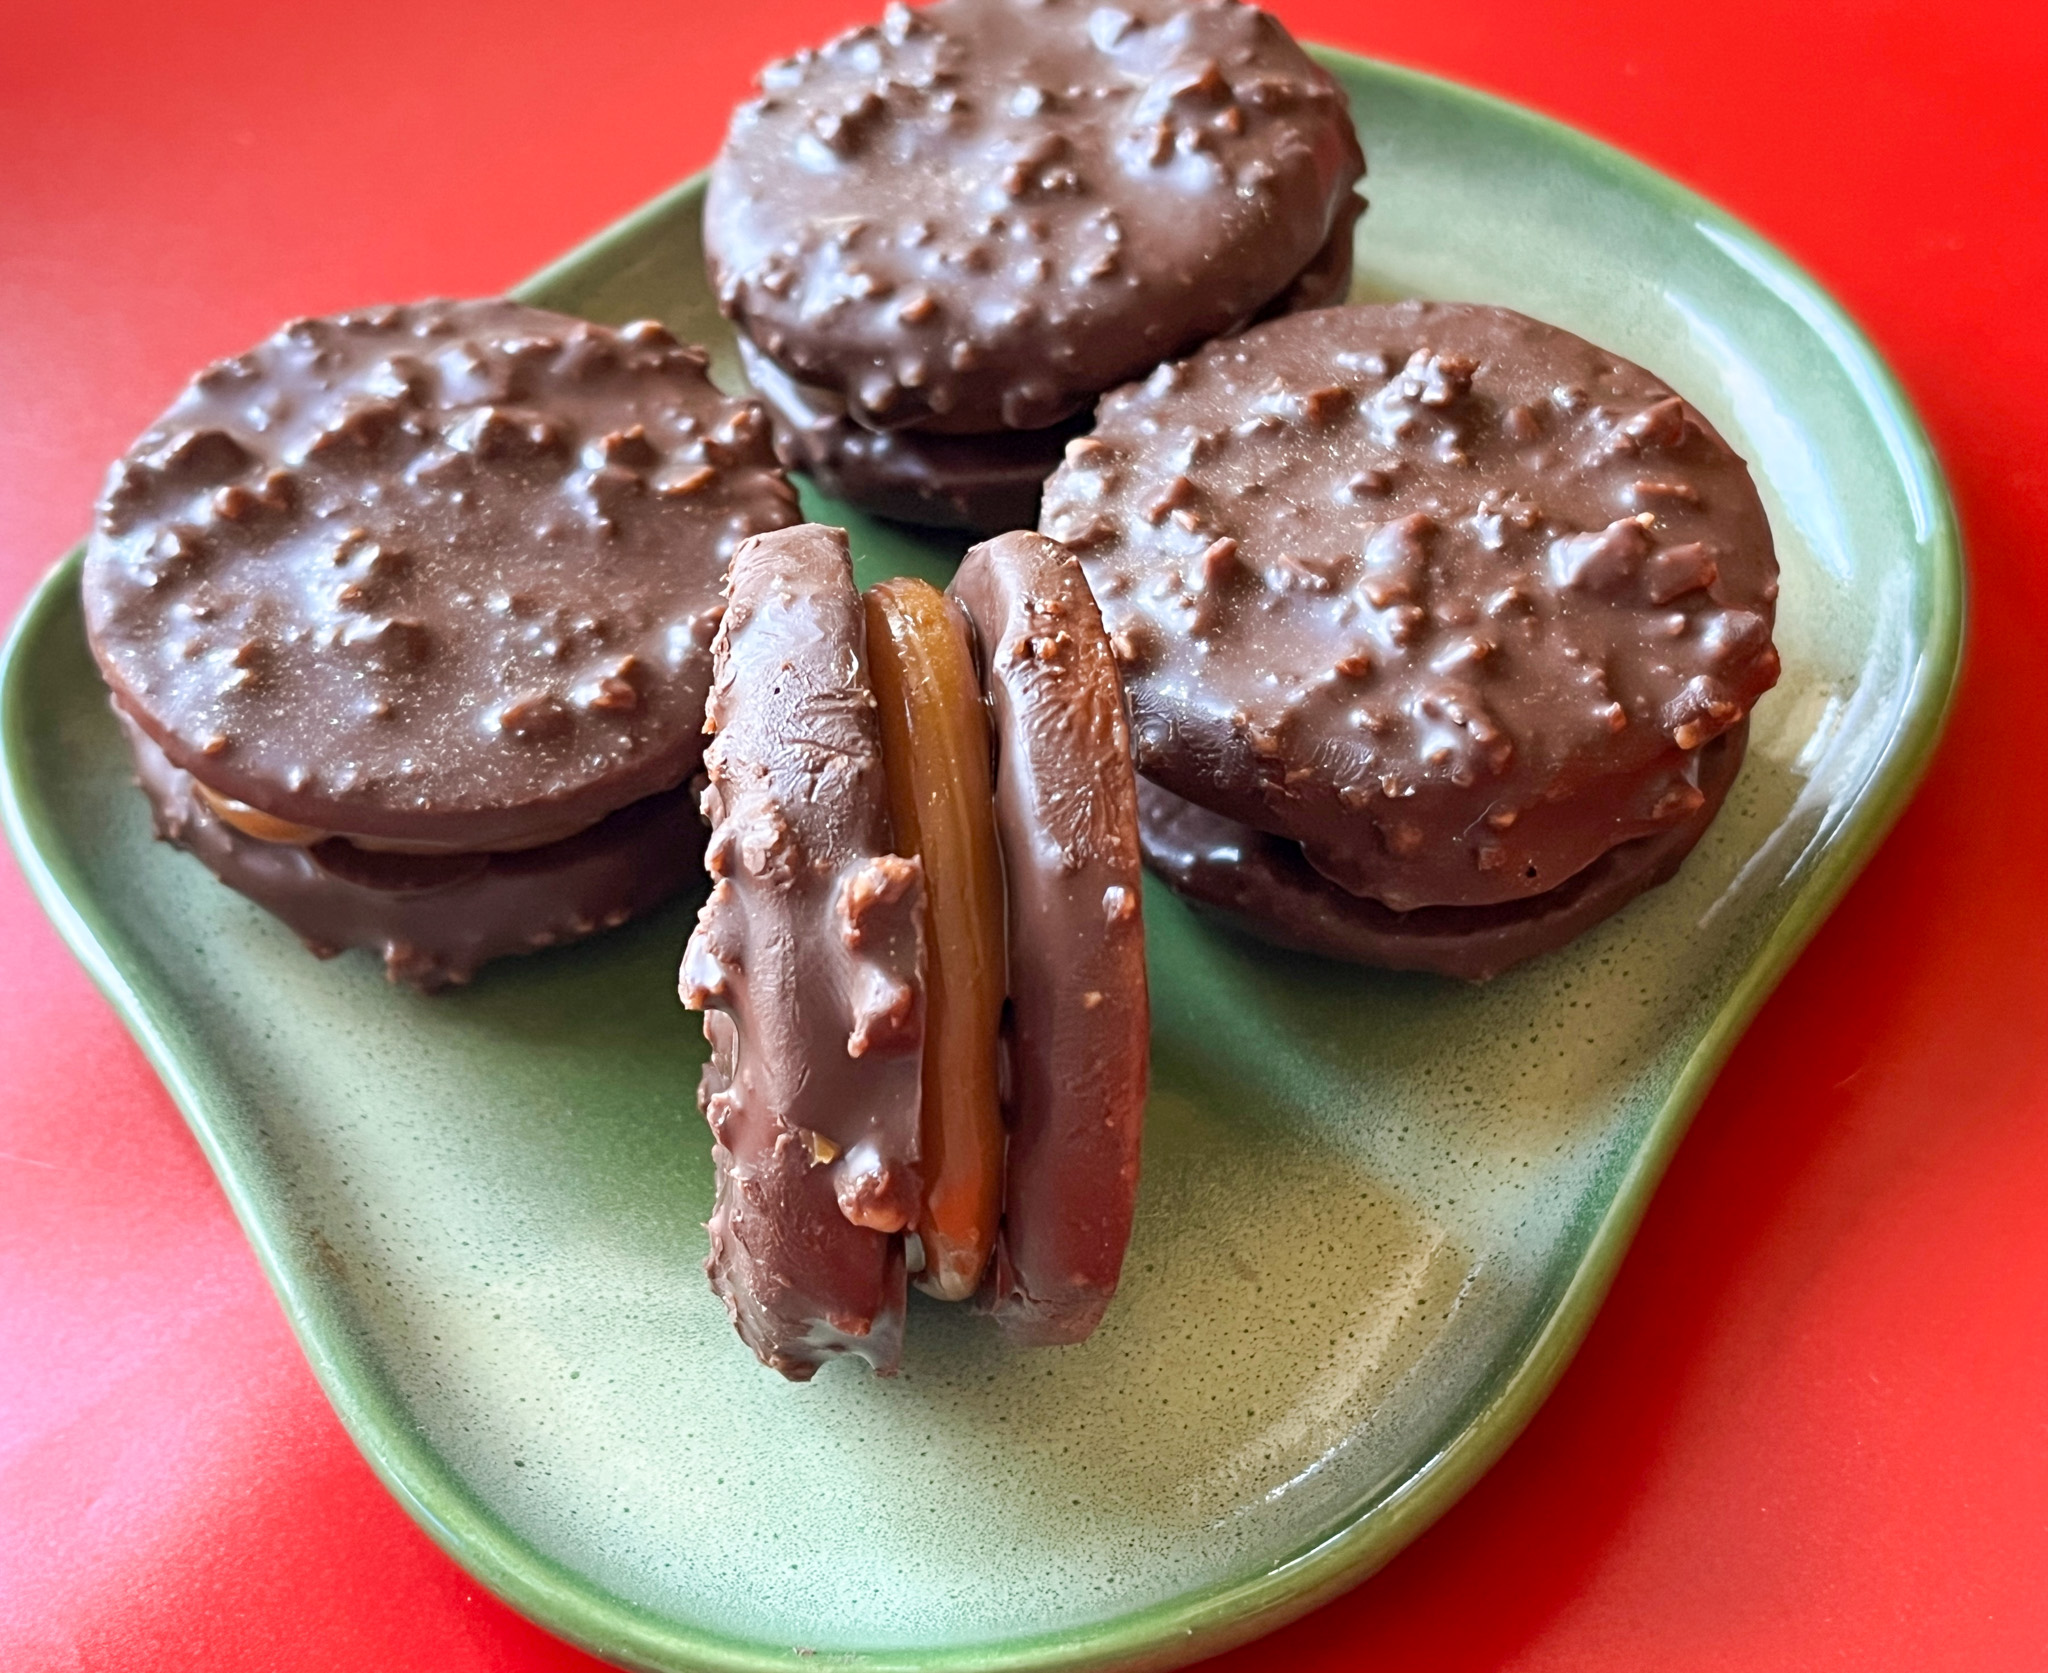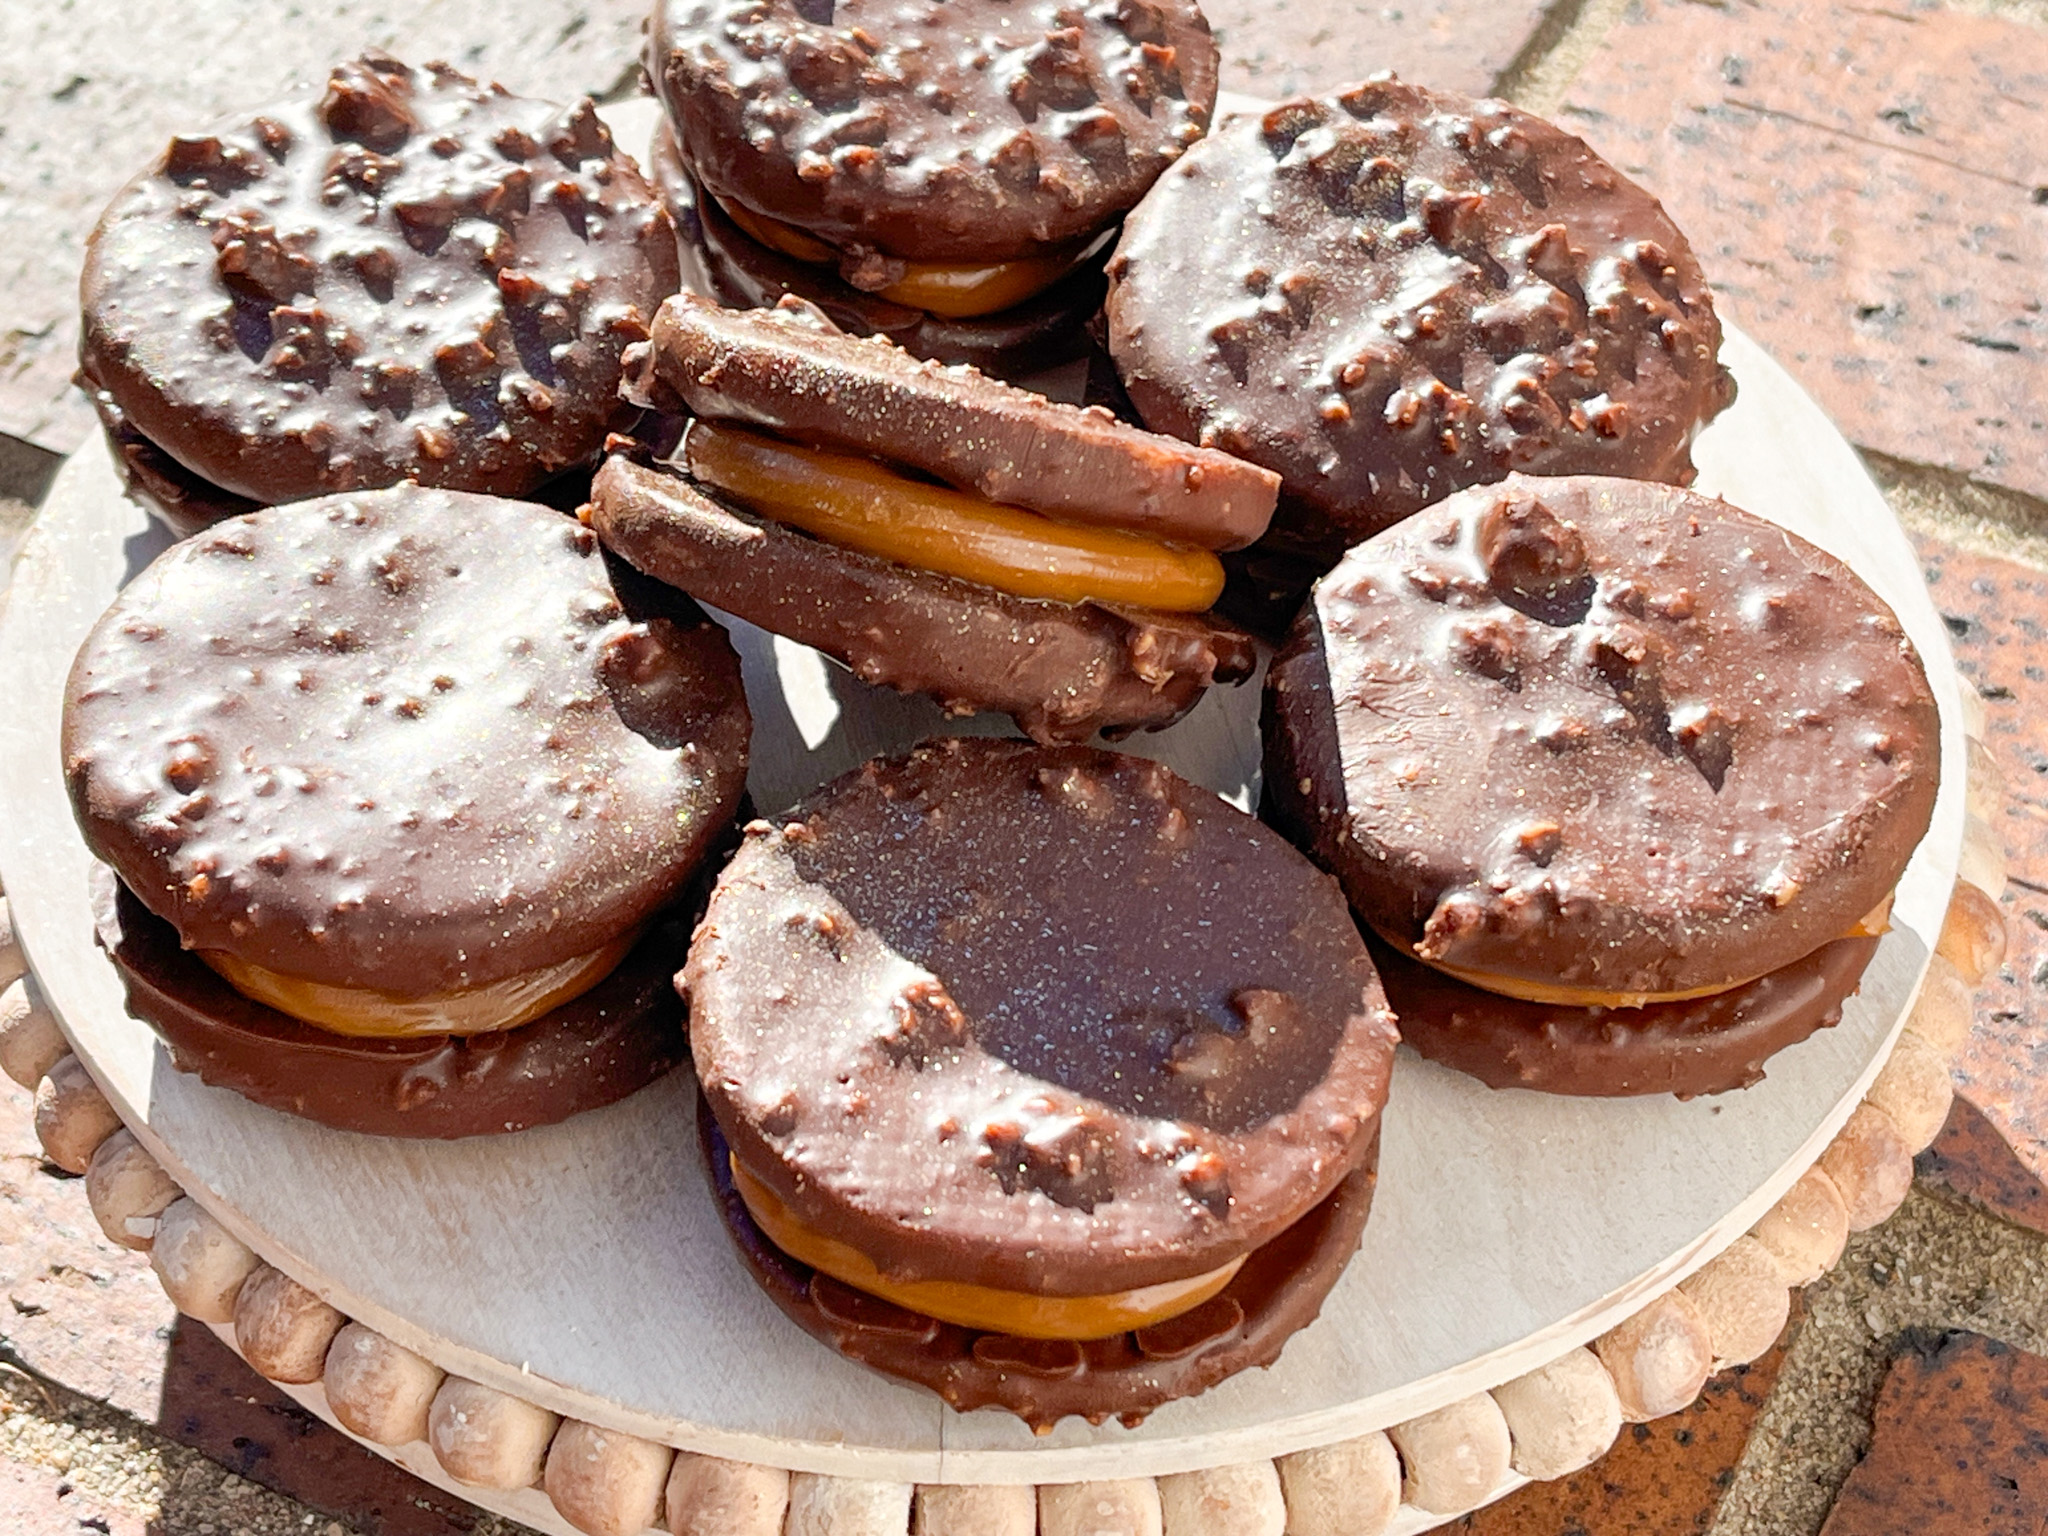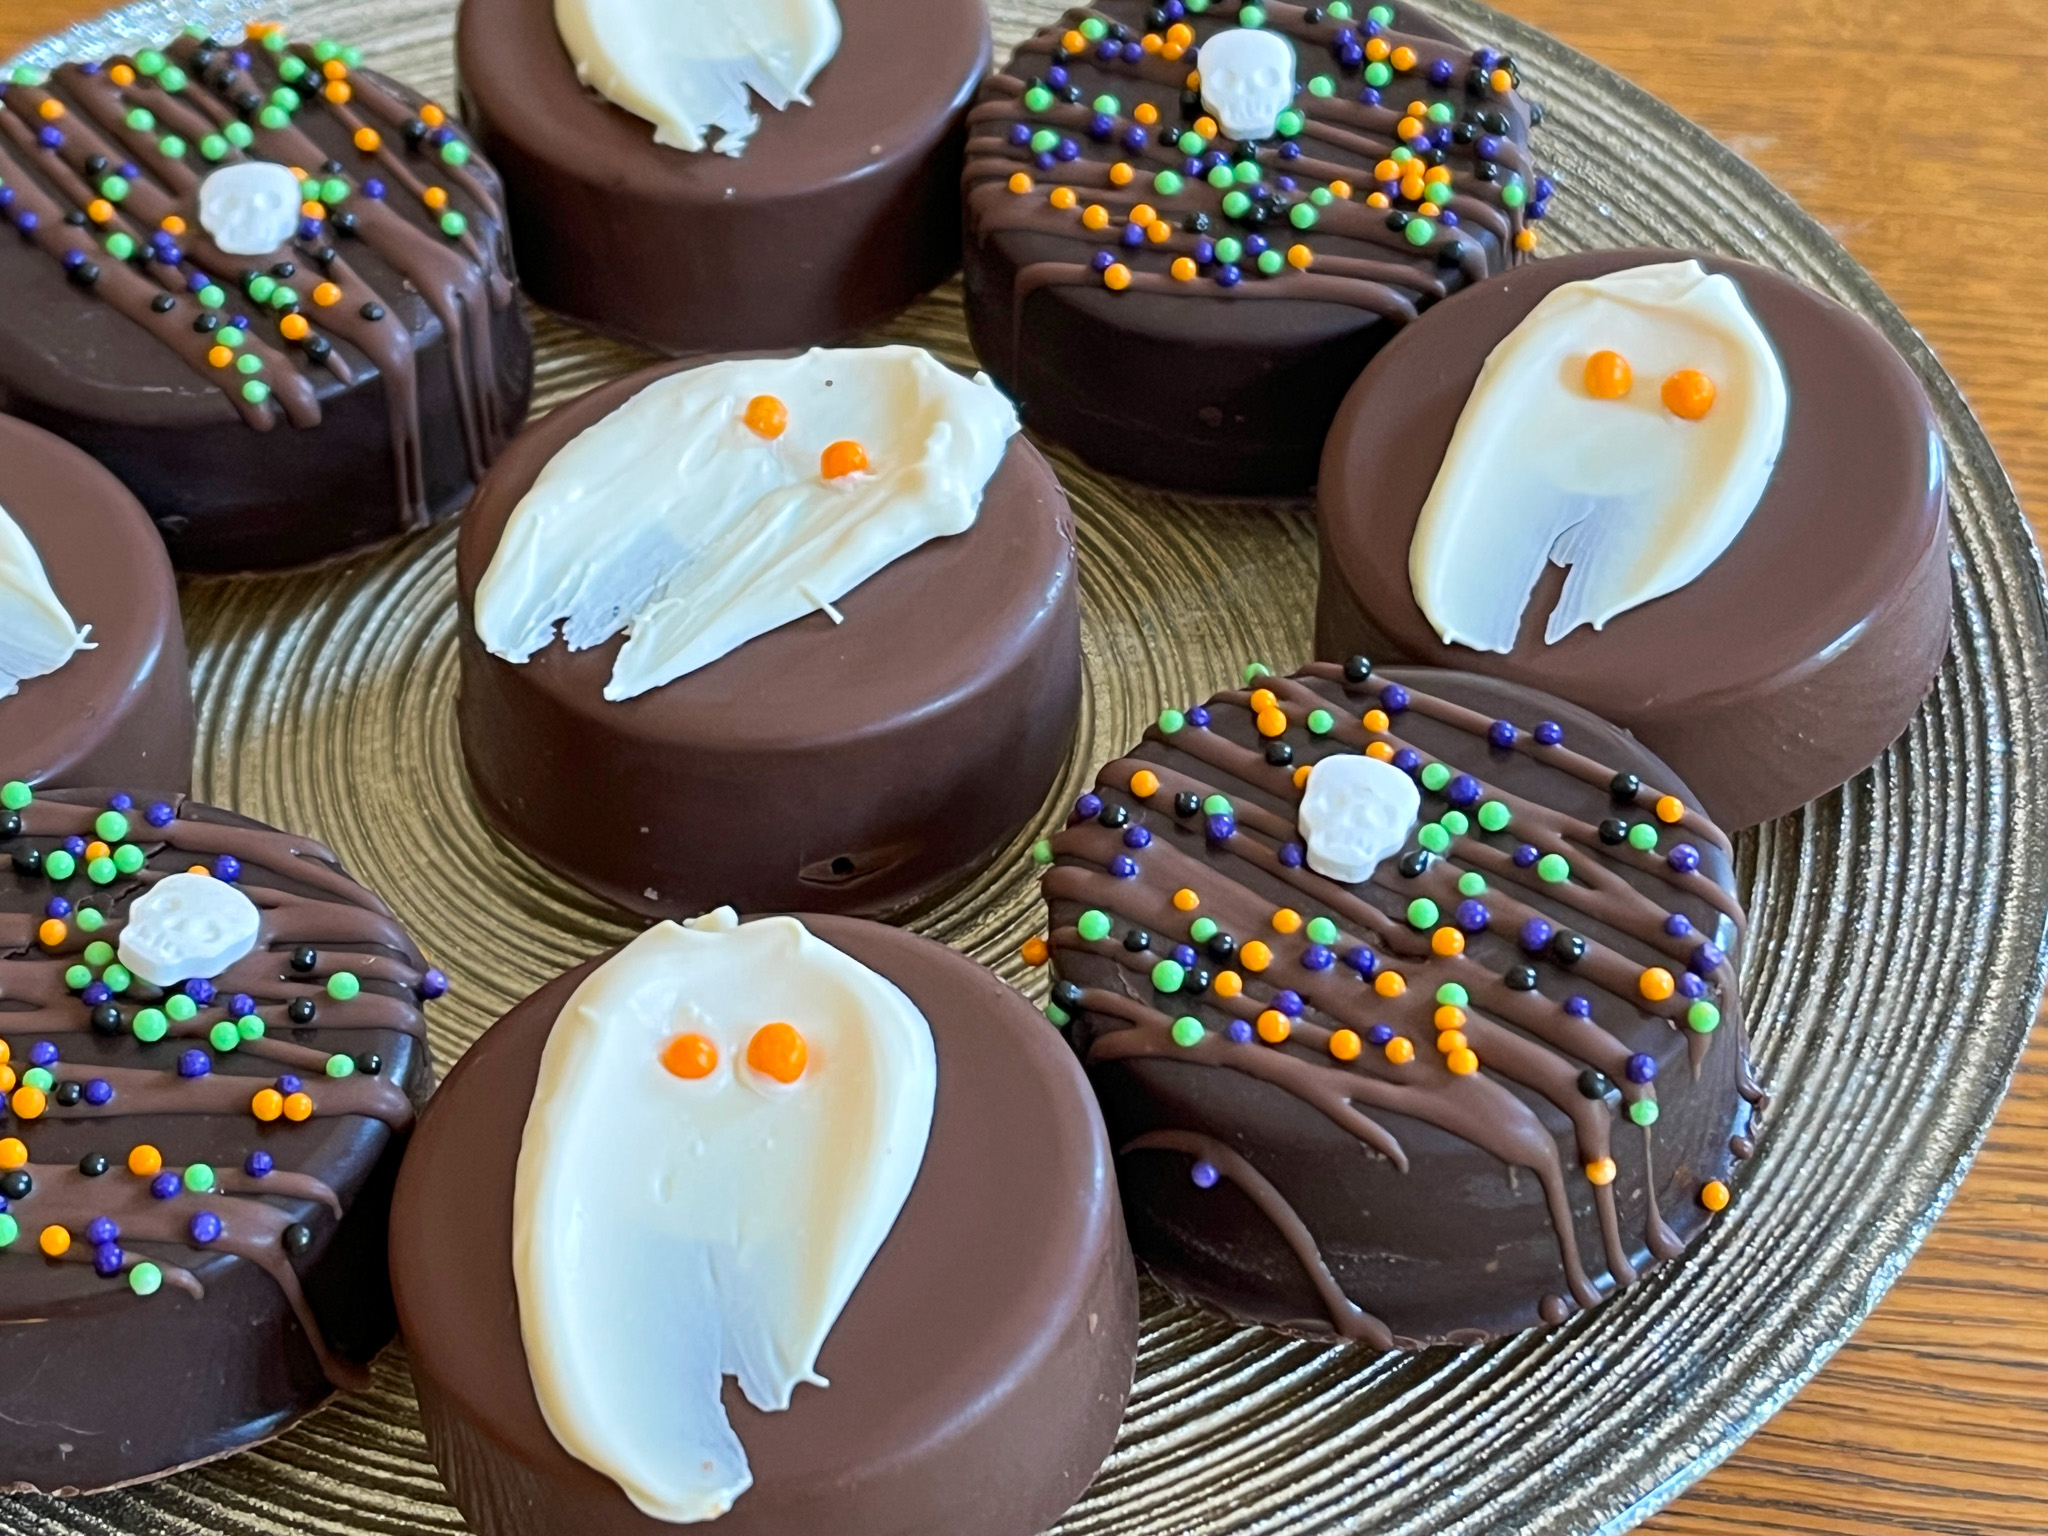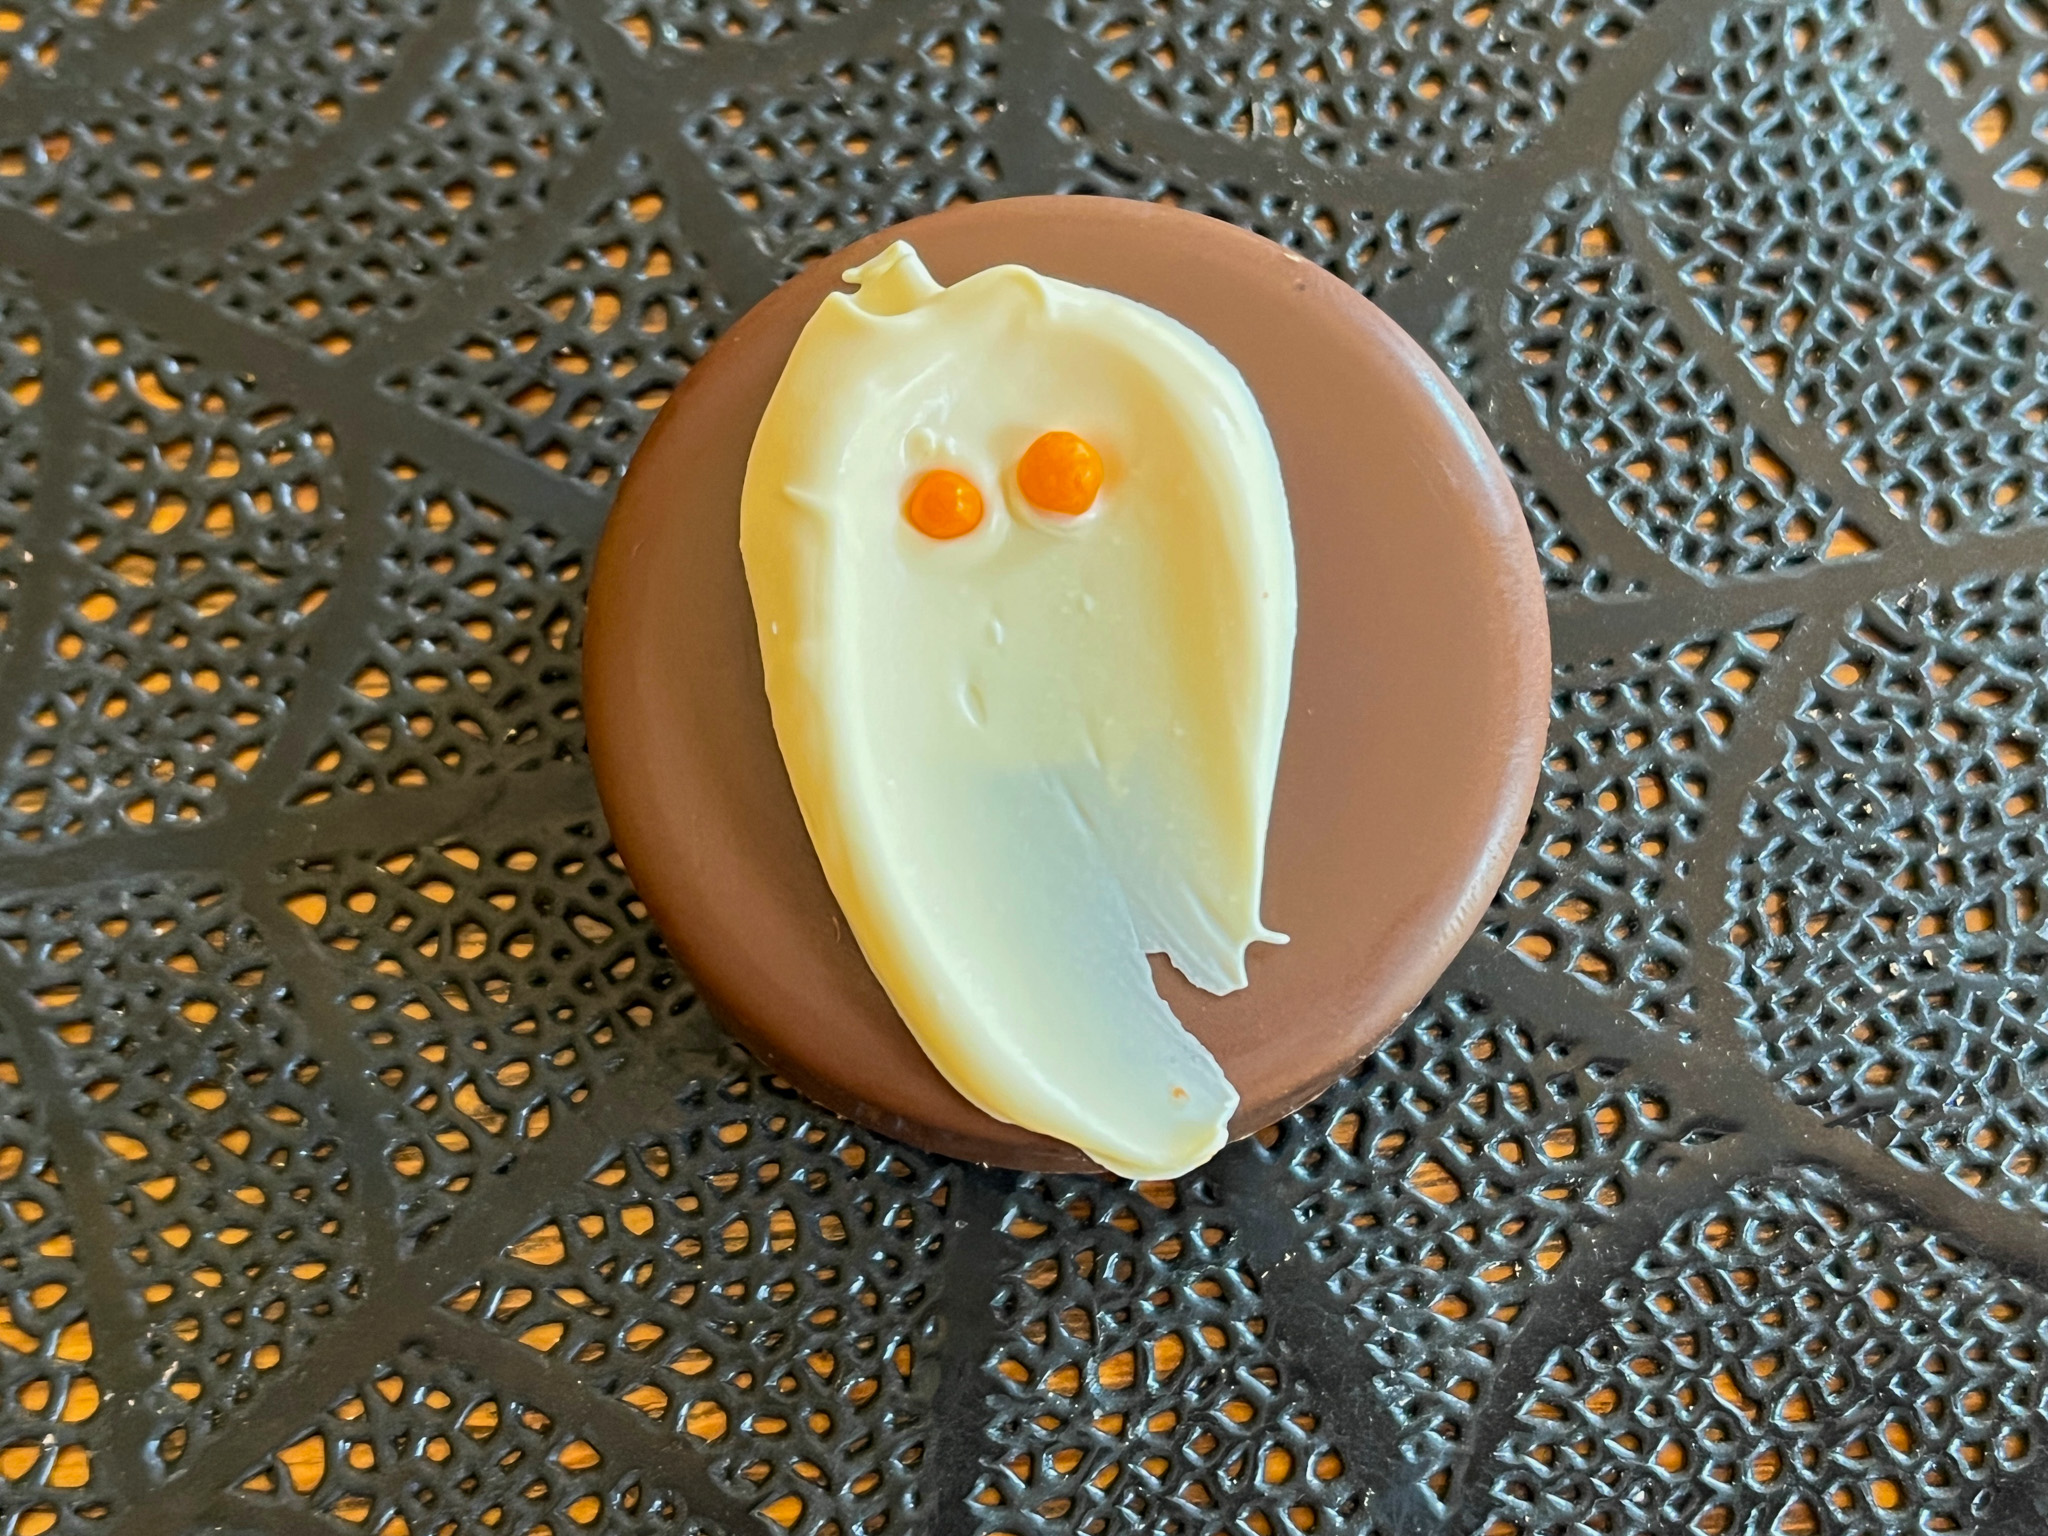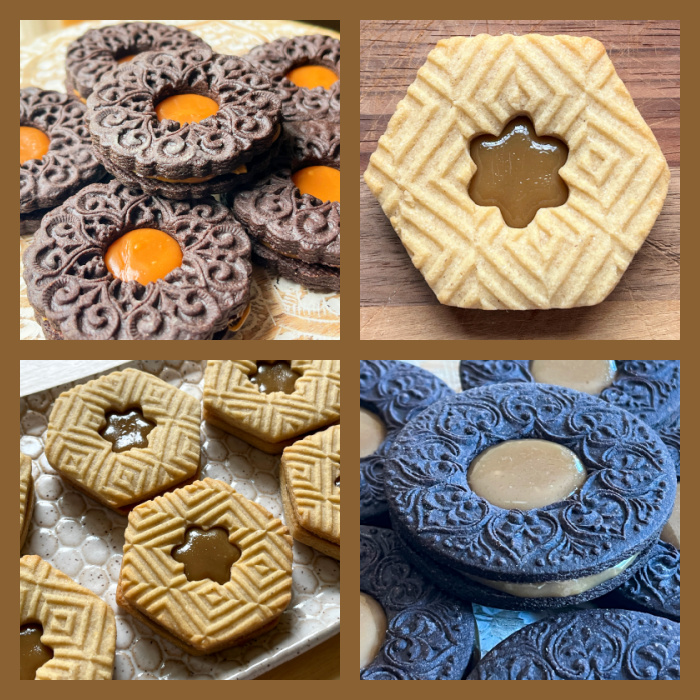
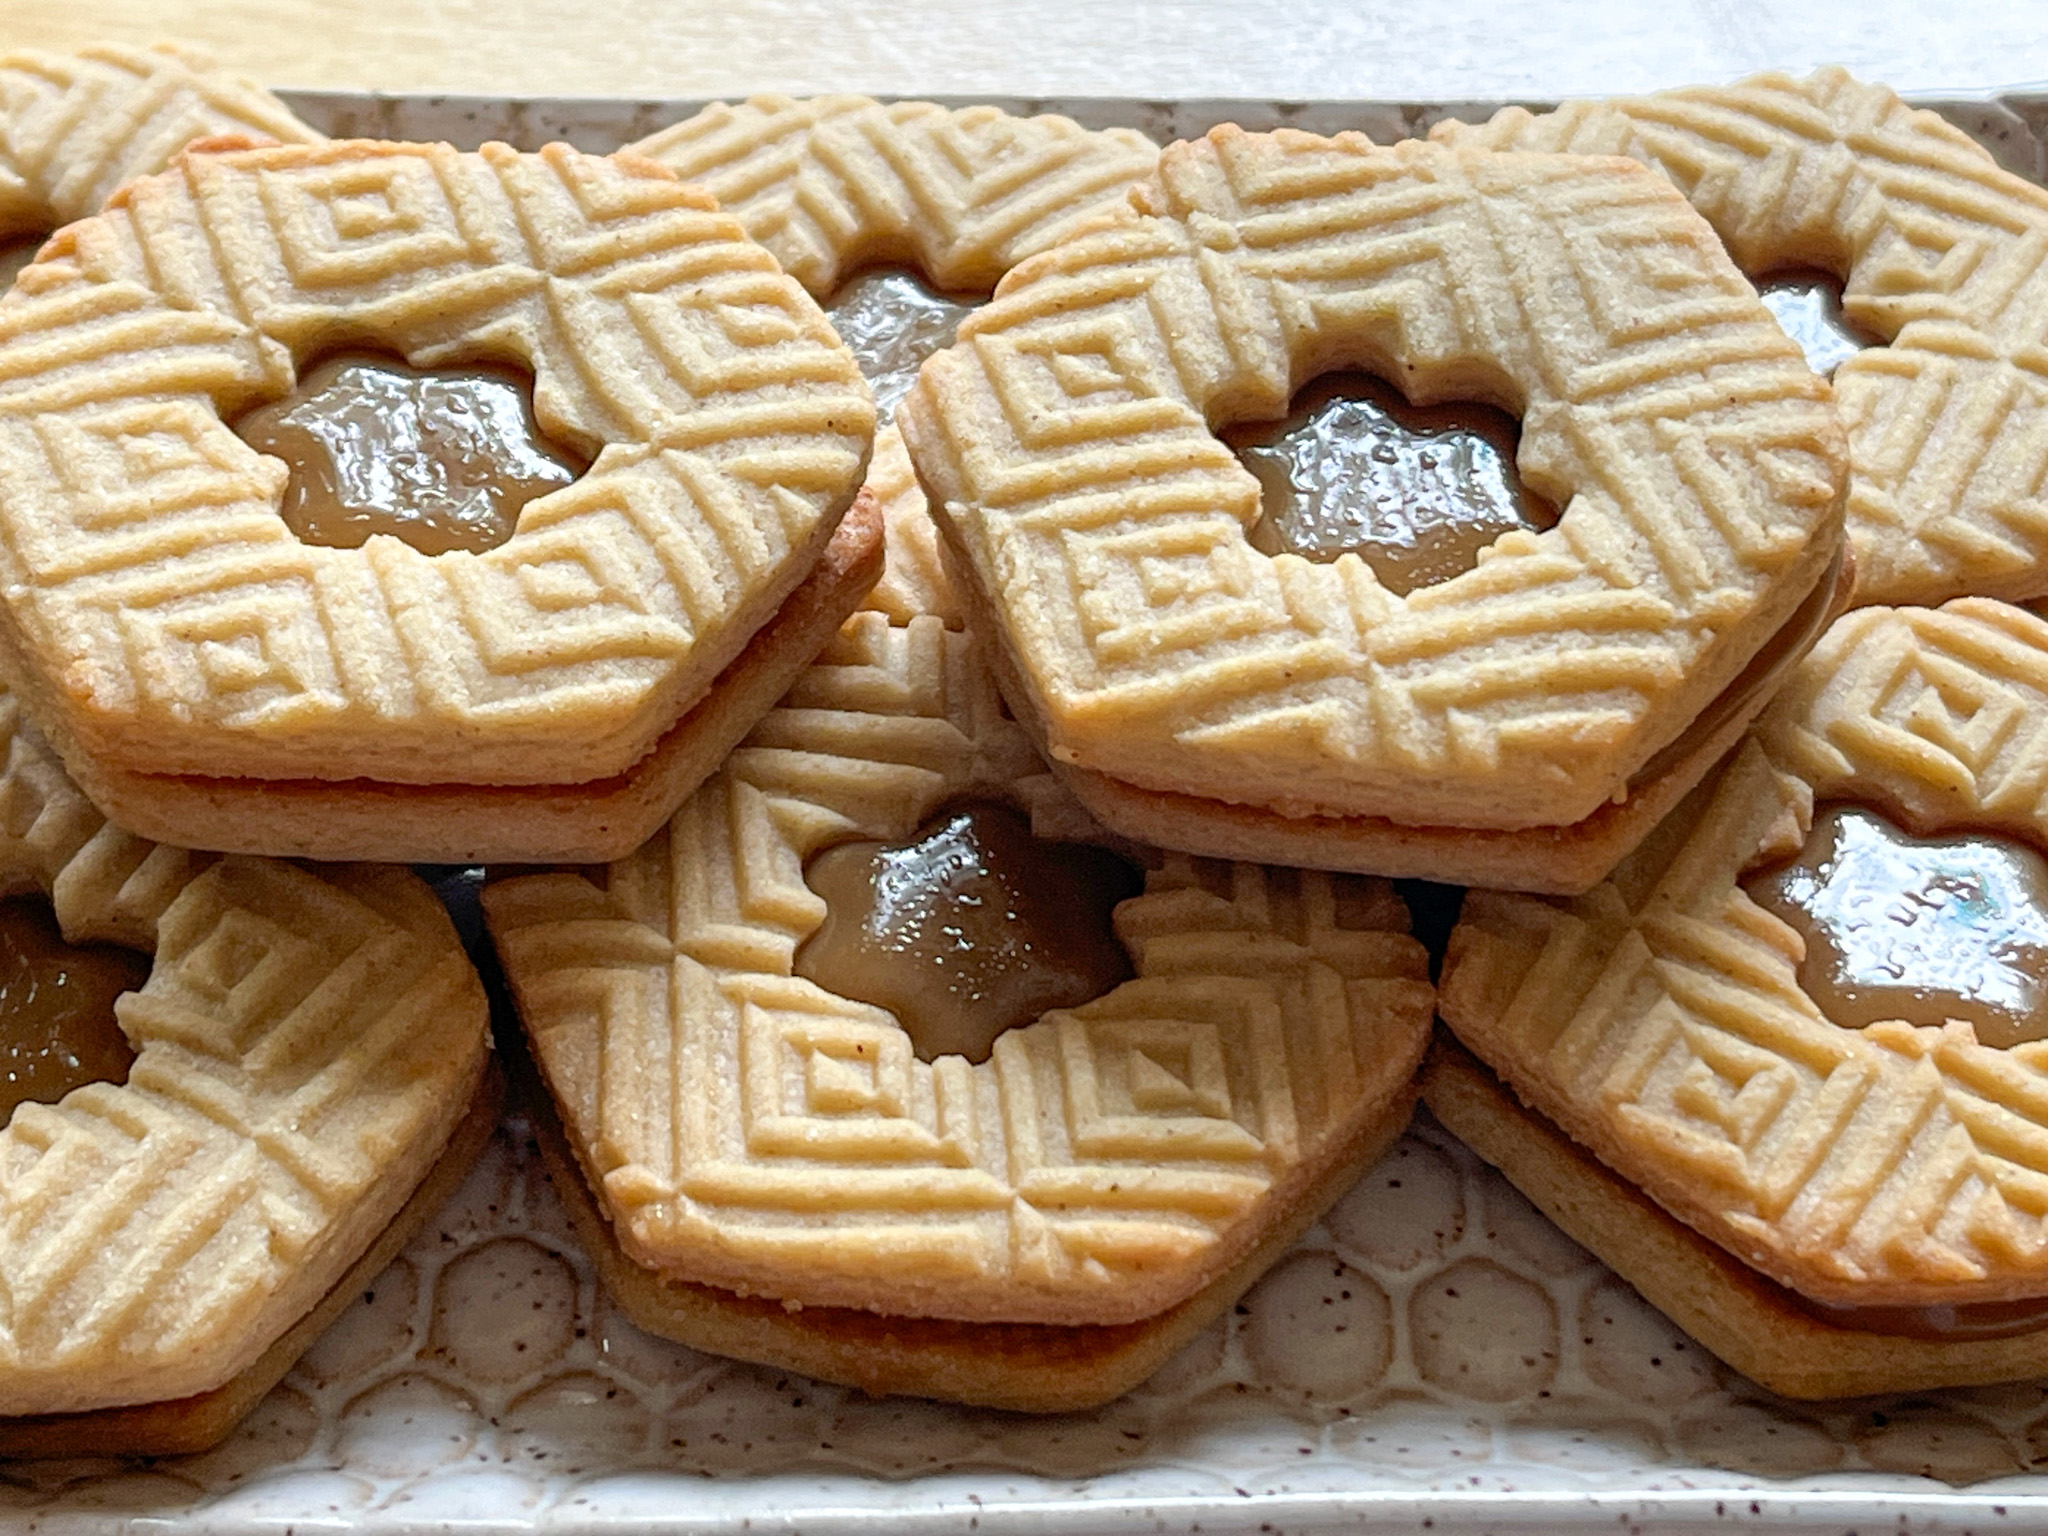
Today I share three versions of Caramel Sandwich Cookies. The first recipe (top left) is my default (Chocolate Chipotle Cookies that you can find here). The second version (bottom right) was made using Sweetapolita Bakebook recipe for Dark Chocolate Cutout Cookies which I won’t share due to copyright issues. At any rate, as written the recipe is a bit too strong for my taste, I would advise using less dark cocoa powder particularly if you are baking for kids. The lighter cookie (bottom left) is Cinnamon Orange, and the recipe is below.
CINNAMON-ORANGE SUGAR COOKIE
(from The Bewitching Kitchen)
1 cup butter (226 g), at room temperature
1 cup sugar (200g)
zest of half a large orange
1/4 cup agave nectar
2 eggs
1 tsp orange bakery emulsion or orange extract of your choice
575 g all-purpose flour (about 4 cups)
1 tsp cinnamon
1/2 tsp salt
1/4 tsp baking powder
Heat the oven to 350 F and line baking sheets with parchment. Mix the flour, cinnamon, baking powder and salt, and set aside. Mix the sugar with the zest rubbing it well to release the oils. Cream the butter with the flavored sugar, just until smooth and combined. Add the agave nectar and continue mixing for a minute or so.
In a small bowl whisk the eggs and orange emulsion. Add to the butter-sugar mixture and mix at low speed until combined. Add the flour mixture on low-speed, until it forms a dough.
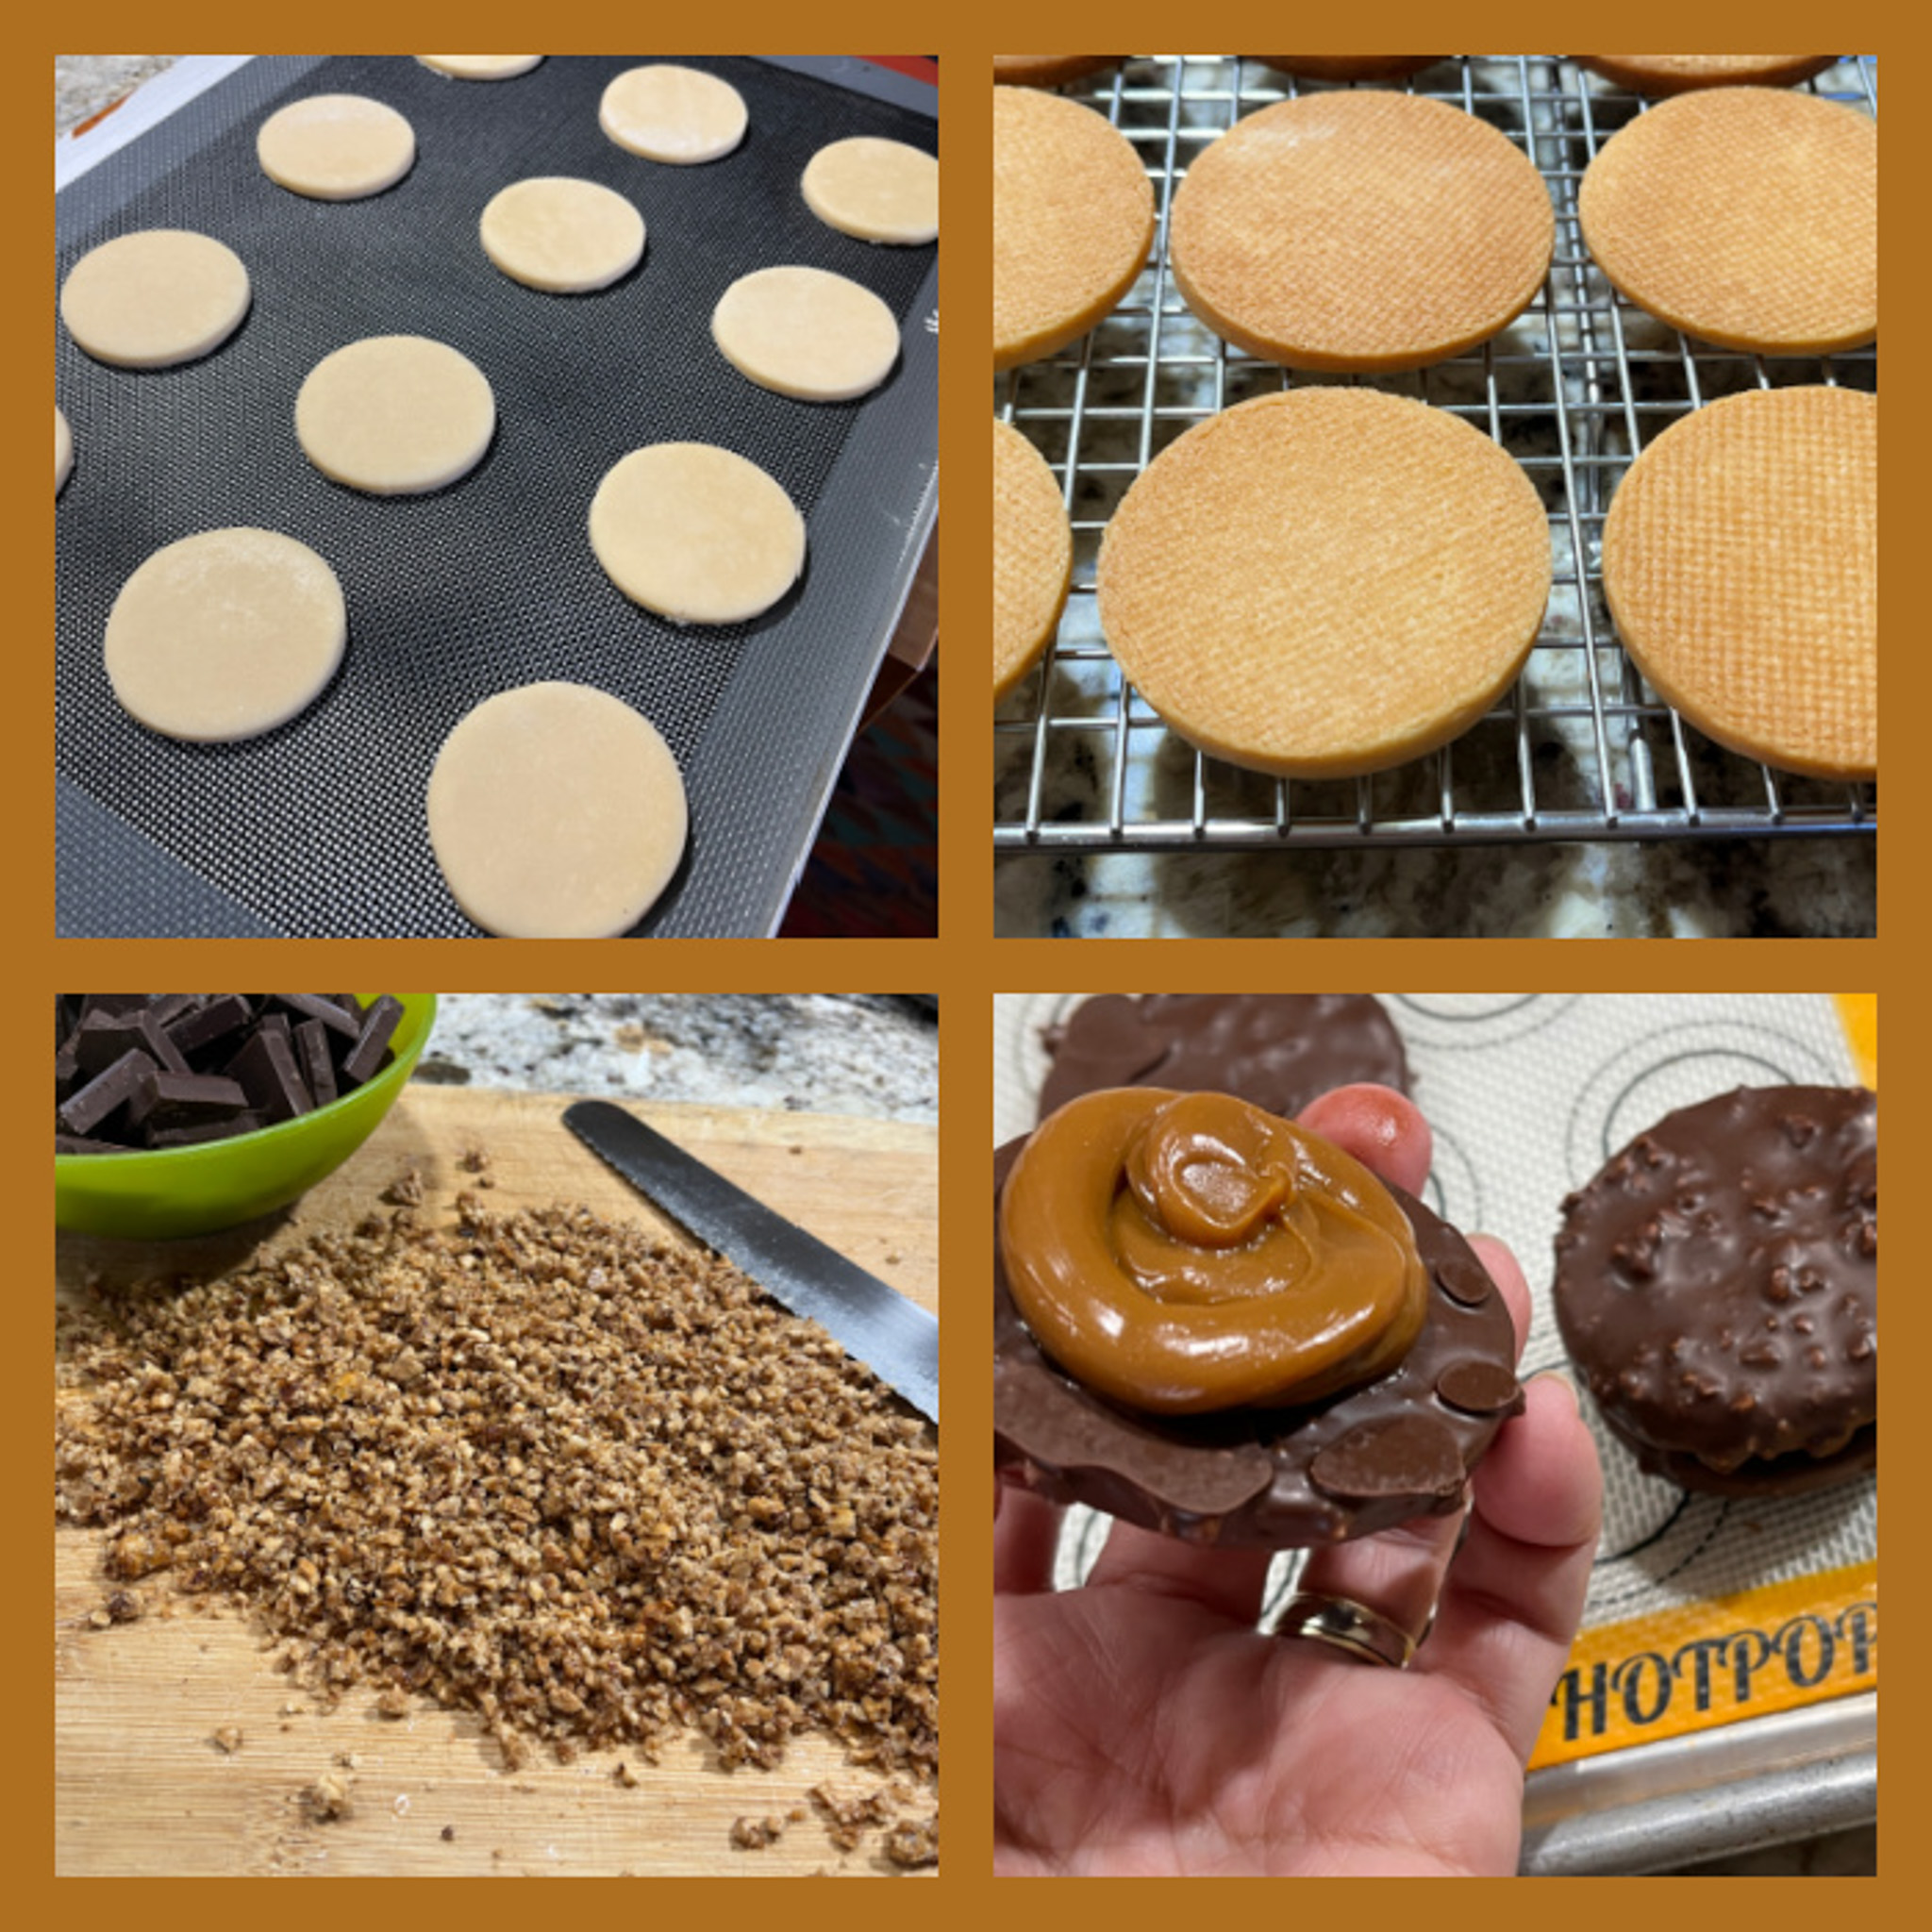
Remove the dough from the bowl, cut in two pieces and wrap them in plastic. Refrigerate for one hour, then roll, cut shapes and bake in 350 F oven until golden at the edges, depending on the size of the cookies, 10 to 15 minutes. For these cookies, I used a patterned rolling pin.
ENJOY!
to print the recipe, click here
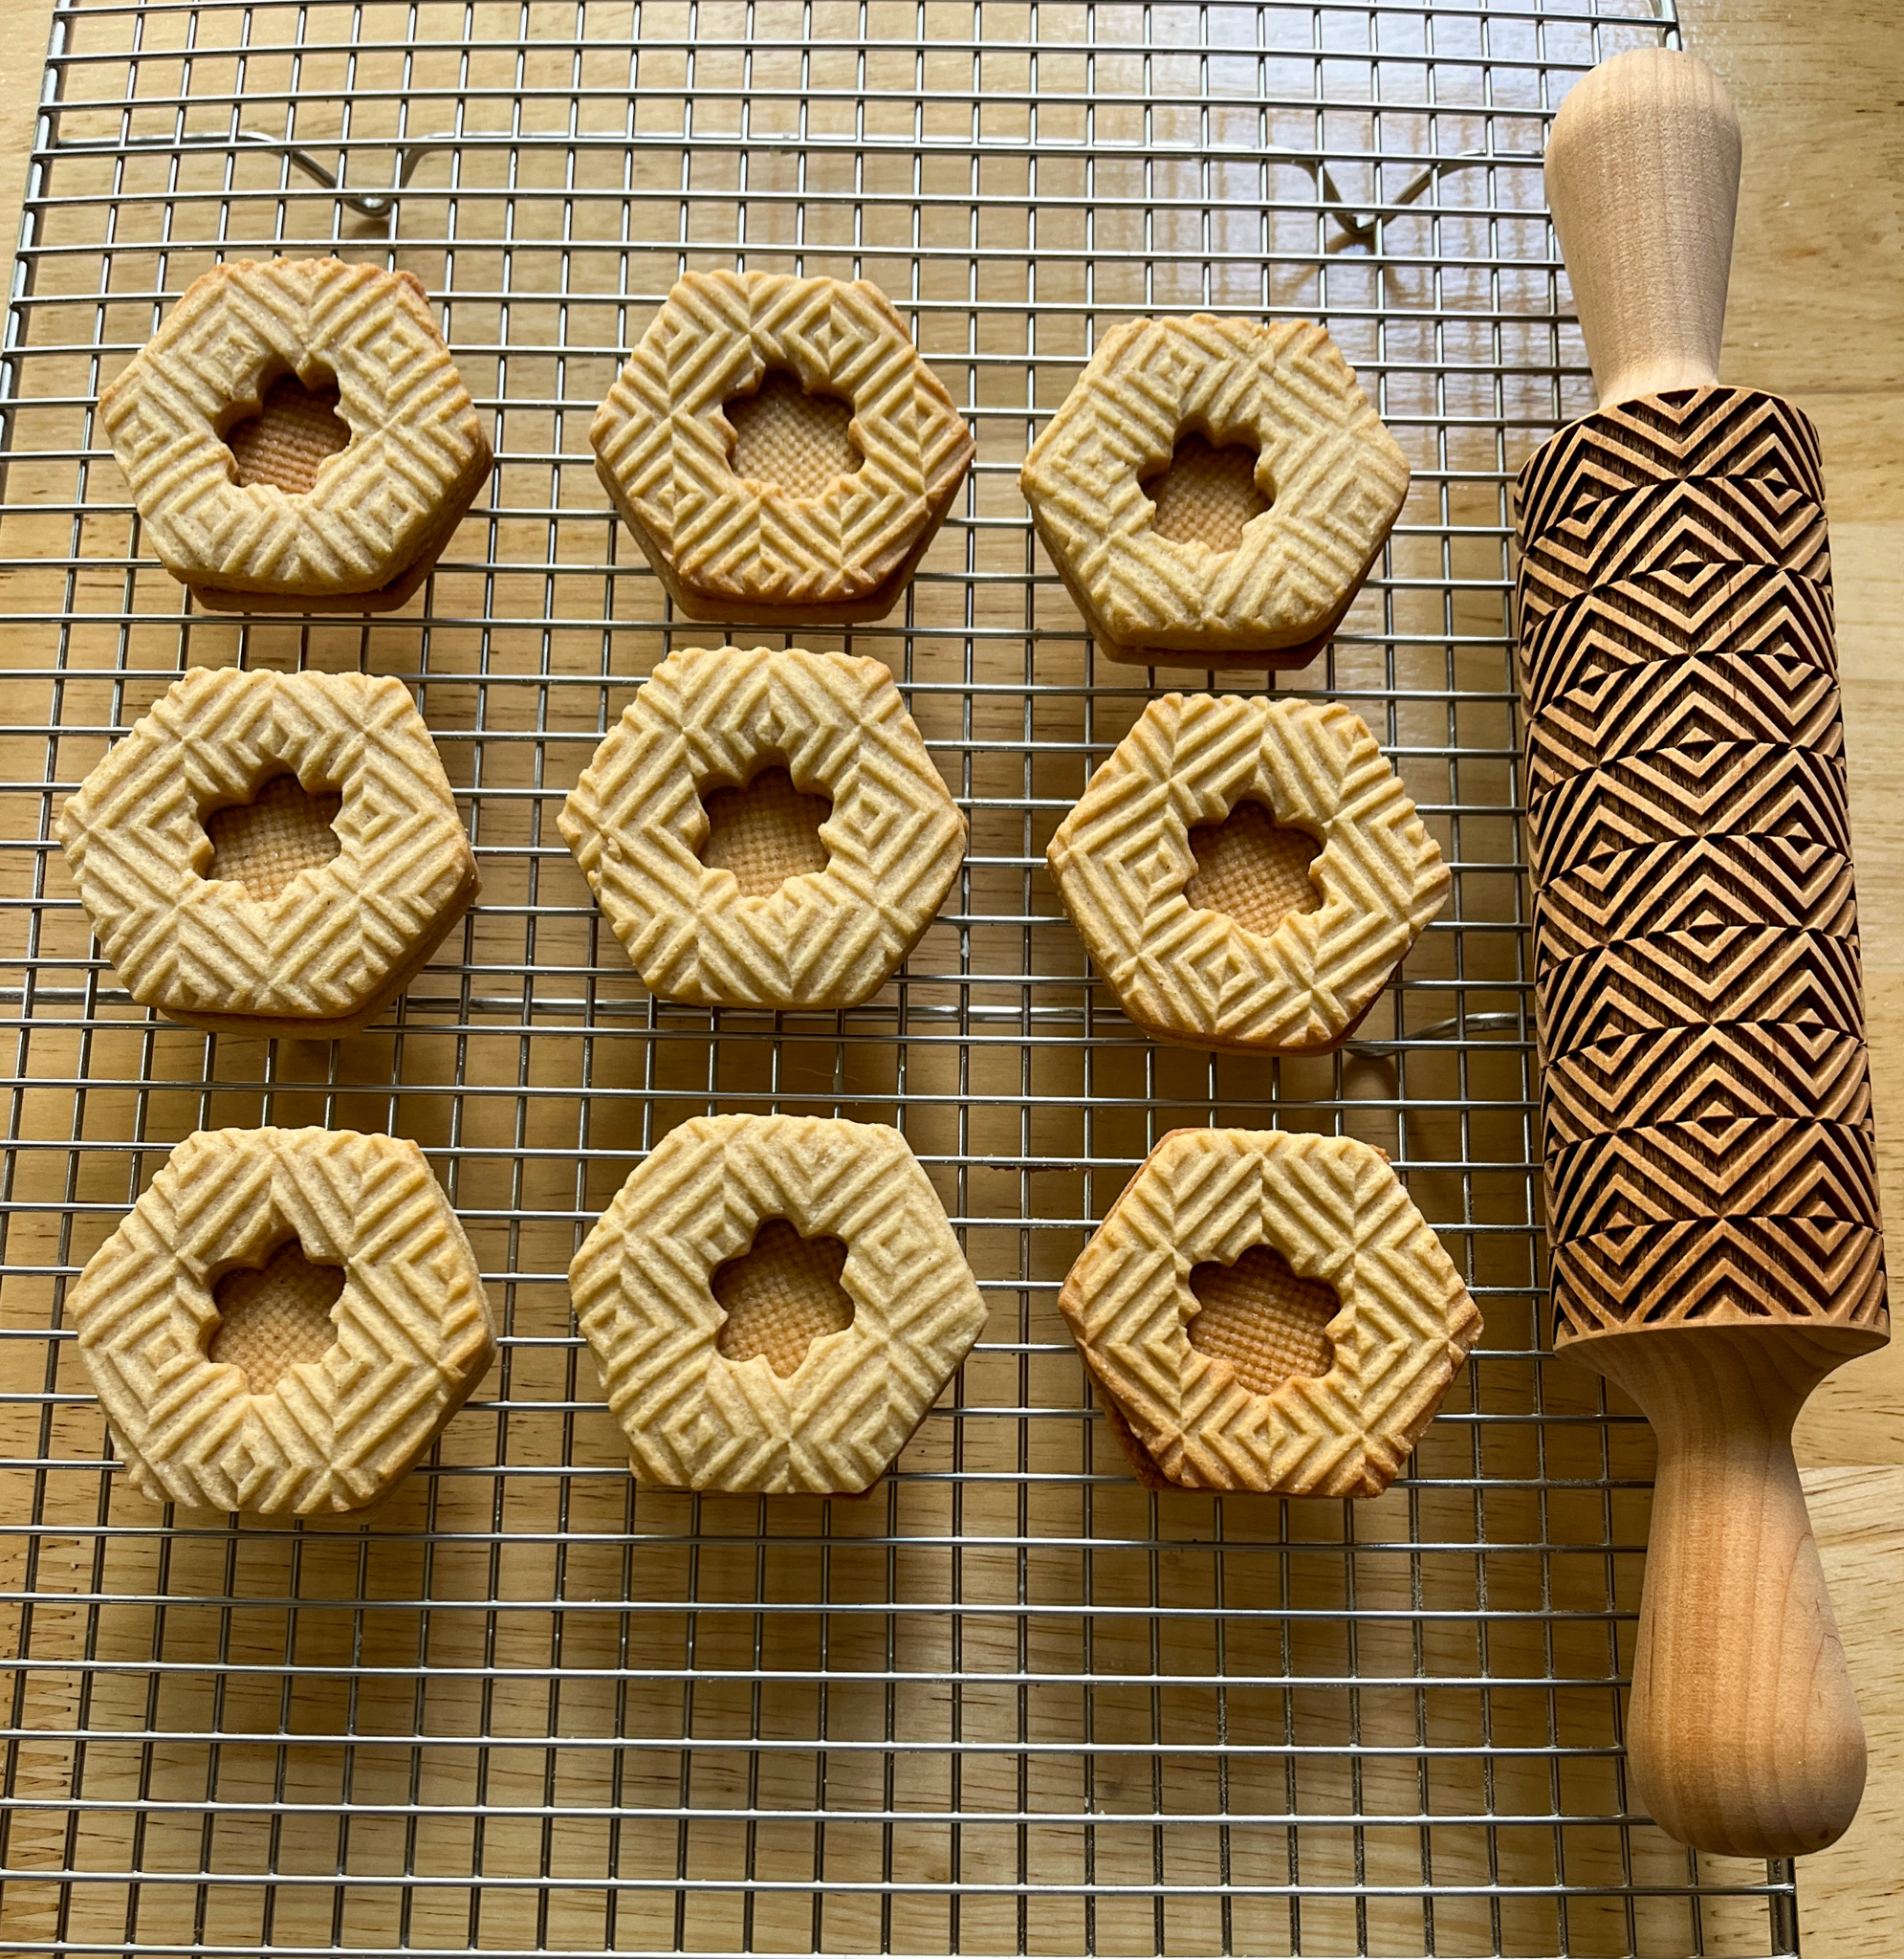
Rolling pin available at etsy (click here)
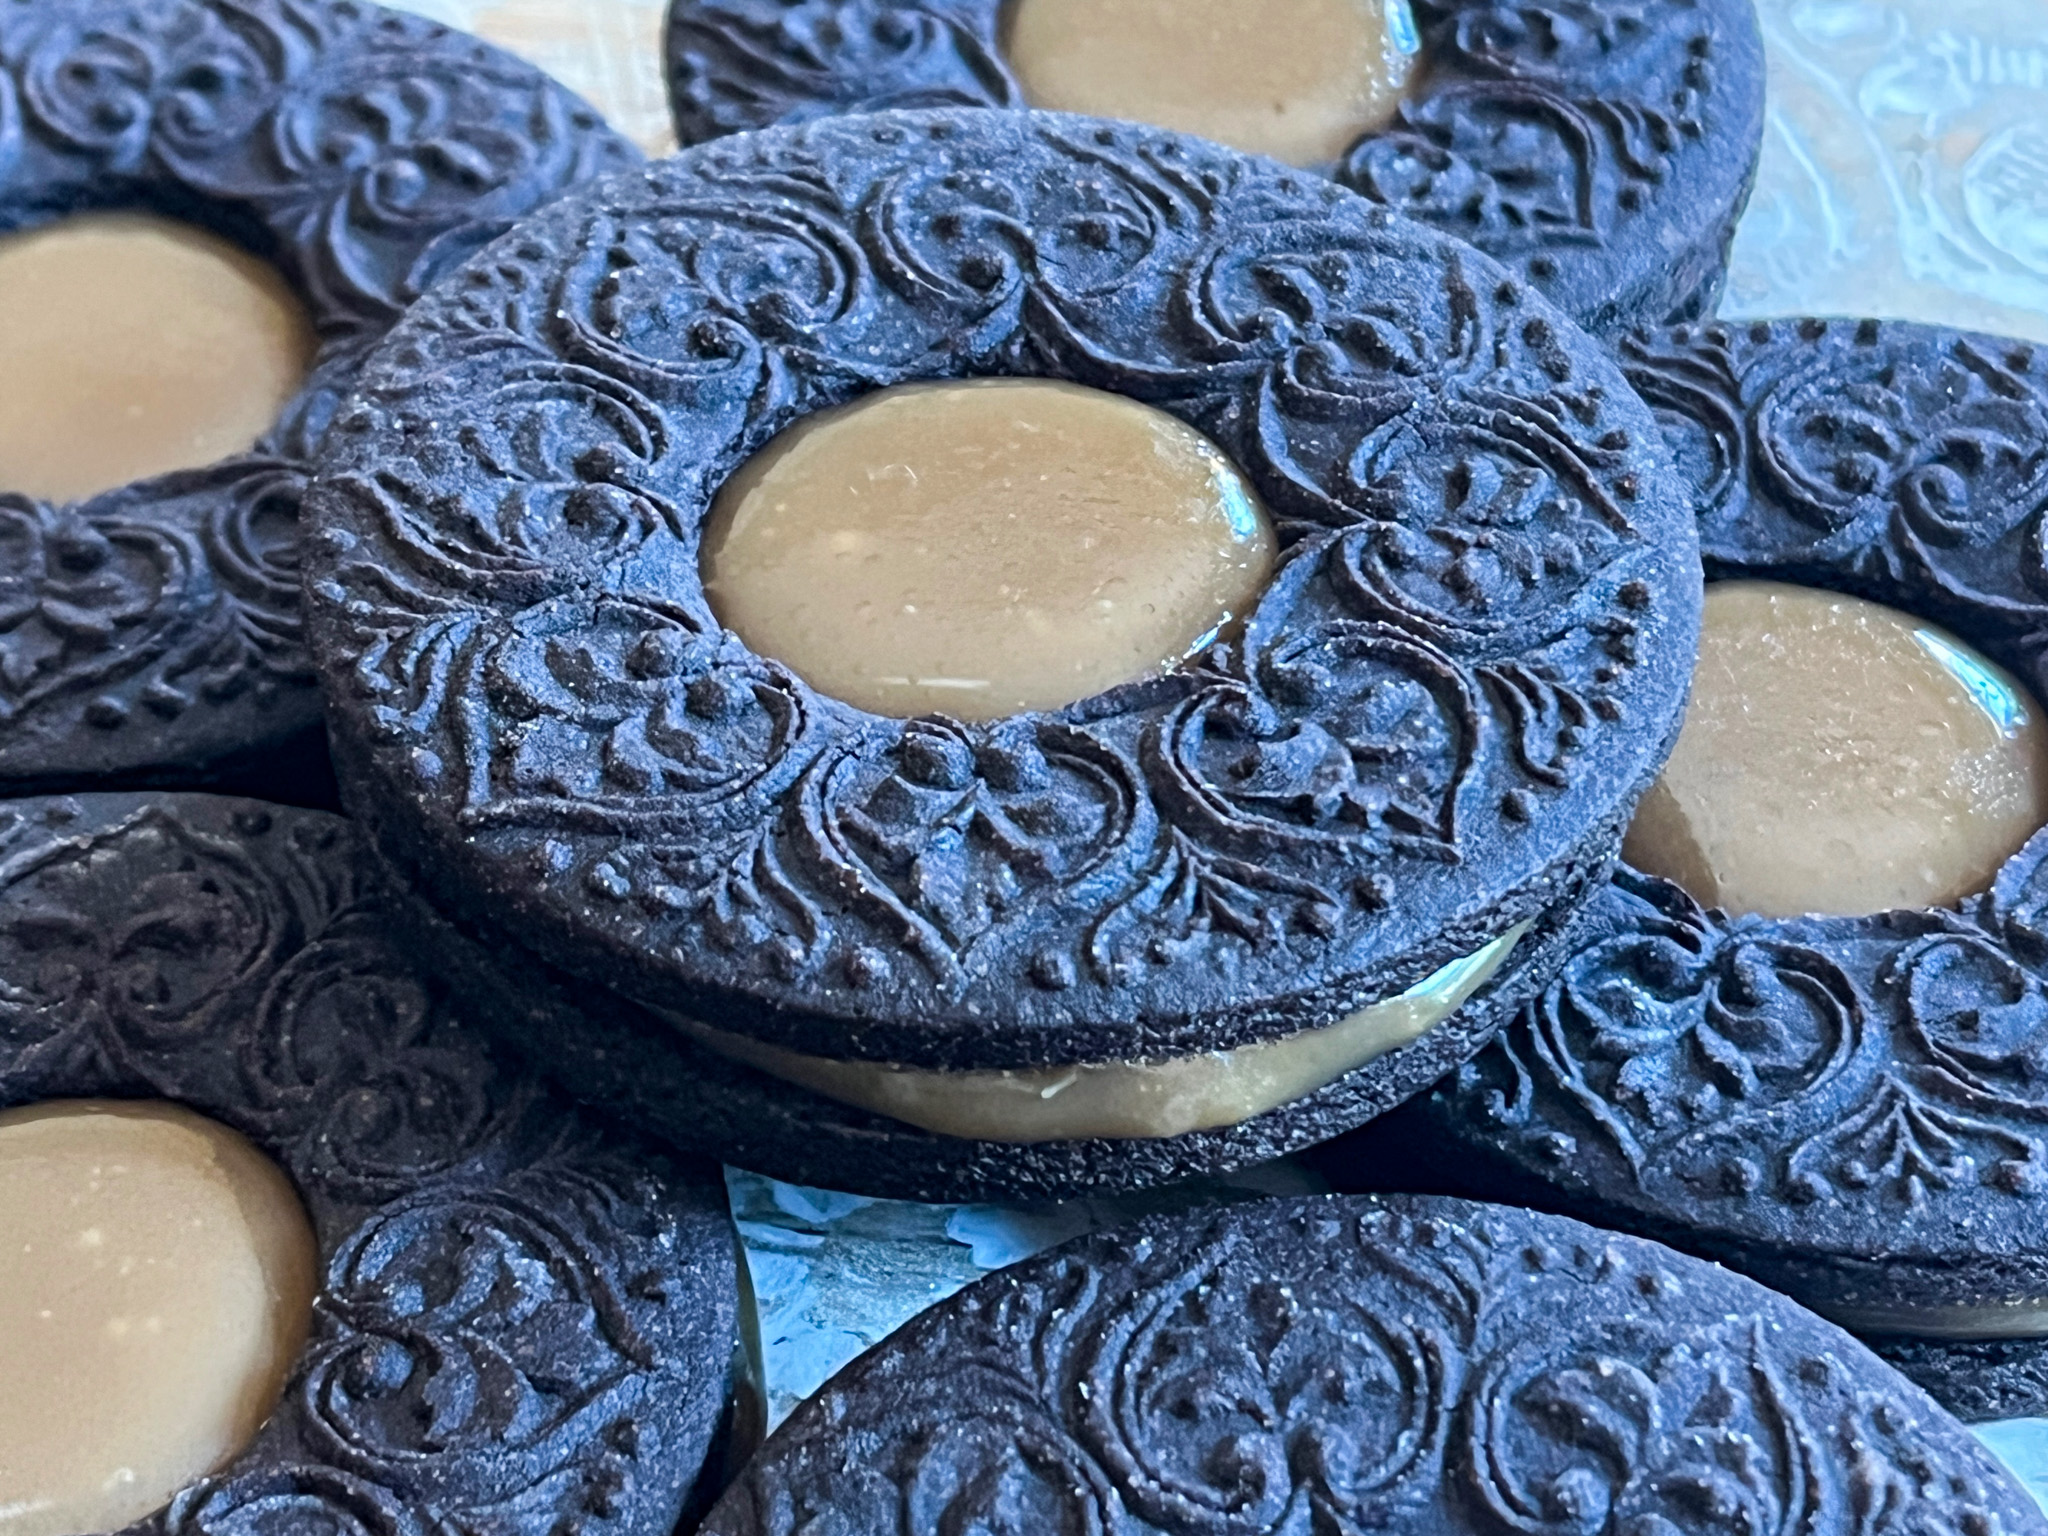
For both chocolate cookies, I used a stamp to create the design on the top portion of the cookie. One of them is available here, the other I could not find any longer, had it for many years.
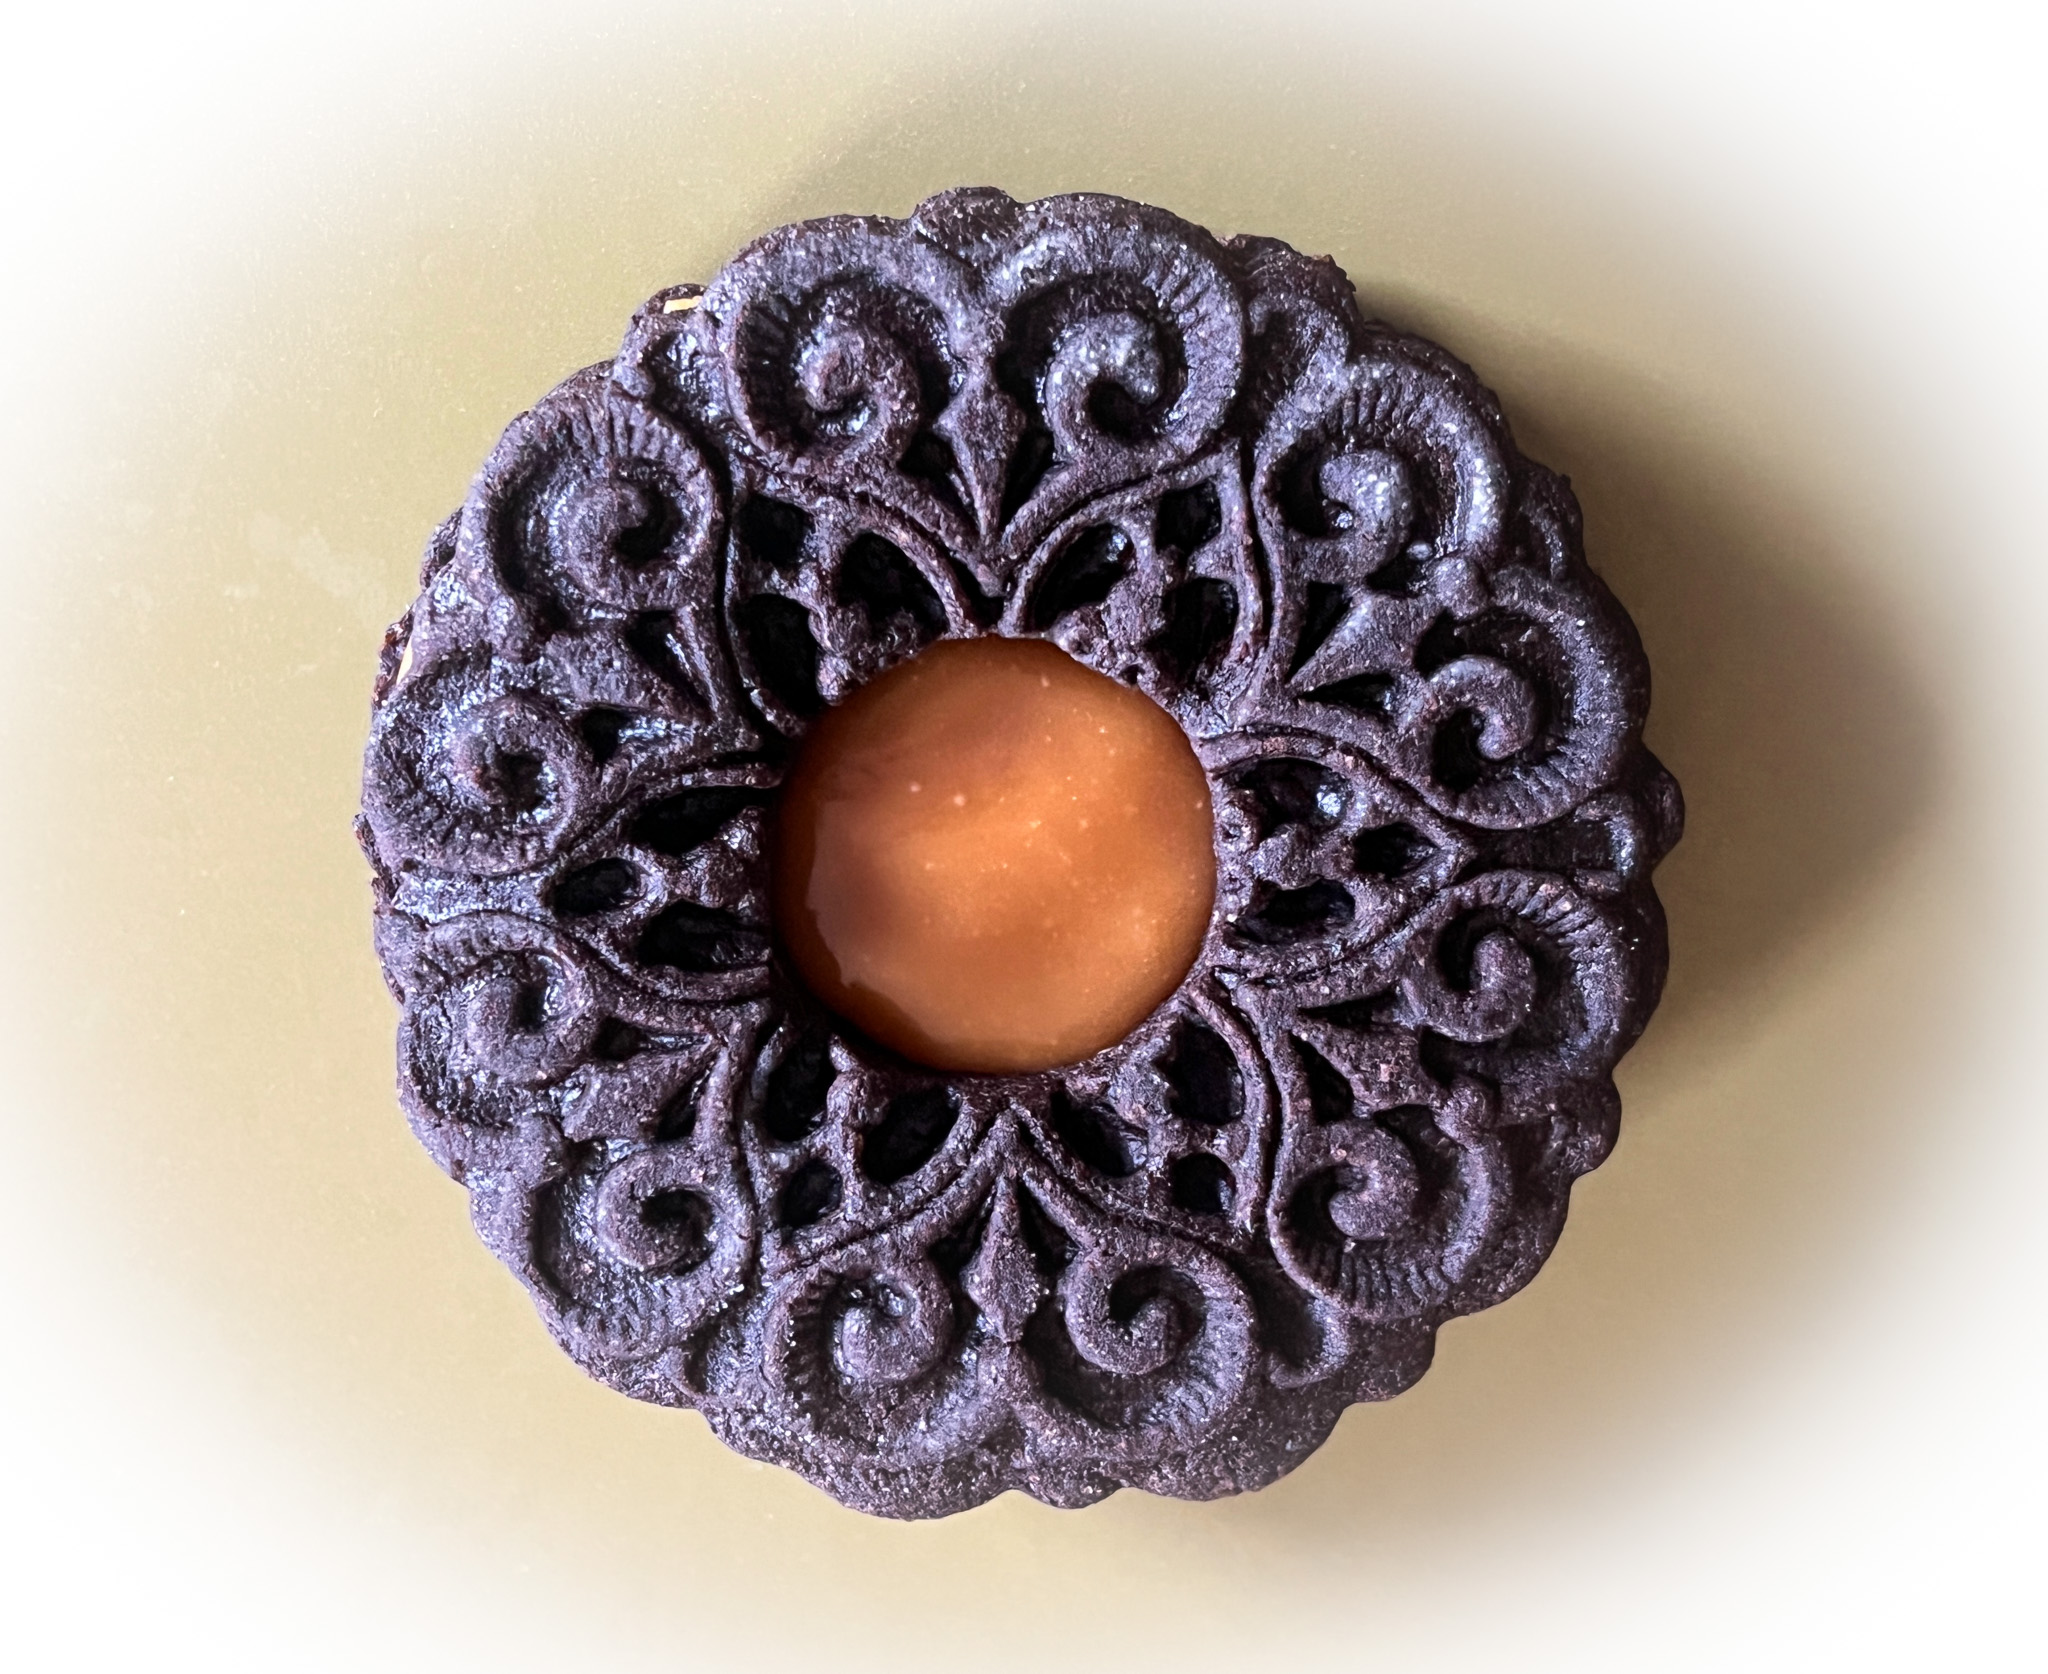
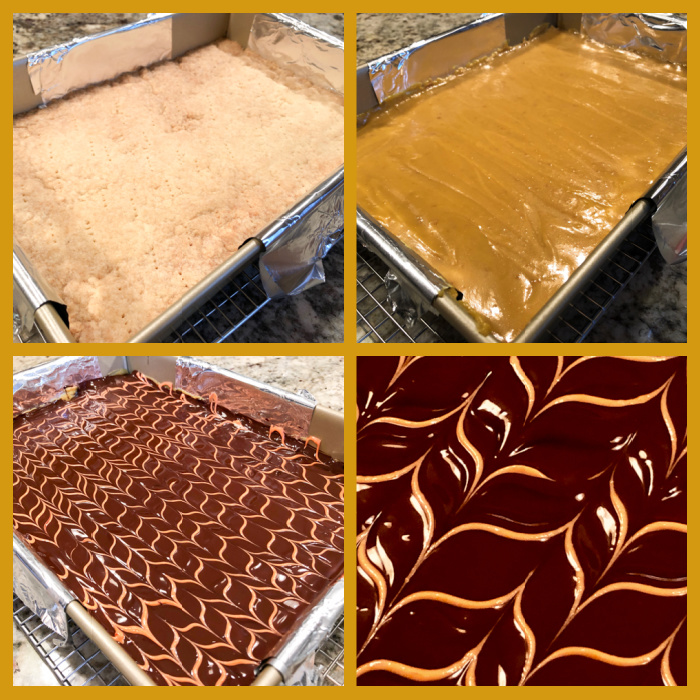
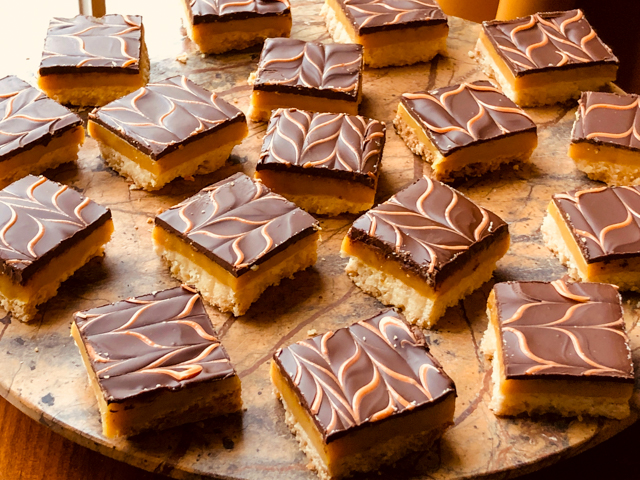
I have tried two different recipes for caramel filling, but the second one was far better in terms of texture and flavor. You can find it here. I made half the recipe published in the site.
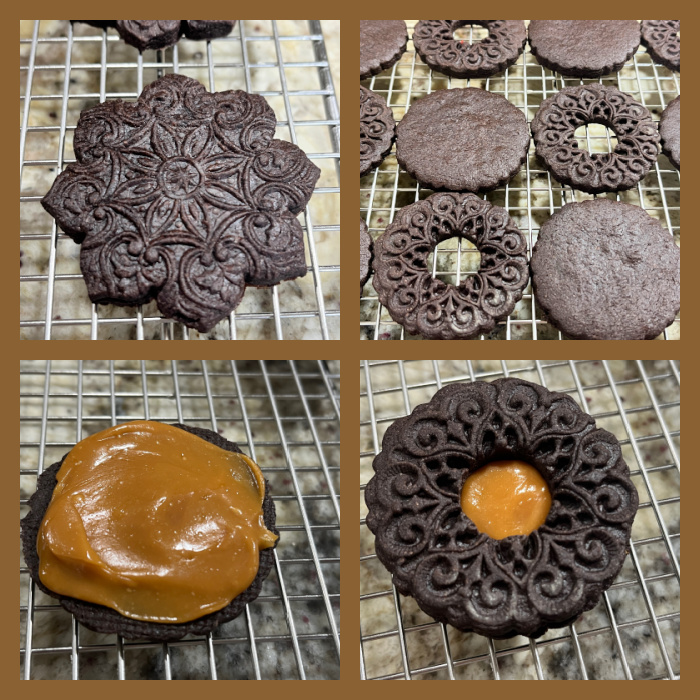
The caramel filling complements quite well both the chocolate and the orange cookies, very versatile, and it has the perfect texture to bite into. I think that embossed rolling pins and springerle-type stamps are a very nice way to embellish sandwich cookies.
ONE YEAR AGO: Miso-Caramel Cracker Cookies
TWO YEARS AGO: Mooncakes for Mid-Autumn Festival
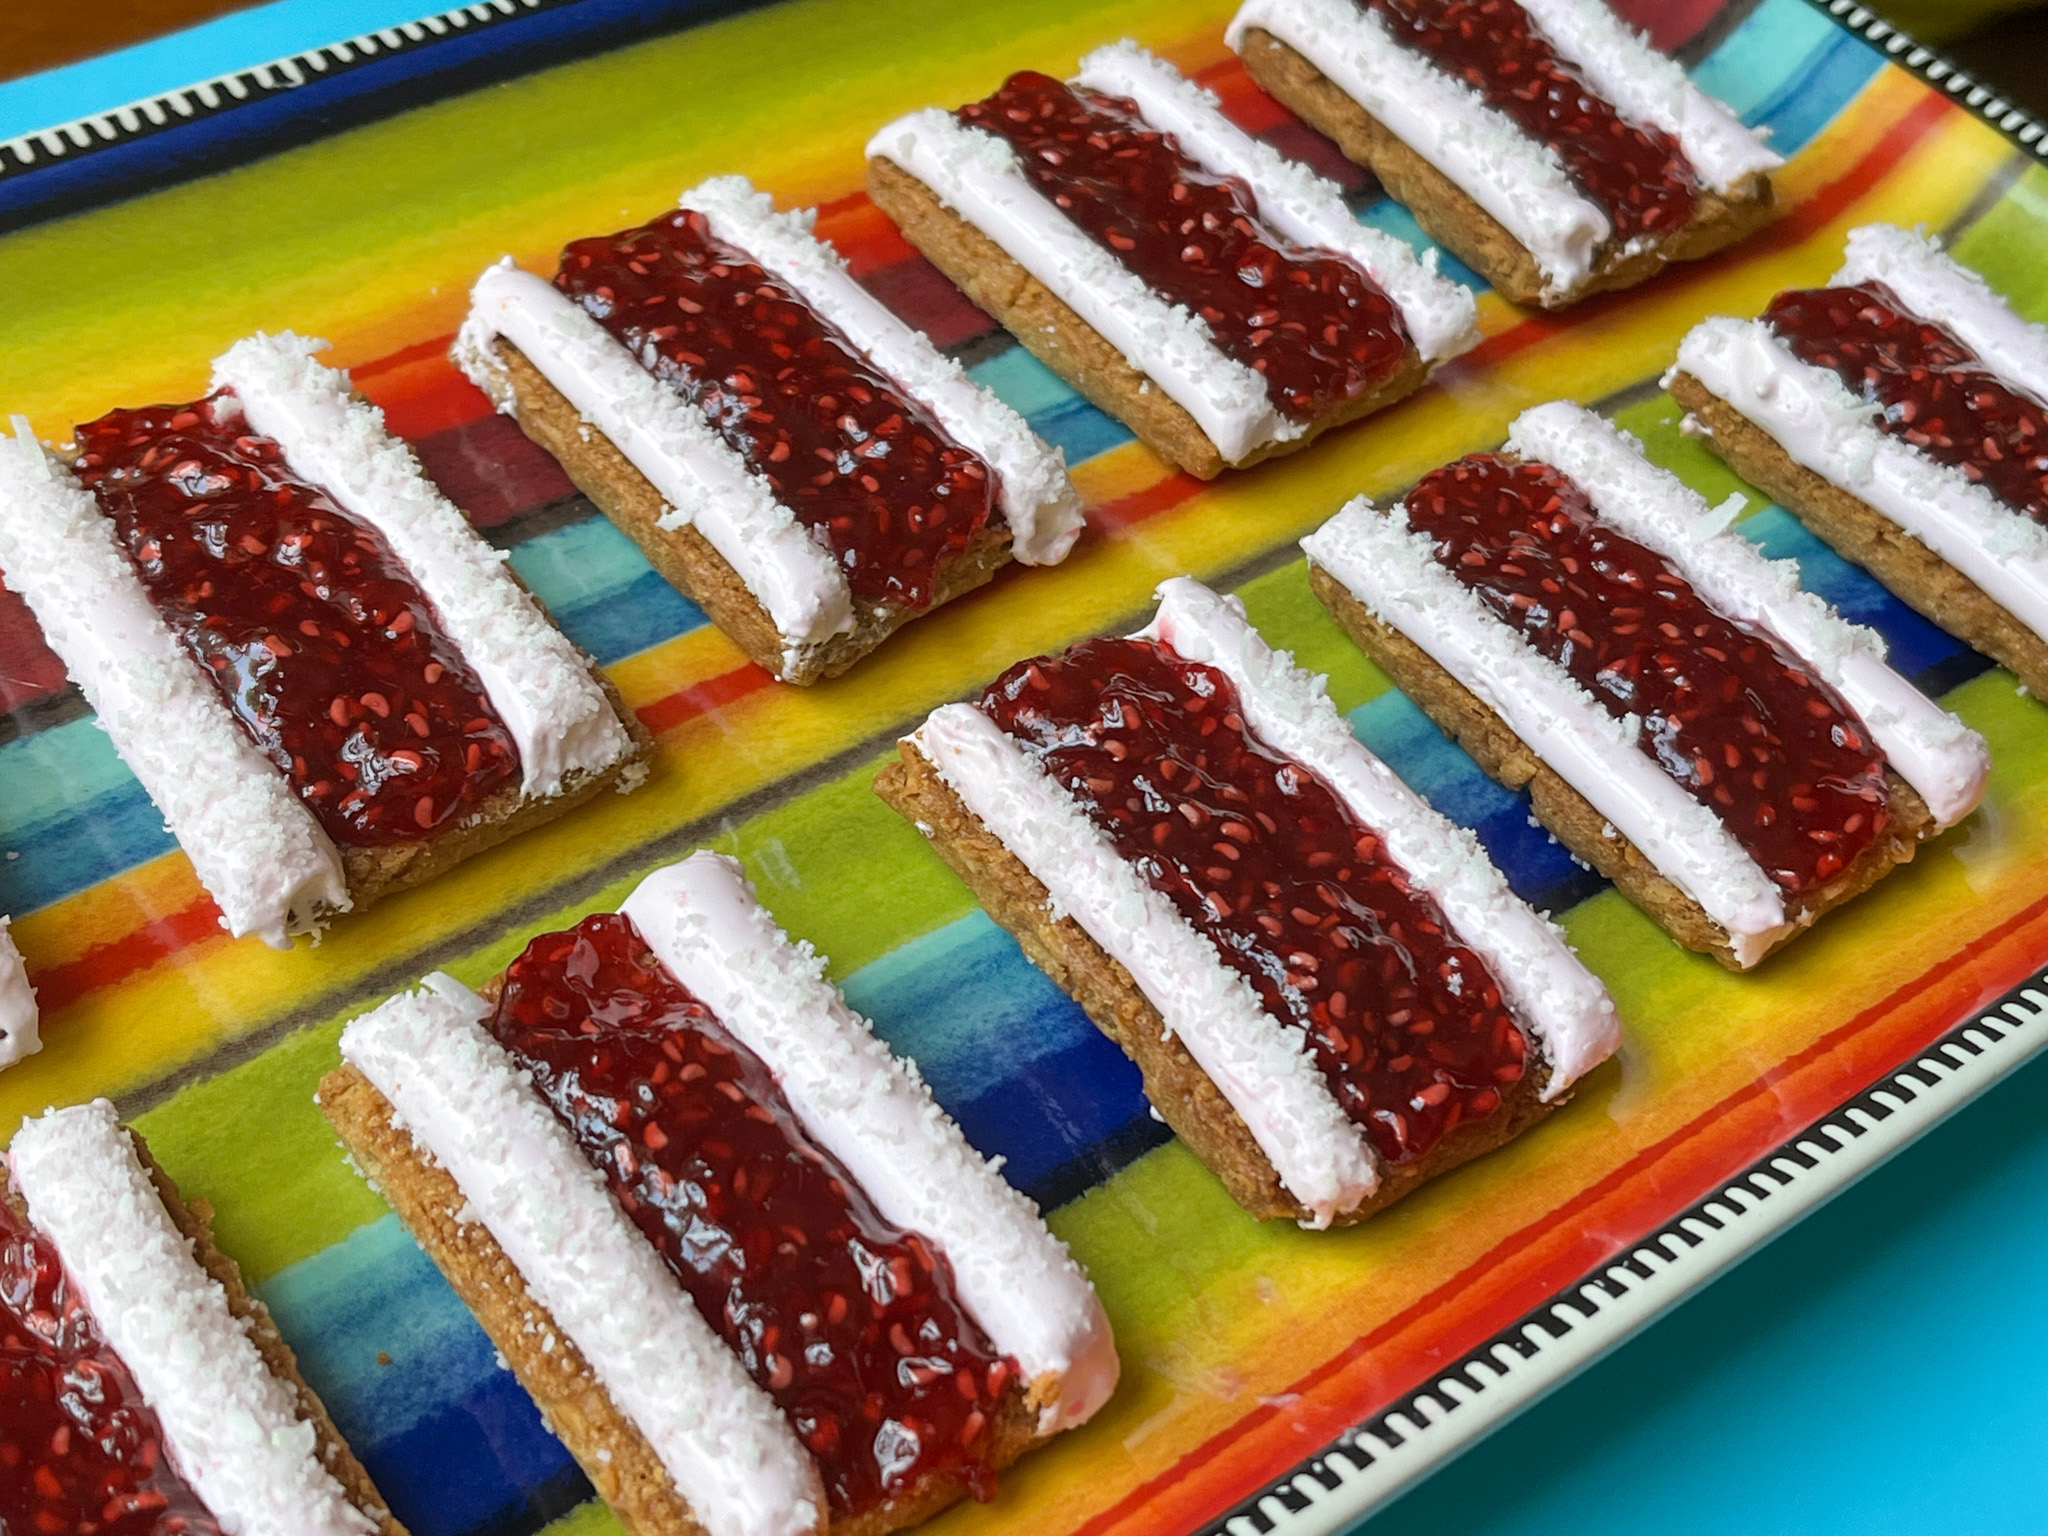
THREE YEARS AGO: Almond-Raspberry Triangles and a Special Cookbook Review
FOUR YEARS AGO: Sweet and Spicy Roasted Cauliflower
FIVE YEARS AGO: Roasted Cauliflower Salad over Hummus
SIX YEARS AGO: Queen of Sheba
SEVEN YEAR AGO: Brunch Burger
EIGHT YEARS AGO: Mango Salsa with Verjus
NINE YEARS AGO: Raspberry Bittersweet Chocolate Chunk Brownies
TEN YEARS AGO: Scary Good Pork Burgers
ELEVEN YEARS AGO: Review of exercise program Focus25
TWELVE YEARS AGO: Celebrate Wednesday with a Thai Seafood Curry
THIRTEEN YEARS AGO: Post-workout Breakfast
FOURTEEN YEARS AGO: Semolina Barbecue Buns
FIFTEEN YEARS AGO: Lavash Crackers