REVVING THE ENGINES FOR HALLOWEEN!


It is almost time!!!! I share with you three baking ideas to keep you appropriately spooked…

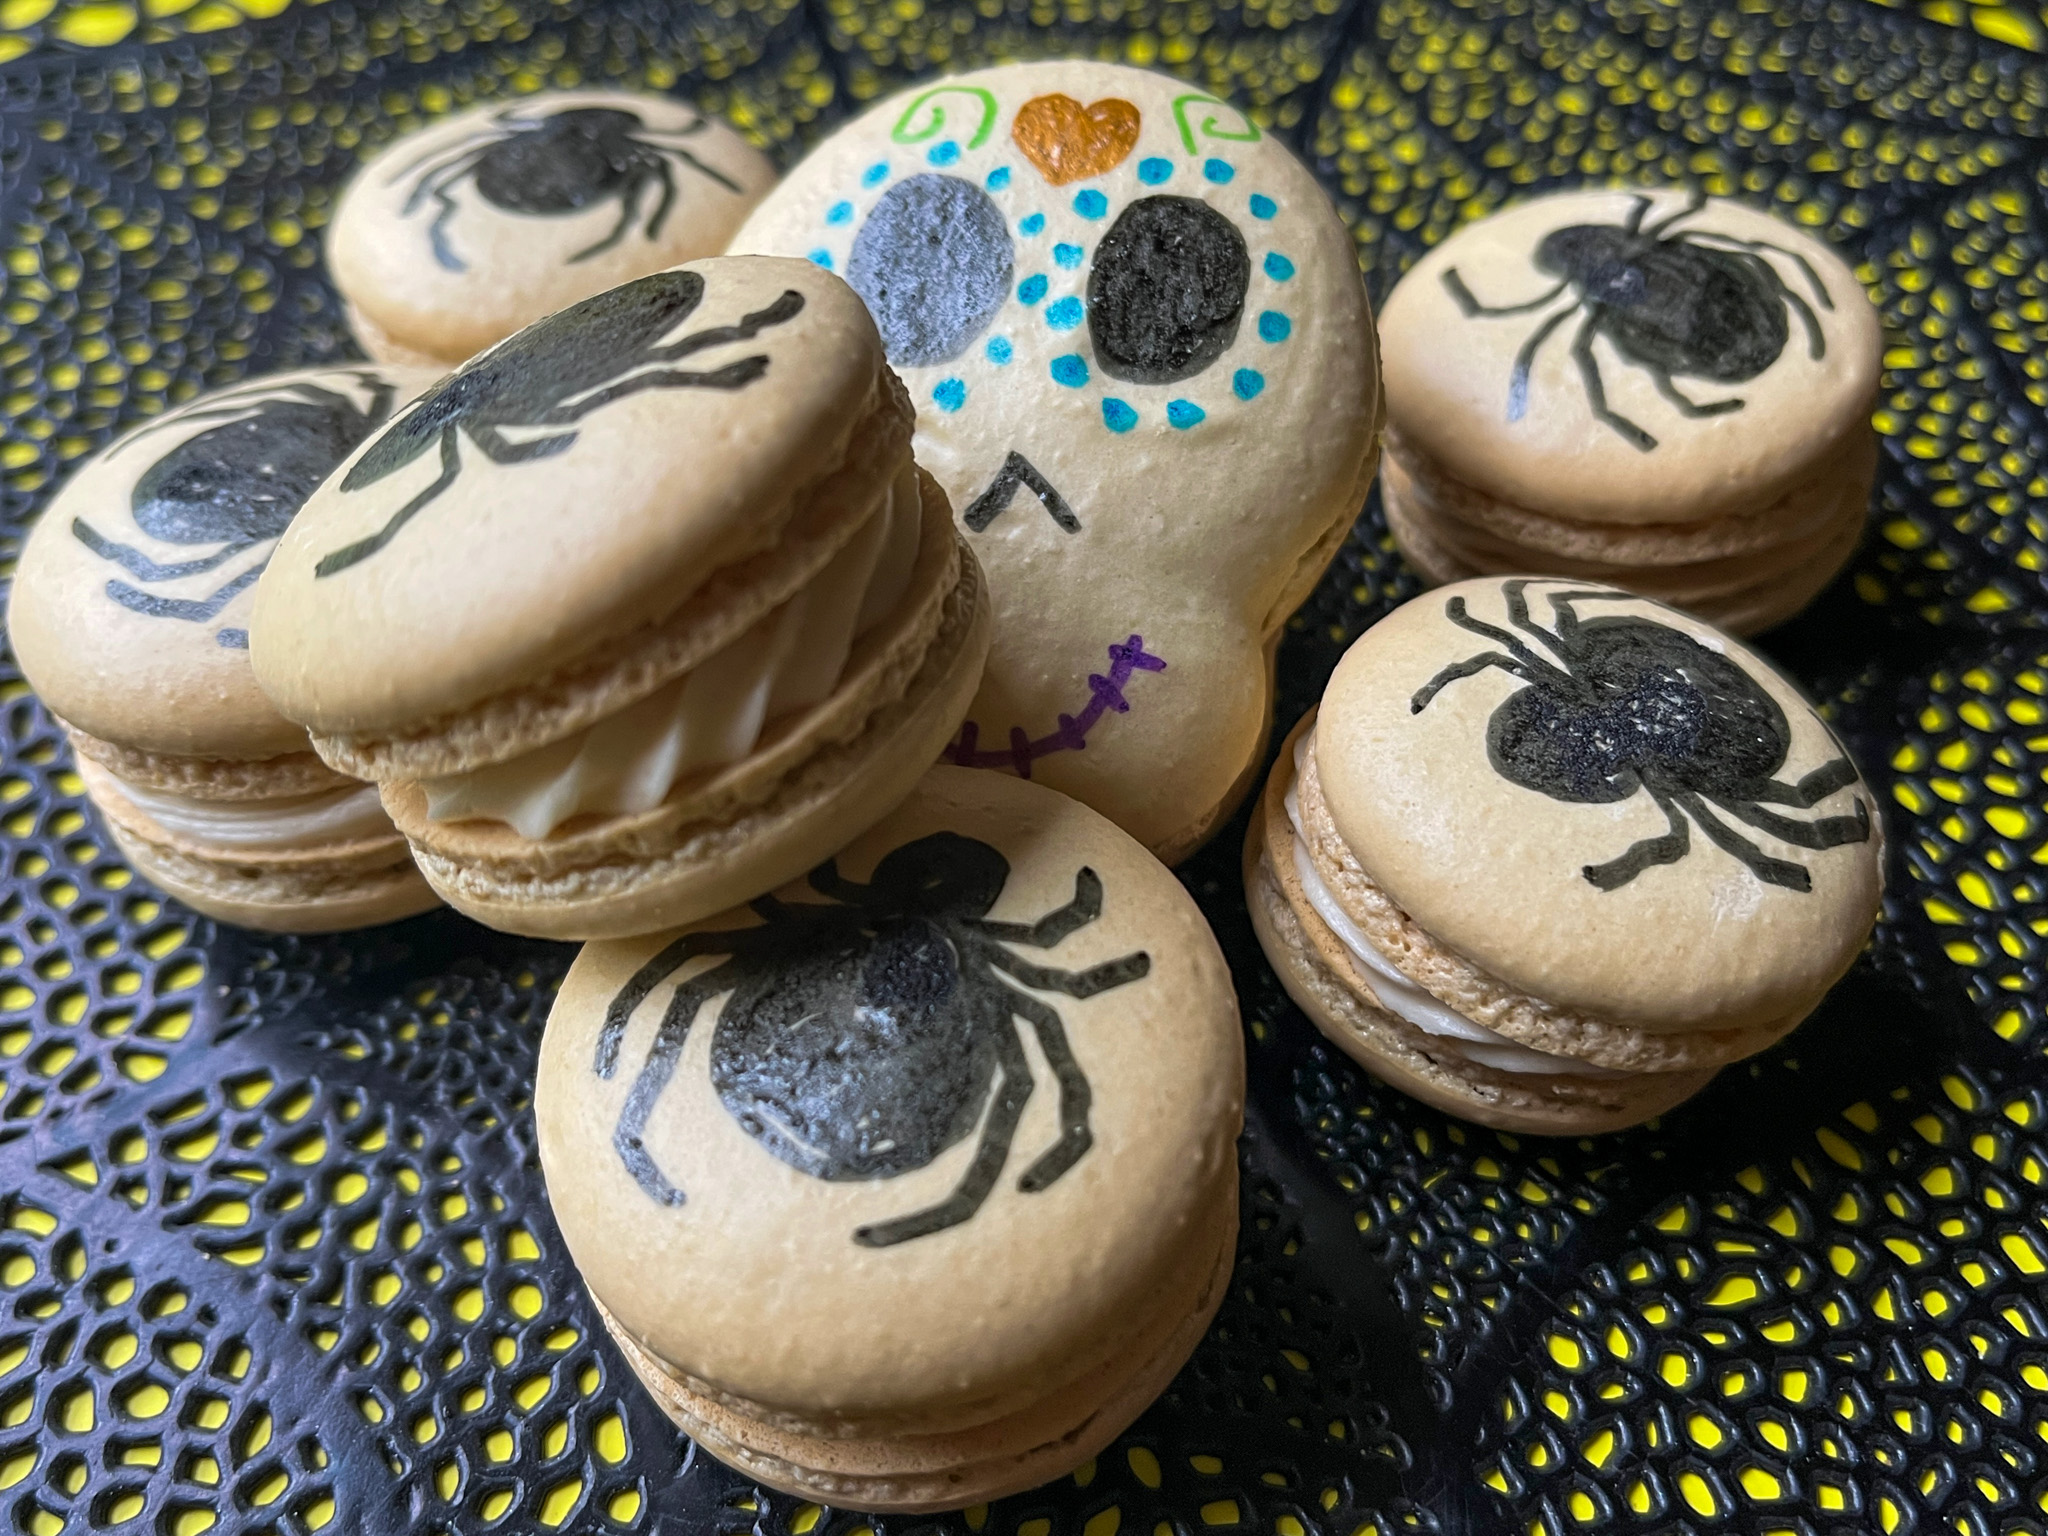
SKULL AND SPIDER MACARONS

The idea for these came from my friend Dorothy, who tagged me on Instagram after seeing this post. I opted for a filling of Caramel Buttercream and Apple Jelly for these scary creatures.

CARAMEL AND APPLE MACARONS
(from the Bewitching Kitchen)

for the shells, use my default recipe.
I dyed the shells with a very small amount of AMERICOLOR CORK

For the filling:
60g butter
120g powdered sugar
pinch of salt
5 soft caramels (Werther’s)
2 tablespoon milk
apple jelly (store-bought is ok)

Pipe the shells in skull shape or round (if you prefer to simplify). Bake them, let them cool, and pair them.

Draw the design of your choice (skull or spider) on the shells.

Make the buttercream: beat the room temperature butter for a couple of minutes. Add the salt and powdered sugar, beat until almost incorporated (mixture will be dry). Microwave the caramels with the milk until very hot, and whisk the caramels to dissolve. Let them cool slightly and add to the buttermilk. Finish creaming everything together, you should not need to add any more liquid, but if necessary, add a few drops of milk to achieve piping consistency.

Add a circle of buttercream to the bottom shell, a little blob of apple jelly in the center, and close the macaron with the top shell. Keep in the fridge for 24 hours before eating.

ENJOY!

to print the recipe, click here


Comments: The idea for the filling came from this post. That is a great site for macaron ideas, by the way. I did not make a template for the skulls, just improvised them starting from a regular circle, so they are not all the same shape, which I think is even better for a spooky bake.


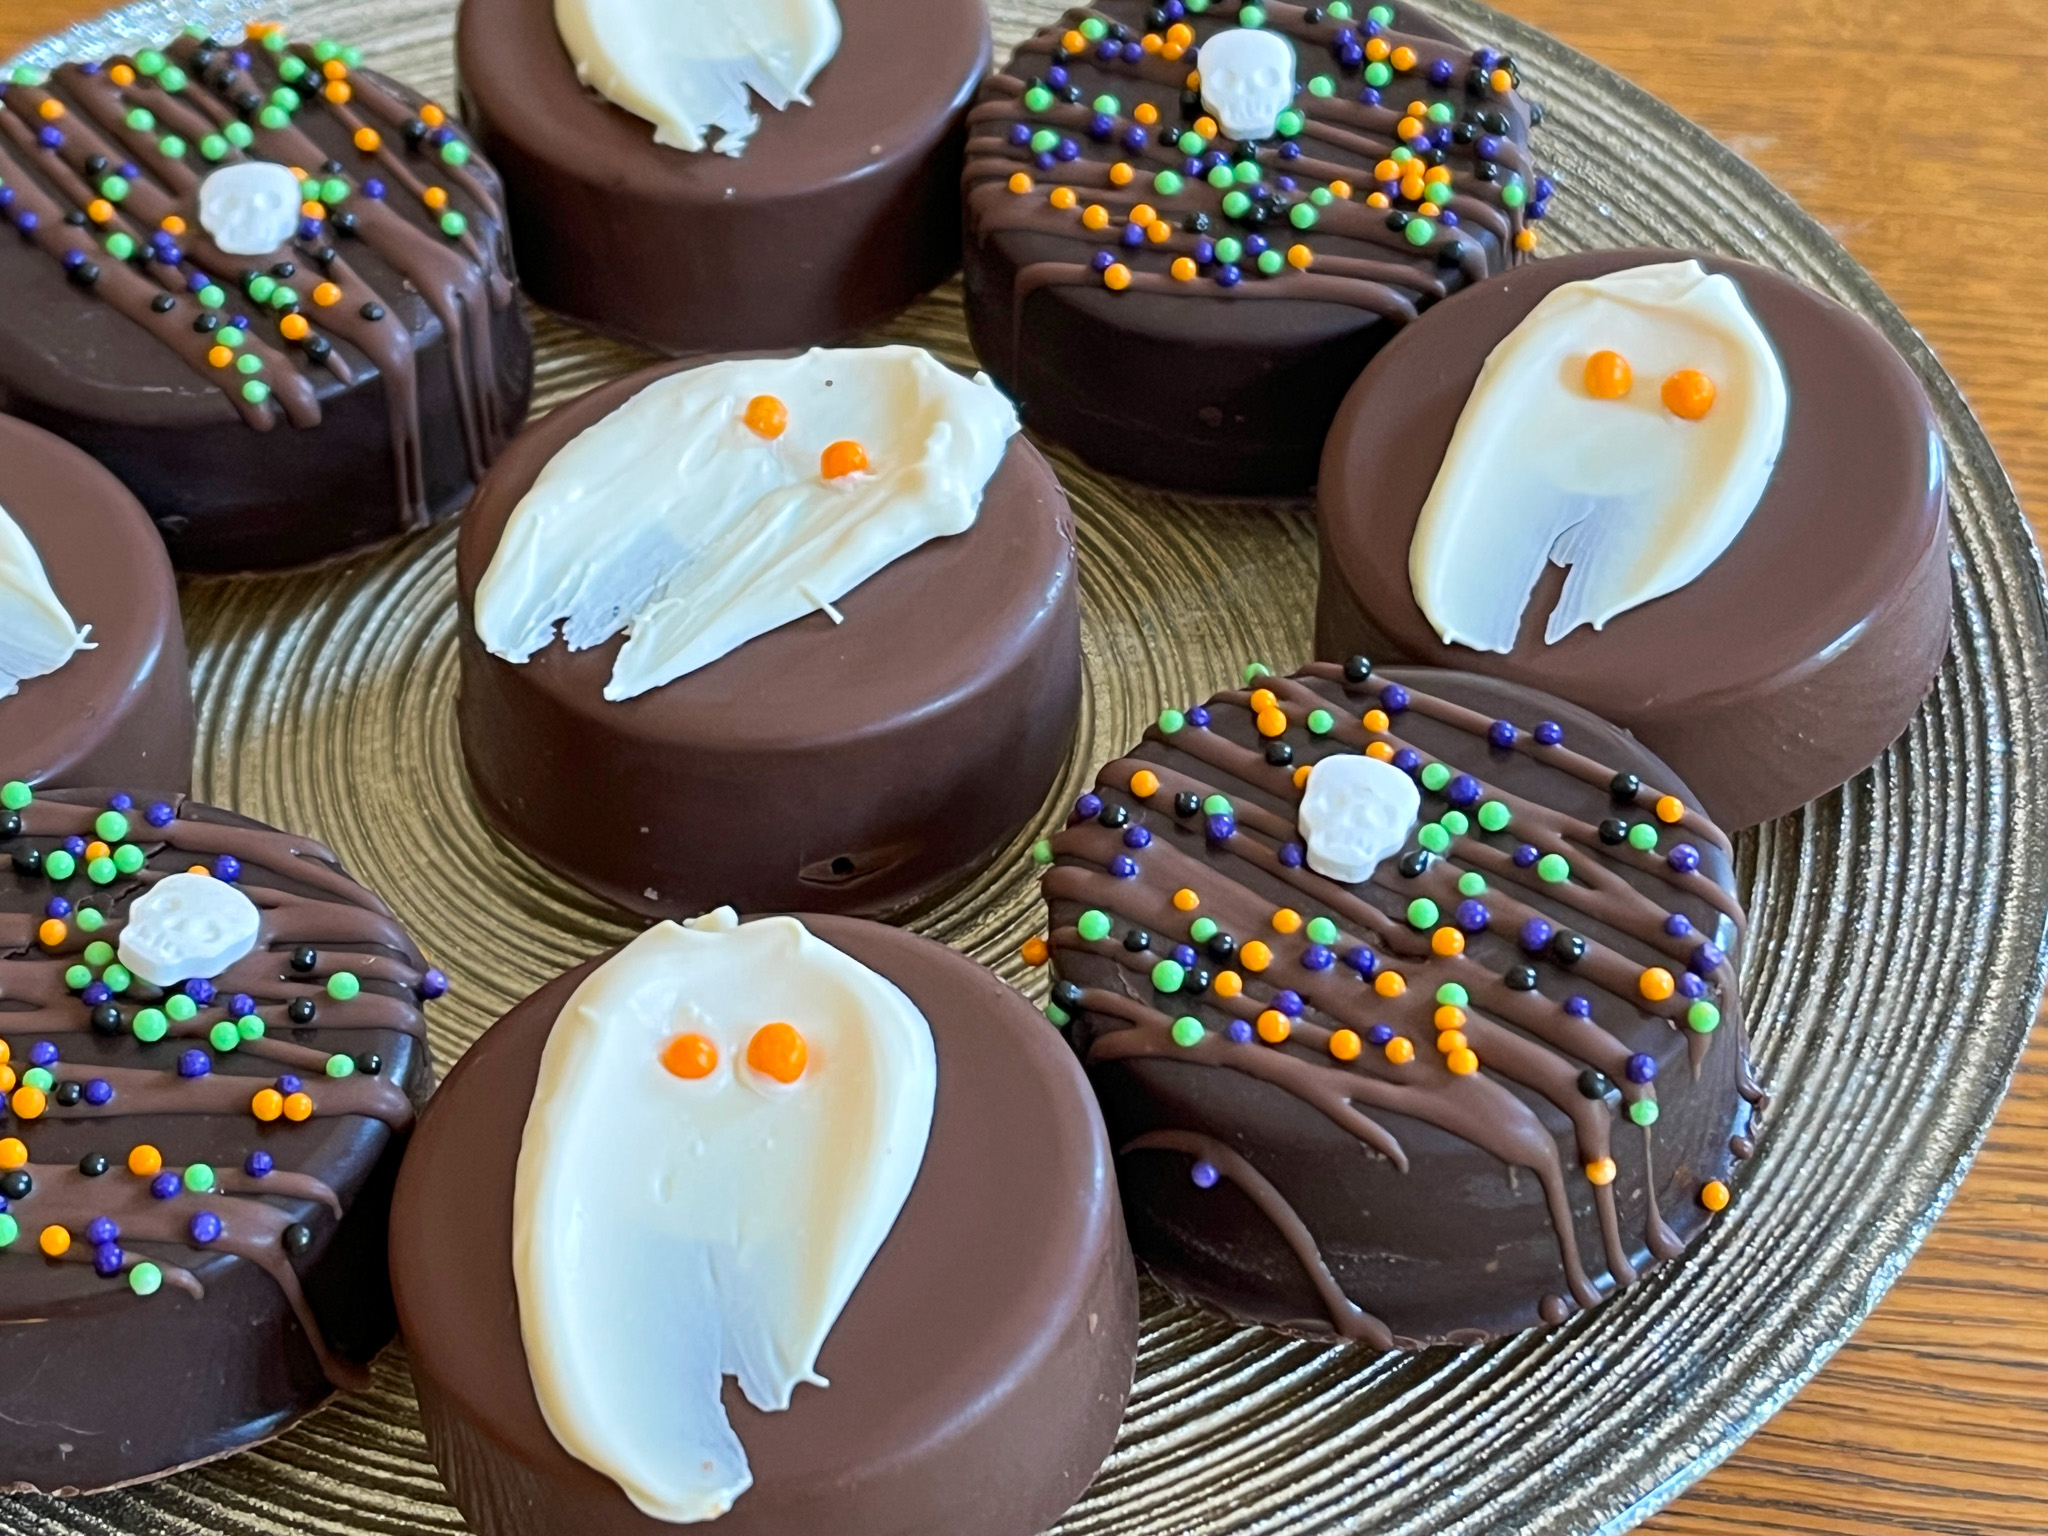
SPOOKY CHOCOLATE-COVERED OREOS

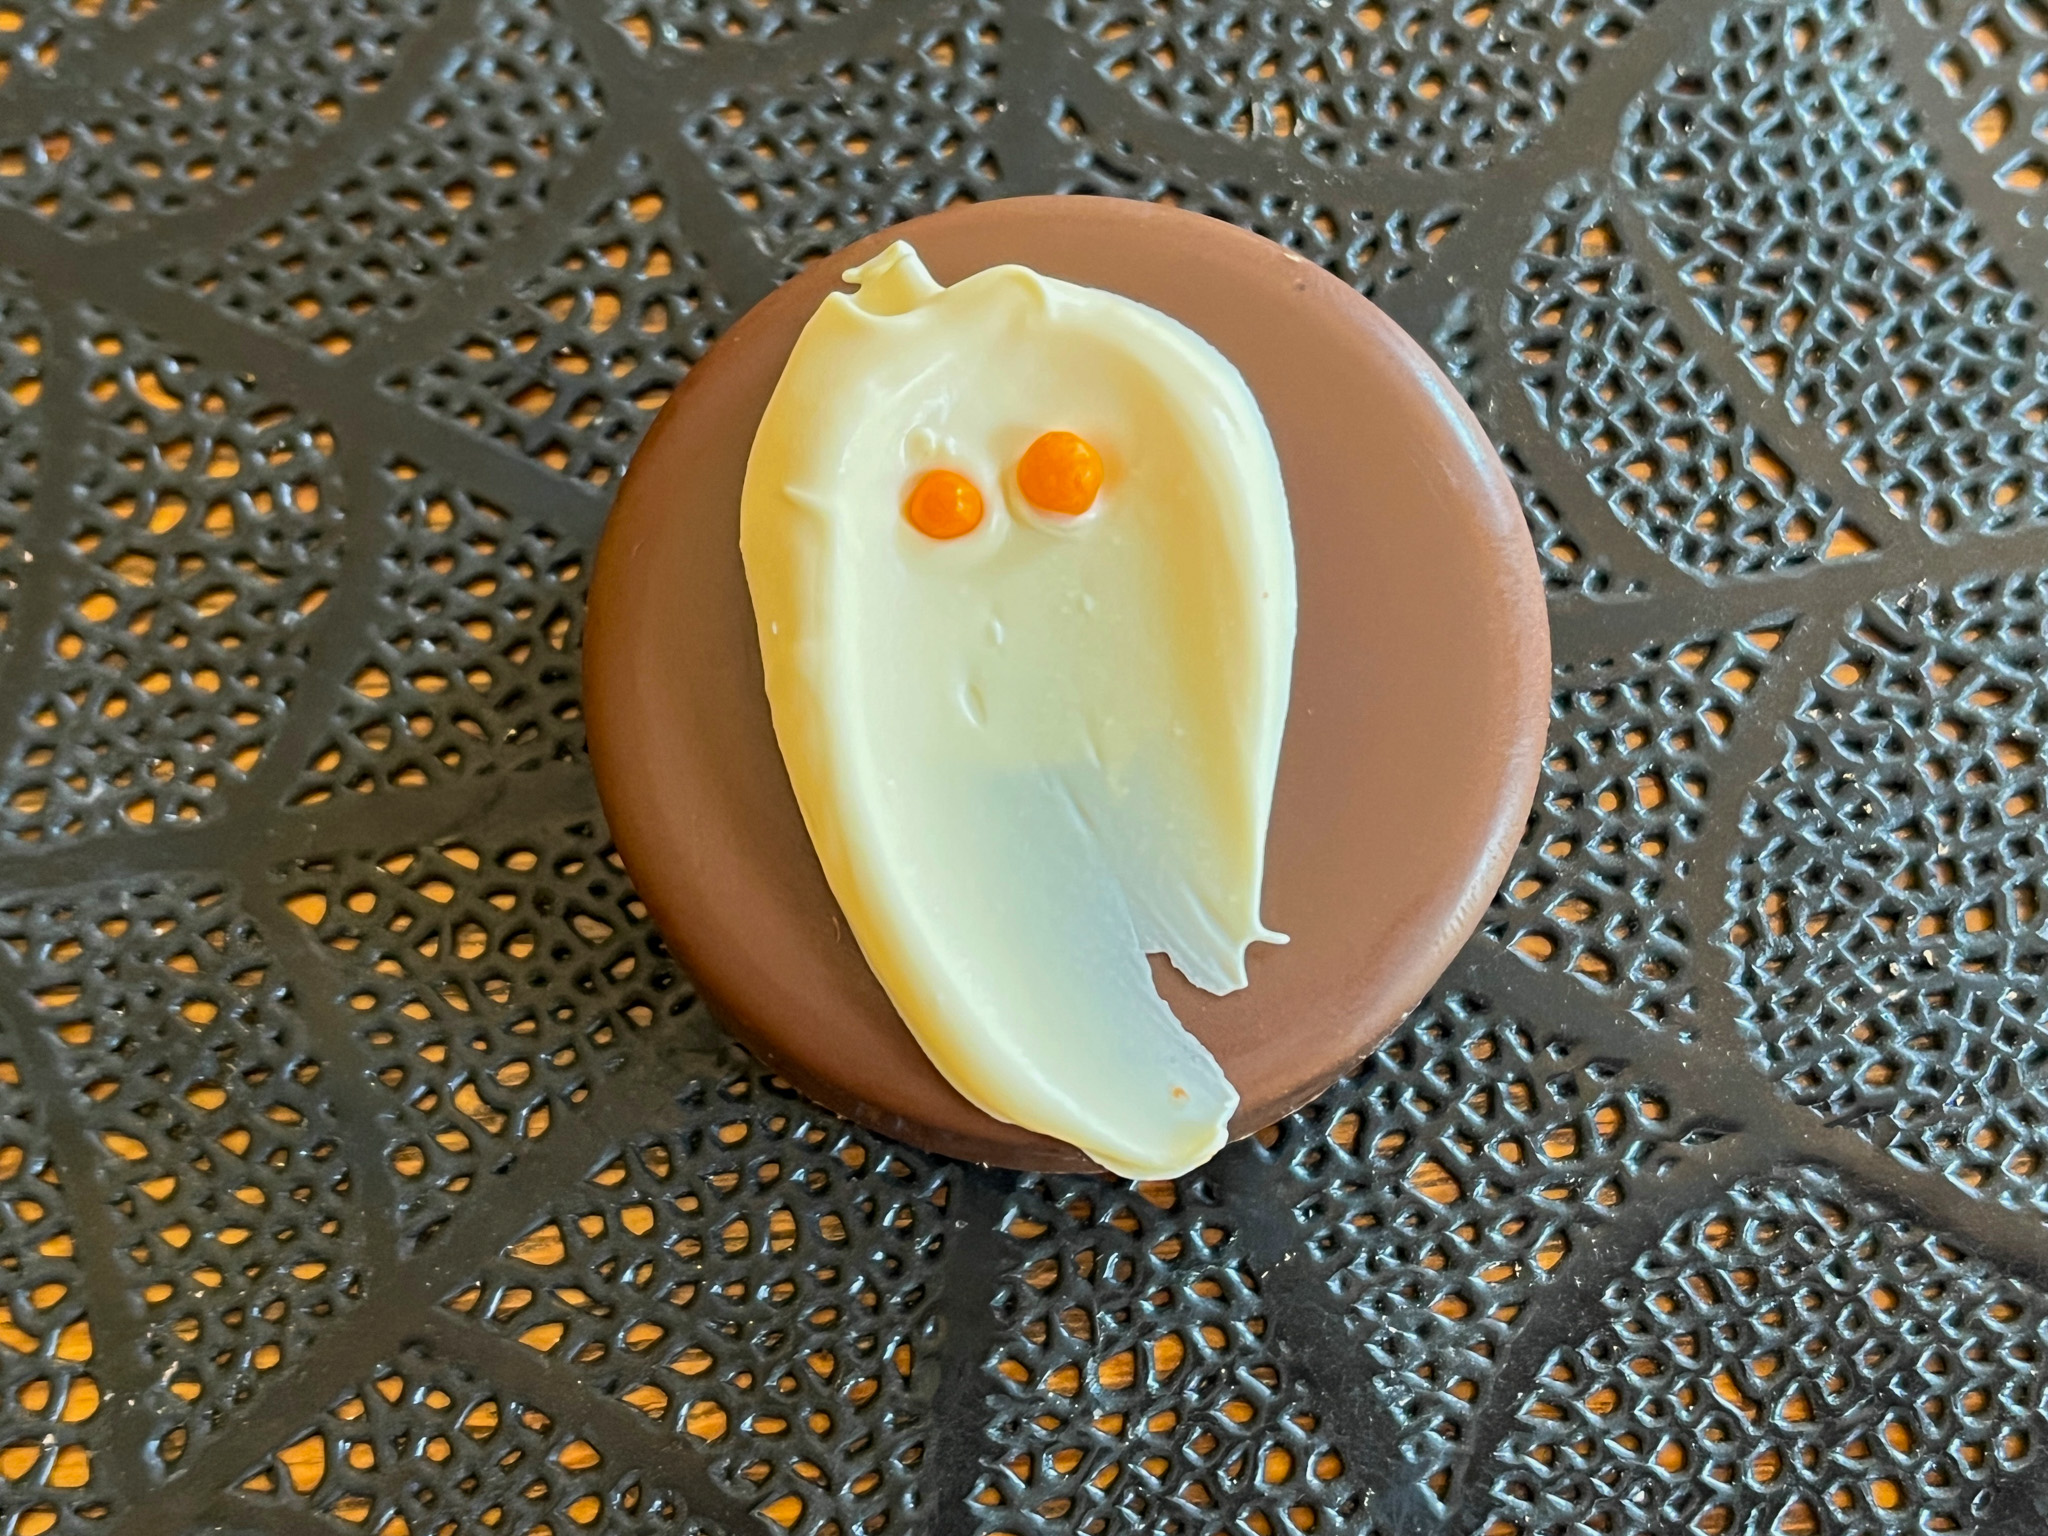
Use your regular mold for covering Oreos and use a contrasting color of chocolate to drizzle and glue sprinkles. The ghost is made with a smear of white compound chocolate on parchment paper, and orange sprinkles for the eyes. Once that is set (within a few minutes), place on the covered Oreo with a tiny amount of melted chocolate.


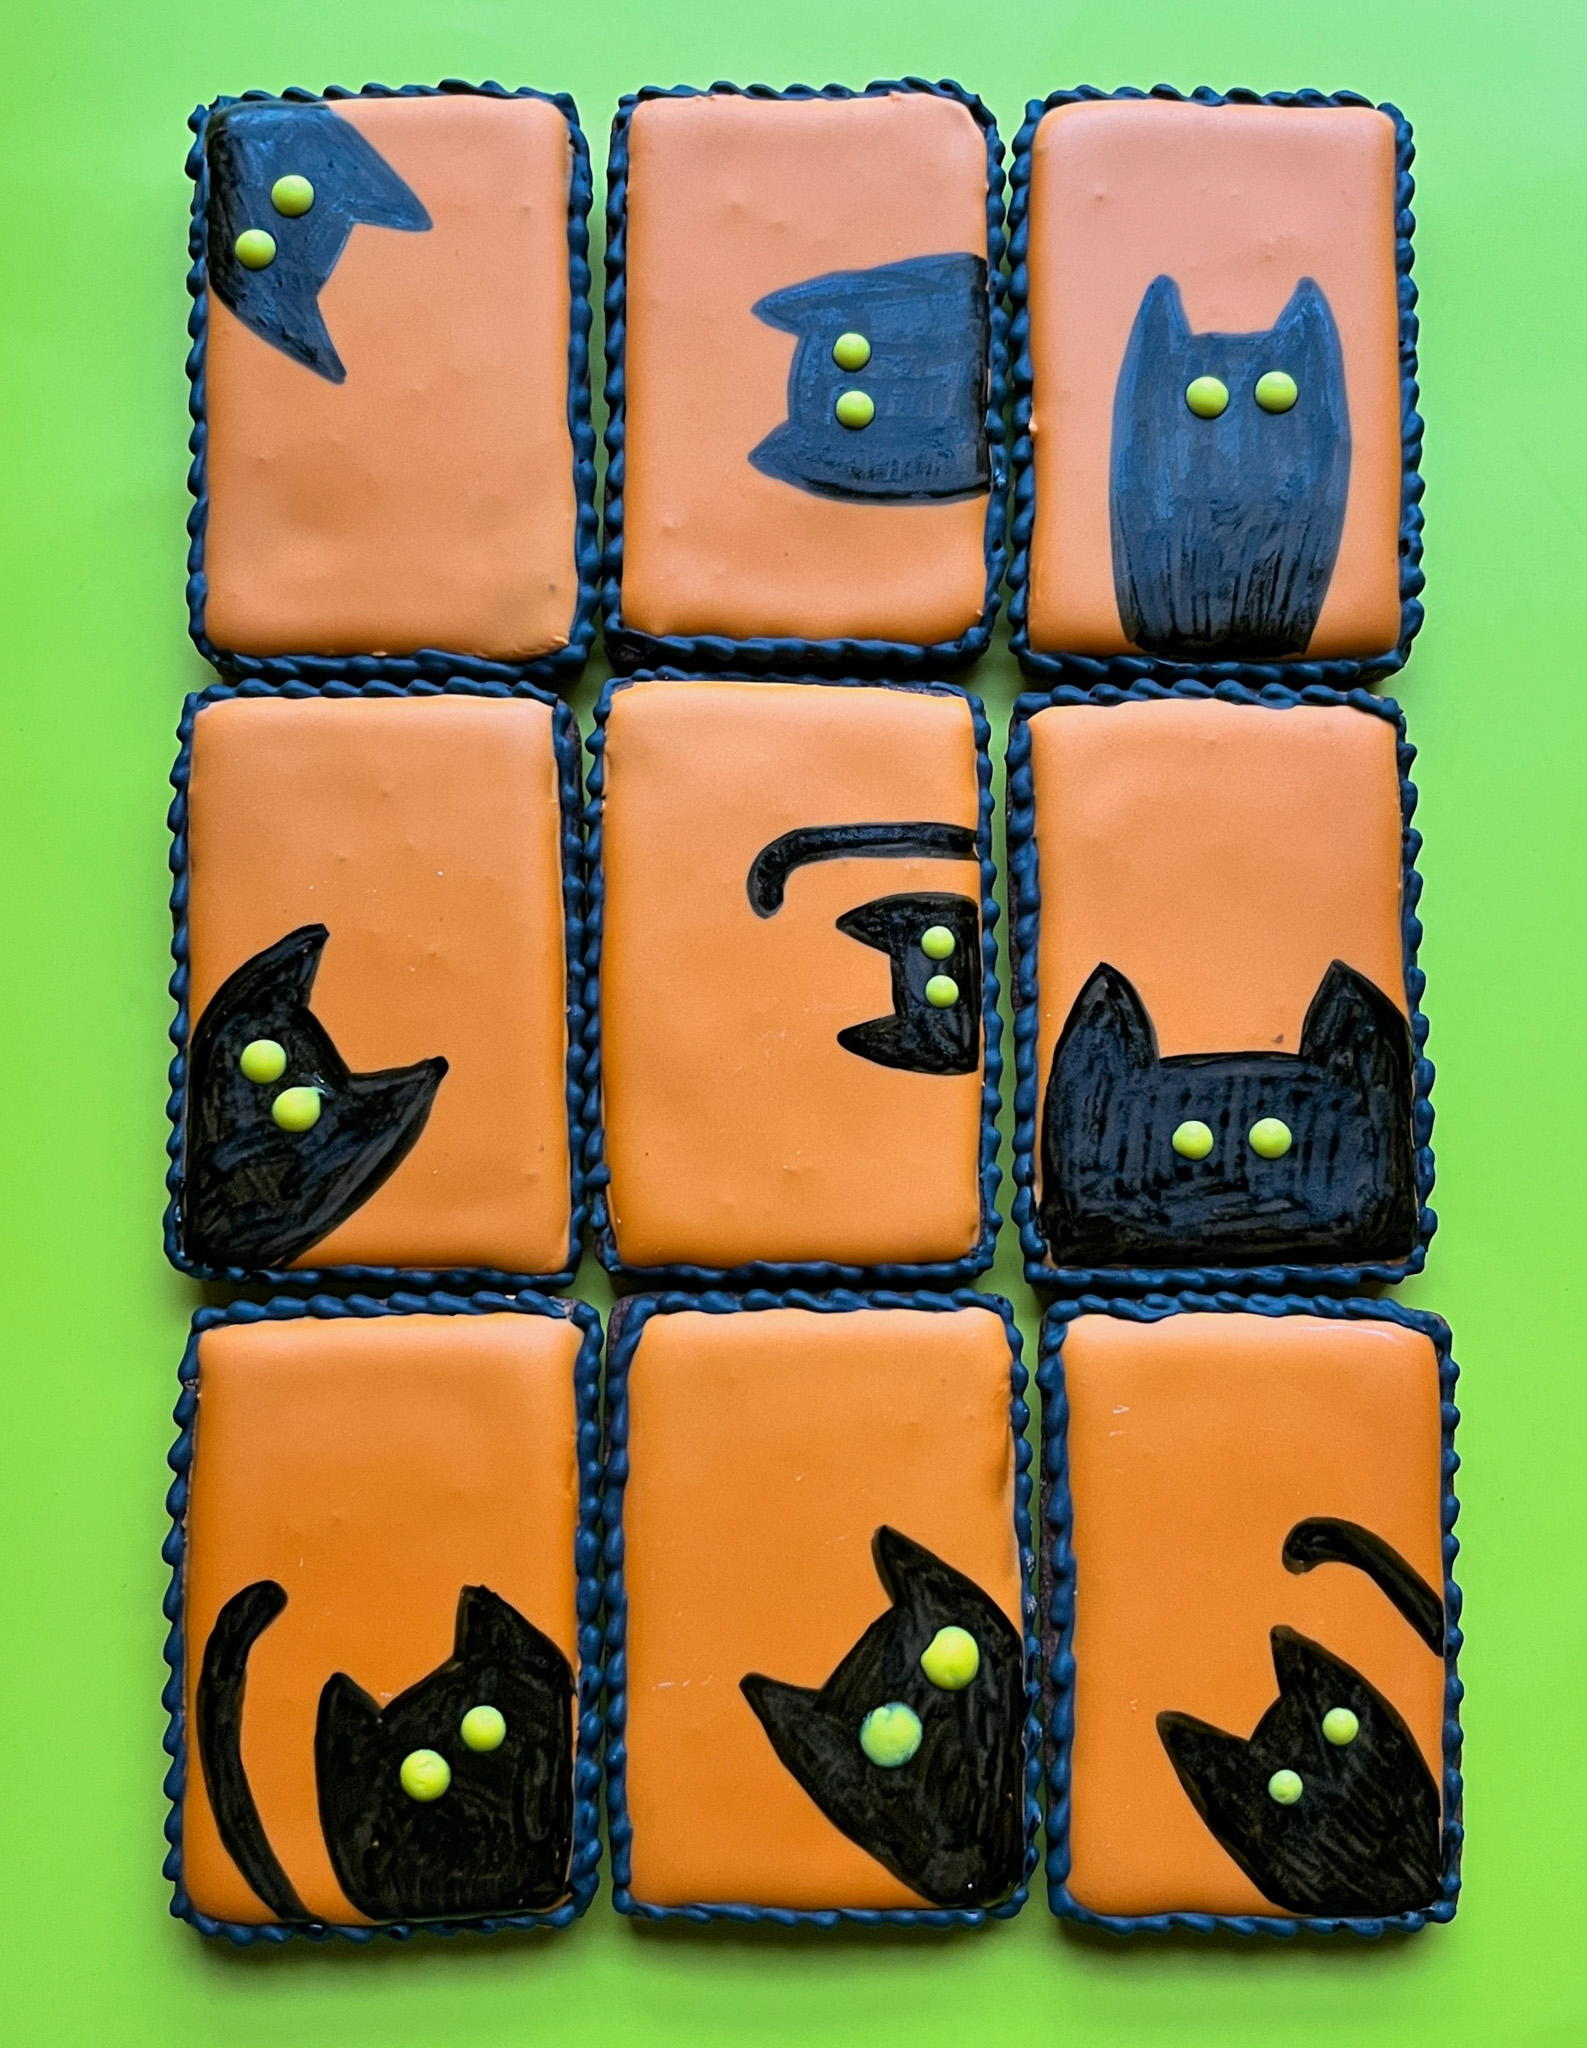
NINE BLACK CATS

These are my default Chocolate-Chipotle cutout cookies, iced with orange Royal icing and painted with Sugarprism. I just did a free-hand drawing, following the design of Kathy Barbro (IG page here).

ONE YEAR AGO: Happy Halloween from my Cookie Blog to You!

TWO YEARS AGO: Incredibly Simple Carrots

THREE YEARS AGO: Sarah Bernhardt’s Cookies

FOUR YEARS AGO: A Really Big Announcement

FIVE YEARS AGO: Stir-Fried Chicken in Sesame-Orange Sauce

SIX YEARS AGO: Monday Blues

SEVEN YEARS AGO: A New Way to Roast Veggies

EIGHT YEARS AGO: Two Takes on Raspberries

NINE YEARS AGO: Spice Cake with Blackberry Puree

TEN YEARS AGO: Own Your Kitchen with Cappuccino Panna Cotta

ELEVEN YEARS AGO: Chicken Parmigiana, the Thriller

TWELVE YEARS AGO: Wild Mushroom Risotto

THIRTEEN YEARS AGO: Tartine Bread:  Basic Country Loaf 

FOURTEEN YEARS AGO:  Pugliese Bread

A BOUQUET OF MACARONS

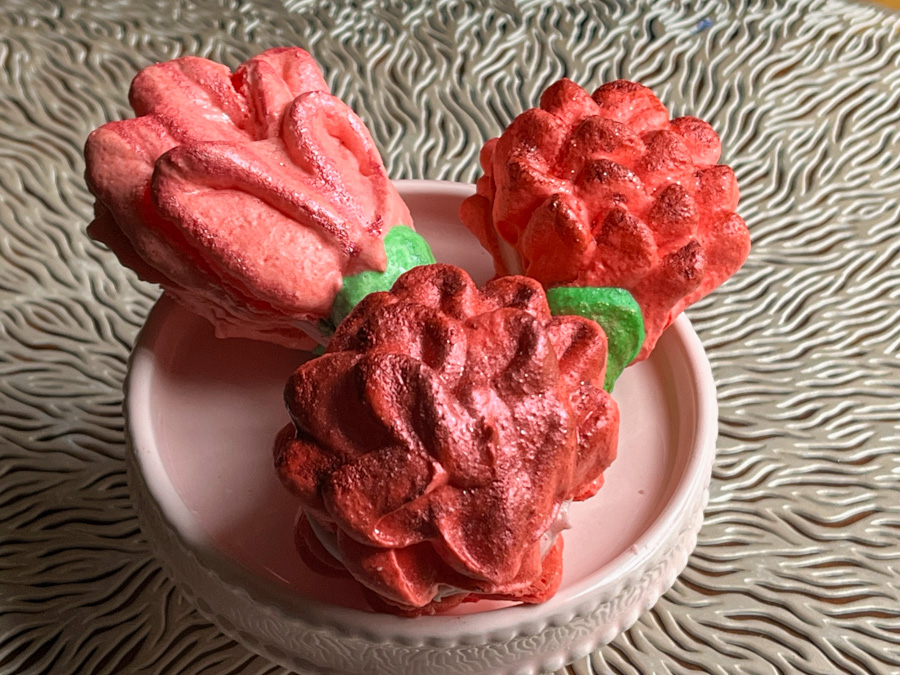
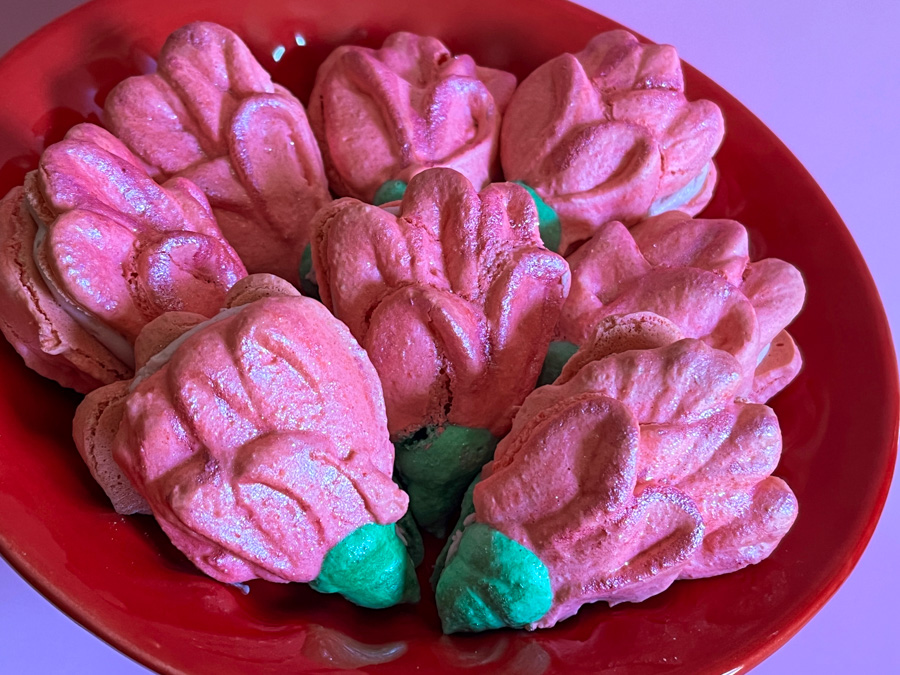
Last month I was minding my own business when my friend Vy sent me a message with a little macaron-design-teaser. This amazing baker – check her page here – shared some carnation macarons that were simply spectacular, and Vy thought I should try to make them (don’t I have great friends????). I resisted for a while, but then decided to go for it. I attempted two floral designs, first using my regular French meringue method, but that did not work well. So I am sharing the exact recipe I used for both, a Swiss-meringue version that is slightly sturdier and performed better to hold shape. The tulip-shape template for piping was from this site. I used it for the larger, pink flowers, the others were free-hand over a circle shape. 


MACARON FLOWERS
(from The Bewitching Kitchen)

100g almond flour
100g powdered sugar
100g egg whites
100g granulated sugar
1/2 tsp vanilla extract
pink, red, green gel food color

Process almond flour and powdered sugar in food processor, about 10 pulses, then pass through a sieve. Reserve.

Bring the sugar and egg whites to the top of a pan with simmering water and whisk until the sugar is fully dissolved and the mixture feels smooth if you rub your fingers into it, 2 to 3 minutes. Immediately transfer it to a KitchenAid bowl and whisk on medium-high until the meringue form solid peaks that fold just slightly as you hold the whisk up. This will take 8 to 12 minutes. Add vanilla. Add the almond flour/powdered sugar mixture, put the blade beater and mix for a few seconds. Mix a little more by hand, remove a small amount do dye green, and dye most of the meringue pink or red. Proceed to do the macaronage but do not take it as smooth as normally for regular macs, you need to hold it back so that the mixture is thicker and holds its shape when piped.

Place the red meringue in a piping bag fitted with a leaf icing tip (104 works well). Place the green meringue in a piping bag fitted with a small round tip, maybe 1/4 inch.

Pipe petals in the shape you desire, then a little green stem. Do not bang the sheet. Let them fully dry until the surface is not moist at all. These need to dry more than round shells, or they will explode. Some cracks will happen, but they usually do not interfere too much with the design.

Fill the shells with the filling of your choice. I used raspberry buttercream (from this post, but regular butter instead of vegan).

Leave the macarons in the fridge for 24 hours before serving.

ENJOY!

to print the recipe, click here

Comments: The larger, pink version had a slight curve in the shape, so it is important that you print the template in two orientations, and then pipe half the shells in one particular way. The smaller, red flowers were symmetrical, so no need to worry about that.

The more you hold back the macaronage, the sharper the shape will be, and I could have made my batter slightly thicker, but it is hard to judge when to stop. I think it was a good compromise and I did not have that many cracks or explosions. All the shells were painted with a little luster powder and vodka but that step is of course optional. It is hard for me to leave cookies alone, as you know…..

If you enjoy making macarons, consider trying some alternative ways to pipe the batter, there are so many possibilities, I am thinking of autumn leaves next, so stay tuned!

ONE YEAR AGO: Chocolate-Hazelnut Tartlets

TWO YEARS AGO: Turkey Taco Salad

THREE YEARS AGO: Cheese and Pesto Emmer Roll-ups and Elaine’s Cookbook Review

FOUR YEARS AGO: Mango-Hazelnut Entremet Cake

FIVE YEARS AGO: Lebanese Lentil Salad and a Cookbook Review

SIX YEARS AGO: Cottage Loaf

SEVEN YEARS AGO: Sourdough Loaf with Cranberries and Walnuts

EIGHT YEARS AGO: Sichuan Pork Stir-Fry in Garlic Sauce

NINE YEARS AGO: Our Green Trip to Colorado

TEN YEARS AGO: Ditalini Pasta Salad

ELEVEN YEARS AGO: Celebrate Wednesday with a Thai Seafood Curry

TWELVE YEARS AGO:  Post-workout Breakfast

THIRTEEN YEARS AGO: Semolina Barbecue Buns

FOURTEEN YEARS AGO: Lavash Crackers

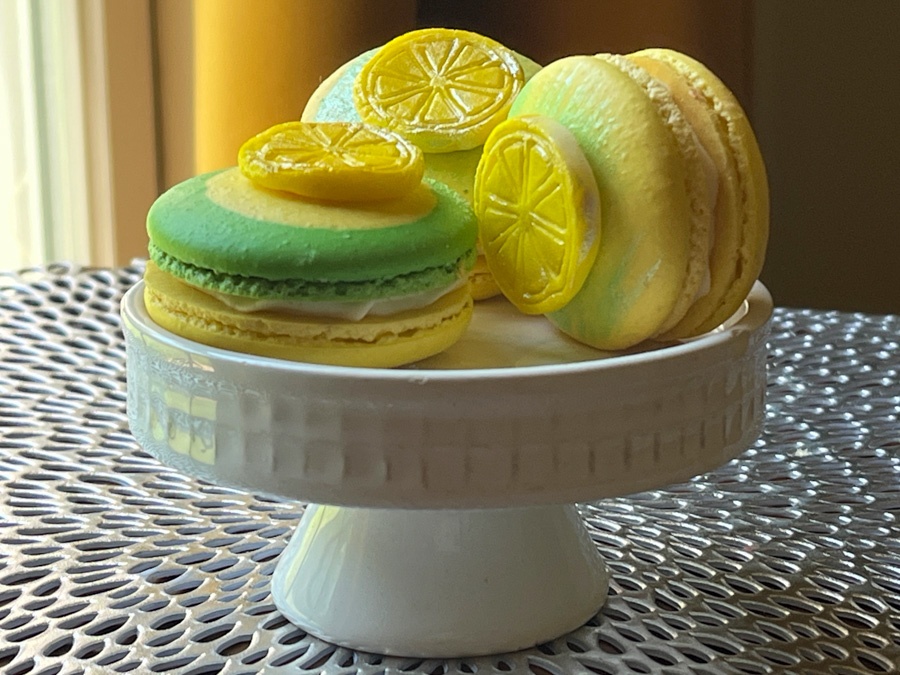
LEMON MACARONS

Nothing new in the recipe for the macaron shells but I am super thrilled to share the filling. Curds in general are a great match for the sweetness of these babies, but they have a major drawback: their moisture tends to destroy the shells, so usually they are best if not stored for more than a couple of days. But this curd recipe is different: it has lower moisture and won’t ruin the shells. I have tried and it delivers what it promised. It was designed by one of the greatest macaron bakers out there, Mimi. Check her very detailed post about her recipe here. I modified it slightly by using the microwave to cook the curd. I’ve been making curd in the microwave for years, to me it is easier and never fails. But you need to try with your own microwave and tweak the power and timing. Once that is done, you will love the method…


LEMON MACARONS
(filling slightly modified from Indulge with Mimi)

for macaron shells, use this recipe

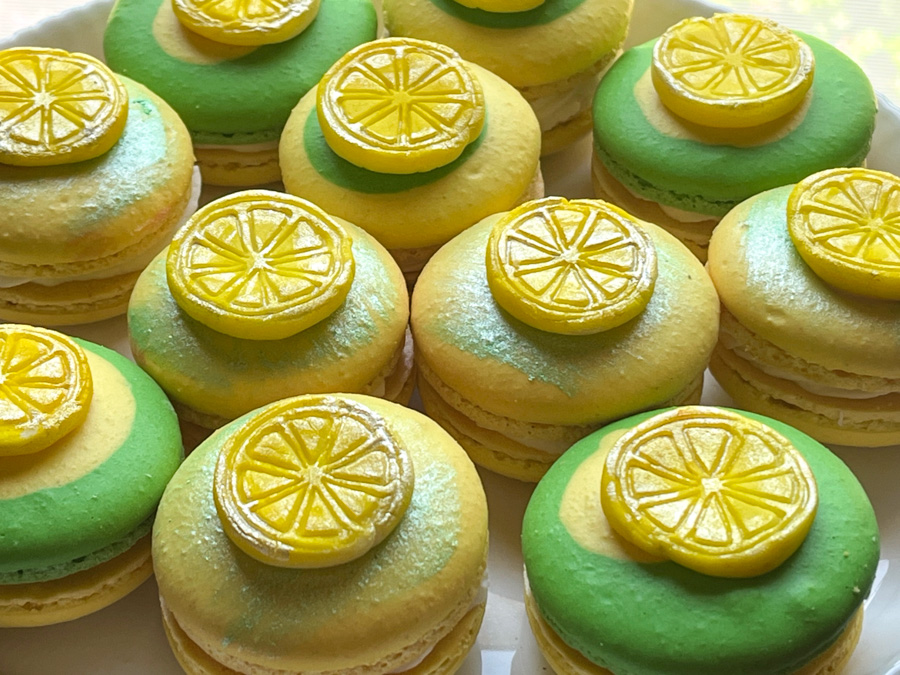
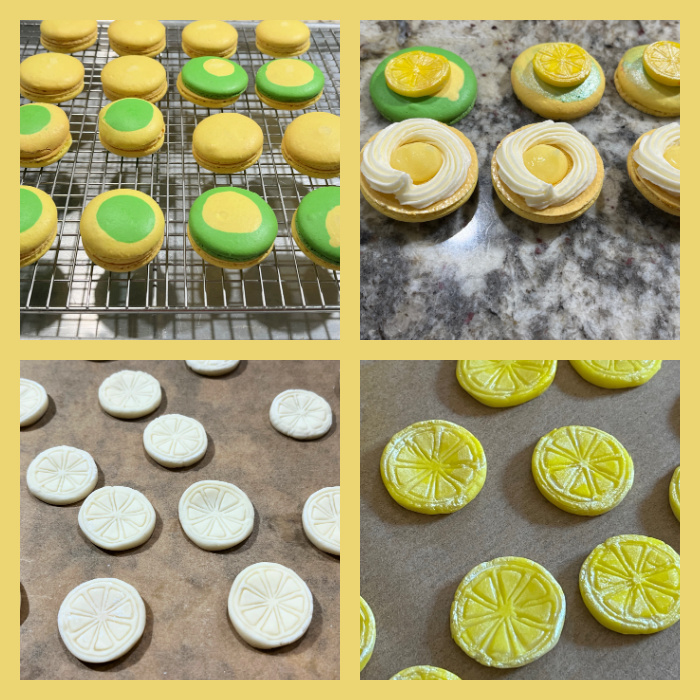
Divide the batter in two, dye one portion yellow, one portion green. Pipe shells starting with one color and piping the other in the center.

for the curd:
zest of two lemons
76 grams lemon juice
2 eggs
50 grams butter, unsalted
180 grams granulated sugar

for the buttercream:
60 grams butter
160 grams powdered sugar
2 tablespoons lemon curd
heavy cream to adjust consistency, if needed

Optional decoration: fondant lemon slices, painted with airbrush and pearl dust.

Make the curd: cream butter and sugar together until incorporated and lighter in color. Add the eggs and beat until incorporated, then add the lemon juice and whisk well. Transfer the mixture to a microwave-safe bowl and cook at 80% power for about 4 and a half minutes, stopping to stir gently every 45 seconds or so. The temperature should reach 180F to 185F. Remove from heat, immediately add the lemon zest and pass through a sieve to have a very smooth curd. Let it cool to room temperature with a plastic wrap touching the surface. Transfer to the fridge until needed for the macarons. It is perfect making one day in advance.

For the Lemon Buttercream: Use a hand-held electric mixer and whisk the butter until creamy. Add the other ingredients except the heavy cream, and whisk until creamy and smooth. If needed, add a bit of heavy cream to loosen the mixture.

Pair shells of the same size and add a center of lemon curd, with a circle of buttercream all around it. Glue a lemon slice on top of the macaron using Royal icing. Keep the macarons in the fridge for 24 hours before serving.

ENJOY!

to print the recipe, click here

Comments: I cannot tell you how much I loved these! In part because curd has been such a disappointment when coupled with macs. Yes, I know one can paint some chocolate on the shell as a barrier but I absolutely hate doing that. A very cumbersome step that I rather avoid. These turned out very lemony, super fresh, and NO effect on the shells. Happy Dance ON! I hope you give it a try, if you are not sure about the microwave step, just follow Mimi’s directions on her blog. And while you are there, browse through her amazing productions!

ONE YEAR AGO: Thai Chicken with Peanut Sauce

TWO YEARS AGO: Baharat Flower Sourdough

THREE YEARS AGO: Biscoitinhos de Canela

FOUR YEARS AGO: Salmon Tacos

FIVE YEARS AGO: The Chignon

SIX YEARS AGO: Rack of Lamb Sous-Vide with Couscous Salad

SEVEN YEARS AGO: Focaccia with Grapes, Roquefort and Truffled Honey

EIGHT YEARS AGO: Moroccan Carrot Dip over Cucumber Slices

NINE YEARS AGO: White Chocolate Macadamia Nut Cookies

TEN YEARS AGO: Cilantro-Jalapeno “Hummus”

ELEVEN YEARS AGO:A Moving Odyssey

TWELVE YEARS AGO:Hoegaarden Beer Bread

THIRTEEN YEARS AGO:
 
Ancho-Chile Marinade: Pleased to Meat you!

FIESTA BAKES FOR CINCO DE MAYO

A small collection of goodies, all inspired by a Mexican fiesta… Cupcakes, Chocolate-Chipotle Cookies, Macarons (filled with Mexican chocolate ganache), and Chocolate-covered Oreos.

FIESTA CUPCAKES

Any vanilla cupcake recipe (or chocolate) will work. Refer to this post for the buttercream, which was divided in two unequal portions: a larger portion dyed pink, and a smaller portion dyed orange. Then, a petal tip like 102 was used to add the icing in layers, as shown below. Any combination of colors will work, this one seemed appropriate for the Cinco de Mayo theme.


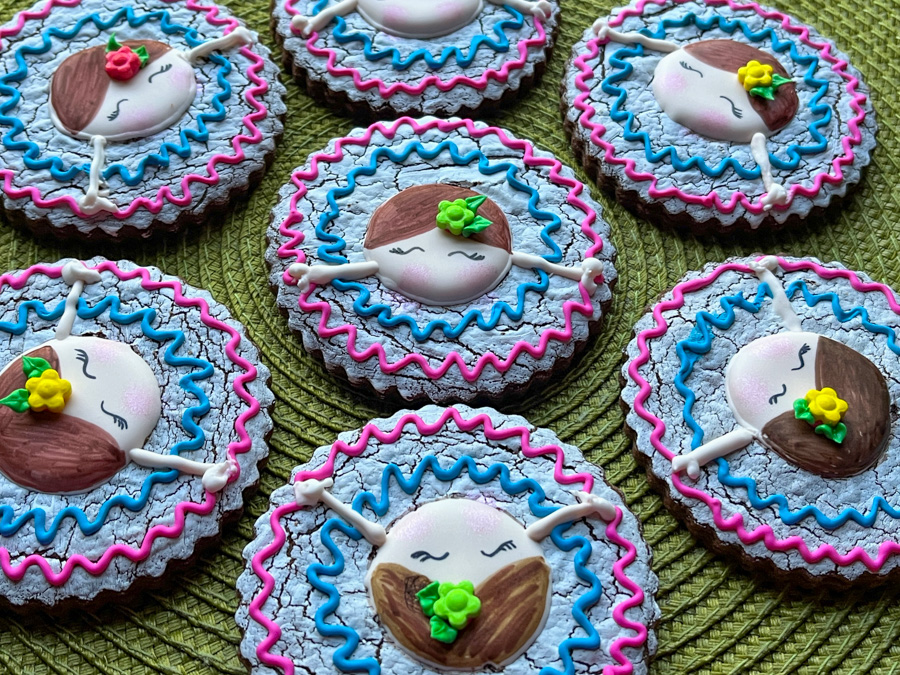
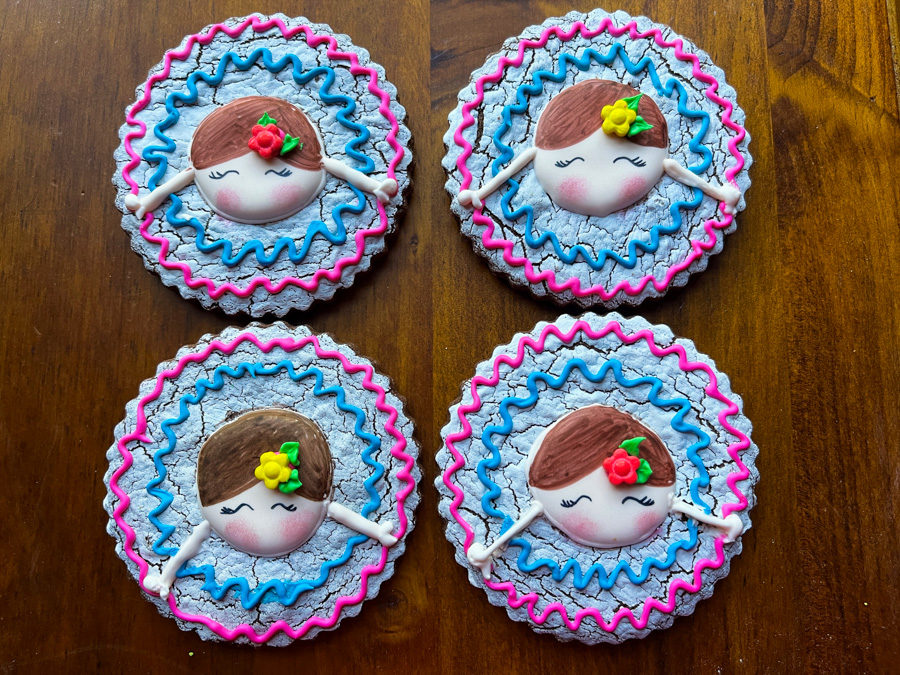
CHOCOLATE-CHIPOTLE COOKIES

I am so smitten by these! Not at all complicated to put together, start with your favorite chocolate cookie recipe (mine is definitely this one), paint with Americolor white before baking to get the crackled effect. Then use Royal icing dyed with flesh tone or ivory to pipe a round for the face. Use any colors you want to make the wavy decorations. Once that sets, you can paint the face and hair, add the arms, and you are done. You can see the steps below.

They make for a real fun set, and will please those who prefer a modest amount of icing on their cookies.

Many colors will work, and I also made a batch with sugar cookies instead of chocolate, with a pink and orange skirt.


MEXICAN CHOCOLATE MACARONS

For these macs, I used my default French meringue method (recipe here), divided the batter into three portions, a large pink, a medium size yellow, and a smaller orange. Piped a circle of pink, went with yellow in the center, then orange to form three concentric circles. Baked the shells and decorated with Royal icing. The ganache was made with


4 oz semisweet chocolate
1/4 cup heavy cream
1/2 tsp cinnamon
a pinch of cayenne pepper


Once the ganache cooled, I whipped it with a handheld mixer for a minute or so. You cannot go too long or the whole thing will turn grainy. You just want to incorporate some air into the ganache.


FIESTA CHOCOLATE COVERED OREOS

These are so much fun to make! I used chocolate transfer sheets cut to fit the inside of the mold, as described in this post. I love this colorful pattern, that would look good also on a white chocolate background.

HAPPY CINCO DE MAYO!

ONE YEAR AGO: Thai-Meatballs Over Wilted Bok-Choy

TWO YEARS AGO: Asparagus with Gunpowder Masala

THREE YEARS AGO: The Home Bakers Collective, April Project

FOUR YEARS AGO: Asian-Style Eggplant Meatballs

FIVE YEAR AGO: Uzbek Flatbread

SIX YEARS AGO: First Monday Favorite – Black Sesame FOUR

SEVEN YEARS AGO: Chocolate Orange Mini-Cakes

EIGHT YEARS AGO: In My Kitchen, May 2015

NINE YEARS AGO: P90X3, a Review of Tony Horton’s Latest Fitness Program 

TEN YEARS AGO: Pasta and Mussels in Saffron Broth

ELEVEN YEARS AGO: Triple Chocolate Brownies

TWELVE YEARS AGO: Shanghai Soup Dumplings

THIRTEEN YEARS AGO: Bite-sized Chocolate Pleasure

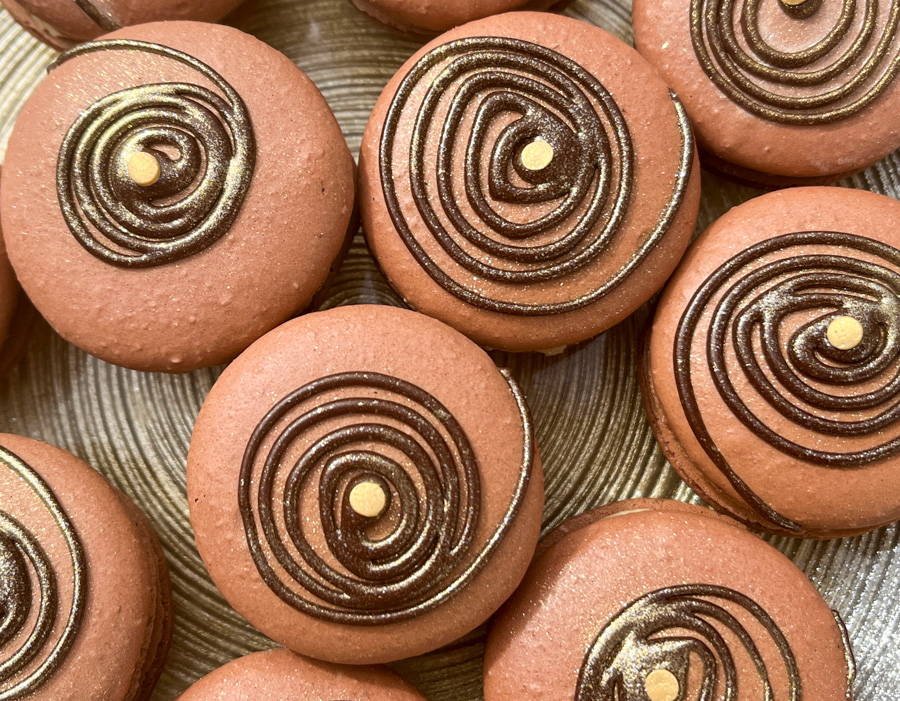
CHOCOLATE PEANUT BUTTER MACARONS

If you follow my cookie blog, maybe you’ve read a recent post in which I played with Chocolate Royal icing? I used fat-free cocoa powder (click here to get some) and they worked extremely well not only in icing but as I show today, to make cocoa-flavored macaron shells.


CHOCOLATE PEANUT BUTTER MACARONS
(adapted from this post)

For the shells:
200g Icing/powdered sugar
115 g ground almonds/almond meal
7g fat-free cocoa powder
115 g egg whites at room temperature (approx. 4 eggs)
1/8 tsp of cream of tartar (optional)
100 g granulated sugar
¼ tsp vanilla paste or extract
1 drop brown food gel
1 drop red food gel

Line 3 heavy baking sheets with parchment/baking paper or Silpat mats. Layer the powdered/icing sugar, ground almonds/almond meal, and cocoa powder in a food processor. Pulse until the mixture looks like fine meal, about 12 pulses. Pass through a sieve and transfer to a small bowl or to a sheet of parchment/baking paper. Set aside.

Place the egg whites and cream of tartar in the bowl of a stand mixer fitted with the whisk attachment. Make sure that the bowl and the whisk are impeccably clean. Starting on medium speed, whip the whites with the cream of tartar until they look like light foam. The whites should not appear liquid. The foam will be light and should not have any structure.

Slowly rain in the granulated sugar in five additions, trying to aim the stream between the whisk and the side of the bowl. Turn the speed up to high. Continue to whip the meringue until it is soft and shiny. It should look like marshmallow creme (marshmallow fluff). Add the vanilla. Whip the egg whites until the mixture begins to dull and the lines of the whisk are visible on the surface of the meringue. Add the drops of food color and continue whisking. Check the peak. It should be firm. Transfer the whites to a medium bowl.

Fold in the ground almond/almond meal mixture in two increments. Paint the mixture halfway up the side of the bowl, using the flat side of a spatula. Scrape the mixture down to the center of the bowl. Repeat two or three times, then check to see if the mixture slides slowly down the side of the bowl. Put the mixture in a piping bag fitted with your choice of piping tip (round, ¼ or ½ inch in diameter or 6 – 12 mm). If you don’t have a macaron mat, draw circles on baking/parchment paper about 2inches/5cm in diameter & turn the paper over before placing on the baking sheets. Pipe shells, I like to count numbers in my head and use the same count for each shell so they end up similar in size.

I pipe inside the circles to about 1 ¾ inches/4.5cm but you can go to 1 ½ inches (3.8cm) & the macarons will spread & fill the circle while drying.

Slam each sheet hard four to six times on the counter/worktop. Let the unbaked macarons dry until they look dull but not overly dry. Drying time depends on humidity. In a dry climate, the macarons can dry in 15 to 20 minutes; in a humid climate, it can take 35 to 40 minutes.

While the macarons are drying, heat the oven to 300 F (150 C/130C Fan oven/Gas Mark 2). Bake one sheet at a time on the middle rack. Check in 11 minutes. If the tops slide or move (independently of the ‘feet’ when you gently twist the top), then bake for 2 to 3 more minutes. Check one or two. If they move when gently touched, put them back in the oven for 1 to 2 more minutes until they don’t move when touched. Let the macaroons cool for 10 minutes before removing from the pan. The macarons should release without sticking.

Assemble the macarons: find two macarons similar in size and add a good amount of filling to the bottom of one of them. Place the other on top and squeeze gently to take the filling all the way to the edge. Store in the fridge for 24 hours for perfect texture.

PEANUT BUTTER BUTTERCREAM

65g smooth peanut butter (Jiffy is fine)
50g cream cheese, room temperature
30g butter, room temperature
250g powdered sugar
milk or heavy cream to adjust consistency, if needed

Place the peanut butter, cream cheese, and butter in the bowl of an electric mixer. Cream until light, about 2 minutes. Add the powdered sugar and whisk on low-speed. Once the powdered sugar is incorporated, increase the speed to medium-high and whisk until very creamy. Adjust the consistency if needed with powdered sugar or milk. Place in a piping bag fitted with your choice of tip, and use to fill macaron shells.

Optional decoration: drizzle of Chocolate Royal icing or melted chocolate plus sprinkles of your choice.

ENJOY!

to print the recipe, click here

Comments: In the past, more often than not I would get wavy shells when adding cocoa powder to the macaron batter. I was very pleasantly surprised by how smooth these turned out. And with a nice chocolate flavor. I did add a touch of brown and a touch of red because the amount of cocoa I added was not enough to darken the shells the way I wanted.

I thought it would be fun to couple the Chocolate Royal icing made with fat-free cocoa powder with the macarons made with the same product. I had some leftover from cookie decorating, so I just added a swirl, the a golden sequin type sprinkle, and while the icing was still soft, a dusting with gold.


The peanut butter filling was perfect for my taste. Using cream cheese cuts a little bit the sweetest, and the natural saltiness of the peanut butter takes it into a salted caramel territory I love. I highly recommend this recipe.

ONE YEAR AGO: Torta di Zucchini, a flash-back

TWO YEARS AGO: Woodland Creatures Cookies

THREE YEARS AGO: Incredibly Simple… Crunchy Asparagus

FOUR YEARS AGO: A Sourdough Quartet

FIVE YEARS AGO: When bad things happen to good people

SIX YEARS AGO: Sweet Potato “Hummus”

SEVEN YEARS AGO: Cauliflower Crust Pizza

EIGHT YEARS AGO: Silky Rutabaga Puree

NINE YEARS AGO: Bon Bon Chicken: Light and Spectacular

TEN YEARS AGO: Red Wine Sourdough Bread with Cranberries

ELEVE YEARS AGO: Award-Winning Sourdough Baguettes

TWELVE YEARS AGO: Country Rye (Tartine)

THIRTEEN YEARS AGO: Penne a la Vechia Bettola