PINK PRALINE BRIOCHE

Sometimes I wonder what makes me try a new recipe. Of course, reading tons of cookbooks and food blogs, new things show up on my radar often. I might make a mental note to try it at some point, labeling them as intriguing or interesting, but for the most part I move on. Then, there’s Pink Praliné Brioche. And no easy way to get it out of my mind. Having lived in Paris for a few years, it was hard to accept I’d never even seen one. Pink praliné. The stuff dreams are made of.

PINK PRALINÉ BRIOCHE
(adapted from Murielle Valette’s Patisserie)

3.5g fresh yeast (I used osmo-tolerant yeast)
25ml milk, at room temperature
250g bread flour
5g salt
15g sugar
3 eggs, at room temperature (about 150g)
125g soft butter
120g pink praliné, crushed lightly in a food processor (recipe follows)
egg wash

Whisk the yeast in a small bowl with the milk.  Put the flour, salt, sugar and eggs into the bowl of a KitchenAid type mixer. Add the milk and yeast, and knead it for about 10 minutes at low-speed.

Little by little add the butter and continue kneading in low to medium speed until the gluten is well-developed.  Place the dough in a bowl lightly coated with oil, cover and place in the fridge overnight.

The following day, turn over the dough on a work surface and gently press it as a rectangle of around 8 by 12 inches, then cut it lengthwise in three strips. Roll each piece to flatten it slightly, sprinkle a line of crushed pink praliné in the center, and enclose it with the dough, rolling it well to seal. Do the same with the other two strips, then braid them together, keeping the seam side down at all times.

Sprinkle more pink praliné over the shaped bread, letting them fall in the folds of the braid.  Cover loosely with plastic wrap and let it at room temperature for a final rise until it almost doubles in size. Mine took 2 hours and 45 minutes.

Heat the oven to 350 F, and right before baking, brush the surface of the braid with the egg wash.  Bake until golden brown, about 40 minutes. Cool completely before slicing.

ENJOY!

to print the recipe, click here

Comments: Brioche dough contains not only flour and yeast, but additional fat in the form of eggs, milk and butter. This type of enriched dough does well with a slow fermentation, so I prefer to mix it the day before. It also makes the actual baking day a lot easier, as you can shape the bread straight from its overnight proofing time in the fridge. It warms up quickly and it’s not hard to work with at all. You could ferment the dough at room temperature for 4 hours or so, but it will be a long baking day. Your kitchen, your call.

If you prefer to buy the pink praliné, amazon sells it, but be prepared to wait, no free 2-day shipping for this one. To make your own, follow the recipe below. 

PINK PRALINÉ
(from Cooking with Bernard)

450 g sugar, divided in 150g amounts
A few drops of red food coloring
125g whole hazelnuts, peeled (about 3/4 cup)
125g whole almonds (about 3/4 cup)

Place one-third of the sugar (3/4 cup / 150 g) in a large frying pan with just enough water to moisten it. Add a few drops of red coloring.  Stir well and turn the heat to high. Bring to a boil. When large bubbles start forming, add the hazelnuts and almonds, stirring non-stop. Control the heat, so that the nuts don’t burn. The syrup will begin to crystallize, and look very grainy. Don’t despair, keep stirring so that the nuts are well coated in sugar. Keep simmering, the sugar that does not coat the nuts will slowly start to melt and turn into a thick liquid. Transfer the contents of the pan to a baking sheet lined with parchment paper or Silpat. You should have nuts and some “free” caramel-sugar. Reserve the nuts and place the sugar in a clean saucepan.

Add another third of the sugar (150g). Add a little more red coloring and water – just enough to moisten the sugar. Bring to a simmer over low heat. Continue until all the pieces of sugar are completely melted. Switch off the burner, add the reserved nuts to the frying pan, but don’t switch turn the heat on yet. Wait until the syrup in the saucepan reaches 255°F. When the syrup is almost at the desired temperature, switch on the burner below the frying pan. It should be at medium heat. Pour the syrup over the nuts, stirring as you pour. You will need to wash this pan to use it again, so make sure to take it right away to the sink and fill with water.

Coat the nuts. The syrup will once again become grainy. Allow the sugar that does not coat the nuts to melt. Transfer the contents of the pan to a sheet of parchment paper and set the coated nuts to one side and the remaining sugar to the other. Place the remaining pink sugar in the saucepan and add the last third of the sugar (150 g) with more food coloring and enough water to moisten it. Allow to melt and bring to 255°F / 124°C. Return the nuts to the frying pan and pour in the syrup when it reaches the right temperature, stirring constantly. At this third stage, the syrup should coat the pink nuts quite well. Stir and wait for the syrup to become grainy and any sugar that does not coat the nuts should melt again.  Pour all the contents of the frying pan onto a sheet of  parchment paper. By now, there should be almost no sugar left unstuck to the nuts.

Final step: Heat the oven to 160°F and bake the candied nuts for at least 45 minutes to dry them out completely. Mine took almost double time to dry.  Let them cool and store in an air-tight container. They are ready to nibble on or use in recipes.

ENJOY!

to print the recipe, click here

Comments: Making pink praliné is a labor of love. You can buy it ready, but  the whole process of making it seemed fascinating enough to make me go for it. Essentially, you are slowly covering hazelnuts and almonds with a red-dyed caramel syrup. The coating happens in three stages. It is a bit time-consuming and also potentially dangerous. I got a burn with one tiny microscopic drop of super heated caramel and trust me, it hurt like hell. Then, it left a tiny scar, perfectly round and brown. Kind of cute, actually. But I don’t recommend it.

Pink praliné is a wonderful snack, and the pups tried some, yes they did. There was intense wagging of three tails. In São Paulo, when I was growing up, they sold a type of peanut made by Japanese immigrants that comes close to pink praliné but not nearly as good. It is called “amendoim doce” (translates as sweet peanut) and you can see it in the link that it also has a pinkish sugary coating, just a bit lighter. Anyway, if you are fond of nuts and feel crazy enough to be around boiling caramel for an extended period of time, try making these babies. They keep for a long time, which is a bonus.

So here it is, the Pink Praliné Brioche! It is absolutely delicious and yes, it was worth the trouble. If you google for photos, you’ll see it in many different sizes, shapes, and variations on how to incorporate the praline in the dough. Some just sprinkle a huge amount on top of a roundish loaf. I like this method better, because some of it gets truly deep inside the bread. The sugar that glues to the nuts melts slightly during baking, and when you bite into it, you get this concentrated sweet taste, truly delicious.  It is not sweet like a spoonful of sugar, of course not. The caramelization process gives the sugar a slightly bitter edge. Perfect, according to my taste buds.

ONE YEAR AGO: A Spinach Salad to Write Home About

TWO YEARS AGO: Karen’s Four Hour French Country Bread

THREE YEARS AGO: The Siren’s Song of the Royal Icing

FOUR YEARS AGO: Blog-worthy Roasted Butternut Squash

FIVE YEARS AGO: Chocolate Currant Sourdough Loaf & Roasted Beet Hummus

SIX YEARS AGO: Sesame and Flax Seed Sourdough

SEVEN YEARS AGO: Spanakopita Meatballs

EIGHT YEARS AGO: Saturday Morning Scones

NINE YEARS AGO: Pain de Mie au Levain


THE BEWITCHING KITCHEN TURNS EIGHT: TWO MILESTONES AND A TRIPLE GIVEAWAY!

*comments are now shutdown, winner to be announced July 3rd, 11pm*

Here I am, wrapping up my eighth year of food blogging. But, are you ready for something even more amazing than that? Today, on this exact day, with this very post, I reach ONE THOUSAND ARTICLES PUBLISHED. I can hardly believe it myself… Can you imagine the odds on that? Gives me a thrill, that’s for sure. I actually noticed that those events could coincide, so I increased up slightly the pace of posting this month, lending a little helping hand to fate. Still, it deserved a very enthusiastic version of Sally’s Personal Happy Dance.  You should be grateful that there are no videos. But, to what matters most. What is a Birthday without cake? It is an idiosyncrasy. I could not allow that to happen. So, I rolled my sleeves up, took a few yogic breaths in and out, sat down on a rug staring at a candle for a full 19 seconds, and look what I baked for this party:

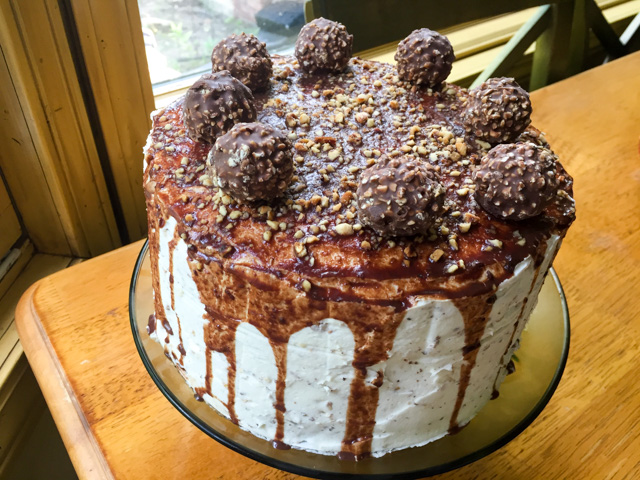
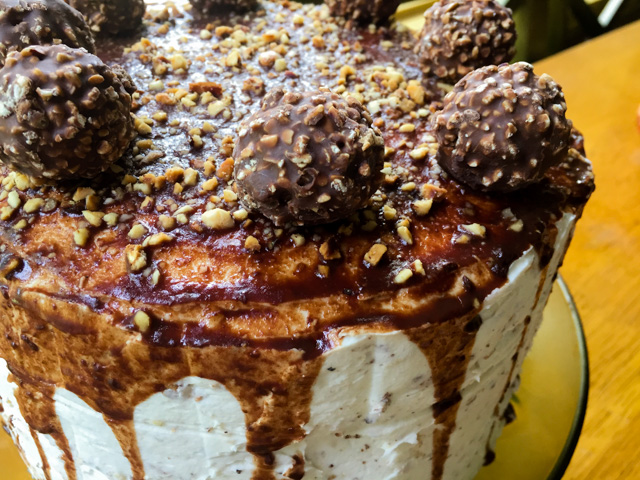
A Ferrero Rocher Cake, with – obviously – eight bonbons decorating the top. One for each year, my friends!

The interesting thing is that I own a pathetically large number of cookbooks. Of those, many, I repeat, many are cake cookbooks. Is this recipe from one of them? Obviously not. Why would I take the sensible path? No, not a chance. I got this recipe from the youtube channel hosted by Chetna Makan, the wonderful contestant of  The Great British Bake Off. A couple of months ago she demonstrated this Ferrero Rocher cake, making it seem easy and doable. I could not take it out of my mind. Plus, the idea of topping it with eight bonbons… how could I not go for it on this occasion? You can see Chetna in action with a click here.  And without further ado, I share with you my transcript of her recipe.

FERRERO ROCHER CAKE
(slightly modified from Chetna Makan)

for the cake component:
250g softened butter
250g caster sugar
50g melted dark chocolate
5 eggs, roughly whisked
200g self-rising flour
50g cocoa powder
1 tsp baking powder
2 Tbs milk

for the ganache:
375g dark chocolate
450mL double cream (I used heavy cream)
30g unsalted butter

for the icing:
300g salted butter, softened
600g icing sugar, divided in two equal portions
2 Tbs milk
4 Tbs finely ground hazelnuts

for the pouring ganache and decoration:
50g dark chocolate
150mL double cream (I used heavy cream)
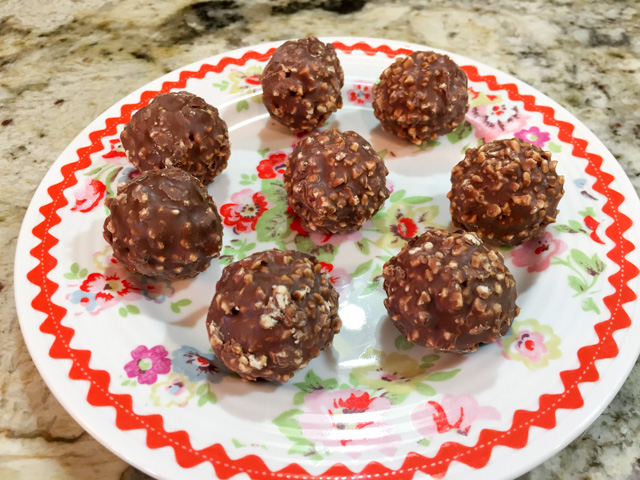
8 Ferrero Rocher bonbons

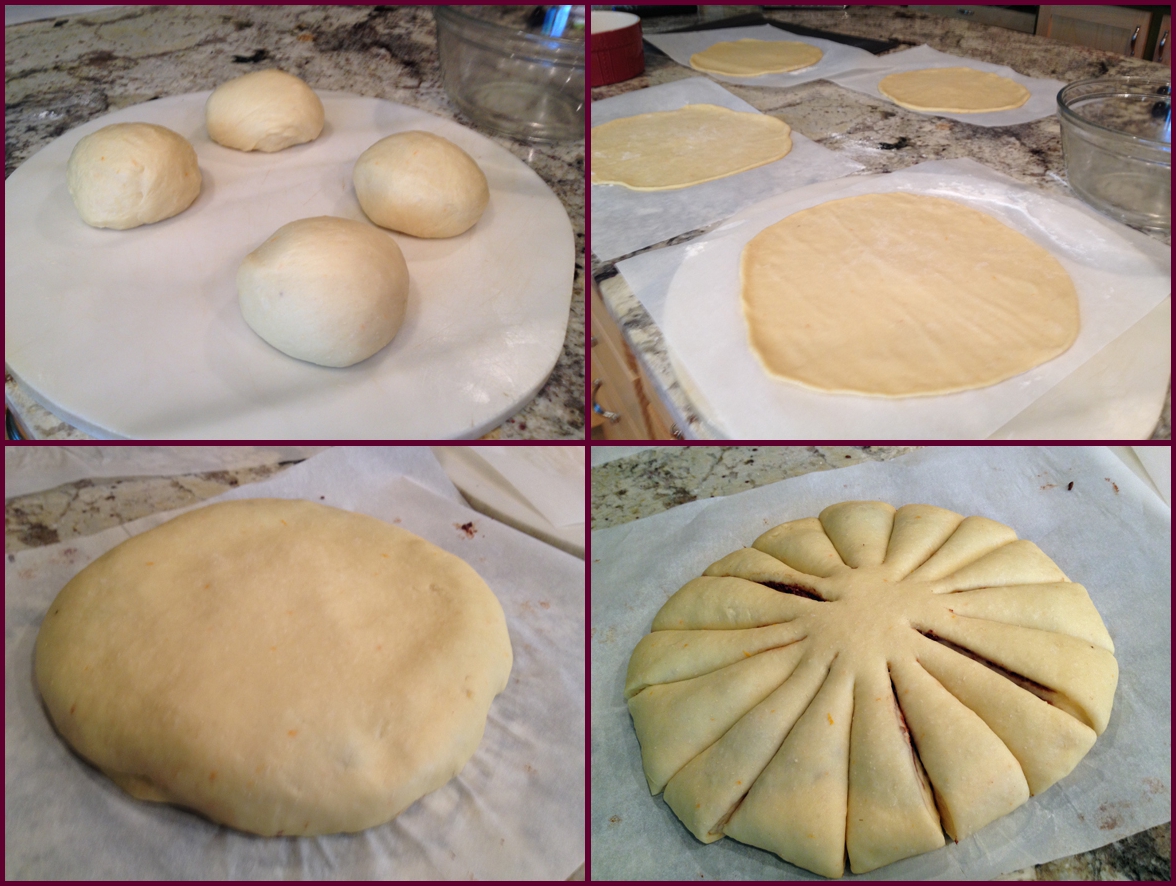
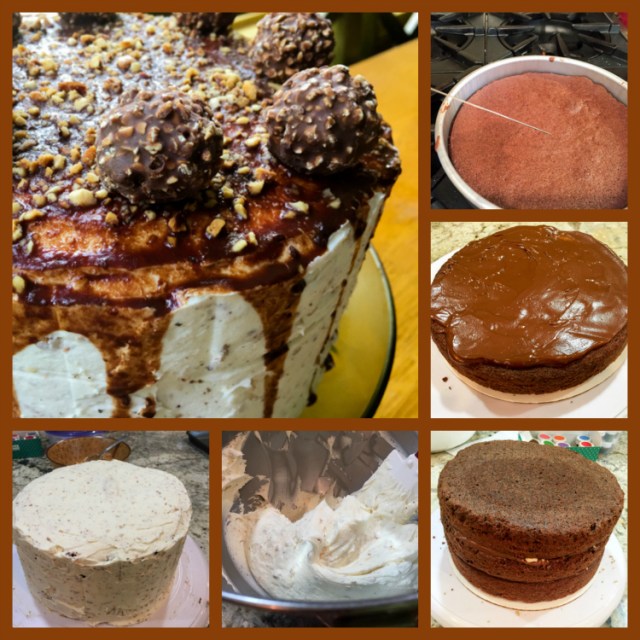
Make the sponge cake component: prepare three 9-inch round pans by greasing them with butter and placing parchment paper on the bottom. In the bowl of a KitchenAid type mixer, combine the softened butter with superfine (caster) sugar. Beat until creamy, a couple of minutes. Add the melted chocolate, mix a few seconds.  Slowly add the eggs, a little at a time with the beater running in low-speed.  Still in low-speed, add sifted self-rising flour, cocoa powder and the additional teaspoon of baking powder.  Mix until combined, add the milk, and mix well. Pour into prepared pans and bake at 350F for about 20 minutes, until a cake tester comes out clean.

Make the ganache: place the chocolate cut into pieces in a large bowl, add very hot –  almost to the boiling point – cream, allow it to sit for a minute, then slowly mix with a spatula. When the chocolate is dissolved, add the butter. Reserve, covered with plastic wrap.

Make the buttercream icing: Add the softened salted butter to the mixer, beat with the paddle attachment until creamy. Add the sifted powdered sugar in two additions, 300g each. Mix well, then add the finely ground hazelnuts. Taste a little bit and dream. Reserve.

Assemble the cake: place the first layer to a cake stand, add the cooled ganache. Spread almost to the edges. Sprinkle diced hazelnuts all over the ganache. Place the second cake layer on top, repeat the ganache/hazelnut spreading. Place the third cake on top. Refrigerate for 30 minutes. Ice the cake with the buttercream hazelnut component. Try to make it smooth on top and sides. Refrigerate the cake for 30 minutes.

Make the pouring ganache: mix the chocolate in pieces with almost boiling heavy cream. Wait a minute or so, then stir until the chocolate is fully melted and smooth. Pour on top of the cake, allowing it to flow down its sides. Sprinkle the top with more chopped hazelnuts, decorate with Ferrero Rocher bonbons….  Place in the fridge until serving time, removing it to room temperature about 30 minutes before slicing.

ENJOY!

to print the recipe, click here

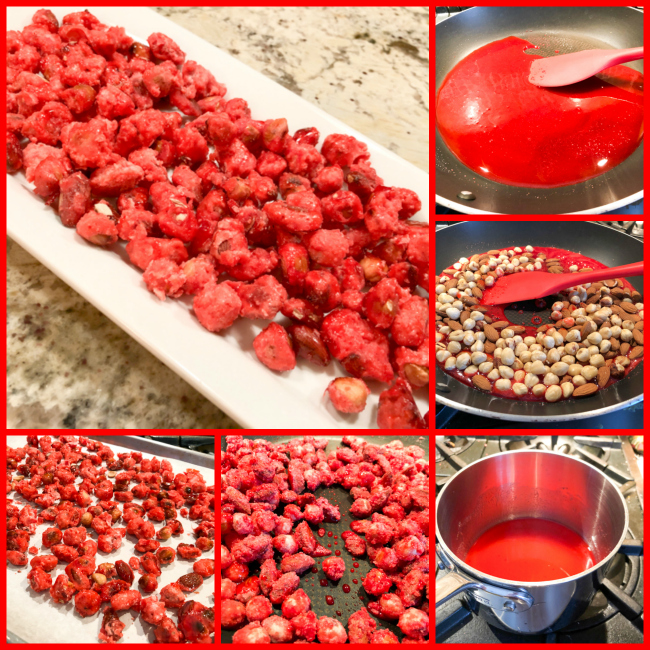
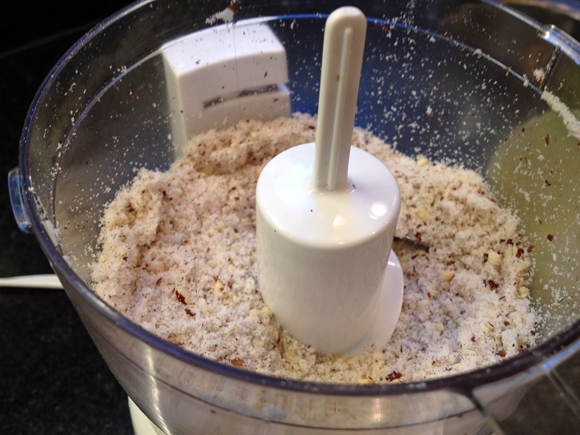
Comments: I decided to take my time to make this cake. Baking the cakes on a Saturday, making the ganache and frosting the following morning, assembling the cake in the afternoon. A well-laid plan indeed. To my delight, the cakes baked beautifully, flat and smooth. I removed them from the pans as if I was born doing it. Something we all know not to be the case. Next day the ganache and buttercream preparation went flawlessly. I was radiating self-confidence and pride. Then, I confronted the hazelnuts. A portion to be coarsely chopped, a smaller portion processed more finely. Hazelnuts are kind of expensive, so I bought them whole. That was a move to regret for as long as I live. Have you ever had to peel those pesky creatures? The skin seems to be covalently bonded to the nut. If you are not into chemistry, let me explain. Covalent bonds are strong. The atoms involved are sharing electrons, and the electrons don’t intend to stop dancing together in that complex, undetermined space. I sense an essay coming:  Implications of Sub-atomic Interactions for Cake Baking.  Anyway,  it took me 90 minutes to peel the hazelnuts. On my first innocent attempt I trusted instructions to simply roast them “and the peel will come off easily by rubbing them with a paper towel.” That is not only wrong, it is cruel. In desperation, and with two fingers burned, I googled for alternatives. Found out that if you boil them for “a couple of minutes” the peel should come off with “very little effort.” When I did that, I could hear the dancing electrons laughing at me. No intention of leaving their Covalent Gala. More google action. Found yet another set of instructions, more realistic as it included a clear warning – this method won’t be easy, but it’s by far the best way.  You do boil them, but with baking soda. A lot of it, actually (3 tablespoons for 2 cups of water). The pan will look like a witches brew, as you can see on the composite photo below. 

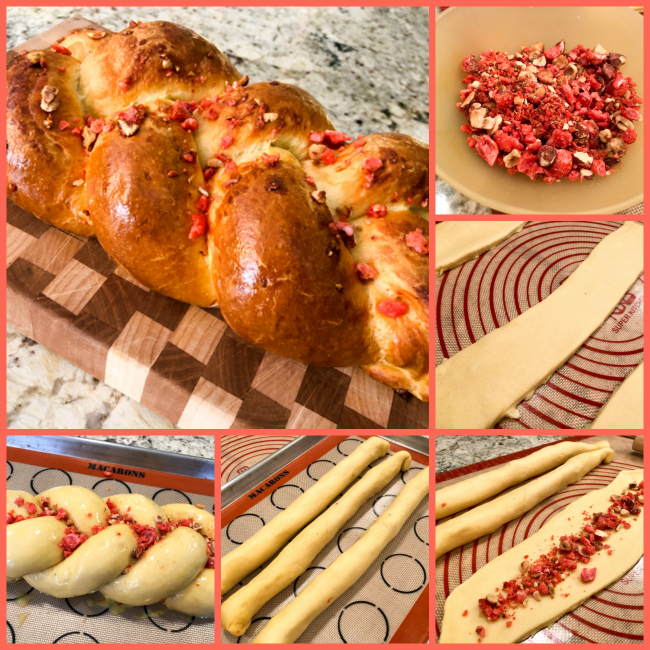
Get a bowl of cold water ready. After 4 minutes, grab a couple of hazelnuts with a slotted spoon and throw them in the water. Rub gently with your fingers, if the peel starts to come off, you are done. If not, keep boiling them, stirring constantly in low heat, otherwise you will have a very epic mess  on your stove (no need to ask me how I know). Once you reach the point of peels starting to come out,  drain the whole batch and shock them all in cold water. Peeling them will still be a labor like no other. Messy and long-lasting. An ordeal that I do not wish on anyone. In fact, I tell you what a great concept for hell could be. A place where you spend your full day peeling hazelnuts. In the background, the song “Don’t worry, be happy” plays non-stop. Once you are done, you can go to sleep, but not before watching Titanic, beginning to end. That is hell. Hazelnuts, Bobby McFerrin & Titanic, day in, day out.

But was it worth all the trouble? Oh, yeah! I tell you one thing, the icing with the finely ground hazelnuts is to die for, some serious deliciousness in taste and texture. If you like Ferrero Rocher, this cake is the ultimate celebration of it. The creaminess of the ganache, its intense chocolate taste echoed by the sponge cake. A real winner. Now, if you watch Chetna’s video, you’ll notice that her pouring ganache ended up thicker than mine. I think it’s a matter of the ingredients used. She used double cream, easily available in the UK, I had to go with our regular whipping cream. If I knew my way around baking, I would probably adapt it, perhaps using a higher proportion of chocolate. At any rate, I am happy with the way it turned out. Also, a warning: the ganache makes more than you’ll need. Chetna baked four cakes, I went with three, slightly larger. But trust me, you can use the leftover ganache in many tasty ways. Macaron filling? Yesssss!  Stirred into the morning cappuccino? Oh, yessssss…

So here I am, at the eight year mark! According to Foodista, 8% of the blogs make it to six years, no statistics available for food blogs older than that. What matters is that I am still having fun, and intend to keep going, so if you’d like, step with me into the 9th year of adventures in our kitchen.

source Foodista

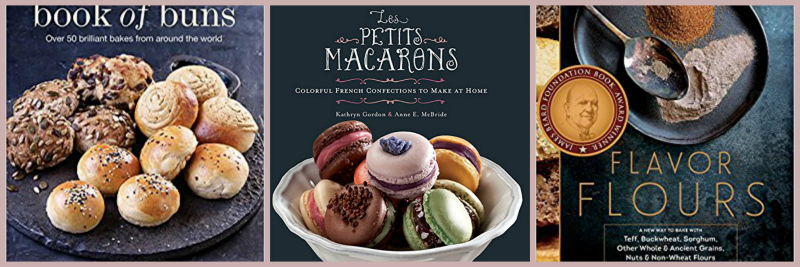
To celebrate my special double milestone, I am offering a triple giveaway!  Three cookbooks that deal with some of my passions. The Book of Buns, a delightful publication that covers all sorts of breads, from simple to more complex. Second, Les Petits Macarons, because… how could I not include this colorful obsession of mine? And finally Flavor Flours, in my opinion the best cookbook for gluten-free baking. If you follow my blog, you know I don’t have any dietary restrictions. But recipes that try to adapt classics to gluten-free alternative versions fascinate me.  I’ve made quite a few of her recipes, and they were all top-notch. Alice Medrich does her homework before coming up with a recipe.

If you’d like to enter this giveaway, just leave a comment, and I’ll draw the winner on June 30th, announcing it the day after. I intend to give the books either as real hard copies (for those living in the USA), or as Kindle copies to those anywhere else in the world. Of course, if you live in the US but rather have the virtual versions, let me know.


Grab a pin to celebrate!

Add to FacebookAdd to DiggAdd to Del.icio.usAdd to StumbleuponAdd to RedditAdd to BlinklistAdd to TwitterAdd to TechnoratiAdd to Yahoo BuzzAdd to Newsvine

ONE YEAR AGO: The Bewitching Kitchen Turns Seven!

TWO YEARS AGO: Bewitching Kitchen Turns Six!

THREE YEARS AGO: The Bewitching Kitchen turns Five!

FOUR YEARS AGO: The Bewitching Kitchen turns Four!

FIVE YEARS AGO: The Bewitching Kitchen Turns Three! 

SIX YEARS AGO:  The Bewitching Kitchen turns Two!

SEVEN YEARS AGO:  Bewitching Birthday!

EIGHT YEARS AGO: Welcome to my blog!

SaveSave

SaveSave

SaveSave

SaveSave

SaveSave

SaveSave

SaveSave

SaveSave

SaveSave

SaveSave

SaveSave

SaveSave

SaveSave

SaveSave

SaveSave

SaveSave

SaveSave

SaveSave

SaveSave

SaveSave

SaveSave

SaveSave

SaveSave

SaveSave

SaveSave

SaveSave

SaveSave

SaveSave

SaveSave

SaveSave

SaveSave

SaveSaveSaveSave

SaveSave

Save

SaveSave

SaveSave

SaveSave

SaveSaveSaveSave

SaveSave

SaveSave

HAZELNUT BLUE CHEESE SOURDOUGH

I am very excited about this bread, because I came up with the formula myself. Well, that is not completely true, as we all follow the footsteps of more experienced folks. Sometimes a dear Grandma, a favorite cookbook author or celebrity chef (excuse me while I try to control my eye roll, the word celebrity does that to me. Every. Single. Time). Back to the bread in question. I had hazelnuts in my mind and thought they would be wonderful added to a rustic sourdough bread. I also had a small amount of blue cheese in the fridge (Bleu d’Auvergne, to be precise), and decided that they could interact nicely with the hazelnuts in the bread environment.  I used a very basic recipe that did not need any special type of starter.  A little spelt flour for added pizzazz. And there you have it, a sourdough bread to call my own. But I would be thrilled if you make it in your kitchen too…

Hazelnut Blue Cheese Sourdough
HAZELNUT BLUE CHEESE SOURDOUGH
(from the Bewitching Kitchen)

125 g  sourdough starter (at 100% hydration)
250 g water, warm to the touch
300 g bread flour
75 g spelt flour
7 g salt
60 g roasted hazelnuts, chopped in large pieces
50 g blue cheese (I used Bleu d’Auvergne)

Add the active starter to a large bowl, mix it with the water until it dissolves more or less smoothly. Add the flours and briefly do a few kneading moves to form a shaggy mess.  Cover loosely with plastic wrap for 30 minutes.

Sprinkle the salt over the dough and incorporate by kneading lightly and folding the dough on itself.  You can keep the dough in the bowl, or transfer to a surface.  After 20-30 seconds of kneading/folding, cover the dough again and let it sit for 40 minutes.

Add the hazelnuts and blue cheese to the dough and repeat cycles of quick kneading/folding two more times, spacing them by 45 minutes.   If the dough doesn’t seem to have enough strength, incorporate one more cycle of folding. After the final kneading cycle, let the dough sit for 20 to 30 minutes, shape it as a round or oval loaf, place it in a banneton with the seam side up and leave it at room temperature  30 minutes longer. Place it in the fridge overnight, lightly covered with a plastic wrap (oil the surface that will be in contact with the dough).

Remove the dough from the fridge 1 hour before baking, while the oven heats to 450 F. If using a Dutch oven, place it in the cold oven as you turn it on. Invert the bread out of the banneton (the easiest way to do it is over a parchment paper on a flat baking sheet), quickly slash it and place it in the Dutch oven. To generate steam, cover the pan with the lid that you rinsed under the sink, allowing some water to be retained on the surface. Bake the bread covered for 30 minutes, remove cover, and allow it to fully bake (reducing the temperature to 425F if the bread seems to be browning too fast) for about 15 minutes longer.  Remove to a rack to cool completely before slicing.

ENJOY!

to print the recipe, click here

compositehazelnut
Comments:  The blue cheese I used was quite strong, and until I tasted a slice of this bread I was quite worried. The smell as it baked was so intense, I thought that adding the cheese was overkill. Well, I was wrong. No need to worry at all. The cheese pretty much melted throughout the crumb, and gave it sort of background of flavor, almost smoky, although it could be the roasted hazelnuts speaking. Hard to tell. I love the way the crumb delicately involved each piece of nut, like little eggs in a nest.  And the taste? Incredible. I had to pat myself in the back for this bread, even if my parents insisted that modesty is one of the most important qualities of a human being. A pat in the back is not that bad, right? It’s  not as if I’m bragging to the world about it… what? Is that what blogging is about?  But, but, but… will you look at this crumb?

CrumbShot2

If that’s not a pat-in-the-back crumb, I don’t know what is… 

ONE YEAR AGO: My First Truffle Adventure: Poulet Demi-Deuil

TWO YEARS AGO: My Rio de Janeiro: A Cookbook Review

THREE YEARS AGO: Hearts of Palm Salad with Cilantro Vinaigrette

FOUR YEARS AGO: Watercress Salad

FIVE YEARS AGO: Curried Zucchini Soup

SIX YEARS AGO: Chocolate Bread

STAR-SHAPED CHOCOLATE BRIOCHE BREAD

Every once in a while I fall in love with a recipe, and cannot wait to make it. Last week I logged into Facebook, and by pure chance there on the top of the Artisan Bread Bakers page I saw a gorgeous bread, worthy of the cover of a Breads Illustrated Swimsuit Issue – if there was such a thing. Except that, contrary to what seems to be the case for many supermodels, no Photoshop tweaking was involved. The bread was naturally stunning. I wasn’t sure I would be able to make it, as it involved a shaping technique I had never seen before. But, it all worked well. It’s bread after all, not cake.  😉

Star-Shaped Brioche1

STAR-SHAPED CHOCOLATE BRIOCHE BREAD
(from  Lindarose at Instructables)

for the dough:
500g all-purpose flour
2 eggs
60g sugar
180ml room temperature milk (3/4 cup)
80g room temperature butter
7g active dry yeast
8g salt
peel from one orange

for the chocolate cream:
35g cocoa powder
75g sugar
250g ricotta ( about 1 cup)
30g hazelnuts

Put the flour in the mixer and add the yeast, milk, sugar and eggs. Start mixing on low, as the ingredients start to incorporate, add the butter in small pieces, the salt, and the orange peel.  Keep mixing until very smooth (about 5 minutes on a Kitchen Aid type mixer). Remove the dough to a lightly floured surface and finish kneading it by hand, to make sure all butter is uniformly distributed. The dough should be slightly tacky, resist the urge to add more flour. Form a ball, and let it rise in a bowl in a warm spot until double in size, about 2 hours, depending on the temperature of your kitchen.

While you wait for your dough to rise, prepare the chocolate cream.

In a food processor, mix the sugar and hazelnuts together until you obtain a powder. It’s ok if there are still some big pieces in it. Transfer to a bowl, and sift the cocoa powder on top of it.   Add the ricotta and mix everything together with a hand mixer until your mixture becomes a cream.

Once your dough has risen, divide it in 4 equal pieces and make 4 separate balls. Make a disc with each of the 4 balls using a rolling-pin. The most important thing is that the discs are all the same size.

Place the first disc on a piece of parchment paper and spread some chocolate cream on it, making sure to leave about half an inch of free border all around. Lay the second disc on the first one and press the border with your fingers to join them together. Now spread some other chocolate cream on the second disc (always leaving a free border), add the third disc and close it with your fingers. Do the same on the third disc and close it with the last disc, but don’t spread the chocolate on it this time. The 4th disc is the top of the bread.

Using a knife, divide the dough in 4 with 4 cuts. It’s  crucial for the shaping that you don’t cut the center of the disc (see pictures). Now make other 4 cuts between the others, for a total of 8, always leaving the center free. Finally, make 8 cuts between the ones you already made, just like the others. You will have a total of 16 sections now.

Consider 2 sections that are next to each other: lift one with one hand and the other with the other hand and twist each of them towards the outside. This means that the piece you are holding with your right hand will be twisted to the right and the one you are holding with your left hand will be twisted to the left. Do this for all the sections. Your bread will look like a snowflake. Put it in the baking sheet with the help of the parchment paper (don’t remove it) and let it rest and rise for another hour. As the bread rises, turn your oven to 350 F.

Bake at 350°F (180°C) for 25 to 30 minutes. Let it cool on a rack.

ENJOY!

to print the recipe, click here

balls-checker

I woke up very early on Labor Day to bake this bread. Long before sunrise. Mixed the dough and went for a run with Phil, while the streets were still completely dark. Come to think of it, “with Phil” is not a correct statement. Let’s say we start together and within five minutes I am begging for mercy,  slow down my pace and see him move farther and farther ahead.  The sun started to rise midway through our run, in such a magical experience, the subtle change in light, slow and beautiful. By far my favorite kind of run. A day that started so perfectly had  to be a good baking day. And indeed it was.

hazelnutpowder

This dough is wonderful to work with.  As you can see in the instructions, the most important thing to keep in mind is dividing the dough in equal parts – use a scale, don’t just eye-ball it.  Once the dough is divided, it rolls out very nicely, use just a little bit of flour on top of the parchment paper so that you can release it easily. I rolled all four balls of dough, but if you prefer, roll one at a time, spread the chocolate cream, move to the next one. Before you cover the bread with the last disk of dough, wash your hands of any chocolate to keep the surface of the bread clean.

shaped

Slicing the dough in 16 sections and twisting the sections for the final shaping is not as hard as it may seem.  I have a lot of trouble with spacing things regularly, and was a bit nervous handling the knife, but even if my cutting was not perfectly uniform,  the bread turned out ok.  Maybe not worthy of the cover of Breads Illustrated, but not bad for a first time.

This star-shaped bread reminded me of the classic Chocolate Babka, which I’ve never made, but saw Peter Reinhart demonstrate in a lecture in Dallas many years ago. In fact, my friend Marilyn said this bread looked like “Babka’s wealthy cousin”.  I suppose that defines it quite well.

The filling can be anything you like. Some bakers from the Facebook group used pesto and cheese, others used cinnamon cream, or a mixture of different nuts with chocolate. Pretty much anything goes with the exact same dough and shaping.  Be creative and impress your friends and family, it is a show-stopper of a bread.

Sliced

I am submitting this post to Susan’s Yeastspotting event…

ONE YEAR AGO: Blueberry-Banana Bread 

TWO YEARS AGO: Into the Light Again

THREE YEARS AGO: Five Grain Sourdough Bread

FOUR YEARS AGO: The Nano-Kitchen

FIVE YEARS AGO: Kaiser Rolls