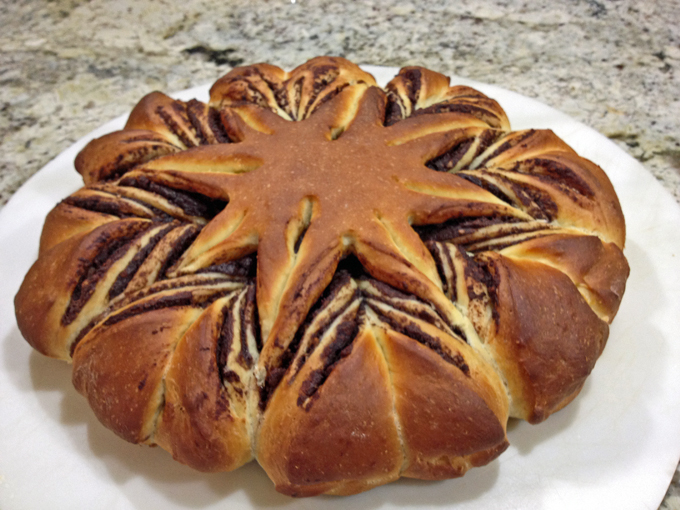
This is a type of bread we see often this time of the year, because it looks so festive, but it is actually quite simple to make. The filling can be sweet (think Nutella, caramel, raspberry jam) or savory. My version used sundried-tomato and cheese. You can take it in different directions, and it will always turned out great, with that visual impact we love so much, particularly during the holiday season.
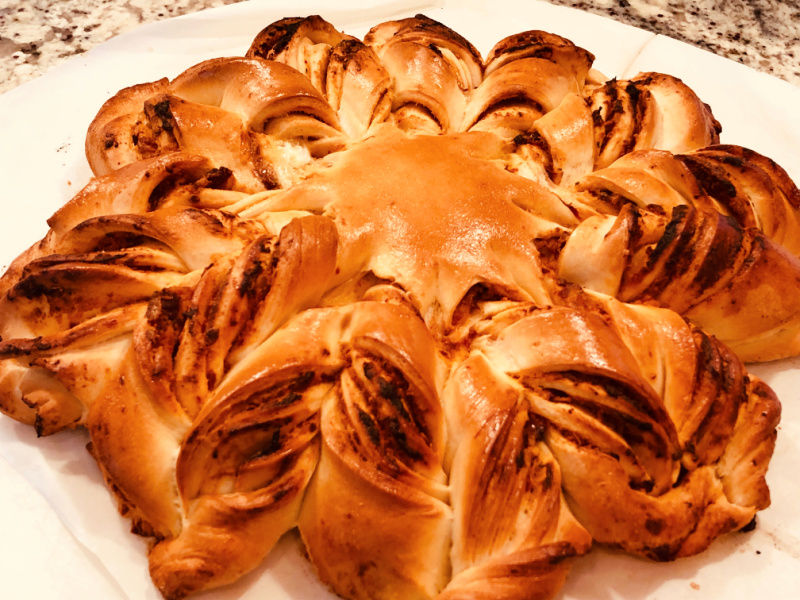
STAR-SHAPED SUNDRIED TOMATO BREAD
(adapted from King Arthur Flour)
for the dough:
3/4 cup lukewarm milk
2 teaspoons active dry or instant yeast
360g all-purpose flour, divided
1 large egg
3 tablespoons olive oil
1 teaspoon salt
for the filling:
¾ cup shredded mozzarella
½ cup oil-packed sun-dried tomatoes
1/2 tsp herbes de Provence
½ teaspoon salt
1 egg for egg wash
To make the dough, place the milk, yeast, and 120g all-purpose flour in a large mixing bowl and stir to combine. Cover and let rest for 15 minutes.
Add the egg, olive oil, salt, and the rest of the all-purpose flour. Mix to make a soft dough, then knead for 6 to 8 minutes, until smooth and supple. Place in an oiled bowl, cover, and let rise for about 1 hour, until doubled.
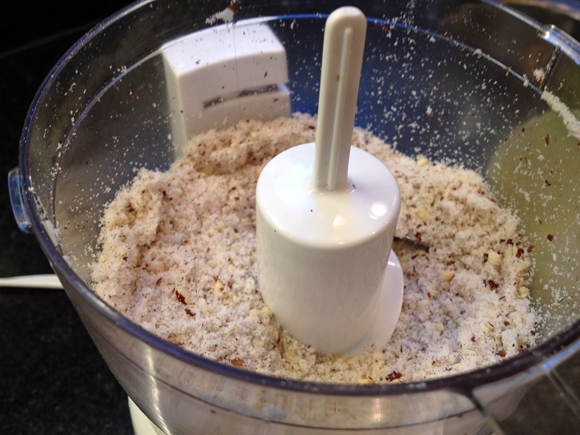
Mix together minced sun-dried tomatoes, salt and herbes de Provence. Reserve.
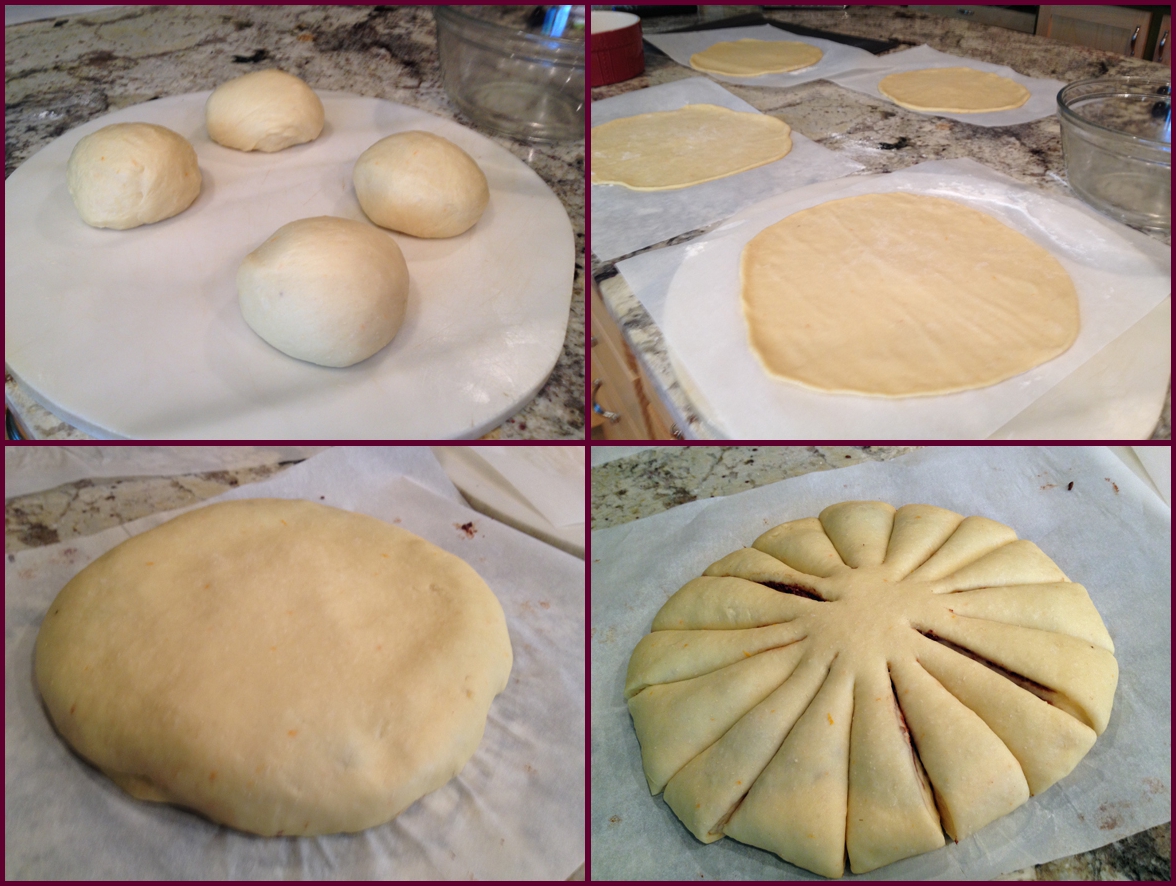
Divide the dough into four pieces and shape into balls. Cover and let rest for 10 minutes.
Place one piece of dough on a piece of parchment. Roll it into a 10″ circle. Spread ⅓ of the sun-dried tomato mixture on the first layer of dough in an even layer. Sprinkle ⅓ of the cheese, leaving ½” around the outside edge uncovered. Roll out the second ball of dough to the same size as the first. Place it on top of the first circle and repeat the three layers of filling. Again, repeat with the third ball of dough and the last ⅓ of filling. Roll out the last ball of dough and place it on top.
Place a 2″ round biscuit cutter or drinking glass in the center of the dough to serve as a guide. Using a sharp knife, cut the larger circle into 16 equal strips, from the outside edge to the cutter/glass in the center, through all the layers. Using two hands, pick up two adjacent strips of dough and twist them away from each other twice, so the top side is facing up again. Repeat with the remaining strips of dough all the way around the circle. Remove the cutter/glass.
Pinch the ends of adjacent strips together all the way around the bread to create eight star-like points. Transfer the star on the parchment to a baking sheet. Cover with plastic wrap and let rise for about 45 minutes. Dough should look expanded and airy.
Heat the oven to 400F. Remove the plastic wrap and brush the star with a thin coat of the egg wash. Bake for 25 to 30 minutes, until nicely golden. Remove the bread from the oven and cool for 10 minutes before serving.
ENJOY!
to print the recipe, click here


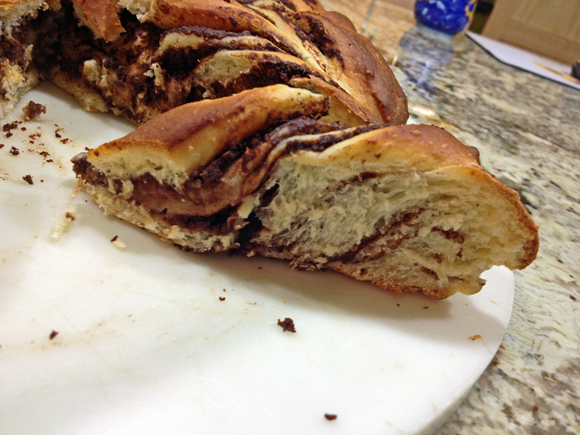
Comments: This is a very rich dough, and a pleasure to work with. Even if you are a beginner at bread baking, the whole process is pretty forgiving. The circles of dough do not have to match precisely, it is all going to get twisted and any little gaps won’t affect the final product.
There are many videos available on youtube to show you how to shape the bread, like this one.

If you are still searching for a nice bread as a centerpiece for your holiday festivities, this is truly a great option…

ONE YEAR AGO: Cranberry White Chocolate Tart
TWO YEARS AGO: I dream of Madeleines and a Tower of Cheesecakes
THREE YEARS AGO: Dominique Ansel’s Chocolate Mousse Cake
FOUR YEARS AGO: Slow-Roasted Eye of the Round Beef
FIVE YEARS AGO: Steam-Roasted Indian-Spiced Cauliflower
SIX YEARS AGO: Creamy Zucchini-Mushroom Soup
SEVEN YEARS AGO: Ken Forkish’s Pain au Bacon
EIGHT YEARS AGO: Carrot and Cumin Hamburger Buns
NINE YEARS AGO: Potato Galettes a l’Alsacienne & Book Review
TEN YEARS AGO: Caramelized Carrot Soup
ELEVEN YEARS AGO: Miso-Grilled Shrimp
TWELVE YEARS AGO: Pain Poilane