KAREN’S BRAIDED LEMON BREAD WITH BLACKBERRIES

She posted. I read the post while away on a trip. Could not wait to get home to bake it. As far as enriched bread goes, you cannot get much better than this. Think brioche loaded with a tangy lemon cream and luscious blackberries. As I said, cannot get much better. THANK YOU, KAREN!

BRAIDED LEMON BREAD WITH BLACKBERRIES
(from Karen’s Kitchen Stories)


For the Sponge:
3 ounces warm water (95 to 105 degrees F)
1 teaspoon sugar
1 1/2 teaspoons instant yeast
30 grams unbleached all purpose flour

For the Final Dough:
All of the sponge
85 grams vanilla yogurt, room temperature (I used plain and added 1/2 tsp vanilla)
56 grams softened unsalted butter
1 large egg, beaten
50 grams sugar
1 teaspoon salt
1 teaspoon vanilla
300 grams unbleached all purpose flour
one beaten egg for the egg wash
pearl sugar for topping (optional, but nice)

For the Filling:
85 grams cream cheese, at room temperature
25 gram sugar
29 grams sour cream (I used creme fraiche)
1 tsp lemon juice
15 grams all-purpose flour
100 grams lemon curd
Handful of blackberries


Combine the sponge ingredients in a small bowl, stir, and cover with plastic wrap. Let it sit for 15 minutes.
In your stand mixer bowl, combine the sponge, yogurt, butter, egg, sugar, salt, vanilla, and flour. Mix with the dough hook for about 8 minutes. Place the dough in an oiled dough rising bucket or bowl, cover, and allow to rise for one to two hours, until doubled (mine took 2 hours and 30 minutes).

Mix the cream cheese, sugar, sour cream, lemon juice, and flour until smooth. Cover and set aside.
Line a cookie sheet with parchment paper. Place the risen dough not the parchment, and press or roll it into a 10 inch by 15 inch rectangle. Mark the dough lengthwise into thirds by pressing a ruler into the dough. Spread the cream cheese mixture onto the middle third, leaving about an inch uncovered at the top and the bottom. Spread the lemon curd on top of the cream cheese mixture. Top with the blackberries.

Cut the outer sides into strips. Cut off the strips from the four “corners” of the dough, leaving a flap at the top and bottom. Fold up the bottom flap and fold the strips over the filling alternating in a braid pattern. Fold the flap over the top before finishing the braid. Cover loosely with oiled plastic wrap.
Preheat the oven to 360 degrees F.


Let the dough rise for about 45 minutes. When the dough is ready, brush it with the egg wash and sprinkle it with the sugar. Bake for 25 to 30 minutes until a deep golden brown. Cool on a cooling rack for at least 20 minutes. Slice and serve.

ENJOY!

to print the recipe, click here

Comments: Make sure to stop by Karen’s post because her pictures and explanations are very detailed and will help you with the shaping. The dough is a pleasure to work with, as enriched doughs always seem to be. You can make the filling while the dough rises, and use store-bought lemon curd to make your life easier. Next time I will add more blackberries, I was afraid they would contribute too much moisture and leak too much, but that was not the case.

This basic method can be used for savory breads, or use different sweet fillings. Karen has a lot of suggestions in her article, so pay her a visit.

ONE YEAR AGO: Bulgur-Pork Tomatillo Platter

TWO YEARS AGO: Baking through the blogosphere

THREE YEARS AGO: Chickpea Burgers, Vegan and Delicious

FOUR YEARS AGO: Macarons with Ganache Noisette

FIVE YEARS AGO: Quiche with Asparagus and Fennel

SIX YEARS AGO: Fakebouleh

SEVEN YEARS AGO: Yellow Squash Soup

EIGHT YEARS AGO: Grilled Chicken with Tamarind and Coconut Glaze

NINE YEARS AGO: Chicken-Apricot Skewers

TEN YEARS AGO:  Asparagus Quiche

ELEVEN YEARS AGO: Two-stage Pea and Prosciutto Risotto

TWELVE YEARS AGO: Mellow Bakers: Corn Bread

OLIVE OIL BRIOCHE

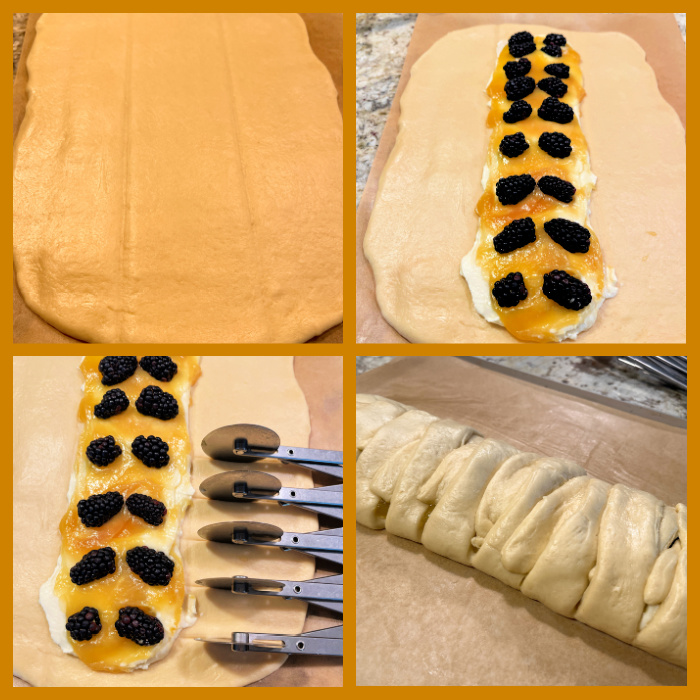
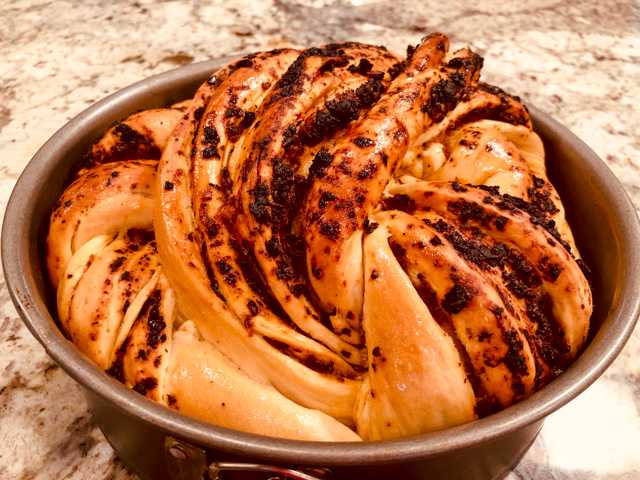
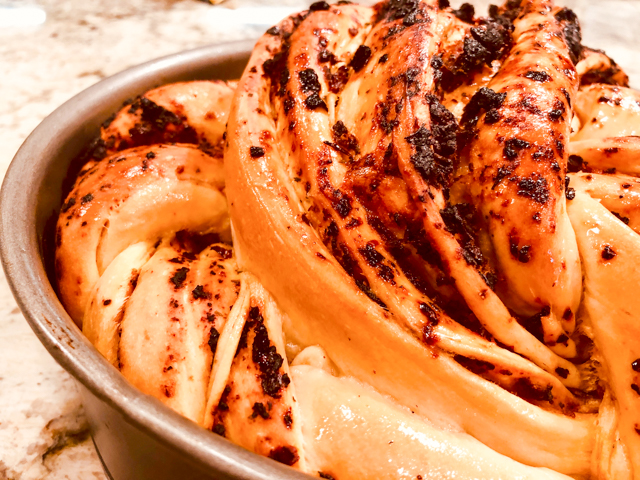
Karen from Karen’s Kitchen Stories is a source of endless inspiration for me. Particularly on anything related to bread, she finds the most unusual, exotic, unique recipes, and then bakes them like it’s no big deal at all.  Just to give you a recent example, look at this incredible concoction for which she used 12-ounce empty soda cans wrapped with foil as a baking “pan.”  Amazing, isn’t it? Today I share with you my adventure with her Olive Oil Brioche. I made only half the recipe and still had a ton of dough to play with. Enough for a large loaf and 6 buns. For reasons that will be discussed in the comments, if you make it, be ready to have one loaf and 8 buns. The amount for the loaf pan was a tad too much.
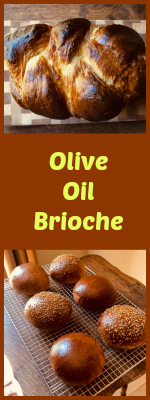
OLIVE OIL BRIOCHE
(slightly modified from Karen’s Kitchen Stories)

for the poolish:
100 grams all purpose flour
100 grams water
1.5 grams instant yeast

Mix the ingredients, cover with plastic wrap, and place in the refrigerator over night.

for the levain (Sourdough)
1 tablespoon starter
110 grams all purpose flour
110 grams water

Mix the ingredients, cover with plastic wrap, and let sit overnight at room temperature until bubbly.

for the final dough: 
200 grams poolish
150 grams levain
500 grams bread flour
12 grams salt
7.5 grams instant yeast
250 grams eggs
120 grams milk
80 grams honey
Zest of one Meyer lemon (optional)
25 grams water
220 grams extra virgin olive oil
For the egg wash: 1 egg plus one tablespoon milk

In a stand mixer, combine the flour, salt, yeast, eggs, milk, levain, poolish, honey, lemon zest, and water and mix on low for about 5 minutes. Cover and let rest for about 20 minutes.

Mix the dough with the spiral hook on medium to high speed for 8 minutes.
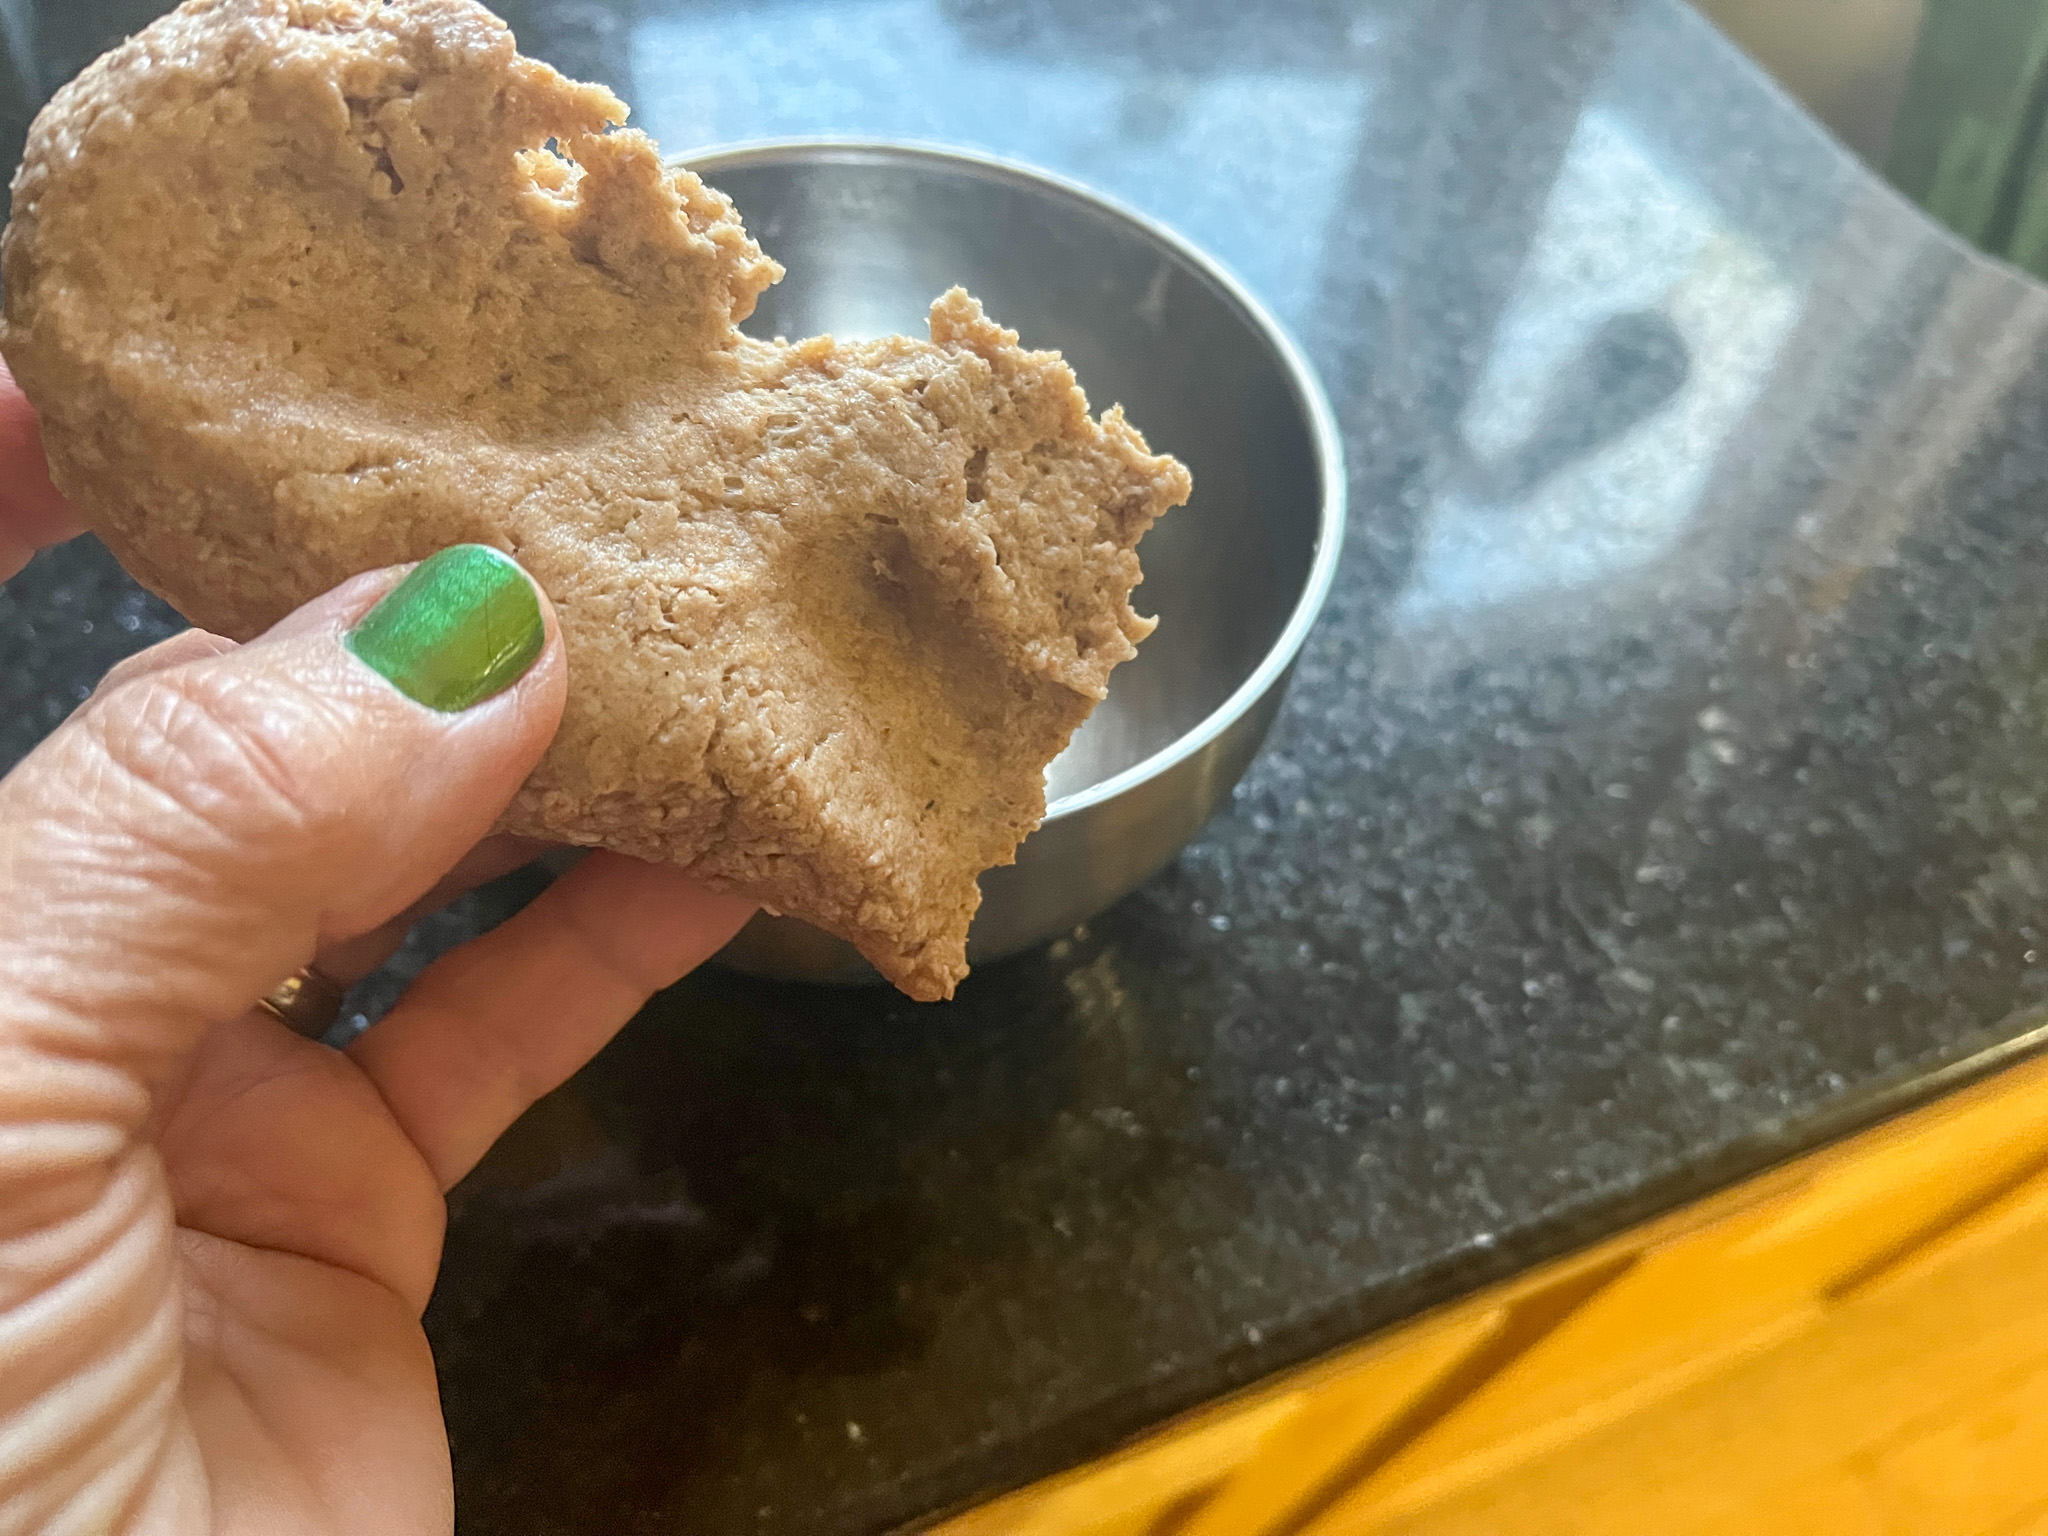
With the mixer running on medium,  add the oil slowly, pausing so that the oil is absorbed. I did it in three additions. Incorporation of the oil will take time, so exercise patience.  Add a sprinkle of bread flour to speed incorporation if you so desire, but do it only in the second and third addition. The dough should end up very smooth and not tear when  you stretch it.

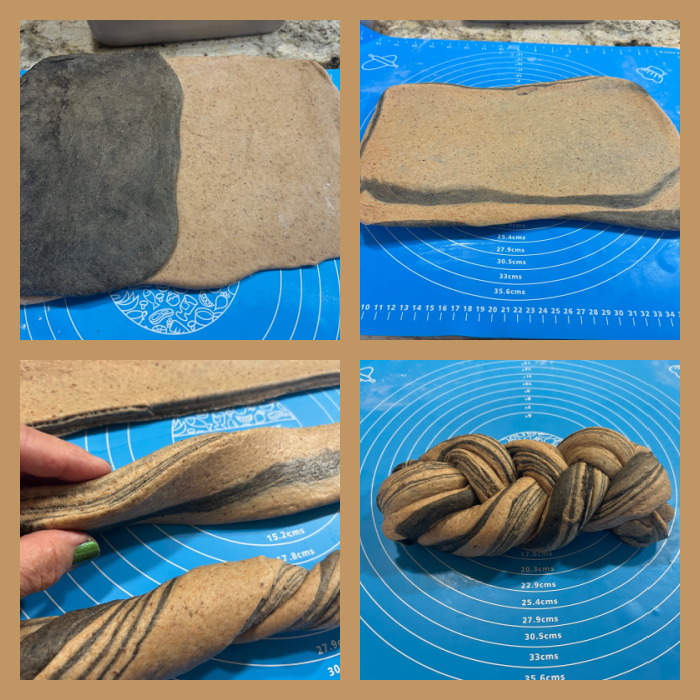
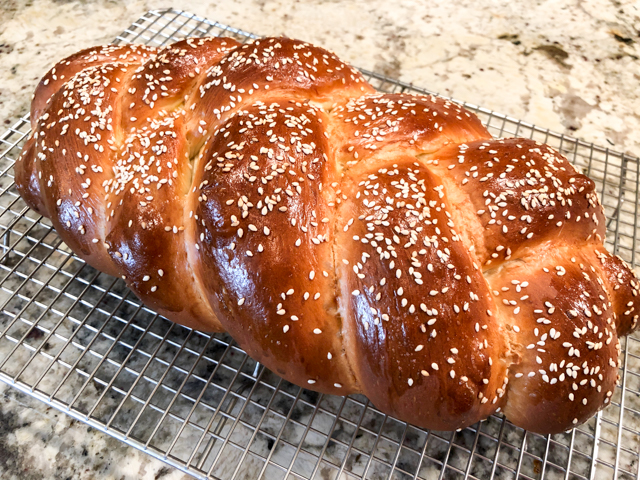
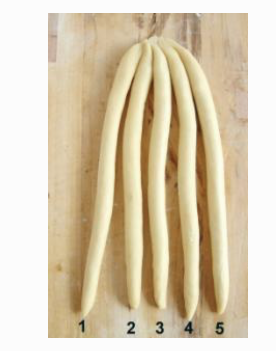
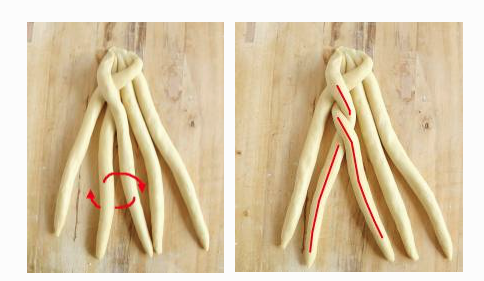
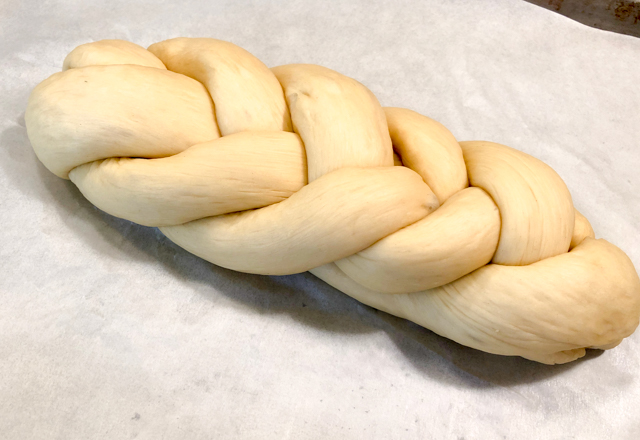
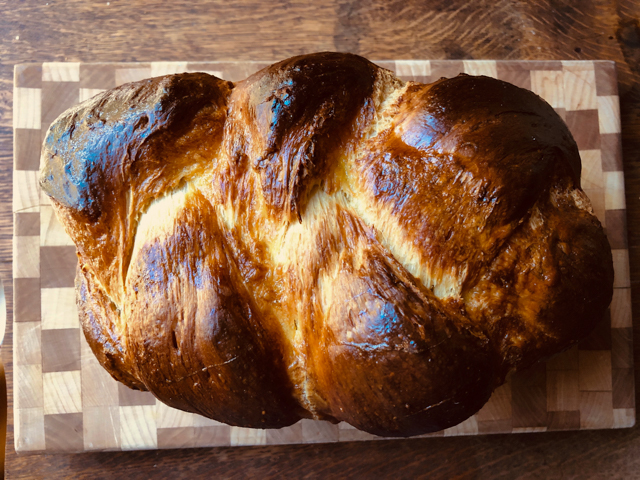
Allow the dough to bulk ferment (in a large bowl covered in plastic wrap) for 2 hours at 70 degrees F. Do three stretch and folds during the first 90 minutes, one every thirty minutes.  When the dough is ready, remove three pieces of about 250g each and braid them. Place in a slightly oiled 9 x 5 loaf pan for final proofing. Divide the rest of the dough in 8 portions, shape as buns, and proof.

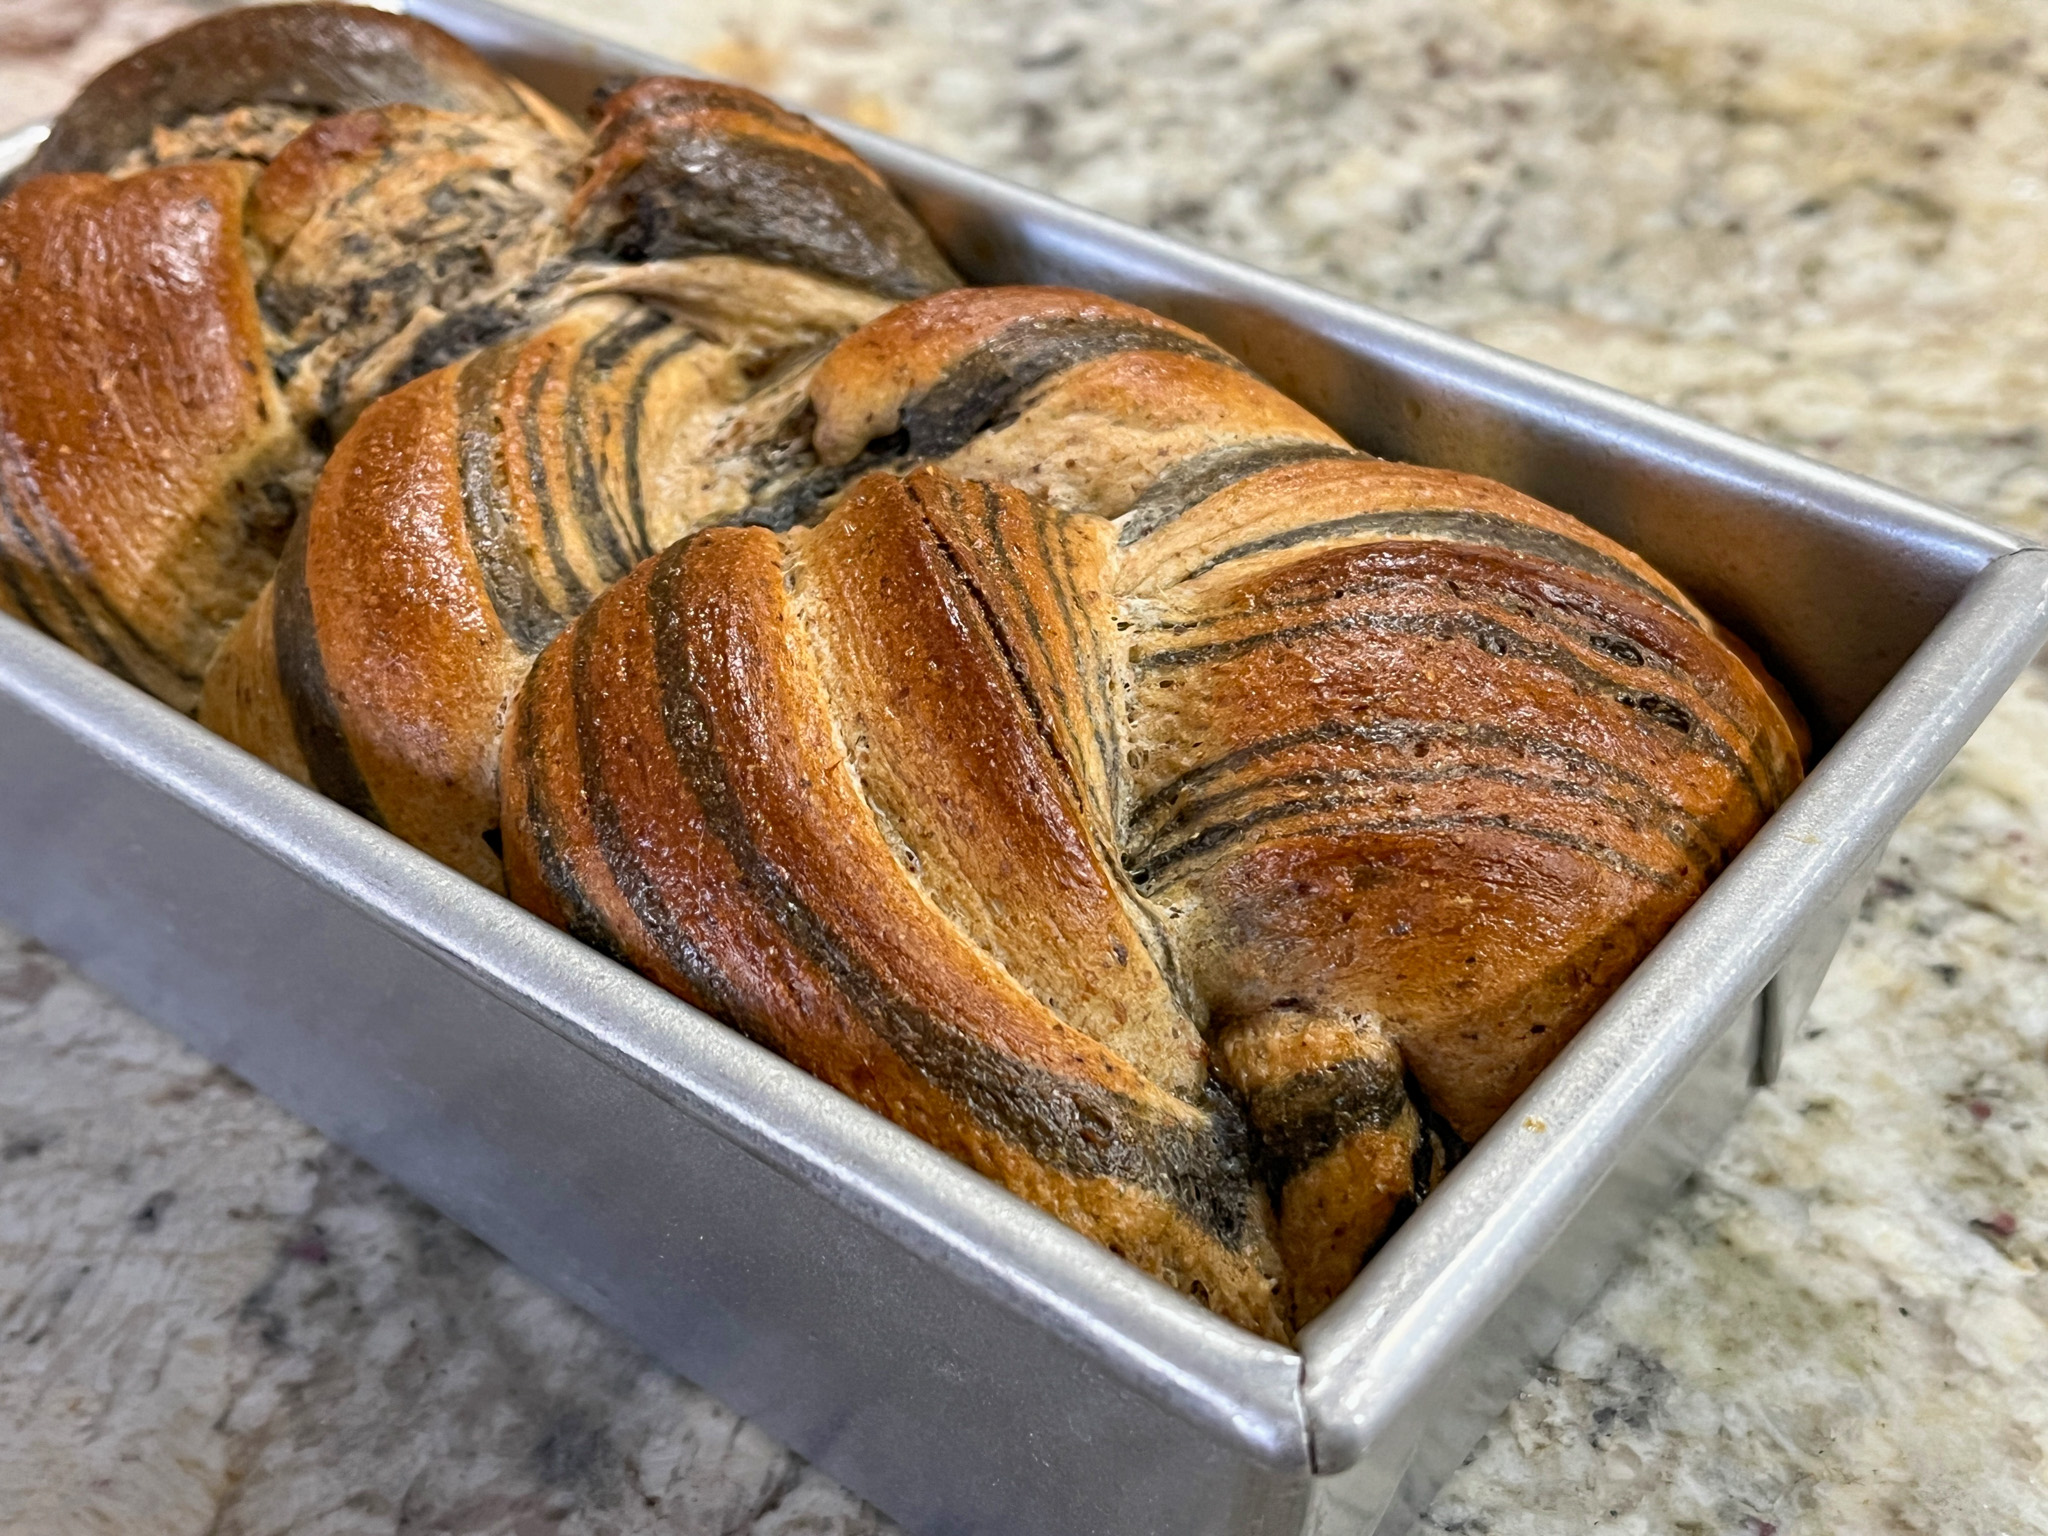
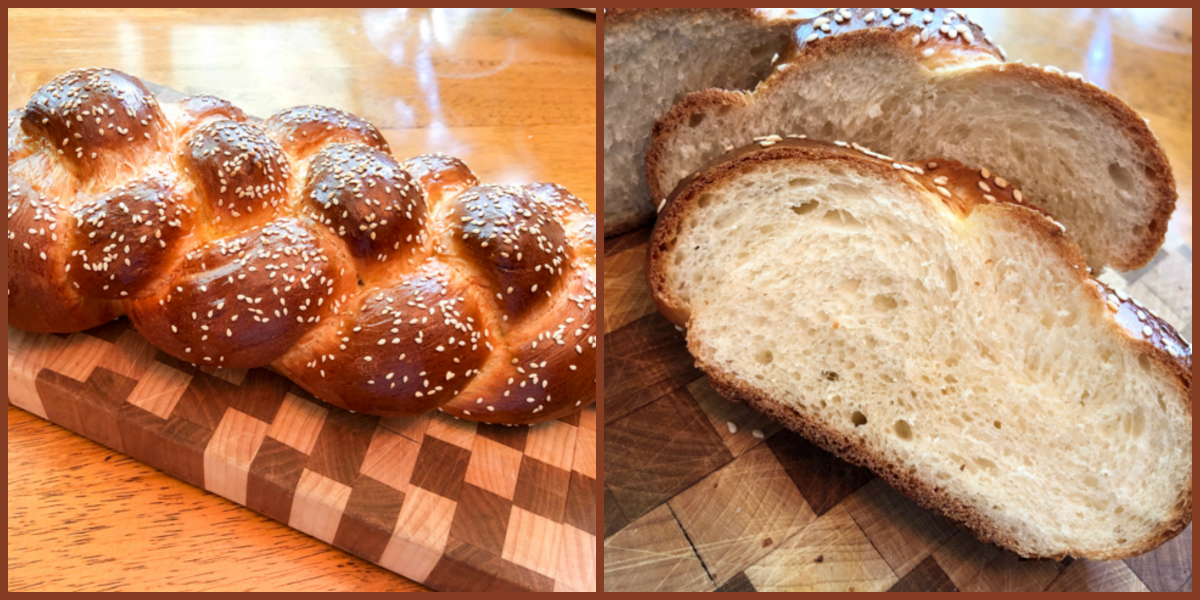
Heat the oven to 425 degrees F.  After the bread has been proofing for 1 and a half to 2 hours (until doubled), brush with egg wash and bake until golden brown, 30 to 40 minutes, until internal temperature is 200 F. You can sprinkle sesame seeds on the buns if you so desire.

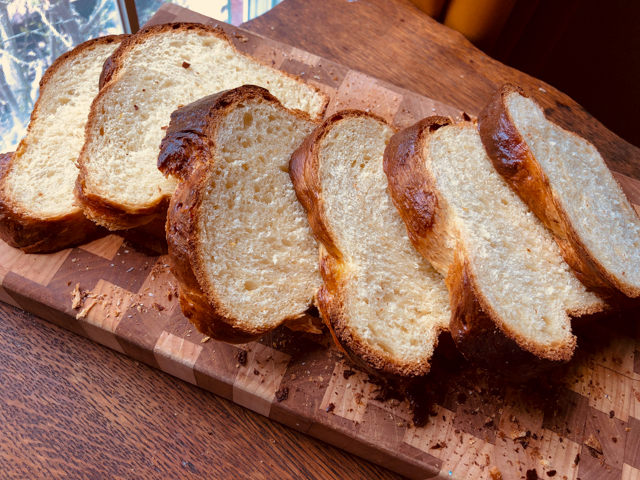
Un-mold the large loaf and cool on a wire rack together with the buns.

ENJOY!

to print the recipe, click here

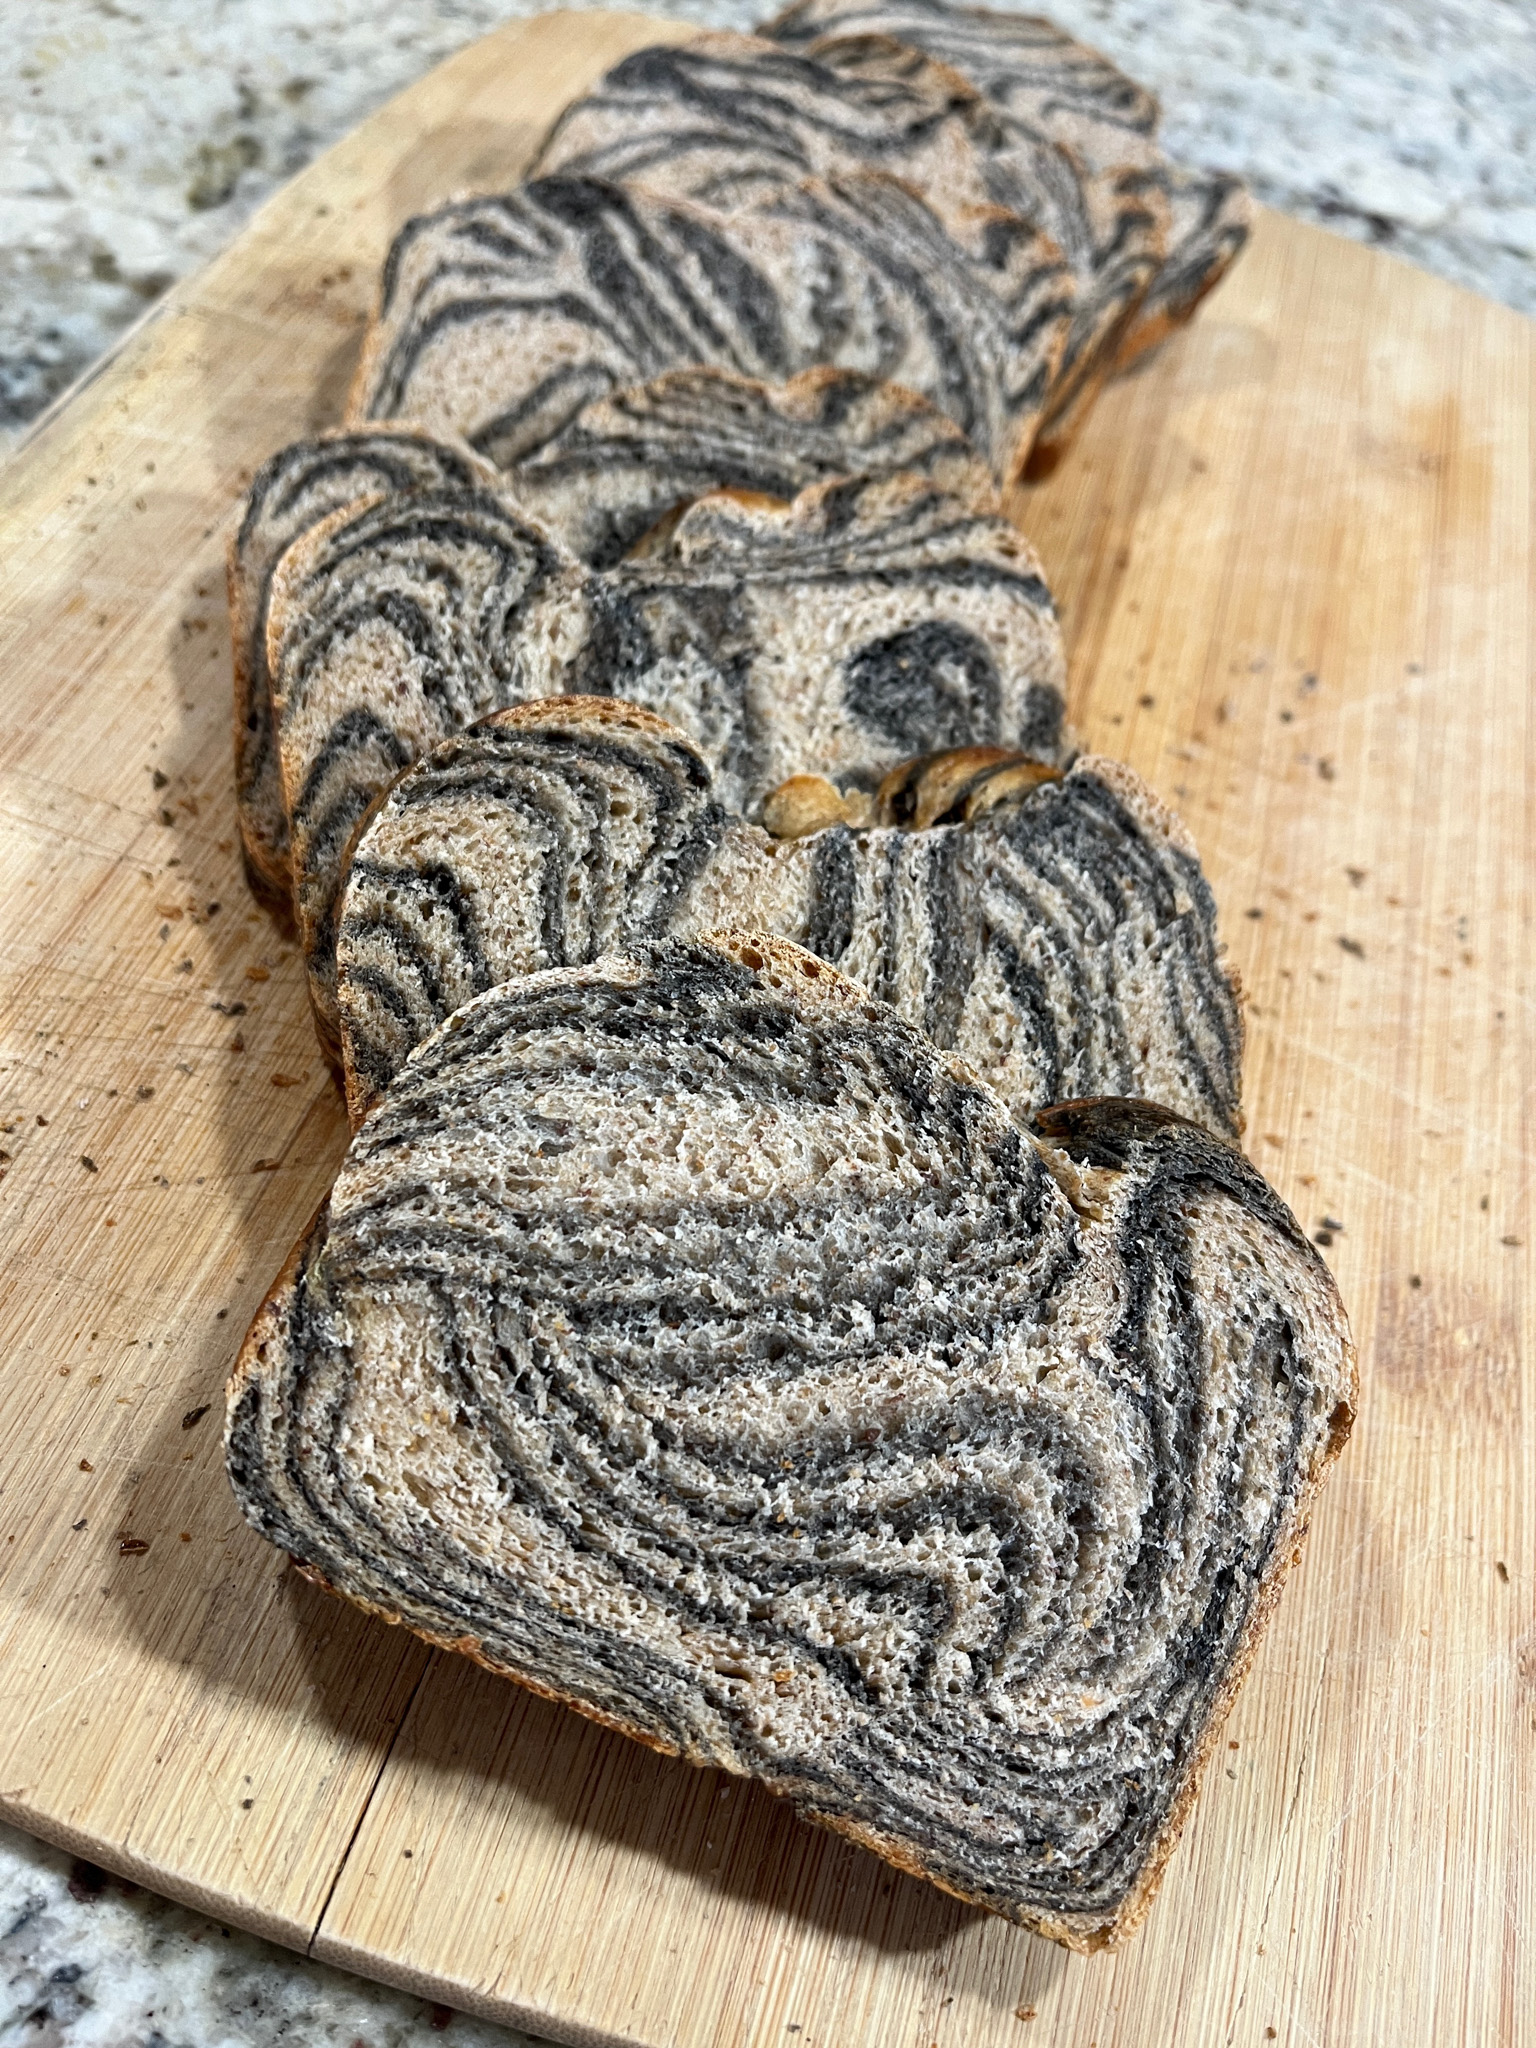
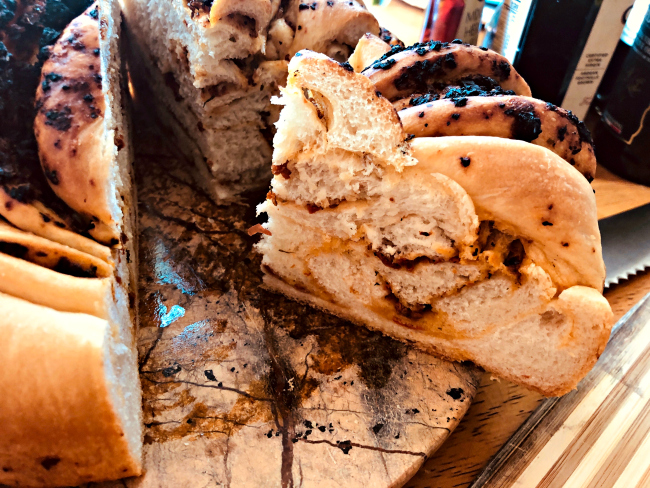
Comments: I will not lie to you, this is a project. The bread requires a sourdough starter, a poolish (fermented flour using small amount of commercial yeast and prepared the day before), and commercial yeast in the final dough. But it is a total pleasure to work with, rises like a rocket and the texture and taste? You will not miss the butter, that’s for sure. As Karen said, it keeps a lot better than the traditional version. And freezes beautifully too.

When you start adding the olive oil, you will be sure the whole thing is ruined, and might have a few rude thoughts directed at me. It seems impossible for the dough to come together. Have bread faith. And here is a little tip that might help: as you add the olive oil and the mixer is going and going, with a puddle of oil all around and looking hopeless, add just a sprinkle of bread flour on top. It will help things get in shape faster. But just a sprinkle, I say 1 tablespoon or so. If you add the olive oil in three additions, do that in the final two, when the dough will have more trouble incorporating it.

For a 9 x 5 loaf pan, I advise you to make three strands with about 250g of dough in each. Then divide the rest in 8 buns. When you do that, you will be able to let the shaped loaf proof for closer to 2 hours and it will not rip a bit like mine did. I had no choice but to bake after 1 hour and 10 minutes, the dough wanted to leave the pan and explore the kitchen. No bueno. That’s because I used 300g per strand, a bit too much. Don’t be put off by the complexity of this recipe, once you have the starter and the poolish prepared the day before, it is just a matter of weighing all other ingredients and having some fun.

Karen, thank you for the inspiration, I know I tell you this all the time but it’s so true… Your blog is a pleasure to follow!

ONE YEAR AGO: Coconut and Lime Macarons

TWO YEAR AGO: Flank Steak Carnitas

THREE YEARS AGO: Sesame and Poppy Seed Sourdough

FOUR YEARS AGO: Pecan-Crusted Chicken from Southern at Heart

FIVE YEARS AGO: Lamb Shanks en Papillote with Cauliflower-Celeriac Purée

SIX YEARS AGO: Chestnut Brownies and a Blog Award!

SEVEN YEARS AGO: Quinoa with Cider-Glazed Carrots

EIGHT YEARS AGO: Celebrate Wednesday: Heirloom Tomatoes Steal the Show

NINE YEARS AGO: Pain de Provence

TEN YEARS AGO: Golspie Loaf, from the Scottish Highlands

FIVE STRANDED BRAIDED BREAD & A COOKBOOK REVIEW

Braids, twists and elaborate knots fascinate me. I suppose it’s the repetitive pattern leading to elegance and serenity. Tying things together in harmony. When it comes to bread, going past the three-strand braid can be intimidating, but trust me, once you get the pattern going it is quite simple. A few months ago I was searching for videos on youtube to help me understand the process and found a gem of a cookbook: The Art of Braiding Bread, by Roberto von Krammer. His instructions are crystal clear and easy to follow.  I share with you my first attempt at a five-stranded braided bread.

FIVE-STRANDE BRAIDED BREAD
(adapted from The Art of Braiding Bread)

345 g bread flour
30 g sugar
26 g egg yolks
48 g whole eggs
26 g mild vegetable oil
110 g water
7 g salt
10 g instant yeast

Place all the ingredients in a Kitchen Aid type  bowl. Knead on first speed for 3 minutes until all the ingredients are thoroughly incorporated, then on second for approximately 5 minutes.

Ferment for 2 hours. The dough can also ferment overnight in the fridge. If you prefer to do that, allow it to sit at room temperature for one hour, then degas it gently by pressing it down, and place in the fridge. Press it down gently again two more times over a period of two hours.  A colder dough temperature makes it easier to form strands. The dough can be divided and shaped straight from refrigeration.

Pre-shape 5 round of dough and rest on an unfloured work surface, covered with plastic. When relaxed enough to be elongated without tearing, usually 10 to 15 minutes, roll out the strands and form the braids (process in the comments). Once braided, proof the loaves covered with baker’s linen and a sheet of plastic to prevent the formation of a skin.

Final fermentation after braiding: ½ to 2 hours at about 25 C.

Heat oven to 375 F. Before baking, thoroughly egg wash the surface of the loaves. If desired, sprinkle poppy or sesame seeds on top. Bake until golden brown and internal temperature is about 200 F, about 30 minutes.

ENJOY!

to print the recipe, click here

Comments:  With Mr. Krammer’s permission, here is the process to form a 5-stranded beta braid. First thing is to number the strands from left to right, then keep in mind that as the strand moves around, then new formation also gets numbered the same way, first strand to the left will be number 1, last one to the right will be number 5. If strand #5 jumps in between strand #1 and #2, it will become strand #2 in the new formation.

 Place #5 between #1 and #2

Move #1 between #3 and #4

Place #2 over #3 and #3 under #2 (twist)

End of cycle, repeat all over again until you reach the end of the bread.

By going through the process, you’ll end up with a beautiful 5-strand braid, that is then allowed to ferment until almost doubled in size.

I also made a Four-Braided Alpha loaf, and you can see that it generates a totally different look.

Now for the book. I could not believe how many different styles of braiding bread exist. From the number of strands used to the actual braiding, it is mind-blowing! You can use the basic dough for all of them, dividing the dough in the appropriate number of strands, and then deciding which method to follow. For each one Roberto provides pictures of EACH movement of the strand, plus the numeric pattern that you can memorize and repeat as you become more comfortable and experienced.

You will find several methods of braiding for 3, 4, 5, and 6 stranded loaves that go way beyond what you might imagine. Some braiding methods are challenging, but his instructions are so clear and the pictures of each step make it all doable.  I will definitely be challenging myself to the more complex styles, including braided round loaves, and breads that stack braids together.

This composite photo shows a few examples of the many found in his book, which I highly recommend! Click on his name below the recipe title for buying info.

A braided bread never fails to impress because it is so festive, and of course you can use other types of dough, with chocolate, or even going into a savory territory. Don’t be intimidated, and have fun with it!

ONE YEAR AGO: Green Olive Salad

TWO YEARS AGO: Coffee Macarons Dressed up to Party

THREE YEARS AGO: Blogging Hiatus

FOUR YEARS AGO: Tomato Tatin

FIVE YEARS AGO: Headed to Colorado!   

SIX YEARS AGO: Farofa Brasileira

SEVEN  YEARS AGO: Thai-Inspired Pork Tenderloin

EIGHT YEARS AGO: A yummy Brazilian cake: Bolo de Fuba’

NINE YEARS AGO:  Summer’s Tomatoes

TEN YEARS AGO: Leaving on a jet plane… 

SUNDRIED TOMATO TWIST BREAD

Since they say confession is good for the soul, here is mine: I’ve been cheating. Big time. Not only I’ve been baking bread with commercial yeast, but I went one step further down the path of debauchery and grabbed a bottle of “rapid rise” to play with. Just for the fun of it. This bread was ready in less than 3 hours. It had a wonderful texture and tasted amazing too. Sourdough will never leave my world, but I see some other “quickies” in my future.

SUNDRIED TOMATO TWIST BREAD
(adapted from several sources)

3 + 1/2  (420 g)  cups all purpose flour, divided
2 1/4 teaspoons (1 package) fast acting yeast (about 7g)
2 teaspoons sugar
1  teaspoons salt
1 + 1/4 cup (280 g) water
1/4 cup (53 g) canola oil
1/2 tablespoon white vinegar
1/4–1/2 cup sundried tomato pesto (store-bought or homemade)
1/3 cup shredded Gruyere cheese (eye-balling is ok)

In the bowl of a stand mixer, combine 2 + 1/2 cups (300 g) flour, yeast, sugar, and salt with a whisk.

Heat water and canola oil until warm (100 F). Add to flour mixture. Add vinegar. Mix roughly with a wooden spoon, then switch to the dough hook and add the remaining flour in small amounts until you get a dough that is smooth and barely sticks to the sides of the bowl.  You might not need the full amount of flour, I had just a little bit left.

Knead for about 5 minutes in low-speed. Place in a bowl lightly coated with oil, and let it rise until almost doubled.  If using fast-acting yeast, it will take less than one hour.

Grease a 9-inch springform pan, and line bottom with parchment; grease paper. Place on top of a baking sheet. Set aside. Punch down the dough. On a floured surface, roll the dough into a thin rectangle, as thin as you can without tearing it. Spread a thin layer of pesto on top of the dough, leaving a small border without any pesto. Spread the Gruyere cheese all over the pesto.  Starting at the long edge, roll it tightly and gently into a log.

Use a bench scraper to cut the dough in half lengthwise. Cross the two halves (layers facing up) to create an X shape; braid top and bottom of dough by laying the left piece over the right keeping the cut side up, until pieces of dough are tightly twisted. Pinch ends together.

Start at the thinner edge and slowly and very gently, roll the braid into a giant snail shell or a very large cinnamon bun. Be careful to keep all the layers facing up.  Carefully pick up the shaped bread and place in the prepared springform. Cover; let rise in warm place until almost double.  If using fast-acting yeast, it will again be ready in about 40 minutes, or even less, depending on the temperature of your kitchen.

Heat the oven to 400 F as the bread is in its final proofing stage.  Bake at 400º for 10 minutes, lower oven temperature to 350º and bake for an additional 30 minutes. When the bread is out of the oven lightly brush olive oil on top and sides. Let cool completely on a rack before slicing.

ENJOY!

to print the recipe, click here

Comments: Amazing how fast that yeast works. Being used to working with sourdough it almost scared me when after what it felt like the blink of an eye I caught the dough almost an inch above the rim. Unreal. A really nice dough to work with thanks to the addition of oil, handles very smoothly, not threatening to tear while rolling out and shaping.

I used store-bought sundried tomato pesto, because I made this bread in a weekend of intense baking and taking a little shortcut was my only real option, but of course making the pesto from scratch would be even better. So many other fillings will be great also. Black olives, pieces of ham or crispy bacon, you can take this bread in many directions. Just try to roll tightly and thinly, so that you get as many little layers as possible.

If you are a novice at bread baking, don’t let the shaping scare you, this is the type of dough that is very forgiving and even if you mess up the shaping a bit, it will look great. You don’t even have to do the twisted shape, you could braid the two halves of the dough, join the ends and call it a day.

Leftovers are superb toasted!

ONE YEAR AGO: And now for something completely different….

TWO YEARS AGO: Parsnip, Coconut, and Lemongrass Soup

THREE YEARS AGO: In My Kitchen, October 2016

FOUR YEARS AGO: Paleo Moussaka

FIVE YEARS AGO: In My Kitchen, October 2014

SIX YEARS AGO: In My Kitchen, October 2013

SEVEN YEARS AGO: Crimson and Cream Turkey Chili

EIGHT YEARS AGO: Taking a break from the nano-kitchen

NINE YEARS AGO: Chocolate Chip Cookies

PINK PRALINE BRIOCHE

Sometimes I wonder what makes me try a new recipe. Of course, reading tons of cookbooks and food blogs, new things show up on my radar often. I might make a mental note to try it at some point, labeling them as intriguing or interesting, but for the most part I move on. Then, there’s Pink Praliné Brioche. And no easy way to get it out of my mind. Having lived in Paris for a few years, it was hard to accept I’d never even seen one. Pink praliné. The stuff dreams are made of.

PINK PRALINÉ BRIOCHE
(adapted from Murielle Valette’s Patisserie)

3.5g fresh yeast (I used osmo-tolerant yeast)
25ml milk, at room temperature
250g bread flour
5g salt
15g sugar
3 eggs, at room temperature (about 150g)
125g soft butter
120g pink praliné, crushed lightly in a food processor (recipe follows)
egg wash

Whisk the yeast in a small bowl with the milk.  Put the flour, salt, sugar and eggs into the bowl of a KitchenAid type mixer. Add the milk and yeast, and knead it for about 10 minutes at low-speed.

Little by little add the butter and continue kneading in low to medium speed until the gluten is well-developed.  Place the dough in a bowl lightly coated with oil, cover and place in the fridge overnight.

The following day, turn over the dough on a work surface and gently press it as a rectangle of around 8 by 12 inches, then cut it lengthwise in three strips. Roll each piece to flatten it slightly, sprinkle a line of crushed pink praliné in the center, and enclose it with the dough, rolling it well to seal. Do the same with the other two strips, then braid them together, keeping the seam side down at all times.

Sprinkle more pink praliné over the shaped bread, letting them fall in the folds of the braid.  Cover loosely with plastic wrap and let it at room temperature for a final rise until it almost doubles in size. Mine took 2 hours and 45 minutes.

Heat the oven to 350 F, and right before baking, brush the surface of the braid with the egg wash.  Bake until golden brown, about 40 minutes. Cool completely before slicing.

ENJOY!

to print the recipe, click here

Comments: Brioche dough contains not only flour and yeast, but additional fat in the form of eggs, milk and butter. This type of enriched dough does well with a slow fermentation, so I prefer to mix it the day before. It also makes the actual baking day a lot easier, as you can shape the bread straight from its overnight proofing time in the fridge. It warms up quickly and it’s not hard to work with at all. You could ferment the dough at room temperature for 4 hours or so, but it will be a long baking day. Your kitchen, your call.

If you prefer to buy the pink praliné, amazon sells it, but be prepared to wait, no free 2-day shipping for this one. To make your own, follow the recipe below. 

PINK PRALINÉ
(from Cooking with Bernard)

450 g sugar, divided in 150g amounts
A few drops of red food coloring
125g whole hazelnuts, peeled (about 3/4 cup)
125g whole almonds (about 3/4 cup)

Place one-third of the sugar (3/4 cup / 150 g) in a large frying pan with just enough water to moisten it. Add a few drops of red coloring.  Stir well and turn the heat to high. Bring to a boil. When large bubbles start forming, add the hazelnuts and almonds, stirring non-stop. Control the heat, so that the nuts don’t burn. The syrup will begin to crystallize, and look very grainy. Don’t despair, keep stirring so that the nuts are well coated in sugar. Keep simmering, the sugar that does not coat the nuts will slowly start to melt and turn into a thick liquid. Transfer the contents of the pan to a baking sheet lined with parchment paper or Silpat. You should have nuts and some “free” caramel-sugar. Reserve the nuts and place the sugar in a clean saucepan.

Add another third of the sugar (150g). Add a little more red coloring and water – just enough to moisten the sugar. Bring to a simmer over low heat. Continue until all the pieces of sugar are completely melted. Switch off the burner, add the reserved nuts to the frying pan, but don’t switch turn the heat on yet. Wait until the syrup in the saucepan reaches 255°F. When the syrup is almost at the desired temperature, switch on the burner below the frying pan. It should be at medium heat. Pour the syrup over the nuts, stirring as you pour. You will need to wash this pan to use it again, so make sure to take it right away to the sink and fill with water.

Coat the nuts. The syrup will once again become grainy. Allow the sugar that does not coat the nuts to melt. Transfer the contents of the pan to a sheet of parchment paper and set the coated nuts to one side and the remaining sugar to the other. Place the remaining pink sugar in the saucepan and add the last third of the sugar (150 g) with more food coloring and enough water to moisten it. Allow to melt and bring to 255°F / 124°C. Return the nuts to the frying pan and pour in the syrup when it reaches the right temperature, stirring constantly. At this third stage, the syrup should coat the pink nuts quite well. Stir and wait for the syrup to become grainy and any sugar that does not coat the nuts should melt again.  Pour all the contents of the frying pan onto a sheet of  parchment paper. By now, there should be almost no sugar left unstuck to the nuts.

Final step: Heat the oven to 160°F and bake the candied nuts for at least 45 minutes to dry them out completely. Mine took almost double time to dry.  Let them cool and store in an air-tight container. They are ready to nibble on or use in recipes.

ENJOY!

to print the recipe, click here

Comments: Making pink praliné is a labor of love. You can buy it ready, but  the whole process of making it seemed fascinating enough to make me go for it. Essentially, you are slowly covering hazelnuts and almonds with a red-dyed caramel syrup. The coating happens in three stages. It is a bit time-consuming and also potentially dangerous. I got a burn with one tiny microscopic drop of super heated caramel and trust me, it hurt like hell. Then, it left a tiny scar, perfectly round and brown. Kind of cute, actually. But I don’t recommend it.

Pink praliné is a wonderful snack, and the pups tried some, yes they did. There was intense wagging of three tails. In São Paulo, when I was growing up, they sold a type of peanut made by Japanese immigrants that comes close to pink praliné but not nearly as good. It is called “amendoim doce” (translates as sweet peanut) and you can see it in the link that it also has a pinkish sugary coating, just a bit lighter. Anyway, if you are fond of nuts and feel crazy enough to be around boiling caramel for an extended period of time, try making these babies. They keep for a long time, which is a bonus.

So here it is, the Pink Praliné Brioche! It is absolutely delicious and yes, it was worth the trouble. If you google for photos, you’ll see it in many different sizes, shapes, and variations on how to incorporate the praline in the dough. Some just sprinkle a huge amount on top of a roundish loaf. I like this method better, because some of it gets truly deep inside the bread. The sugar that glues to the nuts melts slightly during baking, and when you bite into it, you get this concentrated sweet taste, truly delicious.  It is not sweet like a spoonful of sugar, of course not. The caramelization process gives the sugar a slightly bitter edge. Perfect, according to my taste buds.

ONE YEAR AGO: A Spinach Salad to Write Home About

TWO YEARS AGO: Karen’s Four Hour French Country Bread

THREE YEARS AGO: The Siren’s Song of the Royal Icing

FOUR YEARS AGO: Blog-worthy Roasted Butternut Squash

FIVE YEARS AGO: Chocolate Currant Sourdough Loaf & Roasted Beet Hummus

SIX YEARS AGO: Sesame and Flax Seed Sourdough

SEVEN YEARS AGO: Spanakopita Meatballs

EIGHT YEARS AGO: Saturday Morning Scones

NINE YEARS AGO: Pain de Mie au Levain