Of the many contestants of The Great British Bake Off, I cannot think of anyone sweeter and more lovely than Kim-Joy. Her talent as a baker goes way beyond mixing sugar with butter, she turns everything she touches into little works of art. Her love for animals and nature is often present in cakes, cookies, all things pastry. I have mixed feelings about Instagram, to me it often passes a pseudo-glamour aura. But when you stumble on Kim-Joy’s instagram feed, you realize it is just one more venue in which she shows how special and caring a person she is. And of course, you can marvel at all she is baking now, a couple of years down the road from her amazing performance in a certain tent.

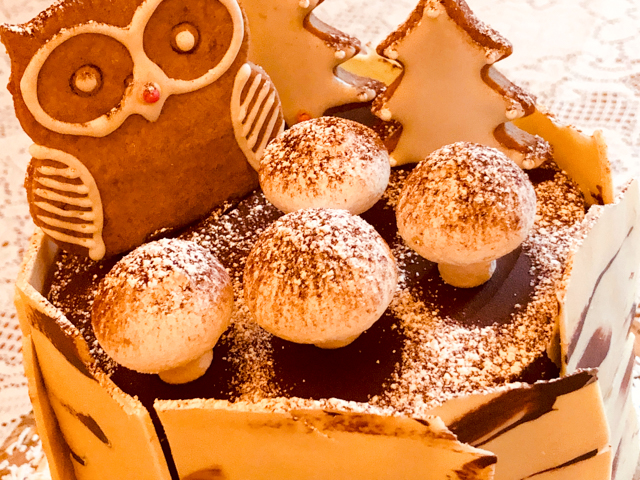
Every year I ask Phil to choose a cake for his Birthday, which falls right after Christmas. Last month, he saw Kim Joy’s book over the table and announced that his cake would have to be from her book. It took him just a few minutes to come back with “This one. Woodland Cake.” Sure. A three-layer cake with ganache frosting, home-made praline’, ginger cookies, mushroom-shaped meringues, and a gigantic sheet of white chocolate, well-tempered. In other words, a cake that says I really, really love you.
Kim-Joy offers several suggestions for the chocolate cake, in the book she opted for a vegan version. I’ve been meaning to try Ina Garten’s intense chocolate cake for a while, so I decided to go with it. I used the ginger cookies from Kim Joy’s book and also her Royal icing, but will share only the other components of the cake.

WOODLAND CAKE
(published with permission from Kim-Joy)
for the cake:
used the recipe from Ina Garten, available here
(exact amounts as shown, baked in 3 cake pans, 6 inch diameter)
for chocolate bark:
100g brown candy melts
500g white chocolate, tempered
for coconut-chocolate ganache:
400g dark chocolate, chopped into small pieces
300 mL coconut milk
100 to 250g powdered sugar
for praline’:
130g super fine sugar
35mL water
1 tsp liquid cornstarch (optional)
75g hazelnuts peeled and toasted
for mushroom meringue:
140g superfine sugar
80g egg whites
pinch of cream of tartar
for cookies (optional):
use any favorite recipe for gingerbread cookies
Bake the cake according to the recipe in the link, using 3 round pans with 6-inch in diameter. Cool completely. It can be prepared a couple of days in advance, reserve in the fridge.
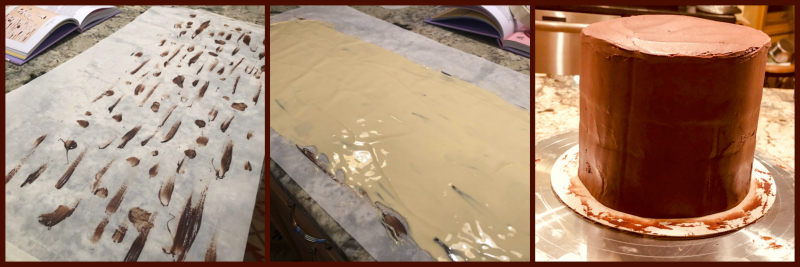
Make the chocolate bark. Lay out a rectangular piece of parchment paper measuring roughly 9 1/2 x 27 1/2 inches. Melt the brown candy melts gently in the microwave. Use a paintbrush to paint dots and stripes to mimi the pattern of a birch tree. Let it cool to harden.
Temper the white chocolate and pour on top of the paper with the design already painted and set. Spread gently with an offset spatula to get a smooth, thin coating. Once the chocolate sets, break into pieces of bark (easier way to do it is by hand, using a knife tends to shatter the pieces). Reserve. Can be prepared the day before.
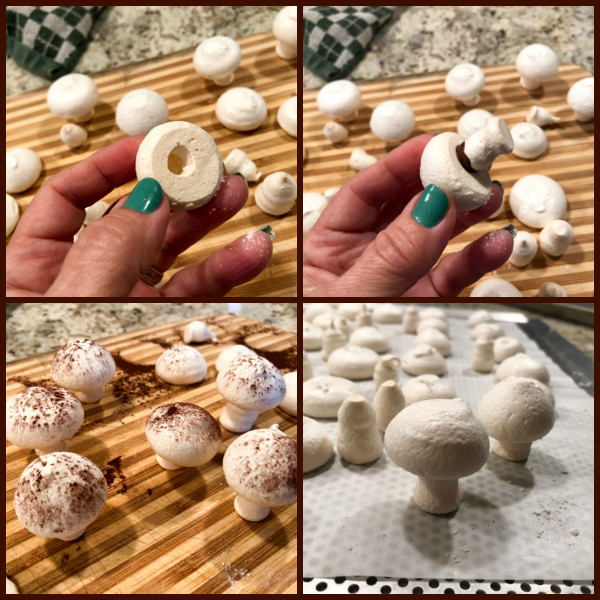
Make the mushroom meringues. Heat the oven to 400F, line a baking sheet with parchment paper and spread the sugar over it. Bake for about 8 minutes until warm but not caramelized. Leave the door open for the sugar to cool down to about 212F.
Add the egg whites to a KitchenAid type mixer and whisk at high speed until you get soft peaks. Add the cream of tartar then the baked sugar very slowly, about 1 Tablespoon at a time, allowing it to dissolve before adding more. Transfer to a piping bag and pipe small blobs to be the head of the mushrooms and small stalks piping with the bag straight up, to form the stalks.
Bake at 200F for 60 to 90 minutes, depending on how dry you like them to be. Switch the oven off and leave the meringues inside for a couple of hours to get the meringues fully dry. To form the mushrooms, make a small hole in the bottom of the “caps”, and use some melted chocolate or candy melts to glue the stalk into it. Shower the mushrooms with cocoa powder if you like.
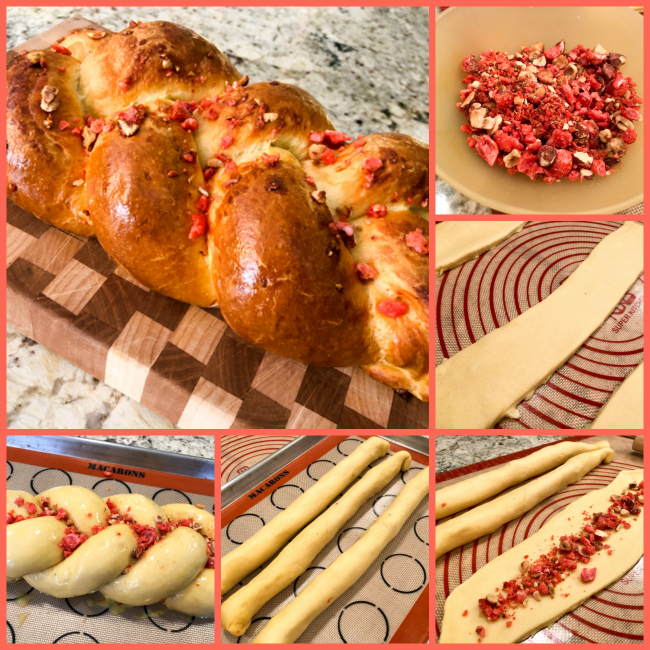
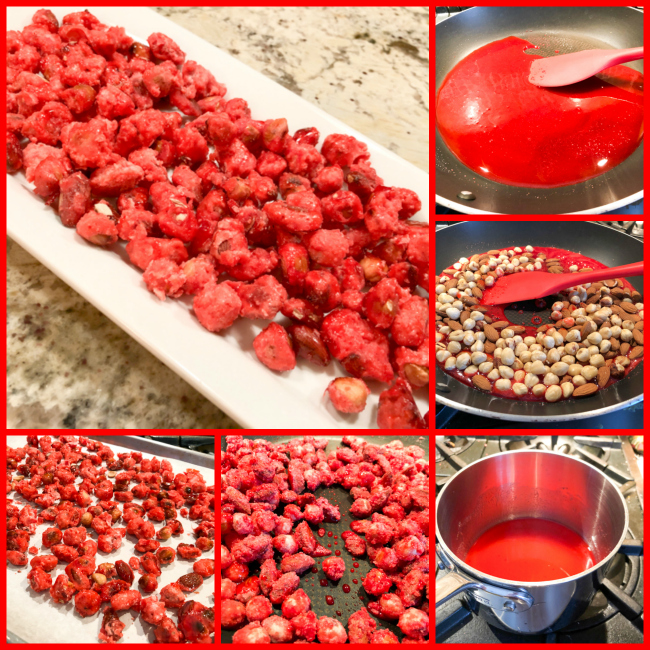
Make the praline paste. Add the sugar, water and cornstarch to a pan. Stir to combine, then stop stirring, bring to a boil. Meanwhile spread the hazelnuts over a Silpat or parchment paper. When the sugar mixture turns amber in color, pour quickly over the hazelnuts, and allow it to fully set. Break into pieces and place in a food processor, blitzing it into a paste. Reserve.
Make the coconut ganache. Place the chocolate in a large Pyrex type bowl. Heat the coconut milk until it starts to bubble. Pour over the chocolate and let it sit undisturbed for 2 minutes. Stir until fully smooth. Add the sugar and whisk with a handheld mixer until just combined. Transfer 2/3 of the ganache to a bowl and chill for 15 minutes. This portion will be used to coat the cake.
Add the praline paste to the remaining 1/3 of the ganache. This will be used to fill the cake layers.
Optional step: Bake gingerbread cookies in the shape of your choice to decorate the cake, icing them if you like.
ASSEMBLE THE CAKE: Place one cake layer over a cardboard round and add ganache/praline mixture on top. Place second layer of cake, repeat the spreading of ganache, and the final cake layer on top. Coat the sides and top with the pure ganache. Set the cake in the fridge for an hour or so. Transfer it to the serving platter.
Adjust the size of the chocolate bark so that pieces will overlap the cake all around and have more or less similar heights. Remember that nature is never fully perfect, so go with the flow. Melt some candy melts if needed, for the bark to stick better to the cake.
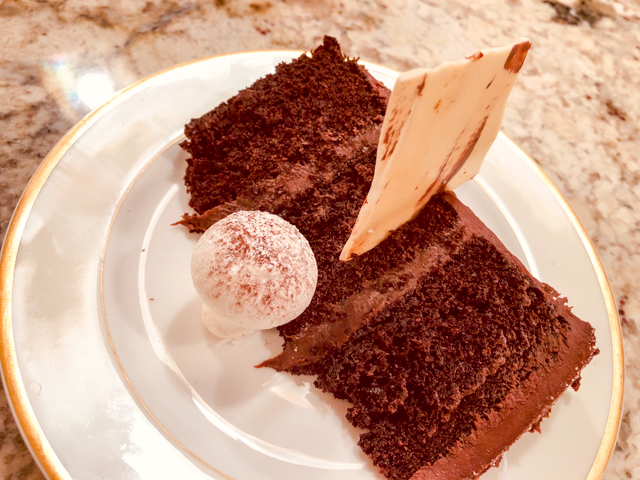
Add the cookies and meringue on top of the cake, spread some coconut flakes around the bottom, a few more meringues. Say I love you, and serve!
ENJOY!
to print the recipe, click here
Comments: If there is anything more fun to bake than this cake, I don’t know what it could be. As Kim-Joy says in the book, you don’t have to make every single component in her cakes, but if you decide to do, just go slowly, make them ahead of time. The meringues I made 5 days earlier and froze. The cookies last days at room temperature, the bark also can be made 3, 4 days ahead. All of a sudden it becomes quite doable. Bake the cakes, make the praline and ganache, and you are pretty much done. If tempering chocolate gets you into severe hyperventilation, you can use candy melts. It won’t taste as good, but the visual effect will be similar and everyone will be impressed.
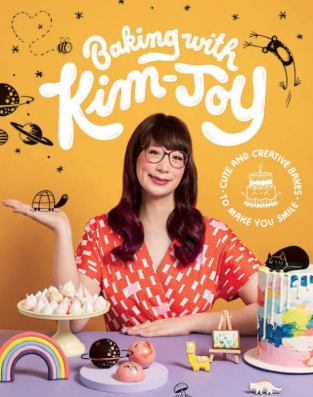
And now, allow me to share a little review of Baking with Kim-Joy
BAKE, BE ADVENTUROUS, AND ABOVE ALL, BE HAPPY!
(Kim-Joy)
If you love color and happy feelings, this book is for you. It is pure Kim in each page, every little detail of the book, from cute drawings to uplifting messages, it is impossible not to browse without a smile. Just as I wrote this phrase, I opened the book and saw the very first page:
Cute and Creative Bakes to Make you Smile.
See? What did I just tell you?
The book is divided in 5 chapters: Cakes and Frosting, Cookies and Icing, Breads, Square Cakes and Little Bakes. I will go chapter by chapter sharing my thoughts
CAKES AND FROSTING. She opens the chapter (actually she opens the book) with a cake that took my breath away, not only because it is gorgeous, but the flavors! Pistachio and Cardamom Cake with Mango-Saffron Jam. The cake is naked, she offers different versions of buttercream to lightly coat it, and the top is sprinkled with ground pistachios in a very simple but artistic way. I adore it. I will make the mango jam very soon. Next comes the Vegan Chocolate Cake with Praline, which would be her cake of choice for the Woodland Cake I shared today. The whole idea behind her book is to use it as a starting point. For instance her Spiced Carrot & Walnut Cake shows up as a regular cake, but then she dresses it up for Halloween adding meringue ghosts and poached pears, for stunning decoration. Stunning and fun at the same time. You can also find a Rainbow Cake (how could she not include one?) but coupled with the perfect type of icing, and if you want to go the extra mile, make it a cake that holds something unexpected inside as you slice it open. Yes, get her book! Easter Cake, Cat Paradise, Space Turtle (!!!!), Whale Underwater Cake, one more interesting than the other, each offering a unique type of decorating, sometimes with gingerbread little sculptures, sugar paste, isomalt, dripping ganache. The chapter ends with several types of frostings and decorating techniques.
COOKIES AND ICINGS. She offers four basic cookie recipes, advising on when to use each. Semolina Shortbread, Ginger Cookies (that I used in the cake, her version has the right amount of cloves for our taste), Basic Vegan Shortbread, and Vegan Ginger Cookies. Then she moves to cookie decorating tips and ideas, starting with her small batch of Royal Icing. I love that. In fact, I’ve been using her small scale version quite often, because I hate to have a huge amount of Royal Icing hanging around. I now know pretty much how much I need, and might make her recipe or maybe double it, but never need more than that.
BREADS. The book opens with a recipe using tangzhong, which is a technique I found not too long ago and love to use. She uses it to make adorable cat buns, of course, and immediately follows with a version that bakes a Honey Wreath of little cats around a wheel of camembert cheese. It is just the cutest bread you’ll ever see. A No-Knead overnight Caraway Bread also calls my name. She shares a recipe for a Japanese classic bread called “Melonpan” which again, is going to bring a huge smile to your face once you see it. The type of baking that if you have kids around, you definitely must embrace.

SQUARE CAKES. I want to bake every single cake of this chapter. It is color, and art, and fun all around. I don’t have the artistic skill to do some of them, but maybe with Phil’s help I could give the Lavender and Orange Cake a try. It looks like a Monet’s painting.
LITTLE BAKES. Macarons. The chapter starts with macaron tips and ideas. You can imagine my happy dance, right? Honestly, some shapes seem very challenging, but it is nice to see how creative one can be with macaron piping. She moves to other types of cookies, like Cardamon, Almond and Honey Bee Cookies that use her basic Semolina Shortbread flavored with a touch of cardamon. The decoration in the cookies is just amazing, they end up like cute little bees, each with a unique “expression.” After that comes choux buns, tartlets and madeleines, that she transforms into little works of art. Just mind blowing. This final chapter alone is worth the whole book, in my opinion.
I cannot say that her book is for beginners, maybe it would be a bit too challenging for someone who has never baked a cake or a batch of cookies. But if you are passionate about baking, the book is a must-have, no matter your skill level.
Kim-Joy, thank you so much for giving me permission to share this recipe, and for being a constant source of inspiration for those who love to bake.

ONE YEAR AGO: Lemon-Almond Cake with Cranberry Glaze
TWO YEARS AGO: The Iron (Uptake) Chef Challenge
THREE YEARS AGO: Thank you!
FOUR YEARS AGO: Salmon Rillettes, a Classy Appetizer
FIVE YEARS AGO: Linzer Cookies
SIX YEARS AGO: Baked Ricotta, Take Two
SEVEN YEARS AGO: Pumpkin Uncanned
EIGHT YEARS AGO: Pork Ragu
NINE YEARS AGO: Friendly Kuri Squash
TEN YEARS AGO: Celery and Apple Salad