A CAKE TO SAY I LOVE YOU FROM KIM-JOY’S COOKBOOK


Of the many contestants of The Great British Bake Off, I cannot think of anyone sweeter and more lovely than Kim-Joy. Her talent as a baker goes way beyond mixing sugar with butter, she turns everything she touches into little works of art. Her love for animals and nature is often present in cakes, cookies, all things pastry. I have mixed feelings about Instagram, to me it often passes a pseudo-glamour aura. But when you stumble on Kim-Joy’s instagram feed, you realize it is just one more venue in which she shows how special and caring a person she is. And of course, you can marvel at all she is baking now, a couple of years down the road from her amazing performance in a certain tent.

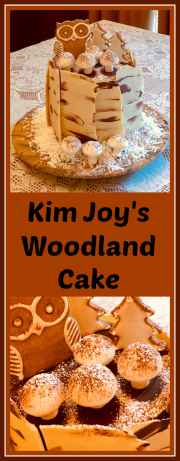
Every year I ask Phil to choose a cake for his Birthday, which falls right after Christmas. Last month, he saw Kim Joy’s book over the table and announced that his cake would have to be from her book. It took him just a few minutes to come back with “This one. Woodland Cake.”  Sure. A three-layer cake with ganache frosting, home-made praline’, ginger cookies, mushroom-shaped meringues,  and a gigantic sheet of white chocolate, well-tempered. In other words, a cake that says I really, really love you.

Kim-Joy offers several suggestions for the chocolate cake, in the book she opted for a vegan version. I’ve been meaning to try Ina Garten’s intense chocolate cake for a while, so I decided to go with it.  I used the ginger cookies from Kim Joy’s book and also her Royal icing, but will share only the other components of the cake.

WOODLAND CAKE
(published with permission from Kim-Joy)

for the cake:
used the recipe from Ina Garten, available here
(exact amounts as shown, baked in 3 cake pans, 6 inch diameter)

for chocolate bark:
100g brown candy melts
500g white chocolate, tempered

for coconut-chocolate ganache:
400g dark chocolate, chopped into small pieces
300 mL coconut milk
100 to 250g powdered sugar

for praline’:
130g super fine sugar
35mL water
1 tsp liquid cornstarch (optional)
75g hazelnuts peeled and toasted

for mushroom meringue:
140g superfine sugar
80g egg whites
pinch of cream of tartar

for cookies (optional):
use any favorite recipe for gingerbread cookies

Bake the cake according to the recipe in the link, using 3 round pans with 6-inch in diameter. Cool completely. It can be prepared a couple of days in advance, reserve in the fridge.

Make the chocolate bark. Lay out a rectangular piece of parchment paper measuring roughly 9 1/2 x 27 1/2 inches. Melt the brown candy melts gently in the microwave. Use a paintbrush to paint dots and stripes to mimi the pattern of a birch tree. Let it cool to harden.

Temper the white chocolate and pour on top of the paper with the design already painted and set. Spread gently with an offset spatula to get a smooth, thin coating. Once the chocolate sets, break into pieces of bark (easier way to do it is by hand, using a knife tends to shatter the pieces). Reserve. Can be prepared the day before.

Make the mushroom meringues. Heat the oven to 400F, line a baking sheet with parchment paper and spread the sugar over it. Bake for about 8 minutes until warm but not caramelized.  Leave the door open for the sugar to cool down to about 212F.

Add the egg whites to a KitchenAid type mixer and whisk at high speed until you get soft peaks. Add the cream of tartar then the baked sugar very slowly, about 1 Tablespoon at a time, allowing it to dissolve before adding more.  Transfer to a piping bag and pipe small blobs to be the head of the mushrooms and small stalks piping with the bag straight up, to form the stalks.

Bake at 200F for 60 to 90 minutes, depending on how dry you like them to be. Switch the oven off and leave the meringues inside for a couple of hours to get the meringues fully dry. To form the mushrooms, make a small hole in the bottom of the “caps”, and use some melted chocolate or candy melts to glue the stalk into it. Shower the mushrooms with cocoa powder if you like.

Make the praline paste. Add the sugar, water and cornstarch to a pan. Stir to combine, then stop stirring, bring to a boil. Meanwhile spread the hazelnuts over a Silpat or parchment paper. When the sugar mixture turns amber in color, pour quickly over the hazelnuts, and allow it to fully set. Break into pieces and place in a food processor, blitzing it into a paste. Reserve.

Make the coconut ganache. Place the chocolate in a large Pyrex type bowl. Heat the coconut milk until it starts to bubble. Pour over the chocolate and let it sit undisturbed for 2 minutes. Stir until fully smooth. Add the sugar and whisk with a handheld mixer until just combined. Transfer 2/3 of the ganache to a bowl and chill for 15 minutes.  This portion will be used to coat the cake.

Add the praline paste to the remaining 1/3 of the ganache.  This will be used to fill the cake layers.

Optional step: Bake gingerbread cookies in the shape of your choice to decorate the cake, icing them if you like.

ASSEMBLE THE CAKE: Place one cake layer over a cardboard round and add ganache/praline mixture on top. Place second layer of cake, repeat the spreading of ganache, and the final cake layer on top. Coat the sides and top with the pure ganache.  Set the cake in the fridge for an hour or so. Transfer it to the serving platter.

Adjust the size of the chocolate bark so that pieces will overlap the cake all around and have more or less similar heights. Remember that nature is never fully perfect, so go with the flow.  Melt some candy melts if needed, for the bark to stick better to the cake.

Add the cookies and meringue on top of the cake, spread some coconut flakes around the bottom, a few more meringues. Say I love you, and serve!

ENJOY!

to print the recipe, click here

Comments: If there is anything more fun to bake than this cake, I don’t know what it could be. As Kim-Joy says in the book, you don’t have to make every single component in her cakes, but if you decide to do, just go slowly, make them ahead of time. The meringues I made 5 days earlier and froze. The cookies last days at room temperature, the bark also can be made 3, 4 days ahead. All of a sudden it becomes quite doable. Bake the cakes, make the praline and ganache, and you are pretty much done.  If tempering chocolate gets you into severe hyperventilation, you can use candy melts. It won’t taste as good, but the visual effect will be similar and everyone will be impressed.

And now, allow me to share a little review of Baking with Kim-Joy

BAKE, BE ADVENTUROUS, AND ABOVE ALL, BE HAPPY!
(Kim-Joy)

If you love color and happy feelings, this book is for you. It is pure Kim in each page, every little detail of the book, from cute drawings to uplifting messages, it is impossible not to browse without a smile. Just as I wrote this phrase, I opened the book and saw the very first page:

Cute and Creative Bakes to Make you Smile.  

See? What did I just tell you?

The book is divided in 5 chapters: Cakes and Frosting, Cookies and Icing, Breads, Square Cakes and Little Bakes. I will go chapter by chapter sharing my thoughts

CAKES AND FROSTING. She opens the chapter (actually she opens the book) with a cake that took my breath away, not only because it is gorgeous, but the flavors! Pistachio and Cardamom Cake with Mango-Saffron Jam. The cake is naked, she offers different versions of buttercream to lightly coat it, and the top is sprinkled with ground pistachios in a very simple but artistic way. I adore it. I will make the mango jam very soon. Next comes the Vegan Chocolate Cake with Praline, which would be her cake of choice for the Woodland Cake I shared today.  The whole idea behind her book is to use it as a starting point. For instance her Spiced Carrot & Walnut Cake shows up as a regular cake, but then she dresses it up for Halloween adding meringue ghosts and poached pears, for stunning decoration. Stunning and fun at the same time.  You can also find a Rainbow Cake (how could she not include one?) but coupled with the perfect type of icing, and if you want to go the extra mile, make it a cake that holds something unexpected inside as you slice it open. Yes, get her book!  Easter Cake, Cat Paradise, Space Turtle (!!!!), Whale Underwater Cake, one more interesting than the other, each offering a unique type of decorating, sometimes with gingerbread little sculptures, sugar paste, isomalt, dripping ganache.  The chapter ends with several types of frostings and decorating techniques.

COOKIES AND ICINGS. She offers four basic cookie recipes, advising on when to use each. Semolina Shortbread, Ginger Cookies (that I used in the cake, her version has the right amount of cloves for our taste), Basic Vegan Shortbread, and Vegan Ginger Cookies. Then she moves to  cookie decorating tips and ideas, starting with her small batch of Royal Icing. I love that. In fact, I’ve been using her small scale version quite often, because I hate to have a huge amount of Royal Icing hanging around. I now know pretty much how much I need, and might make her recipe or maybe double it, but never need more than that.

BREADS. The book opens with a recipe using tangzhong, which is a technique I found not too long ago and love to use. She uses it to make adorable cat buns, of course, and immediately follows with a version that bakes a Honey Wreath of little cats around a wheel of camembert cheese. It is just the cutest bread you’ll ever see. A No-Knead overnight Caraway Bread also calls my name. She shares a recipe for a Japanese classic bread called “Melonpan” which again, is going to bring a huge smile to your face once you see it. The type of baking that if you have kids around, you definitely must embrace.

SQUARE CAKES. I want to bake every single cake of this chapter. It is color, and art, and fun all around. I don’t have the artistic skill to do some of them, but maybe with Phil’s help I could give the Lavender and Orange Cake a try. It looks like a Monet’s painting.

LITTLE BAKES. Macarons. The chapter starts with macaron tips and ideas. You can imagine my happy dance, right? Honestly, some shapes seem very challenging, but it is nice to see how creative one can be with macaron piping. She moves to other types of cookies, like Cardamon, Almond and Honey Bee Cookies that use her basic Semolina Shortbread flavored with a touch of cardamon. The decoration in the cookies is just amazing, they end up like cute little bees, each with a unique “expression.” After that comes choux buns, tartlets and madeleines, that she transforms into little works of art. Just mind blowing.  This final chapter alone is worth the whole book, in my opinion.

I cannot say that her book is for beginners, maybe it would be a bit too challenging for someone who has never baked a cake or a batch of cookies. But if you are passionate about baking, the book is a must-have, no matter your skill level.

Kim-Joy, thank you so much for giving me permission to share this recipe, and for being a constant source of inspiration for those who love to bake.

ONE YEAR AGO: Lemon-Almond Cake with Cranberry Glaze

TWO YEARS AGO: The Iron (Uptake) Chef Challenge

THREE YEARS AGO: Thank you!

FOUR YEARS AGO: Salmon Rillettes, a Classy Appetizer

FIVE YEARS AGO: Linzer Cookies

SIX YEARS AGO: Baked Ricotta, Take Two

SEVEN YEARS AGO: Pumpkin Uncanned

EIGHT YEARS AGO: Pork Ragu

NINE YEARS AGO: Friendly Kuri Squash

TEN YEARS AGO: Celery and Apple Salad

THE DOBOS TORTE


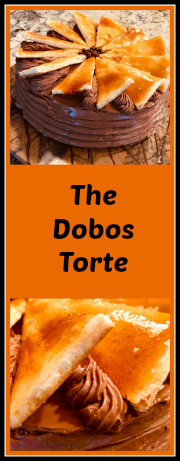
Several years ago I saw a recipe for Dobos Torte in a website and the image of those thin cake layers joined together with chocolate buttercream, plus the interesting crown of caramelized cake made me wish I could taste a piece right then through the screen. I said to myself I would be making it really soon. Days turned into weeks, weeks into months, and I swear it’s been at least 3 years if not more in my plans. Finally, I went for it, and it was one of the most rewarding experiments in our kitchen. I enjoyed the preparation of each component, and loved how they came together nicely. But what really makes this cake is the decoration on top. You must get the caramel dark enough so that it will stay hard on the cake, otherwise it might start to weep and you lose the textural contrast. This is definitely a cake fit for a special occasion. Like a gray Monday early in November that brought with it unexpected snow showers.

THE DOBOS TORTE
(adapted from a recipe from Chef Wilhelm Wanders)

for the sponge cake layers:
140 g egg yolks
120 g granulated sugar, divided (60 + 60g)
2 g salt
1 tsp vanilla paste
210 g egg whites
120 g all-purpose Flour
40 g unsalted butter, melted and cooled

for the chocolate buttercream:
250g granulated sugar
250 g whole eggs
550 g unsalted butter at room temperature
200 g dark chocolate (I used Lindt 70%)

for the caramel:
150 g granulated sugar
50 g water
10 g fresh lemon juice
1/2 tsp coffee extract

to decorate:
crispearls or shaved chocolate

Heat the oven to 375 F. 2. Prepare six sheets of parchment paper drawing a circle with 8 in diameter in the center. Flip the parchment, so that the pencil drawing is in the bottom. Reserve.

Important: weigh the bowl you will be using to make the cake batter and write down that number. 

Whisk the egg yolks with  half of the sugar (60g), salt and vanilla using a KitchenAid type mixer fitted with the wire whisk. You must whisk until the mixture is thick enough to form a ribbon when the batter drips from the whisk. It might take more than 8 minutes to get there, be patient.

In a clean mixing bowl with the whisk attachment, whip the egg whites and remaining 60 g of sugar on high speed to soft peaks. Fold the egg whites into egg yolk mixture, then fold the flour (sifted on top). Remove a small amount of the batter and mix with the melted, cooled butter. That makes it easier to incorporate the butter homogeneously into the cake batter. Fold the butter into the cake batter.  Weight the bowl and calculate exactly how much batter you have. Divide by six to get the exact amount you’ll need to spread on each parchment paper. In my case I played conservative, and although the calculations gave me 104 g of batter per circle, I used 100 g only.
Spread onto the parchment lined baking sheets within the circles. Bake for about 10 minutes, in my oven I could do two sheets at a time. The other circles can wait as you bake.  Remove from oven and transfer the baking sheet to a cooling rack.

Make the chocolate buttercream. In a clean metal mixing bowl, warm the sugar and eggs over a water bath to 140 F. Whisk in a KitchenAid at medium-high speed for 5 minutes, so that the mixture will cool almost to room temperature.  Add the butter (room temperature, preferably as close as possible as the temperature of the egg/sugar mixture) in small pieces, then the melted chocolate, and mix until homogenous and a spreadable consistency.

Make the caramel:  Stir the sugar, water, and lemon juice and melt in a saucepan over medium heat. Prepare an off-set spatula by coating it lightly with oil. Cook the sugar until the caramel turns amber. Pour the caramel onto one of the cake layers and spread with an oiled offset spatula.  Wait 30 to 60 seconds. With a well-oiled chef’s knife score the caramel-coated cake layer into twelve even pieces slices. Use scissors to cut neatly the 12 triangle shaped slices.  Set aside to cool in the fridge. Add 1/4 cup water and coffee extract to the pan with the leftover caramel, gently heat and make a simple syrup to use as a soaker for the cake slices.

Place the first sponge layer on work surface. Soak the sponge layer with simple syrup. Evenly spread a thin layer of buttercream filling on the cake layer. Repeat until five cake layers have been filled with equal amounts of buttercream filling. Frost the cake and decorate the sides using a cake comb.  Score the cake into 12 pieces.

Pipe decoration on each piece using a star-shaped piping tip. Place caramel sponge decoration on each cake piece and decorate the center with crispearls or shaved chocolate.  Cool for buttercream to set, but if possible bring to room temperature before serving.

ENJOY!

to print the recipe, click here

Comments: One of the best advices I’ve seen lately for baking in general is to weigh the bowls you use most often and write down that number someplace. I actually stuck a tape on my Kitchen Aid with the magical number 1,045. That is how much the bowl weighs.  Whenever I make cake layers I don’t need to think twice. Just weigh the bowl with the batter, subtract the magical number and work from there. If I  need to divide the batter in 2, 3, 4 pans, I do it on the scale and know exactly how much to pour.

In the case of the Dobos, it’s really important that the layers get uniform in thickness. Next time I will also weigh the amount of buttercream added to the first layer, so that I can make sure all others are exactly the same. I had a little too much enthusiasm filling one of the layers and it is evident in the sliced photo that you’ll see later. Finally, I think it could be also good to spread the cake batter slightly bigger than 8 inches in diameter and then use a cake ring to cut them all exactly the same size. Details like this will make the final product more polished.

I cannot praise enough that caramel coated-decoration. In fact, I think one could make cake-cookies just like that. I had to control myself not to go to the mail room in our department and steal all the decorations. But truth is I always send a picture of the dessert as a group email on Sunday, so it would be hard to explain how its crown would be all of a sudden absent.

The cake is obviously very rich but a small slice is more than enough. I’ve seen Dobos Tortes showcasing 8 or even 9 layers, so if you feel particularly brave and indulgent, make more cake batter and go for it. But you will need extra buttercream also, the recipe as written had enough to fill, cover and make the piped decorations with a small amount leftover. I have also seen variations without the cake layers fanned on top and using sugar work instead. I urge you to stick to the classic method. I hate to be repetitive, but… those caramelized pieces? You need to get up close and personal with them…

ONE YEAR AGO: Coffee-Caramel Entremet Cake

TWO YEARS AGO: Fennel Soup with Almond-Mint Topping

THREE YEARS AGO: Eataly

FOUR YEARS AGO: Spaghetti Squash Perfection

FIVE YEARS AGO: Skinny Eggplant Parmigiana

SIX YEARS AGO: Supernova Meets Wok

SEVEN YEARS AGO500 Posts and The Best Thing I ever made

EIGHT YEARS AGO: Back in Los Angeles

NINE YEARS AGO: White House Macaroni and Cheese

TEN YEARS AGO: Korean-Style Pork with Asian Slaw

THE BEWITCHING KITCHEN TURNS EIGHT: TWO MILESTONES AND A TRIPLE GIVEAWAY!

*comments are now shutdown, winner to be announced July 3rd, 11pm*

Here I am, wrapping up my eighth year of food blogging. But, are you ready for something even more amazing than that? Today, on this exact day, with this very post, I reach ONE THOUSAND ARTICLES PUBLISHED. I can hardly believe it myself… Can you imagine the odds on that? Gives me a thrill, that’s for sure. I actually noticed that those events could coincide, so I increased up slightly the pace of posting this month, lending a little helping hand to fate. Still, it deserved a very enthusiastic version of Sally’s Personal Happy Dance.  You should be grateful that there are no videos. But, to what matters most. What is a Birthday without cake? It is an idiosyncrasy. I could not allow that to happen. So, I rolled my sleeves up, took a few yogic breaths in and out, sat down on a rug staring at a candle for a full 19 seconds, and look what I baked for this party:

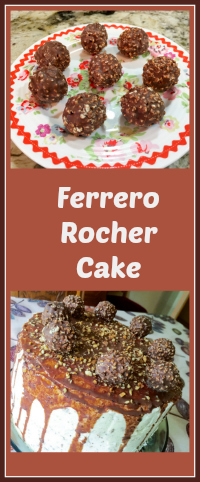
A Ferrero Rocher Cake, with – obviously – eight bonbons decorating the top. One for each year, my friends!

The interesting thing is that I own a pathetically large number of cookbooks. Of those, many, I repeat, many are cake cookbooks. Is this recipe from one of them? Obviously not. Why would I take the sensible path? No, not a chance. I got this recipe from the youtube channel hosted by Chetna Makan, the wonderful contestant of  The Great British Bake Off. A couple of months ago she demonstrated this Ferrero Rocher cake, making it seem easy and doable. I could not take it out of my mind. Plus, the idea of topping it with eight bonbons… how could I not go for it on this occasion? You can see Chetna in action with a click here.  And without further ado, I share with you my transcript of her recipe.

FERRERO ROCHER CAKE
(slightly modified from Chetna Makan)

for the cake component:
250g softened butter
250g caster sugar
50g melted dark chocolate
5 eggs, roughly whisked
200g self-rising flour
50g cocoa powder
1 tsp baking powder
2 Tbs milk

for the ganache:
375g dark chocolate
450mL double cream (I used heavy cream)
30g unsalted butter

for the icing:
300g salted butter, softened
600g icing sugar, divided in two equal portions
2 Tbs milk
4 Tbs finely ground hazelnuts

for the pouring ganache and decoration:
50g dark chocolate
150mL double cream (I used heavy cream)
8 Ferrero Rocher bonbons

Make the sponge cake component: prepare three 9-inch round pans by greasing them with butter and placing parchment paper on the bottom. In the bowl of a KitchenAid type mixer, combine the softened butter with superfine (caster) sugar. Beat until creamy, a couple of minutes. Add the melted chocolate, mix a few seconds.  Slowly add the eggs, a little at a time with the beater running in low-speed.  Still in low-speed, add sifted self-rising flour, cocoa powder and the additional teaspoon of baking powder.  Mix until combined, add the milk, and mix well. Pour into prepared pans and bake at 350F for about 20 minutes, until a cake tester comes out clean.

Make the ganache: place the chocolate cut into pieces in a large bowl, add very hot –  almost to the boiling point – cream, allow it to sit for a minute, then slowly mix with a spatula. When the chocolate is dissolved, add the butter. Reserve, covered with plastic wrap.

Make the buttercream icing: Add the softened salted butter to the mixer, beat with the paddle attachment until creamy. Add the sifted powdered sugar in two additions, 300g each. Mix well, then add the finely ground hazelnuts. Taste a little bit and dream. Reserve.

Assemble the cake: place the first layer to a cake stand, add the cooled ganache. Spread almost to the edges. Sprinkle diced hazelnuts all over the ganache. Place the second cake layer on top, repeat the ganache/hazelnut spreading. Place the third cake on top. Refrigerate for 30 minutes. Ice the cake with the buttercream hazelnut component. Try to make it smooth on top and sides. Refrigerate the cake for 30 minutes.

Make the pouring ganache: mix the chocolate in pieces with almost boiling heavy cream. Wait a minute or so, then stir until the chocolate is fully melted and smooth. Pour on top of the cake, allowing it to flow down its sides. Sprinkle the top with more chopped hazelnuts, decorate with Ferrero Rocher bonbons….  Place in the fridge until serving time, removing it to room temperature about 30 minutes before slicing.

ENJOY!

to print the recipe, click here

Comments: I decided to take my time to make this cake. Baking the cakes on a Saturday, making the ganache and frosting the following morning, assembling the cake in the afternoon. A well-laid plan indeed. To my delight, the cakes baked beautifully, flat and smooth. I removed them from the pans as if I was born doing it. Something we all know not to be the case. Next day the ganache and buttercream preparation went flawlessly. I was radiating self-confidence and pride. Then, I confronted the hazelnuts. A portion to be coarsely chopped, a smaller portion processed more finely. Hazelnuts are kind of expensive, so I bought them whole. That was a move to regret for as long as I live. Have you ever had to peel those pesky creatures? The skin seems to be covalently bonded to the nut. If you are not into chemistry, let me explain. Covalent bonds are strong. The atoms involved are sharing electrons, and the electrons don’t intend to stop dancing together in that complex, undetermined space. I sense an essay coming:  Implications of Sub-atomic Interactions for Cake Baking.  Anyway,  it took me 90 minutes to peel the hazelnuts. On my first innocent attempt I trusted instructions to simply roast them “and the peel will come off easily by rubbing them with a paper towel.” That is not only wrong, it is cruel. In desperation, and with two fingers burned, I googled for alternatives. Found out that if you boil them for “a couple of minutes” the peel should come off with “very little effort.” When I did that, I could hear the dancing electrons laughing at me. No intention of leaving their Covalent Gala. More google action. Found yet another set of instructions, more realistic as it included a clear warning – this method won’t be easy, but it’s by far the best way.  You do boil them, but with baking soda. A lot of it, actually (3 tablespoons for 2 cups of water). The pan will look like a witches brew, as you can see on the composite photo below. 

Get a bowl of cold water ready. After 4 minutes, grab a couple of hazelnuts with a slotted spoon and throw them in the water. Rub gently with your fingers, if the peel starts to come off, you are done. If not, keep boiling them, stirring constantly in low heat, otherwise you will have a very epic mess  on your stove (no need to ask me how I know). Once you reach the point of peels starting to come out,  drain the whole batch and shock them all in cold water. Peeling them will still be a labor like no other. Messy and long-lasting. An ordeal that I do not wish on anyone. In fact, I tell you what a great concept for hell could be. A place where you spend your full day peeling hazelnuts. In the background, the song “Don’t worry, be happy” plays non-stop. Once you are done, you can go to sleep, but not before watching Titanic, beginning to end. That is hell. Hazelnuts, Bobby McFerrin & Titanic, day in, day out.

But was it worth all the trouble? Oh, yeah! I tell you one thing, the icing with the finely ground hazelnuts is to die for, some serious deliciousness in taste and texture. If you like Ferrero Rocher, this cake is the ultimate celebration of it. The creaminess of the ganache, its intense chocolate taste echoed by the sponge cake. A real winner. Now, if you watch Chetna’s video, you’ll notice that her pouring ganache ended up thicker than mine. I think it’s a matter of the ingredients used. She used double cream, easily available in the UK, I had to go with our regular whipping cream. If I knew my way around baking, I would probably adapt it, perhaps using a higher proportion of chocolate. At any rate, I am happy with the way it turned out. Also, a warning: the ganache makes more than you’ll need. Chetna baked four cakes, I went with three, slightly larger. But trust me, you can use the leftover ganache in many tasty ways. Macaron filling? Yesssss!  Stirred into the morning cappuccino? Oh, yessssss…

So here I am, at the eight year mark! According to Foodista, 8% of the blogs make it to six years, no statistics available for food blogs older than that. What matters is that I am still having fun, and intend to keep going, so if you’d like, step with me into the 9th year of adventures in our kitchen.

source Foodista

To celebrate my special double milestone, I am offering a triple giveaway!  Three cookbooks that deal with some of my passions. The Book of Buns, a delightful publication that covers all sorts of breads, from simple to more complex. Second, Les Petits Macarons, because… how could I not include this colorful obsession of mine? And finally Flavor Flours, in my opinion the best cookbook for gluten-free baking. If you follow my blog, you know I don’t have any dietary restrictions. But recipes that try to adapt classics to gluten-free alternative versions fascinate me.  I’ve made quite a few of her recipes, and they were all top-notch. Alice Medrich does her homework before coming up with a recipe.

If you’d like to enter this giveaway, just leave a comment, and I’ll draw the winner on June 30th, announcing it the day after. I intend to give the books either as real hard copies (for those living in the USA), or as Kindle copies to those anywhere else in the world. Of course, if you live in the US but rather have the virtual versions, let me know.


Grab a pin to celebrate!

Add to FacebookAdd to DiggAdd to Del.icio.usAdd to StumbleuponAdd to RedditAdd to BlinklistAdd to TwitterAdd to TechnoratiAdd to Yahoo BuzzAdd to Newsvine

ONE YEAR AGO: The Bewitching Kitchen Turns Seven!

TWO YEARS AGO: Bewitching Kitchen Turns Six!

THREE YEARS AGO: The Bewitching Kitchen turns Five!

FOUR YEARS AGO: The Bewitching Kitchen turns Four!

FIVE YEARS AGO: The Bewitching Kitchen Turns Three! 

SIX YEARS AGO:  The Bewitching Kitchen turns Two!

SEVEN YEARS AGO:  Bewitching Birthday!

EIGHT YEARS AGO: Welcome to my blog!

SaveSave

SaveSave

SaveSave

SaveSave

SaveSave

SaveSave

SaveSave

SaveSave

SaveSave

SaveSave

SaveSave

SaveSave

SaveSave

SaveSave

SaveSave

SaveSave

SaveSave

SaveSave

SaveSave

SaveSave

SaveSave

SaveSave

SaveSave

SaveSave

SaveSave

SaveSave

SaveSave

SaveSave

SaveSave

SaveSave

SaveSave

SaveSaveSaveSave

SaveSave

Save

SaveSave

SaveSave

SaveSave

SaveSaveSaveSave

SaveSave

SaveSave

THE UNBEARABLE UNFAIRNESS OF CAKE BAKING

A tale of cakes, dogs and tears

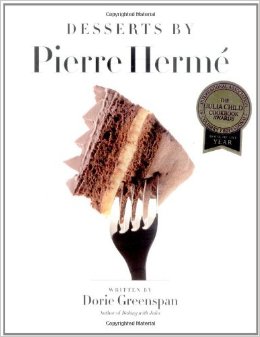
My beloved’s Birthday falls on December 27th. Since he was a child, he felt it was a bit unfair to have his special day buried in between Christmas and New Year’s Eve, a day that was born to be ignored. But certain things do improve with age, and now he feels it’s perfect: the university is pretty much closed, he can work as much or as little as he wants, it is a Birthday in the middle of a small vacation break. A nice way to view it. This year we would be by ourselves on his big day. I told him I would cook a special dinner, and then had this crazy idea: offered to bake any cake he wanted. Did you get this? Sally, the cake-o-phobe offered her husband to bake ANY cake he fancied. I was reasonably confident he would choose one of his childhood cakes, like Chocolate Cake with Coconut Frosting, or his grandma’s legendary Angel Food Cake. I was wrong. He did not even blink, asked me where was “that book.” You know, that book…”  I knew, but pretended not to. “Of course you know, that book by the French guy.”  I seriously considered telling him the book was lost during our move to Kansas 5 years ago, but how could I lie to my perfect match about something as important as his Birthday cake? I couldn’t. Sheepishly, I went upstairs, grabbed the book,  gave him, and sat down, already with a cold feeling in the stomach. “That guy” is Pierre Hermé. “That book” is Desserts by Pierre Hermé.

41zkpoakd3l-_sx258_bo1204203200_
Before my blogging life, I made one cake from the book, also for Phil’s Birthday, a Chocolate Dome Cake that shaved at least 24 months from my life expectancy. It required three visits to the grocery store, the first to get the ingredients, the second to get a few more eggs, and the third (in complete distress) to get the final dozen. So, of course, I was beyond worried when I handed the book aka How To Kill Yourself in Your Own Kitchen. He opened it, and in two seconds flat screamed: I FOUND IT!  I WANT THIS ONE!  He managed to open the book at random on the page featuring Carioca Cake. Can you imagine the odds on that?  Mind you, I am not carioca, but paulista. Paulista Cake would have absolutely zero charm, which is a bit unfair. Cariocas get all the love, fame, attention. Would Tom Jobim ever make a song about The Girl from Vila Mariana? Not a chance. Oh, well. São Paulo is close enough to Rio, let’s not split hairs.

r1280x0

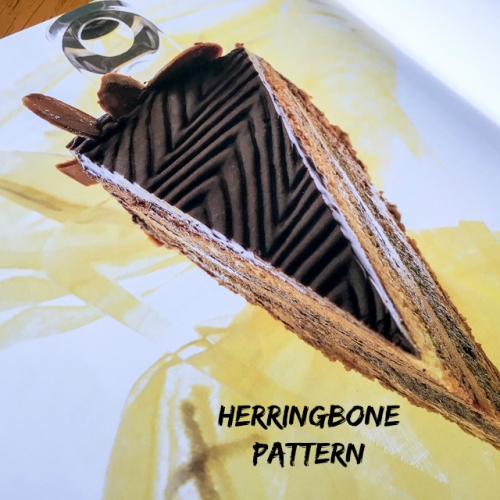
Now, ask yourself which other food blogger would give you a free lesson in geography? You are so very lucky. Anyway, as I was saying, I took a very deep breath and read the recipe. FIVE components. The first, a genoise cake. My heart missed four beats. My nemesis. My most feared cake in the universe of cakes, the cake that embarrassed me in front of special guests, the cake that made me swear off cake baking for years. I cringed anticipating the disaster ahead. Apart from the genoise, it also required a coffee syrup, almonds roasted in cocoa syrup, a chocolate mousse, and a chocolate ganache. As a bonus, you also need skills of an Iron Chef to make the authentic decoration on top. Can you spell unfair? This is what the finished product is supposed to look like.

photoherme11Can you spell doomed too?

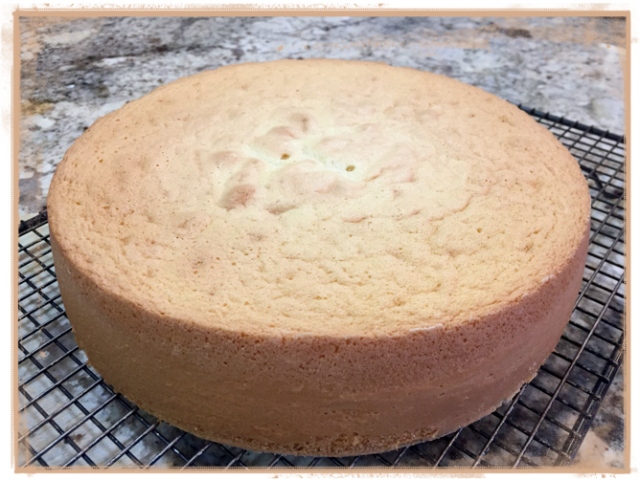
I immediately texted my friend-patissier-guru-golfer extraordinaire Gary, and asked begged  for help. In fact, when he visited us a couple of years ago he was kind enough to make a genoise cake right in front of my eyes to help me exorcise my inner ghosts. Gary sent me a few emails with reminders, pointers, videos and basically told me “you can do this.”  And you know what? He was absolutely right. Look at my production!

ready11

GENOISE CAKE – RECIPE OVERVIEW

I will not publish the recipe, as I do not want to deal with the process of asking permission from Mr. Herme’ or the publisher. Obviously, all genoise recipes are very similar, the success of baking it is all in technique. His formula calls for

2 ounces of unsalted butter, melted and slightly cooled
6 eggs
1 cup of sugar
1 + 1/2 cups flour, sifted

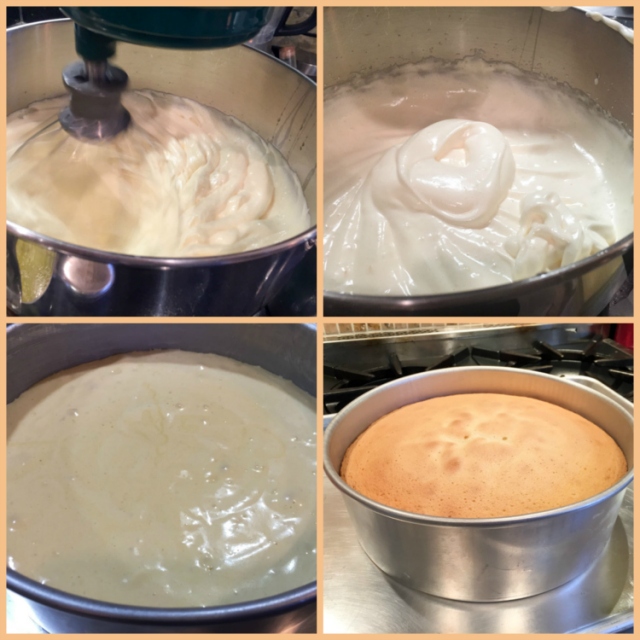
You will beat the eggs and sugar over simmering water until they reach a temperature of 130 to 140 F, then beat the living bejesus out of it until it triples in volume.  Once you get there – and the batter falls like a ribbon from the beater – you’ll add the flour and the butter, in specific ways described by Hermé, hoping not to deflate the batter too much. You’ll need to be delicate and assertive, quite a combination of skills. The batter is poured into a 9-inch springform pan, and baked in a 350 F oven.

If all goes well, you’ll be rewarded with a perfect starting point for your Carioca Cake.

composite
Comments: I cannot tell you how thrilled I was when I removed the cake from the pan and realized I had finally done it. I overcame my demons and managed to bake a perfectly gorgeous looking genoise cake! The extended version of the happy dance took place mid-afternoon on December 24th. The cake would wait until next day when I would proceed with the preparation, in plenty of time for the Bday celebration.

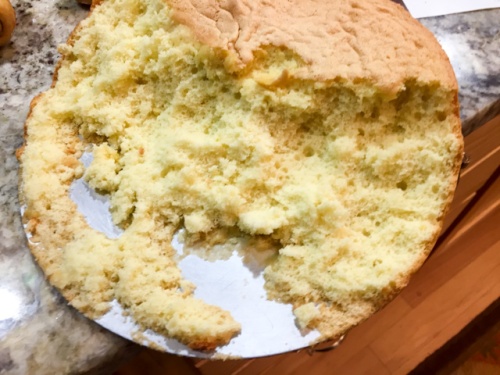
That evening we were going to cook our Christmas Eve meal together, so we put some music on, and let the fun start. I briefly mentioned to Phil that we should make sure to keep the sliding doors to the dining room closed because “I left the genoise over the table, and you never know with Bogey what could happen.”  Phil laughed, I laughed, and that was that.  Not sure how long after that innocent remark, I am in the kitchen and I hear Phil from the dining room, scream with intense pain in his voice… “Oh, no!”   I swear my first thought was “David Bowie is already dead, could it be Neil Young?”  I walked in, and realized no beloved singer had passed away. But a genoise cake had definitely passed to another dimension.

disaster

I confess, I sat down and cried. My perfect genoise. Gone. Instead, I had a dalmatian sleeping off his sugar coma, still with a smile on his face. Carioca Cake was brutally kidnapped from my life.

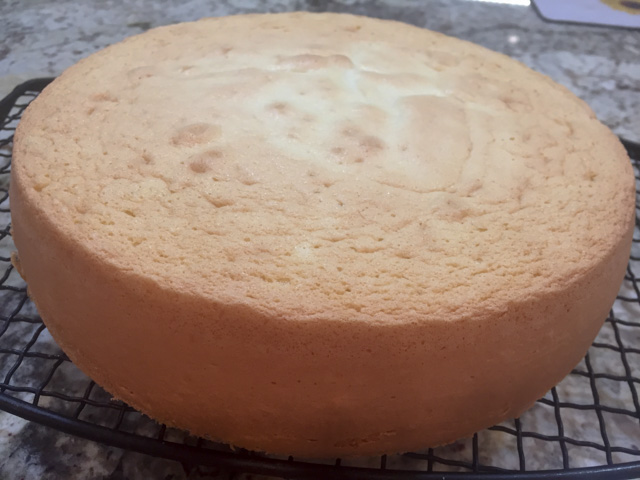
But, as the sun does every day, it rose again next morning. Phil had washed the cake pan for me, took care of the many crumbs left on the dining table and washed the table-cloth. All signs of the canine crime were gone, apart from that smile still on Bogey’s face, and his sudden obsession with the dining room table. I did the only sensible thing to do: started all over. And once more, I have the thrill to share my second – perfect – genoise, made 36 hours after the first.

genoise2

Thanks to Gary and a very mischievous dalmatian also known as The Fastest Mouth in the West, I can tell you I permanently erased the Curse of the Genoise from my life. Bring it, Pierre Hermé, bring it….

Unfortunately, he did bring it….

Add to FacebookAdd to DiggAdd to Del.icio.usAdd to StumbleuponAdd to RedditAdd to BlinklistAdd to TwitterAdd to TechnoratiAdd to Yahoo BuzzAdd to Newsvine

(to be continued) 

ONE YEAR AGO: Hermit Cookies

TWO YEARS AGO: Cremini Mushroom Meatloaf

THREE YEARS AGO: Ottolenghi & Tamimi’s Roast Chicken with Clementines

FOUR YEARS AGO: Eight-Ball Zucchini: The Missing Files

FIVE YEARS AGO: Grilling Ribbons

SIX YEARS AGO: Peppery Cashew Crunch

SEVEN YEARS AGO: Ossobuco Milanese: an Italian Classic