LACE-DECORATED SOURDOUGH: A WORK IN PROGRESS

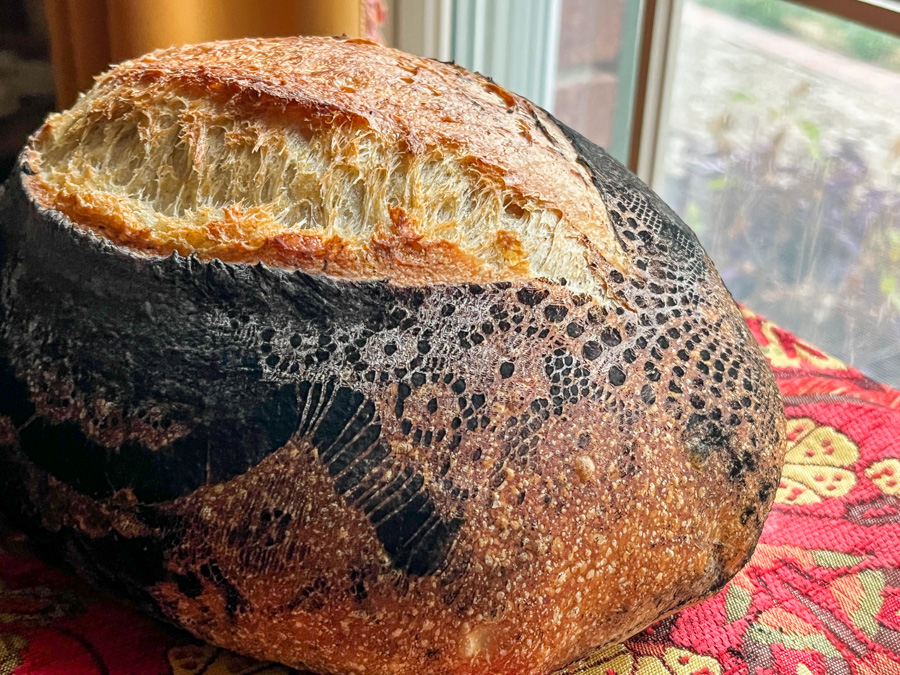
Friends, this has been a bit of an ordeal to get to work. The basic idea is to use lace and rub charcoal-activated powder on top of it to create a design. A few posts and reels on Instagram guided me, but it quickly became obvious that every single detail matters and can make or break the outcome. The variables are many: what kind of fabric, how open the design is, and most important, how to make the lace glue to the bread but not too much. I have not hit Nirvana yet, but with this third loaf, I feel good enough to share it with you. Stay tuned for future experiments in which I hope to get all the details optimized.
You can use any sourdough recipe you are fond of. For this particular loaf I used my basic formula described in this post, adding 1 tsp Garam Masala to the dough.

From what I saw in Instagram, the favorite method is to add the lace to the bottom of the banneton, leave it there overnight in the fridge for final fermentation, then rub charcoal, pull the lace and score the top, in a way that the design won’t be too compromised. When I did that, I had two different outcomes, none of them very nice. In the first, I rubbed too much flour over the surface of the dough, and that prevented the charcoal from staying well enough. The second time, I skipped the rubbing of white flour before inverting the dough on the lace, and that was a catastrophic move: the lace glued to the bread, and when I pulled it, it ripped the surface, ruined the design, it was a complete and utter mess.

This time I allowed the bread to sit in the fridge overnight in the banneton, inverted it over parchment paper, placed the lace on top and pressed it as best as I could. Next I added charcoal and rubbed it in. My mistake was to mist the surface with water, a bit too much water went on top, and made the charcoal sip underneath the lace. So the top did not reveal the design, and got way too dark. I think it is easy to fix next time, so I am sharing with you this version and maybe you can play with it and hit the jackpot on you first attempt! Go ahead, make me proud!
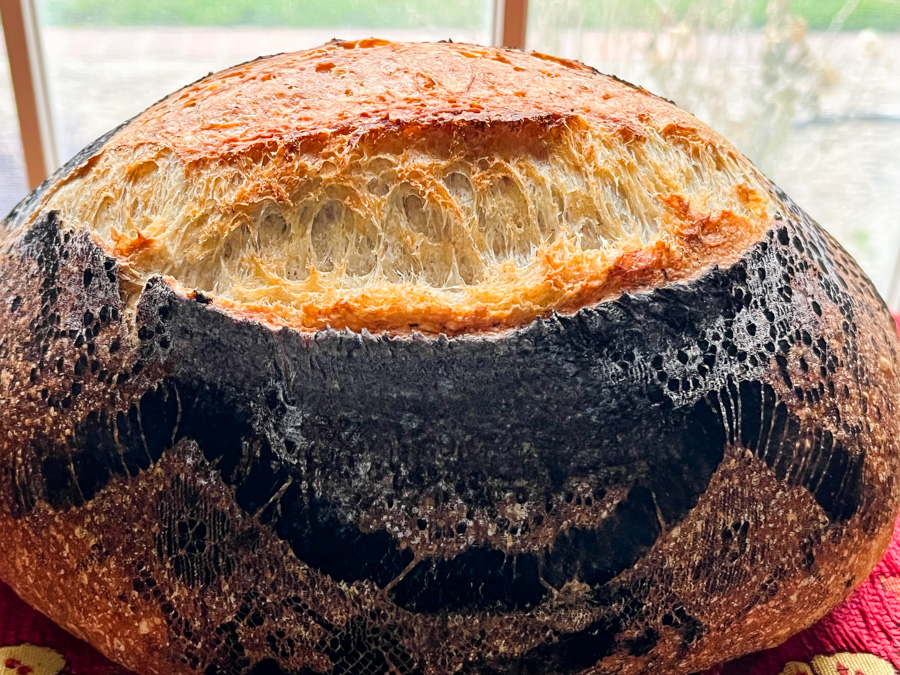
The bead had great oven spring, so if I had managed to get the design imprinted all over, it would have been pretty awesome… But, this is much better than my previous two attempts. My advice to you is, try this method if you like it, but don’t expect it to work on your first time, you might have to tweak things depending on the fabric you have, and the design itself. But no matter what, the bread underneath will always taste great, no major harm done if you don’t get it right. This is really a super fun technique and with a ton of possibilities…. Stay tuned for more soon!

ONE YEAR AGO: Incredibly Simple Carrots

TWO YEARS AGO: Sarah Bernhardt’s Cookies

THREE YEARS AGO: A Really Big Announcement

FOUR YEARS AGO: Stir-Fried Chicken in Sesame-Orange Sauce

FIVE YEARS AGO: Monday Blues

SIX YEARS AGO: A New Way to Roast Veggies

SEVEN YEARS AGO: Two Takes on Raspberries

EIGHT YEARS AGO: Spice Cake with Blackberry Puree

NINE YEARS AGO: Own Your Kitchen with Cappuccino Panna Cotta

TEN YEARS AGO: Chicken Parmigiana, the Thriller

ELEVEN YEARS AGO: Wild Mushroom Risotto

TWELVE YEARS AGO: Tartine Bread:  Basic Country Loaf 

THIRTEEN YEARS AGO:  Pugliese Bread

HAPPY HALLOWEEN FROM MY COOKIE BLOG TO YOU!

To see the details behind this series of Halloween-inspired cookies, visit my cookie blog with a click here.

WOULD YOU LIKE A COOKIE OR A BROWNIE?

HAVE BOTH!

I cannot take credit for the idea, it was something Marlyn posted on her youtube channel, and I thought it was brilliant! She took the concept of colored cookie dough one step further, and used it to top brownies, baking them together. Works like a charm, and the possibilities are endless…

for Marlyn’s version, click here

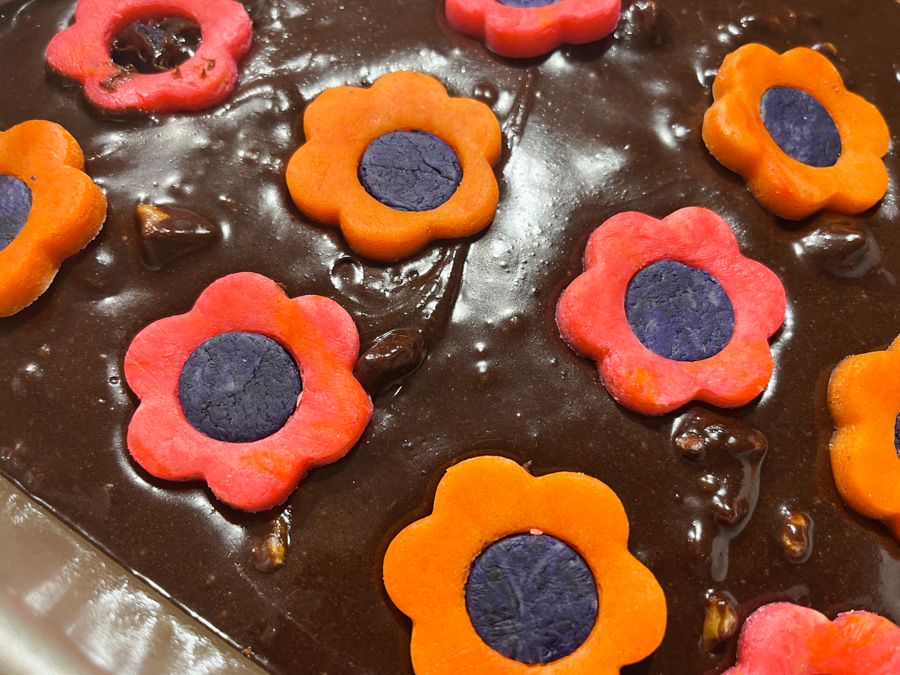
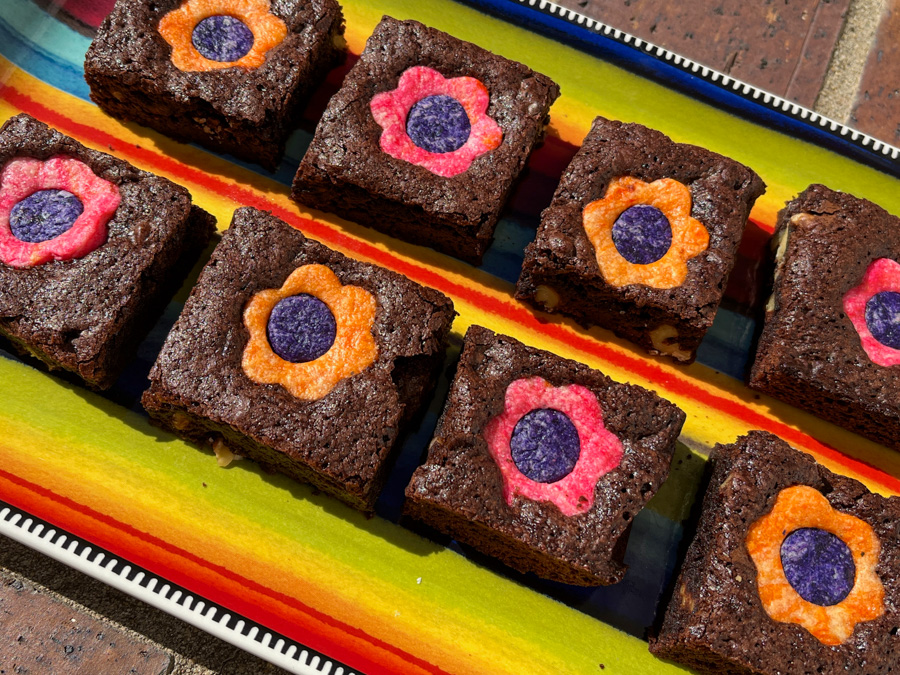
You can use any brownie recipe you like, mine included walnuts. For the cookies, I made flowers with dough of different colors, and with marbled pieces too.

You then need to place them (FROZEN) over the raw brownie batter. Marlyn placed shapes all over in random spots, and that works too, you just cut through the design once serving the brownie. I decided to space the flowers so that each would end up centered on every piece.

After that, bake as you normally would. The cookies and the brownies have similar baking times, and the brownie batter protects the cookie if you need to bake longer. But for me it was a total of 25 minutes. Let the brownie completely cool, and then slice it in pieces.

This was a huge success when I took to the department to share with our colleagues on a Monday morning. Nothing like starting the week correctly!


I am dreaming of baking a set of blondies with chocolate cookie shapes on top. Once baked, you can even add details with a little Royal icing, like I showed yesterday on my cookie blog (see last picture of this post).

ONE YEAR AGO: Sourdough Fun, Three Ways

TWO YEARS AGO: Spooky Bakes, a Farewell

THREE YEARS AGO: Fall-Inspired Baking

FOUR YEARS AGO: On a Halloween Roll

FIVE YEARS AGO: Pumpkin Macarons

SIX YEARS AGO: Zucchini, Lemon & Walnut Cake

SEVEN YEARS AGO: Paleo Energy Bars

EIGHT YEARS AGO: Pecan-Crusted Chicken with Honey Mustard Dressing

NINE YEARS AGO: Mozzarella Stuffed Turkey Burgers

TEN YEARS AGO:  Cashew Chicken Lettuce Wraps

ELEVEN YEARS AGO: Clay-pot Pork Roast

TWELVE YEARS AGO: Panmarino

THIRTEEN YEARS AGO: A Classic Roast Chicken

SPICY CITRUS PEANUT SALAD

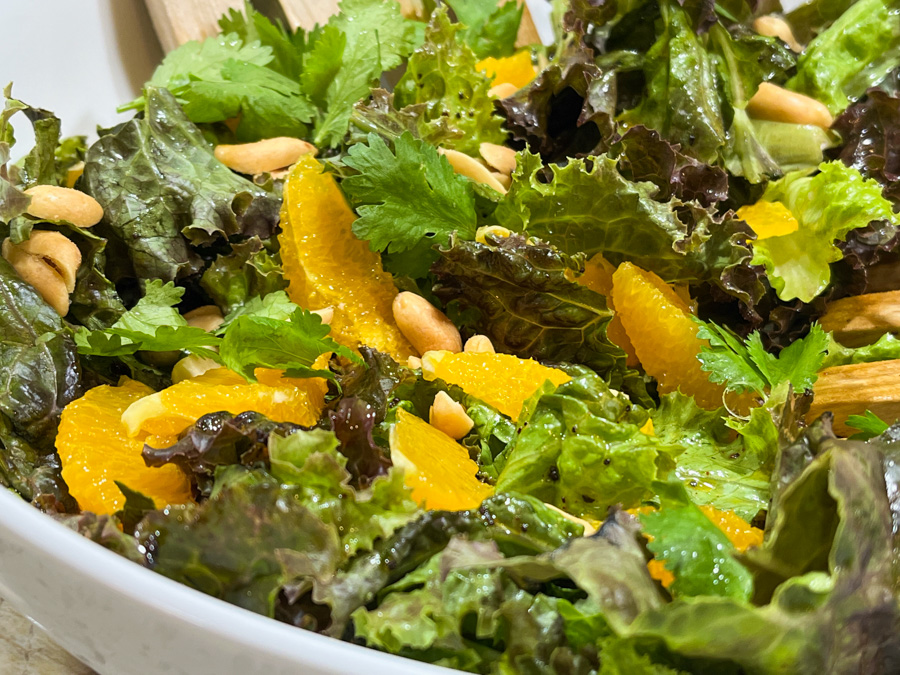
I’ve made variations of this recipe three times in the past month. I am a bit obsessed with the dressing, that has the right amount of heat and very mild hint of sweetness. The original recipe was published in the blog Naturally Nidhi, and you can find it here.

SPICY CITRUS PEANUT SALAD
(slightly modified from Naturally Nidhi)

makes 2 servings

for the salad:
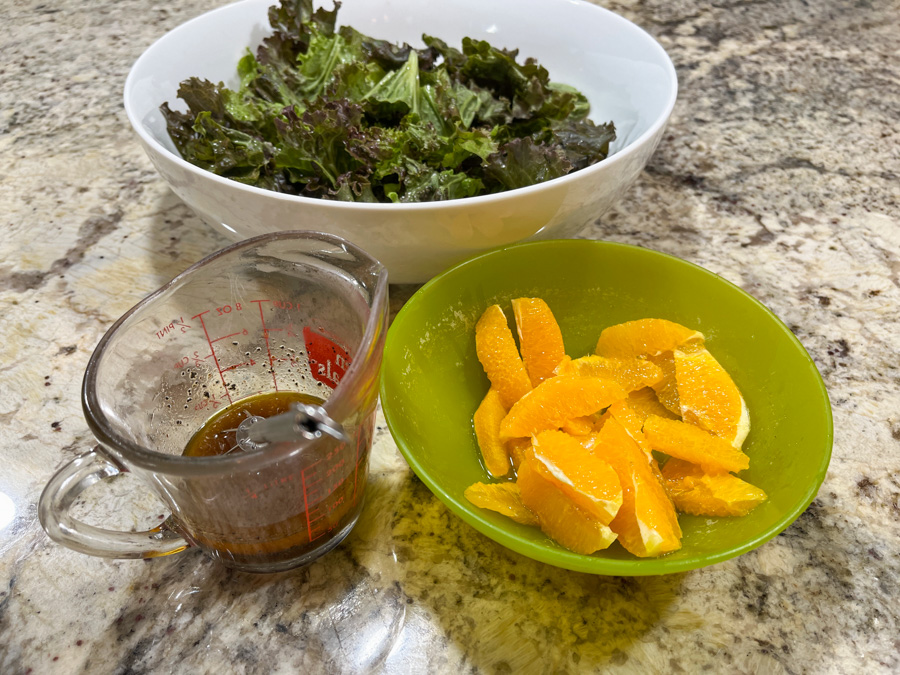
2 oranges , peeled and segmented
greens of your choice (I used green leaf lettuce), amount enough for two
1/4 cup peanuts, roasted and salted

for the dressing:
2 tbsp olive oil
1 tbsp honey
2 tsp lemon juice
1/2 tsp red chili powder
1/2 tsp cumin powder
1/2 tsp poppy seeds
salt to taste

In a serving bowl, whisk together all the dressing ingredients. Add the greens, toss to coat uniformly with the dressing. Add the orange segments, peanuts and toss gently. Adjust seasoning if needed with a little salt.

ENJOY!

to print the recipe, click here

Comments: In her blog post, Nidhi used arugula. If you like to pump the sharpness-spicy level up, go for it. We like to use lettuce, I made it once with red leaf lettuce, another with butter lettuce, they all go quite well with all other ingredients. The dressing, so simple, packs a ton of flavor, I bet it would be great brushed oven a nice piece of salmon before grilling it. I simplified it a bit, so make sure to check her blog post for a more complex version.

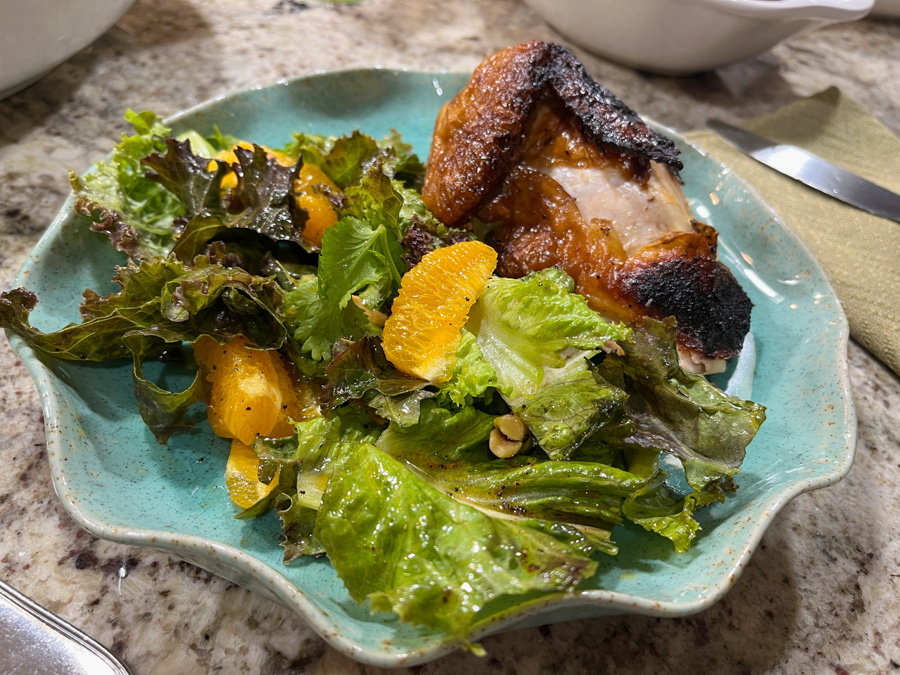
We enjoyed it with rotisserie-style chicken from our grocery store, and no, I am not ashamed to confess it. Sometimes it is good to make life easier and concentrate on making just a salad and a side dish.

ONE YEAR AGO: Shrimp Stir-Fry, Kung Pao-Inspired

TWO YEARS AGO: Cauliflower Steaks with Olive and Caper Salsa

THREE YEARS AGO: Twice-Cooked Eggplant

FOUR YEARS AGO:  Turkey Burger, Japanese-Style

FIVE YEARS AGO: Pumpkin Macarons

SIX YEARS AGO: Slow-Cooked Whole Chicken

SEVEN YEARS AGO: Chocolate Zucchini Cake with Chocolate Frosting

EIGHT YEARS AGO: Pecan-Crusted Chicken with Honey-Mustard Dressing

NINE YEARS AGO: Bewitching Kitchen on Fire!

TEN YEARS AGO: Cashew Chicken Lettuce Wraps

ELEVEN YEARS AGO: Chiarello’s Chicken Cacciatore

TWELVE YEARS AGO: Donna Hay’s Thai-Inspired Dinner

THIRTEEN YEARS AGO: Panettone

RAW ZUCCHINI AND CHICKPEA SALAD WITH TAHINI YOGURT

This whole meal was superb, main dish and salad from Josette’s blog, that I am super fond of. The salad stole the show, but I will give you the link to the Turkish chicken so you can have the whole gastronomic experience. I would definitely serve this for company. Simple to put together, awesome in flavor and texture.


RAW ZUCCHINI AND CHICKPEA SALAD WITH TAHINI YOGURT
(slightly modified from Thebrookcook)

3/4 cup plain whole-milk yogurt
2 T tahini
zest from 1 large lemon, plus 1 tablespoon freshly squeezed lemon juice
1 1/2 tsp plus 2 T extra-virgin olive oil, divided, plus more to serve
Kosher salt and ground black pepper
15 1/2 ounce can chickpeas, rinsed and drained
2 T red wine vinegar
2 tsp za’atar
2 medium zucchini, quartered lengthwise and thinly sliced on a diagonal
1/4 cup lightly packed fresh mint, finely chopped
2 tsp dried dill
ground sumac, to serve (optional)


In a medium bowl, whisk together the yogurt, tahini, lemon zest and juice, 1 1/2 teaspoons oil, 1/2 teaspoon salt and 1/4 teaspoon pepper; set aside. In a large microwave-safe bowl, stir together the chickpeas, shallot, vinegar and za’atar. Cover and microwave for 90 seconds. Uncover and cool to room temperature, stirring occasionally.

When the chickpeas have cooled, stir in the remaining 2 tablespoons oil, the zucchini, mint, and dill. Taste and season with salt and pepper. Transfer the chickpea-zucchini mixture to a platter, spooning it around the edge. Scoop the yogurt mixture into a mound in the center of the chickpea-zucchini mixture.
Drizzle with additional oil and sprinkle with sumac, if using.

ENJOY!

to print the recipe, click here


Comments: Totally in love with this preparation of zucchini, and leftovers tasted great too. We enjoyed it with another recipe from Josette’s site, Turkish Grilled Chicken Thighs with Yogurt Marinade (for full recipe, click here). Josette has a very similar taste in food, so I am always paying attention to her posts. If you don’t follow her yet, consider doing so…

ONE YEAR AGO: Black Tahini Shortbread Cookies

TWO YEARS AGO: A Fruitful Trio (of Macarons)

THREE YEARS AGO: Halloween Entremet Cake

FOUR YEARS AGO: Pork with Prunes, Olives and Capers

FIVE YEARS AGO: Kansas Corn Chowder

SIX YEARS AGO: Impossibly Cute Bacon and Egg Cups

SEVEN YEARS AGO: Pulling Under Pressure

EIGHT YEARS AGO: Cooking Sous-vide: Two takes on Chicken Thighs

NINE YEARS AGO: Miso Soup: A Japanese Classic

TEN YEARS AGO: On my desk

ELEVEN YEARS AGO: A must-make veggie puree

TWELVE YEARS AGO: Vegetarian Lasagna

THIRTEEN YEARS AGO:  Brazilian Pão de Queijo