BRAZILIAN PAO DE MEL

In case you’ve missed my big announcement:
12 days to showtime!

Want to say it as a native? Pay attention to the nasal sound of PÃO… and repeat after me…

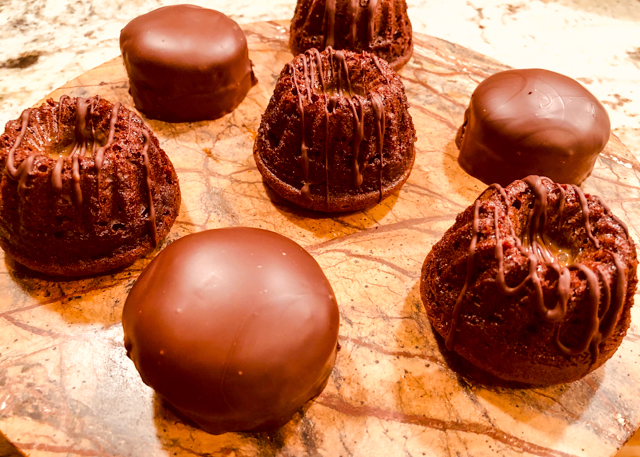
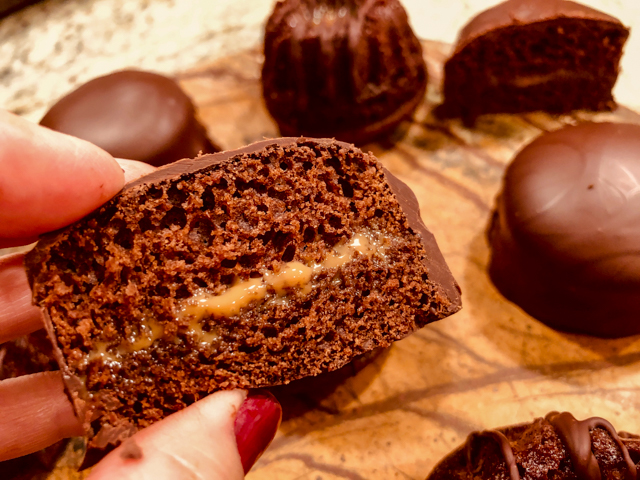
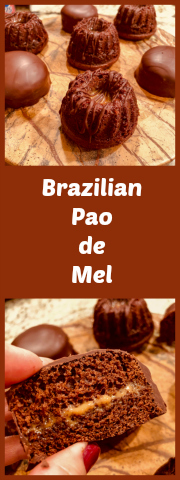
Pão de mel translates literally as “honey bread.” However, it is definitely not a bread, and honey might not be the first flavor that comes to mind once you take your first bite. I admit the name is misleading, but I am thrilled to share this recipe with you, because it is a real classic in my home country. It has flavors I adore (that ginger, spicy thing), enclosed in a nice chocolate shell. The ones I grew up with were a bit on the dense side. My family had no tradition of baking, so I only had pão de mel that you get in stores, wrapped in plastic for who knows how long. This version is so good, very soft, tender, sweet and spicy. I made two kinds, the traditional, covered with a shell of chocolate, and a little departure from the classic, in bundt shape. You decide which one you like best.

PÃO DE MEL
(from the Bewitching Kitchen, adapted from several sources)

1 egg
250mL whole milk
90 g  sugar
270 g honey
30 g butter, melted and cooled
240 g all purpose flour
7 g baking soda
1 teaspoon baking powder
1 tablespoon ground cinnamon
1/4 teaspoon salt
½ teaspoon of nutmeg
1/4 tsp ground cloves
3 tablespoons cocoa powder (Dutch process is fine)

for the filling;
dulce de leche (store bought or homemade)

for covering:
tempered bittersweet chocolate, about 500 g

Mix the egg with milk, sugar, honey and butter in a large bowl. Whisk well. In another bowl, stir in the remaining dry ingredients and sift them slowly over the egg mixture in three portions, stirring well after each addition until a smooth, homogeneous mixture is formed.  Place batter in fridge for 15 minutes.

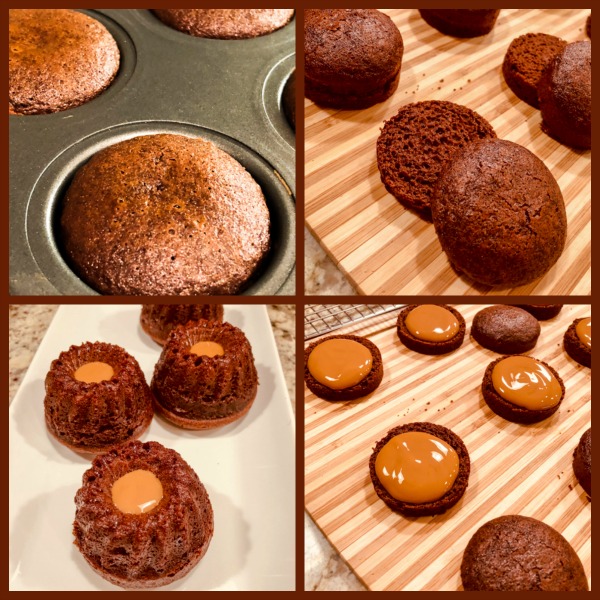
In the meantime, turn the oven on at 360 F. If using non-stick mini cake pans, you don’t need to do anything. Otherwise grease and flour the pans lightly.  Ideally you need a 6 cm round tin (a bit less than 2.5 inches). Pour the batter halfway through the tin, do not fill more than half.  Bake for 15 to 20 minutes. Unmold the still warm rolls and let them cool completely on a rack. Cut them in half and stuff each with the dulce de leche.

Temper chocolate and cover each little pao de mel.

Alternatively, bake the batter in mini bundt pans, fill the central hole with dulce de leche and decorate with a drizzle of tempered chocolate. Mini bundt pans will take slightly longer to bake. Cool them in the mold before unmolding.

ENJOY!

to print the recipe, click here

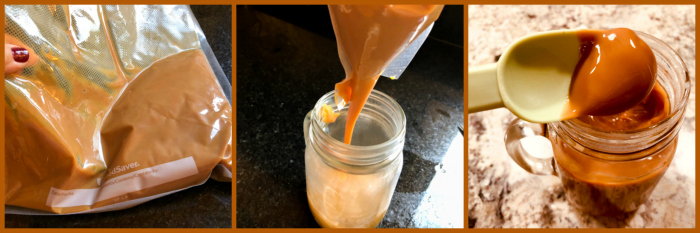
Comments: If you want to make your own dulce de leche, there are many methods to do so. Pressure cooker, slow oven, even the microwave. I opted for sous-vide and must say it was perfect. Simply pour the contents of 1 can of condensed milk into a bag, seal it and cook it at 185F for 12 to 16 hours. When the time is up, simply cut the bag and pour the contents into a container. Into the fridge ready for any dulce de leche emergency.

Homemade dulce de leche is a real treat, I highly recommend you give it a try, but of course, the canned product will work well too. Pão de mel can be frozen for a couple of months without the filling and chocolate covering. You can also simplify the process and skip the filling. The simplified version is actually more common to buy in Brazil. But normally, when people make them at home, they go the extra mile. A very sweet mile, if you ask me.

Which version was better, classic or mini-bundt? I honestly have a hard time deciding. The mini-bundt is a lot easier to make because once you un-mold the little cakes the hard work is done. You can conceivably even get by without tempering chocolate, just melting it gently and drizzling it all over. But of course, the traditional version is the one that brings fond memories of my past. It’s your turn now, make both and let me know what you think…

For those interested:  this is the pan I used to bake the cakes. I love it!

ONE YEAR AGO: Stir-Fried Chicken in Sesame Orange Sauce

TWO YEARS AGO: Monday Blues

THREE YEARS AGO: A New Way to Roast Veggies

FOUR YEARS AGO: Two Takes on Raspberries

FIVE YEARS AGO: Spice Cake with Blackberry Puree

SIX YEARS AGO: Own Your Kitchen with Cappuccino Panna Cotta

SEVEN YEARS AGO: Chicken Parmigiana, the Thriller

EIGHT YEARS AGO: Wild Mushroom Risotto

NINE YEARS AGO: Tartine Bread:  Basic Country Loaf 

TEN YEARS AGO:  Pugliese Bread

GIANT COOKIE MEETS MOUSSE

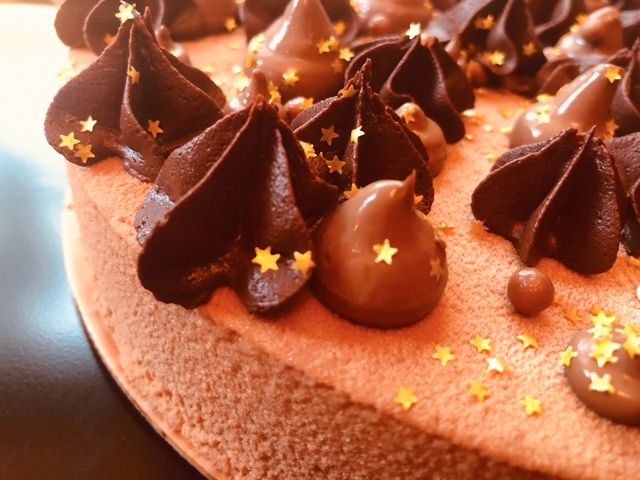
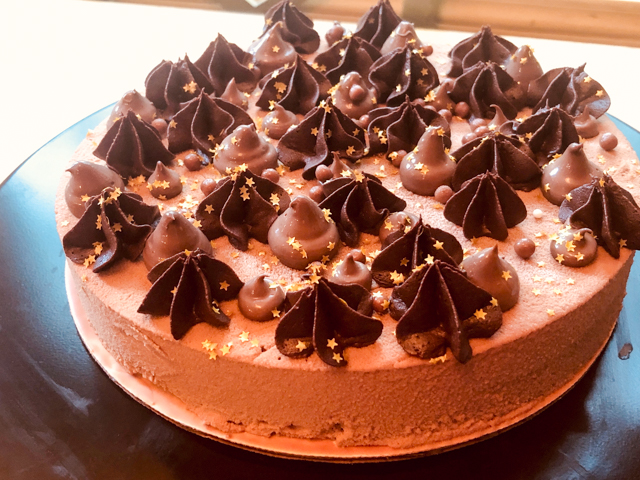
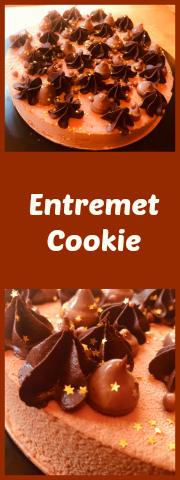
…and the Entremet Cookie is born! I cannot take credit for it, so before I even start talking about this delicious dessert, let me thank Maxime, from Empreintesucree.fr.  She is a professional pâtissière who shares very detailed recipes of her beautiful productions. If you are a bit intimidated by entremet type cakes, this one is an excellent starting point, especially if you simplify the decoration steps (see comments). I guarantee it will still impress your guests.

ENTREMET COOKIE
(slightly modified from Empreintesucree.fr)

for the cookie base:
80 g butter (at room temperature)
65 g muscovado sugar
a pinch of salt
1 egg (55 g)
120 g all purpose flour
2 g baking powder
90 g dark chocolate mini chips

for the chocolate cream:
1 egg yolk
10 g of sugar
100 g heavy whipping cream
38 g dark chocolate (I used Lindt 70%)

for the dark chocolate buttercream:
6 Tablespoons unsalted butter, softened
290 g confectioners’ sugar
90 g unsweetened cocoa powder
1/3 cup whole milk
2 teaspoons vanilla extract
1/4 teaspoon salt

for the chocolate mousse:
180 g Caramelia chocolate (or milk chocolate of  your choice) of milk chocolate
250 g heavy whipping cream

for the chocolate velvet spray (optional)
120 g milk chocolate (I used Caramelia)
80 g of cocoa butter

for decoration:
golden stars
chocolate Crispearls

Suggested timeframe: make cookie two days before serving time and freeze it. The day before serving make the mousse, and the chocolate cream. Assemble the cake and save the cream in fridge until cake is un-molded.  On serving day make the chocolate buttercream, and the chocolate spray suspension (if using).

Make the cookie base. Heat the oven to 350 F. Cover a cookie sheet with parchment paper  and place over it a 20 cm ring. Reserve.

In the bowl of a KitchenAid type mixer, cream the butter with the brown sugar and salt. Add the egg and mix again, then sift the flour with the baking powder and mix gently.  Add the mini chocolate chips, and spoon the batter inside the ring. (It is easier to just pour the batter over the parchment paper eye-balling the dimension, then sit the ring on top and use an off-set spatula to carefully spread it uniformly inside the ring).

Bake for about 15 minutes, until the edges start to get some color. Remove from the oven, and – using oven mitts – immediately make circles with the ring, which will make the cookie base shrink a little bit, as it is still hot. You just want to have the cookie a tiny bit smaller than the ring, so that the mousse will cover the edges fully.  Allow the cookie to cool completely before placing it in the freezer.

Make the chocolate cream.  Whisk the sugar and the egg yolk in a small bowl. In parallel, heat the cream in a small saucepan. Pour the cream over the sugar/yolk mixture to temper it, then transfer everything back to the saucepan. Cook the custard over low heat until 180 F.  Pour the cream over the chocolate until it is slightly melted and mix with a spatula.  Place a plastic film in contact with the cream and reserve it in the refrigerator. When ready to assemble, place in piping bag with a plastic adaptor and have two round piping tips ready, of different sizes.

Make the chocolate mousse. Melt the Caramelia chocolate gently in a double boiler.  Bring one third of the cream, about 80 g to a simmer in a saucepan. Pour the hot cream over the melted chocolate and mix with a spatula until fully smooth. Whip the remaining whipping cream until it gets the consistency of melted ice cream.  Pour half of the cream on your milk chocolate mixture and mix gently with a spatula. Add the remaining cream and mix again until you get a perfectly smooth chocolate whipped cream.

Assemble the dessert. Stretch a piece of plastic wrap on the 20cm circle ring, pulling it well to stretch it nicely.  Flip your circle over a baking dish that fits in your freezer and place a strip of acetate film on the inside to facilitate un-molding later. Pour all the mousse into the circle, then smooth roughly. Take the cookie out of the freezer and push it upside down into the foam (the smooth side of the cookie up). The mousse should be flush with the cookie, smooth over what is needed. Reserve the dessert in the freezer overnight.

Make the dark chocolate buttercream. In the bowl of a stand mixer fitted with the paddle attachment, beat the butter on medium speed until it is smooth. Turn the speed to slow, add the icing sugar and cocoa powder and beat until combined. Pour the milk and vanilla extract then add the salt and continue beating until well combined. Increase the speed to high and beat the frosting for a couple of minutes. Place in a piping bag fitted with a 1M tip or another star-shaped tip of your choice.

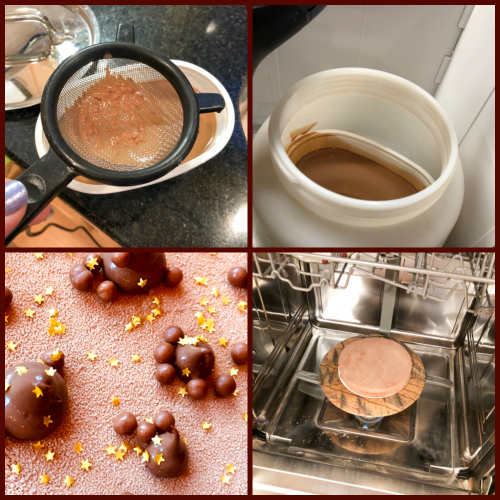
Make the chocolate suspension for velvet effect.  Melt milk chocolate and cocoa butter in a double-boiler. Filter and place the mixture into the tank of your sprayer. Temperature should be 98 F. Un-mold your dessert and immediately spray the chocolate on it. Ideally, do this inside a dishwasher with racks removed. Decorate the cake with the cream and buttercream, add sprinkles of your choice. Leave in the fridge to thaw for at least one hour before serving.

ENJOY!

to print the recipe, click here

Comments: Well, I do realize that it seems a bit of a stretch to post this recipe as simple and then come up with quite a few components to make it. As I mentioned, you can simplify it quite a bit. For instance, you can skip the two different types of piped decoration and do a drizzle of melted dark chocolate all over it. That would work well. A shower of golden sprinkles for fun and a bit of a dressed up look. The velvet spray is also optional. I find it fun to do, though, and it helps me deal with guilty feelings of having a sprayer sitting in the basement just for my patisserie adventures. It’s nice to put it to use.

On that note, three things are worth mentioning. First, you must strain the melted chocolate + cocoa butter before pouring it in the sprayer. If you look at my photo above, you’ll notice how much stuff gets retained in the sieve. That could conceivably clog the sprayer and you don’t want that at all. Second, if you are using a regular paint sprayer for chocolate work, the container is large, so what works very well is to place a much smaller plastic cup inside, so that you don’t need to make a huge amount of chocolate suspension. I used an empty Benecol container. And third, do the spraying inside an empty dishwasher, because it is a messy process and all you need to do after is turn the dishwasher on.

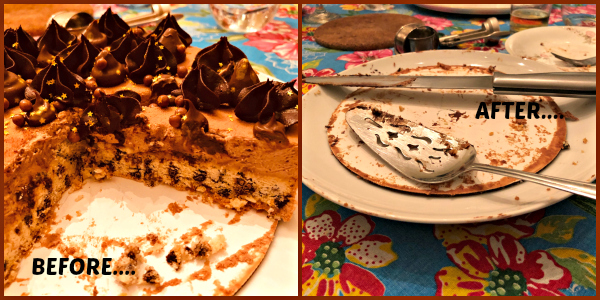
We took this cake to a dinner party at a friend’s home, so I snapped the pictures with my cell phone very quickly. I admit they are not prize-winning shots. At any rate, everybody raved about the dessert. The cookie component goes very well with the creamy mousse, and it had just the right thickness, don’t try to make it thinner because it won’t work the same way. I loved the contrast of the sharp cocoa buttercream with the milk chocolate cream and mousse, but the cake can shine with only one of the piped toppings.

Maxime, thanks for a lovely recipe, I am thinking of many variations in the future.

ONE YEAR AGO: The Brazilian Battenberg

TWO YEARS AGO: Salzburg Sourdough

THREE YEARS AGO: If I had One Hour

FOUR YEARS AGO: Apple Cinnamon Oatmeal Cake

FIVE YEARS AGO: Sourdough Rye Bread with Flaxseeds and Oats

SIX YEARS AGO: Apricot-Raspberry Sorbet: A farewell to Summer

SEVEN YEARS AGO: Marcela’s Salpicon

EIGHT YEARS AGO: Pork Kebabs

NINE YEARS AGO: Fondant au Chocolat

TEN YEARS AGO: Got Spinach? Have a salad!


YOGURT TART

Not too long ago I was browsing the internet searching for entremet cakes, and stumbled on a site that was new to me: Cooking Me Softly, hosted by Arianna, a chef from Italy. All I can say is that I had a very hard time moving away from the computer. Her concoctions are things of complete beauty, her flavor combinations unique and her presentation style superb. Not only she shares detailed recipes, but also short videos with the crucial stages of preparation. Basically, her site is culinary gold for those into patisserie. She blogs in Italian, but I can follow most of it closely enough to get the important points. Or so I hope. I fell in love with her Yogurt Tart the moment I first saw it, and could not wait to try and make it. The use of semi-spheres of mousse on top of the tart? Genius.

YOGURT TART
(slightly modified from Cooking Me Softly)

for Sablé Breton:
80 g egg yolks
100 g granulated sugar
125 g very soft butter
125 g pastry flour
2 g salt
5 g baking powder
grated lemon peel (1 lemon)
MyCryo cocoa butter (optional)

for white chocolate ganache:
340 g Lindt white chocolate
85 g heavy cream

for yogurt mousse:
120 g full-fat Greek yogurt
30 g granulated sugar
15 g of lemon juice, sieved
240 g fresh cream
6 g gelatin, 200 bloom
18 g cold water for gelatine hydration

for decoration:
small meringues
Gold dust
sprinkles of choice

Make the cookie base. In a Kitchen Aid type mixer, whisk the yolks with sugar and lemon zest until pale. Replace the whisk with the leaf beater, add the sifted flour with baking powder, salt, and then the butter. Mix well until creamy.  Place in a piece of plastic wrap, form as a disc and refrigerate for 8 hours.

Roll between two sheets of parchment paper to 1 mm thickness an put in the fridge for another hour, as you heat the oven to 350 F.

Cut a disc of dough with a 20 cm ring (7 + 3/4 in), and bake inside the ring for 20 to 25 minutes. Remove from the oven, and while still hot sprinkle MyCryo over the surface. Allow it to cool completely. Before continuing with assembling, place the base inside the ring and add a band of acetate around it so that the ganache will be poured nicely on top. I like to use a ring that is adjustable, so that I can tighten it better around the base. Often the base shrinks a little during baking.

Make the chocolate ganache. Melt the chocolate gently in the microwave or in a double boiler. Heat the cream to simmering (about 175 F). Add to the chocolate in three additions, whisking gently to fully incorporate the chocolate and the cream.  Reserve. Cool to about 90F before pouring into the cool base. Place in the fridge to cool completely and then in the freezer overnight.

Make the yogurt mousse. Hydrate the gelatin in the water indicated in the recipe. Heat part of the yogurt with the sugar to about 140 F.  Melt the gelatin heating gently for a few seconds in the microwave (do not boil it). Add the melted gelatin to the warm yogurt/sugar mixture.

Add the lemon juice, the remaining cold yogurt and mix. Whip the cream to the consistency of melted ice cream, and fold gently into the yogurt base. Spoon the mousse into a piping bag (no need for a piping tip) and fill half-sphere molds (3.4 and 5 cm in diameter), smoothing the surface well. Put in the fridge to cool and then freeze overnight.

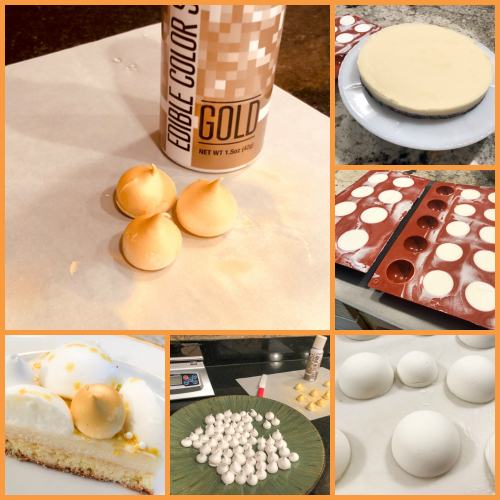
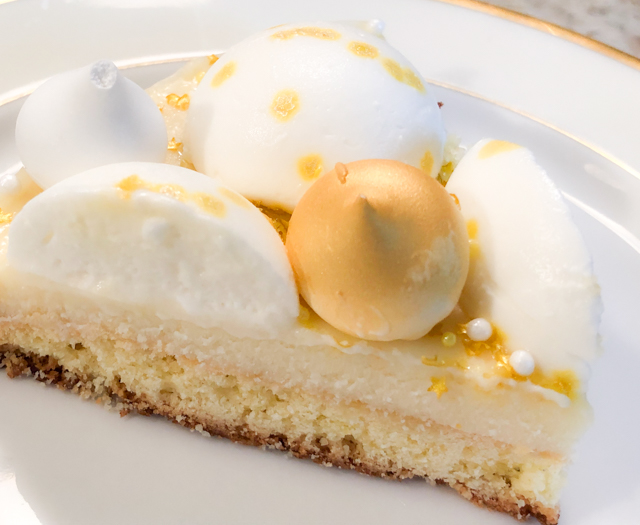
Assemble the tart. Remove the base with chocolate ganache from the freezer, place in a serving tray and remove the acetate. Arrange the mousse spheres of different diameters over the ganache. Decorate with mini-meringues plain and painted with gold spray. Put in the fridge for about 6 hours to allow the ganache to soften and the mousse to thaw.

ENJOY!

to print the recipe, click here

Comments: I truly enjoy making desserts that involve multiple components particularly because they can be made in advance and wait in the freezer or fridge. Finishing the dessert then is easy and fun (assuming it all worked well in the previous steps). For this preparation, Arianna’s video was very helpful, as the Sable Biscuit is quite a bit softer than I anticipated. Watching how she handled it was key to succeed. Also make sure you make the dough the day before you intend to bake it, it needs those 8 hours in the fridge. Another important point is the white chocolate ganache: you need it to be firm enough to slice and hold its shape. Arianna uses a specific brand of chocolate that would be a bit of a hassle for me to find. Using her proportions with the Lindt bar, the ganache ended up way too loose, so I made another batch using a 4:1 ratio chocolate to cream. You can probably get by with a 3.5:1, but not much less than that.

My schedule went like this: I made the biscuit dough on a Friday evening, baked it Saturday morning and made the mini-meringues, the chocolate ganache and the mousse on Saturday afternoon. Once the ganache cooled enough I spread it over the biscuit base and froze it. Sunday afternoon I un-molded the frozen mousse spheres, sprayed some of the meringues with edible gold color, and assembled the tart.

The only issue I had was the golden stars used for decoration. The ones in contact with the ganache held their shape well, but the yogurt mousse (probably due to its acidity) melted the stars within an hour or so.

The flavors were quite amazing, as the sweetness of the white chocolate ganache stood well to the bright flavor of the yogurt mousse. The biscuit base had excellent texture, even if I overbaked it slightly. It was hard to see it inside the ring, next time I’ll be more careful.

Arianna has a cookbook published online and I could not resist getting my copy. It is absolutely amazing, you can get it with a click here.  The name is just too clever: Aria di Dolci. Loved it! Keep in mind it is in Italian, so you need to have some level of understanding of the language.


ONE YEAR AGO: Grilled Lamb-Stuffed Pita Bread

TWO YEARS AGO: Elderflower Macarons

THREE YEARS AGO: A Duet of Sorbets

FOUR YEARS AGO: Sobering Peach Sorbet

FIVE YEARS AGO: Spiralizer Fun

SIX YEARS AGO: Beer-Marinated Grilled Skirt Steak

SEVEN YEARS AGO:  Secret Recipe Club: Corn Chowda

EIGHT YEARS AGO: Page-A-Day Calendar (Pits and Chief 5 minutes of fame…)

NINE YEARS AGO: Home Sweet Home (our beloved Pits in one of his last photos)

TEN YEARS AGO: Marbled Rye

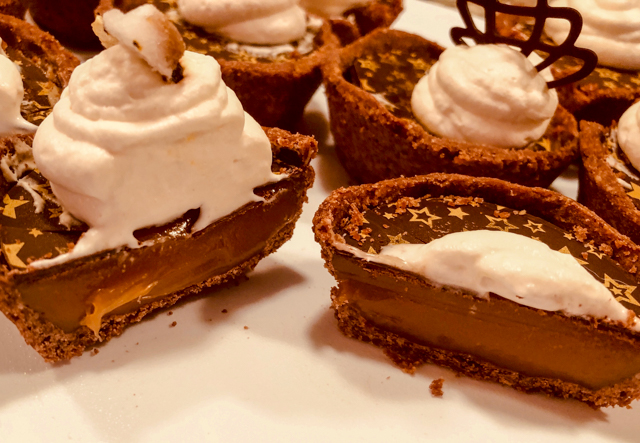
CHOCOLATE TARTLETS WITH HONEY CARAMEL FILLING

Care to find out what’s my latest obsession? Afternoon Tea Cookbooks. Most are not available as Kindle books, so I tend to be very selective when inviting one into our home. Reviews must be absolutely stellar, and pictures must be included for most (if not all) recipes. One book that made the cut is Afternoon Tea At Home, by Will Torrent. It is absolutely wonderful. As I was browsing through its pages and trying to decide what to make first from it, I had this crazy idea and immediately acted on it. Handed the book to Phil and said “Here, pick a recipe, any recipe, and I’ll make it.”  I call that Self-Inflicted Technical Challenge. He needed less than 2 minutes. Of course, the recipe he chose involved a crust, a caramel filling, tempering chocolate, and using transfer sheets to decorate it. Me and my big mouth. When will I ever learn?

CHOCOLATE TARTLETS WITH HONEY CARAMEL FILLING
(adapted from Afternoon Tea at Home)

for the crust:
200g all-purpose flour
150g butter, cut in pieces, cold
90g powdered sugar
60g almond flour
20g cocoa powder
pinch of salt
4 egg yolks

for the filling:
1 cup (320 g) honey
½ cup (120 ml) heavy cream

¼ cup (60 ml) sweetened condensed milk
¼ cup (85 g) corn syrup
pinch of salt
2 tablespoons unsalted butter 

for the topping:
1 cup heavy cream
3 tablespoons powdered sugar (or to taste)
1 tablespoon skimmed dry milk
100g tempered dark chocolate
12 sugar bees

Make the crust: Put the flour and butter in the bowl of a Kitchen Aid mixer and mix until the butter gets into crumbs, coated by the flour. In a separate bowl mix the sugar, almond flour, cocoa powder and salt. Add this mixture to the butter/flour, mix on very low-speed to combine (you want to avoid developing gluten). When it is almost fully combined, add the egg yolks and again mix very gently.  Form a dough, flatten it, wrap in plastic and place in the fridge for 1 hour.

Turn the dough onto a floured surface and roll out to 1/8 inch thick. Cut 12 rounds that will fit a muffin pan, coming all the way to the sides. Chill in the fridge for at least 30 minutes before blind-baking at 325 F.  I like to use plastic wrap to enclose rice or pie weights, it is safe to bake at this temperature, as long as the plastic does not touch the metal surface of the tin. Bake for 10 minutes, remove the weight, and bake for 5 to 10 more minutes. The tartlets must be fully baked, as no more cooking will take place.  Cool in the pan.

Make the filling: Combine the honey,  cream, condensed milk, corn syrup, and salt in a saucepan. Stir over medium heat until the mixture reaches 240F. Remove from the heat and stir in the butter. Divide among fully blind baked shells and allow to cool to room temperature. 

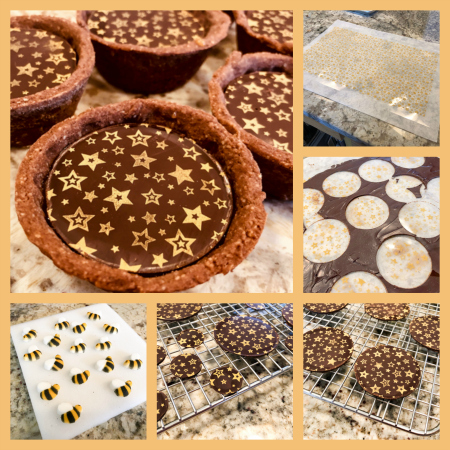
Make the chocolate decoration. Temper the chocolate according to your favorite method. Spread over the transfer sheet (make sure to use the correct side of the sheet!), let it set for a few minutes, then stamp circles the exact size of the top of the tartlets. Once fully set, gently peel the chocolate off the transfer sheet. Marvel at the design, pat yourself on the back.

Make the whipped cream. Beat the heavy cream with sugar and powdered milk until it forms medium peaks, transfer to a piping bag with a simple round piping tip.

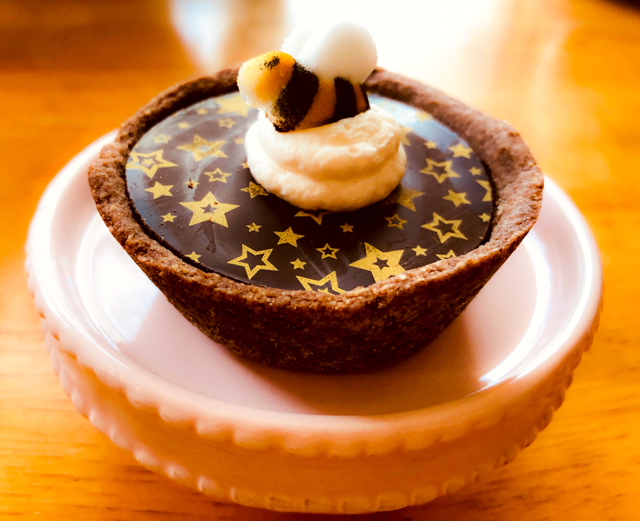
Assemble the tartlets. When the crusts are cold, fill them with the caramel, place in the fridge to speed cooling a bit. Once the surface is set, gently place the chocolate decoration on top. Pipe the whipped cream, and set a little sugar bee on top.

ENJOY!

to print the recipe, click here

Comments: This recipe, originally called Beehive Tarts, comes from David Girard, Head Pastry Chef from The Dorchester. I kept the crust and the chocolate decorations, but changed the filling and the topping. The filling was a honey caramel thickened with gelatin, but I worried that it would not set up enough to be neatly sliced in half. Since I take my bakes to the department, I prefer to offer a larger number of small portions, so more colleagues can enjoy them.  For this reason, I used a caramel adapted from a recipe I made a couple of years ago.  As for the topping, in the book he uses lemon curd (it did give a nice yellow color very cute with the little bee sitting next to it), but I love the combination of chocolate, caramel and whipped cream. I stabilized the whipped cream with powdered milk, a trick I learned from Anna Olson. It does stabilize it very well and is super simple to do, but I prefer the taste of whipped cream stabilized with gelatin (I will talk about it in the very near future).

The chocolate disc decoration… Tempering chocolate is the number one culinary task that gives me hyperventilation. So many failures, it’s not even funny. Somehow this time things worked beautifully in the microwave/seeding method. Two basic changes in my approach: I grated the chocolate finely instead of keeping it in chunks, and used a microwave-safe plastic bowl instead of Pyrex, in very short cycles of heating, not more than 10 seconds at a time. I kept 1/4 of the chocolate grated at room temperature to use as “seed.”  Then I stirred, and stirred, and stirred some more, monitoring the temperature very carefully.  Once the chocolate was tempered, it was spread over the transfer sheet. I tried my best to do it as uniformly as possible.

At that point, I waited for the chocolate to start setting, but did not allow it to fully harden. You have a good window of several minutes to work, no need to panic. You could panic, of course, but it’s not mandatory. Then using a cookie cutter, I pressed into the chocolate, and lifted the disc. That is what I call a rookie’s mistake. If you use this technique, press the cookie cutter, forming the edges as sharply as possible, but do not lift the disc yet. Wait until it is fully set. That will ensure that the pattern will efficiently transfer. My first discs clearly showed some variability in the pattern, weak at some spots, well-defined in others. But for a first time, I am pretty happy with the way it turned out.  The sugar bees? I bought them from amazon.  If you have artistic inclinations, you could make some with fondant, or modeling chocolate. I cringe to imagine what my bees would look like if I attempted to make them from scratch. Rotten mangos? Pineapples after a wild boar stampede?  Neither option would look right.

But the heart of the matter is: can Sally bake without drama? Sometimes yes, but not always. After I took the photos for the post, I placed my cute tartlets in a tray to take them to the fridge, where they would sit until Monday morning. A very unfortunate bump of my hand on the shelf of the fridge, and they slid off the tray, one fell all the way to the floor, some tumbled inside the fridge… Can you feel the pain? At first I thought they were all ruined, but luckily enough most were ok after I shaved off a bit of broken crust  here and there. I had to discard a few bees that were messed up when they got shoved into a puddle of whipped cream. I also had to remove all the cream very carefully, clean the tops and decorate them again. The tartlet that fell to the floor? You can guess who swallowed it before I could do anything to prevent that from happening. Yes, there was chocolate. Yes, he was totally fine and quite pleased with that twist of canine fate.  Never a dull moment, folks. Never a dull moment.

The tartlets are quite decadent, the little bees have a melt in your mouth texture, not hard as rock sugar. I was pleasantly surprised. Obviously you can skip that component, without compromising the dessert. I just felt like going the extra mile, because the person who requested the recipe deserves only the best…

ONE YEAR AGO: Zucchini Soup with Tahini

TWO YEARS AGO: Black Sesame Macarons

THREE YEARS AGO: Fine Tuning Thomas Keller

FOUR YEARS AGO: Cauliflower Tortillas

FIVE YEARS AGO: Majestic Sedona, Take Two

SIX YEARS AGO: Secret Ingredient Turkey Meatballs

SEVEN YEARS AGO: Swedish Meatballs and Egg Noodles

EIGHT YEARS AGO: Italian Easter Pie

NINE YEARS AGO: Black Olive Bialy


BERRY REBELLION TARTS BY KIRSTEN TIBBALLS

Fantastic, terrific, outstanding, phenomenal, impressive, superb. Those are some of the adjectives I must use to express how I feel about Savour online classes, particularly those taught by the founder of the site, Kirsten Tibballs. I found Savour by accident about 6 months ago, and decided that a monthly subscription to have access to the hundreds of patisserie videos (260 at the present time) was more than worthy it. They add new videos on a regular basis, but in my opinion, even if they did not, the material already available is mind-blowing. Yes, yet another adjective joined my party. Kirsten Tibballs’ CV is quite impressive, you can read about her in this recent interview. Plus, she is a perfect teacher, going over every detail in the recipe, making sure you know what is absolutely important to pay attention to and why. I learn a lot watching her classes. And the icing on the cake? She always has a nice smile and a calm, serene demeanor that makes even the most complex recipes seem doable. Well, except when she performs her magic tricks with tempered chocolate. The doable component goes out of the window, and it goes real fast.  Today I share a recipe she offered on her youtube channel, and show you another tart (without the recipe) that is part of the Savour school. They were both spectacular, but I am particularly thrilled by the first one: Berry Rebellion Tarts. We had them for our Valentine’s dinner dessert, and they closed the evening with a golden key. Maybe it was more a ruby-red key?
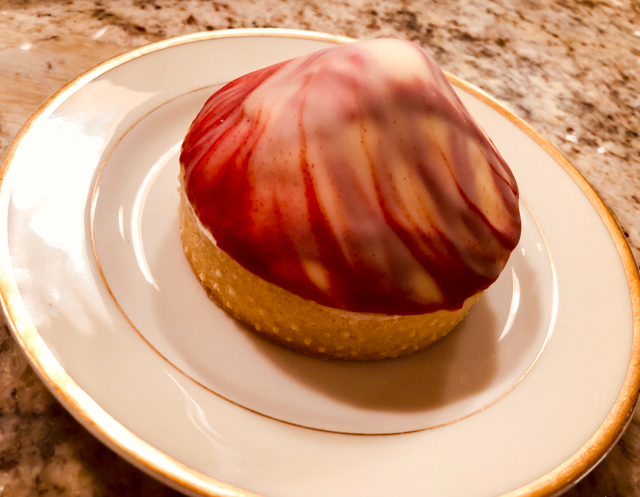
VALENTINE’S BERRY REBELLION TARTS
(slightly modified from Kirsten Tibballs youtube channel)

For the pastry shells:
225g all-purpose flour
125g unsalted butter
75g superfine granulated sugar
1 egg (about 60g)
2 teaspoons of water

Heat the oven to 350F. Combine the sifted flour and butter to form a crumb; you can do this either in a stand mixer with the paddle attachment, food processor or rub the butter into the flour by hand. It is important that you do not over mix at this stage and ensure that all the butter is combined without forming a paste.

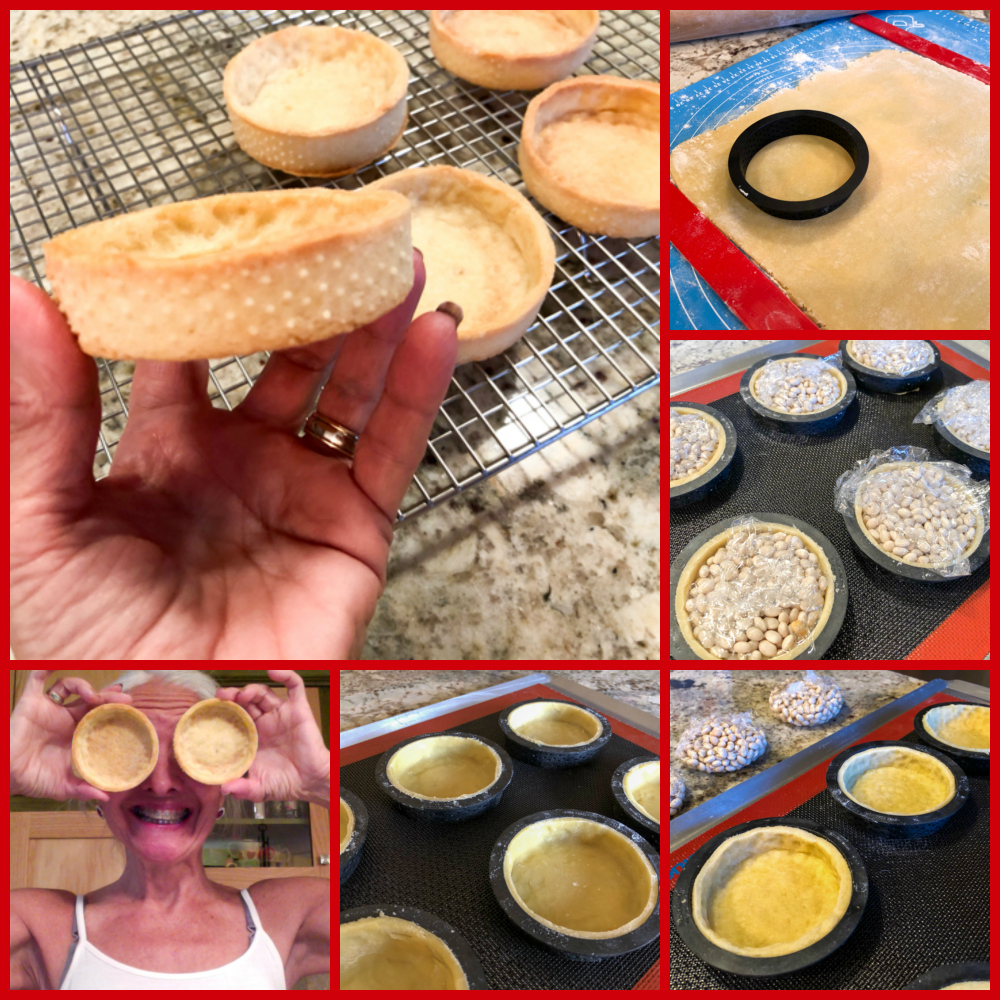
Combine the sugar, water and egg in a bowl, stop the mixer and add this to the crumb mixture. Mix until it just comes together as a dough. Press the dough into a flat square, cover in plastic wrap and rest in the fridge for 1 hour. Once the dough is firm, remove from the fridge and cut in half. Roll the pastry out to 3mm thick on a surface lightly dusted with flour. Cut out discs slightly larger than the tart rings (mine are 8cm in diameter). Place the rings on a lined baking tray and line them with the pastry. Place the tarts in the fridge and repeat the process with the remaining dough.

When the pastry has firmed up, trim the edges with a small sharp knife. Cover the tarts with plastic wrap, fill the tarts with uncooked beans or rice, pressing them into the base firmly to make sure it is filling all the corners. Bake for approximately 10 minutes, remove the rice and plastic lining and bake for a further 4-6 minutes or until a light golden brown colour. Remove the rings while the tarts are warm and allow to cool.

For the crunchy layer:
20g freeze-dried strawberries
13g puffed rice cereal
62g  white chocolate
20g grapeseed oil

Melt the white chocolate in a plastic bowl in the microwave for 30 seconds at a time on high until it is half melted. Stir vigorously to melt all the chocolate and add in the oil. Mix to combine then add the strawberries and rice bubbles and stir. Spoon a thin layer onto the tart shells, followed by a thin layer of compote, made as described below.

For the strawberry compote:
200g strawberries, hulled and cut in pieces
50 g granulated sugar
1 tablespoon cornstarch
1 tablespoon lemon juice
120 mL water (about 1/2 cup)
pinch of salt

Place strawberries in a saucepan with sugar,  lemon juice, and salt. Divide the water into two – pour half with the fruit and combine the other half into the cornstarch.

Heat the fruit on low to medium until sugar is dissolved shaking the pan to cook evenly. Add the well-mixed cornstarch mixture into the bubbling fruit. Continue to cook on low – the mixture will thicken and looks glossy. When thick enough to coat the back of a wooden spoon or spatula it’s ready. Let cool completely. It can be prepared a couple of days in advance.

For the Chantilly topping:
150 ml fresh cream 35% fat (A)
15g liquid glucose
1 teaspoon of vanilla bean paste
105g good quality white chocolate
220 ml fresh cream 35% fat (B)

Boil the cream (A), glucose and vanilla in a saucepan. Pour the boiling mixture over the white chocolate in a bowl and whisk together by hand. Add in the cream (B) and whisk again. Place in the fridge for 6 hours prior to whipping. To whip, whisk it in a stand mixer or by hand to a piping consistency.

Place a generous spoonful of the white chocolate Chantilly cream on top and smooth into a dome shape with a knife. Freeze for 1 hour minimum.  Proceed to make the chocolate coating.

For the chocolate coating:
500g white chocolate
50g grapeseed oil
10g red oil soluble colour (I used only 4g)

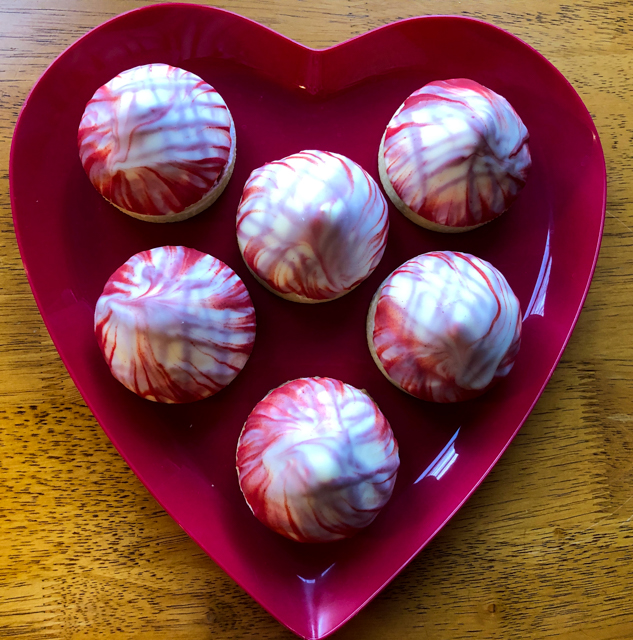
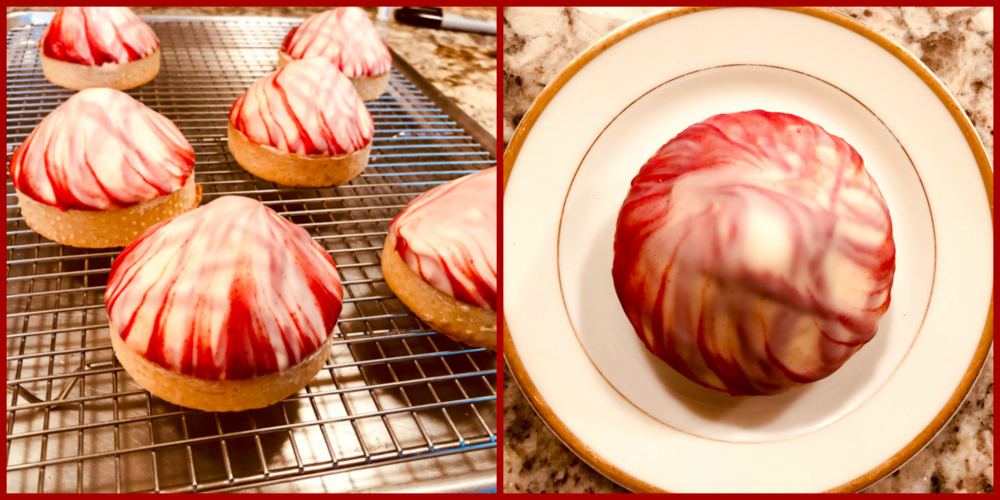
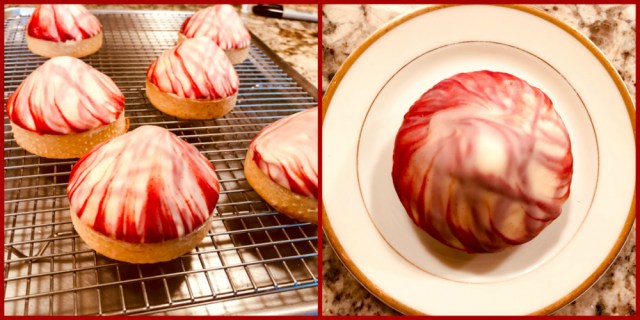
Temper the white chocolate by melting it in the microwave for 30 seconds at a time until half melted. Add in the grapeseed oil and combine. Portion out one-third of the chocolate and sieve in the red colour. Stir to combine then fill a paper piping bag halfway with the chocolate. Place the white chocolate in a smaller bowl and pipe the red chocolate in a grid pattern on top. Holding the tart shell, dip the cream coating into the chocolate and twist the tart as you remove it. Let it drip for a few seconds before turning it upwards and leave at room temperature to set. Pipe red chocolate over the grid pattern each time you dip a new tart, until you coat the six of them.

Allow them to fully set, place in the fridge to defrost for at least one hour before serving.

ENJOY!

to print the recipe, click here
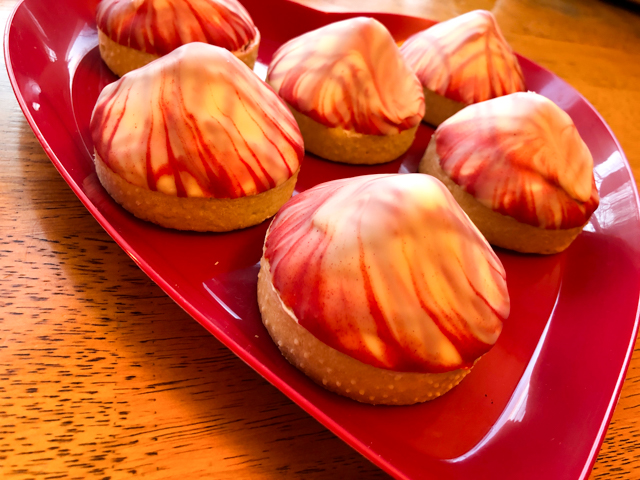
Comments: When I coated the tarts and placed them on the rack to set,  I said to myself “did I make these? did I really make these?”  Nothing beats the thrill of pulling a recipe that seems a bit too complex and that takes me out of my comfort zone. More often than not, I have small issues with it, but not this time. They turned out better than I expected. I spread the preparation over three days, because with Valentine’s falling on a Thursday I had no choice. The tartlets were made on Tuesday evening, the compote on Wednesday evening.
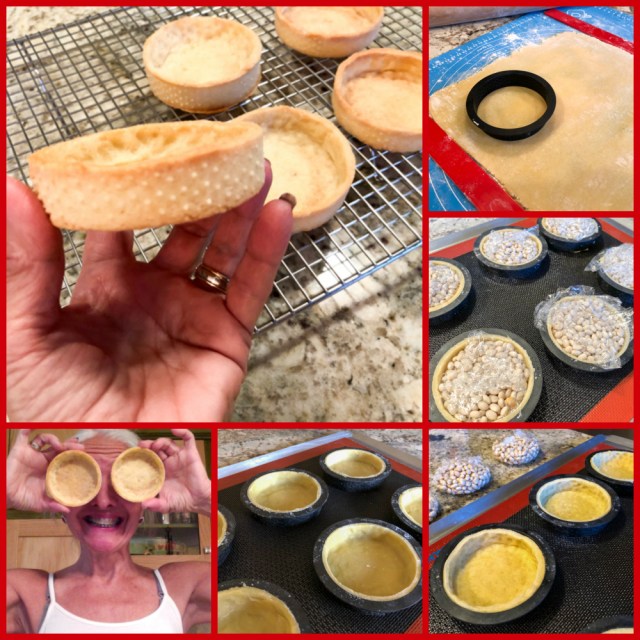
I urge you to watch Kirsten video on youtube. Her method to shape the dough in the tart rings is wonderful and if you follow it closely you’ll have tartlets with a perfect sharp angle at the bottom, instead of a rounded-up edge that makes spreading the filling a bit tricky. Small details matter. The addition of a tiny amount of water in the dough makes it easier to roll out. A pleasure to work with. I used regular saran wrap to cover the tarts before filling with beans (or rice, if you prefer that). Just make sure to crumble the plastic on top,  so that it dos not touch the ring during baking.  Once the tarts are cool, you are ready to move on to the two-component filling…
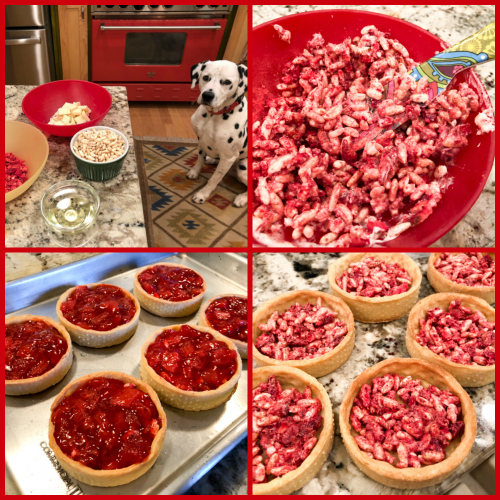
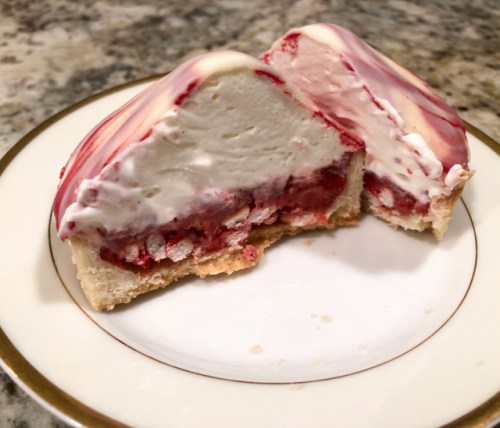
Mis-en-place is everything, and BogeyQT™ definitely approved the way I handled that step. A crusty base with puffed rice cereal, freeze-dried strawberries and white chocolate gives these babies intense flavor and a perfect contrast to the creamy topping that is added later. I changed the recipe for the strawberry compote, because I felt that just simmering the fruit in water and sugar resulted in a very loose mixture. I was afraid it would leak all over the place when I cut the tart. So I used a strawberry compote slightly thickened with cornstarch.  It maybe depends on the fruit available to you, Kirsten made them in Australia at the peak of the summer. Lucky lucky woman, I am in the desolate tundra of Kansas freezing my tropical bones. Once the compote is added, all you have to do is crown it with some seriously awesome white chocolate Chantilly cream.
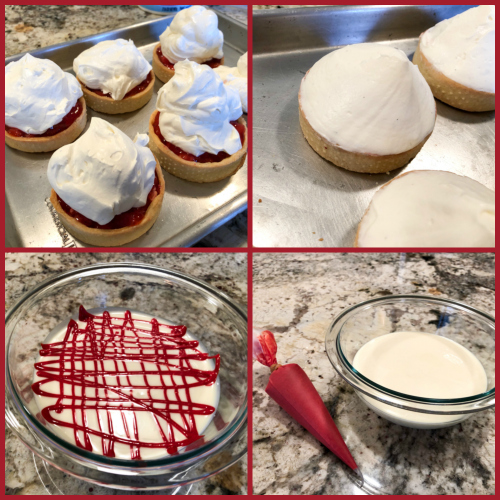
Not to repeat myself, but still doing it, you MUST watch her youtube video for this step (around minute 18). I was a bit worried about sculpting the top in a nice mountain-shape, Chantilly is not the most forgiving substance in patisserie world. But Kirsten, knowing that this step has the potential to induce hyperventilation, holds her spatula and with a very sweet smile says, eyes straight to the camera: I know you can do it!  I got faith on you….  Well, let’s say I would not allow cameras to show my performance, but somehow I managed to do it, a few blobs of cream finding the counter top, but not really that bad. And that final step? Swirling the top of the frozen tartlets in the white chocolate pool? That is THE coolest thing ever! Dip it right to the level of the tart shell, and then control your nerves and lift it as you turn. Don’t over-think it. Go for it. I tell you, it was almost as much of a thrill as crossing the finish line of a marathon back in 1986. Yeah, that’s about right.
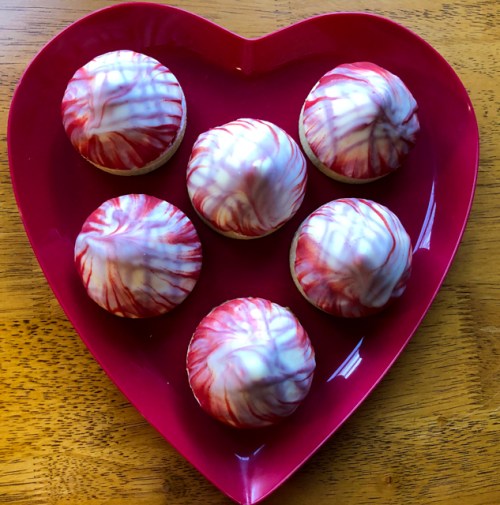
The tart is simply amazing. The white chocolate-Chantilly cream is quite likely one of the most luscious toppings I’ve ever made, and all the components work together well: the extra crunchy layer with the freeze-dried strawberries is full of flavor, the compote sweet-and-tart, and then the creamy top. OMG-type of dessert. Trust me. You could change the color of the swirl component, maybe even add two different colors for a cool effect, adapting it to Easter, Christmas, Mardi Gras… One of the tastiest things I’ve made in a long time.
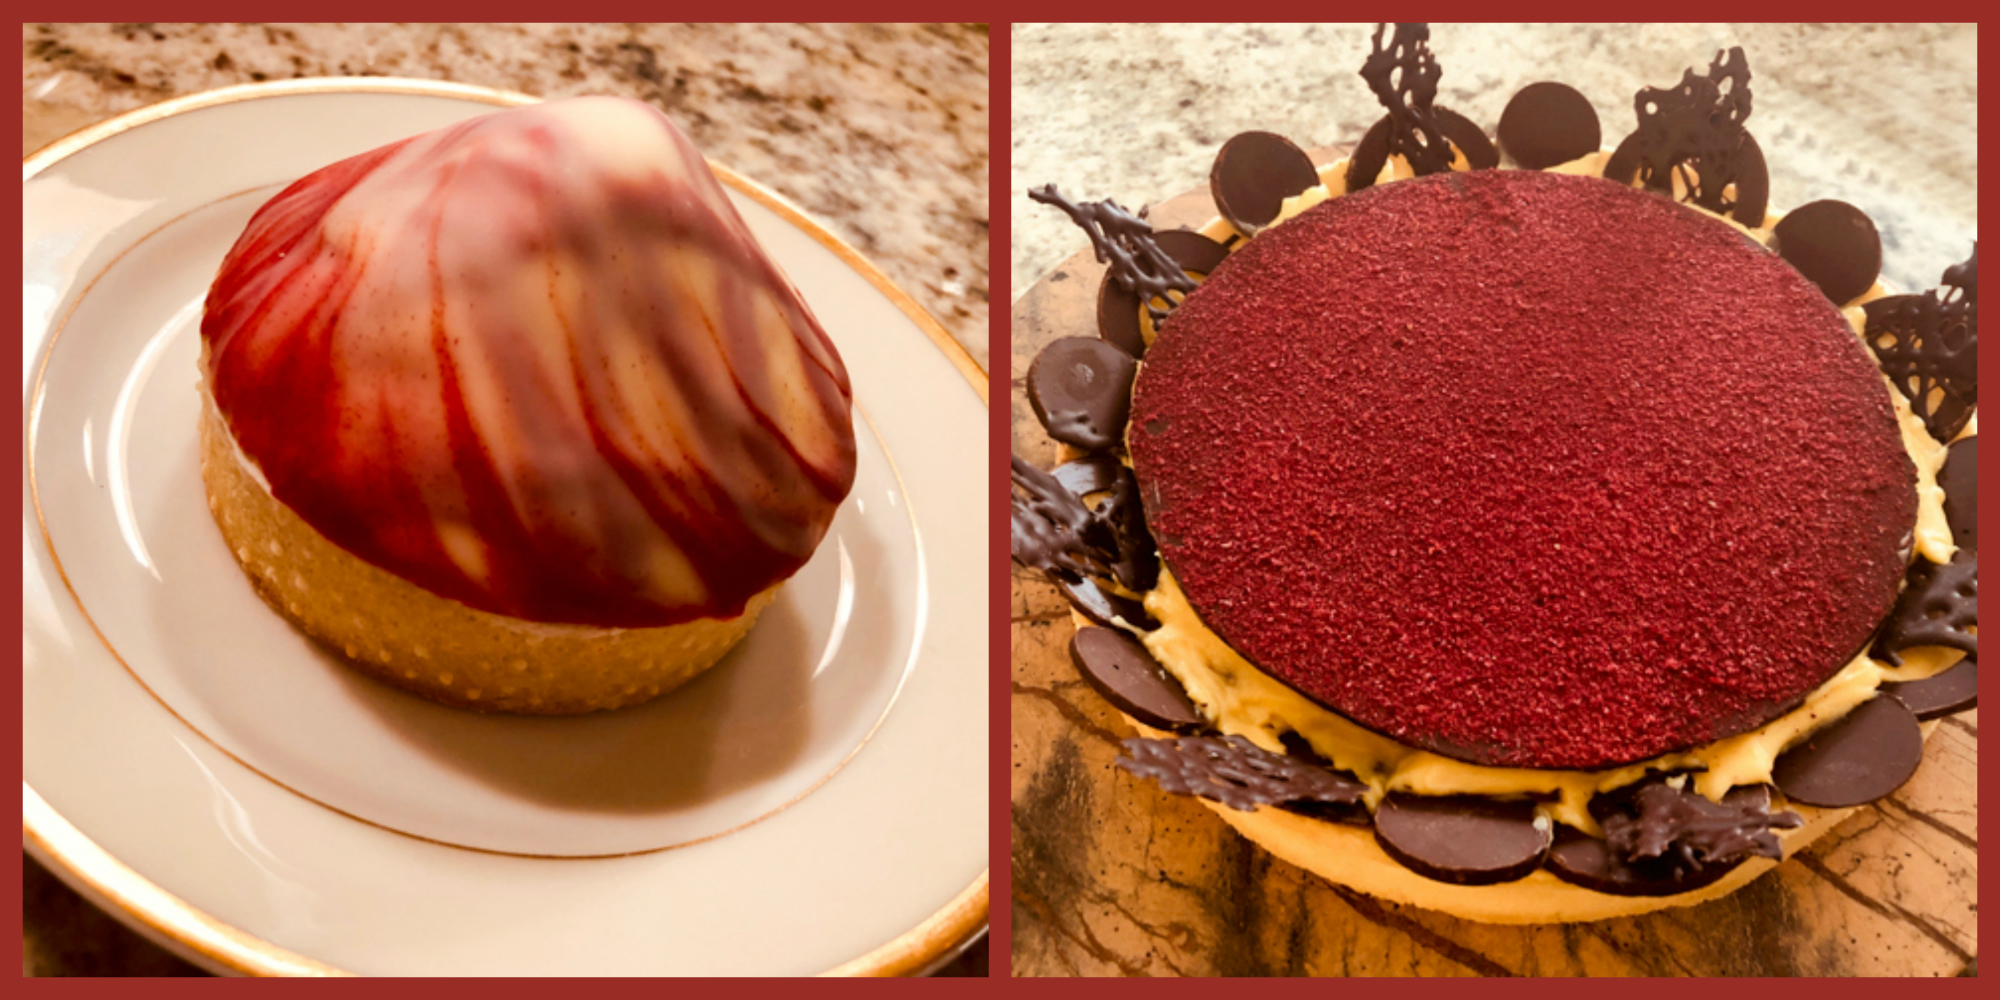
Now, time for a teaser recipe, which you can find at Savour.com.  Kirsten’s Crown of Savour is a single tart with some similarities to the Berry Rebellion. A tart base (slightly different recipe), a crusty layer made with pistachios, slivered almonds, puffed rice and white chocolate. Fresh raspberries spread on top, all covered with a superb vanilla cream perfumed with rose-water. To crown it, a disc of tempered chocolate showered with a dust of freeze-dried raspberries. It was a labor of love, but worth the effort.
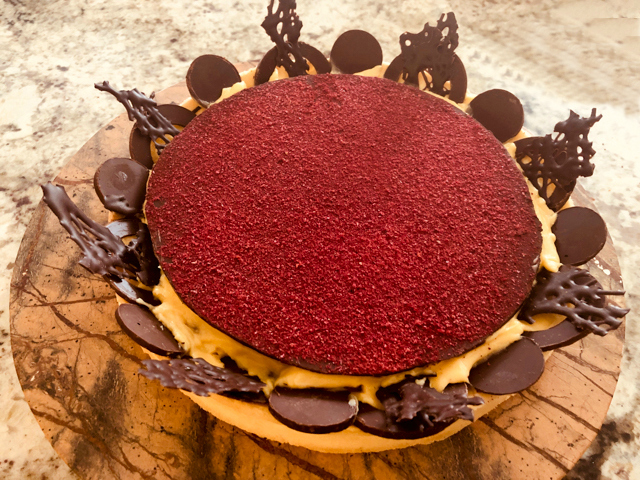

I think the trickiest component of this tart was the tempered chocolate disc. Kirsten is undoubtedly the Queen of Chocolate. She is able to spread the tempered suspension super thin, so the result is a much more delicate topping. The decoration she chose for the tart is also totally different, she baked little sticks with meringue and stuck them in a nice pattern all around. You can marvel at it here.  I could not bring myself to go for those, as all my energy had been depleted in a certain chocolate tempering adventure. I decorated the edges with pieces of tempered chocolate I had played with. Kirsten’s Crown of Savour is a real masterpiece of patisserie.
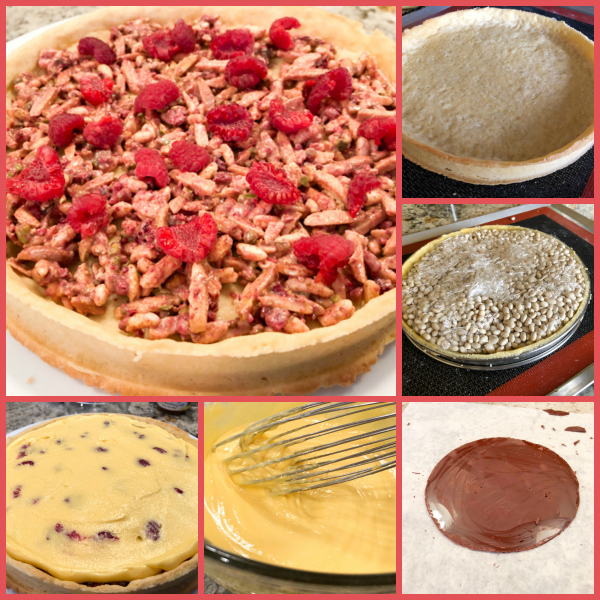
The flavors of this tart were also quite amazing, Kirsten is big on contrasting textures. In the video, she points out that you can potentially simplify things by omitting the crunchy layer on top of the crust, but I do think it adds a lot to the dessert. If you spread preparation over a couple of days, it’s all pretty doable. Of course, the chocolate component a bit of a challenge. Savour has a few tutorials on tempering chocolate using different methods like tabling and microwave, so it’s actually all there for you to learn.  I need a lot more practice, my chocolate decorations are always a bit “heavy”, not enough finesse, because evidently I don’t have the “chocolate skill.” Not yet, that is…
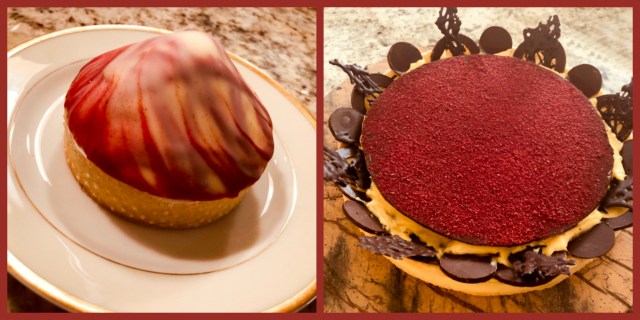
As I mentioned, Savour right now has 260 videos. Most are 20 to 40 minutes long, some are shorter, some slightly longer. They show every single step to make the desserts, no matter how complex. You have access to the full recipe, as well as links to special items used (baking pans, silicone molds, piping gadgets). Finally, you also have access to a forum to ask questions to moderators and other bakers. If you’ve been following my blog, you know that I only recommend things I love, and never accept any requests to review books or products. I am absolutely in love with Savour and feel that anyone with a passion for patisserie will profit from their online classes.

Chef Kirsten, thank you so much for making classes available to home bakers like me, who live so far away from Australia and can only dream of taking a hands-on class from you.


ONE YEAR AGO: Emilie Raffa’s High Hydration Sourdough

TWO YEARS AGO: Short-Ribs with Chickpeas and Chard

THREE YEARS AGO: Asian-Style Short Ribs 

FOUR YEARS AGO: Herbed Goat Cheese Souffles

FIVE YEARS AGO: Barley Risotto with Peas

SIX YEARS AGO: Jammin’ Blueberry Sour Milk Pancakes

SEVEN YEARS AGO: Scallops with Black Pasta in Orange Cream Sauce

EIGHT YEARS AGO: Stir-fried Chicken with Creamed Corn

NNE YEARS AGO: Potato, Cheddar, and Chive Torpedo