BRAZILIAN CANDY: SURPRESA DE UVA

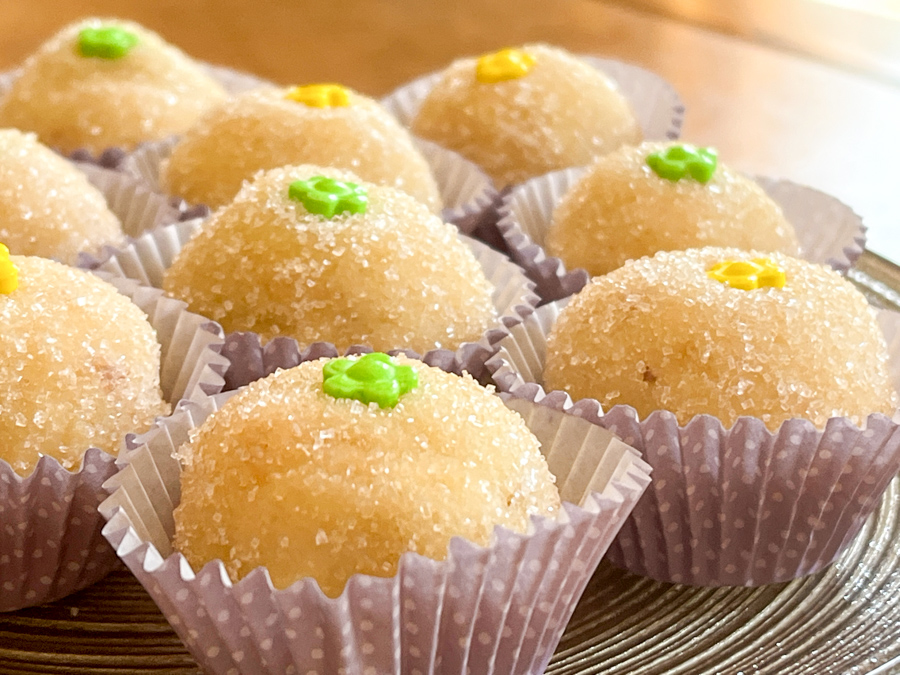
Surpresa de uva means “Grape Surprise”. It is essentially the most traditional of all Brazilian sweets – the brigadeiro – hiding a full grape inside. Everybody back home loves it, but I must admit this was my first time trying one. It was not “a thing” when I was growing up a few years ago (cough, cough). We loved it so much that the husband requested me to work on a “blueberry surprise.” I am on it!

SURPRESA DE UVA
(from the Bewitching Kitchen)

1 can condensed milk
1 tablespoon butter
2 tablespoons heavy cream
1/3 cup white chocolate, cut in small pieces
pinch of salt
16 to 20 small seedless green grapes
sanding sugar to coat
sprinkles to decorate (optional)

Add the condensed milk, butter, heavy cream, chocolate and salt to a heavy non-stick pan and cook, stirring constantly over medium to low heat, until bubbly and the mixture starts to release from the sides of the pan. Once that happens, lower the heat as low as it will go, and keep stirring for another couple of minutes.

Remove from heat, transfer to a small baking dish to cool faster. Place in the fridge if you like to speed up the cooling process. Once at room temperature, grab small amounts with a spoon, spread on the palm of your hand and place a grape in the center. Carefully roll the mixture around (wet hands help), enclosing the grape. Roll on sanding sugar. Decorate with a sprinkle, if so desired.

They will keep at room temperature for a day or two, many days in the fridge, and even longer frozen.

ENJOY!

to print the recipe, click here

Comments: These are sooooo delicious! Brigadeiro is sweet, very sweet. The inclusion of the grape is brilliant, it cuts the sweetness with just the right amount of fresh. I envision a blueberry version in the future, trying to imagine the right flavor of brigadeiro to enclose it with. Stay tuned!

ONE YEAR AGO: Red Quinoa “Tabbouleh”

TWO YEARS AGO: Cucumber Salad with Yogurt-Harissa Dressing

THREE YEARS AGO: Sundried Tomato and Feta Cheese Torte 

FOUR YEARS AGO: Hickory-Smoked Beef Tenderloin

FIVE YEAR AGO: Spaghetti Squash, Revisited

SIX YEARS AGO: Stir-fried Chicken and Cabbage in Spicy Almond Sauce

SEVEN YEARS AGO: Fifteen Years!

EIGHT YEARS AGO: Light Brioche Burger Buns

NINE YEARS AGO: Sourdough Blues

TEN  YEARS AGO: Headed to Hawaii

ELEVEN YEARS AGO: A yummy Brazilian cake: Bolo de Fuba’

TWELVE YEARS AGO:  Hidden Treasure

THIRTEEN YEARS AGO: Avocado Three Ways

RASPBERRY BRIGADEIROS

A departure on the Brazilian classic, I love the way these turned out. The raspberry cuts through the sweetness and gives them a little sharp bite I find quite pleasant. If brigadeiros are new to you, I urge you to make a batch. You can start from the traditional version, or go straight for this dressed up variation.

RASPBERRY BRIGADEIROS
(from the Bewitching Kitchen)

1 can (14 oz) condensed milk
1 tablespoon butter
100g white chocolate, cut in pieces
dash of salt
1/4 cup raspberry jam, seedless
1 tsp Amorettti raspberry flavor (optional)
nonpareils, white and pink
gold air-brush color (optional)

Grease a small baking dish with butter and set aside.

In a medium non-stick pan, combine the butter, sweetened condensed milk, and salt over medium-low heat, stirring constantly with a wooden spoon. Once the brigadeiro mix is warm, add the chocolate pieces, the jam and continue stirring.


The mixture thickens after about 8-10 minutes, and once you can run your spoon through the middle of it without it running back together for 2-3 seconds, it is done. When it starts to thicken, add the raspberry flavor, if using.

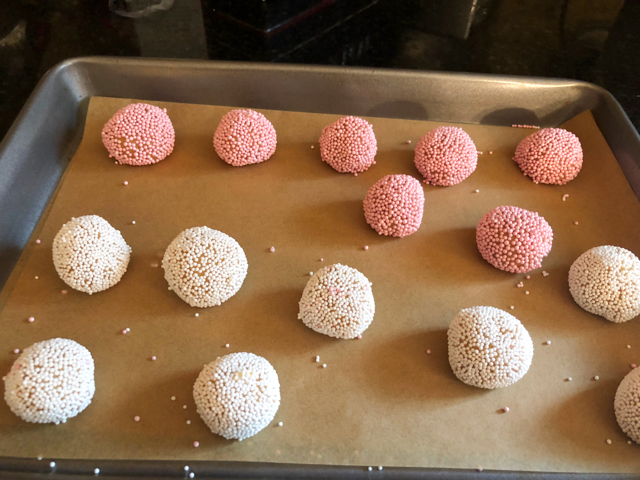
Pour the mixture into the greased plate, and let it chill until you can handle it with your bare hands. Form little balls and roll on nonpareils to coat. If desired, add a little gold color with an air-brush. Place them in small candy cups.

ENJOY!

to print the recipe, click here

Comments: Brigadeiros are very sweet by nature (reducing condensed milk leaves you no way out of it), but even those who are against overly sweet goodies will enjoy this version. The raspberry does its magic.

I went with two colors, pink and white, and added a touch of gold because these brigadeiros had to be dressed for a special party. Have you heard that a certain food blog will turn 12 years old very soon? I say no more for the time being…

ONE YEAR AGO: Kale and Prosciutto Wrapped Chicken Breasts

TWO YEARS AGO: Memories of Pasteis

THREE YEARS AGO: And now for Something Completely Different

FOUR YEARS AGO: Parsnip, Coconut, and Lemongrass Soup

FIVE YEARS AGO: In My Kitchen, October 2016

SIX YEARS AGO: Paleo Moussaka

SEVEN YEARS AGO: In My Kitchen, October 2014

EIGHT YEARS AGO: In My Kitchen, October 2013

NINE YEARS AGO: Crimson and Cream Turkey Chili

TEN YEARS AGO: Taking a break from the nano-kitchen

ELEVEN YEARS AGO: Chocolate Chip Cookies


BRAZILIAN PAO DE MEL

In case you’ve missed my big announcement:
12 days to showtime!

Want to say it as a native? Pay attention to the nasal sound of PÃO… and repeat after me…

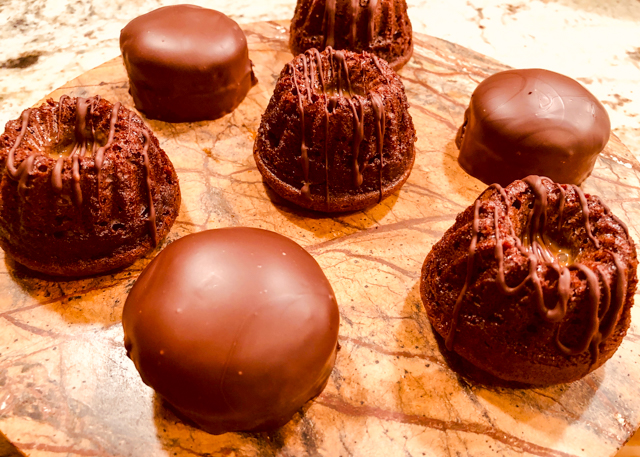
Pão de mel translates literally as “honey bread.” However, it is definitely not a bread, and honey might not be the first flavor that comes to mind once you take your first bite. I admit the name is misleading, but I am thrilled to share this recipe with you, because it is a real classic in my home country. It has flavors I adore (that ginger, spicy thing), enclosed in a nice chocolate shell. The ones I grew up with were a bit on the dense side. My family had no tradition of baking, so I only had pão de mel that you get in stores, wrapped in plastic for who knows how long. This version is so good, very soft, tender, sweet and spicy. I made two kinds, the traditional, covered with a shell of chocolate, and a little departure from the classic, in bundt shape. You decide which one you like best.

PÃO DE MEL
(from the Bewitching Kitchen, adapted from several sources)

1 egg
250mL whole milk
90 g  sugar
270 g honey
30 g butter, melted and cooled
240 g all purpose flour
7 g baking soda
1 teaspoon baking powder
1 tablespoon ground cinnamon
1/4 teaspoon salt
½ teaspoon of nutmeg
1/4 tsp ground cloves
3 tablespoons cocoa powder (Dutch process is fine)

for the filling;
dulce de leche (store bought or homemade)

for covering:
tempered bittersweet chocolate, about 500 g

Mix the egg with milk, sugar, honey and butter in a large bowl. Whisk well. In another bowl, stir in the remaining dry ingredients and sift them slowly over the egg mixture in three portions, stirring well after each addition until a smooth, homogeneous mixture is formed.  Place batter in fridge for 15 minutes.

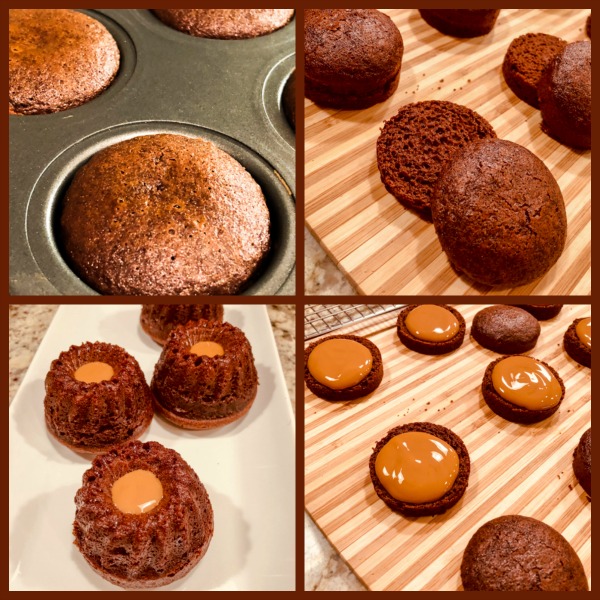
In the meantime, turn the oven on at 360 F. If using non-stick mini cake pans, you don’t need to do anything. Otherwise grease and flour the pans lightly.  Ideally you need a 6 cm round tin (a bit less than 2.5 inches). Pour the batter halfway through the tin, do not fill more than half.  Bake for 15 to 20 minutes. Unmold the still warm rolls and let them cool completely on a rack. Cut them in half and stuff each with the dulce de leche.

Temper chocolate and cover each little pao de mel.

Alternatively, bake the batter in mini bundt pans, fill the central hole with dulce de leche and decorate with a drizzle of tempered chocolate. Mini bundt pans will take slightly longer to bake. Cool them in the mold before unmolding.

ENJOY!

to print the recipe, click here

Comments: If you want to make your own dulce de leche, there are many methods to do so. Pressure cooker, slow oven, even the microwave. I opted for sous-vide and must say it was perfect. Simply pour the contents of 1 can of condensed milk into a bag, seal it and cook it at 185F for 12 to 16 hours. When the time is up, simply cut the bag and pour the contents into a container. Into the fridge ready for any dulce de leche emergency.

Homemade dulce de leche is a real treat, I highly recommend you give it a try, but of course, the canned product will work well too. Pão de mel can be frozen for a couple of months without the filling and chocolate covering. You can also simplify the process and skip the filling. The simplified version is actually more common to buy in Brazil. But normally, when people make them at home, they go the extra mile. A very sweet mile, if you ask me.

Which version was better, classic or mini-bundt? I honestly have a hard time deciding. The mini-bundt is a lot easier to make because once you un-mold the little cakes the hard work is done. You can conceivably even get by without tempering chocolate, just melting it gently and drizzling it all over. But of course, the traditional version is the one that brings fond memories of my past. It’s your turn now, make both and let me know what you think…

For those interested:  this is the pan I used to bake the cakes. I love it!

ONE YEAR AGO: Stir-Fried Chicken in Sesame Orange Sauce

TWO YEARS AGO: Monday Blues

THREE YEARS AGO: A New Way to Roast Veggies

FOUR YEARS AGO: Two Takes on Raspberries

FIVE YEARS AGO: Spice Cake with Blackberry Puree

SIX YEARS AGO: Own Your Kitchen with Cappuccino Panna Cotta

SEVEN YEARS AGO: Chicken Parmigiana, the Thriller

EIGHT YEARS AGO: Wild Mushroom Risotto

NINE YEARS AGO: Tartine Bread:  Basic Country Loaf 

TEN YEARS AGO:  Pugliese Bread

CHICKEN AND HEART OF PALM SQUARES

Puff pastry turns any delicacy into something special. It is hard to beat the taste and texture of a nicely laminated dough. You can go sweet or savory, you can skip any additions, just form them as sticks, twist them around and enjoy plain or with a humble sprinkle of spices. Today I share a recipe for puff pastry squares using a classic Brazilian filling: chicken and hearts of palm.

CHICKEN AND HEART OF PALM SQUARES
(from the Bewitching Kitchen)

for rough puff pastry:
(makes a little more than you’ll need)
345 g unsalted butter, frozen
1 tablespoon sugar
1½ teaspoons salt
300g all-purpose flour + 2 Tbsp (to toss with grated butter)
80 g whole milk, cold
80 g water, cold (may not use it all)
1 egg for egg wash

for the filling:
2 boneless, skinless chicken breasts
2 tablespoons soy sauce
1 lemon (to poach chicken)
salt and ground black pepper to poach chicken breasts
2 Tablespoons olive oil
1 medium onion, finely diced
2 cloves garlic
salt and ground black pepper
2 large tomatoes
2 tablespoons tomato paste
100 g hearts of palm, cut in ¼ inch rounds
100 g frozen peas (no need to defrost)
80 g cream cheese (full-fat)
Sriracha sauce
fresh cilantro to taste
1 lemon
2 tablespoons flour
½ cup whole milk

Mix in a large bowl the 300g flour, sugar, and salt. Set aside.

Grate the butter using a food processor with a grating disk attachment. Toss it with 2 Tbsp flour and reserve.

Take 155 g of the grated butter and mix with the flour in the large bowl, tossing with your hands to form reasonably small crumbles. Keep the rest of the butter in the freezer. Add to the flour/butter mixture all the cold milk and half of the water. Make a smooth dough, trying to handle it as little as possible. Adjust with water and or more flour.

Roll it out as a rectangle, about 12 inches long and 4 inches wide. Add roughly 50 g of frozen grated butter to the center of the dough. Fold bottom half up, add 50 g more butter to the folded portion. Fold the top portion down, covering the butter. Turn the dough so that one open side is facing you. Roll it out as before, add the leftover grated butter exactly the same way. Fold and place in fridge for 30 minutes.

Roll the dough as before, fold two more times without adding any more butter. Roll out as a rectangle and keep in fridge until filling is ready and cold.

Roll out about 1/3 of the dough (roughly 300 g) as a square a little bigger than 12 inches. Do the same for another third of the dough.  Cut 12 squares from each piece of dough, punching a star using a cookie cutter in the center of half the squares (they will be the top of the pastry).

Place the squares that will be the bottom over parchment paper. Add enough cool chicken filling, brush the sides with egg wash, place the top pastry and push the edges to close it down. Brush the top with egg wash and bake at 400F for about 25 minutes, until golden brown.

FOR THE FILLING (can be made a couple of days in advance)
Poach the chicken breasts very gently in water seasoned with salt, pepper, soy sauce and lemon juice. I like to bring the water to almost a boil, turn the heat off, and leave the chicken in the pan for 15 minutes. Keep in mind it will cook longer in the pie.  When chicken is poached and cool enough to handle, shred the meat with your fingers or a couple of forks. Reserve.

Sautee the onion and garlic in olive oil with a touch of salt and pepper in a large skillet until fragrant. Add the shredded chicken breast, tomatoes, tomato paste, hearts of palm pieces and cook for a couple of minutes, stirring. Dissolve the flour in the milk, whisking well to avoid lumps. Pour into the meat mixture and heat until it starts to thicken.  Add the cream cheese, then the frozen peas and mix everything gently. Add the Sriracha sauce, adjust seasoning with salt and pepper if needed. Add the minced cilantro, lemon juice and allow the mixture to cool completely before assembling the pastries.

ENJOY!

to print the recipe, click here

Comments: The filling for these puff pastry squares is very similar to this one of my recent blogging past. It is a classic component of Brazilian recipes like pasteis, empadinhas and pies. The recipe will provide you with leftovers that you can enjoy over rice, pasta, mashed potatoes, or if you are truly daring, try it as a topping for pizza or flatbreads. Add a bit more cheese on top for good measure.

You will have a little bit of puff pastry leftover. You can cut in small squares, fill mini-muffin pans and play with other fillings like….

Mushroom duxelles!  Or save in the freezer for future important experiments in the kitchen. It does freeze beautifully…

ONE YEAR AGO: Seedy Crackers for a Fun Party

TWO YEARS AGO: Brutti ma Buoni Low-Carb Soup

THREE YEARS AGO: Turkey Stir-Fry with Almond Butter

FOUR YEARS AGO: Secret Recipe Club: Tailgating Party!

FIVE YEARS AGO: One Million Page Views!

SIX YEARS AGO: Tlayuda, a Mexican Pizza

SEVEN YEARS AGO: Paradise Revisited 

EIGHT YEARS AGO: Feijoada, the Ultimate Brazilian Feast

NINE YEARS AGO: Vegetable Milhojas

TEN YEARS AGO:  Italian Bread
NOT QUITE MOQUECA

Moqueca is one beloved dish in Brazilian cooking. Several ingredients are mandatory: coconut milk, dende oil, tomatoes, peppers, and cilantro. The main protein can be shrimp, fish, or both. It is spicy, luscious, quite filling, and always served over a simple white rice. I have already messed up with this classic before, but with this recipe I shall infuriate my fellow native Brazilians a second time.

MOQUECA-STYLE SHRIMP AND CHICKPEAS
(from the Bewitching Kitchen)

1.5 pounds large shrimp, peeled and de-veined
1 can chickpeas, drained and rinsed (14.5 oz)
1 bulb fennel, thinly sliced
1 shallot, finely diced
1 red or orange bell pepper, thinly sliced
2 tablespoons grape seed oil
salt and pepper to taste
1 Tablespoon harissa (or to taste)
1.5 cups crushed tomatoes with their juice
3/4 cup light coconut milk
fresh cilantro to taste
juice of half lemon

Heat the oil on a large sauce pan. Add the fennel, shallot and bell pepper, saute everything together seasoning with salt and pepper until translucent and very fragrant.

Add the crushed tomatoes, harissa, and chickpeas, cover and simmer for 20 minutes.  Add the shrimp and  coconut milk, simmer gently until the shrimp is cooked, 5 minute or so. Add the cilantro, lemon juice and serve over white rice.  If you like, add some hot sauce on the plate.

ENJOY!

to print the recipe, click here

Comments: Moqueca originated in one of the hottest states of Brazil, Bahia. Even though it is a kind of stew, it is enjoyed the whole year, even at the height of the summer. I like to bring this up because those of us living in the Northern hemisphere are headed to very warm days. Don’t twist the nose to a nice serving of moqueca for that reason. This will please you no matter how hot it is outside.

I completely forgot to get fresh cilantro at the store, so I added a couple of Dorot frozen cilantro cubes together with the coconut milk/shrimp mixture. But don’t make this mistake, fresh cilantro not only looks great but it adds a lot more flavor, especially if added right before serving the meal.

I committed many sins with the recipe, but served it over white rice as any good Brazilian would. I hope this helps restore my reputation.

ONE YEAR AGO: Roasted Butternut Squash with Cashew Nuts

TWO YEARS AGO: Mississippi Roast and the Open Mind

THREE YEARS AGO: Walnut-Raisin Bran Muffins

FOUR YEARS AGO: A Star is Born!

FIVE YEARS AGO: Chestnut Flour Sourdough Bread

SIX YEARS AGO: Kinpira Gobo and Japanese Home Cooking

SEVEN YEARS AGO: Walnut Sourdough

EIGHT YEARS AGO: Thai Chicken Curry

NINE YEARS AGO: Zen and the art of risotto