BLACK CROWN SEEDED SOURDOUGH

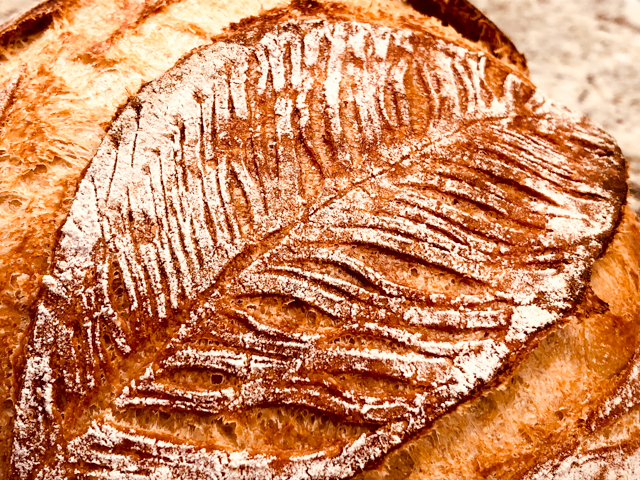
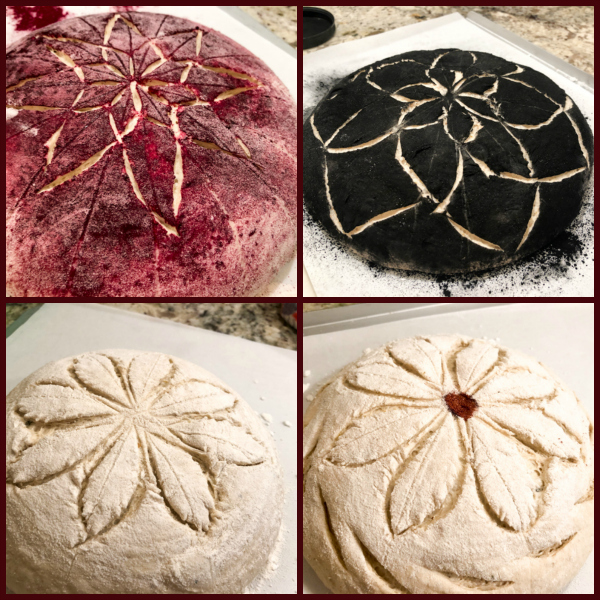
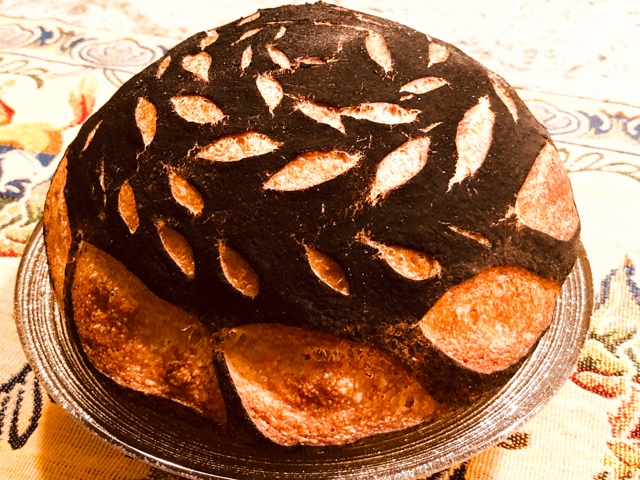
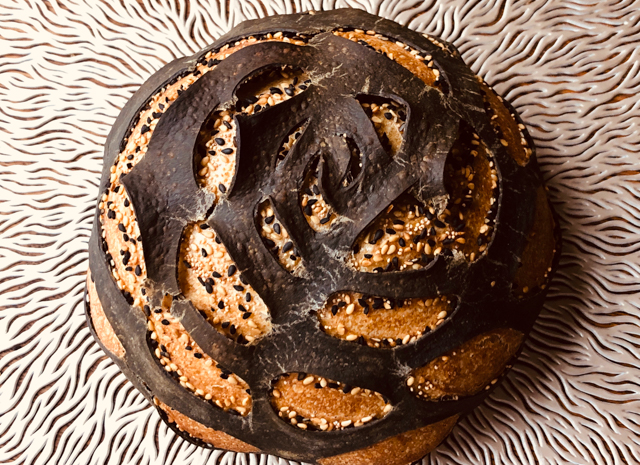
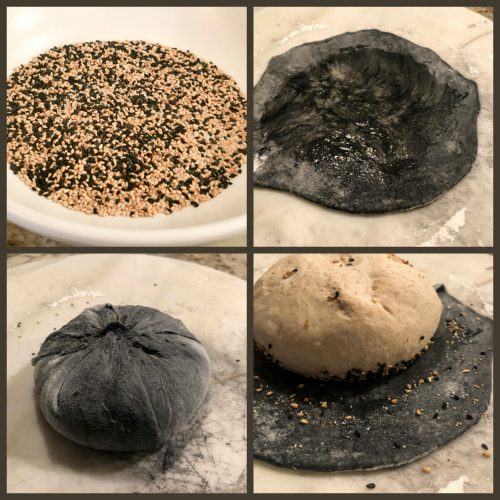
I am so excited to share this recipe today! I’ve always enjoyed the look and taste of sourdough bread with a coating of seeds, but they do interfere with a more elaborate slashing of the surface. Since slashing the bread is quite likely my favorite part of bread baking, seeds posed a problem with no satisfying solution. But then, Alex, tent-baker extraordinaire, tagged me on a post on Instagram, as we had been discussing the issue for a while. His tagging started my virtual journey through #sourdoughrose, and I could not wait to try the technique. Basically, a portion of the dough is rolled out thin, brushed with oil.  The main dough is shaped as a ball, and coated with seeds. The oil prevents the film of dough from sticking during baking, so it more or less peels away, to reveal the seeds underneath.  I dyed the outside dough black, hoping for a more dramatic contrast.

BLACK CROWN SEEDED SOURDOUGH
(from the Bewitching Kitchen, inspired by Ana is Baking)

makes one very small round loaf

150g water
55g starter at 100% hydration
100g bread flour
60g semolina flour
55g whole-wheat flour
1 tsp honey
4.5g salt
activated charcoal powder (optional)
seeds of your choice (I used black and white sesame, nigella, and white poppy seeds)
olive oil to brush laminated dough

Dissolve the starter in the water,  add all other ingredients and knead until smooth (by hand or using a KitchenAid type mixer).

Proof at room temperature for 3 hours, folding every 30 to 45 minutes. After 3 hours, remove a small portion of the dough (about 65g) and dye with charcoal powder if you want to make it black. Leave it plain if you prefer.  Roll this portion as a circle (about 6 inches in diameter), then brush the center with olive oil, leaving a margin without oil, so that it will stick to the main dough.

Shape the dough as a round ball, spray the top with water and roll over the seeds that you can spread on a flat tray. Immediately place the ball of dough over the laminated component, so that the seeds are in touch with the oil. Wrap the dough around, place it, seam side up in a banetton and leave it in the fridge overnight. It the dough seems very mad at you, don’t worry, he’ll get over it as the fermentation proceeds.

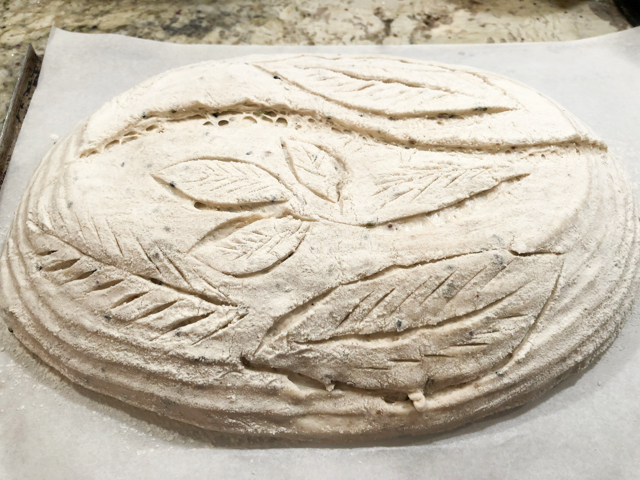
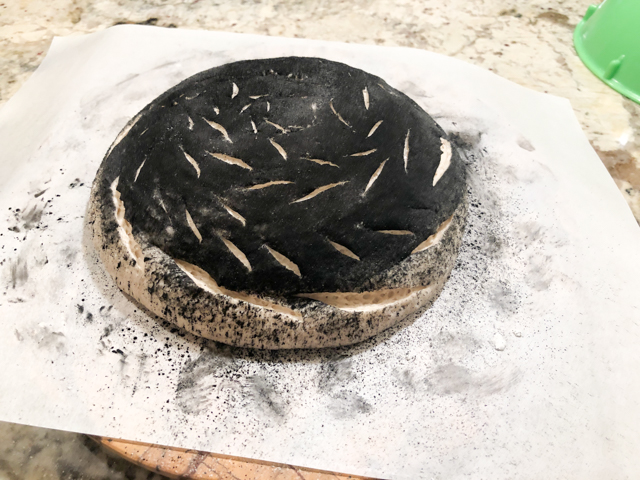
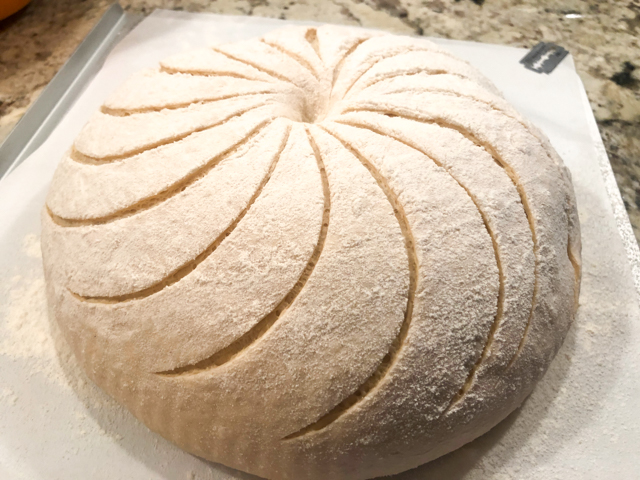
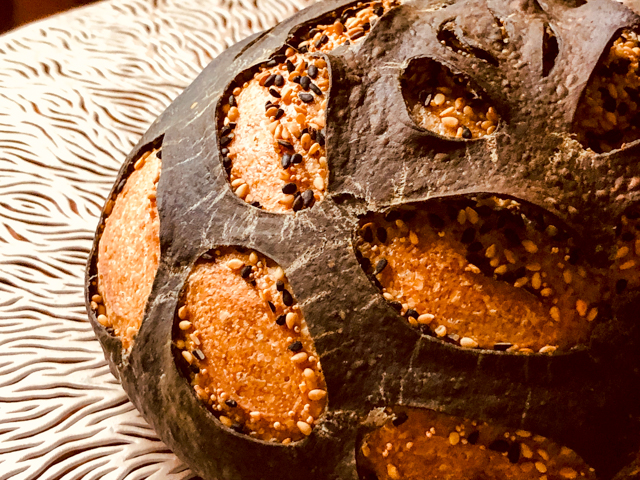
Next morning, turn the oven to 450F.  Once ready to bake, invert the bread over parchment paper, and score the surface in a pattern that will allow it to open in some interesting way. Make sure you cut all the way to expose the seeded component underneath.

Bake for 30 minutes with steam (Dutch oven closed), then remove the lid and bake for 5 to 10 more minutes. Allow it to cool completely over a rack before slicing.

ENJOY!

to print the recipe, click here
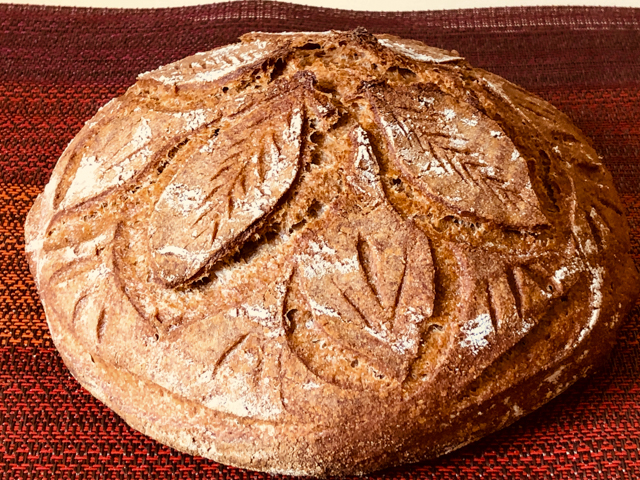
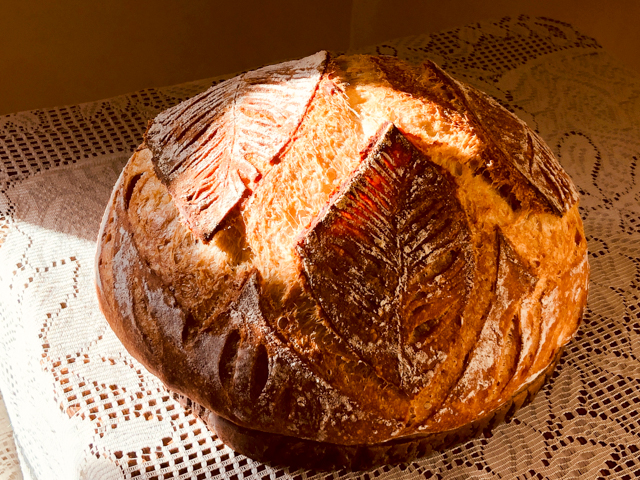
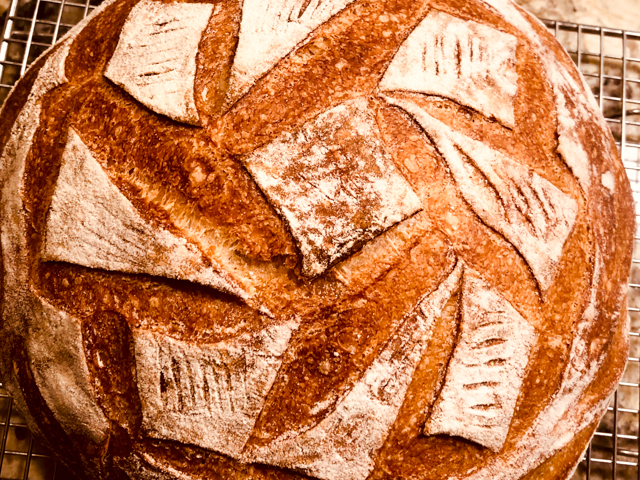
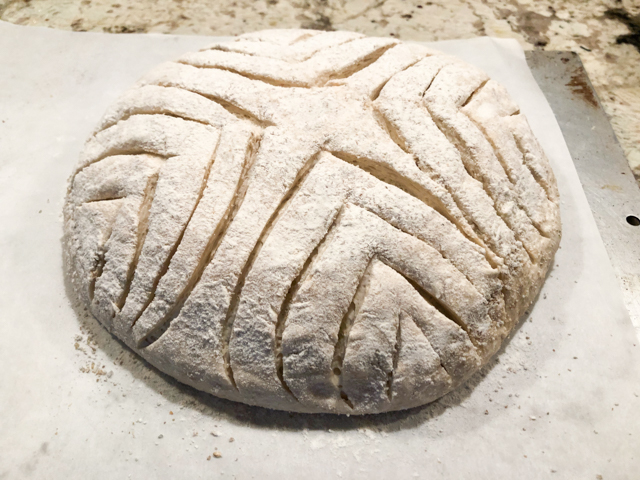
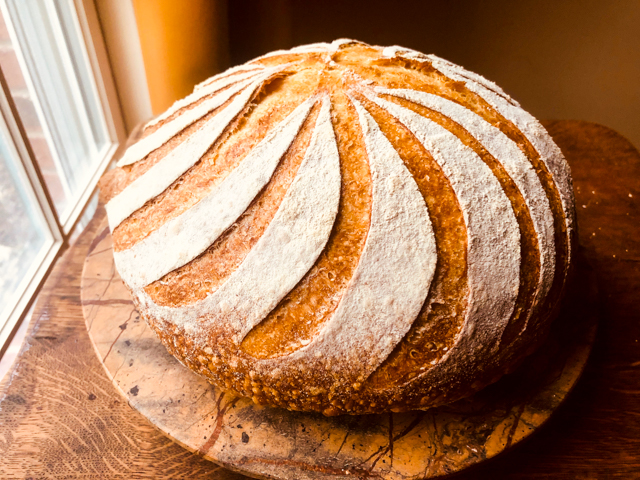
Comments: Obviously, the way you slash the dough will have a huge impact on the look of the final loaf. Most bakers go for the design of a rose, and that was my goal, as  you can see in the picture below:


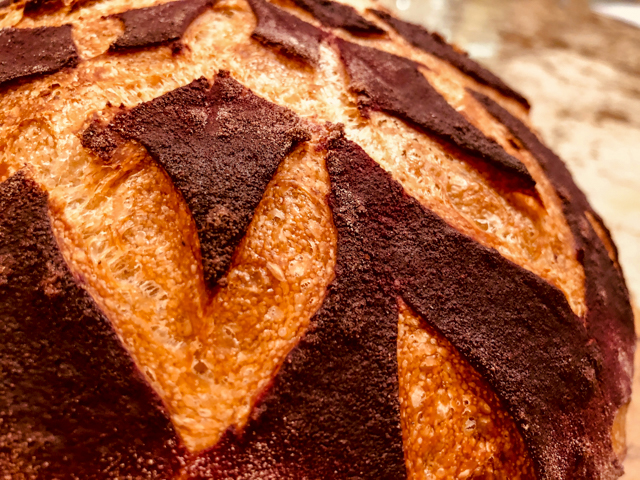
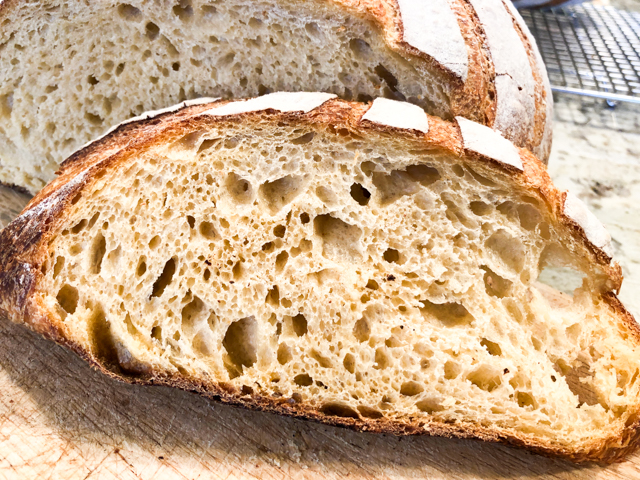
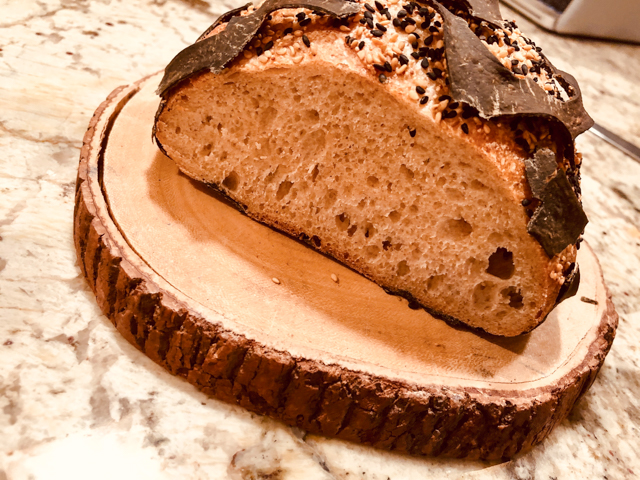
However, I think my decoration ended more in the direction of a crown. Might be my love for all things Game of Thrones.  I want to do this type of bread again, trying to coach the first slashes in the center to open in a more parallel way to the surface. It will be fun to try other designs also. The bread has a lower hydration level than my regular sourdoughs, so the crumb ends a bit tighter, but I love the softness given by the semolina flour.


I am not sure pumpkin and sunflower seeds could work, maybe they are a big too big, but you never quite know until you try it. Just a few more things in that big list of baking and cooking projects for the future.


As you slice the bread, the laminated dough falls off, so you get bread and some bonus crackers, very delicious too…

Alex, thanks so much for bringing #sourdoughrose to my attention! It is exactly the kind of technique I was hoping for, slashes and seeds, co-existing together in perfect harmony…

ONE YEAR AGO: The Great British Bake-Off is Back!

TWO YEAR AGO: Queen of Sheba

THREE YEARS AGO: Brunch Burger

FOUR YEARS AGO: Mango Salsa with Verjus

FIVE YEARS AGO: Raspberry Bittersweet Chocolate Chunk Brownies

SIX YEARS AGO: Scary Good Pork Burgers

SEVEN YEARS AGO: Review of exercise program Focus25

EIGHT YEARS AGO: Celebrate Wednesday with a Thai Seafood Curry

NINE YEARS AGO:  Post-workout Breakfast

TEN YEARS AGO: Semolina Barbecue Buns

ELEVEN YEARS AGO: Lavash Crackers



PAIN DE MIE DRESSED UP TO PARTY

The idea for this bread came from a cookbook called “Le Grand Livre de la Boulangerie” which I recently impulse-bought.  I fell in love with one of the recipes and in less than 24 hours was trying it in our kitchen. It is a simple pain de mie (I modified a King Arthur recipe for it), but with bread dough decorations placed on top right before baking. Imagine the possibilities!

PAIN DE MIE WITH DECORATIONS
(inspired by Le Grand Livre de la Boulangerie)
basic Pain de Mie formula from King Arthur Flour)

175 g milk
260 g water
97 g butter
2 + 1/2 tsp salt
32 g dry milk
40 g potato flour
40 g sugar
650 g all-purpose flour
2 + 1/8 tsp instant yeast
fine charcoal powder (about 1/2 tablespoon)

Combine all of the ingredients, except the charcoal powder into the bowl of a KitchenAid type mixer and knead until fully smooth and with good gluten development (about 8  minutes).  Adjust with flour if the dough seems too loose.  The dough will be soft and pliable.

FOR THE BLACK DECORATIONS:  Remove 180 g of the dough and transfer to a small bowl. Knead by hand into it the charcoal powder (gloves are a very good idea!).  When the dough it nice and black, roll it out to about the dimension of a 9 x 13 pan (no need to be exact, the dough will be about 2mm in thickness). Place between two sheets of parchment paper or Silpat, and bake in a 450F oven for a couple of minutes, you just want to set it a bit.  Immediately remove from the oven and place in the fridge while you continue proofing the main dough.

Bulk proofing: transfer the main, white dough to a lightly greased bowl  and allow the dough to rise until puffy though not necessarily doubled in bulk, about 1 + 1/2 hours, depending on the warmth of your kitchen.

Lightly grease a 13″ pain de mie pan. Gently deflate the dough, transfer it to a lightly greased work surface, shape it into a 13″ log, and fit it into the pan. Cover the pan with lightly greased plastic wrap, and allow the dough to rise until it’s just below the lip of the pan, 45 minutes to 1 hour.

Towards the end of the rising time, preheat the oven to 350°F, and work on the decorations. Take the sheet of black dough out of the fridge, cut it in any shapes you want, keeping in mind the dimensions of the top of the loaf.

When the dough is ready to bake, carefully place the decorations on top, close the lid and place in the oven. Bake for 25 minutes, open the lid, and bake for 20 minutes more, until internal temperature is at least 190F (mine reached 200F).

Remove from the oven, take the bread out of the pan and allow it to cool over a rack before attempting to slice it.

ENJOY!

to print the recipe, click here

Comments: First of all, let me tell you about the book. It is in French and in the words of one of the authors, Chef Jean-Marie Lanio, it is geared towards professionals and “home bakers with skills.” Don’t expect detailed instructions, it is basically a series of formulas with one word (yes, one word) to describe expected dough texture, one word to describe shaping, and a general expected timing for proofing. Truth is, you need to be very comfortable with baking in general (the book is not only on bread) to put it to use. But the recipes are stunning,  always some little twist to make each production unique and special. Come to think of it, baking from this book is like setting yourself up for a technical challenge. But with a huge advantage: no cameras around! Pretty much a win-win situation…


In their recipe, they use a pâte fermentée viennoise as one component and I did not have that around. Being the impatient being I am, I wanted to try the recipe right away. I also don’t have the Pullman loaf pan with the exact dimensions they recommend. So I went to King Arthur site, and from their basic recipe adjusted amounts, hoping for the best.  I am thrilled that it worked so well on  my first attempt. Trust me, that almost never happens in the Bewitching Kitchen.

Making the recipe exactly as described, and using the same pan I did (PADERNO 41750), you will be a bit unsure if it will work, because the dough will be pretty low in the pan as you shape it and place it inside. Don’t worry, in a little over one hour it will rise substantially and in fact I had to push down a little bit the top to make sure I could add the decorations and have some space between the top of the dough and the lid.  It worked perfectly well. The crumb is exactly what you expect from this type of bread, soft, a tad on the sweet side, and a bit buttery.

In the book, they gilded the lily a step further, by adding a line of white flour on top of the black decorations. I just could not make that work, no matter how I tried to deal with the flour (piping bags, piping tips, straws), my lines were never smooth and beautiful, so I skipped that part. I now wonder if rice flour would have worked, as it has a different texture. Anyway, I am super happy with the way it turned out, it’s a nice technique to play with. Imagine how many designs and even colors you can come up with…

As I hit publish and look at the date on my calendar, I realize that exactly one year ago I was being eliminated from a certain show in a certain tent. It is hard not to feel that sadness trying to hit me again, but this too shall pass… and a good bake definitely helps exorcize certain demons….

ONE YEAR AGO: Five-Stranded Bread

TWO YEARS AGO: Green Olive Salad

THREE YEARS AGO: Coffee Macarons Dressed up to Party

FOUR YEARS AGO: Blogging Hiatus

FIVE YEARS AGO: Tomato Tatin

SIX YEARS AGO: Headed to Colorado!   

SEVEN YEARS AGO: Farofa Brasileira

EIGHT  YEARS AGO: Thai-Inspired Pork Tenderloin

NINE YEARS AGO: A yummy Brazilian cake: Bolo de Fuba’

TEN YEARS AGO:  Summer’s Tomatoes

ELEVEN YEARS AGO: Leaving on a jet plane… 

MARBLED CHARCOAL SOURDOUGH

Lately a dramatic, marbled sourdough keeps popping everywhere in the blogosphere and Instagram world. I find marbling pretty cool in cakes, cookies, icings. So, why not take it into bread territory?  Most bakers opt for laminating the two doughs together. I have tried the lamination process and found it a bit too convoluted. To make matters worse,  I never get as much structure and gluten development as I like, so I just took my normal default recipe and used it as a starting point. Read the comments after the recipe, if you are interested in the details. Without further ado, here is my first bi-color sourdough.

MARBLED CHARCOAL SOURDOUGH
(from The Bewitching Kitchen, inspired by many sources)

475g bread flour
25 g whole-wheat flour
100 g sourdough starter at 100%
10 g salt
2 g activated charcoal
375 g water

Mix everything (except the charcoal)  with a KitchenAid in low speed with dough hook for about 3 minutes. Adjust consistency with additional bread flour if the mixture seems too loose. Divide the two in two parts, add the charcoal to half of it, knead until fully incorporated (you can do it by hand or place it back in the KitchenAid for a minute or so).

Transfer the two doughs to individual oiled bowls and bulk ferment for 4 to 4.5 hours at room temperature, folding the dough at every 45 minutes to 1 hour. On folding cycle number 3, incorporate the two doughs together, and continue with the bulk proofing. Fold one last time, shape the bread as a round ball, place in a banetton heavily floured, sticking it in the fridge overnight.

Next morning, heat the oven to 450F. Invert the bread straight from the fridge on parchment paper, dust the surface with a small amount of flour, and slash it with a brand new razor  blade.

Bake inside a covered Dutch oven for 30 minutes, remove the lid, leave it in the oven for additional 15 to 20 minutes, if necessary lower the temp a bit in the final 5 minutes. Cool completely before slicing.

ENJOY!

to print the recipe, click here

Comments: As I mentioned, bakers often use a lamination process to marble different colors of dough, or even to add components such as herbs or nuts. One of my issues with the lamination is that the process tends to be quite a bit longer. When I do my initial mixing in the KitchenAid for 3 to 4 minutes, the dough starts with a solid kneading that not only advances the process of gluten formation, but makes the whole thing quite a bit “cleaner.” The dough, once out of the KitchenAid, already handles quite smoothly for the subsequent folding by hand. And I can tell right away if I need any adjustment, just by the way it behaves during this initial step of mixing.

Most recipes that use lamination rely on a long (3 hours or more) autolyse step,  in which you just mix water and flour, then another pretty long proofing after the starter is incorporated. The hydration level of the dough is often higher (you need to add more water to be able to stretch the dough nicely and laminate it), and that forces you to go through more cycles of folding. I sometimes had to do 5 cycles and still felt the dough a bit weak at the end, but by then it was getting so late I had to call it a day and shape it. If you like to try, search youtube, there are countless videos showing the process.

To achieve this level of mixing between the two types of dough, I joined them at cycle 3 out of 4 total foldings. If you prefer both colors to be more uniformly mixed, join them at folding cycle number 2 instead of 3, and be more aggressive with the way you handle it. I can see a Halloween version with pumpkin and charcoal on my horizon…

ONE YEAR AGO: Sundried Tomato and Feta Cheese Torte

TWO YEARS AGO: Blueberry and Mango Curd Macarons

THREE YEARS AGO: First Monday Favorite

FOUR YEARS AGO: In My Kitchen, August 2016

FIVE YEAR AGO: Ka’Kat, a Middle Easter Snack Bread

SIX YEARS AGO: Spinach and Chickpea Curry

SEVEN YEARS AGO: Sautéed Zucchini with Sun-dried Tomatoes and Basil

EIGHT YEARS AGO: Orzo with Heirloom Tomato Relish

NINE YEARS AGO:  Headed to Brazil!

TEN YEARS AGO: The Rhubarb Brouhaha: Revelation Compote

ELEVEN YEARS AGO: Love me tender…


HOME BAKERS COLLECTIVE: JUNE PROJECT

We just passed Summer solstice. It always makes me sad, knowing that days will be getting shorter and my beloved sun will stay around less and less time each day. Covid-19 is showing its ugly face again, adding more uncertainty to a year that has been full of it from the beginning. But for every yin there is always a yang, and the month of June also brought another group challenge by the tent bakers. This time Alex Tent Baker Extraordinaire came up with the theme, and he was quite straightforward with it. Laminate something. That was his  brief. A brief brief. I loved it! I had quite a few options dancing in my mind, but quickly settled on a Brioche Feuilletée, because it is all about the lamination, no distractions from it. So, without further ado, my assignment is here for you.

BRIOCHE FEUILLETÉE
(recipe from Matt Adlard’s Bake it Better)

for the dough:
415g all-purpose flour
8g salt
50g sugar
85g eggs
153g whole milk
42g soft, unsalted butter
9g instant yeast

for the butter block:
250g unsalted butter

OVERVIEW OF THE RECIPE 
(simplified version, original recipe is copyrighted)

The dough is prepared using all the ingredients and allowed to proof for one hour. It is next transferred to the fridge overnight. At that time, the butter block is made with dimensions of approximately 7 x 8 inches and also placed in the fridge.

Next day the butter block is enclosed in the dough and three folds are performed. First a double fold, the other two single folds. The dough is rolled out and cut into four strips, about 2.5 inches in width. Each strip is rolled and placed inside a loaf pan for a final proofing of 2 to 2 and a half hours.

Bake in a 325F oven for 45 minutes to 1 hour, until deep golden. Remove from the pan and allow it to cool completely.

ENJOY!

to print the recipe overview, click here

Comments: If you want to know all the details and tips that make this recipe easier to follow, you will have to join Matt Adlard’s site. It would not be fair to publish his detailed instructions here, plus his video is a great help. I’ve been a member of his online group for a few months and highly recommend it for those interested in all areas of patisserie. I will write a full blog post about it in the near future. Not only you learn a lot, but you get to interact with a lot of cool, baking-fanatic folks. See what they bake, follow their progress, share failures and victories.


Matt bakes it in a slightly different way. He adds a baking sheet and a heavy weight to the top of the pan, so that as the dough rises during baking, it gets squished on top, ending in a cool rectangular shape, laminated on all sides, but flat. I did not have a pan with the appropriate dimensions to achieve that effect, so I went with the regular baking in which it all freely explodes upwards.


No matter how you bake it, the result will be the same: layers of buttery goodness that you roll out and enjoy. Nothing else is needed, as the bread is quite rich and indulgent as it is, but if you want to spread it with jam, more butter, clotted cream, you will not hurt my feelings. And I bet Matt will not mind a bit either.

Alex, thanks for a great challenge this month… It is hard to believe that one year ago   we were all frantically practicing for the show in our own homes, wondering  who were the other bakers, how would we get along…  Good times.

For my readers, make sure to stop by the Home Bakers Collective, to see what my friends laminated this month… If the link is not yet published, try again a little later in the day.

ONE YEAR AGO: In My Kitchen, June 2019

TWO YEARS AGO: In My Kitchen – July 2018

THREE YEARS AGO: In My Kitchen, July 2017

FOUR YEARS AGO: Secret Recipe Club: Falafel and a Bonus Recipe

FIVE YEARS AGO: Chocolate Toffee Banana Bread

SIX YEARS AGO: In My Kitchen, June 2014

SEVEN YEARS AGO:  Strawberry Frozen Yogurt

EIGHT YEARS AGO: Baked Coconut and “The Brazilian Kitchen”

NINE YEARS AGO: Honey-Glazed Chicken Legs

TEN YEARS AGO: French-Style Rolls

ELEVEN YEARS AGO: Chicken Breasts, Coffee, and Serendipity

GIBASSIER

Those who follow my blog might be aware that I am a huge fan of Helen Fletcher. When she praises a recipe, I just know it will be awesome. Still, this one surpassed all my expectations. Gibassier is a little brioche-like delicacy from Provence, a place that enchanted me when I visited many years ago, right during lavender harvesting season. I will never forget the fields and the intense but delicate lavender aroma present everywhere. Helen’s recipe is a breeze to make  using the food processor, but she also gives detailed instructions to make it in a regular mixer.

GIBASSIER
(from Pastries Like a Pro)

Preferment (Biga):
140 g bread flour
1/2 cup warm milk (about 105°F)
Large pinch of instant yeast

Stir together in a small bowl.  Knead several times to make a smooth ball.  Let sit at room temperature for 12 to 18 hours.

Gibassier Dough:
385 grams bread flour
6 tablespoons unsalted butter, cold (85 grams)
100 grams granulated sugar or 3 1/2 ounces)
2 + 1/2 teaspoons instant yeast
3/4 teaspoon salt
Orange zest from l medium navel orange
All of preferment from above
2 eggs
1/3 cup olive oil
1/4 cup water, divided
1/4 tsp Fiori di Sicilia (optional)
2/3 cup candied orange rind

Place the flour in the processor and pulse several times.  Cut the cold butter into pieces and arrange in a circle over the flour. Process until the butter is no longer distinguishable.

Add the sugar, yeast, salt, zest, and Fiori di Sicilia.  Pulse to incorporate. Tear the preferment into pieces and add it processor.  Process to fully incorporate.

Combine the eggs, olive oil, and half of the water. Pour over the dry ingredients and process to mix completely.  Scrape down and rearrange the dough if necessary.  The dough should be very soft.  Add water a teaspoon at a time if necessary (I did not use additional water).  Add the candied orange rind.  Pulse briefly to mix.  Do not over mix or the  rind will be too small.

Let the dough proof at room temperature for 2 hours, then deflate the dough and transfer to the fridge overnight

Shape the Gibassier.  Line two half-sheet pans with parchment paper. Turn the dough out. Weigh your dough and do the math to find out how many grams you should use to form each little dough. You should have enough for 14 gibassiers. In my case, I used 80 grams per little ball.  Shape all the balls, cover, and refrigerate to make it easier to cut them.  Take two or three out at a time so they don’t soften too much. Take a ball and stretch it out with your fingers to make a rough torpedo shape. Turn it so the best side is up.  With the heel of your hand press the top of the dough upward from the middle. Again from the middle of the dough, with the heel of your hand press the dough downward to form a lemon shape.  Flatten the ends to match the center. It shoud be abut 2 1/2 ” high.

With a single edge razor blade, make a cut in the middle of the dough.Then one to the left. One to the right. Along the right side of the top of the dough cut in toward the center about 3/4” to 1”. Again on the other side. Last cut in the same amount on the right side. And on the left. As you pick it up to put it on the sheet pan, stretch it out to enlarge the holes.  Place 7 on a tray.

Cover them and allow them to rise for 2 to 2 1/2 hours until puffy.

Heat the oven to 350F. While the oven is heating brush 2 or 3 of the rolls with the egg wash and sprinkle heavily with sanding sugar or pearl sugar. Bake one sheet at a time on the middle rung for 18 to 22 minutes until golden brown and baked through.

Serve warm or room temperature.

ENJOY!

to print the recipe, click here

Comments: If you’d like to make Gibassier, I urge you to stop by Helen’s site because her step-by-step photos are perfect to understand what needs to be done. Explaining just with words is a bit tricky. If you make it in the food processor, it will be easy to make just half the recipe, as the processor will handle it without issues. Everything comes together super quickly, and I like the fact that I could use butter straight from the fridge.

Some people suggest using an old credit card to do the cuts on the dough, but Helen’s idea of getting those single edged razor blades is truly spot on. I advise you to allow the final proofing to reach the 2.5 hour mark or even a little big longer as enriched doughs tend to be a bit sluggish. The puffier they get at that stage, the lighter the rolls will be. I had to cut my final proofing a bit short for half of them, and the second batch was better.


This is the type of pastry that will transport you straight to a cafe in France, sitting outside, people-watching, as you sip a little hot chocolate, coffee, or whatever suits your mood…

Helen, thank you once again not only for the inspiration but for your detailed instructions that make it all so much easier to follow.

ONE YEAR AGO: Sundried Tomato Twist Bread

TWO YEAR AGO: And now for something completely different….

THREE YEARS AGO: Parsnip, Coconut, and Lemongrass Soup

FOUR YEARS AGO: In My Kitchen, October 2016

FIVE YEARS AGO: Paleo Moussaka

SIX YEARS AGO: In My Kitchen, October 2014

SEVEN YEARS AGO: In My Kitchen, October 2013

EIGHT YEARS AGO: Crimson and Cream Turkey Chili

NINE YEARS AGO: Taking a break from the nano-kitchen

TEN YEARS AGO: Chocolate Chip Cookies