BUSY BEE SUGAR COOKIES

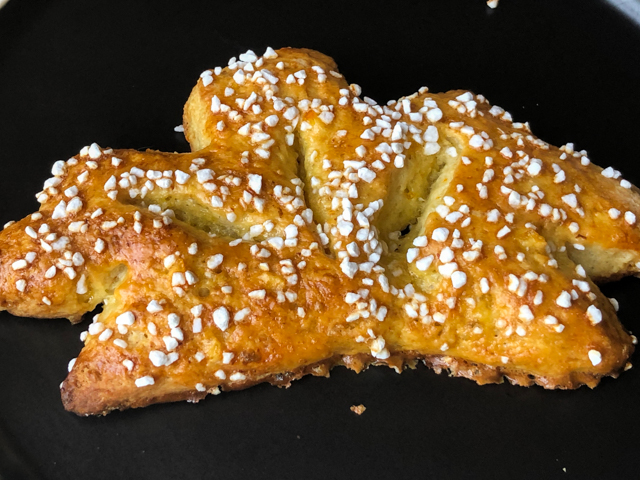
Not too long ago I made some macarons decorated with little bees (view post here). I really wanted to send some to a friend, but in the past I’ve been burned badly trying to ship macarons. What to do? What to do? Turn them into sugar cookies instead! Much more mail-friendly. I adapted the decoration to give those bees a flower to fly to, and to get busy. Then I got busy myself… The cookie dough recipe is a recent incorporation into the Bewitching Kitchen. It produces very sharp edges and I also like the texture of the cookie after baking.

NEAT EDGES SUGAR COOKIES
(adapted from Baking a Moment)

1 cup (227g) unsalted butter,cubed, cold
1 cup (200g) granulated sugar
zest of 1 lemon or half an orange
2 eggs
3 1/2 cups (420g) all-purpose flour
1/2 cup (60g) cornstarch
1/2 teaspoon kosher salt
1/4 tsp baking powder
1 teaspoon Fiori di Sicilia extract (or vanilla, or lemon extract)

to decorate:
your favorite recipe of Royal Icing (I use Tanya’s)
sprinkles
food-safe pen

Heat the oven to 350 F and line baking sheets with parchment. Sift the flour, cornstarch and salt, and set aside. Mix the sugar with the zest rubbing it well to release the oils. Cream the butter with the flavored sugar, just until smooth and combined.

Mix in the eggs and Fiori di Sicilia (or other flavoring extract) until incorporated. Add the flour mixture on low-speed, in three portions. The mixture will seem very dry and sandy at first, but after a couple of minutes the mixer it will start to pull away from the sides of the bowl.

Remove the dough from the bowl, cut in two pieces and wrap one in plastic. Roll the second piece of dough out between 2 sheets of parchment paper, to a thickness of 1/4 inch. Cut into rounds, press a detail flower using another type of cutter, and freeze for 10 minutes. Bake for 10 to 15 minutes, depending on the size of the cookie. I like to have a slight golden tone at the edges.

Cool on a rack and decorate as desired. For the bee decoration you’ll need yellow, and white Royal Icing with flooding consistency, and orange Royal Icing in orange (very small amount, just for the bee’s body).

ENJOY!

to print the recipe, click here

Comments: At the risk of sounding repetitive, I must say I had a considerable amount of fun making these cookies. Perhaps because I made those according to my own imagination, did not follow any design found in the internetic world. I am usually not fully satisfied with my bakes, but this batch of cookies ended up just the way I wanted. What more can a poor baker wish for?

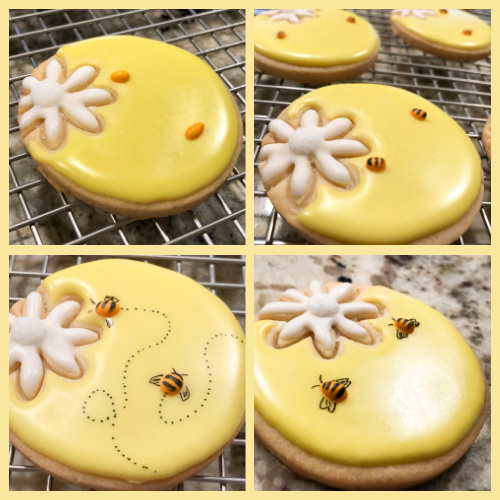
For Royal Icing, I used my default recipe, which you can find in Tanya’s blog. I started flooding the white flower, let it crust. Added a layer of additional icing to the center, and some sanding sugar. Then I flooded the yellow part. Waited for it to crust and piped the bee body. Then, patience was called for. I placed the cookies away from sight and did not touch them until next day. You really want to have the icing fully set before moving on to the next step. A food pen does the rest, details of bee body, wings, and flight path. Finally, I painted the center of the flower with gold.

As to the cookie dough recipe, I’ve settled on this one for the past 6 weeks or so. I’ve tweaked it quite a bit, and this version is probably my favorite, although by now you probably know I rarely leave a recipe alone for too long… The amount of cornstarch can vary from 1/2 cup to 1/3 cup (60 to 40g), and the edges will show a slight difference in sharpness depending on how much you use. I suggest you play around with it and decide what is the magical combination that suits your needs and taste. I prefer to add a tiny amount of baking powder, rather than leaving the recipe without.

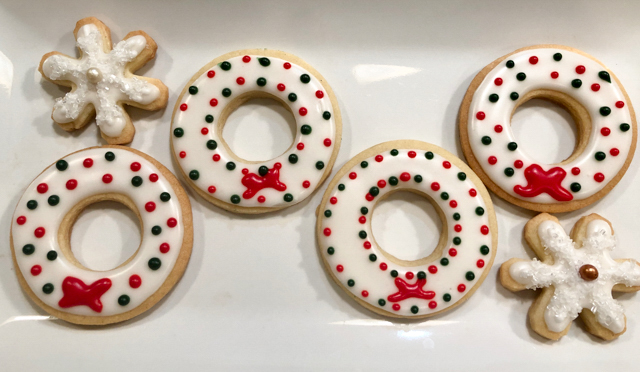
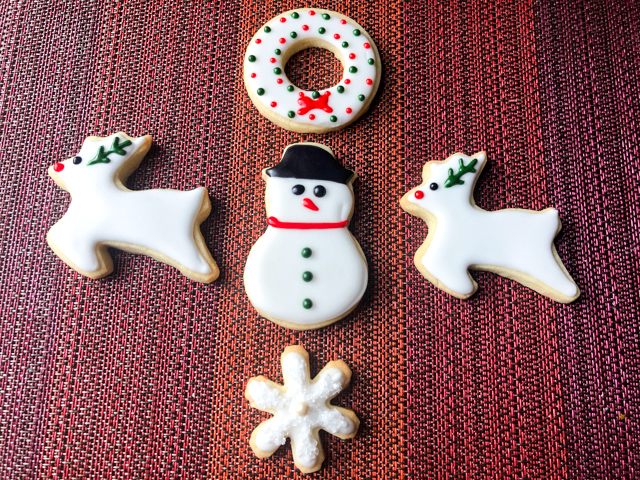
Before I leave you, a little announcement. Since I’ve been making sugar cookies on a weekly basis, I will publish posts that group my favorite designs under the title “Joy Cookie Club.” There will be no recipe, just a brief description of the techniques used to decorate them. I hope you will enjoy those posts, the first one should be published in the near future.

ONE YEAR AGO: Mincemeat Pies, when the third time is a charm

TWO YEARS AGO: Shibari Bread]

THREE YEARS AGO: Incredibly Simple Times Four – January 2018 

FOUR YEARS AGO: Two Salads and a Blog Award!

FIVE YEARS AGO: When Three is Better than Two

SIX YEARS AGO: Somebody Stop Me!

SEVEN YEARS AGO: Zucchini Pasta with Cilantro-Cashew Pesto

EIGHT YEARS AGO: Bran Muffins, Take Two

NINE YEARS AGO: Brown Butter Chocolate Chip Cookies

TEN YEARS AGO: Mogo Mojo

ELEVEN YEARS AGO: Slow-Roasted Chicken Thighs: an Ice-Breaker

SUGAR COOKIES FOR THE HOLIDAYS

Until my participation in a certain show, I was not too wild about decorating sugar cookies with Royal icing. Indeed, in the comfort of my kitchen I would always refer to that white, impossible to tame substance as Royal Pain in the Icing, which indicates how I felt about it. But those intense weeks of preparation for the different episodes of the show forced me into areas of baking I had happily ignored and avoided. Much to my own amazement, I now love everything about cookie decorating, from baking the base to planning the design and trying to make it happen. On that note, I highly recommend that you go through my trilogy of posts on the subject from last month and the detailed tutorials by Tanya which I shared at the time. For all the holiday cookies in this post, I went with a flavor that is deeply ingrained in the season: Fiori di Sicilia, the Italian magical potion that is the classic addition to panettone. As to the decorations, apart from the wet-on-wet which I find the most user-friendly, I will share three methods that were new to me, requiring just a tad more involvement: Crackled Gold Christmas Tree, Reindeer (a clever twist starting from a common cookie cutter), and Stained-Glass Cookies.

FIORI DI SICILIA SUGAR COOKIES
(from the Bewitching Kitchen)

360 g all-purpose flour (3 cups)
2 teaspoons baking powder
200 g granulated sugar
¼ tsp salt
227 g cup butter, cold and cut in pieces
1 egg
3/4 tsp Fiori di Sicilia extract
zest of 1 lemon
¼ tsp cardamom

Heat oven to 350F. Combine the flour, baking powder and salt, set aside. Cream the sugar and butter. Add the egg, Fiori di Sicilia, lemon zest and cardamom, mix well. Scrape the sides of the bowl. Add the flour mixture in two steps, and beat just until combined.

Dough can be rolled right away in between sheets of parchment paper. Roll to about 1/4″ thick, and cut into shapes. Place on parchment-lined baking sheets, freeze for 10 minutes. Bake for about 12 minutes. Transfer to cooling rack and cool to room temperature before icing.

(for Royal Icing, I used Tanya’s recipe, which you can find here)

ENJOY!

to print the recipe, click here

Comments: This is definitely my default recipe for sugar cookies because I adore Fiori di Sicilia and I do flips for cardamon. As far as extracts go, Fiori di Sicilia is not cheap, but it is hard to replace with something else. Some say that orange extract + vanilla does a good enough job playing its part. Your kitchen, your rules, feel free to flavor your cookies the way you like. Just make sure not to roll the cookies too thin. Thin sugar cookies don’t stand up to the icing.

With the basic Christmas colors (red and green, plus white for flooding) you can do a lot…

I used two cookie cutters, one for the basic shape, a smaller to cut a circle in the center, turning it into a wreath. From there, nothing fancy. Flooded with white, allowed to set for just 10 minutes and then a few green and red dots added on top. The little bow added in the very end. Yes, I realize that could be a lot better, and I intend to work on it.

A new cookie cutter I got this year stole my heart. I find it so cute and a bit unusual. A Christmas light bulb, which once again can be made quite simply with only two colors of icing and if you like to gild the lily, some luster gold painted on the “metal” part next day.

By bringing one more color – black – you can expand a bit more the horizons, so that Mr. Snowman has a nice hat and black, profound eyes. The baby deer are also super easy, flooding with white, waiting until it sets a bit and piping the details. The little snowflakes were flooded with white and immediately showered with white sparkling sugar. And one day I will understand why I seem to always type “spanking” sugar before getting it correctly (sigh).

And since there was black Royal Icing around… why not immortalize one of our faithful companions, who has been with us every step of the way in this crazy year? The black dots were placed before the white set (wet-on-wet), then the nose and the red collar were added later, just to have a bit of a 3D effect. Same process went into the snowflakes.

Holiday Baking is not complete without Christmas Trees…

Some of the designs were again wet-on-wet, but then I did something new that blew my little mind when I saw it on a tutorial on youtube. A technique called “Crackled Gold” and you can visualize better in this picture:

It is so cool, I cannot quite believe how creative people can be, figuring these little tricks. What you do is flood the cookie with the base color and wait until it starts to crust. Average will be 15 minutes. Then you use the handle of a painting brush, or what I used: a fondant ball-shaper. I have a set of several sizes and picked one to make the indentations that seemed most appropriate for the size of the tree. Press the ball gently to make a mark on the icing. Let it dry completely and if desired you can add details with gold luster. Or you can leave it without the gold accent, for a simpler look.

To see exactly how that is made, you can check the wonderful tutorial by The Graceful Baker in youtube clicking here. The “crackled gold” starts at 33 min and 10 sec. I already anticipate the same approach in other styles, like crackled heart shapes for Valentine’s…. Wouldn’t that be awesome?

Moving on…. another technique I learned from Stephanie on youtube, and you absolutely MUST check her site. What I loved about this one is the clever use of a cookie cutter that most people have in their little treasure box: a gingerbread man, any size will do. If you turn it upside down you can use it to make a Reindeer!

Am I adorable or what?

I swear, I love this little guy! I admit his ears ended a bit pathetic, and if you watch her video you’ll realize I forgot to add the hair on top of his cute head, but overall I am thrilled with the way he turned out. I will make some more again in the near future, hoping to do a better job.

The final details (eyebrows and smile) are made with a very fine food pen but if you can also try royal icing, I don’t dare going for such fine details using it. Poor Reindeer, he would look like roadkill.

Please make sure you visit Little Cookie co. youtube channel. I already have three different techniques on my list of projects to try soon, in fact it is quite likely that by the time you read this I will be already working on one of them….

And finally… a technique I’ve been flirting with for the longest time: Stained Glass Window Cookies. First time I did it, I was not very happy with the outcome. I liked the overall design but the stained component was not as I expected.

To have the stained glass effect, many recipes will tell you to simply crush hard candy in the color you want and make a little pile in the cut out part right before you bake. I found it hard to time the full melting of the candy with the cookie baking, and also the candy shrinks quite a bit and gets cloudy. Just not the type of effect I had in mind. I consulted with Tanya about it, and she advised me to use a totally different method, her favorite. Essentially you make the sugar syrup yourself, dye any color you want or leave it plain, and spoon it gently in the cut out part after the cookies are already baked. The result is so much better! Nothing like getting advice from a pro…

Here is the recipe I used, it makes enough for many many cookies, but it is hard to scale it down, so I advise you to keep the amounts as written.

SYRUP FOR STAINED GLASS COOKIES
(from The Honey Blonde)

100g sugar (1/2 cup)
3 tablespoons corn syrup
1/4 cup water
gel food color, if desired

Combine sugar, corn syrup, and water into a small sauce pan. Place over medium high heat and bring to a boil. Do not stir sugar while boiling. Continue to boil until mixture reaches about 290-300 degrees. Remove from heat and gently stir gel food color.

Place the cookies on a foil lined baking sheet lightly sprayed with oil, or use a non-stick foil. Spoon the candy into the center of the cookie, using the spoon the spread the candy into the edges of the cut out region.

Let set for about 10 minutes, or until candy is completely hardened.

ENJOY!

to print the recipe, click here

I hope you enjoyed this little collection of Holiday-inspired sugar cookies. Next I will share macaron ideas also inspired by this festive season. Stay tuned!

ONE YEAR AGO: Just a few hours to go!

TWO YEARS AGO: Broccoli Souffle

THREE YEARS AGO: Panettone Time!

FOUR YEARS AGO: How the Mighty Have Fallen

FIVE YEARS AGO: Festive Night at Central

SIX YEAR AGO: The Perfect Boiled Egg

SEVEN YEARS AGO: Light Rye Sourdough with Cumin and Orange

EIGHT YEARS AGO: Homemade Calzones

NINE YEARS AGO: Plum-Glazed Duck Breasts

TEN YEARS AGO: Holiday Double-Decker

ELEVEN YEARS AGO: New York Deli Rye

GIBASSIER

Those who follow my blog might be aware that I am a huge fan of Helen Fletcher. When she praises a recipe, I just know it will be awesome. Still, this one surpassed all my expectations. Gibassier is a little brioche-like delicacy from Provence, a place that enchanted me when I visited many years ago, right during lavender harvesting season. I will never forget the fields and the intense but delicate lavender aroma present everywhere. Helen’s recipe is a breeze to make  using the food processor, but she also gives detailed instructions to make it in a regular mixer.

GIBASSIER
(from Pastries Like a Pro)

Preferment (Biga):
140 g bread flour
1/2 cup warm milk (about 105°F)
Large pinch of instant yeast

Stir together in a small bowl.  Knead several times to make a smooth ball.  Let sit at room temperature for 12 to 18 hours.

Gibassier Dough:
385 grams bread flour
6 tablespoons unsalted butter, cold (85 grams)
100 grams granulated sugar or 3 1/2 ounces)
2 + 1/2 teaspoons instant yeast
3/4 teaspoon salt
Orange zest from l medium navel orange
All of preferment from above
2 eggs
1/3 cup olive oil
1/4 cup water, divided
1/4 tsp Fiori di Sicilia (optional)
2/3 cup candied orange rind

Place the flour in the processor and pulse several times.  Cut the cold butter into pieces and arrange in a circle over the flour. Process until the butter is no longer distinguishable.

Add the sugar, yeast, salt, zest, and Fiori di Sicilia.  Pulse to incorporate. Tear the preferment into pieces and add it processor.  Process to fully incorporate.

Combine the eggs, olive oil, and half of the water. Pour over the dry ingredients and process to mix completely.  Scrape down and rearrange the dough if necessary.  The dough should be very soft.  Add water a teaspoon at a time if necessary (I did not use additional water).  Add the candied orange rind.  Pulse briefly to mix.  Do not over mix or the  rind will be too small.

Let the dough proof at room temperature for 2 hours, then deflate the dough and transfer to the fridge overnight

Shape the Gibassier.  Line two half-sheet pans with parchment paper. Turn the dough out. Weigh your dough and do the math to find out how many grams you should use to form each little dough. You should have enough for 14 gibassiers. In my case, I used 80 grams per little ball.  Shape all the balls, cover, and refrigerate to make it easier to cut them.  Take two or three out at a time so they don’t soften too much. Take a ball and stretch it out with your fingers to make a rough torpedo shape. Turn it so the best side is up.  With the heel of your hand press the top of the dough upward from the middle. Again from the middle of the dough, with the heel of your hand press the dough downward to form a lemon shape.  Flatten the ends to match the center. It shoud be abut 2 1/2 ” high.

With a single edge razor blade, make a cut in the middle of the dough.Then one to the left. One to the right. Along the right side of the top of the dough cut in toward the center about 3/4” to 1”. Again on the other side. Last cut in the same amount on the right side. And on the left. As you pick it up to put it on the sheet pan, stretch it out to enlarge the holes.  Place 7 on a tray.

Cover them and allow them to rise for 2 to 2 1/2 hours until puffy.

Heat the oven to 350F. While the oven is heating brush 2 or 3 of the rolls with the egg wash and sprinkle heavily with sanding sugar or pearl sugar. Bake one sheet at a time on the middle rung for 18 to 22 minutes until golden brown and baked through.

Serve warm or room temperature.

ENJOY!

to print the recipe, click here

Comments: If you’d like to make Gibassier, I urge you to stop by Helen’s site because her step-by-step photos are perfect to understand what needs to be done. Explaining just with words is a bit tricky. If you make it in the food processor, it will be easy to make just half the recipe, as the processor will handle it without issues. Everything comes together super quickly, and I like the fact that I could use butter straight from the fridge.

Some people suggest using an old credit card to do the cuts on the dough, but Helen’s idea of getting those single edged razor blades is truly spot on. I advise you to allow the final proofing to reach the 2.5 hour mark or even a little big longer as enriched doughs tend to be a bit sluggish. The puffier they get at that stage, the lighter the rolls will be. I had to cut my final proofing a bit short for half of them, and the second batch was better.


This is the type of pastry that will transport you straight to a cafe in France, sitting outside, people-watching, as you sip a little hot chocolate, coffee, or whatever suits your mood…

Helen, thank you once again not only for the inspiration but for your detailed instructions that make it all so much easier to follow.

ONE YEAR AGO: Sundried Tomato Twist Bread

TWO YEAR AGO: And now for something completely different….

THREE YEARS AGO: Parsnip, Coconut, and Lemongrass Soup

FOUR YEARS AGO: In My Kitchen, October 2016

FIVE YEARS AGO: Paleo Moussaka

SIX YEARS AGO: In My Kitchen, October 2014

SEVEN YEARS AGO: In My Kitchen, October 2013

EIGHT YEARS AGO: Crimson and Cream Turkey Chili

NINE YEARS AGO: Taking a break from the nano-kitchen

TEN YEARS AGO: Chocolate Chip Cookies