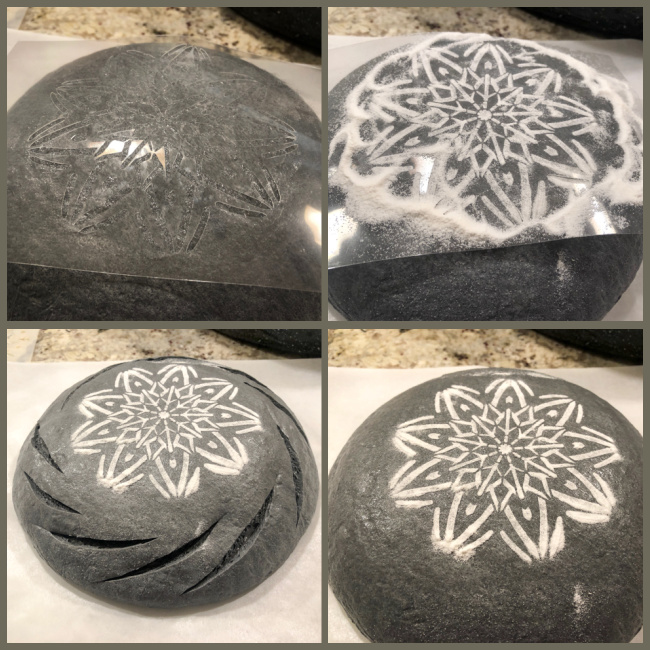
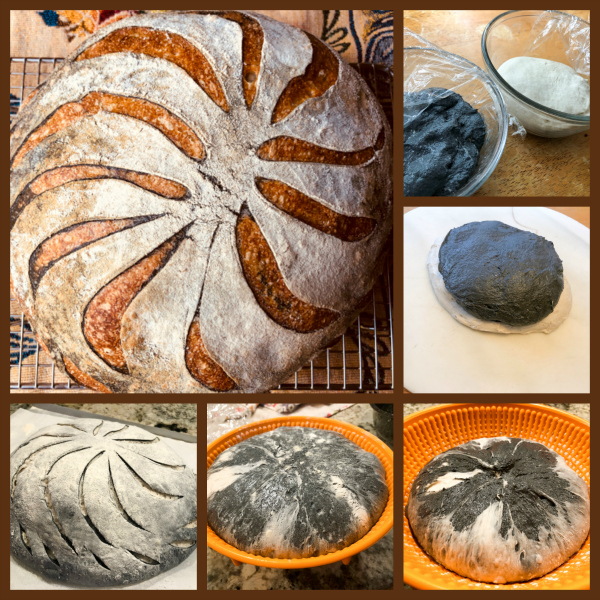
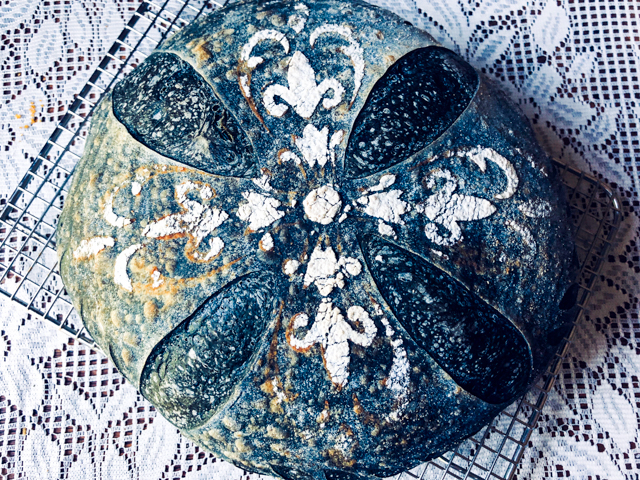
Something new that I’ve tried last week… Use any sourdough recipe you like, I am sharing my default version with a touch of spelt. Once the bread is ready to go into the oven, add some water to a little charcoal powder and brush the surface of the dough. While it’s still wet, place a stencil on top and shower it with white flour (all-purpose is fine). Rub it gently so that the design is as sharp as possible. Carefully lift the stencil, slash the bread and bake.

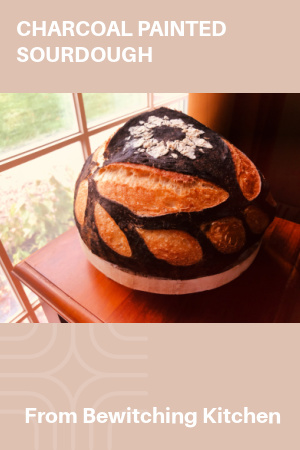
CHARCOAL PAINTED SPELT SOURDOUGH
(from the Bewitching Kitchen)
480g bread flour
20g spelt flour
10g salt
370g water
80g sourdough starter at 100% hydration
1 tablespoon activated charcoal powder
a little water
all-purpose flour for stencil detail
Make the levain mixture about 6 hours before you plan to mix the dough. It should be very bubbly and active.
When you are ready to make the final dough, place the water in the bowl of a KitchenAid type mixer and dissolve the starter in it, mixing with a spatula briefly, then add the two types of flour, and the salt. Turn the mixer on with the hook attachment and knead the dough for 4 minutes at low-speed all the time. If the dough is too sticky, add 1/4 cup flour, you want the dough to start clearing the sides of the bowl, but still be sticky at the bottom.
Remove from the machine, and transfer to a container lightly coated with oil, cover lightly with plastic wrap and allow it to ferment for 4 hours, folding every 45 minutes or so. After four hours bulk fermentation, shape the dough as a ball, and place, seam side up, in a lightly floured banetton. Leave at room temperature one hour, and then place in the fridge overnight, from 8 to 12 hours.
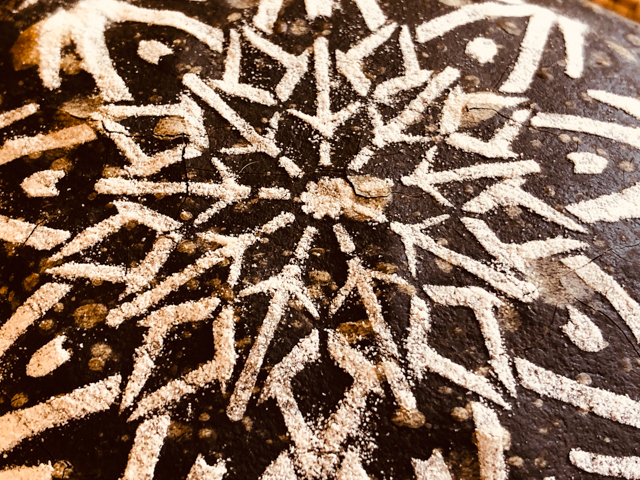
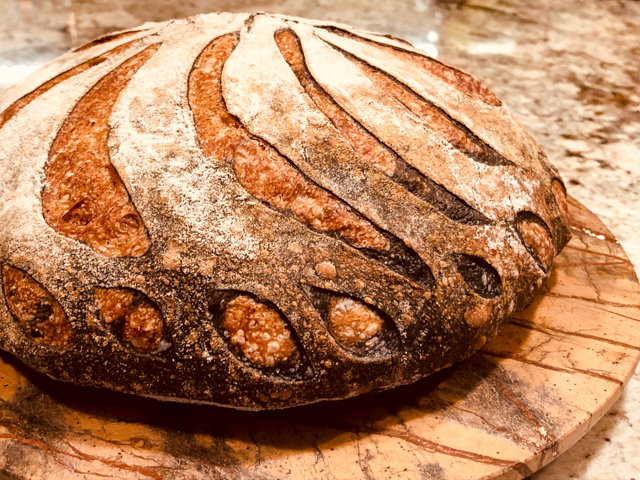
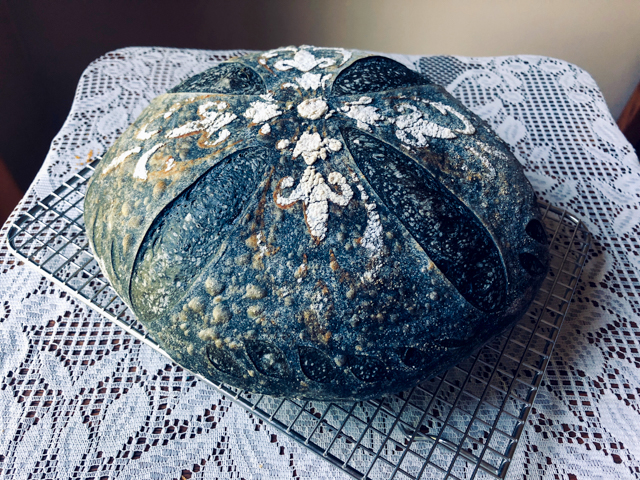
Next morning, heat the oven to 450F. Invert the dough over parchment paper, make a paste with the charcoal powder and water, and paint over the surface. Immediately place a stencil on top, and shower white flour over it, rubbing it gently to get the design to stick well. Next, use a brand new razor blade to score around the design, to coach the bread into opening without ruining the pattern.
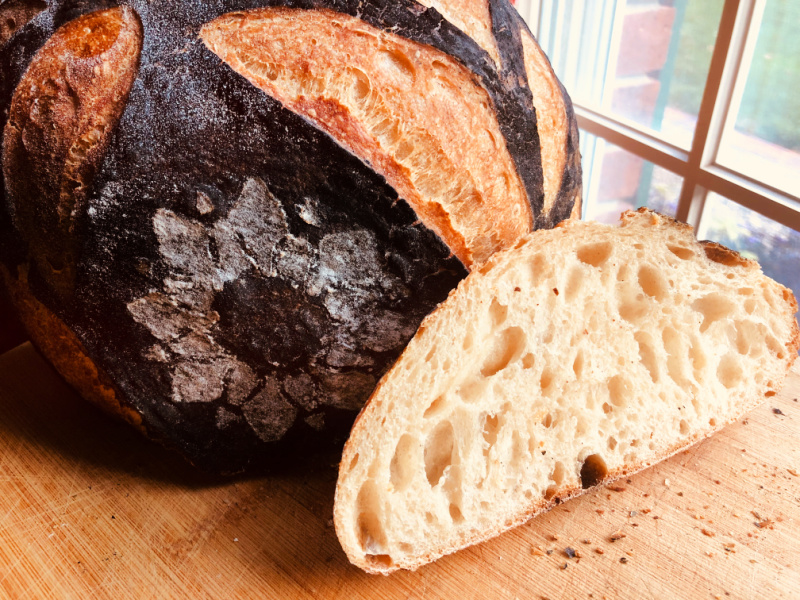
Bake at 450F for 45 minutes, preferably covered for the first 30 minutes to retain steam. Cool completely over a rack before slicing.
ENJOY!
to print the recipe, click here

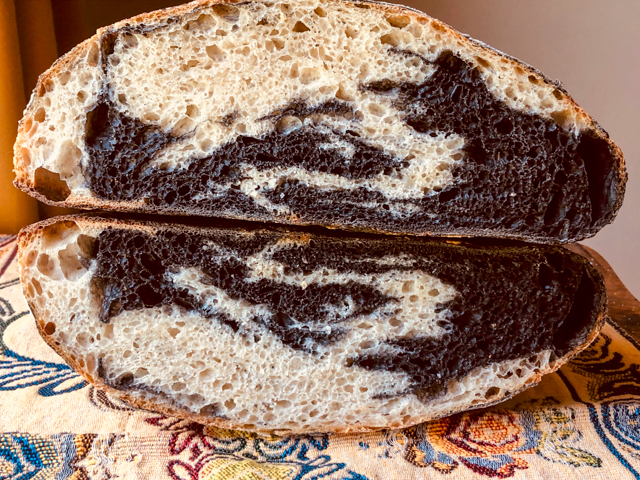
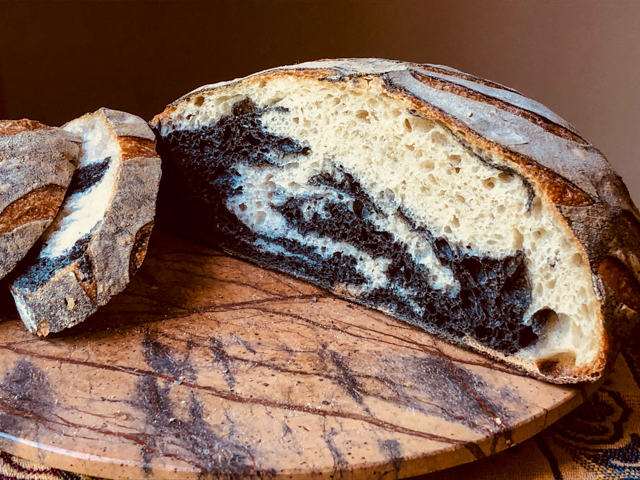
Comments: I know that one should never complain about excessive oven-spring when bread baking, but for some designs it would be better to have a less “explosive” loaf… I intend to play with formulas with higher whole-wheat content to try and tame the loaves with patterns and more elaborate scoring. Still I like the way this turned out, and it is much better than rubbing the powder over the loaf.
You can brush the excess flour once the bread is cold. I need to play a bit with the placement of the stencil and the amount of flour to add to it, but overall I am quite pleased with the overall look.
ONE YEAR AGO: Lime-Ganache Bonbons
TWO YEARS AGO: The Dobos Torte
THREE YEARS AGO: Coffee-Caramel Entremet Cake
FOUR YEARS AGO: Fennel Soup with Almond-Mint Topping
FIVE YEARS AGO: Eataly
SIX YEARS AGO: Spaghetti Squash Perfection
SEVEN YEARS AGO: Skinny Eggplant Parmigiana
EIGHT YEARS AGO: Supernova Meets Wok
NINE YEARS AGO: 500 Posts and The Best Thing I ever made
TEN YEARS AGO: Back in Los Angeles
ELEVEN YEARS AGO: White House Macaroni and Cheese
TWELVE YEARS AGO: Korean-Style Pork with Asian Slaw