THE HOME BAKERS COLLECTIVE: MAY PROJECT

Another month in this crazy year is coming to its end. For May, the Bakers Collective challenge was set up by Bianca (check her site with a click here). I love how she shook things up a bit. We had to bake something savory but not using yeast. It’s a nice change from sweets, and getting yeast out of the equation makes it a tad more challenging. I settled on my choice almost immediately, because I’ve been flirting with soda bread for a long time. Perfect opportunity to give it a go.

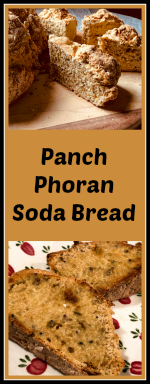
PANCH PHORAN SODA BREAD 
(from Nadiya Hussain)

for Panch Phoran mix (all as whole seeds):
1 tsp fenugreek
1 tsp nigella
1 tsp cumin
1 tsp black mustard
1 tsp fennel seeds

for bread:
250g whole-wheat flour
250g bread flour
1 tsp fine salt
1 tsp baking soda
1 tbsp panch phoran (made from mixture above)
400ml buttermilk

Heat the oven to 400F.

Mix all seeds in a small bowl (you will have mixture leftover).

Put the flours, salt, baking soda and 1 tablespoon of five-spice mixture into a large bowl and mix well. Make a well in the center and add a little over half the buttermilk. Bring the dough together by hand, adding more of the buttermilk if needed (I used the full amount).

As soon as all the flour is absorbed and the dough comes together, lightly flour the work surface, tip the dough onto it and roll into a neat ball. Place on the baking tray. Using a sharp knife, make a cross cut almost all the way down to the bottom of the bread, but do not separate the pieces.

Bake on the middle shelf for 30 minutes, until the bread is golden and sounds hollow when tapped on the base. Allow it to cool completely before slicing.

ENJOY!

to print the recipe, click here


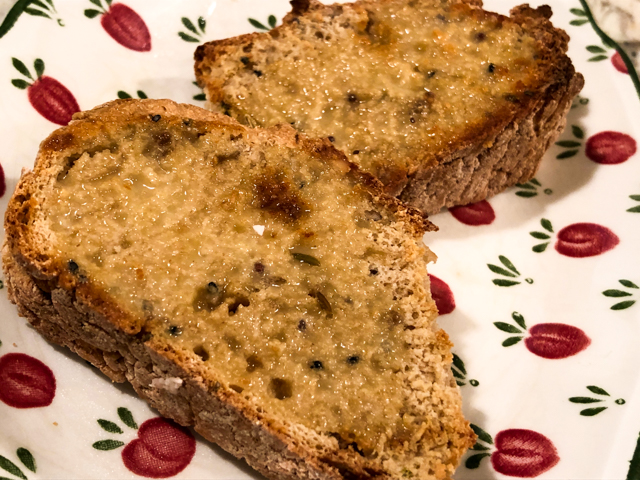
Comments: Soda Bread does not get high marks in the beauty department, I admit. It takes rustic to unprecedented levels, but I promise you Nadiya’s version is very tasty. That mixture of spices is perfect. You can buy packages of the mixture, but it’s really quite simple to prepare it yourself, and I happened to have all those seeds already in my pantry. I had fun browsing amazon and reading the comments from people who bought the mix. Some were furious because “it does not have nearly enough fenugreek.” So if you want to make sure to use the authentic “five spice mixture”, make it yourself. I actually loved so much the flavor of this bread, that I intend to make a sourdough version using those spices. Stay tuned.

Although quick breads leavened with baking powder and with little fat in theory do not stay good for more than a day or so, I was surprised by how good the bread tasted after FOUR days once toasted. We froze half of it because with just the two of us there is a limit to how much bread we can consume. But I know I will be making this and other versions in the near future.

Bianca, thanks for such a cool challenge that made me bake something I had never baked before. I am no longer a Soda Bread Virgin!

To see what my tent-baker friends came up for their challenge, visit the Home Bakers Collective site…. (post might take a few hours to show up, so keep that in mind)

ONE YEAR AGO: Purple Star Macarons

TWO YEAR AGO: Smoked Salmon, Fait Maison

THREE YEARS AGO: Kouign-Amann, Fighting Fire with Fire

FOUR YEARS AGO: In My Kitchen, Yin and Yang

FIVE YEARS AGO: Chocolate Toffee Banana Bread

SIX YEARS AGO: In My Kitchen, June 2014

SEVEN YEARS AGO:  Strawberry Frozen Yogurt

EIGHT YEARS AGO: Baked Coconut and “The Brazilian Kitchen”

NINE YEARS AGO: Honey-Glazed Chicken Legs

TEN YEARS AGO: French-Style Rolls

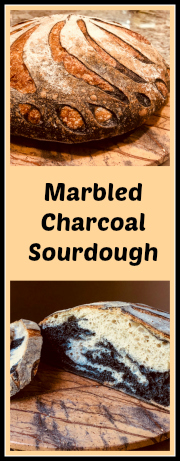
CHARCOAL SOURDOUGH

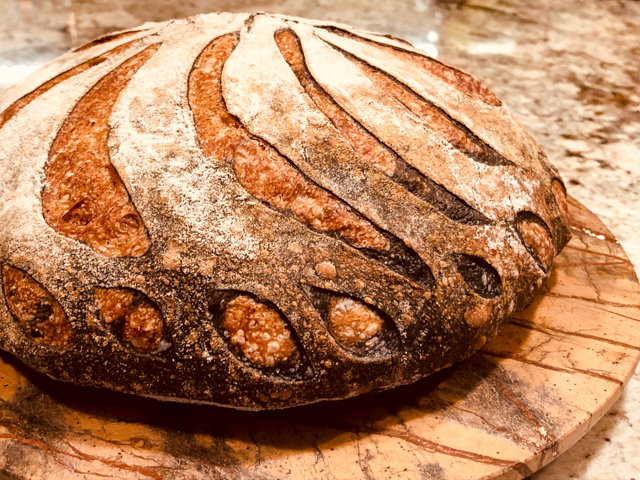
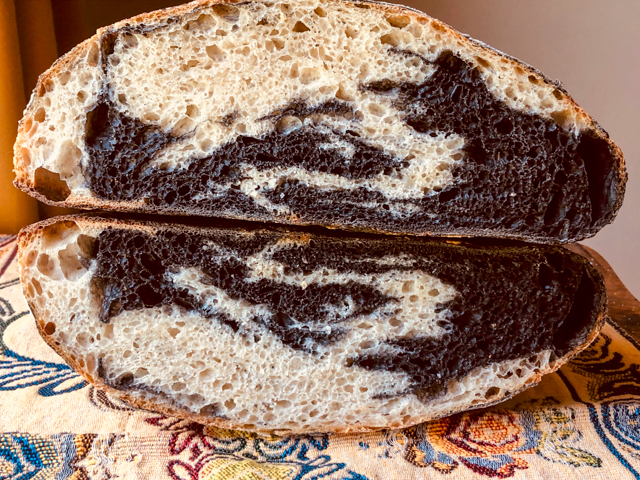
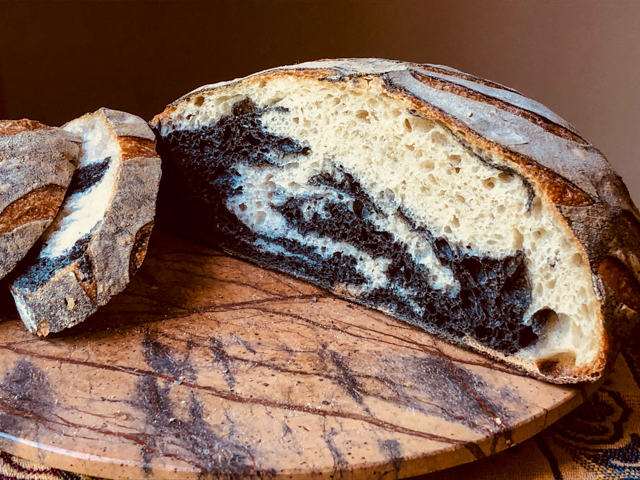
I suppose I’ve resisted long enough. Charcoal baking was a big thing a while ago, I kept seeing all sorts of breads, desserts, drinks using this shocking, funky ingredient. I decided to give it a try and loved playing with it. There is no real taste of charcoal, it is more a visual experience. Charcoal can interfere with the absorption of some drugs, but the amount used in baking is very small, so I would not be worried about it.  If you are into trivia, a French chemist, Mr. Bertrand, first found out the power of activated charcoal to absorb toxins and prevent them from causing harm in animals. Then, in 1813 he went on to do a sort of “chemical performance” live, consuming an amount of arsenic that could kill a horse, but previously mixed with charcoal. He survived to tell the tale and proved the power of charcoal as an antidote. A few years later, another French scientist, Mr. Touery, swallowed a huge amount of strychnine in front of the French Academy of Medicine, and survived it. Gotta love the French!  I hope you try charcoal in your baking, but please, leave the arsenic and strychnine out of it…

CHARCOAL SOURDOUGH
(from the Bewitching Kitchen)

475g bread flour
25 g rye flour
120 g sourdough starter at 100%
10 g salt
2.5 g activated charcoal
380g water

Mix everything with a KitchenAid in low speed with dough hook for about 4 minutes. Adjust consistency with additional bread flour if the mixture seems too loose.

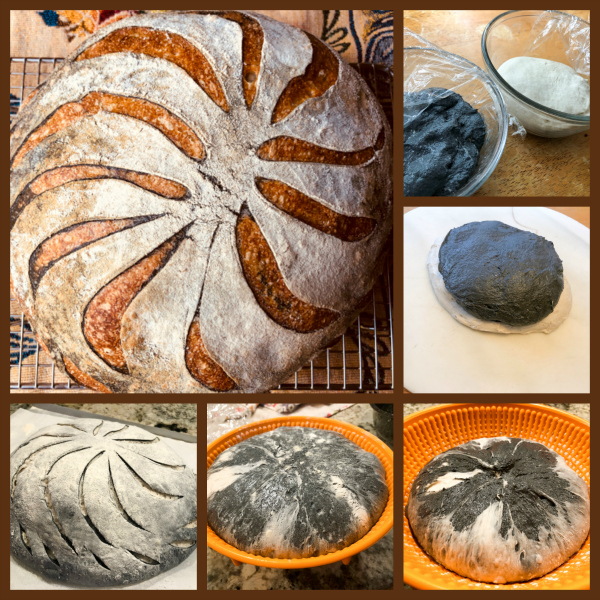
Transfer to oiled bowl and bulk ferment for 4 hours at room temperature, folding the dough at every hour. At the end of four hours shape as a round ball, and place in a banetton heavily floured, sticking it in the fridge overnight.

Invert on parchment paper, moisten the surface with a little water, place a stencil on top. Dust with flour over the stencil, and lift it very carefully. Score the bread in a way that will not interfere with your design.

Bake inside a Dutch oven at 450F for 30 minutes, removed the lid, leave it in the oven for additional 15 to 20 minutes, if necessary lower the temp a bit in the final 5 minutes. Cool completely before slicing.

ENJOY!

to print the recipe, click here

Comments: The charcoal powder I got is this one. Beware it is a very fine powder, so when you open the bottle and remove that little inner protection glued to the top, use caution. It flies everywhere. I mean everywhere. You catch my drift. Charcoal drift.  So far, I’ve only used it in bread and crackers (sourdough and regular), and really love the look, although I admit not everyone is fond of it. Some people are just turned off by breads with “unusual” color. As you probably figured it out, I am not part of that crowd.

Charcoal bread next to a cheese platter would look very nice, and of course, what could be better in a Halloween party?  Keep that in mind… I am actually planning my next sourdough charcoal adventure, and it will involve kalamatas. Taking black to the limit!

ONE YEAR AGO: Ispahan Macarons

TWO YEAR AGO: Smokin’ Hot Meatloaf and Homemade Ketchup

THREE YEARS AGO: Banana Bread with Espresso Glaze

FOUR YEARS AGO: Slow-Cooker Carnitas & Paleo Planet Cookbook Review

FIVE YEARS AGO: The Making of a Nobel Reception

SIX YEARS AGO: Fennel Soup with Almonds and Mint 

SEVEN YEARS AGO: Green Curry Pork Tenderloin

EIGHT YEARS AGO: Farfalle with Zucchini and Ricotta

NINE YEARS AGO: Slow-baked Salmon with Lemon and Thyme

TEN YEARS AGO: Hoisin Explosion Chicken


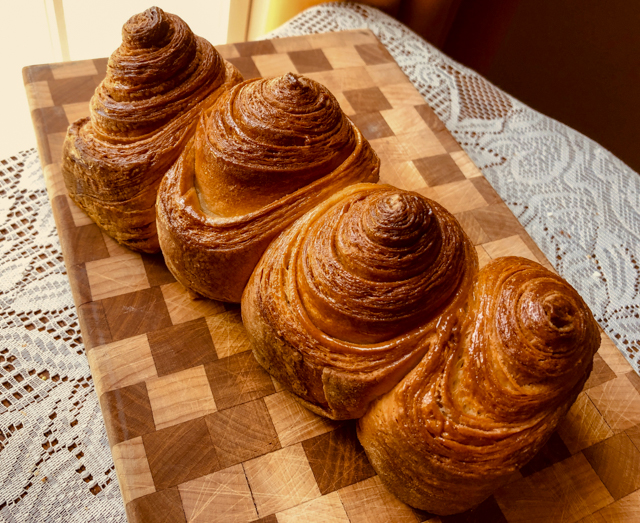
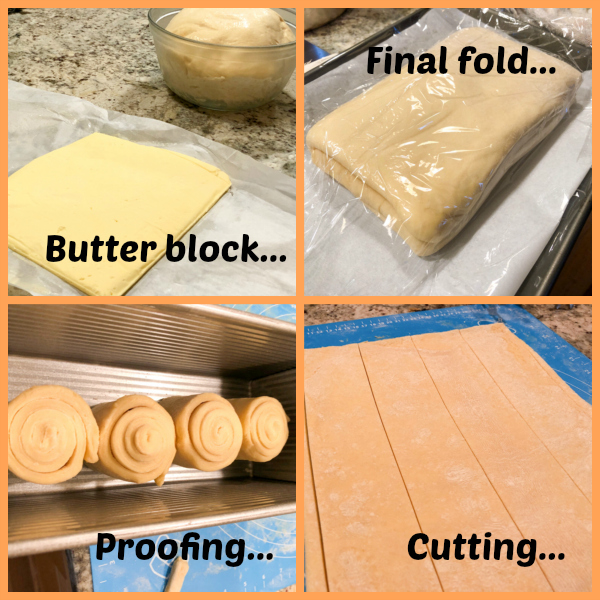
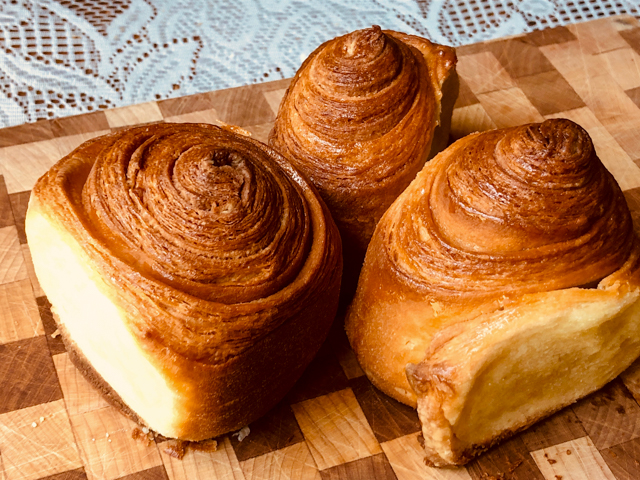
OLIVE OIL BRIOCHE

Karen from Karen’s Kitchen Stories is a source of endless inspiration for me. Particularly on anything related to bread, she finds the most unusual, exotic, unique recipes, and then bakes them like it’s no big deal at all.  Just to give you a recent example, look at this incredible concoction for which she used 12-ounce empty soda cans wrapped with foil as a baking “pan.”  Amazing, isn’t it? Today I share with you my adventure with her Olive Oil Brioche. I made only half the recipe and still had a ton of dough to play with. Enough for a large loaf and 6 buns. For reasons that will be discussed in the comments, if you make it, be ready to have one loaf and 8 buns. The amount for the loaf pan was a tad too much.

OLIVE OIL BRIOCHE
(slightly modified from Karen’s Kitchen Stories)

for the poolish:
100 grams all purpose flour
100 grams water
1.5 grams instant yeast

Mix the ingredients, cover with plastic wrap, and place in the refrigerator over night.

for the levain (Sourdough)
1 tablespoon starter
110 grams all purpose flour
110 grams water

Mix the ingredients, cover with plastic wrap, and let sit overnight at room temperature until bubbly.

for the final dough: 
200 grams poolish
150 grams levain
500 grams bread flour
12 grams salt
7.5 grams instant yeast
250 grams eggs
120 grams milk
80 grams honey
Zest of one Meyer lemon (optional)
25 grams water
220 grams extra virgin olive oil
For the egg wash: 1 egg plus one tablespoon milk

In a stand mixer, combine the flour, salt, yeast, eggs, milk, levain, poolish, honey, lemon zest, and water and mix on low for about 5 minutes. Cover and let rest for about 20 minutes.

Mix the dough with the spiral hook on medium to high speed for 8 minutes.
With the mixer running on medium,  add the oil slowly, pausing so that the oil is absorbed. I did it in three additions. Incorporation of the oil will take time, so exercise patience.  Add a sprinkle of bread flour to speed incorporation if you so desire, but do it only in the second and third addition. The dough should end up very smooth and not tear when  you stretch it.

Allow the dough to bulk ferment (in a large bowl covered in plastic wrap) for 2 hours at 70 degrees F. Do three stretch and folds during the first 90 minutes, one every thirty minutes.  When the dough is ready, remove three pieces of about 250g each and braid them. Place in a slightly oiled 9 x 5 loaf pan for final proofing. Divide the rest of the dough in 8 portions, shape as buns, and proof.

Heat the oven to 425 degrees F.  After the bread has been proofing for 1 and a half to 2 hours (until doubled), brush with egg wash and bake until golden brown, 30 to 40 minutes, until internal temperature is 200 F. You can sprinkle sesame seeds on the buns if you so desire.

Un-mold the large loaf and cool on a wire rack together with the buns.

ENJOY!

to print the recipe, click here

Comments: I will not lie to you, this is a project. The bread requires a sourdough starter, a poolish (fermented flour using small amount of commercial yeast and prepared the day before), and commercial yeast in the final dough. But it is a total pleasure to work with, rises like a rocket and the texture and taste? You will not miss the butter, that’s for sure. As Karen said, it keeps a lot better than the traditional version. And freezes beautifully too.

When you start adding the olive oil, you will be sure the whole thing is ruined, and might have a few rude thoughts directed at me. It seems impossible for the dough to come together. Have bread faith. And here is a little tip that might help: as you add the olive oil and the mixer is going and going, with a puddle of oil all around and looking hopeless, add just a sprinkle of bread flour on top. It will help things get in shape faster. But just a sprinkle, I say 1 tablespoon or so. If you add the olive oil in three additions, do that in the final two, when the dough will have more trouble incorporating it.

For a 9 x 5 loaf pan, I advise you to make three strands with about 250g of dough in each. Then divide the rest in 8 buns. When you do that, you will be able to let the shaped loaf proof for closer to 2 hours and it will not rip a bit like mine did. I had no choice but to bake after 1 hour and 10 minutes, the dough wanted to leave the pan and explore the kitchen. No bueno. That’s because I used 300g per strand, a bit too much. Don’t be put off by the complexity of this recipe, once you have the starter and the poolish prepared the day before, it is just a matter of weighing all other ingredients and having some fun.

Karen, thank you for the inspiration, I know I tell you this all the time but it’s so true… Your blog is a pleasure to follow!

ONE YEAR AGO: Coconut and Lime Macarons

TWO YEAR AGO: Flank Steak Carnitas

THREE YEARS AGO: Sesame and Poppy Seed Sourdough

FOUR YEARS AGO: Pecan-Crusted Chicken from Southern at Heart

FIVE YEARS AGO: Lamb Shanks en Papillote with Cauliflower-Celeriac Purée

SIX YEARS AGO: Chestnut Brownies and a Blog Award!

SEVEN YEARS AGO: Quinoa with Cider-Glazed Carrots

EIGHT YEARS AGO: Celebrate Wednesday: Heirloom Tomatoes Steal the Show

NINE YEARS AGO: Pain de Provence

TEN YEARS AGO: Golspie Loaf, from the Scottish Highlands

THE POWER OF CHEMISTRY: RED BEET SOURDOUGH

I will start by blowing your mind. Below, same exact recipe for sourdough bread, with or without vitamin C added to the formula.

For the past year I’ve been playing with adding beets to bread, both using beet powder and roasted beets, but my experiments failed in the color department. Everything tasted pretty good, but the beautiful red color of beets was consistently lost during baking. I had resigned myself to brownish breads until I remembered using vitamin C to preserve the color of basil for freezing. Works like magic. Sorry, it is actually pure science. Vitamin C is a powerful anti-oxidant, and the browning reaction is simply oxidation of compounds during storage or cooking.  I searched Google University and found out that others had already figured it all out and many bakers use vitamin C in their beet-containing breads.

RED BEET SOURDOUGH
(from the Bewitching Kitchen)

Comments: I was absolutely shocked by the results! You might think that the same outcome could be achieved by using some lemon or orange juice, as those fruits are loaded with vitamin C. It turns out that a whole lemon has about 20mg of vitamin C, so clearly not enough to do the job. I used purified ascorbic acid, borrowed from our lab, but I know home bakers use vitamin C tablets, usually each one contains 500 mg, so one or two tablets will be what you need. I intend to use that in the future and report back.
.

.
Same bread without vitamin C, nothing wrong with it, except that the beautiful red color is lost during baking. Even though, as you see in the composite below, until you put the bread in the oven, all seems totally fine.
.

.
I hope you consider playing with vitamin C if you had issues with your bakes using beets.  It would be interesting to add it to other things that involve color, be it spinach or butterfly pea flower.
.

And let me tell you, Red Beet Sourdough makes amazing croutons!
.

.

.


HOT CROSS BUNS

Until this year, I’ve been a Hot Cross Bun virgin, as I had never even tasted one. They did not exist in Brazil as I was growing up, but are very popular in many places of the world, United Kingdom, USA, Australia, New Zealand. They are usually served on Good Friday, to mark the end of Lent. They are marked with a cross to represent the Crucifixion of Jesus, and contain spices that were said to be used to embalm his body. Some point their origin to the year 1361 in a monastery in St Albans, England. But that is debatable. What is not debatable is how delicious they are, and how much I regret having waited so long to make them.

HOT CROSS BUNS
(very slightly modified from Global Bakes)

for the buns:
180 mL milk warmed to 110 degrees F
1 tsp granulated sugar
2 1/2 tsp active dry yeast (I used osmo-tolerant yeast)
100 grams light brown sugar
2 Tablespoons greek yogurt, at room temperature
70 grams (5 Tablespoons) unsalted butter, at room temperature
2 eggs, at room temperature
1 tsp salt
1/2 tsp ground cinnamon
1/2 tsp ground cardamom
1/4 ground nutmeg
1/4 tsp ground allspice
460 grams all-purpose flour, divided
40 g dried figs, finely minced)
100 g raisins
zest of 1 large orange

for the flour cross:
3 tablespoons flour
1/8 tsp baking powder
2 tablespoons cold water

for the glaze:
3 tablespoons milk
3 tablespoons sugar

Make the Buns
Whisk together the warm milk, yeast, and granulated sugar in the bowl of your stand mixer fitted with a dough hook.  Allow to sit for 5 minutes until yeast becomes frothy.

Add to the bowl the brown sugar, butter, yogurt, eggs, salt, cinnamon, nutmeg, allspice, cardamom and 125 grams (1 cup) of the flour. Beat on low speed for 30 seconds or stir by hand. Scrape down the sides of the bowl with a rubber spatula, then add the remaining flour, the dried fruit, and the orange zest. Beat on medium speed until the dough comes together and pulls away from the sides of the bowl, about 2 minutes. The dough should be a little sticky and soft. If it’s too sticky and not pulling away from the sides of the bowl, mix in additional flour 1 Tablespoon at a time just until it comes together and pulls away from the sides of the bowl. Knead in the machine for about 4 minutes in low-speed, then transfer the dough to a greased bowl and allow it to ferment for 2 hours at room temperature.

Butter a 9×13 inch baking pan.  When the dough is ready, punch it down to release the air. Weigh the dough and divide it into 15 roughly equal pieces (my pieces were 77g each).  Shape each piece into a smooth ball, pinching it on the bottom to seal. Arrange in prepared baking pan. Cover shaped rolls and place in the fridge overnight.

Remove the shaped buns from the fridge and let them sit at room temperature for 2 hours. Heat the oven to 350°F.  Whisk the cross ingredients, adjusting consistency with water or flour so that it is thick enough to form a stable design. Spoon paste into a piping bag. Pipe a line down the center of each row of buns, then repeat in the other direction to create crosses.

Bake for 20-25 minutes or until golden brown on top, rotating the pan halfway through. If you notice the tops browning too quickly, loosely tent the pan with aluminum foil. Five minutes before they are done, make the glaze by boiling milk and sugar until sugar is fully dissolved and the glaze thickens slightly.

When they buns are baked, remove from the oven and immediately brush with the warm glaze. Allow to cool slightly and enjoy still warm or at room temperature.

ENJOY!

to print the recipe, click here

Comments: Tanya was my source of inspiration, she actually made those for the first time also this year, and I just tagged along. I did not have many different kinds of dried fruits in our pantry, so I used just raisins and dried Mission figs. The whole batch went to the homeless meal that happened to fall exactly on Good Friday, but Phil and I decided to share one because I really had to know how they taste.

I loved it! The bread is soft, reminds me a bit of a cinnamon roll, but not as decadent.  I like the addition of baking powder to the flour paste, which I saw in Celia’s blog post of years ago. I think it makes it a bit lighter.

Making them was a very nice, trouble-free process (discreet knock on wood, don’t want to upset the baking gods, as I intend to make macarons in the near future).  I hope you give Tanya’s recipe a try, in her site you can see how to do it in a single day.

Thank you Tanya (globalbakes.com), for your constant inspiration!  Stay safe, stay healthy, stay home… and let’s bake!

ONE YEAR AGO: Avgolemono Soup, My Way

TWO YEARS AGO: Sourdough Chocolate Twist Bread

THREE YEARS AGO: Dan Lepard Times Three

FOUR YEARS AGO: Turkey Portobello Burger

FIVE YEARS AGO: Raspberry Ricotta Cake

SIX YEARS AGO: In My Kitchen, April 2014

SEVEN YEARS AGO: Whole-Wheat Pasta with Lemony Tomatoes and Spinach

EIGHT YEARS AGO: Blood Orange Duck: A work in progress

NINE YEARS AGO: Grilled Mahi-mahi with citrus marinade

TEN YEARS AGO: Memories of Pastéis