
Sometimes a beautiful cake demands a lot from the baker. The Queen of Sheba looks like the outcome of a labor of intense, ever-lasting love, but it is deceptively simple to make. Trust me, because I never lie. If you want to impress your guests and do so without hyperventilating, succumbing to profanity, or worse yet – ending in a puddle of tears, this dessert is for you…

QUEEN OF SHEBA
(adapted from Alice Medrich’s Craftsy class)
for the cake:
6 ounces bittersweet chocolate
10 tablespoons (5 ounces) unsalted butter, cut into pieces
2 tablespoons brandy
1/8 teaspoons salt
2.5 ounces hazelnut flour
2 tablespoons all-purpose flour
4 large eggs, separated and at room temperature
3/4 cup (5.25 ounces) sugar, divided
pinch of cream of tartar
for the glaze:
6 ounces bittersweet or semisweet chocolate cut into pieces
8 tablespoons (4 ounces) unsalted butter, coarsely chopped
1 tablespoon light corn syrup
1 ounce white chocolate, finely chopped (for marbling)
1 ounce milk chocolate, finely chopped (for marbling)
Make the cake. Heat oven to 375 degrees. Line an 8-inch springform pan with a circle of parchment paper. Leave the sides of the pan ungreased.
Melt the chocolate and butter gently over simmering water or in the microwave. Stir in the brandy and salt. Set aside. Mix the hazelnut flour and the all-purpose flour in a bowl until well combined.
In a large bowl, whisk egg yolks with 1/2 cup of the sugar until well blended. Stir in chocolate mixture, reserve at room temperature while you prepare the meringue.
Beat egg whites and cream of tartar at medium speed until soft peaks form, then sprinkle in the remaining 1/4 cup sugar, beating at high-speed until peaks are stiff. Sprinkle the hazelnut/flour mixture over the chocolate batter and scoop about one quarter of the egg whites on top. Fold with a large rubber spatula until partially blended. Scrape the remaining egg whites into the bowl and fold them in. Turn the batter into the prepared pan and level it gently.
Bake for about 30 minutes, or until a toothpick inserted about 1. inches from the edge emerges almost clean but a toothpick inserted in the center is still moist and gooey. Set the pan on a rack to cool. Release the sides of the pan (or push up on the removable bottom) and invert the torte so that the bottom becomes the top, then remove the pan bottom and paper liner. If the torte is still uneven or appears slightly sunken in the center, level it by pressing the top firmly with the bottom of the empty cake pan. It must be at room temperature before you apply the crumb coat.
Make the glaze. Place the chocolate, butter, and corn syrup in a medium heatproof bowl. Set the bowl in the skillet of water over low heat, stirring frequently until completely melted and smooth. Stir mixture gently with a spatula or a wooden spoon until completely smooth; do not whisk or beat. Cool glaze, without stirring, until nearly set and the consistency of easily spreadable frosting. You will use about 1/4 of the mixture to do a fine coating all over the cooled cake (the crumb coat). Place the cake for 10 minutes in the fridge, while you warm up the remaining of the glaze to about 90 F. At this point, melt both the white and milk chocolate and set them aside.
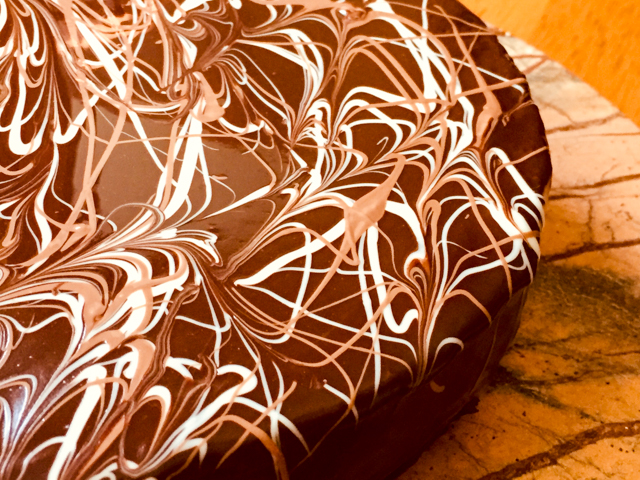
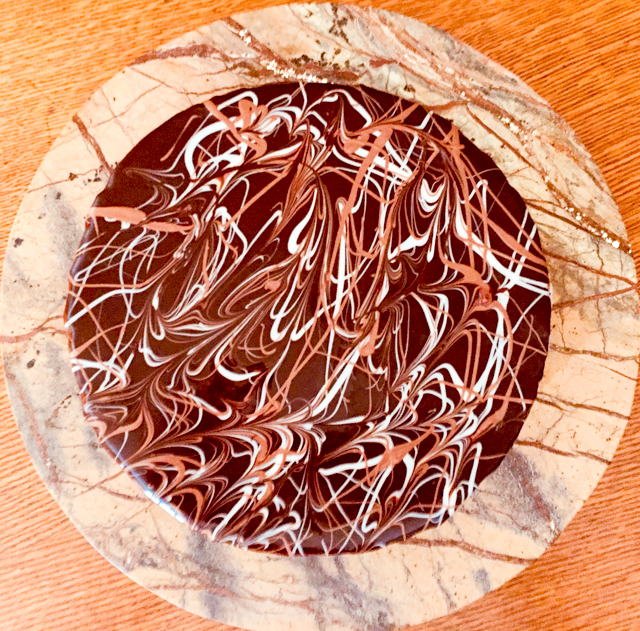
Place the cake on a turntable. Pour all of glaze in the center of the top of the cake. Working quickly, and rotating the turntable, use just 2 or 3 spatula strokes to spread the glaze over the top of the torte so that it runs down over all sides. Use the spatula to scoop up excess glaze and touch it to any bare spots on the sides of the cake. Immediately, while the glaze is still fluid, drizzle the white and milk chocolates randomly in an overlapping “scribble” all over the top of the torte. You can use a toothpick or needle for additional effect.
Remove it to a rack to dry at room temperature. Glaze will set in 10-20 minutes. Store and serve at room temperature, this cake is best if never refrigerated.
ENJOY!
to print the recipe, click here

Comments: If you’ve been following my blog for a while, you might remember that I love Craftsy, and have taken quite a few of their online courses. Based on my personal experience, Alice Medrich’s Decadent Chocolate Cakes is by far the best. I learned so much from her class! Small details on how to deal with ingredients, the clever tricks she uses, stuff that you simply do not find in cookbooks. She has experience, she does things in ways that are often a bit unusual, but make sense. And they work. I highly recommend you to get this class if you are interested in improving your baking skills.
This was a very smooth baking project, which is a huge endorsement of Alice’s teaching skills. Not only she shows exactly what to expect, but, what’s even more important, she tells you what to do to avoid tragedy in case things start to go south. Her class is simply brilliant. I was over the moon when I finished the cake, as you can see in the photo taken by my beloved. Trust me, I rarely have a relaxed smile at the end of a baking session. Thank YOU, Ms. Medrich!
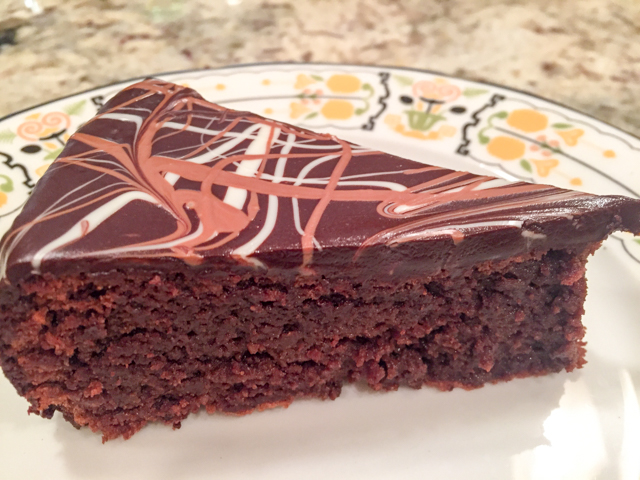
The cake is moist, chocolate-y to the extreme, and I think my decision of using hazelnut flour was a nice move, even if a departure from the classic. As Alice mentions in her class, this is a very flexible recipe. You can use different types of chocolate, different nuts, alternative glazes, or ways to decorate it. It’s like a classic black dress that moves along in many social situations, depending on what you add to it. I really like the modern-chic design she demonstrated in the online class, and that’s what I tried to replicate.
Everybody loved this cake, which brightened up a super rainy Tuesday after Labor Day weekend. You know, it’s not that easy to go back to work after a long weekend, the last summer holiday, so a nice dose of chocolate helps. That’s my story, and I’m sticking to it.

ONE YEAR AGO: Brunch Burger
TWO YEARS AGO: Mango Salsa with Verjus
THREE YEARS AGO: Raspberry Bittersweet Chocolate Chunk Brownies
FOUR YEARS AGO: Scary Good Pork Burgers
FIVE YEARS AGO: Review of exercise program Focus25
SIX YEARS AGO: Celebrate Wednesday with a Thai Seafood Curry
SEVEN YEARS AGO: Post-workout Breakfast
EIGHT YEARS AGO: Semolina Barbecue Buns
NINE YEARS AGO: Lavash Crackers

It looks amazing, another absolute winner!!!!
LikeLiked by 1 person
THank you! very happy with this bake, as you know… 😉
LikeLike
I love Alice Medrich’s recipes. This cake is a stunner. Like a big candy bar in cake form. Perfect for the Tuesday after Labor Day.
LikeLiked by 1 person
I loved baking it, particularly the decoration on top, it was a ton of fun to do…
LikeLike
The view of that slice is driving me crazy. Soooo moist and rich! I have to add this cake to my must-try list.
LikeLiked by 1 person
definitely you should! easy to make and pretty impressive, in a way
LikeLike
Sally, What a lovely cake! The cake is similar to a Hungarian chocolate cake I make that uses only hazelnut flour. Would that work in this recipe, to make it flourless?
LikeLiked by 1 person
you know, I think it might work well… worth experimenting – I ADORE hazelnut flour, anything with hazelnut and I am already smiling
LikeLike